Standard Residential Water Pipe Sizes: What Homeowners Should Know
Homeowners should be aware that standard residential water pipe sizes typically include 1/2″, 3/4″, and 1″, with larger mains or high-demand branches ranging from 1¼” to 2″. It’s important to note that nominal sizes differ from actual internal diameters and can vary based on material and schedule. Factors such as wall thickness and fittings can influence flow and pressure. Generally, 1/2″ pipes are used for fixtures, 3/4″ for branch lines, and 1″ for main feeds. This guide provides a brief overview of markings, flow capacity, and options for replacements to assist homeowners in making informed decisions.
Who This Guide Is For and What You’ll Learn
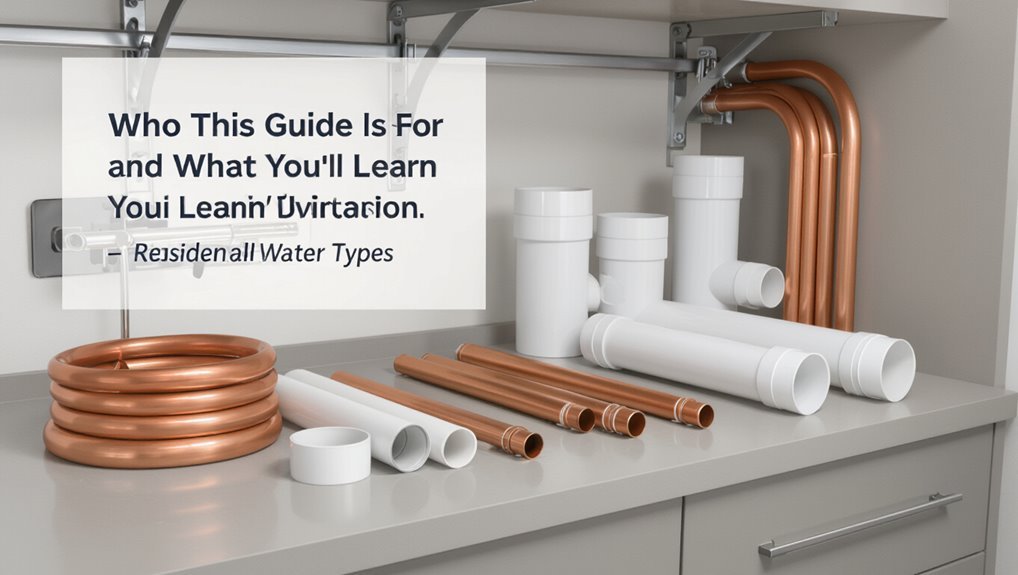
Who needs this guide and what will they gain from it? Homeowners, renters, and property managers seeking clear, practical information about residential water piping will find concise explanations tailored to everyday decisions.
The guide outlines typical pipe materials, diameter implications for pressure and flow, and when to consult a professional. It highlights factors influencing pipe selection—fixture count, layout, and local codes—without delving into specific size tables.
Readers will learn how to assess existing systems, recognize signs of inadequate piping, and prepare useful questions for plumbers, enabling informed maintenance, repair, or upgrade discussions.
Quick Answer: Common Residential Water Pipe Sizes
Typical residential water pipes range from 1/2 inch to 1 inch for interior fixtures, with 3/4 inch common for main supply branches.
Common materials include copper, PEX, CPVC, and galvanized steel, each affecting installation and durability.
Pipe diameter and material together determine available flow and pressure, which homeowners should match to fixture demand.
Typical Pipe Diameters
Most homes use a narrow range of pipe diameters for supply and distribution, with 1/2-inch and 3/4-inch being the most common sizes for branch lines and 3/4-inch to 1-inch for the main service.
Typical interior runs to fixtures often use 1/2-inch; kitchens and laundry may use 3/4-inch when higher flow is needed.
Main water services from the street commonly range from 3/4-inch to 1-1/4-inch depending on demand and local codes.
Hot water heater connections, fixtures, and appliance inlets follow similar sizing, while pressure and fixture units influence upsizing decisions more than length alone.
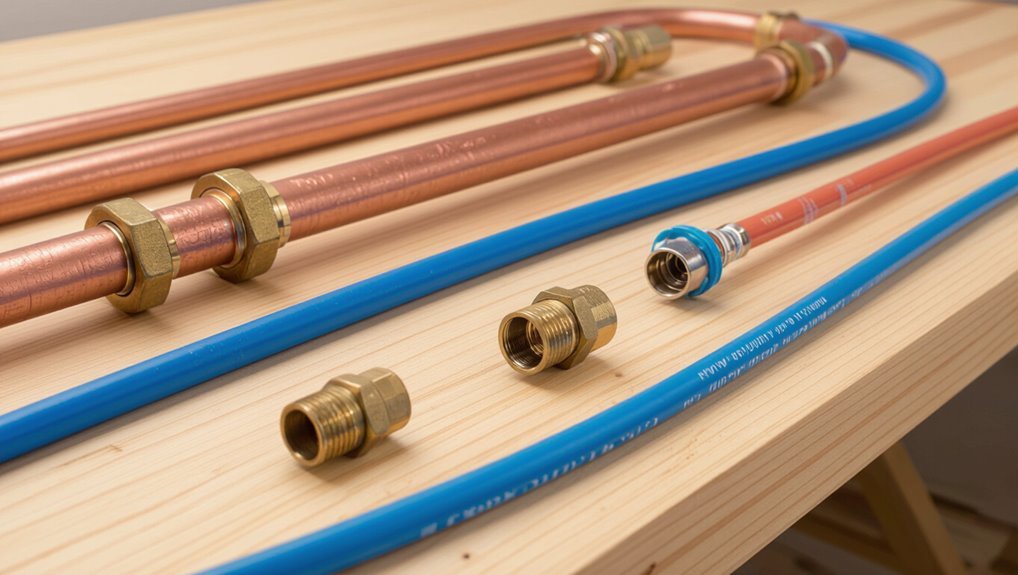
Supply Line Materials
Among common residential supply line materials, copper, PEX, CPVC, and galvanized steel dominate due to their availability, cost, and performance.
Copper offers longevity and soldered or compression connections; Type L and M gauge indicate wall thickness.
PEX provides flexibility, ease of installation, and resistance to freeze damage; available in various sizes and color-coding for hot/cold.
CPVC is a rigid plastic alternative suited for hot water, compatible with solvent-weld fittings.
Galvanized steel is durable but prone to internal corrosion and reduced capacity over time, often replaced during repiping.
Material choice depends on budget, local code, and installation method.
Flow And Pressure
Determine flow and pressure by considering pipe diameter, length, fixture demand, and available supply pressure: smaller diameters and longer runs increase friction losses and reduce flow, while larger diameters preserve pressure but add cost and space.
Calculations use fixture units and expected simultaneous demand to size mains and branches. Head loss charts or Hazen-Williams formulas predict pressure drop per 100 feet; electricians should coordinate with plumbers for accuracy.
Velocity limits prevent noise and erosion—typically 5–8 ft/s for supply lines.
Valves, fittings, elevation changes, and meter restrictions also affect delivered pressure; balance efficiency, cost, and future needs when selecting sizes.
Nominal Vs. Actual Pipe Diameter
Although the nominal pipe size is commonly used to identify residential piping, it does not always match the pipe’s actual internal or external diameter; nominal sizes are standardized identifiers that refer to a pipe’s general capacity and thread compatibility rather than precise measurements. The term “nominal” originated to simplify ordering and guarantee fittings fit across manufacturers.
Actual dimensions vary by material and standard (e.g., copper, PVC, or steel) and affect internal area available for flow. Homeowners and contractors must consult manufacturer tables or plumbing codes to match nominal sizes with real inside and outside diameters when selecting pipe and compatible fittings.
How Pipe Schedule (Wall Thickness) Affects Flow
When considering flow capacity, pipe schedule — the standardized wall thickness for a given nominal diameter — directly changes the pipe’s internal diameter and consequently the hydraulic performance; thicker walls reduce bore size, increasing velocity and head loss for the same volumetric flow. Different schedules (e.g., 40, 80) alter cross-sectional area, affecting frictional losses and pump requirements. Engineers select schedules balancing strength, pressure rating, and flow efficiency. Homeowners should expect slightly higher pressure drops in heavier schedules of the same nominal size, potentially requiring upsized nominal diameters for equivalent flow.
| Nominal | Schedule | Effect |
|---|---|---|
| 1″ | 40 | Standard bore |
| 1″ | 80 | Reduced bore |
| 2″ | 40 | Lower loss |
| 2″ | 80 | Higher loss |
How To Read Pipe Markings to Find Size and Type
On the pipe surface, printed markings provide the quickest way to identify nominal size, material, schedule (wall thickness), pressure rating, and standards; reading these codes lets a homeowner or plumber confirm compatibility without measuring the bore.
Markings typically include nominal diameter (e.g., 1/2″, 3/4″), material abbreviations (CPVC, PVC, PEX, CTS, SCH), schedule numbers (SCH 40, SCH 80) or SDR, and ratings (PSI, temperature).
Standard references (ASTM, ANSI, NSF) and manufacturer codes may follow.
Color bands and embossing also indicate use and certification.
Interpreting stamps and cross-referencing with manufacturer charts guarantees correct replacement and code compliance.
Why Pipe Size Matters for Pressure and Flow
Because pipe diameter directly controls flow velocity and friction losses, selecting the correct size is essential to maintain usable pressure at fixtures. The homeowner is advised that undersized piping raises velocity, increases head loss, and reduces simultaneous-use capacity; oversized piping raises cost and can delay hot water. Proper sizing balances pressure, flow rate, and installation practicality. Typical effects can be visualized:
| Pipe Size | Flow Effect | Pressure Impact |
|---|---|---|
| 1/2″ | Higher velocity | Greater loss |
| 3/4″ | Moderate velocity | Moderate loss |
| 1″ | Lower velocity | Minimal loss |
How Pipe Material Changes Effective Pipe Size
Different pipe materials often have varying nominal-to-actual inner diameters that alter the effective flow area.
Surface roughness and material-specific friction affect flow capacity and head loss even when diameters match.
Joints, fittings, and changeover pieces further reduce effective size by adding constrictions and turbulence.
Material Inner Diameter Differences
Across pipe types, the nominal diameter stamped on a fitting does not always equal the clear internal passage; material thickness, lining, and manufacturing tolerances produce measurable differences in inner diameter that affect flow capacity and pressure drop.
Copper, PEX, PVC, and galvanized steel commonly share nominal labels but vary in wall thickness and bore.
Lined or cement-coated steel reduces ID compared with unlined equivalents.
Thin-walled plastic often yields slightly larger IDs for the same nominal size than thick-walled metals.
Installers should reference manufacturer ID charts rather than nominal sizes when calculating fittings, run lengths, and expected hydraulic performance.
Flow Capacity And Roughness
Having established that nominal sizes mask real internal diameters, material surface characteristics and roughness further alter how much water a pipe effectively conveys.
Smooth materials like copper and new PEX exhibit lower friction, sustaining higher velocities and flow for a given pressure. Rougher surfaces—aged galvanized steel or corroded iron—increase head loss, reducing usable flow and requiring higher supply pressure to maintain fixtures.
Internal deposits narrow effective diameter over time, compounding roughness effects. Designers use Hazen-Williams or Darcy-Weisbach coefficients to compare materials; installers and homeowners should consider long-term roughness when selecting pipe for consistent domestic performance.
Fitting And Joining Effects
In plumbing systems, fittings and joints routinely reduce the effective flow area and increase resistance, so their configuration and material markedly influence hydraulic capacity. Different materials change internal diameter, roughness, and joint geometry; soldered copper, glued PVC, compression brass, PEX crimps, and threaded steel each impose unique losses. Designers account for equivalent length and minor loss coefficients when sizing. Proper selection minimizes pressure drop and preserves nominal pipe performance. Installation quality, corrosion, and scale further alter effective size over time, so material choice affects both immediate hydraulics and long-term reliability.
| Material | Typical Effect |
|---|---|
| Copper (soldered) | Low loss |
| PVC (glued) | Smooth, low loss |
| Brass (compression) | Moderate loss |
| PEX (crimp) | Low-moderate loss |
| Steel (threaded) | Higher loss |
Copper Pipe Sizes: Types and Common Uses
Copper pipe sizes commonly appear in three types—K, L, and M—each defined by wall thickness and typical applications: Type K has the thickest walls for underground or high-pressure use, Type L suits general plumbing and hydronic systems, and Type M, the thinnest, is used for interior residential water lines where pressure demands are lower.
- Type K: used for service mains, burial, and areas requiring durability; available in larger diameters.
- Type L: common for branch lines, interior supply, and heating loops; balanced strength and cost.
- Type M: economical for light-duty interior supply where building codes permit its use.
PEX Pipe Sizes and When to Choose Them
Often chosen for retrofit and new residential plumbing, PEX (cross-linked polyethylene) comes in several nominal sizes—commonly 1/2″, 3/4″, and 1″—and is selected for its flexibility, corrosion resistance, and simpler installation compared with rigid metal pipes.
PEX sizing aligns with fixture demand and run length: 1/2″ for individual fixtures, 3/4″ for short mains or grouped fixtures, and 1″ for longer main runs or higher flow needs.
Its ease of routing through framing reduces fittings and potential leak points.
PEX also supports manifold systems for balanced distribution and is cost-effective for many residential applications.
CPVC Sizes and Where They Fit in Homes
For many residential systems, CPVC (chlorinated polyvinyl chloride) provides a rigid, cost-effective alternative to metal and flexible plastic piping, typically available in nominal sizes such as 1/2″, 3/4″, and 1″ that correspond to common fixture and branch-mains requirements.
CPVC suits hot and cold potable water lines, resists corrosion, and installs with solvent cement.
Typical applications and considerations include:
- Branch lines: 1/2″ for sinks, toilets, and local fixtures where flow demand is low.
- Manifold feeds: 3/4″ for groups of fixtures or short runs to maintain pressure.
- Main runs: 1″ for larger distributions or higher simultaneous demand.
Galvanized and Older PVC Sizes to Watch For
Galvanized piping and older PVC lines present distinct sizing and condition concerns that homeowners and inspectors should note.
Galvanized steel commonly appears in 1/2″, 3/4″, and 1″ nominal sizes; internal corrosion often reduces effective diameter, causing flow loss and pressure issues despite nominal size.
Older PVC (pre-1970s and some schedule types) is typically found in 1/2″ to 2″ sizes for branch and waste lines; brittle joints and dimensional changes can affect fittings and repairs.
Identifying material, measuring outside diameter, and evaluating internal condition guides replacement decisions and proper matching to modern copper or PEX fittings.
Typical Sizes for Incoming Main Water Service Lines
Many residential incoming main water services are sized between 3/4″ and 1¼” nominal diameter, with 1″ being the most common in single-family homes; larger homes, multi-unit buildings, or long service runs may require 1½” to 2″ lines to maintain adequate flow and pressure.
The incoming main size balances fixture demand, pipe length, and local code. Typical considerations include meter size, potential future expansion, and available materials.
Suggested common sizing examples:
- 3/4″ — small homes or limited fixtures.
- 1″ — standard single-family installations.
- 1½”–2″ — large residences or multi-unit service needs.
Municipal Supply Pressure and Its Impact on Pipe Sizing
How much pressure the municipal supply delivers directly affects required pipe diameters and system design: higher supply pressure can compensate for smaller pipe sizes over short runs by sustaining flow and overcoming friction losses, while low municipal pressure often necessitates larger mains, booster pumps, or pressure-balancing strategies to meet fixture demand and code minimums.
Engineers evaluate static and residual pressures, peak flow rates, and head loss to size service lines and choose materials.
Pressure variability, elevation changes, and fire-flow requirements influence decisions.
Where pressure is marginal, designs prioritize minimizing long-run friction, installing pressure boosters or storage, and coordinating with utility limits.
Standard Interior Distribution Pipe Sizes for Single-Family Homes
Typical interior distribution pipe sizes for single-family homes range from 1/2 inch to 1 inch for most branch lines and from 3/4 inch to 1 inch for the main house feed, with larger diameters used selectively for long runs, multiple high-demand fixtures, or whole-house systems.
The selection balances fixture count, simultaneous use, and pressure.
Common practices include:
- 1/2″ for individual fixtures (sinks, toilets) where flow demand is low.
- 3/4″ for kitchen groups, laundry, or runs serving multiple fixtures.
- 1″ for the primary riser or short main runs to preserve pressure and reduce velocity.
How to Size a Main Distribution Line for Multi-Bath Homes
When planning the main distribution line for a multi-bath home, engineers evaluate total fixture demand, simultaneous use probability, and available inlet pressure to determine an appropriate diameter and layout.
They balance flow rate requirements with acceptable pressure loss, selecting larger diameters or parallel runs where long distances or many fixtures would otherwise cause drops.
Material choice, valve placement, and branching minimizes turbulence and allows isolation for maintenance.
Designers also account for future expansion, pump or pressure‐reducing station needs, and code minimums for velocity and fixture coverage.
Final selection is validated with hydraulic calculations to assure service reliability under peak conditions.
Fixture Unit Method for Whole-House Sizing
Using the fixture unit method, designers convert a building’s assortment of plumbing fixtures into standardized demand values that reflect probable simultaneous use and flow rates.
The method totals fixture units, applies diversity factors from codes, and translates units into required pipe sizes and supply pressure.
It suits whole-house planning where peak coincidence is unlikely and conserves material versus sizing for absolute maximum flow.
Key steps include:
- Inventory fixtures and assign fixture unit values per code.
- Apply demand adjustment or diversity factors for combined units.
- Use conversion tables to select main and riser pipe diameters meeting pressure and velocity limits.
Simple Branch-Line Sizing for One or Two Fixtures
For simple branch-line sizing, the designer refers to lookup tables or basic rules to select pipe diameters for a single fixture based on its flow and run length.
When two fixtures share a short branch, combined flow characteristics and fixture unit allowances determine whether the branch can remain the same size or must be increased.
Clear, concise examples follow to illustrate sizing for one fixture and for two fixtures paired on a short run.
Sizing For Single Fixture
Sizing for a single fixture establishes the minimum pipe diameter and length considerations required to deliver adequate flow and pressure to one or two nearby outlets on a branch line.
Guidance typically assumes short runs and modest demand; designers select pipe size to keep friction loss low and maintain fixture unit requirements.
Common practice uses 1/2-inch for lavatories and sinks, 3/4-inch for tubs or laundry when run lengths increase.
Considerations include material, fittings, and allowable run length to avoid pressure drop.
Typical steps:
- Determine fixture flow rate and allowable head loss.
- Select pipe size meeting velocity and loss limits.
- Verify run length and fittings.
Sizing For Two Fixtures
Designate a simple branch line to serve two nearby fixtures by balancing combined demand and allowable friction loss so both outlets receive adequate flow and pressure. The designer calculates total fixture units or expected simultaneous flow, then selects a pipe size that keeps velocity and head loss within code limits over the branch length.
Tee orientation, run length, and fitting equivalents influence friction. Where one fixture dominates, size to its needs but verify the second still meets minimum pressure under peak use. Short runs often allow 3/8–1/2 inch lines; longer or higher-demand branches typically require 3/4 inch to prevent drop.
Pipe Sizes for Kitchen Supply Lines and Fixtures
Kitchen supply lines and fixture connections require pipe diameters that balance flow rate, pressure loss, and fixture demand.
Typical cold and hot branches use 1/2″ copper or PEX to serve a sink, dishwasher, and icemaker, while the main kitchen riser may be 3/4″ where multiple outlets converge.
Consider water heater proximity and fixture units to prevent drops during simultaneous use.
- 1/2″ — common for individual sink spouts and dishwasher feeds.
- 3/4″ — used for short runs feeding multiple kitchen fixtures.
- 1″ — chosen when long runs or high-demand appliances justify reduced head loss.
Pipe Sizes for Bathroom Fixtures and Showers
Bathroom plumbing demands precise pipe-sizing to maintain adequate flow and pressure for fixtures such as lavatories, tubs, toilets, and showers.
Typical branch lines for lavatories use 1/2-inch supply to provide sufficient flow while limiting noise; showers and tubs commonly receive 1/2-inch or 3/4-inch depending on multi-function valves and simultaneous use.
Toilets normally connect with 3/8-inch to 1/2-inch supply stops but rely on larger drain sizing for proper flush performance.
Shower valves and mixer assemblies often require 1/2-inch hot and cold feeds; long runs or multiple fixtures should step up to 3/4-inch to avoid pressure drop.
Sizes for Laundry and Utility Connections
For laundry and utility connections, supply and drain pipe sizes must accommodate both instantaneous demand and intermittent heavy flows: typical cold and hot supply branches to washing machines use 1/2-inch lines with 3/4-inch recommended for long runs or multiple machines, while utility sinks and floor-mounted laundry tubs often accept 1/2- to 3/4-inch supplies; drains generally require a 2-inch or larger trap and waste to handle overflow and lint-laden discharge without frequent clogs.
- Washing machine supplies: 1/2″ standard, upgrade to 3/4″ for distance or load.
- Utility sink/tub: 1/2″–3/4″ supply, 2″ drain minimum.
- Multiple appliances: consider manifold or larger mains to maintain pressure.
Hot Water Heater Inlet, Outlet, and Recirculation Sizing
When determining inlet, outlet, and recirculation pipe sizes for a residential water heater, the objective is to match flow capacity, minimize heat loss, and preserve system pressure under peak demand.
Pipe diameters typically follow fixture unit loads and heater flow rate; common practice uses 3/4 inch for main inlet/outlet on heaters up to ~50 gpm demand, 1/2 inch for individual branch runs, and 1 inch or larger for higher-capacity systems.
Recirculation lines are sized to balance return velocity (to avoid stagnation) and heat loss, often matching branch sizing.
Valve selection and short, insulated runs reduce pressure drop and energy waste.
Thermal Expansion and Sizing for Hot-Water Loops
Thermal expansion in hot-water systems occurs as heated water increases pressure and can affect pipe stress and fixture operation. Proper loop sizing must account for expected volume change, circulation rates, and net positive pressure to limit pressure rises. Mitigation typically involves expansion tanks, relief valves, and control strategies sized and located to match the system’s calculated expansion.
Thermal Expansion Basics
In a closed hot-water domestic system, water expands as it heats, increasing pressure unless a means of accommodation is provided. Thermal expansion must be managed to protect fittings, valves, and appliance warranties. Key considerations include expansion volume, system pressure ratings, and installation of mitigation devices.
- Calculate expansion volume from temperature rise and system water content to determine required mitigation capacity.
- Use an expansion tank or pressure relief valve sized and set per manufacturer and local code to control pressure excursions.
- Monitor static pressure and test devices periodically to guarantee long-term protection and compliance.
Loop Sizing Methods
For hot-water recirculation and closed domestic loops, sizing must balance flow requirements, temperature rise, and the system’s capacity to accommodate expansion without excessive pressure or noise.
Loop sizing methods evaluate pipe diameter, loop length, and pump head to achieve required turnover and acceptable velocity.
Calculations consider heat loss, desired temperature differential, and fixture demand to set flow rate; then select pipe size that minimizes friction while avoiding low velocities that promote sediment.
Material selection affects expansion coefficients and allowable stress.
Properly sized loops reduce cycling and maintain comfort; designers use standard charts, hydraulic calculations, and manufacturer data to finalize dimensions.
Mitigation And Control
Addressing thermal expansion and proper sizing in hot-water recirculation loops requires coordinating expansion control, pressure management, and flow characteristics so system integrity and performance are maintained.
A compact approach balances loop diameter, flow rate, and pressure relief to limit stress and noise.
Key measures include expansion tanks, correctly rated relief valves, and loop length optimization.
Monitoring and routine maintenance confirm setpoints and detect drift.
- Use expansion tanks sized to absorbed volume and system pressure.
- Specify relief valves and backflow preventers rated for hot-water temperatures.
- Design loop diameters and pump curves to minimize velocity and thermal cycling.
Sizing for Outdoor Hose Bibs and Irrigation Lines
Designing outdoor hose bibs and irrigation lines requires balancing peak flow needs, pressure loss, and practical installation constraints to guarantee reliable watering performance.
Sizing depends on fixture demand, run length, elevation change, and desired nozzle or sprinkler operating pressure.
Typical hose bibs connect to 3/4″ or 1″ piping to support one or two outlets with minimal pressure drop; sprinkler mains often use 1″–1¼” for small yards and 1½”–2″ for larger systems.
Submains and laterals reduce to ¾”–½” as branch runs shorten.
Proper sizing minimizes pump cycling and pressure loss while avoiding unnecessary material and trenching costs.
Valve and Fixture Inlet Sizes That Limit Pipe Selection
Valve and fixture inlet sizes often determine the practical limits for upstream piping because many valves and appliances accept only standard connection diameters such as 1/2″, 3/4″, or 1″.
Manufacturers may also specify nonstandard or proprietary fittings that restrict the choice of pipe material and size. Where mismatches occur, adapters and adapter fittings are used to join different sizes or types while minimizing pressure loss and leak risk.
Common Valve Inlet Sizes
Because many fixtures and control valves employ standardized inlets, the maximum practical pipe size in a residential system is often determined by the connection dimensions of those components.
Common inlet sizes typically match nominal copper, CPVC, or PEX fittings and constrain upstream distribution sizing. Typical retail and OEM valves use a small set of threads and compression dimensions that installers expect.
- 1/2 inch NPT or compression — prevalent for individual fixture shutoffs and supply risers.
- 3/8 inch OD compression — common for faucet and toilet flexible connectors.
- 3/4 inch NPT or sweat — used for main valves, laundry, and hose bibs.
Fixture Connection Limitations
In practice, fixture inlet dimensions frequently dictate the upper limit for upstream piping, since most faucets, toilets, and control valves accept only a narrow range of thread and compression sizes; installers consequently select branch and riser diameters to match available connectors rather than hydraulic capacity alone.
Fixture manufacturers commonly provide 1/2″ or 3/8″ compression inlets and 3/4″ threaded toilet supplies, limiting direct connection of larger mains. Where larger pipe is present, designers use short reductions at the appliance to maintain sealing and flow characteristics. Specifying fixtures with compatible inlet sizes simplifies installation and avoids unnecessary fittings.
Adapters And Transition Fittings
Plumbers frequently rely on adapters and adapter fittings to reconcile the mismatch between larger supply pipes and the limited inlet sizes of valves and fixtures. These components allow shifts between pipe materials and sizes, preserving flow while matching manufacturer inlet threads or compression faces.
Selection depends on pressure rating, material compatibility, and code compliance. Improper choices can cause leaks, reduced flow, or voided warranties. Installers often stock common sizes but must verify fixture requirements before final assembly.
- Use matched-pressure adapters for differing materials.
- Prefer manufactured shift kits for warranties.
- Avoid excessive reduction levels to maintain flow.
Pressure Drop Charts for Pipe Sizing Decisions
How much pressure loss occurs over a run of pipe, and how that loss influences fixture performance, are central questions when selecting residential pipe sizes. Pressure drop charts summarize expected head loss per unit length for various pipe materials, diameters, and flow rates.
Designers consult these charts to compare options rapidly, ensuring adequate pressure at fixtures while minimizing oversizing. Charts typically express loss in psi/ft or feet of head per 100 feet and assume fully developed turbulent flow; users must match chart conditions to the system.
Proper interpretation balances flow requirements, acceptable loss, and cost for practical sizing decisions.
How Length and Fittings Reduce Effective Pipe Size
Along a run of pipe, length and fittings combine to reduce the system’s effective diameter by adding cumulative resistance to flow; each foot of pipe contributes friction loss while elbows, tees, valves, and couplings add equivalent lengths that amplify that loss. The designer must treat total equivalent length as the controlling dimension, not just nominal pipe size.
Short runs with few fittings behave closer to published capacities; long runs with many fittings require upsizing. Common considerations include:
- Elbows and tees often count as multiple feet of straight pipe.
- Valves add significant equivalent length, especially partially open.
- Couplings and adaptations create localized turbulence.
Flow Rate Examples: Gallons Per Minute by Pipe Size
After accounting for equivalent length and fittings, designers next compare expected flow rates to pipe capacity so that fixture demand and run characteristics align.
Typical residential copper or PEX sizes deliver roughly: 1/2-inch nominal ~4–8 gpm depending on pressure and length; 3/4-inch nominal ~8–15 gpm; 1-inch nominal ~15–25 gpm.
Longer runs with many fittings shift values toward the lower end.
These example ranges assume standard household pressures (40–60 psi) and typical fixture heads. Designers use such examples to verify a chosen size meets simultaneous-use scenarios, minimizing pressure loss while avoiding oversizing that increases cost and complexity.
Typical Rules of Thumb Plumbers Use for Home Piping
Plumbers commonly rely on simple rules of thumb when choosing pipe sizes, matching nominal diameters to expected fixture counts and run lengths.
They gauge acceptable flow rates by pipe diameter and consider pressure loss over distance to avoid weak fixtures.
These practical guidelines help balance cost, performance, and future demand without complex calculations.
Pipe Size Selection Rules
When sizing residential water piping, tradespeople rely on a few consistent rules of thumb that balance fixture demand, pipe length, and flow velocity to guarantee adequate pressure and minimize noise or corrosion.
They select pipe diameters to serve groups of fixtures, step down near fixtures to limit excess volume, and avoid overly long runs that encourage sediment and bacterial growth.
Key practices include:
- Size main lines larger to feed multiple branches, then reduce to fixture branches.
- Keep branch lengths short and direct; provide manifold or looped layouts for balance.
- Maintain recommended minimum velocities to prevent stagnation without causing noise.
Flow Rate And Pressure
In evaluating residential water systems, tradespeople use simple rules of thumb relating fixture flow rates, pressure loss, and acceptable velocities to size pipes so fixtures receive adequate flow without excessive noise or wear.
Typical practice assumes fixture unit values to estimate simultaneous demand; designers convert fixture units to gallons per minute, then select pipe sizes that keep velocities between about 4–8 ft/s for cold and 3–5 ft/s for hot to limit noise and erosion.
Pressure drop targets commonly stay below 5–10 psi across a branch.
For long runs or high-demand fixtures, upsizing minimizes head loss and preserves performance.
When Upsizing Pipe Makes Sense for Future-Proofing
For homeowners planning renovations or anticipating higher future demand, upsizing supply lines can prevent pressure loss, reduce noise, and avoid costly rework later.
A detached review considers long-term usage, appliance additions, and peak simultaneous fixtures.
Larger pipes cost more initially but limit friction losses and preserve flow as systems evolve.
Decisions weigh installation disruption, fixture layout, and local code or municipal service limits.
Typical scenarios favor upsizing at main runs rather than every branch.
Benefits include simpler future upgrades and fewer bottlenecks.
- Evaluate planned fixtures and peak demand.
- Compare long-run vs. branch sizing.
- Check code and service capacity.
Signs Your Home May Have Undersized Water Pipes
After considering future needs and where upsizing makes sense, homeowners can look for concrete indicators that existing lines are too small.
Common signs include persistently weak flow at multiple fixtures simultaneously, noticeable pressure drops when several outlets run, and slow recovery of tank water heaters.
Frequent throttled showerheads or faucets that require full opening to get adequate flow suggest constrained piping.
In older homes, small-diameter supply lines visible in basements or crawlspaces suggest limitations.
Repeated use of pressure-boosting devices or complaints from occupants about inconsistent water delivery are further clues that pipe capacity may be insufficient.
Common Problems From Incorrect Pipe Sizing and Fixes
Incorrect pipe sizing commonly causes low water pressure, audible pipe noises, and repeated clogs that affect system performance.
Each symptom points to different underlying issues—restrictive diameter reducing flow, turbulent flow or loose fittings creating noise, and improper gradients or size changes encouraging blockages.
Practical fixes range from upsizing or reconfiguring runs to securing fittings, adding vents or traps, and cleaning or rerouting troublesome sections.
Low Water Pressure Issues
Low water pressure often signals that pipe diameters, layout, or fittings do not match household demand. The article outlines typical causes and corrective steps concisely.
- Smaller mains or long runs: undersized lines increase friction loss; upgrading to larger diameter or adding parallel runs restores flow.
- Excessive fittings and sharp bends: each elbow or valve adds resistance; rerouting or using smoother fittings reduces head loss.
- Pressure-regulating devices and shared supply: misadjusted PRVs, clogged aerators, or multiple fixtures drawing simultaneously can lower pressure; recalibrate PRVs, clean outlets, or sequence fixture use to improve performance.
Noisy Pipes And Causes
In plumbing systems, noisy pipes often indicate mismatched pipe sizing, turbulent flow, or abrupt pressure changes that create banging, whining, or rattling sounds. Causes include water hammer from sudden valve closure, high velocity in undersized lines, and loose hangers or fittings. Remedies focus on correct sizing, installing arrestors, adjusting pressure regulators, and securing piping. A qualified plumber evaluates flow rates and pipe runs to select appropriate diameters and add damping devices where needed.
| Symptom | Likely cause | Fix |
|---|---|---|
| Banging | Water hammer | Arrestor/soft close valve |
| Whining | High velocity | Upsize pipe |
| Rattling | Loose supports | Secure hangers |
Frequent Pipe Clogs
Noisy pipes can signal underlying sizing problems that also contribute to frequent clogs; when pipe diameter is too small for the required flow or fixture layout, solids and sediment are more likely to accumulate and restrict passage.
Incorrect slope, multiple sharp bends, or undersized branch lines increase debris buildup and reduce self-cleansing velocity. Remedies focus on matching pipe size to demand, correcting pitch, and minimizing abrupt direction changes.
Typical interventions include:
- Upsizing affected runs to restore adequate flow and reduce deposition.
- Reconfiguring pipe layout to improve slope and eliminate traps.
- Regular flushing and targeted cleanouts after resizing.
Water Hammer: How Size and Layout Influence It
Water hammer occurs when flowing water is suddenly forced to stop or change direction, sending pressure waves through a pipe network; pipe diameter, wall stiffness and fixture layout strongly affect the magnitude and frequency of those waves. Smaller diameters raise wave speed and pressure spikes; larger diameters store more kinetic energy, prolonging oscillations. Rigid materials transmit sharper shocks; flexible piping damps them. Long straight runs create standing waves; multiple fixtures and abrupt fittings produce reflections and higher peak pressures. Proper layout, air chambers, arrestors, and gradual bends mitigate impacts. Imagery:
| Pipe Size | Effect |
|---|---|
| Small | Sharp spikes |
| Large | Prolonged oscillation |
Coordinating Pipe Size With Water Softeners and Filters
When installing water softeners or whole‑house filters, pipe size should match the unit’s maximum flow rate to prevent bottlenecks.
Undersized lines can reduce treated water delivery, while oversized runs may complicate pressure management.
Proper sizing preserves line pressure and guarantees the conditioning equipment operates at rated capacity.
Match Flow Rate Capacity
Determine the combined peak demand of fixtures and appliances before selecting filter or softener connections, because undersized piping or devices with lower flow capacity can create pressure drops that impair performance. The chosen softener or filter should list a maximum flow rate; match that to the house peak flow and main pipe capacity to avoid bottlenecks. Consider valve sizes and bypasses that may reduce effective flow.
- Compare device GPM rating to calculated peak GPM.
- Verify inlet/outlet diameters equal mains to prevent constriction.
- Account for future load increases and multi-fixture use.
Proper matching preserves service and extends equipment life.
Maintain Proper Line Pressure
In coordinating pipe sizes with water softeners and filters, maintaining adequate line pressure guarantees treated water reaches fixtures at expected flow rates without causing premature wear or system inefficiency.
Proper pipe diameter minimizes pressure drop through media beds and housings; undersized piping reduces performance and may trigger bypasses or frequent regeneration.
Pressure regulators, booster pumps, and pressure gauges help manage system variability and protect components rated for specific operating ranges.
Installers should consider peak demand, head loss from devices, and manufacturer specifications when selecting pipe size.
Routine pressure testing verifies design assumptions and detects restrictions, ensuring longevity and consistent treated-water delivery.
Retrofitting Old Pipe Systems: Sizing Considerations and Costs
Retrofitting an aging residential water system requires careful assessment of existing pipe dimensions, material condition, and flow demands to guarantee upgraded sizing delivers adequate pressure and capacity without unnecessary expense. The retrofit plan should balance demand, available pressure, and pipe longevity while minimizing disruptions. Inspectors measure diameters, check corrosion, and map runs to identify bottlenecks and parallelization opportunities. Design choices consider fixture units, velocity limits, and future needs. Installation sequencing, fittings, valve placement, and code compliance affect complexity. Homeowners receive cost estimates that separate labor, permits, and unexpected repairs.
- Evaluate existing condition and flow.
- Size for current and anticipated demand.
- Prioritize minimal invasive routing.
Estimating Material Cost by Pipe Size and Length
Estimating material cost by pipe size and length requires converting the system layout and selected diameters into quantities of pipe, fittings, and ancillary supplies, then applying unit prices and waste factors to produce a reliable budget line.
The estimator tallies runs by diameter, counts fittings (elbows, tees, couplings), and includes valves, supports, sealants, and connectors.
Unit prices vary by material — copper, PEX, CPVC, or galvanized — and by diameter; larger diameters cost more per foot and require larger fittings.
Allowances for scrap and extra fittings (typically 5–15%) are added, and regional labor or procurement premiums adjust final material budgets.
Economical Material/Size Combinations for Remodels
The discussion shifts to balancing material cost and long-term durability when selecting pipe types for remodels.
Attention is given to choosing right-sized pipes that meet demand without unnecessary oversizing.
Practical, labor-friendly installation options are highlighted to minimize time and contractor expense.
Material Cost vs. Durability
Choosing pipe materials and sizes for a remodel requires balancing upfront cost against expected service life and failure risk. Durable materials reduce long‑term expenses despite higher initial price, while cheaper options may increase replacement and labor costs. Consider corrosion resistance, joint reliability, and local water chemistry when comparing options.
- Copper: higher material and labor cost but excellent longevity and corrosion resistance in many areas.
- PEX: moderate cost, flexible installation, resistant to scale and freezing damage; limited UV exposure required.
- CPVC/PVC: low material cost, acceptable lifespan in appropriate applications but more prone to brittle failure over decades.
Right-Sized Pipe Choices
For remodels balancing cost and performance, selecting pipe material and diameter should prioritize expected fixture demand, peak flow rates, and longevity rather than lowest upfront price alone.
Practical pairings favor 3/4-inch copper or PEX for main branch lines feeding multiple baths; 1/2-inch copper or PEX for individual fixtures achieves reliable pressure.
Galvanized steel is generally avoided due to corrosion; CPVC suits moderate temperatures where code permits.
Consider local code, water quality, and future flexibility when choosing sizes.
Matching material lifespan to expected remodel cycle reduces total cost of ownership while maintaining required flow and minimizing repair frequency.
Labor-Friendly Installation Options
After sizing and material considerations narrow options toward 3/4-inch mains and 1/2-inch fixture runs, labor-friendly choices focus on methods and components that reduce install time and error while staying economical.
Prefab assemblies and simple fittings minimize cutting and soldering; PEX with crimp or push-fit connections speeds retrofits; keeping nominal sizes consistent avoids special adapters.
- Use PEX with push-fit fittings for tight access and fewer tools.
- Choose brass push-fit valves and straight runs to reduce layout time.
- Standardize on 3/4″ supply trunks and 1/2″ drops to limit inventory and fittings.
Permits, Code Minimums, and Residential Pipe Sizing
When planning residential water pipe installations, homeowners and contractors must understand permit requirements, code minimums, and how those standards influence pipe sizing and layout decisions. Permits document planned work and guarantee inspections verify compliance with local plumbing codes.
Codes set minimum pipe sizes for mains, branches, and fixtures to maintain pressure, flow, and sanitary distances; they also address materials, insulation, and protection from freezing. Designers use fixture unit tables and pressure-loss calculations within code constraints to size pipes.
Failure to obtain permits or meet code minimums can lead to failed inspections, costly rework, and liability for unsafe or noncompliant systems.
Regional Differences That Affect Service Size Choices
Local permitting and code requirements set the baseline for pipe sizing, but regional factors frequently dictate the final service size selected. Climate, water source, and infrastructure age shape practical choices: colder areas may need larger mains to avoid freeze-related flow reductions; rural homes on well systems require different sizing than urban connections; older districts with low-pressure mains often force upsizing at the property line.
- Climate — freeze risk and seasonal demand alter safe minimums.
- Water source — municipal vs. private supply changes pressure expectations.
- Infrastructure age — pipe condition and municipal pressure determine workable service sizes.
When to Call a Plumber or Engineer for Pipe Sizing
In situations where pipe sizing affects safety, code compliance, or significant cost, a qualified plumber or civil/mechanical engineer should be consulted to evaluate flow, pressure, and system constraints. Professionals are needed for complex remodels, service upgrades, high-demand fixtures, long runs, or weak municipal pressure.
They assess demand calculations, pipe material selection, velocity limits, and pressure loss to prevent noise, cavitation, or inadequate supply. Engineers handle atypical loads, booster pump integration, or cross-connection control requiring stamped plans.
Plumbers interpret local code, obtain permits, and implement practical solutions. Engage licensed experts when uncertainty, repeated failures, or inspection requirements arise.
DIY Checks to Confirm Pipe Size Without Tools
Homeowners can estimate pipe diameter by comparing visible pipes to familiar objects like a quarter, a soda can, or a finger to get a rough sense of size.
A gentle pinch or feeling along accessible runs helps distinguish thin supply lines from thicker mains by stiffness and wall thickness.
Observing flow — how strong water feels at a tap or how quickly filling a container occurs — offers a practical clue to whether pipes are likely narrow or ample.
Compare To Common Objects
As a quick, tool-free approach, comparing exposed pipes to everyday objects can help confirm approximate pipe diameter before committing to repairs or fittings.
The method suits preliminary checks when measurements or tools are unavailable.
- A coin: match pipe width to a quarter (24mm) or a penny (19mm) to estimate common small pipe sizes.
- A finger: compare single-finger thickness (about 15–20mm) or two fingers together for larger residential lines.
- A soda can or marker: align circumference visually; a standard can (~66mm) approximates larger service or drain pipes.
Use these comparisons only for rough sizing; verify before purchase.
Measure By Touch And Flow
After using visual comparisons like coins or fingers, one can confirm pipe size by feel and by observing flow characteristics. A homeowner lightly presses the pipe to gauge wall thickness and outside diameter; thinner walls and larger circumference suggest larger nominal sizes.
Water velocity and fixture output offer clues: steady, forceful flow from multiple outlets implies wider mains, while weak, narrow streams indicate smaller pipes or restrictions. Listening for vibration or turbulence at open taps helps identify constrictions.
These tactile and flow-based checks are approximations only; they guide decisions about further measurement or professional assessment rather than provide definitive sizing.
How to Document Pipe Sizes for Future Owners or Contractors
When preparing property records for future owners or contractors, include a clear, labeled diagram showing each branch of the domestic water system with pipe sizes, material types, fixture connections, and flow direction. The document should pair the diagram with concise notes and verified measurements, stored digitally and as a printed copy near the main shutoff.
Recommend periodic updates after work or alterations.
- Record pipe size, material, install date, and responsible contractor for each segment.
- Note pressure measurements, flow rates, and any restrictions or softeners affecting flow.
- Include photos of key junctions, access panels, and meter labels for fast identification.
Case Study: Resizing a 1950s Home From Galvanized to Modern Sizes
In converting a 1950s home from galvanized piping to contemporary sizes, the project balances preserving serviceability with modern flow standards: the contractor assesses existing pipe diameters, corrosion severity, and fixture demands, then maps a new layout that often ups main trunks to 3/4″ or 1″ copper or PEX while retaining 1/2″ runs to fixtures, addresses pressure drop across long runs, and plans changesover and isolation valves to minimize disruption.
The case study documents selective replacement where salvageable sections remain, sequences work to keep water available, updates shutoffs and risers, and verifies pressure and leak-free joints before final sign-off for occupancy.
Quick Reference Chart: Size, Flow (GPM), and Typical Uses
For quick selection during residential plumbing work, a one-page chart matching common pipe sizes to approximate flow rates (GPM) and typical fixture or run uses provides immediate guidance; it summarizes nominal internal diameters for copper, PEX, and PVC, expected peak flows under normal household pressures, and the usual applications (main trunk, branch, fixture supply, or appliance).
A clear chart lists size, estimated GPM, and typical use so decisions align with demand and pressure limits. Examples illustrate common matches:
- 3/4″ — 8–12 GPM — main branch, water heater feed.
- 1/2″ — 4–6 GPM — individual fixtures, sinks.
- 1″ — 12–16 GPM — short main runs, multiple fixtures.
Next Steps: Choose the Right Pipe Size for Your Project
Before selecting pipe sizes, the project scope and anticipated simultaneous fixture demand must be quantified so capacity and pressure loss can be matched to layout constraints. The homeowner should review fixture units, run lengths, and available pressure, then compare results to standard charts or consult a plumber. Prioritize main service diameter, branch sizing, and potential future expansion. Use pressure-loss tables and local code requirements to finalize choices. When in doubt, select the next larger common size to reduce friction loss. Example quick comparison:
| Pipe Size | Typical Flow | Common Use |
|---|---|---|
| 1/2″ | 2–8 GPM | Fixtures |
| 3/4″ | 8–15 GPM | Branches |
| 1″ | 15–25 GPM | Mains |
Conclusion
In sum, the guide equips homeowners with the tools to read pipe markings, distinguish nominal from actual diameters, and weigh schedule and material when sizing systems — a toolbox, compact but complete. By documenting existing pipes and consulting the quick-reference chart, owners can plan upgrades or repairs with confidence, avoid common pitfalls from legacy galvanized systems, and hand future occupants clear records that keep water flowing efficiently and predictably.