How to Use Pipe Tape: Quick Guide for DIY Plumbing & Repairs
To effectively use pipe tape for plumbing and repairs, start by cleaning the threads of any dirt, oil, or old sealant and inspecting for damage. If any parts are compromised, replace them. Then, hold the PTFE tape at the end of the pipe and wrap it clockwise with light, even tension, starting from the first full thread. Use about 2–3 wraps for small threads and 3–6 for larger ones. Smooth the tape into the crests, hand-tighten the connection, and then use a wrench to tighten it to specifications. Finally, test the connection under pressure for leaks and rewrap if necessary. For further guidance on grades, safety, and troubleshooting, continue reading.
Quick Answer: Seal Threaded Pipes in 5 Steps
Start by preparing the male threads: clean off dirt, oil, and old sealant so the tape adheres evenly and the threads seat properly.
Wrap PTFE tape clockwise around the threads, overlapping by about half the tape width and covering two to three full turns.
Smooth the tape into the threads with a finger to guarantee conformity.
Thread the fitting by hand, then tighten with the appropriate wrench until snug; avoid over-tightening.
After pressurizing the system, check for leaks and, if needed, tighten slightly.
If leaks persist, disassemble, inspect for damage, and reapply tape or replace the fitting.
When to Use Pipe (PTFE) Tape
Use PTFE tape when joining metal threaded fittings where a thin, conforming seal is needed to prevent leaks and ease disassembly. It suits water, air, and many non-reactive gases and liquids on tapered or parallel metal threads.
Apply to clean, dry threads, wrapping clockwise three to six turns without overlapping into the first thread to avoid contamination.
Avoid using PTFE tape on sealed flange faces, compression fittings, or plastic threads unless specified; excessive tape can cause misalignment or cracking.
For high-pressure, high-temperature, or chemically aggressive systems, consult component specifications or a professional before relying solely on tape.
PTFE vs. Plumber’s vs. Thread Seal Tape
How do the terms PTFE, plumber’s tape, and thread seal tape differ in practice and meaning?
PTFE tape is the chemical name for polytetrafluoroethylene tape used to seal threaded pipe joints; it is inert, slippery, and resists corrosion.
Plumber’s tape is a common, informal name often referring to PTFE tape in plumbing contexts.
Thread seal tape is a broader descriptor that can include PTFE and other specialized tapes for sealing threads.
In practice, all three labels often point to the same white PTFE product for water lines, but buyers should check material, color coding, and manufacturer notes to confirm suitability for specific applications.
Tape Grades and Thickness: Water, Gas, Air
Different tape grades and thicknesses are specified to match the demands of water, gas, and air lines: thicker, denser PTFE is typically used for gas because it must withstand higher pressures and provide a more robust seal, while standard thin white PTFE is common for potable water, and lighter or specialized tapes (often colored or marked) are used for low-pressure air or non-potable services.
Selection depends on pressure, temperature, chemical compatibility, and code requirements. Gas tapes often carry yellow coloring and higher density ratings; water tapes prioritize purity and flexibility; air services may accept thinner or non-PTFE options where permitted.
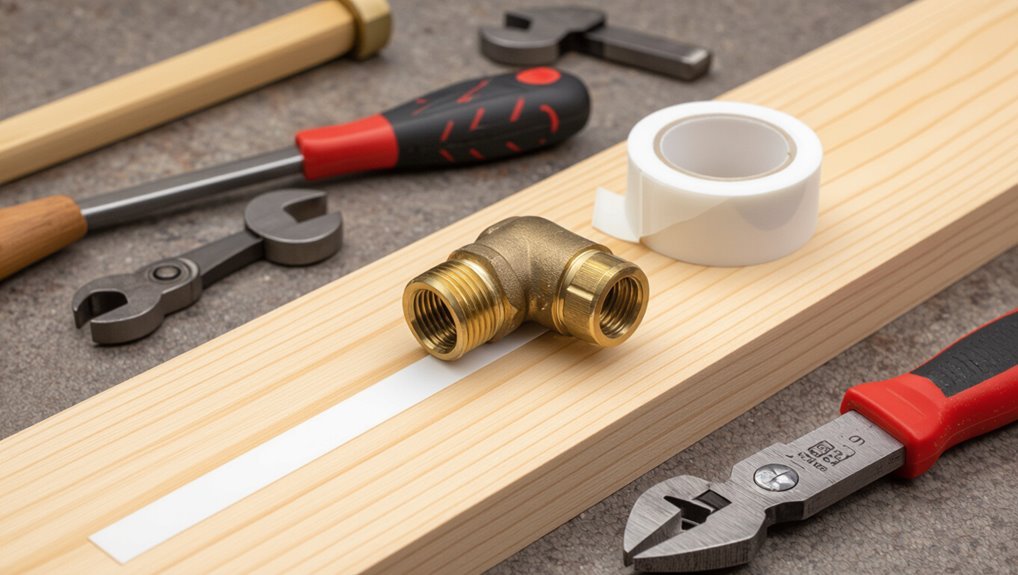
Tools & Materials to Gather First
Having selected the appropriate tape grade and thickness for the service, the next step is to assemble the small set of tools and materials that make consistent, reliable seals possible.
Essential items include PTFE tape, boxed or on-card for cleanliness; a utility knife or scissors for neat cuts; adjustable wrench or pipe wrench sized to the fittings; thread sealant paste for applications specified by manufacturer; a small brush to apply paste when needed; lint-free cloths for drying nearby surfaces; gloves to protect hands and maintain cleanliness; and a flashlight for visibility in tight spaces. A simple parts tray keeps components organized.
Inspecting and Cleaning Pipe Threads
Before applying pipe tape, the threads should be visually inspected for damage, corrosion, or uneven wear.
Any loose paint, metal shavings, or sealant residue must be removed with a wire brush or clean rag to guarantee a smooth mating surface.
Proper cleaning prevents leaks and helps the tape seat evenly.
Visual Thread Inspection
Inspecting pipe threads visually guarantees a reliable seal and prevents leaks caused by damage, debris, or improper thread form. The inspector looks for nicks, flattened peaks, cross-threading, and corrosion. Uniform thread profile and sharp crests indicate fit; mismatched pitch or distortion signals replacement. Light and magnification reveal hairline cracks and embedded particles. Rotate parts to view root and crest continuity. If damage is localized and slight, consider repair; major deformities require new fittings. Proper inspection precedes tape application to assure effectiveness and safety.
| Feature | OK indicator | Action if faulty |
|---|---|---|
| Crest shape | Sharp, uniform | Repair or replace |
| Pitch match | Continuous | Replace |
| Surface | Smooth, clean | Inspect further |
Cleaning Thread Debris
Why remove loose material from pipe threads? Debris prevents tight seals, causes leaks, and interferes with tape adhesion.
The technician inspects threads under light, checking for metal shavings, old tape fragments, corrosion, and grit.
A small brass or nylon brush clears grooves; compressed air or a clean rag removes remaining particles.
For stubborn residue, a solvent-compatible cleaner softens deposits, followed by thorough drying to prevent contamination of tape.
Bent or damaged threads are filed or replaced rather than masked.
Proper cleaning guarantees pipe tape seats uniformly, creating a reliable, leak-free joint and reducing the need for rework.
How Many Tape Wraps You Need
The appropriate number of tape wraps depends on the thread size, with finer threads generally requiring fewer turns than coarse ones.
Tape thickness also influences how many wraps are needed to form a proper seal without overbuilding the joint.
Higher-pressure systems typically call for additional wraps to guarantee reliability under load.
Thread Size Matters
How many wraps of pipe tape are needed depends primarily on the thread size and pitch of the fitting.
The appropriate wrap count increases with larger diameters and coarser pitches; fine threads require fewer wraps to avoid binding.
Practitioners estimate wraps by visualizing thread depth and ensuring tape covers the male threads without excess on the leading edge.
Typical guidance scales modestly: more wraps for larger pipes, fewer for small, fine-thread fittings.
- 1/8″–1/4″ fine threads: 2–3 wraps
- 3/8″–1/2″: 3–4 wraps
- 3/4″–1″: 4–6 wraps
- Larger sizes: increase wraps accordingly
Tape Thickness Counts
Tape thickness directly affects how many wraps are needed to produce a proper seal: thicker tape fills thread gaps faster and so requires fewer turns, while thinner tape calls for more wraps to build equivalent sealing thickness.
Different tape grades exist—standard, heavy, and specialty densities—each altering wrap count expectations. Installers assess tape thickness visually and by feel, adjusting wraps until threads appear uniformly covered without bulking.
Overwrapping can distort fittings; underwrapping risks leaks. Consistency across the joint is important: maintain even tension and direction with each pass.
Manufacturers sometimes recommend wrap counts; when in doubt, match tape density to thread size.
Wraps For Pressure
Pressure rating and system type determine how many wraps are appropriate for a joint: higher-pressure lines generally require more layers of tape (or a heavier grade) to guarantee the seal holds under load, while low-pressure or drain applications can get by with fewer turns.
Guidelines depend on thread size, tape thickness, and media. Typical recommendations range from three to eight wraps; thicker tape needs fewer turns. Apply tape clockwise, stretch lightly, and cover threads without excess. Consider manufacturer specs and test the joint under pressure.
Common considerations include:
- Thread diameter and pitch
- Tape thickness (standard vs. plumbers’ grade)
- Operating pressure
- Compatibility with conveyed fluid
Wrap Metal Threaded Pipes : Step‑by‑Step
When preparing to wrap metal threaded pipes, gather the correct materials and work methodically: clean threads, select the appropriate tape, and maintain consistent tension during application.
Begin by removing dirt, oil, and old sealant with a wire brush and solvent; allow threads to dry.
Hold the tape at the pipe end and overlap threads in the direction of tightening.
Apply three to six tight, even wraps, keeping tape flat and avoiding wrinkles.
Tear the tape cleanly, press the end into the first wrap, and reinstall fittings.
Test the joint under pressure and rewrap if leaks appear.
Wrapping Plastic/PVC Threads Safely
Before applying tape to plastic or PVC threads, the threads should be cleaned of dirt and old sealant to ensure proper seating.
PTFE tape must be wrapped in the direction of the threads with firm, even tension to prevent unraveling during assembly.
Care should be taken to avoid overlapping layers, which can create bulges and interfere with a proper seal.
Clean Threads First
A clean-thread routine guarantees plastic and PVC fittings seal properly and prevents tape from bunching or tearing during assembly. Surfaces are inspected, debris and old sealant removed, and threads dried before tape application. Use gentle tools to avoid damage; solvents that attack plastic are avoided. Attention to detail reduces leaks and secures uniform tape lay.
- Remove dirt, fibers, and dried compound with a soft brush.
- Wipe threads with isopropyl alcohol; allow to evaporate completely.
- Inspect for cracks, stripped threads, or deformities.
- Use nonmetallic picks or nylon brushes to protect plastic threads.
Use PTFE Tape Correctly
Wrap PTFE tape smoothly and evenly in the direction of the threads to guarantee proper seal and prevent unraveling during assembly.
The installer should hold the fitting steady, stretch the tape slightly, and lay it flat across the thread crests, covering from the first full thread back toward the pipe body.
For plastic or PVC fittings use light pressure to avoid deforming threads.
Three to four wraps usually suffice for standard household connections.
Avoid tape on damaged or dirty threads; replace or clean them first.
After wrapping, assemble fittings by hand, then tighten to specified torque, checking for leaks once pressurized.
Avoid Overlapping Layers
Having applied PTFE tape correctly on metal threads, attention shifts to special care for plastic and PVC fittings where overlapping tape layers can cause problems.
Excess tape increases thickness, preventing full thread engagement and risking cracks or leaks. The installer should wrap smoothly, with minimal layers and consistent tension. Follow manufacturer guidance for compatible sealants.
- Use only 2–3 thin wraps on plastic or PVC threads.
- Avoid layering over previous tape; remove and rewrap if needed.
- Make certain tape lies flat without bunching near the first thread.
- Test fit by hand before final tightening to confirm thread engagement.
Why Wrap Clockwise and Keep Tension
Because most threaded fittings tighten clockwise, wrapping PTFE tape in the same direction guarantees the tape does not unravel when the joint is screwed together; maintaining slight tension while wrapping assures snug, even layers that fill threads without bunching. Proper direction and tension reduce gaps, prevent loose ends catching during assembly, and produce a consistent seal. Apply 2–3 snug turns for standard threads, more for larger or damaged threads. Avoid overlapping excessively. The brief table below highlights key points.
| Aspect | Recommendation |
|---|---|
| Direction | Clockwise with thread turn |
| Tension | Slight, consistent pull |
| Turns | 2–3 typical |
| Overlap | Minimal, avoid bulk |
Using PTFE Tape With Pipe Dope: Yes or No?
When combining sealants, many plumbers favor either PTFE tape or pipe dope alone, but using both together can be appropriate in specific situations; PTFE tape provides thread lubrication and gap-filling while pipe dope adds adhesive sealing and resistance to vibration.
The choice depends on pipe material, pressure, and service fluid. Combined use can improve seal security on metal threads, but risks overfill or incompatibility with some compounds. Consider manufacturer guidance and application technique.
- Use tape first, wrap correctly
- Apply a thin layer of compatible dope
- Avoid on tapered plastic threads
- Test under pressure before burying
Common Mistakes That Still Cause Leaks
The most frequent causes of persistent leaks are using the wrong type of tape and not applying enough wraps to the threads.
Incorrect tape can lack necessary thickness or chemical compatibility, while too few layers fail to fill gaps and seal.
Addressing both selection and wrap count eliminates many common failures.
Wrong Tape Type
Which tape is chosen matters: using the wrong type—such as plumber’s tape designed for water threads on gas lines, or general-purpose Teflon tape on high-temperature fittings—can prevent proper sealing and lead to leaks.
Selection should match media, temperature, and thread type.
Material mismatches degrade under heat, chemical exposure, or pressure.
Manufacturers label tapes for specific uses; ignoring labels invites failure.
Inspect compatibility before application and replace old tape with the correct variety.
- Use gas-rated tape for fuel lines only.
- Choose high-temp or silicone variants for hot systems.
- Avoid painter’s or general-purpose tapes on threads.
- Confirm chemical compatibility for corrosive fluids.
Insufficient Wraps
After selecting the correct tape type, proper application technique becomes equally important: too few wraps of tape on pipe threads often leaves gaps that prevent a gas- or fluid-tight seal. The writer notes that insufficient wraps reduce compression and allow thread exposure, causing leaks under pressure or vibration. Recommended practice is to wrap clockwise, overlap by half the tape width, and use 3–6 full turns depending on thread size and tape thickness. Inspect visually for consistent coverage and avoid stretching tape thin. Tighten fittings carefully to compress tape without displacing it; rewrap if threads remain visible.
| Issue | Cause | Fix |
|---|---|---|
| Leak | Too few wraps | Add 3–6 turns |
| Exposure | Uneven coverage | Rewrap clockwise |
| Failure | Overstretched tape | Use proper tension |
Fixing a Leaking Joint That Already Has Tape
When a threaded joint wrapped in pipe tape still leaks, evaluate the situation before rewrapping: confirm the leak’s source, inspect the tape for gaps or damage, and check that threads are clean and undamaged.
If tape is suspect, remove the joint, strip old tape, and clean threads with a wire brush and solvent. Dry thoroughly, then reapply tape in the direction of threading with 3–6 snug wraps, overlapping slightly and covering the first thread.
Hand-tighten, then wrench to specification. Monitor for leaks after pressurizing.
Quick checklist:
- Remove old tape completely
- Clean and dry threads
- Rewrap with correct direction
- Tighten properly and test
When Tape Isn’t the Right Fix (Alternatives)
If rewrapping fails to stop a leak or thread damage, tape may not be the appropriate remedy; alternatives should be considered.
A threaded coupling with damaged threads often needs replacement or a thread repair kit (chasing die or tap).
For larger leaks, replace fittings or use compression fittings, push-to-connect couplers, or soldered/brazed joints on copper.
Epoxy putty or pipe repair clamps provide temporary fixes for small holes but inspect and plan permanent repair.
For PVC or CPVC, solvent welding or proper replacement is preferred.
Always match materials and pressure ratings; consult a professional for complex or concealed systems.
Safety Rules for Gas Lines and Gas‑Rated Tape
When working on gas lines, only tape specifically rated for gas connections should be used.
Adequate ventilation must be maintained during installation and testing to prevent accumulation of gas.
After assembly, fittings should be checked carefully for leaks using an approved leak-detection method.
Use Gas-Rated Tape Only
Why is gas-rated tape essential for gas-line connections? Gas-rated tape is formulated to resist fuel, pressure, and temperature of gas systems; using non-rated tape risks leaks and failures. Only approved yellow or specifically labeled gas PTFE should be used on fuel fittings. Proper application and correct tape type guarantee a reliable seal and compliance with codes.
- Use tape labeled “gas” or “yellow” PTFE only.
- Apply in the direction of thread rotation, 3–5 wraps.
- Do not mix with pipe dope unless manufacturer allows.
- Replace tape on disturbed or corroded threads; never reuse.
Ensure Proper Ventilation
Before beginning any work on gas fittings, make certain the area has adequate ventilation to prevent accumulation of leaked gas and to disperse fumes from sealants.
Work in open spaces or guarantee windows and doors promote cross‑ventilation. Use fans or mechanical ventilation when natural airflow is insufficient, directing exhaust away from occupied areas.
Avoid enclosed basements or rooms without dedicated ventilation for gas tasks. Never block vents or intake openings.
If using solvents or primers, follow manufacturer ventilation recommendations and wear appropriate respiratory protection.
Proper airflow reduces inhalation hazards and lowers the risk of vapor buildup during assembly and curing.
Check For Leaks Carefully
At the completion of assembly, every gas joint must be tested meticulously for leaks using approved methods and equipment. The installer should use gas-rated tape only on compatible fittings and follow manufacturer torque and wrap directions. Testing confirms seal integrity and prevents hazardous leaks.
- Use a calibrated gas leak detector for accurate readings.
- Apply soapy water to exposed joints when detectors aren’t available.
- Never use open flames to check for leaks.
- If any leak is detected, depressurize, disassemble, rewrap with gas-rated tape, and retest.
Document results and, if uncertain, consult a licensed gas professional before returning service.
Removing Old Tape and Reapplying Right
When fittings show built-up or frayed tape, the old sealant must be removed completely to guarantee a reliable new wrap; residues, dirt, and corrosion interfere with tape adhesion and thread engagement.
A nylon brush, rag, and solvent remove particles and oils; brass or plastic picks clear thread roots without damaging metal.
Inspect threads for nicks or cross-threading and replace damaged fittings.
Dry threads fully before applying new tape.
Wrap tape clockwise from the first full thread, overlapping by about half its width for three to five turns, keeping tension steady and avoiding over-bulk that prevents proper engagement during assembly.
Pressure & Temperature Limits for Tape
After removing old sealant and ensuring a clean, dry thread, attention must turn to the operating limits of the tape material.
The selected tape’s rated pressure and temperature determine suitability: standard PTFE tape handles typical household pressures and temperatures, while thicker or joint-specific tapes extend ranges. Exceeding ratings risks extrusion, creep, or seal failure.
Consider system media (gas vs. liquid) and transient spikes.
Manufacturers’ datasheets provide definitive values; when in doubt, choose tape with higher ratings or use complementary sealing methods for extreme conditions.
- Maximum continuous temperature
- Maximum working pressure
- Chemical compatibility
- Transient/pressure spike tolerance
Quick Checks to Test a Taped Joint
Verify a taped joint quickly with a few practical checks that reveal common installation problems without disassembly.
Inspect visually for uniform tape overlap, whether edges tuck into threads, and absence of loose ends.
Run a rag around the joint to detect sticky residue or caught fibers indicating fraying.
Press fittings lightly and listen for hissing on pressurized lines; use soapy water to spot bubbles at low-pressure tests.
After a brief run period, recheck for dampness or mineral trails.
Note temperature and vibration sources that may destabilize tape.
If any anomaly appears, depressurize and rewrap before returning to service.
Best Tape Brands, Cost, and Where to Buy
For buyers prioritizing reliable seals and ease of use, a few manufacturers consistently stand out: PTFE tape from Oatey and RectorSeal is favored for general plumbing, Jameson and Loctite are chosen for higher-pressure or industrial fittings, and specialized tapes like Gorilla’s high-density variants serve DIY tasks where durability matters.
Price varies by type and width: basic PTFE rolls range $1–$5, specialty or thread-sealing tapes $5–$15.
Purchase from hardware stores, plumbing suppliers, and major online retailers.
Consider quantity, certifications, and planned application when selecting.
- Oatey, RectorSeal: general PTFE
- Jameson, Loctite: industrial-grade
- Gorilla: heavy-duty DIY
- Local plumbing supply and online options
Maintenance: When to Recheck and Reseal
Regularly inspecting threaded connections helps catch leaks and loosening before they escalate. Homeowners should check visible joints after initial installation, then at one month, three months, and annually. High-vibration, outdoor, or chemically exposed lines merit more frequent review—seasonally or after intense use.
When minor seepage or looseness appears, shut off supply, disassemble, clean threads, apply fresh pipe tape evenly, and reassemble to proper torque. Replace tape whenever fittings are disturbed.
Document inspections and note recurring issues that suggest worn fittings or improper materials. Professional assessment is advised for persistent leaks, corrosion, or assemblies beyond basic DIY confidence.
Conclusion
To summarize, PTFE pipe tape reliably seals threaded joints when matched to application-specific grade and applied correctly. For example, a homeowner fixed a leaky garden hose spigot by wrapping three turns of water-grade tape clockwise before reattaching the fitting, eliminating drips and avoiding a costly plumber’s visit. Periodic checks and using the right tape for gas or high-temperature lines ensure long-term performance, making PTFE tape a simple, cost-effective tool for common plumbing repairs.