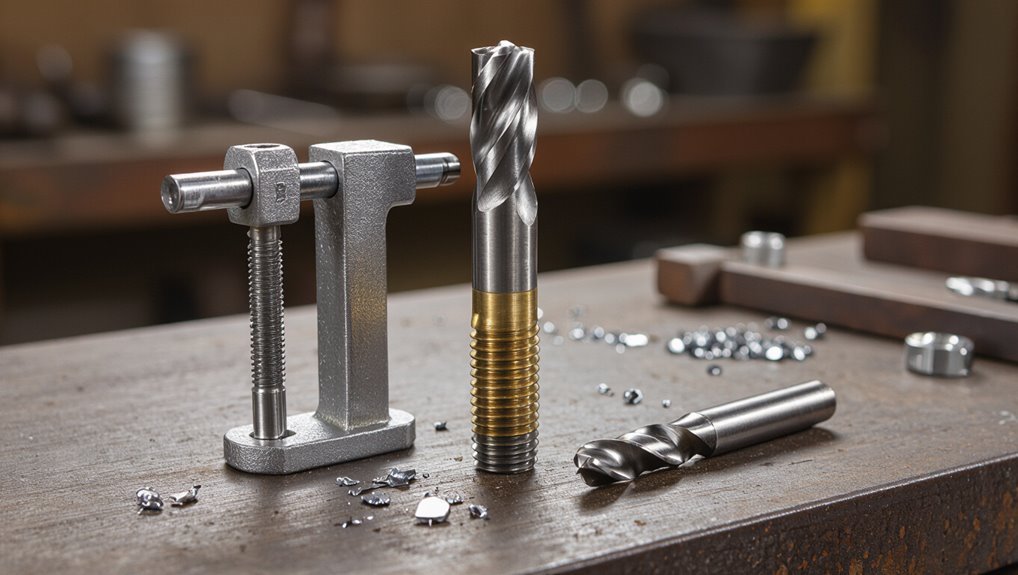
What Drill Bit Size for 1/2″ Pipe Thread Tap? Quick Guide
For a 1/2″ pipe-thread tap, the correct drill bit size varies by thread standard. Use a drill bit of approximately 21/64″ to 11/32″ for a 1/2″ NPT (National Pipe Taper) tap, and for a 1/2″ BSP (British Standard Pipe), select a drill bit around 13/32″ for parallel BSPP (British Standard Pipe Parallel) threads. If you’re tapping tapered BSPT (British Standard Pipe Taper) threads, opt for a slightly smaller drill bit. Remember, nominal pipe size does not equal thread outer diameter, so it’s important to verify with the tap manufacturer for precise specifications.
Quick Answer: Drill Bit for 1/2 Pipe Thread (Npt Vs BSP)
For a 1/2″ pipe thread, the correct drill size depends on the thread standard: NPT uses a tapered thread and typically requires a 21/64″ (0.328″) or 11/32″ (0.344″) drill for starting a hole before tapping, while BSP (parallel BSPP or tapered BSPT) follows British sizes—commonly a 13/32″ (0.406″) for BSPP clearance and a slightly smaller pilot for BSPT; always confirm with the specific tap manufacturer’s chart because NPT and BSP tap profiles and recommended pilot diameters differ.
The practitioner selects tooling based on desired fit: NPT for sealing via taper, BSPP for parallel fittings with seals, BSPT when taper is required.
How Pipe Thread Sizes Are Specified (NPT, BSP, and Nominal)
When describing pipe threads, standards like NPT and BSP define thread form, pitch, and whether the thread is tapered or parallel, while the nominal size refers to a historical bore designation rather than the actual measured diameter; together these conventions determine compatibility, sealing method, and the correct tap and drill sizes for a given connection. NPT is tapered and uses American thread form; BSP has parallel (BSPP) and tapered (BSPT) variants with British pitch standards. Nominal size (e.g., 1/2″) indicates pipe capacity, not thread OD. Select taps and drills based on standard tables and desired seal type.
| Standard | Key trait |
|---|---|
| NPT | Tapered, UN thread form |
| BSPT | Tapered, Whitworth form |
| BSPP | Parallel, Whitworth form |
| Nominal | Historical bore size |
| Selection | Based on table and seal type |
Why 1/2″ NPT Vs 1/2″ BSP Changes the Drill Size
Because the thread standard defines pitch, thread form, and whether the thread is tapered or parallel, a nominal 1/2″ NPT and a nominal 1/2″ BSP require different drill sizes: NPT uses an American tapered profile with specific root diameters that change along the length, while BSP (BSPT or BSPP) uses Whitworth-form threads and different pitch that set a distinct core (drill) diameter.
The differing thread angle (60° for NPT, 55° Whitworth for BSP), pitch (threads per inch), and taper vs. parallel form alter the desired minor diameter. Consequently, tap drill selection follows the standard’s calculated core diameter, not the nominal pipe size.
The Quick Reference: Drill Bit for 1/2 NPT Tap
As a quick reference, the recommended drill size for a 1/2″ NPT tap is 21/32″ (0.656″) for standard pipe tap depths, providing the proper minor diameter to form NPT’s 60° tapered threads while allowing adequate thread engagement and sealant. This value suits typical through and blind hole preparations in metals and plastics; deeper, nonstandard taps may require adjusted pilot sizes. Use proper tap drill technique, lubrication, and backing to maintain thread quality. Verify with thread gauges where critical. The following table summarizes key dimensions:
| Parameter | Value |
|---|---|
| Tap size | 1/2″ NPT |
| Drill size | 21/32″ (0.656″) |
The Quick Reference: Drill Bit for 1/2 BSP Tap
A concise drill size chart for a 1/2 BSP tap provides the recommended drill diameter and thread details.
The chart pairs each tap size with the correct drill bit to guarantee proper tap engagement and thread form.
This quick reference simplifies selection when preparing holes for 1/2-inch BSP pipe threads.
Drill Size Chart
For quick reference, the drill size chart lists the recommended pilot bit for cutting 1/2″ BSP (British Standard Pipe) internal threads, showing the nominal thread, pitch, and the corresponding drill diameter to use before tapping.
The chart presents: 1/2″ BSP (1.814″ OD), pitch 14 TPI (1.814″ nominal), drill size 21.2 mm (approx. 0.835″) for standard internal threads.
It includes metric and imperial equivalents, tolerance notes, and applicable material considerations.
Users can match nominal size and pitch then select the listed drill diameter.
The chart is intended to serve as a concise selection tool for correct pre-tap hole sizing.
Tap And Drill
With the drill size chart providing the recommended 21.2 mm (≈0.835″) pilot for a 1/2″ BSP internal thread, the quick-reference section condenses that information into a practical tap-and-drill pairing: select the listed drill, secure the workpiece, and use the matching 1/2″ BSP tap to cut threads to the specified pitch.
The guide emphasizes correct drill diameter, centering, and proper clamping to prevent chatter and misalignment.
It notes lubricant selection for material type, progressive pecking to evacuate chips, and backing out to clear swarf.
A simple table links drill size, tap designation, and nominal thread pitch for fast selection.
How to Read a Tap Chart for 1/2 Pipe Threads
When consulting a tap chart for 1/2″ pipe threads, the reader should first locate the column that lists thread form and size—usually shown as “1/2″ NPT” or “1/2” BSP”—so the correct standard is identified before any measurements are used.
Next, note pitch or threads per inch (TPI) for that standard; NPT uses tapered pipe pitch, BSP may use BSPT or BSPP variants.
Find the recommended drill bit size or tap drill entry corresponding to the listed tap size.
Check material notes, drill clearance, and whether a pilot or counterbore is advised.
Verify unit system (inch vs. metric) before proceeding.
Why Pipe Thread Taps Use Different Drill Math Than Bolt Taps
By design and function, pipe thread taps require different drill math than bolt (straight) taps because pipe threads are meant to seal—and often are tapered—rather than merely clamp with a nut.
Pipe threads prioritize interference and controlled deformation to form a fluid-tight joint; drill size choice must account for thread depth, taper angle, and sealing compound or PTFE tape.
Bolt threads prioritize engagement strength and standard thread percentage for shear and tensile loads, so drill math centers on major/minor diameters and percent engagement.
Consequently, pipe tap drill calculations favor clearance for sealant and taper geometry over strict tensile engagement metrics.
Calculating Drill Size From Thread Percentage for 1/2 Taps
To convert a desired thread percentage into a drill size for a 1/2″ pipe tap, one must translate the target minor diameter (expressed as a percentage of full thread depth) into an actual hole diameter that accounts for the pipe thread form and taper. The calculation starts with full-profile minor diameter, multiplies by the percentage (e.g., 75%), and adds or subtracts taper allowance to yield the drilling diameter.
Practical use requires selecting the closest standard drill size and verifying fit with a thread gauge. Emotional resonance can motivate careful selection:
- Relief when tolerance aligns
- Confidence from precise calculation
- Frustration avoided by verification
Drill-Size Adjustments: Steel, Brass, Aluminum, and Plastic
When tapping holes for 1/2″ pipe threads, material-specific drill-size adjustments are necessary to achieve proper thread form and tool life.
Hardened steel often requires smaller pilot sizes or pre-drilling with carbide tools to reduce tap stress, while brass and aluminum may allow slightly larger drills and slower feed to prevent tearing and work hardening.
Plastics demand larger clearances and reduced cutting forces or support to avoid cracking and excessive burr formation.
Hardened Steel Adjustments
Hardened steel requires different drill-size considerations than softer metals because its reduced machinability and higher work-hardening tendency affect chip formation, drill wear, and tap engagement.
For hardened steel, choose slightly undersized pilot drills, use carbide or cobalt bits, and apply rigid fixturing plus rigid tapping methods; peck drilling and frequent lubrication reduce seizure.
Expect slower feeds and conservative speeds to preserve tool life; consider pre-softening or specialized taps when hardness exceeds tool capability.
- Frustration eased by the right carbide bit.
- Confidence grows with steady, lubricated cuts.
- Relief arrives when work-hardening is avoided.
Brass And Aluminum Tips
After addressing the challenges of hardened steel, attention shifts to brass and aluminum, which behave very differently under drilling and tapping.
These softer, more ductile metals require less aggressive feeds and sharpened bits to avoid burring and smearing.
For 1/2″ pipe thread taps, standard drill sizes per tap charts typically suffice, but slight undersizing compensates for material compression—especially in free-machining brass.
Use sharp HSS or cobalt bits, light lubrication for aluminum, and slow speeds to prevent galling.
Deburr holes before tapping and back out frequently to clear chips; these steps yield cleaner threads and reduce tap breakage.
Plastic Drilling Considerations
Considering plastics’ wide range of properties, drilling and tapping for 1/2″ pipe threads demands different tactics than for metals. Plastics require slower speeds, minimal thrust, and often larger pilot holes to avoid cracking or melting; tapping may need lubricants like wax or soap and use of thread-forming taps where appropriate. Support backing to prevent blowout and heat control are essential. Adjust drill size slightly larger than metal recommendations for softer plastics, and smaller for brittle types.
Emotional emphasis:
- Relief when cuts stay clean and controlled
- Frustration avoided by proper speeds and support
- Confidence from predictable, strong threads
When to Use a Slightly Larger Pilot Hole for Hard Materials
When drilling pilot holes for tapping 1/2″ pipe threads in tough alloys or work-hardened steels, using a slightly larger drill than the nominal pilot reduces bit walking, heat buildup, and premature wear; this adjustment helps maintain hole diameter and thread form as cutting forces increase.
The practitioner selects a drill up to one size larger when material hardness or toughness causes rapid dulling or excessive torque. Cooling, rigid fixturing, and slower feed complement the larger pilot to preserve tap life.
This approach trades a modest increase in material removal for cleaner threads, fewer broken taps, and more consistent thread engagement in demanding metals.
When to Use a Slightly Smaller Pilot Hole for Thin-Walled Pipe
Shifting focus from hard alloys to thin-walled pipe, the practitioner often selects a slightly smaller pilot hole to preserve wall thickness and provide sufficient thread engagement without cutting through the tube. This conservative choice minimizes risk of rupture, secures stronger threads in limited material, and allows for controlled tap entry.
Careful alignment and slow feed prevent distorting the thin wall. When using a smaller pilot, lubrication and backing support reduce burring and collapse. Choose drill size based on measured wall thickness and tap specifications, aiming for maximum material retention while achieving functional thread depth.
- relief at avoiding failure
- confidence in stronger joins
- satisfaction from neat workmanship
Choose Drill Bit Type: HSS, Cobalt, or Carbide for 1/2 Taps
For tapping a 1/2″ pipe thread, the choice between HSS, cobalt, and carbide drill bits hinges on workpiece material, required tool life, and cost: HSS is adequate for mild steels and softer alloys with low wear and provides the best balance of price and toughness; cobalt (5–8% cobalt) offers higher hot hardness and wear resistance for stainless steels or interrupted cuts; carbide suits high-volume production or very hard materials but demands rigid setup and careful feed control to avoid fracturing.
Select HSS for general use and hand-fed machines, cobalt for tougher alloys and longer life, and carbide when rigidity, speed, and maximum wear resistance justify expense.
How Hole Diameter Affects Thread Engagement on 1/2 Pipe Taps
By controlling the drill hole diameter, a machinist directly determines the depth of thread engagement that a 1/2″ pipe tap will cut into the parent material.
Smaller pilot holes increase engagement, enhancing strength but raising tap torque and fracture risk; larger holes reduce engagement, easing tapping but weakening the joint. Material type and tap geometry moderate these effects. Optimum diameter balances thread strength and tool life, matching recommended percentage of full thread for the application.
Emotional reaction can be prompted by concise reminders of consequences:
- Pride in durable threads when engagement is correct
- Frustration from broken taps with excessive engagement
- Relief with predictable, balanced results
Prepare Workpiece for a 1/2 Pipe Tap
After selecting the correct drill diameter to yield the desired thread engagement, the workpiece must be secured and prepared for tapping. Surfaces are cleaned of chips, oil, and debris to guarantee accurate thread form and tool seating.
Deburring the hole entrance removes burrs that can cause tap misalignment or damaged threads. For through-holes, concentricity and opposing clearance are checked; for blind holes, depth is measured and marked to prevent tap bottoming.
Appropriate lubrication is chosen for the material and tap type. Finally, the tap is inspected for wear or damage before insertion to guarantee consistent thread quality.
Center Punching and Clamping for Accurate 1/2 Tap Holes
With a scribe mark aligned to the layout lines, the operator uses a center punch to create a small, crisp dimple at the hole location to guide the drill and prevent walking.
After punching, the workpiece is secured with clamps or a vise to eliminate movement; firm, even pressure preserves alignment while allowing access for the drill and tap. Protective pads prevent marring and maintain consistent clamping force. Attention to punch depth and clamp placement reduces chatter and misalignment, improving thread concentricity and tool life.
- Relief that precision brings to anxious installers
- Confidence from a stable setup
- Satisfaction in clean, centered holes
Drill Speed & Feed for 1/2 Pilot Holes
For 1/2″ pilot holes, appropriate spindle speed and feed control are essential to achieve clean holes and extend tool life.
Recommended RPM ranges depend on material—slower speeds for harder alloys and higher speeds for softer metals—while feed rate guidelines should match the drill diameter and material to avoid chatter or premature wear.
The following section will present typical RPM bands and suggested feed rates for common workpiece materials.
Recommended RPM Ranges
When determining recommended RPM ranges for drilling 1/2″ pilot holes, the operator should match drill speed and feed to material, bit diameter, and machine type to balance cutting efficiency and tool life.
Suggested RPM bands vary: low for hard alloys, medium for steels, higher for soft metals and plastics.
Use cutting fluid and slower speeds for heat-prone materials; increase speed cautiously with rigid setups.
Monitor chatter and chip formation, adjusting RPM to maintain steady swarf and finish.
Emotional cues for conservative adjustments:
- Relief from reduced bit wear when RPMs are conservative
- Confidence from consistent chip evacuation
- Satisfaction with smooth, chatter-free holes
Feed Rate Guidelines
Frequently, proper feed rate selection for drilling a 1/2″ pilot hole is the most critical factor in achieving accurate threads and preventing premature tool wear.
Operators should match feed to material, drill diameter, and machine rigidity: use lower feeds for hardened steels and higher feeds for softer alloys and aluminum.
For handheld drills, maintain conservative feeds to reduce walking and breakage; for benchtop or CNC, use consistent, slightly higher feeds to optimize cycle time.
Combine recommended RPM with a feed per revolution (FPR) guideline—typically 0.002–0.010″ FPR depending on material—to calculate feed rate in inches per minute.
Lubrication and Cooling When Drilling Pilot Holes for 1/2 Taps
During pilot-hole drilling for 1/2″ pipe taps, appropriate lubrication and cooling reduce heat, extend drill life, and improve hole quality. The operator should select compatible cutting fluid (oil for steel, water-soluble for softer alloys) and apply steadily to the bit and entry point. Short pecking cycles clear chips and prevent local overheating. Inspect both tool and workpiece temperature frequently; pause to cool if smoking or discoloration appears. Proper coolant flow preserves thread integrity and minimizes burrs.
- Relief at seeing smooth, chip-free holes.
- Confidence in longer tool life and repeatable results.
- Satisfaction from clean, accurate threads.
Using a Drill Press Versus a Hand Drill for 1/2 Tap Holes
When choosing between a drill press and a hand drill for 1/2″ tap pilot holes, the drill press offers superior accuracy and alignment while a hand drill requires steady technique to avoid wobble.
The drill press also provides more consistent speed and control, whereas a hand drill gives greater flexibility for awkward positions.
Chip evacuation differs as well: a press allows controlled feed and easier use of air or coolant, while a hand drill often relies on periodic withdrawal and manual clearing.
Accuracy And Alignment
Although a hand drill can produce acceptable holes with care, a drill press consistently yields superior alignment and concentricity for 1/2″ tap holes. The drill press’s fixed spindle, adjustable table, and greater rigidity minimize wander, producing straighter, more repeatable pilot holes that improve tap engagement and thread quality.
Hand drills rely on operator steadiness and visual judgment, increasing the chance of misalignment and tapered threads. For critical fits, the drill press reduces scrap and rework.
Emotional resonance:
- Confidence that each hole will meet specification.
- Relief from fewer failed taps and wasted materials.
- Satisfaction in consistently professional results.
Speed And Control
In comparing a drill press to a hand drill for 1/2″ tap holes, the drill press offers steadier, more controllable cutting speeds and feed rates, allowing the operator to select lower RPMs and consistent descent for cleaner chip formation and reduced tap breakage. A drill press maintains perpendicularity and repeatable feed, minimizing side loads on the tap.
A hand drill can suffice for softer materials or emergency use but requires careful speed control and two-handed steadiness to avoid wobble and premature tap failure. For production or harder alloys, the drill press improves tool life and hole quality, reducing rework and operator fatigue.
Chip Evacuation Methods
Managing chip evacuation is critical for successful 1/2″ pipe thread tapping, and the chosen tool—drill press or hand drill—determines available strategies. A drill press allows steady feed, vertical alignment, and periodic reverse to clear chips; coolant and compressed air remove debris without disturbing the hole.
A hand drill demands slower, controlled pecking, frequent withdrawal, and vigilant chip clearing to avoid clogging and tap breakage. Material, chip form, and tap type influence technique.
Emotional cues emphasize caution, confidence, and satisfaction when done properly:
- Relief when chips clear smoothly
- Anxiety easing with steady control
- Pride in a clean, accurate thread
Step Drilling: When and How for 1/2 Pipe Thread Taps
When cutting 1/2″ pipe threads, step drilling is used to reduce tap load and prevent burrs by removing material in controlled increments rather than all at once.
Step drilling applies when stock thickness, hard material, or long through-holes risk excessive tap torque or poor chip breaking.
Begin with a pilot sized to the minor diameter of the tap, then advance with one or two larger bits toward the final drill size, keeping increments small (typically 1–2 mm).
Use backing support, light pecking, and coolant.
Inspect each step for concentricity and burrs before tapping to make certain thread quality and tool life.
Tap 1/2 Pipe Threads: Alignment, Chip Control, and Backing Off
Proper alignment of a 1/2″ pipe tap is critical to prevent crooked threads and guarantee seal integrity.
Controlling chips with correct feed, frequent reversal, and use of cutting fluid reduces breakage and eases chip evacuation.
Regular backing off while tapping prevents chip packing and lowers torque, improving thread quality.
Tap Alignment Importance
In drilling and tapping a 1/2″ pipe thread, precise tap alignment is critical to guarantee thread concentricity, reduce tool breakage, and produce a reliable seal. Misalignment causes uneven load, leaks, and costly rework; proper fixturing, pilot holes, and perpendicular entry make certain uniform threads and longer tool life. The operator benefits from methodical setup, steady feed, and verification with gauges before assembly.
Attention to alignment minimizes risk and builds confidence in outcomes. Emotional resonance can be emphasized by considerations such as:
- Pride in craftsmanship and dependable joints
- Relief from avoiding leaks and rework
- Confidence in durable, professional results
Chip Control Techniques
For effective chip control while tapping 1/2″ pipe threads, operators must balance cutting conditions, tool geometry, and deliberate feed cycles to prevent chip packing and tap breakage. Proper lubricant choice, moderate spindle speed, and controlled feed reduce chip size; spiral-flute taps or chip breakers help evacuate swarf. Periodic backing-off clears chips and relieves torque; counting turns prevents overcutting. In brittle materials, smaller depth increments and frequent chip clearing are critical. Monitoring torque rise signals clogging. Training guarantees consistent technique. Use the table below for quick reference.
| Parameter | Recommendation |
|---|---|
| Speed | Moderate |
| Lubricant | High-quality cutting fluid |
| Tap type | Spiral or chip-breaker |
| Motion | Forward with periodic backing off |
| Feed | Controlled, per-thread increment |
Choosing the Right Tap Wrench for 1/2 Pipe Taps
When selecting a tap wrench for a 1/2″ pipe tap, the decision should prioritize torque control, stability, and compatibility with pipe-thread tap sizes; the wrench must securely hold the tap shank and allow smooth, even rotation to avoid cross-threading or breakage.
The writer recommends an adjustable T-handle or bar-style wrench sized to the tap shank, with hardened jaws and comfortable grip. Ratcheting wrenches reduce fatigue in confined spaces. Proper leverage and alignment matter more than cheap length. Consider material quality and fit to reduce tap stress and increase precision.
- Confidence in each turn
- Relief from binding
- Satisfaction of clean threads
Thread Sealant and Tap Finish for 1/2 Threaded Fittings
Selection of an appropriate thread sealant—PTFE tape, pipe dope, or anaerobic compounds—depends on the fluid type, pressure, and assembly method.
Proper application technique, including correct tape wrap direction or even coating and avoiding excess, guarantees reliable sealing without contaminating the thread form.
The finish of the tap and condition of the cut threads influence sealant adhesion and stress concentration, so thread quality should be inspected before applying sealant.
Choosing Thread Sealants
Regarding 1/2″ threaded fittings, choosing an appropriate thread sealant hinges on the combination of fluid type, pressure, and the tap finish of the threads. The decision balances chemical compatibility, required pressure rating, and whether threads are coarse, tapered, or finely finished. PTFE tape suits many low-pressure water or air lines and smooth tap finishes. Pipe dope offers better gap-filling for rougher threads and higher pressures. Anaerobic sealants can provide a rigid, leak-proof bond for metal-to-metal contact where vibration is a concern.
- Relief that the right choice prevents leaks
- Confidence from tested compatibility
- Assurance of longevity and safety
Applying Sealant Correctly
Although tap finish and fluid type dictate the best sealant choice, correct application is equally critical to a leak-free 1/2″ threaded joint. Apply PTFE tape or liquid sealant to the male threads only, starting one thread back from the end to prevent contamination of the passage.
Wrap tape clockwise three to five turns, keeping it snug and avoiding overlap at the gap. For paste, coat threads evenly without excess; wipe away drips.
Assemble fittings hand-tight, then tighten per fitting specification. Allow curing time for anaerobic compounds before pressurizing. Inspect joints under test pressure for immediate leakage.
Tap Finish Effects
Tap finish markedly influences how thread sealants behave and how reliably a 1/2″ threaded joint holds under pressure. A smooth, well-formed finish promotes even sealant distribution and consistent compression; rough or burred threads can trap sealant, cause uneven sealing, and invite leaks.
Proper tapping technique and tool condition yield predictable mating surfaces, aiding torque control and reducing galling. Selection of sealant (PTFE tape, paste, anaerobic) depends on finish: porous or rough threads may need thicker paste, while fine finishes suit tape.
Inspect and deburr threads before applying sealant to secure reliable performance.
- Relief: confidence in a solid seal
- Frustration: from flaky threading
- Assurance: from clean, matched surfaces
Reaming Vs Drilling for Precise 1/2 Tap Hole Sizes
When achieving the tight tolerances required for a 1/2″ pipe thread tap, reaming and drilling serve distinct roles: drilling removes bulk material quickly to reach a near-size pilot hole, while reaming produces a precise, smooth final diameter and roundness necessary for consistent thread engagement. The drilling step centers and sets depth; the reamer corrects size, concentricity, and finish. Selection depends on material, tolerance, and production rate. Proper feeds, speeds, and lubrication minimize burrs. Reaming is slower but yields repeatable results; drilling alone risks ovality and surface defects that can impede tap life and thread fit.
| Process | Primary Benefit |
|---|---|
| Drilling | Speed, material removal |
| Reaming | Precision, roundness |
| Combined | Accurate, efficient |
| Alone (Drill) | Faster but less precise |
Inspecting Hole Size Before Tapping: Gauges and Measuring Tools
After reaming or drilling produces the planned pilot diameter, verifying that the hole meets the required size and form prevents tap breakage and guarantees thread quality.
Inspecting relies on simple gauges and measuring tools: calipers check diameter, plug gauges confirm fit, and depth gauges ascertain full thread engagement.
Visual inspection under light reveals burrs or taper.
Cleanliness and correct units prevent misreads.
The inspector chooses tools based on tolerance and material, preferring go/no-go plug gauges for quick pass/fail and micrometers for exact measures.
Documentation of readings preserves repeatability and informs corrective action if needed.
- Relief at pass
- Frustration at fail
- Confidence restored
Common Mistakes That Change Effective Drill Size for 1/2 Taps
Why do some holes that began at the correct pilot diameter still produce poor threads? Material deformation during drilling, tool wander, and bit wear alter the effective size.
Skewed feeds or misalignment in the drill press create tapered or oversized entries. Heat buildup can expand material locally, then shrink, leaving imperfect profiles.
Burrs and torn fibers reduce clearance and impede tap engagement. Using the wrong drill geometry or applying excessive feed blunts the bit, increasing cutting forces and enlarging the hole.
Poor clamping allows workpiece movement, and reaming or peck cycles performed inconsistently change final dimensions unpredictably.
Fixing an Undersized or Oversized Hole for a 1/2 Pipe Tap
A quick inspection with calipers or a go/no‑go gauge identifies whether the drilled hole is undersized or oversized for a 1/2″ pipe tap.
For an undersize, enlarging the hole with the correct drill or reaming to the specified minor diameter restores proper tap engagement.
For an oversize, options include sleeving, using a larger nominal thread with appropriate fittings, or machining a stepped repair to regain sufficient thread depth.
Recognize Hole Size Error
When a tapped hole resists the tap or produces thin, distorted threads, the problem is often an incorrect pilot hole size; diagnosing whether the hole is undersized or oversized is the first step toward repair. The inspector evaluates visual clues, tap torque, and thread engagement. Undersize shows heavy cutting, chatter, and snapped flutes; oversize yields loose threads and shallow engagement.
Measurement with calipers, thread gauges, or trial taps confirms the error. Document findings before proceeding. Emotional responses—frustration, relief, urgency—guide decision-making and care to avoid further damage.
- Frustration at stubborn taps
- Relief on clear diagnosis
- Urgency to act correctly
Correcting An Undersize
Having confirmed an undersized or oversized pilot hole through visual signs and measurement, the inspector selects the appropriate corrective method for a 1/2″ pipe tap.
For an undersize, the inspector first verifies material hardness and fixture alignment. A correctly sized drill bit matching the specified core diameter is mounted in a stable drill press or reamer guide. The hole is re-drilled with light, steady feed and cutting fluid, removing minimal material to avoid eccentricity. If threads began, damaged threads are chased or ground back before re-drilling. After correction, the hole is deburred, measured, and test-tapped to confirm proper fit.
Fixing An Oversize
In cases of an oversize pilot hole for a 1/2″ pipe tap, the inspector evaluates the extent of enlargement and the integrity of surrounding material before selecting a repair method.
If damage is minor, remedies include reaming to a larger standard size and using an oversize tap or installing a threaded insert. Severe deterioration warrants patching with welded buildup or a replacement fitting. Selection balances strength, accessibility, and service pressure.
- Frustration at wasted time and material
- Relief when a simple insert restores function
- Concern over long-term joint reliability
How Wall Thickness of Pipe Affects the Pilot Hole Choice
With varying wall thickness, the required pilot hole for tapping 1/2″ pipe threads changes because thicker walls demand more material engagement and thinner walls leave less margin for thread formation.
Pipe with thick walls permits a slightly larger pilot hole while maintaining sufficient thread depth; this reduces tap torque and lowers breakage risk.
Thin‑walled tubing requires a smaller pilot to ensure adequate thread profile without cutting through the opposite side or producing weak threads.
Material type and thread standard also influence the choice.
Measuring wall thickness and consulting recommended tap drill charts for the specific pipe material guarantees reliable, durable threads.
Tapping Blind Holes Versus Through Holes for 1/2 Pipe Threads
When choosing pilot holes based on wall thickness, the decision to tap a blind hole versus a through hole adds another layer of consideration for 1/2″ pipe threads. Blind holes require slightly different depth control, slower chip evacuation, and often a bottoming tap; through holes permit freer chip exit and simpler tap choice.
Material, tap type, and lubricant influence success. Attention to pilot diameter remains critical to avoid thread distortion or breakage.
The tradeoffs affect strength and sealing differently, so selection depends on application priorities and skill.
- Anxiety over tap breakage
- Satisfaction when threads seat perfectly
- Relief after successful sealing
Using Thread Gauges to Verify 1/2 Thread Fit After Tapping
For verifying a freshly tapped 1/2″ pipe thread, a calibrated thread gauge provides an objective check of fit and form before assembly. The inspector selects the correct BSPT/NPT profile and engages the go/no-go set: the “go” plug should enter smoothly to the proper depth, confirming pitch and minor diameter, while the “no-go” must not fully seat, ensuring tolerances are not exceeded.
Visual inspection of flank contact and feel for binding detects partial defects. Records note gauge ID, temperature, and operator. Rejects trigger rework or retap. Periodic gauge calibration maintains measurement reliability and traceability.
Tapping Lubricants to Use for Different Materials With 1/2 Taps
Having verified thread form and fit with gauges, attention turns to selecting proper tapping lubricants for 1/2″ taps, since lubricant choice directly affects tool life, thread quality, and chip control.
For steels, use a sulfurized or chlorine‑activated cutting oil to reduce heat and prevent galling.
For stainless, employ a high‑viscosity synthetic or paste to improve lubricity and aid chip evacuation.
For aluminum and nonferrous alloys, light soluble oils or tapping-specific lubricants minimize built‑up edge and leave cleaner threads.
- Relief: smoother cuts reduce frustration.
- Confidence: correct lubricant assures repeatable results.
- Pride: clean threads reflect craftsmanship.
When to Swap Worn Drill Bits Before a 1/2 Tap Job
Before starting a 1/2″ pipe thread tap, the operator should check cutting performance for signs of dullness such as increased feed force, chatter, or poor chip formation.
A quick visual inspection of bit geometry—looking for rounded cutting edges, chipped lips, or uneven wear—helps determine serviceability.
If performance or geometry is compromised, the bit should be swapped to prevent thread defects and tool breakage.
Check Cutting Performance
When inspecting drill bits prior to a 1/2″ pipe-thread tap, attention should focus on cutting performance indicators: clean, sharp lips, uniform flute geometry, and minimal burr formation.
The technician evaluates chip color, cutting force, and exit quality during a test cut; elevated resistance, blueing, or crushed fibers signal replacement.
Consistent chip formation and smooth hole walls indicate readiness, while chatter marks or sudden diameter loss mandate swapping.
Timely replacement prevents ruined taps, stripped threads, and wasted material.
Emotional cues prompt action:
- Frustration when progress stalls
- Relief at crisp, easy cuts
- Confidence with predictable results
Inspect Bit Geometry
In evaluating drill-bit geometry for a 1/2″ pipe-thread tap, the inspector focuses on key angles and edges: point angle symmetry, chisel edge condition, helix consistency, and flute clearance.
Worn or uneven point angles raise thrust and wander; a rounded or cracked chisel edge indicates loss of cutting lip and reduced centering.
Irregular helix or burrs along the flute lead to poor chip evacuation and heat buildup.
Inspect for micro-fractures, blunt lips, and asymmetric wear under magnification.
Replace bits showing any of these signs before tapping to guarantee accurate hole size, clean threads, and reduced tap breakage risk.
Portable Jobsite Tips for Drilling and Tapping 1/2 Pipe Threads
On a busy site, portability and setup speed dictate the choice of tools and techniques for drilling and tapping 1/2″ pipe threads. The writer emphasizes compact drills, lightweight tap holders, and pre-measured guides to maintain accuracy without bulky rigs. Quick-change bits and a small magnetic base increase efficiency. Proper chip evacuation is handled with short pecks and compressed air between passes. Battery management and spare bits are planned ahead.
Emotional resonance is invoked through three concise prompts:
- Relief at tools that fit a crowded truck
- Pride in clean, repeatable threads
- Confidence when deadlines loom
Safety Checklist for Drilling and Tapping 1/2 Pipe Threads
A concise safety checklist covers essential protections when drilling and tapping 1/2″ pipe threads.
It notes required personal protective equipment, proper material support and clamping to prevent movement, and the use of coolant and chip control to avoid tool damage and injury.
Adherence to these items reduces risk and improves thread quality.
Personal Protective Equipment
Consistently wearing appropriate personal protective equipment (PPE) reduces the risk of injury when drilling and tapping 1/2″ pipe threads. The operator should use gear that shields eyes, hands, and lungs from metal chips, coolant, and dust. High-quality safety glasses with side protection, cut-resistant gloves suited to tool handling, and a respirator or dust mask for fine particulates are essential. Hearing protection is advised in noisy environments. Inspect PPE before use and replace damaged items promptly.
Emotional reassurance comes from knowing one’s kit is reliable, enabling focused, confident work without unnecessary fear.
- Safety glasses: clear, snug, trustworthy
- Gloves: protective, dexterous, calming
- Respirator: steady breath, steady mind
Material Support And Clamping
Properly securing the workpiece prevents slippage, misalignment, and injury when drilling and tapping 1/2″ pipe threads, complementing the protective measures of PPE. The operator should select a vice, clamp, or fixture appropriate to material size and shape, ensuring contact points do not distort the workpiece. Use parallel jaws, soft jaws, or packing blocks for thin or delicate parts.
Position clamps to allow full drill and tap travel without obstruction. Verify rigid support beneath the piece to absorb thrust and prevent chatter. Recheck tightness after initial cuts and before backing out taps to maintain alignment and control.
Coolant And Chip Control
With coolant applied and chips managed, thread quality and operator safety are preserved during drilling and tapping of 1/2″ pipe threads.
A steady stream of appropriate coolant reduces heat, prevents workhardening, and aids chip evacuation; selection depends on material and machine.
Periodic pecking and clearing prevent long curls from jamming the tap, while compressed air or a brush removes chips between passes.
Operators should monitor flow and chip buildup, stopping to clear when needed.
Proper coolant and chip control extend tool life and improve thread consistency.
- Relief at seeing clean cuts
- Confidence in predictable taps
- Satisfaction from durable threads
When to Call a Pro for Precision 1/2 Tapped Holes
Often the choice to call a professional for a precision 1/2″ tapped hole comes down to required tolerance, material difficulty, and the consequences of failure. A pro is recommended when tolerances are tight, the workpiece is hard or thin, or alignment and thread depth must be exact. Professionals offer specialty tooling, controlled fixturing, and inspection equipment. For critical assemblies, safety or cost risk outweighs DIY saving. Routine, noncritical holes can remain a home project.
| Situation | Risk | Professional Benefit |
|---|---|---|
| Tight tolerance | High | Precision setup |
| Hard material | Medium | Specialty bits |
| Safety-critical | Very high | Certified inspection |
Converting Between Imperial and Metric Drill Sizes for 1/2 Taps
Converting fractional imperial drill sizes to metric equivalents requires reference to precise decimal values to match the 1/2″ tap’s pilot hole dimensions.
The writer notes common fractional sizes and their nearest metric counterparts, then assesses which metric drill gives the proper minor diameter for a clean 1/2″ thread.
Practical guidance favors selecting the closest metric size that maintains thread engagement without over-enlarging the hole.
Fractional To Metric Equivalents
How does one match common fractional drill sizes to metric equivalents when preparing for a 1/2″ pipe thread tap? The text explains that fractional inch drill sizes are often converted to nearest metric (mm) values using tables or simple calculations. Exact matches are rare; practical equivalents are selected for compatibility. The objective is clear: translate sizes for sourcing or measurement.
- Relief that a familiar fraction can correspond to a usable metric drill
- Confidence from consulting a reliable conversion table
- Satisfaction when the chosen metric size performs as expected
Reference conversion tables rather than guessing to guarantee accuracy and repeatability.
Choosing Closest Drill Size
When selecting a metric drill to substitute for an imperial size for a 1/2″ pipe thread tap, the technician compares the required tap drill diameter to standard metric drill increments and chooses the nearest size that maintains proper thread engagement and material strength.
The decision balances slight undersize for full threads against oversize for easier tap entry. Charts and calipers confirm metric candidates; common substitutions are 12.5 mm or 13 mm depending on calculated imperial equivalent.
Material hardness and thread class influence the final pick. Where precision matters, pilot drilling and trial taps verify fit before production.
Common Drill Sizes Hobbyists Use for 1/2 NPT and Why
For hobbyists working with 1/2″ NPT threads, a handful of drill sizes is commonly chosen to balance ease of tapping and acceptable thread engagement: most often a 27/64″ (0.4219″) or a 13/32″ (0.4062″) twist drill, occasionally a 11/32″ (0.3438″) for softer materials or shallower threads, and for metric-minded builders a close 10.8–11.0 mm option; these sizes reflect compromises between leaving enough material for strong tapered threads and creating a pilot hole that the tap can follow without excessive force or risk of tap breakage.
- Confidence: pick 27/64″ for reliable holding strength.
- Relief: choose 13/32″ when tapping is tough.
- Flexibility: use 11/32″ for soft metals or plastics.
Table: Standard 1/2 NPT Tap Drill Sizes and Percentages
As a quick reference, the table below lists standard drill sizes used to tap 1/2″ NPT threads together with the approximate percent thread engagement each size produces; it allows a fast comparison of the trade‑off between holding strength and tapping ease so users can choose the appropriate pilot hole for their material and skill level.
The table presents common drill sizes (e.g., 7/16″, 29/64″, #27, #26, 15/32″) alongside approximate engagement percentages (roughly 50–85%). Lower percent values ease tapping and reduce split risk in weaker materials; higher values increase holding strength but require greater torque and risk in thin or brittle stock.
Table: Standard 1/2 BSP Tap Drill Sizes and Percentages
A concise table of standard 1/2 BSP tap drill sizes is presented using common metric drill numbers for easy selection. It includes recommended tap percentages to guide thread engagement and expected strength.
Notes on thread fit outline when to choose higher or lower percentages based on material and sealing requirements.
Metric Drill Sizes
In the Metric Drill Sizes section, the table lists standard metric drill diameters paired with their corresponding 1/2″ BSP tap thread percentages to guide correct hole preparation.
The entry succinctly maps common metric bits (for example 13.3mm, 13.5mm, 14.0mm) to percentage engagement values, enabling selection based on material and strength requirements.
The presentation emphasizes practical clarity over theory, allowing users to match drill size to desired thread fill without complex calculation.
- Practical reassurance when matching tools to tasks.
- Quiet confidence for precision work.
- Satisfaction from predictable, repeatable results.
Tap Percentage Guide
Several common drill sizes are paired with their resulting thread engagement percentages for 1/2″ BSP to help select the right pre-tap hole. The guide lists typical drill choices and their approximate engagement percentages, enabling quick comparison when preparing taps. Higher percentages increase engagement but require more torque; lower percentages reduce engagement for easier tapping. The table shows standard pairings; choices depend on material and tool capability. Reference these values when planning work to balance strength and manufacturability.
| Drill Size | Thread % |
|---|---|
| 15/32″ | 60% |
| 29/64″ | 75% |
Thread Fit Considerations
How closely should a tap drill match the nominal 1/2″ BSP thread to achieve the desired fit and performance? The discussion focuses on achieving correct thread engagement and sealing while balancing strength and ease of assembly.
Standard 1/2″ BSP tap drill sizes yield varying percentage fills; selecting higher percentages increases contact and sealing but risks galling, while lower percentages ease insertion yet reduce load distribution.
Practical selection depends on material, application, and required seal.
Emotional reaction emphasizes responsibility and confidence in choice:
- Relief when threads seal reliably and resist leaks
- Confidence from robust engagement under load
- Frustration avoided by choosing appropriate percentage
How Thread Percentage (50%, 75%, 90%) Changes Hole Choice for 1/2 Taps
For a 1/2″ pipe thread tap, thread percentage directly dictates the drill size selected because it determines the amount of material left for the threads to cut and the resulting strength and fit of the thread.
At 50% thread, the pilot hole is larger, easing tap cutting and reducing tap torque; it suits softer materials or difficult setups but yields weaker threads.
At 75%, the hole balances strength and ease of tapping, commonly used for general-purpose fittings.
At 90%, the pilot is smallest, producing very strong threads but increasing tap load and risk of jamming; this is reserved for hard materials or critical strength needs.
How to Salvage a Broken Tap in a 1/2 Hole
Recovering a broken tap from a 1/2″ hole requires a calm, systematic approach that prioritizes preserving the workpiece and minimizing further tool damage. The technician assesses accessibility, documents tap depth, and secures the part.
If remnants protrude, gentle backing with locking pliers may free the fragment; if flush or recessed, spotting with a center punch for extraction tools follows. Carbide grabbers, left-hand drills, or EDM are considered based on material and value.
Avoid aggressive drilling that expands the hole unless scrap. Success depends on patience, correct tooling, and willingness to escalate to precision methods when needed.
- Shocked at sudden failure
- Frustrated by wasted time
- Relieved when saved
Best Practices for Repeating Consistent 1/2 Tap Holes in Production
When producing batches of 1/2″ tapped holes, consistency hinges on controlled setup, repeatable tool life, and process monitoring; accurate fixturing, calibrated spindle speeds and feeds, and strict tap maintenance reduce variation and rework.
Establish documented parameters: material, drill size, tap type, lubrication, speed and feed, and depth.
Implement incoming material inspection and verify hole location with simple gauging.
Schedule tap replacement based on hole count or torque trends rather than visual wear.
Use cycle reports and torque signatures to detect drift.
Train operators on consistent chip evacuation and lubrication application.
Review scrap rates and adjust parameters promptly to maintain tolerances.
Tools and Jigs That Make 1/2 Tapping Faster and More Accurate
Which fixtures and guides actually speed up 1/2″ tapping while improving accuracy? A concise selection of tools reduces setup time and human error. Hardened drill bushings locate and support the tap, minimizing walk. Tapping guides with spring-loaded alignment keep perpendicularity and control tap depth. Dedicated jigs clamp workpieces repeatably for fast cycling.
- Hardened drill bushings: confidence in alignment, less rework.
- Spring-loaded tapping guides: smoother feeds, reduced breakage anxiety.
- Custom clamping jigs: consistent spacing, faster throughput.
These tools combine to increase speed, repeatability, and operator confidence without complex workflow changes.
Cost Vs Quality: Drill Bit Investments That Help 1/2 Tap Work
Choosing drill bits for 1/2″ pipe thread tapping requires weighing tool longevity against upfront cost.
Higher-quality bits often last longer and reduce replacement and rework expenses, improving performance per dollar over time.
A brief comparison of life-cycle cost and cutting efficiency helps identify the most economical option for a given workload.
Tool Longevity Vs Price
Investing in higher-quality drill bits often extends usable life and reduces the frequency of replacement for work involving a 1/2″ pipe thread tap. The relationship between upfront cost and longevity is measurable: harder coatings, precise tolerances, and better steel alloys resist wear, preserve diameter accuracy for cleaner taps, and lower downtime.
Savings appear through fewer purchases and less rework, though initial outlay is higher. Selection should weigh expected usage, material drilled, and maintenance habits.
Emotional resonance can guide choices:
- Relief from constant replacements and interrupted projects
- Pride in reliable, professional results
- Confidence when tackling demanding materials
Performance Per Dollar
After weighing longevity against upfront cost, the next consideration is how much performance each dollar buys for drill bits used with 1/2″ pipe thread taps. Evaluations prioritize material, coating, and tolerance: cobalt or carbide blends cost more yet resist heat and dulling, reducing replacements when drilling holes for 1/2″ NPT taps.
Titanium-coated HSS offers a balance—improved life at moderate price. Cheaper bits perform adequately in soft metals or light-duty projects but require frequent replacement, raising long-term cost. For regular tapping work, investing in higher-quality bits lowers total expense per usable hole and improves thread accuracy.
Quick Troubleshooting Guide When 1/2 Threads Leak or Strip
When 1/2″ pipe threads leak or strip, the first step is to assess the failure mode and the environment: identify whether the leak is due to damaged threads, improper tap size, sealing compound absence or incompatibility, or excessive torque.
Inspect visually, feel for burrs, and test fit to determine repair strategy. Consider re-threading, using thread repair inserts, or replacing the fitting if material is weakened.
Use appropriate sealant and torque specifications on reassembly.
Emotional resonance can motivate careful work:
- Frustration at repeated leaks
- Relief when a simple fix works
- Confidence after a durable repair
Checklist: Exact Steps to Drill and Tap a 1/2 Pipe Thread Correctly
How should a 1/2″ pipe thread be drilled and tapped to guarantee a reliable seal and correct fit? The technician first confirms thread standard (NPT/NPTF) and selects the correct tap and matching drill bit. Mark center, clamp work, and use a proper pilot or starter hole if needed.
Drill at low speed with cutting fluid, keep perpendicular, and deburr. Align tap squarely, apply cutting oil, and start by hand for several turns to form threads. Use a back-and-forth motion to break chips, advance steadily, and finish with a final clockwise pass. Clean chips, inspect threads, and test fit.
Resources and Printable Cheat Sheet for 1/2 Tap Drill Sizes
For quick, accurate selection of the correct drill for a 1/2″ pipe thread, a compact printable cheat sheet and curated resource list saves time and prevents costly mistakes.
The section offers a one-page PDF with drill/tap charts, thread size conversions, material-specific notes, and safety reminders. Links point to authoritative standards, downloadable templates, and recommended tool brands. Users gain confidence and reduce rework with clear, portable references.
- Relief: concise guidance eases anxiety during projects.
- Confidence: verified specs remove guesswork.
- Pride: professional-looking results elevate workmanship.
Conclusion
Briefly, choosing the correct drill for a 1/2″ pipe thread is a small hinge that swings the whole job between success and trouble — NPT and BSP call for different pilot sizes, good bits save time, and careful tapping prevents leaks. Following the quick references, investing in quality drills, and using the checklist will guarantee tight, reliable threads; when leaks or strips occur, troubleshoot methodically and correct root causes before reworking the fitting.