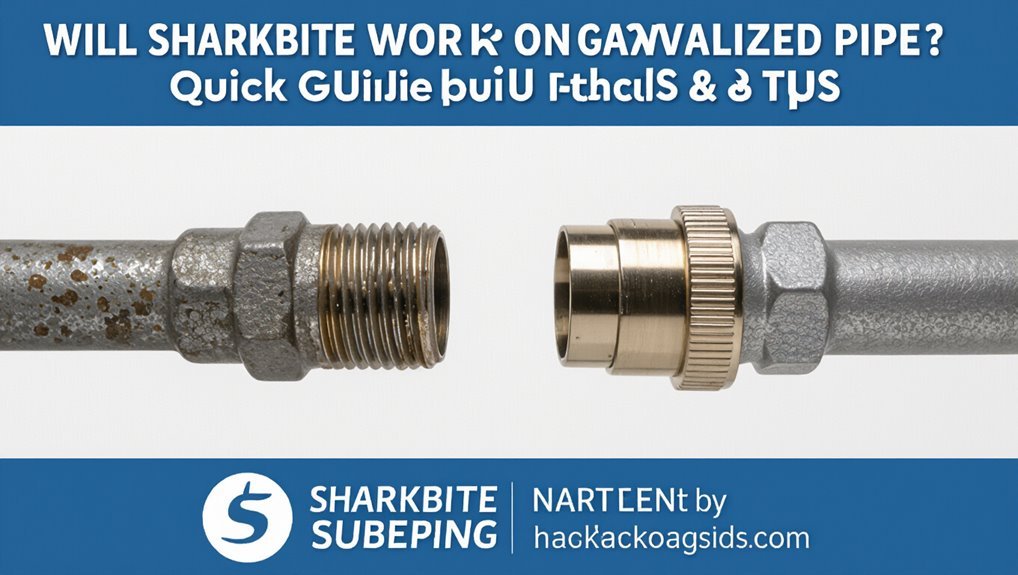
Will SharkBite Work on Galvanized Pipe? Quick Guide & Tips
Yes, SharkBite fittings can be used on galvanized pipe, provided that the pipe end is clean, square, and free from heavy corrosion. For successful installation, ensure the correct insertion depth, that the outer diameter (OD) is intact, and that you prepare the surface properly so the O-ring can create a reliable seal. These fittings are ideal for quick repairs, retrofits, or threaded-nipple adaptations. However, they should not be used on badly pitted, crushed, or buried lines, or in situations where building codes require permanent joints. Follow the preparation and testing steps below for more detailed guidance.
Short Answer: Can SharkBite Be Used on Galvanized Pipe?

In general, SharkBite fittings can be used on galvanized steel pipe, provided the pipe end is clean, free of heavy corrosion, and cut squarely to allow a proper seal.
A short answer: yes, SharkBite will join galvanized pipe in many retrofit and repair situations.
Success depends on pipe condition, correct insertion depth, and following manufacturer prep instructions.
Heavily pitted, deformed, or internally scaled pipe may prevent a reliable seal.
Installation should verify seating by measuring insertion depth and performing a pressure test.
For uncertain conditions, inspection or replacement of compromised galvanized sections is recommended before relying on a push-fit connection.
When SharkBite Is a Safe Choice for Galvanized Lines
SharkBite fittings can be a safe choice for galvanized lines when the pipe surface is clean and free of heavy corrosion or buildup.
They are most appropriate where the fitting can engage a compatible threaded or smooth section that meets the manufacturer’s installation requirements.
Use is generally best limited to short-term repairs or changes rather than as a permanent solution on severely corroded galvanized systems.
Clean Metal Surface
Prepare the mating surfaces by removing scale, corrosion, and any loose debris so the fitting can seat fully and the O-ring can guarantee a seal.
A clean, smooth pipe end guarantees uniform compression and reduces leak risk when using a push-to-connect SharkBite on galvanized lines.
Attention to surface condition is critical: pitting or heavy oxidation compromises grip and may require cutting back to sound metal.
After cleaning, inspect for sharp edges and burrs that could damage the O-ring.
Recommended actions include:
- Wire-brush to bright metal, then wipe with a solvent.
- File or sand minor irregularities smooth.
- Reinspect and dry before assembly.
Threaded Connection Compatibility
When are push-to-connect fittings appropriate on galvanized systems with threaded joints? Compatibility depends on thread condition, adapter quality, and application pressure.
If existing threads are clean, undamaged, and seal with a proper male-to-female adapter, a SharkBite can be used after converting the threaded end to a smooth, compatible OD with a brass or stainless adapter.
The adapter must seat fully into the push-fit and match pipe OD.
Avoid forcing fittings on corroded, tapered, or mismatched threads.
For potable systems, confirm materials are approved.
Professional inspection is advised when thread integrity or long-term reliability is uncertain.
Short-Term Repair Use
After confirming that threaded joints are sound or have been properly adapted to a smooth, compatible OD, push-to-connect fittings can serve as a reliable short-term solution on galvanized lines under specific conditions. They are appropriate for temporary fixes, emergency stops, or holding repairs until full replacement occurs.
Installations should be inspected for corrosion, burrs, and correct tube OD; pressure ratings must match system demands. Consider documenting location and planned replacement timeline to avoid prolonged reliance.
- Use only on accessible sections with minimal internal corrosion.
- Limit service duration and monitor for leaks.
- Replace with permanent fittings when practical.
When SharkBite Is Not Recommended for Galvanized Pipe
In cases where the existing galvanized piping is heavily corroded, pitted, or reduced in diameter from buildup, SharkBite fittings are not recommended because the push-to-connect mechanism requires a reasonably smooth, full-diameter surface to seal and grip reliably.
Additionally, SharkBite should be avoided when pipe threads or ends are deformed, crushed, or missing enough length to allow proper insertion.
It is also unsuitable where systemic corrosion continues, risking ongoing deterioration beyond the fitting.
For high-pressure systems, buried lines, or installations requiring code-approved permanent joints, alternative repairs or pipe replacement are preferable to guarantee long-term integrity and compliance.
How SharkBite Connects Galvanized, Copper, and PEX
Through a simple push-and-seat action, SharkBite fittings join galvanized, copper, and PEX by compressing an internal O-ring and biting ring onto the pipe surface to form a water-tight mechanical seal.
The mechanism relies on material compatibility: the stainless steel teeth bite into softer copper and PEX, while gripping the harder galvanized surface without threads or solder.
No heat or adhesives are required, enabling quick shifts between differing pipe types.
Longevity depends on correct seating and system conditions; vibrations or corrosion can affect performance over time.
- Multi-material grip: teeth + O-ring create immediate seal.
- Tool-free installation speeds repairs.
- Removable for reconfiguration.
Pipe Prep Needed for SharkBite?
Prepare the pipe end by ensuring it is clean, square, and free of debris so the SharkBite’s O‑ring and teeth can form a reliable seal.
Remove corrosion, paint, and burrs with a wire brush or emery cloth; cut back any damaged or excessively pitted sections to solid metal.
Deburr the inside and outside edges to prevent O‑ring damage.
Confirm the pipe end is round and not collapsed; use a reamer or tubing cutter for a straight cut.
Clean with a rag and appropriate solvent, then dry completely.
Mark insertion depth and avoid applying sealants or tapes on the SharkBite connection area.
Inspecting Galvanized Pipe Interior Before Using SharkBite
Before fitting a SharkBite onto galvanized pipe, an internal inspection determines whether the connection will seal and hold. The inspector checks for loose debris, bulges, and obvious corrosion that could prevent the O-ring from contacting clean metal. A lighted bore scope or inspection camera provides visual confirmation without cutting. Mechanical cleaning is considered only if the pipe wall remains sound.
- Verify interior diameter consistency and remove loose scale or sediment.
- Confirm edges are free of burrs and sharp damage at the cut end.
- Document findings and decide whether replacement is safer than repair.
Can SharkBite Seal Pitted or Scaled Galvanized Pipe?
After interior inspection confirms the pipe wall is intact, the question becomes whether a SharkBite fitting can form a reliable seal where the metal is pitted or encrusted with scale. Performance depends on pit depth, scale hardness, and sealing surface contact. Minor surface irregularities often compress under the O-ring; deep pits or loose scale prevent uniform contact and risk leaks. Cleaning to bright metal and removing flaky deposits improves outcomes. If damage is extensive, replacement or a mechanical coupling designed for compromised surfaces is safer. Use inspection, cleaning, and tests before relying on a push-to-connect repair.
| Condition | Likelihood of Seal | Recommended Action |
|---|---|---|
| Light pitting | Moderate | Clean, test |
| Heavy pitting | Low | Replace pipe |
| Thick scale | Low | Remove scale |
Remove Thread Sealant and Tape Before Using SharkBite?
Before installing a SharkBite fitting on galvanized pipe, any existing thread sealant or tape should be completely removed.
The threads must be cleaned thoroughly to guarantee a smooth, metal-to-metal grip and proper O-ring seating.
Failure to remove residue can prevent a reliable seal and lead to leaks.
Clean Threads Thoroughly
When preparing a threaded galvanized connection for a SharkBite fitting, all existing thread sealant and tape must be removed so the fitting seats against clean metal; any residual paste or Teflon can prevent a proper metal-to-metal seal and compromise the SharkBite’s brass stop.
Threads should be inspected and cleaned with a wire brush or solvent to remove corrosion, grease, and sealant residue. Debris-free threads allow accurate engagement depth and prevent misalignment that could damage the O-ring. Cleaning also reveals thread damage that may require replacement before fitting.
- Use a brass or stainless wire brush.
- Apply a compatible solvent.
- Dry and inspect thoroughly.
Remove All Tape
Having cleaned the threads to bare metal, all remaining Teflon tape and pipe dope must be completely removed prior to seating a SharkBite fitting.
Residual sealant prevents the fitting’s stainless steel teeth and O-ring from achieving a full, uniform grip on the metal surface, risking leaks or joint failure.
Use a clean rag and a suitable solvent or mechanical scraper to eliminate adhesive traces, then inspect visually and by touch for any residue.
Make certain the pipe is dry and free of particles before insertion.
No additional sealant, tape, or compound should be applied to SharkBite connections; they rely on metal-to-rubber contact.
Measure Galvanized Pipe for Correct SharkBite
To make certain a secure SharkBite connection, measure the exposed length of galvanized pipe accurately and note both the outer diameter and the straight-end length from the pipe shoulder to the cut end. The installer records measurements, confirms pipe condition, and selects the matching SharkBite fitting size. Precision prevents leaks and guarantees the grab ring seats properly on clean metal.
- Use calipers for outer diameter and a tape for straight-end length from shoulder to cut end.
- Verify the pipe end is square and free of burrs; re-cut if necessary.
- Compare measurements to SharkBite sizing charts before fitting.
Use SharkBite on Threaded Galvanized Nipples: Steps
The procedure for using SharkBite on threaded galvanized nipples begins with cleaning the threads thoroughly to remove rust, debris, and old sealant.
Proper thread preparation—wiping, brushing, and guaranteeing a smooth, even surface—reduces the risk of leaks and guarantees the SharkBite seat contacts the pipe correctly.
These preparatory steps are essential before trimming or inserting the nipple into a SharkBite fitting.
Clean Threads Thoroughly
Before installing a SharkBite on a threaded galvanized nipple, inspect and clean the threads thoroughly to guarantee a reliable seal and proper grip. Corrosion, debris, and old sealant reduce contact and can prevent the fitting from seating.
Use a wire brush and solvent to remove scale and grease; follow with compressed air or a clean rag to clear residues. Make certain threads are dry and free of particles before proceeding to the next step.
Consider replacement if threads are heavily pitted.
- Remove loose corrosion with a stainless wire brush.
- Degrease with an appropriate solvent and wipe dry.
- Blow out remaining debris with compressed air.
Proper Thread Preparation
Preparing threads correctly guarantees a secure SharkBite connection on a threaded galvanized nipple. The procedure begins with removing old tape, pipe dope, rust, and debris using a wire brush or solvent, assuring visible, sharp threads.
Inspect threads for damage; replace nipples with flattened, cracked, or heavily corroded threads. Apply a light, even layer of approved thread sealant or PTFE tape wrapped clockwise to avoid unraveling when engaging the fitting.
Hand-start the nipple into the coupling to ensure alignment, then tighten to manufacturers’ recommended engagement without over-torquing. Final inspection confirms uniform sealant coverage and proper seating before testing the connection under pressure.
Use SharkBite on Plain-Cut Galvanized Pipe: Steps
Begin by cutting the galvanized pipe squarely and removing any burrs so the end is smooth and true; accurate preparation is essential for a secure SharkBite connection.
The pipe should be cleaned of corrosion and debris; measure insertion depth and mark the tube.
Align the fitting, push straight on until the mark reaches the fitting shoulder, and verify engagement by visual and tactile check.
Test the joint by slowly turning on water and inspecting for leaks.
If removal is necessary, use a SharkBite removal tool; follow manufacturer guidance for reinstallation or replacement.
- Clean and deburr
- Measure and mark
- Push straight and test
Pressure Limits for SharkBite on Galvanized Lines
Rated for residential and commercial use, SharkBite push-to-connect fittings maintain their listed pressure ratings when installed on clean, properly prepared galvanized pipe, typically up to 200 psi for cold-water systems and lower for elevated-temperature conditions.
Designers and installers should verify system maximums and account for localized pressure spikes from pump starts or water hammer. Where pressure approaches manufacturer limits, use pressure-reducing valves, surge arrestors, or alternative fittings rated for higher service.
Routine inspection for leaks and corrosion helps safeguard long-term integrity.
Installations that combine materials must follow code and manufacturer guidance to avoid exceeding rated pressures and compromising seals.
Temperature Limits When Connecting SharkBite to Galvanized Pipe
When installed on galvanized pipe, SharkBite fittings must be used within the manufacturer’s specified temperature range—typically up to 200°F (93°C) for short-duration hot-water service and lower for continuous high-temperature applications—to guarantee seal integrity and material performance.
The elastomeric O-ring and PEX/metal body are sensitive to prolonged heat; sustained exposure near maximum ratings can accelerate degradation and reduce joint life.
Installation in systems with cycling temperatures or steam is discouraged without confirmation of compatibility.
- Verify peak and continuous operating temperatures before selecting SharkBite.
- Use thermal insulation to limit ambient heat transfer.
- Consult manufacturer data for specific duty limits.
Will Galvanic Corrosion Affect SharkBite Joints?
Consideration of metal-to-metal contact between SharkBite brass components and galvanized steel is essential because differing metals can set up galvanic cells.
The condition and continuity of the galvanized coating influence whether the zinc layer will protect the steel or allow corrosion at the joint.
Evaluation should focus on exposed steel surfaces, coating integrity, and whether isolation or additional protection is needed to prevent accelerated corrosion.
Metal-to-Metal Contact
In direct contact, dissimilar metals can set up a galvanic cell that accelerates corrosion, so evaluating SharkBite fittings on galvanized pipe requires attention to electrical and chemical compatibility.
Metal-to-metal contact concentrates corrosion risk at junctions; SharkBite’s brass bodies touching zinc-coated steel create a potential anodic/cathodic pair.
Insulation, stray current, water chemistry, and exposure determine reaction speed.
Practical assessment weighs expected lifespan against maintenance.
- Identify metals and their positions in the galvanic series to predict which will corrode first.
- Check for electrical continuity paths that could drive current between fittings and pipe.
- Monitor joints periodically for early signs of deterioration.
Protective Coating Impact
Regarding protective coatings, their condition and compatibility largely determine whether galvanic corrosion will threaten SharkBite joints on galvanized pipe.
The presence of intact zinc or other coatings isolates dissimilar metals, reducing electrochemical cell formation at SharkBite fittings.
Damaged, flaking, or chemically incompatible coatings expose bare steel and increase corrosion risk where the brass fitting contacts the pipe.
Seal integrity and cleanliness during installation matter: debris or residual solvents can compromise coatings.
Where coating loss is suspected, repair or replace the galvanized section or apply an approved dielectric barrier.
Routine inspection and targeted coating maintenance minimize galvanic action and extend joint life.
Can Galvanic Corrosion Under a SharkBite Cause Leaks?
When a SharkBite fitting is installed on galvanized pipe, a difference in metal composition can create a galvanic cell at the contact point that accelerates corrosion of the less noble metal. This localized electrochemical action may thin the pipe wall beneath the fitting over time, raising leak risk where the seal depends on intact substrate.
Factors influencing failure include electrical continuity, water chemistry, and presence of conductive deposits. Predictable timelines are hard to state; some installations remain watertight years while others fail sooner.
Mitigation focuses on isolating dissimilar metals and monitoring for early signs of degradation.
- Environmental conductivity
- Metal pairing
- Contact area
Cleaning Steps for the Galvanized Pipe End (For SharkBite)
Because corrosion beneath a SharkBite fitting can compromise the seal, proper surface preparation of the galvanized pipe end becomes the next priority before installation.
The pipe end should be cleaned to bright metal: remove loose rust, scale, and old paint with a wire brush or abrasive pad.
Follow with 80–120 grit sandpaper or emery cloth to polish the contact area, rotating to eliminate high spots and reveal uniform metal.
Wipe with a clean, lint-free rag dampened with isopropyl alcohol or acetone to remove dust, oils, and residues.
Allow to fully evaporate before proceeding to fitting placement.
Deburr and Square a Cut Galvanized Pipe End
Before fitting a SharkBite, the cut galvanized pipe end should be inspected for unevenness and leftover metal fragments.
Any burrs must be removed completely with a file or deburring tool to prevent seal damage.
Finally, the pipe edge should be squared so the fitting seats evenly and seals reliably.
Inspect The Cut End
Inspect the cut end of the galvanized pipe for a square, clean face and any burrs or rough edges that could prevent a proper seal with a SharkBite fitting. The inspector notes concentricity, flatness, and the absence of nicks that might misalign the O-ring or push the grab ring aside.
Measurements and visual checks confirm the pipe end sits flush against the fitting shoulder. Corrosion at the cut face is noted and lightly cleaned if present, avoiding deep abrasion.
Any irregularities are marked for re-cutting or filing before attempting the push-to-connect installation.
- Verify squareness with a small square.
- Check for visible nicks or gouges.
- Confirm clean, dry surface for sealing.
Remove Burrs Thoroughly
Having confirmed the cut face is square and free of major defects, the next step is to remove all burrs and square the pipe end so the SharkBite O‑ring and grab ring seat evenly. The technician deburrs inside and outside with a proper tool, removing metal shards and roughness that could compromise the seal or damage the O‑ring. Cleanliness follows: brush and wipe away filings, then inspect the bore for remaining slivers. Proper deburring prevents leaks and guarantees reliable grab ring engagement without extra force. Final verification uses tactile and visual checks before attempting assembly.
| Tool | Purpose |
|---|---|
| Deburring tool | Remove internal/external burrs |
| File | Smooth outer edge |
| Brush | Clean filings |
| Rag | Wipe residue |
| Light | Inspect bore |
Square The Pipe Edge
Square the pipe edge precisely so the SharkBite O‑ring and grab ring seat evenly against the pipe end. The cut must be square and free of burs to prevent leaks and uneven compression.
Use a pipe cutter for a straight cut, then a file or deburring tool to remove internal and external burs. Verify squareness with a small square or by rotating the pipe against a flat reference.
- Check cut face for perpendicularity and remove any high spots.
- Deburr inside and outside to protect the O‑ring and make certain full grip.
- Clean and inspect before insertion.
When to Use a SharkBite Adapter vs. a Coupling
When connecting or modifying galvanized pipe, the choice between a SharkBite adapter and a SharkBite coupling depends primarily on whether a conversion to a different material or a directional change is required.
An adapter converts between threaded or galvanized ends and copper, PEX, or CPVC; it is chosen when joining dissimilar materials or shifting from male/female threads to a push-fit connection.
A coupling joins two smooth, same-diameter pipes directly and is used for straight repairs or extensions without altering material type or thread condition.
Selection should consider pipe condition, required seal type, and available space for installation.
Installing a SharkBite Slip Coupling on Galvanized Pipe
After deciding between an adapter and a standard coupling, the next step is preparing the galvanized line for a SharkBite slip coupling. The installer measures and marks cut locations, then cuts squarely using a saw suitable for steel, deburring and cleaning all burrs and corrosion to guarantee a smooth contact surface. The coupling slides easily over cleaned pipe ends; alignment is checked before full insertion. After seating, the connection is tested under pressure for leaks.
Recommended steps include:
- Clean and deburr pipe ends thoroughly.
- Guarantee straight, square cuts for full insertion.
- Test the joint under working pressure.
Installing a SharkBite Adapter on Threaded Galvanized Pipe
To install a SharkBite adapter on threaded galvanized pipe, the installer begins by removing any old fittings and thoroughly cleaning the male threads with a wire brush to eliminate corrosion and debris.
Next, thread sealant or PTFE tape is applied clockwise to the male threads, avoiding excess that could obstruct the adapter.
The SharkBite adapter is hand-started, then tightened with a wrench until snug; excessive torque is avoided to prevent thread damage.
Once seated, the installer checks alignment and secures the connection.
Finally, the system is pressure-tested for leaks and rechecked after a brief period under normal pressure.
Marking Insertion Depth for SharkBite on Galvanized Pipe
With the adapter threaded and snug, attention shifts to marking the correct insertion depth on the galvanized pipe so the SharkBite fitting seats fully against its stop.
The technician measures from the end of the adapter to the fitting’s depth spec, transfers that distance onto the pipe, and makes a clear, single mark.
Debris, burrs, and paint are cleared where the mark sits so the fitting can reach the stop without obstruction.
Consistent, visible marking prevents under- or over-insertion, which can compromise seal integrity.
- Measure twice, mark once precisely.
- Deburr and clean at mark.
- Align fitting to mark before push.
Testing a SharkBite Connection on Galvanized Systems
Begin pressurizing the section slowly while monitoring the SharkBite connection for immediate leaks and seating issues.
Observe for steady dripping, weeping, or sudden spray; any moisture suggests reseating or replacement.
Check both static and dynamic pressures by cycling nearby fixtures to confirm hold under flow.
Use a dry paper towel to detect small leaks and mark any wet spots.
Inspect the joint for correct alignment and full insertion marks.
After several minutes at normal system pressure, depressurize and recheck compression ring and O-ring seating visually.
Record results and proceed according to leak presence—repair, re-seat, or replace as necessary.
How Long Do SharkBite Fittings Last on Galvanized Pipe?
Over months to years, the lifespan of a SharkBite fitting on galvanized pipe depends on installation quality, water chemistry, and mechanical stress.
Performance varies: properly installed fittings in neutral water may last many years; aggressive water or vibration shortens service life.
Corrosion at the pipe interface and trapped galvanic currents influence longevity.
Routine inspection and addressing external forces improve outcomes.
Replacement may be prudent when exposure to contaminants or movement is persistent.
- Installation: clean cuts, deburring, full seating extend life.
- Water chemistry: pH, chloride, hardness affect corrosion rates.
- Mechanical stress: vibration, freezing, or bending reduce lifespan.
Signs a SharkBite Fitting Is Failing on Galvanized Lines
Visible corrosion around a SharkBite joint on galvanized pipe often signals compromised sealing and metal degradation.
Persistent water leaks at or near the fitting indicate the connection is no longer watertight and may require replacement.
Reduced water flow downstream can confirm internal obstruction or deterioration linked to a failing fitting.
Visible Corrosion Around Joint
Frequently, corrosion around a SharkBite joint on galvanized pipe appears as rust-colored deposits, flaking metal, or greenish-blue streaks at the connection point. Such visible deterioration signals compromised metal and possible seal degradation; observers should note texture changes, discoloration progression, and surrounding pipe condition.
Assessment focuses on extent and rate of corrosion to judge fitting viability versus replacement. Visual cues often precede functional failure and help prioritize maintenance without invasive testing.
- Localized pitting or flakes that detach easily.
- Discoloration spreading beyond the fitting onto adjacent pipe.
- Corrosion paired with softened or eroded pipe surface.
Persistent Water Leaks
When corrosion around a SharkBite joint progresses, it often leads to persistent water leaks that indicate the fitting is failing on galvanized lines.
Persistent dripping or steady seepage at a connection, even after tightening, signals the seal has been compromised by rust, pitting, or loss of mechanical grip.
Intermittent wetness that worsens with pressure changes or temperature cycles also suggests degradation.
Visible pooling beneath joints, water stains, or mineral buildup downstream are corroborating signs.
Immediate inspection should confirm whether the O-ring, grab ring, or pipe surface is damaged; failing fittings require replacement to prevent structural and water damage.
Reduced Water Flow
In cases of SharkBite fittings installed on galvanized pipe, reduced water flow often appears as a steady decline in pressure or a noticeable drop in fixture performance downstream of the joint. This symptom can indicate internal obstruction from corrosion, a misaligned insert, or partial seal failure where debris accumulates. Flow reduction may be intermittent or progressive, worsened by mineral buildup typical in galvanized systems.
Diagnosis involves isolating the fitting, measuring pressure upstream and downstream, and inspecting for visible blockage. If confirmed, replacement with a clean, properly seated fitting or removal of scale restores capacity and prevents downstream damage.
- Measure pressure differential.
- Inspect for debris/scale.
- Replace or re-seat fitting.
Temporary vs. Permanent Repairs With SharkBite on Galvanized
For homeowners and plumbers evaluating options, SharkBite fittings on galvanized pipe serve best as temporary fixes rather than guaranteed long-term solutions: they can quickly stop leaks and allow system restoration without soldering, but corrosion, pitting, and scale inside older galvanized lines reduce sealing reliability and may shorten the joint’s service life compared with copper or PEX connections.
In practice, SharkBite often repairs emergent leaks, supports pressure testing, and buys time for planned repiping. For permanent outcomes, professionals usually recommend replacing affected galvanized sections or converting to compatible materials; relying solely on push-fit seals in degraded pipes risks recurrence and hidden failure.
Code and Inspection Considerations for SharkBite on Galvanized
Regarding building codes and inspections, applying SharkBite fittings to galvanized pipe requires attention to local plumbing regulations, approved-material lists, and inspector expectations because acceptance varies by jurisdiction and the condition of the existing pipe.
Inspectors may require evidence of product listing (UPC/NSF), compatible pressure ratings, and that fittings are accessible for future inspection or replacement.
Installers should document pipe condition and any cleaning or adapter use.
Some authorities limit push-fit fittings to repairs or non-buried locations; others permit them broadly when listed.
Always verify with local code officials before completing work.
- Confirm product listings and ratings.
- Document pipe condition and prep.
- Assure accessibility for inspection.
When Pros Choose Solder, Compression, or SharkBite for Galvanized
Professionals weigh solder, compression fittings, and SharkBite by comparing pros and cons for each method. They consider installation speed against long-term reliability and suitability for the specific galvanized condition.
The choice often balances immediate access needs with projected maintenance and lifespan.
Pros And Cons
When weighing repair methods for galvanized pipe, experienced plumbers balance durability, time, and system compatibility.
Pros prefer solder for permanent joints and long-term corrosion resistance but require clean copper transitions and heat.
Compression fittings suit moderate permanence without soldering, yet may leak if threads or pipe ends are corroded.
SharkBite offers tool-free connection and works well for quick repairs or tight spaces, though it can be less ideal where long-term chemical compatibility or hidden fittings matter.
- Solder: durable, corrosion-resistant, needs skills and proper fittings.
- Compression: reversible, moderate reliability, affected by pipe condition.
- SharkBite: fast, versatile, potential longevity and compatibility caveats.
Installation Speed
Install time often dictates the method chosen for repairing galvanized pipe: soldering requires the most preparation and skilled labor, compression fittings take moderate time with careful end preparation, and SharkBite connections are fastest, typically completed in minutes without special tools.
Professionals favor solder for permanent, concealed runs when downtime is acceptable and skill is available. Compression fittings suit situations needing reliable joints without heat, balancing speed and durability.
SharkBite is chosen for emergency stops, tight spaces, or quick retrofits where minimal disruption matters. Each choice reflects job constraints: access, required turnaround, available tools, and whether the installer prioritizes speed over other factors.
Long-Term Reliability
Often, tradespeople weigh long-term reliability heavily when choosing between solder, compression, or SharkBite on galvanized pipe because each method presents distinct durability profiles and failure modes. Soldered joints resist vibration and provide a permanent metal-to-metal bond but require surface preparation and flux; corrosion at the base metal can undermine longevity.
Compression fittings offer predictable performance and are serviceable but depend on nut torque and ferrule condition.
SharkBite provides rapid installation and decent short-term sealing; over decades push-fit plastics and O-rings may degrade, especially with galvanic or chemical attack.
- Solder: durable, corrosion-sensitive base.
- Compression: serviceable, torque-dependent.
- SharkBite: fast, O-ring lifespan limited.
Cost Comparison: SharkBite vs. Traditional Repair Methods
Comparatively, the upfront cost of using SharkBite fittings typically exceeds that of basic soldered or threaded fittings per unit, but the total project expense often favors SharkBite once labor, downtime, and specialized tools are included.
For small repairs, SharkBite reduces installation time, eliminating torch, solder, or threading gear and cutting labor billed by the hour. Traditional methods may be cheaper for long continuous runs if a skilled plumber already has equipment.
Parts availability and the possibility of reusing fittings affect costs. Final choice depends on scope: emergency spot repairs lean toward SharkBite; extensive pipe replacement can favor conventional methods.
Safety Tips When Working With Old Galvanized Plumbing
After weighing cost and convenience between SharkBite and traditional repairs, attention should turn to safety when handling old galvanized plumbing. Precautions reduce injury and contamination risks: assess pipe integrity before cutting; assume fragility and support pipes to prevent collapse.
Wear eye, hand, and respiratory protection when disturbing scale or cutting into lines. Isolate water and drain sections thoroughly to avoid unexpected releases.
- Use PPE and proper tools to limit exposure to rust, lead, and debris.
- Test water for lead if renovations disturb aged fittings or soldered joints.
- Consult a professional when corrosion compromises structural or sealing surfaces.
Alternatives If SharkBite Isn’t Suitable for Your Galvanized Pipe
When SharkBite fittings are unsuitable for corroded, undersized, or heavily threaded galvanized pipe, homeowners and plumbers should consider proven alternatives that restore reliability and safety without relying on push-fit connections.
Options include cutting out damaged sections and installing threaded brass or stainless couplings that match existing threads, using mechanical compression fittings where thread integrity is poor, or employing dielectric unions to prevent galvanic corrosion when joining dissimilar metals.
For extensive degradation, replacing runs with copper, PEX, or PVC is durable. Professional pipe relining or spot replacement by a licensed plumber can address hidden corrosion and guarantee code compliance.
Transitioning From Galvanized to Copper or PEX With SharkBite
When switching from galvanized to copper or PEX, the galvanized pipe ends must be cleaned, de-rusted, and cut square to ensure a proper seal.
SharkBite adapters designed for conversion — such as male or female threaded conversion fittings and push-to-connect couplers — provide a quick way to join the old pipe to new copper or PEX.
Proper preparation of the galvanized ends and using the correct SharkBite adapter together minimize leaks and simplify the conversion.
Preparing Galvanized Pipe Ends
For a secure changeover from galvanized steel to copper or PEX using a SharkBite fitting, the galvanized pipe end must be cut square and cleaned of corrosion and old sealant to make certain a proper metal-to-metal seal.
The technician removes rust, burrs, and paint to reveal bright metal, deburring the ID and OD to prevent seal gaps. Threads are not relied upon; the ferrule must seat against smooth pipe.
Clean, dry surfaces and a chamfered edge aid insertion. Verification by visual inspection and gentle test insertion makes certain readiness before fitting.
- Cut square and deburr
- Remove corrosion and sealant
- Inspect and test fit
Using SharkBite Adapters
With the galvanized pipe prepped, the installer selects a SharkBite adapter rated for conversion to copper or PEX and positions it squarely over the cleaned pipe end; the push-fit mechanism and internal O-ring are designed to form an immediate, code-compliant seal without solder or thread tape.
The adapter is pushed until the visible stop aligns with the pipe shoulder, ensuring proper engagement. For copper, the mating end accepts slip or crimp connections; for PEX, it accepts insert fittings or expansion ends.
After installation, the joint is tested under pressure. Corrosion monitoring and occasional inspection are recommended where galvanized remains in the system.
Common Installation Mistakes to Avoid With Galvanized Pipe
Frequently, installers overlook small errors that lead to leaks, corrosion, or reduced flow in galvanized pipe systems. Careless cutting, inadequate cleaning, and improper thread preparation create seal failures when joining to SharkBite or other fittings. Galvanized scale and burrs prevent full engagement; trapped debris accelerates corrosion and restricts flow. Over-tightening adapters stresses threads and deforms ferrules, while under-supporting modified runs causes movement and joint fatigue.
- Fail to deburr and clean pipe ends before fitting.
- Use damaged or corroded sections without proper inspection or replacement.
- Rely on thread tape alone instead of correct adapters and secure support.
Quick Troubleshooting Checklist After Installing SharkBite
After installation, a brief, systematic check can catch most issues before they become leaks or failures. The technician inspects seating depth, confirms the pipe end is deburred and clean, and verifies that the fitting aligns without strain. Pressure is applied gradually while monitoring for drips. Temperature and compatibility notes are reviewed for galvanized surfaces. If a leak appears, the fitting is depressurized, removed, and the pipe re-prepped. Documentation records torque, pipe type, and test results for future reference.
| Checkpoint | Action | Pass/Fail |
|---|---|---|
| Seating | Verify depth | |
| Cleanliness | Remove debris | |
| Pressure test | 60–100 psi |
Conclusion
SharkBite offers quick, reliable connections for clean, intact galvanized runs and rapid repairs on accessible fittings — fastening copper, PEX, or cut galvanized ends with speed and minimal tools. It should not be relied on for heavily corroded, buried, or structurally compromised galvanized systems. Where appropriate, it simplifies conversions, preserves pressure, and speeds projects; where inappropriate, it defers to replacement, soldering, or threaded adapters to guarantee long-term integrity and safety.