What Is Heat Tape for Pipes? Easy Guide to Prevent Frozen Pipes
Heat tape for pipes is an electrical heating element designed to prevent water pipes from freezing and bursting by keeping them warm. It can be applied to both metal and plastic pipes, particularly in vulnerable areas such as crawlspaces and exterior runs. There are two main types: self-regulating heat tape, which adjusts its output based on the surrounding temperature, and constant-wattage heat tape, which maintains a steady output. For effective use, it’s important to incorporate proper insulation, controls, and GFCI protection. Regular inspections and testing ensure safe operation. Follow our simple tips for selection, installation, and maintenance to keep your pipes safe from freezing.
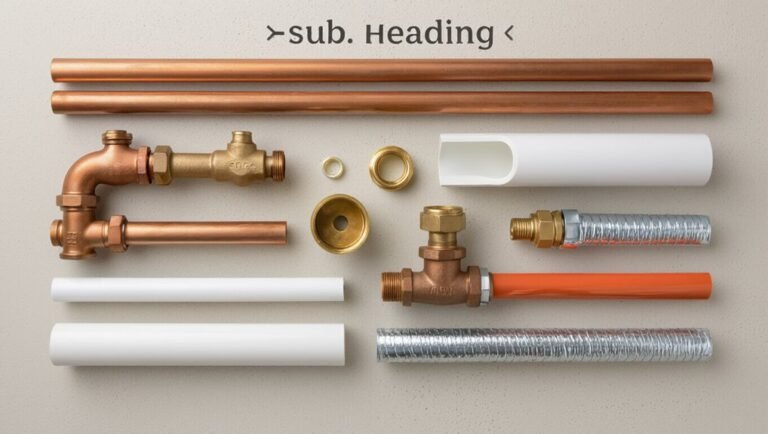
What Is Heat Tape for Pipes and How It Works
Used on exposed plumbing to prevent freezing, heat tape is a slim electrical heating element applied along the length of a pipe to maintain temperature above freezing.
It transfers heat directly to metal or plastic pipes, counteracting ambient cold and preventing ice formation.
Installation follows manufacturer instructions: secure the tape along the pipe, avoid overlap, and connect to a grounded power source with appropriate protection.
Some models include built-in thermostats or sensors to control heat output.
Proper selection, correct placement, and routine inspection guarantee reliable operation and reduce freeze risk while minimizing energy use and electrical hazards.
Self‑Regulating vs. Constant‑Wattage Heat Tape
When choosing heat tape, homeowners and professionals must weigh the differences between self‑regulating and constant‑wattage types to match performance, safety, and energy needs.
Self‑regulating tape varies its output with pipe temperature: resistance decreases as temperature rises, reducing power draw and lowering overheating risk. It adapts to irregular shapes and is safer for close contact and overlapping.
Constant‑wattage tape supplies steady heat regardless of ambient or pipe temperature, offering predictable performance and often higher output for very cold conditions but requiring careful control and thermostat/protection to prevent overheating.
Selection depends on pipe material, exposure, and installation constraints.
When to Use Heat Tape vs. Alternatives
Heat tape is presented as a targeted solution for preventing freezing on individual or short runs of exposed pipe.
For broader systems or whole-building protection, continuous alternatives such as insulated recirculation, heated enclosures, or distributed warm-water tracing are typically more effective and cost-efficient.
The discussion compares the practical limits, installation complexity, and long-term operational trade-offs between localized heat tape and system-wide approaches.
Use For Localized Pipes
For short runs or isolated sections of plumbing exposed to freezing temperatures, heat tape can be an effective targeted solution compared with whole-system options like pipe insulation jackets or rerouting.
It is appropriate when only a few feet of pipe are vulnerable, access is limited, or immediate protection is required without major remodeling. Heat tape suits irregular shapes, short exterior stretches, and localized freeze points such as near hose bibs, garage pipes, or foundation penetrations.
Installation complexity, electrical access, and thermostat requirements should be weighed.
For persistent widespread exposure, broader measures may be more cost-effective and reliable.
Choose Whole-System Alternatives
Localized heat tape is best for isolated trouble spots, but broader plumbing systems often require alternatives that protect multiple runs or entire zones more reliably.
Whole-system options include insulated, recirculating hot-water loops, in-line cable systems designed for trunk lines, or forced-air space heating to raise ambient temperatures. These solutions reduce installation complexity, lower long-term energy costs, and simplify maintenance compared with dozens of individual tapes.
Selection depends on pipe layout, accessibility, system length, and local freeze risk. Professionals evaluate load, control integration, and code compliance; homeowners weigh upfront cost versus reliability and choose whole-system methods when coverage and resilience are priorities.
Which Pipe Materials and Locations Need Heat Tape
The discussion turns to which pipe materials and locations most commonly require heat tape. Metal pipes exposed to cold air, PVC and other plastic lines vulnerable to freezing, and runs located outdoors or in unheated crawlspaces each present distinct risks.
Guidance will compare material sensitivity and siting considerations to indicate when heat tape is appropriate.
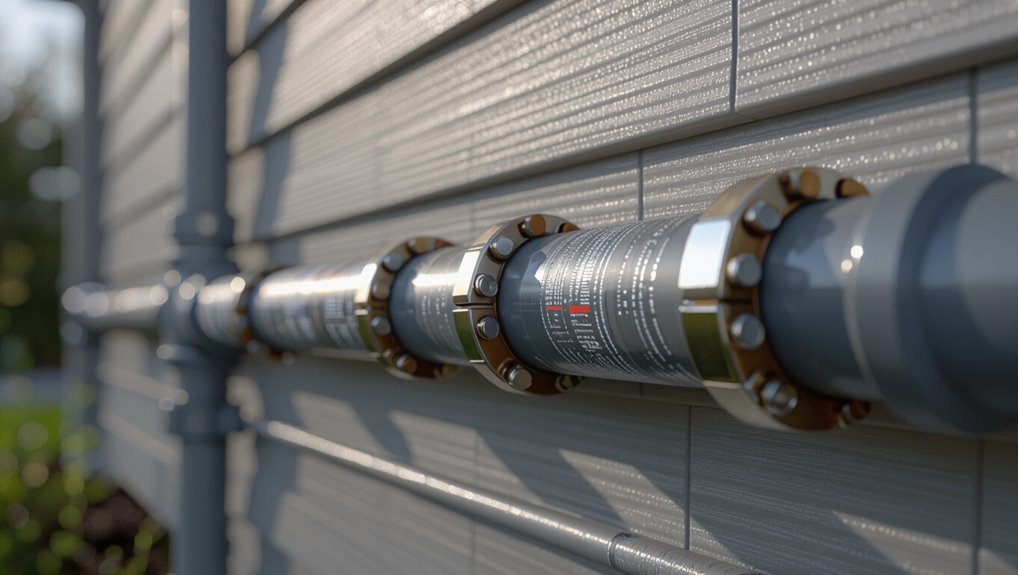
Exposed Metal Pipes
When exposed to cold air, metal pipes—especially uninsulated copper, galvanized steel, and iron—are at greatest risk of freezing and bursting; applying heat tape to these materials in unheated attics, crawlspaces, exterior walls, and outdoor supply lines prevents ice formation and reduces rupture risk.
Heat tape should be selected and installed to match pipe diameter, material, and exposure level. Proper installation follows manufacturer spacing, avoids overlapping, and pairs with thermal insulation. Electrical supply and grounding must meet code. Regular inspection confirms adhesive or self-regulating elements remain functional and undamaged by rodents or abrasion.
- Uninsulated copper pipes
- Galvanized steel lines
- Iron supply mains
- Exterior hose bibs
- Pipes in attic/crawlspace
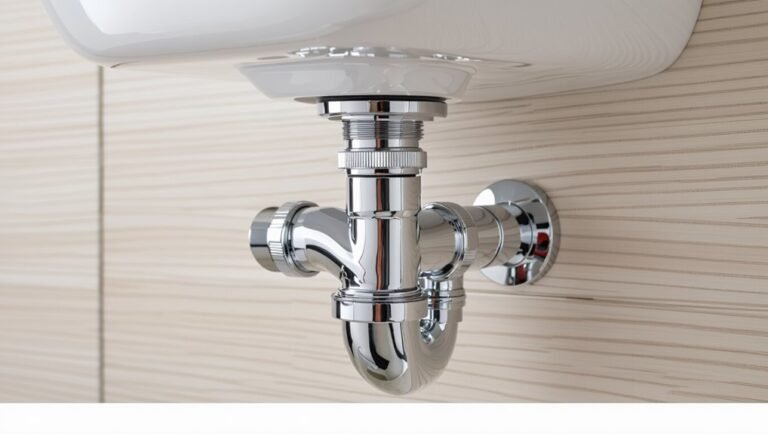
PVC And Plastic Lines
Although metal pipes are often most vulnerable, PVC and other plastic lines present different freezing risks and require distinct heat-tape considerations.
Plastic becomes brittle when cold and can crack under ice expansion; its lower thermal conductivity means heat tape must provide more localized warming. Use heat tape rated for plastic, with built-in thermostat control or low-watt designs to avoid overheating. Secure tape without stretching, follow manufacturer spacing and insulating guidelines, and avoid direct contact with solvent-weld joints or threaded seals. Inspect connections and replace damaged tape.
For buried or concealed plastic runs, consult product specifications and a professional for safe, code-compliant installation.
Outdoor And Crawlspace Runs
In exposed locations like exterior walls, uninsulated crawlspaces, and along foundation perimeters, pipes face rapid heat loss and consequently are prime candidates for heat tape.
Heat tape suits metal, copper, and some approved plastic lines when installed per manufacturer guidelines. It protects supply and drain lines that run outdoors or through cold voids, especially where insulation is limited or absent. Selection depends on pipe material, ambient temperature, and access for maintenance. Use thermostat-controlled or self-regulating tapes for variable conditions, and avoid constant-output types on temperature-sensitive plastics.
- Exterior supply lines
- Crawlspace main runs
- Foundation perimeter loops
- Above-ground hose bibs
- Exposed PVC drainage runs
How to Decide If Your Pipe Needs Heat Protection
To determine whether a pipe needs heat protection, assess its exposure, material, and the severity of potential freezing conditions; pipes located in unheated spaces, made of copper or PVC, or carrying water that would cause significant disruption if frozen typically require heat tape or other protection.
Consider wind chill, insulation gaps, and proximity to exterior walls.
Evaluate usage: main supply lines, sprinkler risers, and pipes serving critical appliances merit priority.
Low-flow or easily drained lines may not.
Also weigh accessibility for installation and maintenance, local climate records, and cost versus consequence of a freeze when deciding on heat protection.
Measure Pipes and Choose the Correct Tape Length
After identifying which pipes need protection, the next step is measuring runs and selecting the right length of heat tape.
Measure along the pipe’s centerline from end to end, including bends and fittings, and add extra length for overlaps and the plug or controller location.
Note pipe diameter and whether insulation or protective conduit will be added.
Record each run separately and round up to the nearest available tape length.
Confirm tape type supports continuous runs or requires segmentation.
- Measure centerline including bends
- Add slack for overlaps and connections
- Document each run separately
- Round up to available sizes
- Note pipe diameter and insulation
Choose Heat‑Tape Wattage and Power Type (120V/240V/Hardwired)
How much heat a pipe run requires depends on pipe diameter, exposure, and ambient temperatures, so select tape wattage that supplies enough BTUs per linear foot without overheating the pipe or overloading circuits. The installer evaluates wattage (low, medium, high), chooses 120V for simple plug‑in runs, 240V where higher loads or longer runs demand it, and hardwired units for permanent or commercial systems. Match circuit capacity and use ground‑fault protection. Consider control methods: thermostats, self‑regulating, or constant‑wattage. Use the table to compare common options and guide selection.
| Wattage | Power Type | Typical Use |
|---|---|---|
| Low (4–7 W/ft) | 120V | Short, insulated runs |
| Medium (8–12 W/ft) | 120V/240V | Longer or exposed runs |
| High (13+ W/ft) | 240V/hardwired | Commercial or extreme cold |
| Self‑regulating | 120V/240V | Variable heat demand |
Safety Ratings, Listings, and Certifications to Check
One key step is verifying that heat tape carries recognized safety listings and certifications that match the installation environment and local code requirements.
Manufacturers should supply clear label information and documentation proving third‑party testing and suitability for wet, outdoor, or buried applications.
Confirm temperature limits, insulation class, and grounding requirements.
Check for compatibility with pipe material and mounting method.
Retain certificates and installation instructions for inspections.
- UL or ETL listing for electrical safety
- CSA or Intertek approval for regional markets
- IP rating for moisture/dust ingress
- Temperature class or max surface rating
- Manufacturer’s warranty and traceable test data
Local Code, Permits, and When to Hire an Electrician
Local electrical codes and permit requirements determine how heat tape may be installed and inspected in a given jurisdiction.
Homeowners should check local ordinances and building department guidance before beginning work to avoid violations or failed inspections.
For any nontrivial wiring, new circuits, or unclear code interpretation, a licensed electrician should be hired to guarantee compliance and safety.
Local Electrical Code
When installing heat tape, homeowners must follow the electrical code that governs wiring methods, grounding, and circuit protection for their jurisdiction. Local codes specify acceptable heat tape types, connection methods, required GFCI protection, conductor sizes, and approved mounting practices. Compliance reduces shock and fire risk and guarantees inspections proceed smoothly. Electricians can interpret ambiguous code language and confirm compatibility with existing circuits. Documentation of installed devices and circuit labeling aids future maintenance. Failure to follow code can lead to remedial work or liability.
- Verify listed heat tape and installation instructions
- Use GFCI-protected circuits where required
- make certain proper grounding
- Follow conductor size and breaker limits
- Maintain accessible junctions
Permit Requirements
After confirming code-compliant heat tape selection and proper wiring methods, attention turns to permits and professional involvement required by local authorities. Local jurisdictions often require permits for adding heat tape where electrical circuits, exterior wiring, or structural penetrations are involved.
Permit processes verify compliance with grounding, GFCI protection, and manufacturer instructions. Homeowners should check municipal building or electrical departments for requirements and submit plans or product specifications when requested.
Inspections may be mandated after installation. If permit rules or technical wiring tasks exceed homeowner competency or local law, engaging a licensed electrician avoids violations and guarantees the installation meets inspection standards.
Hiring A Licensed Electrician
Call a licensed electrician whenever heat-tape installation intersects with regulated electrical work, complex wiring, or any condition that could compromise safety or code compliance.
The electrician verifies local code, assesses load and circuit capacity, secures required permits, and guarantees connections, grounding, and GFCI protection meet standards.
Hiring a pro reduces fire and shock risk, prevents failed inspections, and preserves insurance coverage.
Engage a licensed contractor for installations in unconditioned spaces, on metal pipe runs, where new circuits are needed, or when building codes mandate inspection.
Obtain written scope, permit records, and a certificate of compliance upon completion.
- Verify local licensing and insurance
- Confirm permit handling
- Request load calculation
- Require GFCI and grounding checks
- Get written compliance documentation
Prepare Pipes: Cleaning, Drying, and Surface Checks
Before applying heat tape, the pipe surfaces must be free of dirt, rust, oil, loose paint, and moisture to guarantee proper adhesion and electrical safety.
Inspect fittings, valves, and brackets for corrosion or sharp edges that could damage tape insulation.
Remove loose scale and flaking paint with a wire brush; degrease with an appropriate solvent and allow complete evaporation.
Dry with lint-free cloths or low-heat air until no visible moisture remains.
Check pipe insulation gaps and secure or replace degraded wrap to provide a smooth substrate.
Make sure surfaces are cool to the touch before proceeding to installation steps.
Install Self‑Regulating Heat Tape: Step‑by‑Step
Once the pipe surface is clean and dry, the installer locates the heat tape’s power lead and end cap, lays out the tape along the pipe to confirm routing and length, and plans attachment points at regular intervals to guarantee even heat distribution and avoid overlaps that can overheat the tape.
The installer secures the self‑regulating tape with recommended fasteners, maintains manufacturer clearance at valves and fittings, and routes the power lead to a GFCI outlet. After powering briefly for a functional check, insulation is applied over the tape without compressing it.
- Align tape along centerline
- Use approved clips or zip ties
- Avoid crossing tape
- Keep joints clear
- Test before insulating
Install Constant‑Wattage Heat Tape: Step‑by‑Step
When preparing to install constant‑wattage heat tape, the installer confirms the correct tape length and wattage for the pipe run, inspects the cable for damage, and plans attachment points to prevent overlap and minimize thermal stress at fittings.
The installer cleans and dries the pipe, applies electrical tape or thermal adhesive at the start, lays the cable along the pipe maintaining manufacturer spacing, and secures it with approved fasteners without crushing the element.
At fittings and valves, the cable is run in a straight line or looped per instructions.
Terminate, ground, and weatherproof connections; test continuity before insulation and enclosure.
Do You Need a Thermostat or Controller With Heat Tape?
Is a thermostat or controller necessary for heat tape? Many heat tapes function without one, but a thermostat or controller adds regulation, energy savings, and protection. Selection depends on tape type, pipe location, and risk tolerance.
Advantages and considerations include:
- Matches heat output to ambient temperature for efficiency.
- Prevents overheating on constant‑wattage tapes when insulated or bundled.
- Enables automatic operation, reducing manual intervention and failure risk.
- Some manufacturers require specific controllers for warranty compliance.
- Adds cost and complexity; not always needed for self‑regulating tapes on exposed runs.
Decision should follow product specifications, local codes, and risk assessment.
Insulate Pipes After Applying Heat Tape for Best Results
After installing heat tape, attention turns to selecting the right pipe insulation to maximize heat retention and protect the heating element. The material and thickness should match the pipe size, local climate, and manufacturer recommendations to guarantee efficient performance.
Proper installation — snug fit, sealed seams, and avoidance of compressing the heat tape — preserves both insulation R-value and safe tape operation.
Choose Appropriate Insulation
Proper insulation selection greatly improves the effectiveness of heat tape by reducing heat loss and preventing freeze points along the pipe.
The right material complements heat tape, matching pipe temperature, exposure and moisture conditions.
Rigid foam, rubber sleeves, or fiberglass offer varying R-values; closed-cell foam resists water absorption.
Thickness should balance thermal performance with space constraints.
Vapor barriers prevent condensation on cold pipes.
Fire-resistant options suit high-temperature heat tape.
Compatibility with the tape’s manufacturer recommendations guarantees warranty and safety.
- Match R-value to climate
- Choose closed-cell for wet areas
- Use fire-rated where specified
- Size insulation to pipe diameter
- Verify manufacturer compatibility
Proper Insulation Installation
With heat tape selected and matched to the insulation type, insulation should be applied over the tape to retain heat and prevent surface condensation. Installation follows straight, snug wrapping without compressing the insulation; seams are sealed with appropriate tape. Maintain manufacturer clearance from thermostats and junctions; avoid covering power connections. For long runs, section insulation and include access points for inspection and replacement. After installation, test the system and monitor for hotspots or cold sections. Periodic checks guarantee integrity and safe operation. Use vapor barrier where moisture is present to prevent degradation and preserve R-value.
| Step | Purpose |
|---|---|
| Wrap | Retain heat |
| Seal | Prevent moisture |
| Inspect | Guarantee safety |
Electrical Outlets, GFCIs, and Wiring Requirements
Typically, electrical outlets and GFCIs installed for heat tape circuits must be dedicated, grounded, and rated for the load and environment, including outdoor or wet locations; they should be protected by a ground-fault circuit interrupter where required and wired using appropriately sized conductors and overcurrent protection to match the heat tape’s amperage and manufacturer instructions.
Installations must follow local electrical codes, use weatherproof enclosures for exterior connections, and make certain connections remain accessible for inspection. Proper grounding and circuit labeling enhance safety. Regular testing of GFCIs and adherence to manufacturer wiring diagrams are essential.
- Dedicated circuit sizing
- GFCI protection
- Weatherproof outlets
- Correct conductor gauge
- Accessible junctions
Common Installation Mistakes to Avoid
Why do so many heat tape installations underperform or fail? Installers often skip manufacturer instructions, use wrong tape type for pipe material, or overlap heating cable, causing hotspots and damage.
Poor surface preparation and loose attachment reduce heat transfer. Failing to insulate properly or covering thermostats and sensors defeats controls.
Running heat tape over sharp edges, through doors, or where it crosses itself creates wear points and short circuits. Using improper power sources, extension cords, or unsecured connections risks electrical faults.
Neglecting clearances from combustibles and not routing cable away from moisture-prone areas shortens service life and increases hazard.
How to Test and Verify Heat Tape After Install
Before leaving a newly installed heat tape to protect pipes, the installer should perform a concise series of tests to confirm correct operation, safe wiring, and effective heat transfer. The installer visually inspects connections, verifies manufacturer-required spacing and insulation, and confirms the thermostat or self-regulating section functions.
Electrical tests measure continuity and grounding, and a clamp meter checks current draw against specifications. Thermal verification makes certain the tape warms the pipe surface uniformly without hotspots. Record results and label the installation date for future checks.
- Visual inspection of connections and tape condition
- Continuity and ground resistance check
- Current draw measurement
- Thermostat/function test
- Surface temperature verification
Troubleshooting Common Heat‑Tape Problems
Troubleshooting begins with basic power source checks to confirm the circuit and outlet deliver consistent voltage.
Next, a careful inspection of the tape for cuts, crushing, or degraded insulation can reveal physical faults.
Finally, testing thermostats and control components guarantees temperature regulation and any automatic shutoffs are functioning correctly.
Power Source Checks
When a heat‑tape installation fails to warm pipes, the power source is the most common and easily checked culprit; verifying supply voltage, connection integrity, and outlet health quickly narrows whether the problem is electrical rather than with the tape itself.
A technician or homeowner should methodically confirm circuit condition, outlet grounding, and that the timer or thermostat (if present) is set and functional. Simple tools like a multimeter and receptacle tester give immediate feedback. If the circuit is GFCI‑protected, reset and monitor tripping patterns before replacing tape.
- Check line voltage with a multimeter
- Test outlet polarity and ground
- Inspect plug and cord continuity
- Reset and monitor GFCI/AFCI
- Verify timer/thermostat settings
Tape Damage Inspection
Often a visual and tactile inspection quickly reveals whether heat tape has suffered the physical damage that stops it from warming pipes.
Inspect for cuts, abrasions, melted sections, crushed areas, and exposed conductors along the tape length. Check adhesive backing and fasteners for failure where tape may have shifted. Look for signs of overheating: discoloration, brittle insulation, or burned odor. Make certain end seals and connection points remain intact and corrosion-free. Replace any tape with compromised insulation or visible conductor exposure. Photograph damage, note location, and document age to guide replacement decisions and warranty claims.
Thermostat And Controls
Regularly checking the thermostat and control components is essential to make certain heat tape operates only when needed and to prevent both freezing and overheating.
The thermostat, sensors, and switches should be tested periodically for accurate response; faulty controls can leave pipes vulnerable or waste energy. Inspect mounting, wiring, and connections for corrosion or looseness. Replace malfunctioning controllers and use manufacturer‑approved replacements. Make sure setpoints match local conditions and that manual overrides or timers function. Record tests and any adjustments to track recurring issues.
- Test sensor accuracy with a reference thermometer
- Verify wiring integrity and secure connections
- Check controller indicator lights
- Confirm timer and override operation
- Replace damaged components promptly
Maintenance and Winter Prep Checklist
As temperatures drop, homeowners should inspect heat tape and associated piping to make certain reliable freeze protection. A concise checklist helps: visually check tape for damage, confirm secure attachment and overlap rules, clear debris, test thermostat operation, and verify outlet GFCI protection. Document installation locations and last inspection date. Schedule repairs for frayed or adhesive-failed sections. Keep spare tape and manufacturer instructions accessible. Before the first freeze, run a controlled test and note abnormal heating or odors. Follow safety guidelines; do not bypass controls or layer incompatible products.
| Task | Frequency |
|---|---|
| Visual inspection | Monthly |
| Functional test | Season start |
| Documentation update | After work |
Costs, Lifespan, and When Replacement Is Due
After completing the winter-prep checklist, homeowners should evaluate the costs and expected service life of heat tape to determine when replacement is warranted.
Costs vary by type: basic self-regulating tapes cost more but offer longer reliable service than simple constant-wattage options.
Typical lifespan ranges from 5–20 years depending on exposure, installation quality, and UV or abrasion damage.
Budget for periodic inspection and modest replacement every 7–12 years in harsh conditions.
Warranties differ; register products and keep purchase records.
- Initial purchase price
- Installation time or contractor fee
- Expected warranty period
- Environmental wear factors
- Planned replacement interval
When to Call a Pro: Warning Signs and Failure Modes
When heat tape shows damage, inconsistent heating, or electrical signs such as tripped breakers or scorch marks, a qualified technician should inspect it immediately.
Professionals evaluate physical breaks, exposed conductors, degraded insulation, and improper installation that creates hot spots. They test continuity, resistance, and thermostat function, and assess compatibility with pipe material and insulation.
Warning signs also include burning odors, discolored pipe or wrap, persistent moisture under the tape, or failed temperature regulation.
Technicians replace unsafe sections, correct grounding and junctions, and may recommend alternative freeze protection. Timely professional intervention prevents fires, pipe damage, and costly emergency repairs.
Conclusion
To summarize, heat tape offers a practical line of defense against frozen pipes when chosen and installed correctly. Homeowners should weigh self‑regulating versus constant‑wattage options, assess pipe materials and exposure, and follow maintenance and troubleshooting steps to keep systems functioning. Regular inspection prevents surprises; replace aging tape before it fails. When signs of malfunction appear, call a professional—better safe than sorry—to avoid pipes bursting and costly water damage.