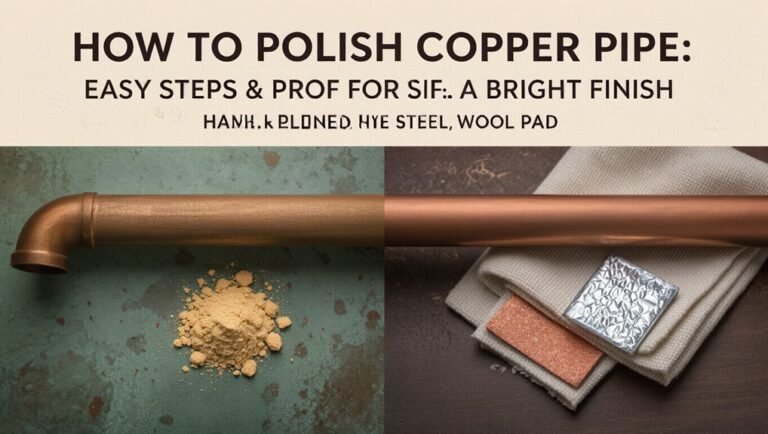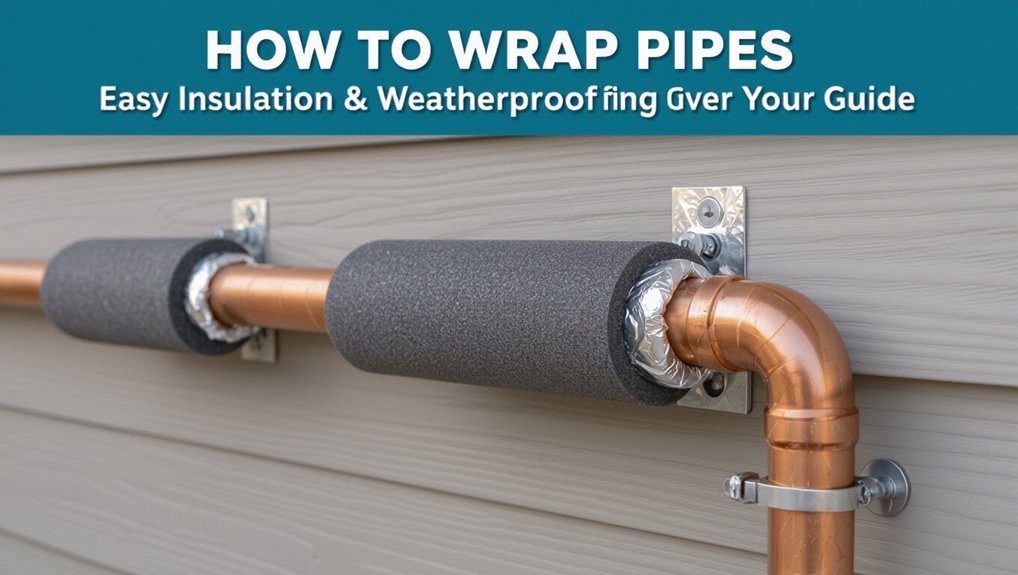
How to Wrap Pipes: Easy Insulation & Weatherproofing Guide
Wrapping pipes is essential for reducing heat loss, preventing freezing and costly bursts, and improving energy efficiency. To effectively insulate exposed supply lines, hose bibs, and runs in crawlspaces and attics, use closed-cell foam or elastomeric sleeves for optimal vapor resistance. Start by cleaning and drying metal pipes and removing any rust. Then, slide or split the insulation sleeves over the pipes, sealing seams with weatherproof tape and securing the ends with clamps. In extreme cold, consider using heat-trace systems and jacketing for outdoor pipes. Always follow the manufacturer’s guidelines and local codes for materials and safety to ensure a successful insulation project.
Why Wrapping Pipes Prevents Freezes and Saves Money
In cold weather, wrapping pipes reduces heat loss from the water inside, lowering the risk of freezing and the resulting bursts.
Insulation maintains fluid temperature, slows conductive and convective cooling, and limits ice formation that expands and fractures pipe walls.
Preventing freezes avoids emergency repairs, water damage, and associated replacement costs.
Thermal wraps also improve energy efficiency by reducing the need for heating system compensation and lowering utility bills.
Installation and material expenses are modest compared with potential losses from burst pipes and wasted heat.
Regular inspection of wraps preserves performance and extends the lifespan of plumbing infrastructure.
Which Pipes to Insulate: Indoor, Outdoor, and Yard Lines
Often, homeowners and maintenance professionals focus insulation efforts on the most exposed and freeze-prone runs: outdoor faucets, crawlspace and basement supply lines, attic routes, and any yard or irrigation mains that cross unheated areas.
Priority goes to water supply lines serving kitchens, bathrooms, and boilers; short, cold pockets near exterior walls; and hose bibs. Hot-water distribution should be insulated to reduce loss and improve recovery.
Sewer and drain lines generally need less thermal protection unless subject to freezing. Valves, backflow preventers, and exposed connectors require custom-fit insulation or barriers. Assess accessibility and risk to allocate materials efficiently.
Quick Method: Wrap a Straight Pipe in 5 Minutes
Using a simple foam sleeve and a few basic tools, a straight pipe can be wrapped in about five minutes to cut heat loss and reduce freeze risk.
The steps are straightforward and fast when performed methodically. Measure the pipe length, slide or split the sleeve over the pipe, align seams, and secure with tape or clamps.
Finish by checking for gaps and snug fit.
- Slide the sleeve over the pipe along its length.
- Align seams so insulation fully contacts pipe surface.
- Overlap or seal joints with weatherproof tape.
- Secure ends with clamps or ties.
- Inspect for gaps and adjust as needed.
Tools and Supplies You Need Before You Start
What tools and materials are essential before tackling pipe insulation? A concise kit prevents delays: foam or fiberglass insulation, weatherproof tape, scissors or utility knife, measuring tape, gloves, and sealant. Protective eyewear and a marker help mark cuts and avoid injury. Choice depends on pipe type and exposure; select materials rated for outdoor use when needed. Store items nearby to streamline work.
| Item | Purpose |
|---|---|
| Foam/fiberglass | Thermal barrier |
| Weatherproof tape | Seal seams |
| Knife/scissors | Cut material |
| Sealant/adhesive | Secure joints |
How to Measure Pipes for Correct Insulation Length
With tools and materials assembled, measuring pipes for the correct insulation length becomes a straightforward task. The technician records pipe runs, accounting for fittings, valves, and bends. Measurements use a tape measure along the pipe centerline; each segment is noted and rounded up to the nearest insulation length increment. Allow for overlap at joints and extra length for end caps. Markings are transferred to a cutting list to minimize waste and assure continuous coverage.
- Measure each straight run separately
- Note elbows, tees, and valves
- Round up to available product lengths
- Add overlap allowances for joints
- Create a clear cutting list
Choose Pipe Insulation: Foam, Rubber, Fiberglass Overview
Often technicians weigh three insulation types—closed-cell foam, elastomeric rubber, and fiberglass—before specifying materials for a job, because each offers distinct thermal, moisture, and installation characteristics.
Closed-cell foam is lightweight, easy to cut, resists water absorption, and suits low-temperature indoor lines.
Elastomeric rubber remains flexible across temperature swings, delivers superior vapor barrier properties, and performs well on mechanical systems.
Fiberglass provides higher temperature tolerance and fire resistance, often used with jacketing for exposed runs.
Selection depends on pipe temperature, condensation risk, accessibility, and code requirements; installers match material properties to performance needs and environmental constraints.
Foam Sleeves vs. Rubber Wrap vs. Fiberglass: Quick Comparison
A concise comparison highlights where foam sleeves, elastomeric rubber wrap, and fiberglass each excel and where they fall short: foam sleeves are lightweight, easy to install, and resist moisture but have lower temperature limits; rubber wrap offers flexibility, a strong vapor barrier, and better long-term resilience; fiberglass withstands higher temperatures and fire exposure but requires protective jacketing and careful handling.
- Foam sleeves: best for simple, dry, low-temperature runs.
- Rubber wrap: suited for curved runs, outdoor exposure, and condensation control.
- Fiberglass: ideal where high-temperature resistance and fire safety matter.
- Installation: foam fastest, rubber moderate, fiberglass needs skill.
- Durability: rubber highest, fiberglass durable with jacketing, foam limited.
How to Choose the Right Pipe Insulation Material for Your House
Selection hinges on three practical factors: the insulation material (foam, rubber, fiberglass) suited to the pipe location and temperature range, the R-value and required thickness for adequate thermal protection, and moisture/vapor control to prevent condensation and corrosion.
Homeowners should weigh performance, durability, and installation ease when comparing options. Proper matching of material, R-value, and vapor barrier guarantees efficient, long-lasting protection.
Insulation Material Types
When choosing pipe insulation for a home, homeowners should weigh thermal performance, moisture resistance, installation ease, and cost to match material properties with the plumbing’s location and purpose.
Various insulation types suit different needs and environments. Selection depends on indoor vs. outdoor use, exposure to moisture, flexibility requirements, and budget constraints.
- Foam rubber: flexible, resists condensation, good for indoor pipes.
- Polyethylene foam: affordable, easy to install, common for cold-water lines.
- Fiberglass: handles high temperatures, used for hot water and boilers.
- Closed-cell foam: waterproof, ideal for outdoor or damp areas.
- Reflective foil: minimizes radiant heat loss on exposed runs.
R-Value And Thickness
Choosing the right insulation thickness and R-value follows naturally from comparing material types and their planned locations; thermal resistance determines how effectively a wrap slows heat flow from hot pipes or prevents freezing on cold lines. The homeowner evaluates pipe diameter, ambient temperature, and desired protection duration to pick R-value and thickness that meet local codes and practical needs. Higher R-values or thicker wraps suit unheated spaces; thinner options suffice inside conditioned areas. Cost, flexibility, and installation complexity also influence choice. Quick reference:
| Location | Typical R-value | Typical Thickness |
|---|---|---|
| Indoor | 2–4 | |
| Garage/Unheated | 4–8 |
Moisture And Vapor Control
Because moisture can undermine insulation performance and promote corrosion or mold, evaluating vapor permeability and whether a vapor barrier is needed is essential when selecting pipe wraps. The choice depends on pipe location, climate, and condensation risk.
Closed-cell foams resist vapor; fiberglass requires an external vapor jacket. Properly installed seams and tape prevent moisture intrusion. Consider desiccant or breathable options where drying is possible. Regular inspection maintains effectiveness.
- Closed-cell foam: low permeability, durable
- Fiberglass with jacket: versatile, needs barrier
- Elastomeric foam: flexible, good vapor resistance
- Vapor tape/seams: critical for continuity
- Outdoor-rated wraps: UV and moisture resistant
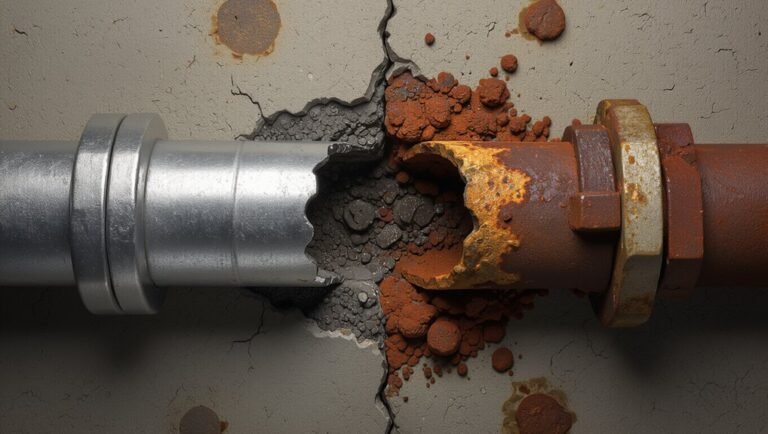
Prep Wet or Rusty Metal Pipes So Insulation Will Stick
Begin by removing loose rust, scale, and obvious debris with a wire brush or abrasive pad to create a clean surface for adhesives and tape.
If the pipe is wet, dry it thoroughly with clean rags, a heat gun on low, or allow air drying to eliminate surface moisture. Treat remaining corrosion with a corrosion converter or rust inhibitor per product instructions, then wipe residue away.
Apply a primer recommended for the chosen adhesive if metal is porous or treated. Make certain surfaces are cool and dry before applying adhesive or tape.
Document treated areas and monitor periodically for recurrence.
How to Cut Insulation Cleanly and Accurately
How should insulation be cut to fit pipes without gaps or ragged edges? A clean, accurate cut guarantees consistent coverage and prevents heat loss or condensation.
The installer measures twice, scores with a sharp utility knife, and uses a straightedge for guidance. Cuts follow pipe contours and fittings; offsets are trimmed to maintain snug seams.
Small sacrifices are avoided; replacement pieces are prepared rather than forcing poor fits. Finishing touches include sealing seams and smoothing edges.
- Measure pipe length and mark lines
- Use a new blade for crisp cuts
- Clamp or steady material before cutting
- Cut slowly along a straightedge
- Trim and test fit before sealing
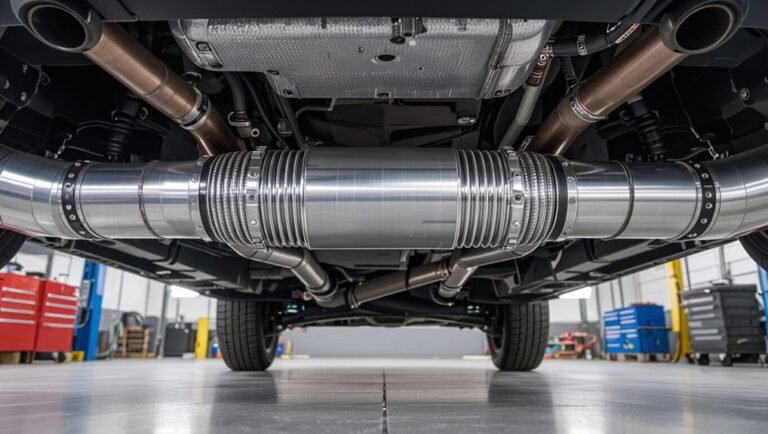
Wrap Straight Indoor Pipes (Foam Sleeves): Step‑by‑Step
Sliding a foam sleeve over a straight indoor pipe provides fast, effective insulation when done methodically. The installer measures pipe length, selects matching sleeve diameter, and cuts to fit. Sleeves are slit lengthwise, opened, and positioned with the slit facing up for easy sealing. Joints overlap slightly; seams are taped with insulation tape. Ends near fixtures are snugged and sealed to prevent drafts. Inspect for gaps and compressions. Maintain clearance from heat sources. Clean up debris and label long runs. Repeat along runs, maintaining consistent overlap and tape application for thermal continuity.
| Step | Action | Tip |
|---|---|---|
| 1 | Measure pipe | Match diameter |
| 2 | Cut sleeve | Use sharp blade |
| 3 | Seal seam | Use tape |
Wrapping Elbows, Tees, and Other Fittings
After insulating straight runs, attention turns to elbows, tees, and other fittings, where simple foam sleeves won’t provide continuous coverage. Short, flexible pieces and careful sealing prevent heat loss and freezing. Common approaches include pre‑molded elbow covers, slit foam wrapped and taped, and fiberglass with vapor barrier for irregular shapes. Steps emphasize snug fit, overlapping seams, and weatherproof tape or silicone for outdoor joints.
- Choose pre‑formed pieces when available for a clean fit.
- Use adhesive‑backed tape on slit seams.
- Layer fiberglass on bulky fittings.
- Seal joints against moisture ingress.
- Label fittings for future access and maintenance.
Insulate Small‑Diameter Pipes and Condensate Lines
Insulating small‑diameter pipes and condensate lines requires products and techniques tailored to their size and thermal sensitivity: thin, high‑density foam tubing or self‑sealing elastomeric sleeves minimize heat transfer and prevent condensation without adding bulk that interferes with brackets or drains.
Install snug, continuous insulation along the run, leaving access for valves and condensate traps. For outdoor exposures choose UV‑resistant materials; indoors select vapor‑impermeable types when moisture risk is high.
Secure insulation with appropriate clips or non‑corrosive tie tape, avoiding compression that reduces R‑value. Inspect periodically for moisture, degradation, or displacement and replace compromised sections promptly.
Seal Seams and Joints to Block Drafts and Moisture
To make certain insulation performs effectively, seams and joints should be taped to prevent air infiltration.
Rigid or cloth HVAC tape is recommended for straight seams, while flexible areas may benefit from overlapping tape techniques.
After taping, a bead of exterior-grade caulk around fittings and penetrations provides a moisture-resistant seal.
Tape Over Seams
When seams and joints in pipe insulation are wrapped with appropriate tape, they form a continuous barrier that minimizes air leakage and moisture infiltration.
Proper tape selection and application reinforce insulation, prevent unraveling, and extend lifespan.
Surface cleanliness and dry conditions guarantee adhesion.
Overlap edges by half the tape width and smooth firmly to eliminate bubbles.
Replace degraded tape promptly to maintain protection.
- Use weatherproof foil or elastomeric tape for exterior runs
- Choose acrylic adhesive for long-term indoor use
- Cut tape slightly longer than the seam
- Press seams with a roller or gloved hand
- Inspect annually for gaps and wear
Seal With Caulk
After taping seams, sealing gaps with caulk provides a final barrier against drafts and moisture that can bypass taped joints.
One-inch beads of exterior-grade silicone or polyurethane should be applied along joints, around fittings, and where insulation meets walls or supports.
Surfaces must be clean, dry, and free of loose material; use a solvent wipe if needed.
Smooth the bead with a damp finger or tool for uniform contact and compact fill.
Allow manufacturer-recommended cure time before exposing to weather or insulating wrap.
Periodic inspection and replacement of cracked or separated caulk preserves thermal performance and prevents water intrusion.
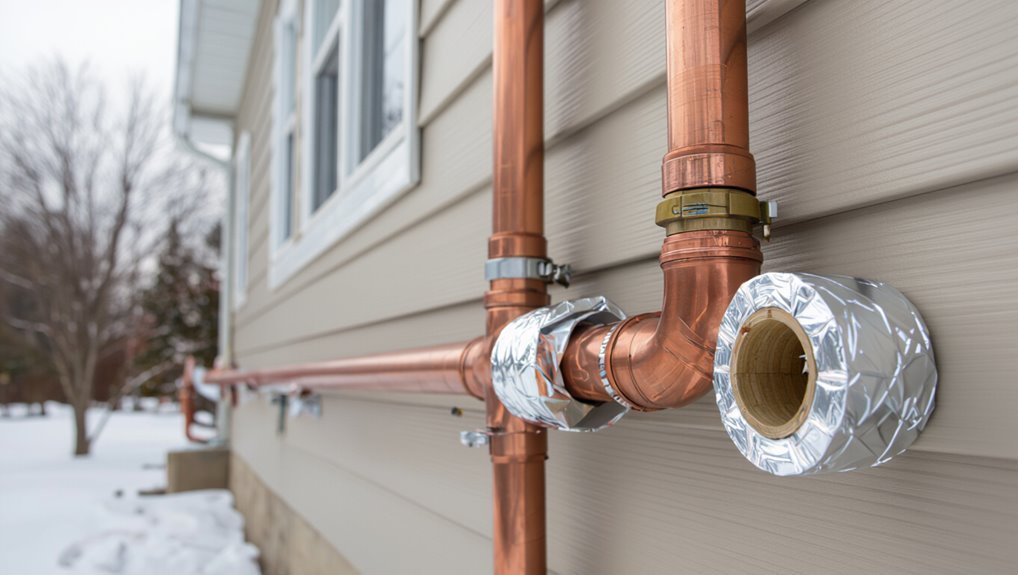
Insulate Outdoor Pipes and Hose Bibs
For exposed outdoor pipes and hose bibs, adding proper insulation and weatherproofing prevents freezing, reduces heat loss, and extends service life.
The guide explains selecting foam sleeves, insulating tape, and faucet covers, then demonstrates secure fit, sealed seams, and UV protection.
Best practices include draining lines before cold snaps and using heat tape where necessary.
Routine inspections catch damage and wear early.
Consider local freeze temperatures when choosing R-value.
- Choose closed-cell foam sleeves sized to pipe diameter
- Wrap joints and valves with self-sealing tape
- Install insulated faucet covers
- Use approved heat trace for extreme cold
- Check annually for cracks
Weatherproof Insulation in Crawl Spaces and Basements
Protecting pipes outdoors naturally leads to taking into account the conditions beneath and around a home, where crawl spaces and basements can drive heat loss, moisture problems, and pipe vulnerability.
In these spaces, installers select closed-cell foam or rubber insulation with vapor barriers to resist dampness and mold. Pipes are elevated off cold surfaces, joints sealed with tape or mastic, and seams overlapped to maintain continuity.
Supplemental measures include insulating exposed walls, adding proper ventilation or conditioned air, and installing heating cables where freeze risk persists.
Regular inspections verify integrity and catch condensation, corrosion, or animal damage before failures occur.
Insulate Pipes in Unheated Garages and Sheds
In unheated garages and sheds, selecting insulation rated for low temperatures and outdoor exposure is crucial to protect exposed pipes.
Properly sized foam sleeves, rubber insulation, or insulated wrap reduce conductive and convective heat loss along vulnerable runs.
Attention to seams, joints, and valve covers guarantees the chosen material performs effectively to prevent freezing and minimize energy waste.
Choose Proper Insulation
Unheated garages and sheds present a high risk of pipe freezing, so selecting insulation that fits the space and local climate is essential. The recommendation focuses on durable, moisture-resistant materials sized for exposed runs and fittings. Foam pipe sleeves, rubber wrap, and self-sealing tapes suit different diameters; closed-cell foam offers better R-value for very cold regions.
Consider ease of installation, UV resistance for partial exposure, and compatibility with existing supports. Properly sealed seams prevent drafts and condensation. Inspect annually and replace degraded sections.
- Closed-cell foam sleeves for high R-value
- Rubber insulation for durability
- Self-sealing foam tape for tight spots
- Fiberglass with vapor barrier for older runs
- UV-resistant coverings for exposed areas
Prevent Heat Loss
When temperatures near freezing, insulating pipes in garages and sheds reduces heat loss, prevents freezing, and limits condensation that can corrode fittings.
Properly sized foam sleeves, fiberglass wrap, or rubber insulation should be applied continuously along exposed runs, sealing joints with compatible tape or mastic.
Attention to gaps at unions, valves, and dead legs prevents thermal bridges.
For unheated spaces, adding pipe heating cable with thermostat control supplements insulation where risk is highest.
Regular inspection for compression, moisture ingress, or rodent damage preserves performance.
Combining insulation, heat trace, and passive barriers delivers reliable protection and reduces energy waste.
Protect Pipe Insulation From Rodents and Pests
Prevent rodent and pest damage to pipe insulation by choosing chew-resistant materials and installing physical barriers where pipes enter crawlspaces or exterior walls.
Inspect regularly for gnaw marks, droppings, or gaps. Seal entry points with metal flashing or hardware cloth. Use dense foam or mineral wool with a protective jacket to deter chewing. Consider traps or professional pest control when signs of infestation appear.
- Fit metal collars at wall penetrations
- Wrap with wire mesh before outer cladding
- Maintain clearance from vegetation and debris
- Repair compromised insulation promptly
- Store spare insulation sealed and elevated
When to Use Heat Tape or Cable With Pipe Wrap
Determine the need for heat tape or cable based on pipe location, exposure, water contents, and freeze risk; use it where ambient temperatures and wind chill can drop below the liquid’s freezing point or where intermittent flow makes standing water likely to freeze.
Consider vulnerable runs: exposed outdoor piping, unheated basements, crawlspaces, attics, and exterior wall penetrations. Prioritize lines carrying potable water, sprinkler systems, and drains prone to stagnation.
Combine heat tape with appropriate pipe wrap for thermal continuity and moisture protection. Avoid relying on tape alone for long insulated runs; assess electrical access, long-term maintenance, and manufacturer guidance before selection.
How to Safely Install Electric Heat Tape on Metal Pipes
Begin by shutting off power to the circuit that will supply the heat tape and confirming it is de-energized with a non-contact voltage tester; safety protocols reduce shock and fire risk before any attachment or insulation work.
The installer measures pipe length, selects compatible self-regulating tape rated for metal, and inspects for damage.
Surfaces are cleaned and dried.
The tape is applied straight along the pipe or spiraled per manufacturer instructions, secured with listed fiberglass tape or cable ties, and terminated with a weatherproof connection.
Finally, insulation is added over the tape without compressing it and the circuit is restored after testing.
- Measure pipe length and choose rated tape
- Clean and dry metal surface
- Apply tape per manufacturer directions
- Secure and weatherproof electrical terminations
- Insulate over tape without compressing
Combine Insulation Types for Best Results
The guide notes that selecting insulation with R-values appropriate to local climate is the first step toward reliable freeze protection.
Combining reflective foil with closed-cell foam layers can block radiant heat loss while reducing conductive transfer.
Practical instruction follows on sequencing and securing these materials for maximum performance.
Match R-Values To Climate
Matching R-values to local climate guarantees pipe insulation delivers the needed thermal protection without waste. Assessment begins by noting average winter lows, exposure, and heating system type. Choose materials whose combined R-value meets regional recommendations; higher R-values suit colder zones, while moderate R-values suffice for mild climates. Consider installation constraints and cost-effectiveness when combining products for incremental gains.
- Cold climates: prioritize higher R-value wraps and thicker foam
- Temperate climates: moderate R-values with moisture resistance
- Intermittent freeze risk: focus on continuous coverage and adequate R
- Exposed pipes: add weatherproof sleeves
- Budget trade-offs: balance R-value versus installation complexity
Layer Foil And Foam
By combining reflective foil with closed-cell foam, installers create a layered barrier that cuts conductive heat loss while also blocking radiant transfer and moisture intrusion.
This assembly uses foil outward to reflect radiant energy and a dense foam core to reduce conduction and compressive damage.
Seams are taped and joints sealed with weatherproof mastic to prevent air and vapor movement.
Thicknesses are chosen for pipe diameter and local freeze risk; foam provides mechanical protection while foil lowers surface emissivity.
Installation is straightforward: wrap foam snugly, overlay reflective tape, and secure with UV-resistant strapping for long-term performance.
Insulate to Prevent Summer Condensation on Cold Pipes
During warm months, cold water moving through uninsulated pipes often causes surface condensation that can drip, promote mold, and corrode fittings.
Insulating pipes creates a thermal barrier, reducing moisture formation and protecting surrounding materials. Select closed-cell foam or rubber insulation sized to fit pipe diameters. Secure seams with appropriate tape or adhesive, and maintain ventilation to prevent trapped humidity.
Periodic inspection confirms insulation remains intact and dry.
- Choose closed-cell foam or elastomeric rubber
- Match insulation thickness to humidity and pipe temperature
- Seal joints with compatible tape or adhesive
- Leave access at valves and fixtures
- Confirm nearby ventilation to reduce ambient moisture
Check Wrapped Pipes for Gaps and Cold Spots
After insulation is installed to prevent condensation, a careful inspection for gaps and cold spots guarantees that the barrier performs as designed.
The inspector scans seams, joints, valves, and fittings for exposed pipe, compressed or torn insulation, and loose tape. Hands detect temperature differences; a thermal camera or infrared thermometer locates hidden cold spots quickly.
Marked deficiencies receive corrective action: add foam, replace damaged sections, seal seams with appropriate tape or sealant, and secure loose wrap.
Document locations and fixes for reference.
A thorough check reduces moisture buildup, energy loss, and corrosion risk, preserving system reliability and insulation effectiveness.
Maintain and Re‑Wrap Insulation Seasonally
Regularly, a seasonal review of pipe insulation guarantees continued protection against moisture, freezing, and heat loss.
The inspector notes worn sections, compressed foam, and degraded tape, then plans selective replacement.
Rewrapping restores R-value, seals joints, and prevents drafts.
Tasks are scheduled during mild weather, using correct-fit sleeves, fresh adhesive, and corrosion-resistant fasteners.
Record dates, materials, and locations for future checks.
- Inspect all accessible runs for wear and moisture.
- Remove damaged insulation and clean pipe surfaces.
- Replace with appropriate thickness and material.
- Seal seams and penetration points with approved tape.
- Document work and set next seasonal review date.
Troubleshoot a Frozen Pipe That Was Wrapped
When a wrapped pipe appears frozen, the first step is a careful inspection of the pipe and its insulation for gaps, moisture, or damage.
If the wrap is compromised, repair or replace it before addressing the frozen section.
Once the wrap is secure, restore water flow by gently thawing the pipe with safe heat sources and monitoring for leaks.
Inspect Pipe And Wrap
Inspecting a wrapped but frozen pipe begins with a visual and tactile survey to locate ice blockages and evaluate the wrap’s condition. The inspector notes firm sections, condensation, damaged insulation, and nearby heat sources. Safety (shutoffs, electricity) precedes hands-on work.
- Check for bulges, frost, or leaking joints.
- Feel along the wrap for cold spots indicating trapped ice.
- Inspect seams, tape, and fasteners for gaps or compression.
- Look for water stains, mold, or degraded material that reduce insulation.
- Verify ambient space is ventilated and not exposing the pipe to drafts.
Document findings and plan targeted repairs.
Restore Water Flow
After documenting the wrap’s condition and locating cold spots, the next step is to restore water flow by safely thawing the frozen section and repairing any compromised insulation.
The technician assesses whether the pipe shows bulging or leaks; if damaged, water is shut off and the section is isolated.
Thawing begins with a hair dryer, heat gun on low, or warm towels, moving from faucet toward the freeze to push ice out. Open faucets relieve pressure.
Once thawed, inspect for cracks and replace or patch damaged pipe segments. Rewrap with appropriate insulation and seal gaps to prevent recurrence.
How Much Does Pipe Wrapping Cost Per Linear Foot?
How much does pipe wrapping typically cost per linear foot depends on material, thickness, and installation complexity. Costs range from low-cost foam sleeves to higher-priced fiberglass with vapor barrier; expect variations by climate and supplier. Labor, special fittings, and access add to per-foot pricing when professionals are used. Budget estimates help compare options and plan projects.
- Basic foam sleeves: low cost, easy install
- Rubber insulation: mid-range, durable
- Fiberglass with jacket: higher cost, for extremes
- Self-sealing tape: variable, for small runs
- Accessories (tape, clamps, sealant): add-on expenses
DIY vs. Hiring a Pro: What to Expect
Cost differences and material choices naturally lead to the question of whether a homeowner should tackle pipe wrapping themselves or hire a professional. A DIY approach suits straightforward runs, basic foam sleeves, and simple weatherproofing; it saves labor costs and allows flexible timing. It requires basic tools, careful measurement, and attention to sealing joints.
Hiring a pro increases expense but yields faster completion, consistent workmanship, proper handling of complex fittings, and often guarantees. Pros can recommend optimal materials for specific climates and detect related issues like corrosion.
Homeowners should weigh skill level, time, project complexity, and willingness to accept responsibility for results.
Relevant Building‑Code Requirements Homeowners Must Know
Building codes set minimum standards for pipe insulation and weatherproofing that homeowners should follow to guarantee safety, energy efficiency, and legal compliance. Authorities specify R‑value minimums, frost protection for exposed piping, and required clearance from heat sources.
Permits and inspections may be required for major alterations. Local amendments can change national model code requirements. Liability and insurance policies can depend on code compliance.
- Follow local code for minimum insulation R‑value.
- Protect outdoor and unheated space pipes against freezing.
- Use approved materials and fire‑resistant wraps near combustibles.
- Obtain permits when altering plumbing or adding insulation permanently.
- Keep documentation for inspections and insurance.
Eco‑Friendly Insulation Options and Recycling Tips
The article introduces alternatives to conventional pipe insulation, highlighting products made from recycled fibers and reclaimed materials.
It notes best practices for separating and preparing used insulation for municipal recycling programs or specialized facilities.
Guidance is provided on identifying local disposal regulations and safe handling to prevent contamination.
Recycled Insulation Materials
Exploring recycled insulation materials offers an eco-friendly path to reducing waste and improving thermal performance in pipe insulation projects. The section outlines common recycled options, their benefits, and practical considerations for selection and installation.
Focus rests on material properties, moisture resistance, R-value stability, and compatibility with common pipe types. Cost and availability are noted alongside environmental impact.
Installation tips emphasize proper sealing and avoiding compression that reduces insulating effectiveness. Safety guidance includes checking for contaminants and using appropriate protective gear when handling reclaimed materials.
- Recycled denim: good R-value, non-toxic
- Cellulose: high recycled content
- Reclaimed rubber: flexible, durable
- Recycled foam: lightweight insulation
- Composite blends: balance performance and sustainability
Proper Disposal And Recycling
Addressing proper disposal and recycling guarantees that pipe insulation choices minimize environmental harm at end of life while recovering valuable materials for reuse.
The discussion outlines sorting protocols, local recycling options, and manufacturer take‑back programs for foam, fiberglass, and rubber insulation.
Contaminated or asbestos‑containing materials require professional abatement and regulated disposal.
Clean, separated materials can be repurposed or processed into new insulation, reducing landfill demand.
Consumers are advised to consult municipal waste guidelines, label removal instructions, and certified recyclers.
Proper documentation and small‑batch drop‑offs improve recovery rates, support circular markets, and make certain compliance with environmental regulations.
Conclusion
Like a gardener tucking vulnerable seedlings beneath a frost cloth, the homeowner shields pipes with careful wrapping—tough on the outside, gentle where it counts. Each insulated length becomes a tiny furrow against winter’s bite, saving water, money, and worry. By choosing the right materials and technique, the household tends its hidden network, ensuring flow and resilience; small, consistent protection grows into lasting warmth and secure comfort through the coldest nights.