At What Temperature Do Pipes Freeze? Cold-Weather Plumbing Tips
Pipes can start to freeze at or below 32°F (0°C), but the actual risk varies based on factors like exposure, insulation, pipe material, diameter, and whether water is flowing. Uninsulated, exposed pipes can freeze near 32°F during rapid temperature drops, while insulated or sheltered pipes often remain safe even below 20°F. Copper pipes cool more quickly than PEX, and smaller pipes freeze sooner than larger mains. Additionally, wind, drafts, and contact with cold masonry can increase heat loss. For effective prevention and emergency measures, continue reading.
At What Temperature Do Water Pipes Actually Freeze?
How cold must it get before pipes freeze? The temperature at which water in pipes freezes depends on exposure, insulation, pipe material, and water movement.
In sheltered, insulated systems, freezing may not occur until well below 20°F; exposed, uninsulated lines can freeze near or above 32°F when heat loss is rapid overnight. Slow-moving or stagnant water freezes faster than flowing water.
Soil, wind chill, and building heat loss influence internal temperatures around pipes.
Predicting freeze risk requires evaluating location, insulation quality, and usage patterns rather than relying on a single ambient temperature threshold.
Why 32°F Alone Won’t Predict Frozen Pipes
Air temperature reading of 32°F is only one factor influencing whether water inside a pipe will freeze.
The actual pipe temperature can differ based on insulation, surrounding materials, and whether the pipe is exposed to wind or radiant heat loss.
Evaluating insulation quality and exposure is necessary to predict freezing risk accurately.
Air Temperature Vs. Pipe Temp
Why does a thermometer reading of 32°F not guarantee frozen pipes? Air temperature measures ambient conditions, not the thermal state of buried, insulated, or flowing pipes.
Pipe temperature depends on conduction, convection, radiation, groundwater warmth, heat from adjacent buildings, and whether water moves.
Thermal lag means pipes cool more slowly than sudden drops in air.
Conversely, prolonged subfreezing air will eventually equalize with unprotected pipes.
Consequently, a single outdoor reading is insufficient; localized conditions determine when and where freezing actually occurs.
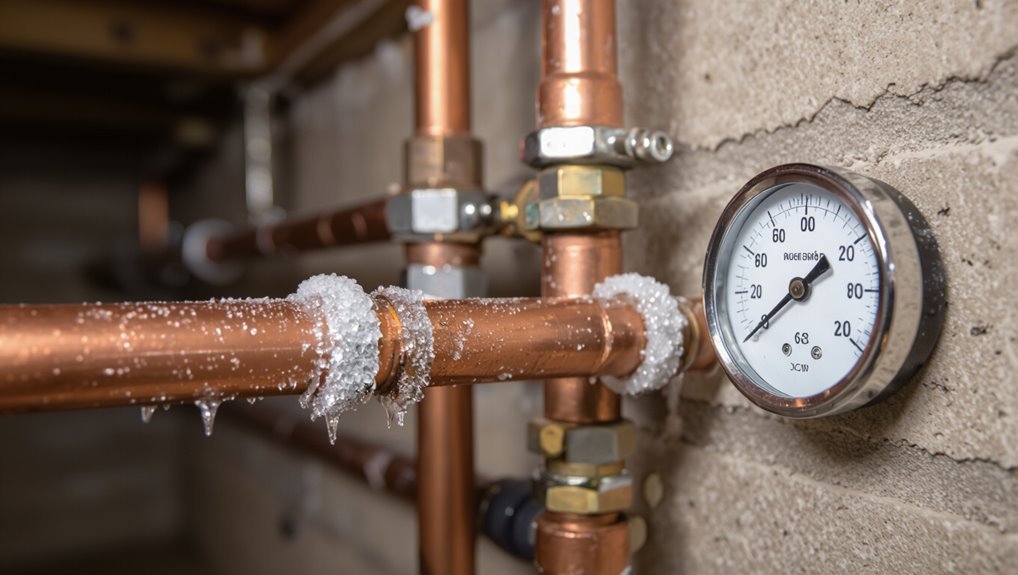
Insulation And Exposure
Against exterior walls, inside unheated crawlspaces, or where pipes run through poorly insulated attics, the risk of freezing depends far more on exposure and insulation than on the ambient thermometer reading alone.
Pipe temperature reflects heat loss to surrounding materials and air movement; drafts, radiant cooling, and contact with cold masonry can drop a pipe below 32°F even when indoor air stays marginally warmer.
Insulation reduces conductive and convective losses but must be continuous and correctly fitted. Exposed fittings and valves remain vulnerable.
Evaluating freeze risk requires examining insulation type, thickness, gaps, and local airflow rather than relying solely on outdoor temperature.
Copper vs PEX vs PVC: Freeze Risk Compared
Often, pipes made from different materials respond very differently to freezing conditions, so homeowners and builders should consider material properties when evaluating freeze risk.
Copper conducts heat rapidly, so water inside cold copper lines chills faster and can freeze sooner; rigid copper also cracks when ice expands.
PEX is more flexible and tolerates expansion, reducing burst risk even if the water inside freezes; its lower thermal conductivity slows cooling, offering a small advantage.
PVC is brittle at low temperatures and can fracture under pressure from ice; its thermal behavior sits between copper and PEX.
Material choice influences vulnerability and repair consequences.
How Pipe Diameter Affects Freezing Time
Pipe diameter plays a direct role in how quickly water inside a pipe will freeze: narrower pipes have less water volume and a larger surface-area-to-volume ratio, so they lose heat faster and freeze sooner than wider pipes under the same external conditions.
Smaller-diameter lines reach equilibrium with ambient temperature more rapidly, reducing the time available for heat flow from upstream sources. Conversely, larger-diameter mains contain more thermal mass and require longer exposure to subfreezing temperatures before ice forms.
Predicting freeze time consequently requires accounting for pipe size alongside material thermal conductivity and flow conditions for accurate risk assessment.
Why Pipe Location Matters More Than Outdoor Temperature
While diameter influences how quickly water cools, the pipe’s physical location within a structure typically exerts a stronger control on freezing risk.
Pipes in uninsulated exterior walls, crawl spaces, attics, or basements face greater exposure to cold drafts and conductive heat loss than those routed through interior cavities. Proximity to heat sources, thermal mass, and airflow patterns determine local temperatures around piping more than ambient outdoor readings.
Insulation, placement against conditioned space, and routing away from openings reduce vulnerability. Evaluating location guides targeted mitigation—insulation, heat tape, or rerouting—so measures match the actual exposure rather than an assumed outdoor threshold.
How Long Does a Pipe Take to Freeze at Different Temperatures?
Estimates of how long water takes to freeze in pipes vary with ambient temperature, ranging from many hours near freezing to under an hour in extreme cold.
The conductive properties of copper, PVC, and iron alter freeze times, so material choice meaningfully changes risk.
Insulation quality and whether a pipe is exposed, buried, or inside a heated space further modify those estimates.
Water Freeze Time Estimates
How long it takes water in a domestic pipe to freeze depends primarily on ambient temperature, pipe material and diameter, insulation, and whether water is moving.
At 20°F (-7°C) still water in an uninsulated 1/2‑inch pipe can begin to freeze within two to four hours; at 0°F (-18°C) that window shortens to under an hour.
Slight flow delays freezing—trickling water may extend freeze onset to many hours.
Insulation or enclosed spaces add further time.
Estimates vary with exposure and thermal mass; use these figures as guidelines for risk assessment and timely preventive action rather than exact prediction.
Pipe Material Differences
Different pipe materials change the rate at which water inside them reaches freezing by altering heat transfer, thermal mass, and exposure to ambient temperature. Metal pipes (copper, steel) conduct heat rapidly, so internal water equilibrates faster with cold surroundings and can freeze sooner. Plastic pipes (PVC, PEX) have lower thermal conductivity and often delay freezing. Pipe wall thickness and internal diameter influence time-to-freeze through thermal mass and flow resistance. Temperature thresholds remain similar, but time until ice forms varies by material and geometry.
- Copper: fast conduction, quicker freeze.
- PVC/PEX: slower conduction, slower freeze.
- Cast iron/steel: high thermal mass, variable response.
Insulation And Location
Near exterior walls, uninsulated crawlspaces, and attics, pipes lose heat to cold air and ground much faster than those located inside heated interior zones, so the time for water inside to freeze shortens markedly as ambient temperature drops. Location and insulation determine heat loss rate; foam sleeves, wrap, or cavity insulation slow freezing, while exposed runs freeze quickest. Smaller-diameter lines freeze faster than large mains. Predictive guidelines combine pipe material, diameter, and ambient exposure to estimate minutes-to-hours to freeze; maintenance focuses on insulating vulnerable runs and relocating or adding heat to reduce risk.
| Location | Relative freeze time |
|---|---|
| Interior heated | Longest |
| Exterior wall | Short |
| Crawlspace | Shorter |
| Attic | Shortest |
| Outdoors | Immediate |
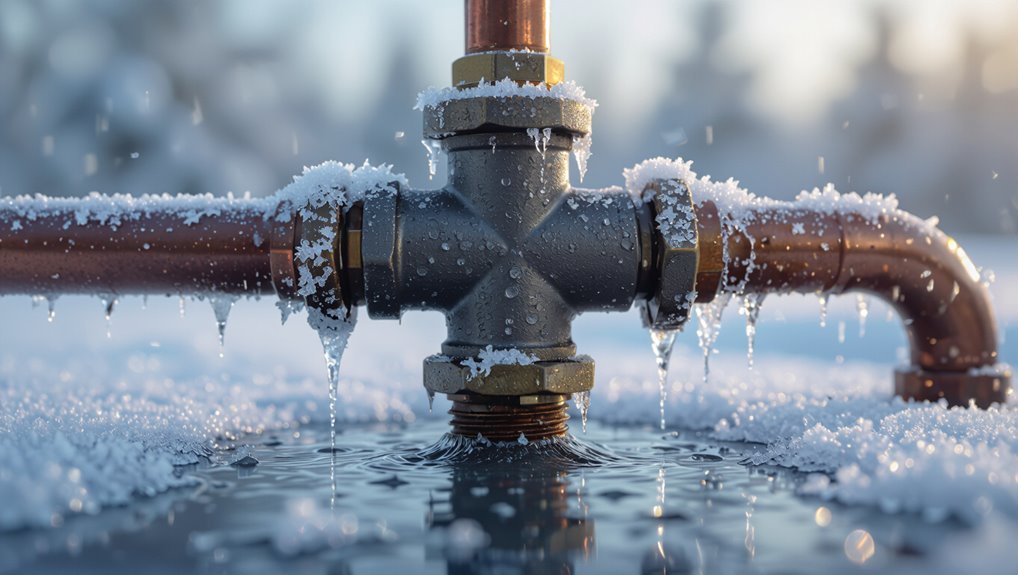
How Wind and Exposure Speed Up Pipe Freezing
Why does a brisk wind make outdoor plumbing freeze faster? Wind increases convective heat loss from exposed pipes, lowering surface temperature and accelerating ice formation even above calm-air freeze points. Drafts through vents, gaps, or around sheds exacerbate cooling.
Sunlight absence and night radiative loss compound the effect.
- Increased convection: moving air removes the thin insulating layer of warm air, speeding heat loss.
- Direct exposure: pipes on windward sides cool faster than sheltered ones, creating uneven freeze risk.
- Wind-driven moisture: evaporative cooling from wet surfaces and windblown spray intensifies temperature decline.
How Soil Type and Snow Cover Alter Underground Freeze Risk
Beneath the surface, soil composition and snow cover together determine how quickly ground temperatures fall and how deeply frost penetrates, affecting the vulnerability of buried pipes. Coarse, sandy soils drain and cool faster, allowing deeper frost lines, while clay and loam retain moisture and heat, slowing freeze progression. Organic-rich topsoils insulate better than mineral soils.
Snow acts as an insulating blanket: light, fluffy accumulations reduce heat loss and limit frost depth, whereas wind-scoured or absent snow exposes ground to colder air, increasing freeze risk. Pipe depth, soil thermal properties, and snow presence combine to set underground freezing likelihood.
Which Indoor Areas Are Most Likely to Have Frozen Pipes
Rooms and spaces that lack regular heating or sit at the building’s thermal margins are the most prone to frozen pipes.
Interior plumbing in seldom-used or poorly insulated zones faces higher risk: slow heat exchange and cold drafts lower pipe temperature quickly.
Attention focuses on areas where pipes run against exterior walls or through unconditioned cavities.
Vulnerable locations concentrate where maintenance is infrequent and airflow is limited.
- Basements and crawlspaces bordering outside foundations.
- Attics and eaves with minimal insulation and ventilation gaps.
- Exterior walls, closets, and corners housing supply lines near cold surfaces.
How to Spot Early Signs of a Freezing Pipe
A homeowner may notice cold spots on walls or along exposed plumbing runs where heat loss is concentrated.
Another early sign is reduced water flow or intermittent pressure from faucets and fixtures.
Noting these symptoms promptly can indicate a developing freeze before a pipe fully blocks or bursts.
Cold Spots On Walls
Along exterior walls and around poorly insulated plumbing runs, cool patches in paint or wallpaper often signal a drop in surface temperature long before visible ice forms; noticing these cold spots—dull paint, subtle condensation, or a thin rim of frost—provides an early warning that a pipe behind the wall is at risk of freezing.
Observers should scan baseboards, closets, and behind appliances for localized discoloration or lingering dampness. Use a hand to detect chill or a thermal camera for confirmation.
Early detection permits targeted insulation or localized heating before more serious damage occurs.
- Inspect visually and by touch.
- Check vulnerable wall cavities.
- Confirm with a thermal device.
Reduced Water Flow
Many homeowners notice reduced water flow long before pipes visibly ice, as a steady weakening of pressure or a sputtering stream signals the start of an internal restriction.
A partial freeze narrows the bore, causing intermittent trickles, air in lines, or slower hot-water delivery. Observers may note one fixture affected while others remain normal, indicating a localized cold pocket.
Early detection includes checking exposed pipes for chill, monitoring outdoor temperatures near vulnerable runs, and running faucets briefly to confirm persistence.
Promptly insulating, applying gentle heat, or calling a plumber prevents full blockage and costly bursts when thawing occurs.
Why Frozen Pipes Burst and Where Breaks Usually Occur
Water expands as it freezes, and that expansion creates pressure inside a closed pipe system that can exceed the pipe’s strength, causing ruptures.
Freezing concentrates stress at weak points: joints, fittings, and sections constrained by brackets.
Thermal contraction and ice block pressure force fractures outward; older materials and corrosion lower rupture thresholds.
Breaks most often occur where pipes change direction or pass through uninsulated walls and crawlspaces.
Detection is delayed until thaw increases flow, so damage is often internal and extensive.
Preventive design and insulation reduce risk by eliminating cold spots and minimizing stress concentrations.
- Joints and fittings
- Bends and direction changes
- Uninsulated exterior walls
Emergency Steps If You Suspect a Frozen Pipe
Act quickly but calmly when a frozen pipe is suspected: shut off the main water supply to prevent pressure-driven ruptures.
Next, open nearby faucets to relieve remaining pressure and monitor for flowing or discolored water.
Inspect accessible sections for frost or bulging, and check for leaks or pooling that indicate a rupture.
Close valves to isolated appliances and electrical panels if water is present to reduce hazard.
Notify occupants and avoid using electrical devices near wet areas.
Contact a licensed plumber immediately for assessment and repair.
Document damage with photos for insurance and keep records of actions taken.
How to Thaw a Frozen Pipe Safely (Do’s and Don’ts)
When faced with a frozen pipe, proceed deliberately and prioritize safety: confirm the main water supply is off, open nearby faucets to relieve pressure, and keep electrical devices away from wet areas.
Use gentle, directed heat—hair dryer, heat lamp, or electric space heater—moving progressively from warm areas toward the freeze.
Wrap pipes with towels soaked in warm (not boiling) water if accessible.
Avoid open flames, blowtorches, or high-heat appliances.
Monitor for leaks as ice melts.
- Apply steady, even heat; never overheat fittings.
- Insulate exposed sections after thawing.
- Do not attempt thawing if plumbing is inaccessible or visibly damaged.
When to Call a Plumber for Frozen Pipe Problems
Recognize the limits of DIY fixes and call a professional if signs indicate a serious or unsafe problem: visible pipe bulging, leaking at joints, persistent freezing despite safe thawing attempts, loss of water pressure after thawing, or frozen pipes located within walls, crawlspaces, or other inaccessible areas.
A plumber should also be contacted when multiple fixtures are affected, when water discoloration or unusual noises occur, or when occupants are unsure about shutoff locations.
Professionals assess structural risk, perform controlled thawing, repair or replace damaged sections, and advise on post-incident mitigation.
Timely intervention minimizes water damage, mold risk, and costly emergency repairs.
How to Prevent Frozen Pipes Before a Cold Snap
Before the first hard freeze arrives, homeowners should take targeted steps to protect vulnerable plumbing by insulating exposed pipes, sealing drafts around foundation and attic penetrations, and maintaining a modest indoor temperature day and night.
They should locate and mark exterior shutoffs, drain and winterize unused outdoor faucets, and arrange professional inspections for older systems.
Preparatory tasks reduce risk and simplify emergency responses if temperatures plunge unexpectedly.
- Locate and label all water shutoffs, test them for function.
- Drain and cap outdoor hoses and spigots before freezing weather.
- Schedule a plumber to check pressure, valves, and visible joints.
Insulating Pipes to Prevent Frozen Pipes
The section outlines common pipe insulation materials—foam sleeves, fiberglass wrap, and heat tape—comparing their R-values and suitability for different pipe locations.
It then explains straightforward installation techniques, including measuring, sealing seams, and securing insulation to maintain continuous thermal protection.
Emphasis is placed on matching material choice and proper installation to the pipe’s exposure and temperature risk.
Pipe Insulation Materials
When protecting plumbing from freezing temperatures, selecting the right insulation material is fundamental; choices—foam tubing, fiberglass wrap, rubber, and reflective jackets—differ in R-value, moisture resistance, flexibility, and ease of installation.
The appropriate material depends on pipe location, exposure to moisture, and required durability. Closed-cell foam resists water and suits indoor and semi-exposed lines.
Fiberglass handles higher temperatures but needs vapor barrier protection. Rubber offers flexibility for tight bends. Reflective jackets reduce radiant heat loss in attics or crawl spaces.
Consider lifespan, UV resistance, and compatibility with existing systems when choosing materials.
- Match R-value to exposure
- Prefer moisture-resistant options where wet
- Select durable, UV-stable materials for outdoors
Insulation Installation Techniques
In colder climates and changeover seasons alike, proper installation techniques determine whether chosen insulation performs to specification and prevents pipe freeze-ups.
Installers should measure pipe runs, select snug-fit sleeves or wrap materials, and maintain continuous coverage over fittings, joints, and valves.
Seal seams with compatible tape or adhesive to eliminate gaps and minimize thermal bridging.
For exposed outdoor lines, add weatherproofing and secure insulation against wind and moisture.
Maintain clearance from heat sources and avoid compressing foam, which reduces R-value.
Periodic inspections catch deterioration; replacing damaged sections restores effectiveness and reduces the risk of freeze-related ruptures.
How Heat Tape and Heat Cable Should Be Installed
Install heat tape or cable along the length of vulnerable piping, ensuring direct contact and following manufacturer spacing and overlap instructions to provide consistent, even warmth. The installer secures the heating element with approved tape or clips, avoids crossing or doubling sections unless rated for overlap, and routes cords to nearby outlets without creating trip or moisture hazards.
Power connections and any built-in thermostats or self-regulating sections are tested before enclosing. Electrical work complies with local codes and uses ground-fault protection. Periodic inspection for wear, damage, or degradation is scheduled to maintain reliable operation.
- Confirm product rating for pipe material and location.
- Fasten without compressing insulation or cable.
- Test and document power and thermostat operation.
When to Leave Cabinet Doors Open and Why It Helps
When temperatures drop near freezing for several hours, homeowners are advised to open interior cabinet doors to allow warmer room air to reach plumbing.
Cabinets under sinks and against exterior walls are the primary candidates because they contain vulnerable supply lines and receive the most benefit. The amount of heat that reaches pipes depends on cabinet depth, door openings, and airflow from the room, so effectiveness varies by layout.
When To Open Cabinets
During prolonged cold snaps, leaving kitchen and bathroom cabinet doors open can help warm air from the room reach vulnerable pipe sections tucked against exterior walls, reducing the risk of freezing. Timing matters: open cabinets when indoor temperatures drop near freezing, during overnight lows, or when heating is reduced. Owners should observe cold forecasts and begin propping doors before sustained low temperatures arrive. This simple action promotes airflow and offsets cold pockets around plumbing.
Follow practical triggers rather than leaving doors open continuously to conserve energy and privacy while protecting pipes during critical periods.
- Before predicted multi-hour freezes
- Overnight or unheated periods
- During low furnace output
Which Cabinets To Leave
Which cabinets should be opened to protect plumbing without sacrificing comfort? Cabinets under kitchen and bathroom sinks, and those against exterior walls, are the primary candidates. Opening these doors allows warmer room air to circulate around exposed pipes, reducing freezing risk.
Inner cabinets without plumbing need not be opened. When leaving doors ajar, make certain stored items are arranged to permit airflow and avoid contact with pipes.
For multi-cabinet runs, target sections with visible piping, valves, or traps. Close doors when temperatures moderate to retain heat and reduce drafts. This selective approach balances protection with household comfort and energy use.
How Much Heat Reaches
By allowing room air to circulate into sink cabinets, a measurable portion of interior heat reaches exposed plumbing and raises pipe temperature enough to lower freezing risk.
Studies and practical measurements show cabinet interiors typically track room temperature within a few degrees when doors are open, reducing cold spots around traps and supply lines.
Air movement prevents stratification and supplies latent heat from warm walls and floors.
- Open doors raise cabinet air temperature by 2–6°F in most homes.
- Convection distributes heat to pipe surfaces, slowing conductive cooling.
- Combined with a slow faucet drip, risk of freezing falls further.
Using a Trickle Tap to Prevent Frozen Pipes
A trickle tap keeps a small, steady flow of water moving through pipes to reduce the chance of freezing, especially in exposed or poorly insulated sections. The approach is simple: open a cold-water faucet slightly during extreme cold to maintain movement and relieve pressure. It conserves water while lowering freeze risk in vulnerable runs. Residents weigh modest waste against potential burst repairs. Installations should comply with local codes and consider metering. Monitor overnight and during wind-driven cold. Emotional reassurance comes from proactive action and reduced anxiety about damage.
| Calm | Control | Relief |
|---|---|---|
| Quiet | Simple | Safe |
| Small | Steady | Warm |
| Hope | Certainty | Repair avoided |
How to Winterize Outdoor Faucets and Hose Bibs
Before the first hard freeze, the homeowner should shut off outdoor water supplies to hose bibs to prevent backflow into vulnerable pipes.
After shutting off the supply, draining and insulating exposed faucets and pipes reduces the chance of retained water freezing and expanding.
Finally, removing hoses and protecting hose connections with insulated covers or caps prevents trapped water from causing damage.
Shut Off Outdoor Water
When temperatures drop toward freezing, shutting off outdoor water lines and draining hose bibs prevents trapped water from expanding and rupturing pipes or faucets. The homeowner locates interior shutoff valves serving exterior spigots, turns them off, then opens each outdoor faucet to relieve pressure.
Quick visual checks confirm no dripping; trapped pockets are bled to atmosphere. If faucets have vacuum breakers, those are opened as well. After winterizing, labels on valves aid spring reactivation. Professional inspection is advised for inaccessible valves or old fittings that may leak when manipulated.
- Locate interior shutoffs.
- Open exterior spigots.
- Verify dry, labeled valves.
Drain And Insulate
To winterize outdoor faucets and hose bibs, the homeowner drains remaining water and insulates exposed fittings to prevent freezing and cracking; this involves closing indoor shutoffs, opening each exterior spigot to relieve pressure and drain lines, then fitting insulated covers or foam around the valve and spout while ensuring any vacuum breakers are left open or drained.
After draining, the homeowner removes hoses and caps, checks for leaks or corrosion, and installs insulated, weatherproof covers secured against wind.
Any accessible pipes leading to the bib should receive foam sleeves or wrap, and utility areas are inspected periodically during cold spells.
Protect Hose Connections
A homeowner’s hose connections are a common weak point in winterization and deserve specific attention to prevent frozen, burst fittings and water loss.
Exterior hoses should be removed, drained, and stored; leaving a hose attached traps water in the bib.
Shut off and drain any interior isolation valves that supply outdoor faucets, then open the spigot to clear residual water.
Insulating covers and foam bib protectors add protection where internal shutoffs aren’t available.
- Remove and store hoses to avoid trapped water.
- Close and drain interior shutoffs; open exterior spigots.
- Fit insulated covers on exposed hose bibs.
How to Protect Exterior and Garage Plumbing
With exposed lines and rarely used fixtures, exterior and garage plumbing requires simple, targeted steps to prevent freezing and costly damage. Shut off and drain outdoor faucets; use vacuum-break or frost-free spigots where possible. Install insulated covers on hose bibs and cap unused outlets.
Route exposed pipes away from exterior walls or secure heat tape approved for plumbing; follow manufacturer instructions and a GFCI connection. Keep garage doors closed and allow warm indoor air to reach plumbing during cold snaps. Periodically check for drafts and seal gaps around penetrations. Monitor temperatures and act early when forecasts predict prolonged subfreezing conditions.
Insulating Basements, Crawlspaces, and Attics
Attention to basements, crawlspaces, and attics is essential for preventing frozen pipes.
Recommended measures include insulating rim joists, sealing air leaks around penetrations, and adding sufficient attic insulation to limit cold transfer.
These steps reduce heat loss and keep pipe temperatures above freezing.
Insulate Rim Joists
Found along the perimeter where the foundation meets the floor structure, rim joists are a frequent weak point for heat loss and cold air infiltration that can chill pipes running nearby. Insulating rim joists reduces thermal bridging and stabilizes temperatures near plumbing.
Closed-cell spray foam, rigid foam board cut to fit, or mineral wool batts installed between joist bays each provide different R-values, moisture resistance, and ease of installation. Attention to vapor control and compatibility with finishes prevents condensation and mold.
Properly insulated rim joists lower freeze risk and energy use without requiring major renovation.
- Closed-cell spray foam
- Rigid foam board
- Mineral wool batts
Seal Air Leaks
After sealing rim joists, the next step is to identify and close air leaks throughout basements, crawlspaces, and attics that permit cold air to reach vulnerable pipes.
Inspect penetrations for pipes, wiring, vents, and ductwork; seal gaps with appropriate materials such as caulk, spray foam, or weatherstripping.
Use gaskets or foam collars around service entries and install covers on unused openings.
Safeguard access doors and crawlspace vents are properly sealed or adjustable for season.
Maintain ventilation where required by code while minimizing uncontrolled drafts.
Regular inspections and targeted sealing reduce freeze risk by limiting cold air exposure to plumbing lines.
Add Attic Insulation
In cold climates, adding attic insulation is a high-impact step that reduces heat loss through the ceiling and keeps warm indoor air away from pipes in upper floors and near attic chases.
Proper insulation stabilizes attic temperatures, limits freeze risks for pipes routed along or near the ceiling, and improves overall energy efficiency.
Selection should consider R-value for the region, ventilation needs, and avoiding compression over pipes.
Professional assessment is advised for retrofits that interact with ductwork or recessed lighting.
- Choose appropriate R-value and material.
- Maintain attic ventilation paths.
- Insulate and air-seal around pipe chases.
When to Shut Off and Drain Water During Extended Cold
During prolonged cold spells, homeowners should consider shutting off and draining water systems when temperatures are expected to remain below freezing for more than 48–72 hours or when heat loss is likely due to power outages or extended vacancy.
A shutoff limits standing water that can freeze and burst pipes; draining removes residual water from fixtures, hoses, and low points.
Prioritize main shutoff valves, water heaters (follow manufacturer guidance), and outdoor spigots.
After draining, open interior faucets and flush toilets to clear lines.
Label shutoff locations and document steps.
Refill and restore pressure only after temperatures recover and pipes are confirmed undamaged.
How to Winterize Vacation Homes and Vacant Properties
When a property will be unoccupied for an extended period, homeowners should take proactive measures to prevent freeze damage, theft, and long-term maintenance problems.
Winterizing vacant homes includes draining water lines or maintaining a low-temperature heat schedule, insulating exposed pipes, and sealing gaps to reduce drafts.
Consider shutting off and draining irrigation and pool plumbing, removing perishables, and arranging regular inspections to detect leaks or tampering.
Utilities and access should be documented for emergency responders or contractors.
Professional winterization services can provide checklist verification and warrantyable work for long absences.
- Drain and shut off nonessential systems
- Insulate and seal vulnerable areas
- Schedule routine property checks
How Smart Thermostats and Sensors Reduce Freeze Risk
Smart thermostats and temperature sensors form an active safety layer that detects drops toward freezing and triggers heating, alerts, or automated water shutoffs to prevent pipe bursts. These devices monitor indoor and crawlspace temperatures, learn occupancy patterns, and raise minimum setpoints when risk is detected.
Remote notifications inform owners or property managers so corrective action can occur before ice forms. Integrated leak sensors and smart valves can isolate affected zones automatically.
Installation is straightforward for most systems and can be configured with geofencing, schedules, or weather-triggered rules. Regular battery checks and firmware updates keep the network reliable throughout winter.
How to Choose a Professional for Winter Plumbing Work
Selecting a qualified plumber for winter work starts with verifying licensing and insurance to guarantee compliance and liability protection.
Practical winter experience should be confirmed, with preference given to technicians who have handled frozen pipes and cold-weather repairs.
References or reviews that mention successful winter jobs provide quick evidence of capable, season-specific expertise.
Licensing And Insurance
Why verify credentials before hiring for winter plumbing work? Licensed plumbers meet local code standards and carry required insurance, protecting property owners from liability and substandard repairs. Confirming license numbers and insurer details reduces risk of fraudulent contractors and guarantees access to recourse if damage or injury occurs.
Homeowners should request documentation before work begins and record it.
- Verify active license with municipal regulator.
- Confirm general liability and workers’ compensation coverage; obtain policy numbers.
- Require written contract specifying scope, permits, and proof of insurance.
These steps prioritize safety, compliance, and financial protection during cold-weather repairs.
Winter Experience
Regularly, homeowners should prioritize a plumber’s winter-specific experience when hiring for cold-weather repairs and freeze prevention. A qualified professional demonstrates prior work on insulation, pipe tracing, heat tape installation, and emergency thawing.
Verification includes references, documented cold-season projects, and knowledge of local freeze patterns and building codes. Prefer contractors who offer seasonal maintenance plans, rapid-response services, and clear estimates for winterization tasks.
Certifications or manufacturer training for heating elements and leak-detection technology are advantageous. Clear communication about preventive steps, expected timelines, and warranty terms helps guarantee reliable winter plumbing performance and reduces the risk of costly freeze-related damage.
Homeowners Insurance: Coverage for Frozen and Burst Pipe Claims
How does homeowners insurance typically respond when pipes freeze and burst? Coverage generally depends on policy terms and homeowner responsibility. Most policies cover sudden, accidental water damage from burst pipes but exclude damage caused by neglect or lack of maintenance. Preventive steps taken by the owner can affect eligibility.
- Covered: sudden rupture and resulting repair and water damage remediation, subject to deductible and limits.
- Excluded: damage stemming from prolonged vacancy, failure to maintain heat, or known freezing risks.
- Mitigation duty: insured must act promptly to limit damage; failure can reduce or void benefits.
How to Document Damage for an Insurance Claim
When pipes freeze or burst, the homeowner should photograph all visible damage from multiple angles to establish condition and scope.
They should keep receipts and contractor estimates to document expenses and repair plans.
A clear timeline and records of communications with insurers and service providers will support the claim.
Photograph All Visible Damage
Begin by photographing every visible area affected by the freeze, capturing wide-angle shots to show context and close-ups for detail.
The observer should methodically record damaged pipes, wet ceilings, warped flooring, and any secondary effects like mold or staining.
Timestamped images and multiple angles strengthen claims.
Maintain a clear sequence: overall room, specific feature, and close detail of failure points.
Make certain good lighting and scale references such as a ruler.
- Capture context: room and appliance relationships.
- Detail failure: cracks, ruptures, corrosion, moisture boundaries.
- Document progression: before/after repairs or worsening conditions.
Keep Receipts And Estimates
A claimant’s careful collection of receipts, invoices, and repair estimates creates the documentary backbone for an insurance claim, proving both the extent of loss and the costs to remediate it.
All receipts for emergency supplies, temporary repairs, materials, and contractor invoices should be preserved. Obtain written, itemized estimates from licensed plumbers and restorers showing labor, parts, and scope. Include dated proof of payment or credit card statements linked to expenses.
Organize documents chronologically and label them with brief descriptions of each item. Copies should be stored digitally and physically to guarantee accessibility during claim review and settlement.
Record Timeline And Communications
After discovering damage, the claimant should create a clear, chronological timeline that records dates, times, actions taken, and communications related to the loss.
A concise timeline supports credibility and streamlines claim processing.
Include who was contacted, when, and what was said or promised; note repair steps, interim mitigation, and inspection dates.
Preserve originals and back up digital copies.
Time-stamped photos and videos linked to entries strengthen the record.
Provide copies to the insurer and retain originals.
- Contact log: names, numbers, call outcomes, emails saved
- Repair/mitigation record: receipts, contractor notes, photos
- Inspection/documentation: adjuster reports, timestamps
Seasonal Maintenance Checklist to Prevent Frozen Pipes
Before the first deep freeze, homeowners should complete a focused seasonal maintenance checklist to reduce the risk of frozen pipes.
Inspect exposed and indoor plumbing for leaks, insulation gaps, and pipe routing; add or replace foam insulation on vulnerable sections.
Drain and shut off exterior faucets, remove hoses, and winterize irrigation systems.
Test and service heating sources, ensuring consistent indoor temperatures and functioning thermostats.
Seal gaps around foundation, vents, and crawlspaces to limit cold drafts.
Label shutoff valves and verify access.
Document completed tasks and schedule professional inspections for complex systems before prolonged cold spells arrive.
Typical Repair Costs After Burst Frozen Pipes (Cost vs. Benefit)
Preventive maintenance reduces the likelihood of pipe bursts, but when freezing damage occurs homeowners face a range of repair costs that are important to understand when weighing prevention expenses against potential losses.
Repair bills vary by extent: a single burst pipe and localized repair might cost a few hundred dollars, widespread plumbing replacement runs into thousands, and water damage remediation with drying and mold prevention substantially increases totals. Insurance can offset some expenses but often requires deductibles and proof of negligence absence.
- Immediate plumbing repair: $200–$1,500
- Full line replacement: $1,500–$6,000+
- Water damage/mold remediation: $1,000–$10,000+
Best DIY Fixes for Minor Pipe Freezes
Many simple pipe freeze issues can be resolved with basic tools and caution, letting homeowners address frozen sections quickly without waiting for a plumber.
Identify the frozen area by feeling for cold spots and checking for no-flow taps.
Apply gentle, consistent heat: use a hair dryer, electric heating pad, or hot towels wrapped around the pipe, starting nearest the faucet and moving toward the freeze to allow melting flow.
Open the faucet to relieve pressure and monitor for leaks.
Insulate exposed pipes afterward with foam sleeves or heat tape.
If thawing fails within 30–60 minutes or damage appears, contact a professional.
Common Mistakes That Make Freezing Worse
After attempting DIY thawing, homeowners can unintentionally worsen a freeze with a few common mistakes. Incorrect techniques, like using open flames, create fire hazards and uneven heating that can crack pipes.
Applying heat only to exposed sections ignores hidden frozen pockets and can increase pressure elsewhere. Prematurely turning water back on before full thawing risks burst fittings and sudden leaks.
- Using open flames or high heat sources
- Heating only visible pipe segments while neglecting insulated or buried runs
- Restoring full water pressure before confirming complete thaw and leak-free joints
Adapting Your Freeze-Prevention Strategy by Climate and Geography
Across different climates and landscapes, effective freeze-prevention must be tailored to local temperatures, snowfall, wind patterns, and soil conditions; what works in a coastal, temperate region will often be inadequate in high-altitude or continental zones.
Strategies vary: in mild maritime areas, minimal insulation and sealing gaps suffice; in snowy, windy regions, windproofing, deeper burying of outdoor lines, and heavier insulation are needed.
Permafrost or rocky soils require specialized routing and flexible piping.
Urban heat islands may reduce risk, while rural exposure increases it.
Local building codes, utility practices, and historical weather data should guide chosen measures.
How to Prepare for an Extreme Cold Weather Watch or Warning
When an extreme cold weather watch or warning is issued, homeowners and facility managers should act quickly to protect pipes, water supplies, and heating systems. Inspect vulnerable plumbing paths, open cabinet doors to circulate warm air, and set thermostats to maintain steady temperatures day and night.
Drain or isolate seldom-used exterior lines and know shutoff locations to limit damage if freezing occurs. Monitor local forecasts and communicate plans with occupants or maintenance staff. Prepare temporary heat sources for small, enclosed spaces and test backup power for sump pumps or heating controls.
- Inspect and open cabinets.
- Isolate exterior lines.
- Verify shutoff and backup power.
Tools and Supplies to Keep on Hand for Winter Plumbing
A small, well-chosen kit of tools and supplies can greatly reduce damage and downtime from frozen or burst pipes.
Include a reliable pipe wrench, adjustable pliers, and a compact hand auger; insulated tape and heat tape for targeted warming; a thermostatic portable heater and a hair dryer for thawing; pipe insulation sleeves and foam wrap; a moisture-absorbing dehumidifier or desiccant packs; hose bib covers and faucet insulation kits; a quality flashlight, extra batteries, and waterproof gloves; plumber’s epoxy, pipe repair clamps, and a spare length of pipe with couplings for emergency fixes.
Keep items together, labeled, and accessible.
How to Build a Simple Home Plan to Avoid Future Frozen Pipes
Having a compact winter plumbing kit is only one part of preparedness; developing a simple home plan documents regular checks, preventive upgrades, and emergency steps so frozen pipes are far less likely.
The plan lists vulnerable pipe locations, routine inspection timing, and responsible household members.
It specifies insulation targets, recommended thermostat settings, shutoff valve locations, and a contact list for a plumber and utility companies.
A practiced drill for rapid response shortens reaction time during a freeze.
- Inspect: monthly checks, attic, crawlspace, exterior walls.
- Upgrade: add insulation, heat tape, seal drafts.
- Respond: shutoff steps, warm-water thawing, call pros.
Conclusion
When winter tightens its grip, homeowners learn that pipes often freeze not simply at 32°F but when cold, exposure, and insulation gaps combine — a stitch in time saves nine. Knowing material, diameter, and location guides smarter defenses: insulation, heat tape, and drip strategies tailored by climate. Preparedness—tools, a written plan, and swift response steps—turns alarm into action, reducing damage and expense when the mercury falls and a freeze warning arrives.