How to Use Teflon Pipe Tape: Easy Guide for Leak-Free Plumbing
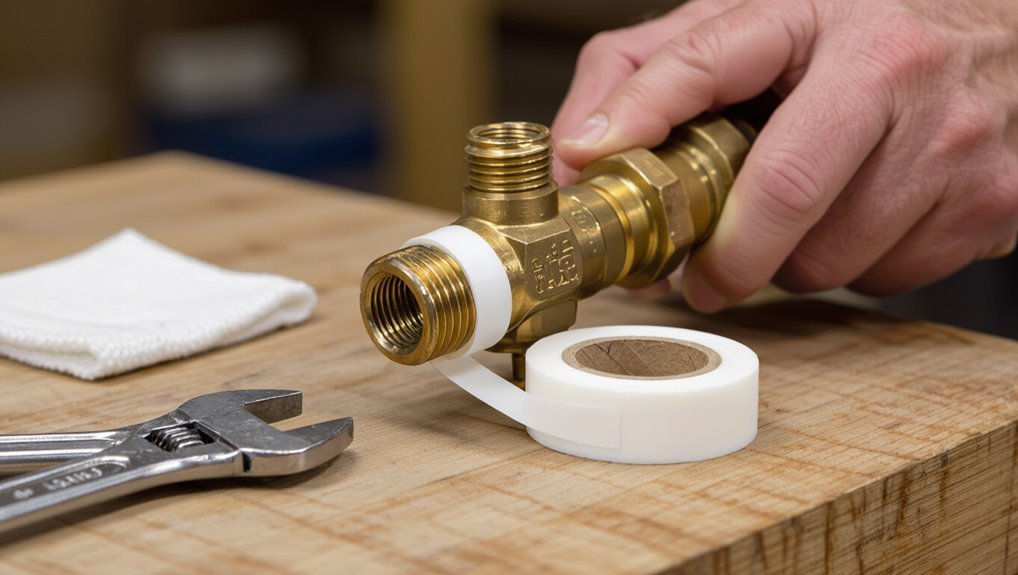
Teflon pipe tape, also known as PTFE tape, is essential for sealing threaded plumbing joints to prevent leaks. To use it effectively, first clean the threads, then anchor the tape on the first thread and wrap it clockwise with three to five snug, half-overlapping turns. This ensures the tape moves with the tightening of the joint. Smooth down the tape’s tail into the threads, taking care to avoid stretching or bunching. If fittings are damaged, replace them for the best results. Following this technique not only prevents leaks but also makes future disassembly easier. Read on for specific tips on gas applications and troubleshooting common issues.
What Is Teflon Pipe Tape and Why Use It?
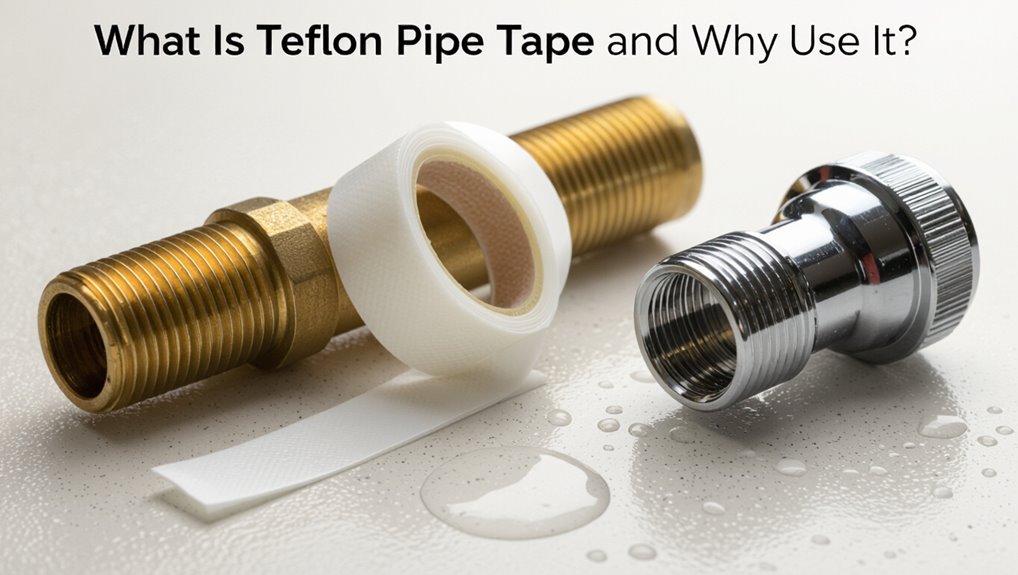
As a thin, flexible film made from polytetrafluoroethylene (PTFE), Teflon pipe tape is wrapped around threaded pipe joints to create a leak-resistant seal and ease assembly.
It fills microscopic gaps between mating threads, reducing the chance of fluid or gas escape while permitting disassembly without damage.
Non-reactive and heat-resistant, the tape suits water, gas, and many chemical lines, though specific formulations target gas or high-temperature use.
Correctly applied, it prevents galling and eases tightening.
It is not an adhesive; effectiveness depends on thread condition, tape quality, and appropriate application for the service and system pressure.
Quick How-To: Wrap a Thread in 60 Seconds
Start by cleaning the male threads with a wire brush or rag to remove dirt, oil, and old sealant so the tape can bond to metal.
Hold the fitting; secure the end of the tape on the first thread, keeping tension.
Wrap clockwise (direction of tightening) so tape doesn’t unravel when screwing on the fitting.
Overlap each pass by about half the tape width, covering threads evenly.
Make three to five full wraps for standard fittings; adjust for thread size.
Tear or cut the tape, press the tail into the threads, and smooth it with a fingertip to seat it neatly before assembly.
Common Mistakes That Still Cause Leaks
Common leaks often stem from simple errors such as wrapping the tape in the wrong direction, using too few layers, or applying tape after threads have been nicked or deformed.
Each of these mistakes compromises the seal and can lead to persistent seepage even when fittings appear tight.
Addressing direction, layer count, and thread condition before wrapping prevents most avoidable leaks.
Wrapping Direction Errors
Wrap the tape in the same direction the pipe threads tighten—otherwise the tape can bunch or unwind when a fitting is turned on. Incorrect wrapping direction causes tape to peel against the thread pitch, creating gaps or loose edges that compromise the seal.
Installers should orient the roll so each wrap follows thread rotation toward the fitting. Smooth the tape into threads without stretching; overlapping should be even and lie flat. For left-handed threads, reverse the direction accordingly.
A quick check: rotate the fitting onto the taped male thread; the tape must not roll under the fitting during engagement.
Insufficient Wrap Layers
Frequently, leaks result not from direction but from too few layers of tape on the male thread: inadequate coverage leaves thread peaks exposed and creates pathways for fluid or gas to escape.
Installers often underestimate necessary thickness; thin wraps compress or shred when fittings tighten.
The recommended approach applies three to six snug, overlapping turns, covering threads from end to start while avoiding excess overhang that interferes with sealing faces.
Inspect coverage visually and feel for continuity; gaps or ragged edges indicate rewrap.
For high-pressure or coarse threads, increase layers.
Proper layer count balances malleability and fullness to form a reliable, conforming seal.
Fitting Damage Before Wrap
Inspect fittings for damage before applying tape; nicks, burrs, flattened or cross-threaded peaks prevent tape from seating and will compromise any seal. The installer should clean and file imperfections or replace the fitting. Tape cannot bridge deformities; doing so leads to leaks despite correct wrapping. Proper inspection and minor repairs assure threads engage fully and the tape forms an even, continuous layer. If threads show wear or mismatches, choose replacement. Below is a brief checklist to reinforce inspection steps and common findings.
| Step | Action | Outcome |
|---|---|---|
| 1 | Visual inspect | Identify nicks |
| 2 | Run finger | Detect burrs |
| 3 | Use file | Remove flaws |
| 4 | Test fit | Check engagement |
| 5 | Replace if needed | Assure sealability |
When to Use Teflon Tape vs. Sealants or Pipe Dope
The choice between Teflon tape and liquid sealants or pipe dope depends on the thread type, the service (water, gas, or chemicals), and the need for future disassembly.
Teflon tape is preferred for most metal and plastic threaded fittings where a clean, dry application and easy removal are desirable.
Liquid sealants or pipe dope are better for tapered threads under high pressure, porous materials, or when a thicker, gap-filling bond is required.
When To Use Tape
When joining threaded plumbing fittings, deciding between Teflon (PTFE) tape, liquid pipe sealants, or pipe dope depends on the thread type, the medium being conveyed, and the required resistance to pressure and chemicals.
Teflon tape suits metal tapered threads (NPT) where mechanical sealing and minor thread lubrication are needed.
It works well on water, air, and natural gas lines when applied correctly and overlapped without covering the first thread.
Use tape for quick repairs, tight spaces, and when disassembly may be required.
Avoid using tape on compression fittings, flare fittings, or where a gap-filling compound is necessary.
When To Use Sealants
How should one choose between Teflon tape, liquid sealants, and pipe dope for threaded connections? When selecting a sealant, consider pressure, substance compatibility, and disassembly needs. Each option offers trade-offs: tape is clean and good for general plumbing; liquid sealants fill gaps and suit irregular threads; pipe dope provides durable, reusable joints and resists vibration; some sealants are formulated for gas or chemical service.
Match the product to the application, follow manufacturer instructions, and avoid combining incompatible materials. Proper thread preparation and correct application technique matter more than preference, ensuring leak-free, safe connections.
- Match to application
- Check compatibility
- Consider disassembly
- Follow instructions
How Teflon Tape Prevents Leaks (Simple Physics)
Seals form by filling microscopic gaps between threaded metal surfaces. Teflon tape acts as a conforming layer that increases contact area, blocks fluid paths, and eases torqueing. Its low friction lets threads tighten fully without binding; its deformability closes unevenness. The thin polymer resists chemical attack and maintains integrity under pressure, while its hydrophobic nature repels water and reduces wicking. Properly applied, tape prevents leak initiation by interrupting capillary channels and distributing load across threads, turning a metal-to-metal seal into a mixed polymer-metal interface that maintains compression and resists creep.
| Property | Effect |
|---|---|
| Conformity | Fills voids |
| Low friction | Easier tightening |
| Chemical resistance | Durable seal |
| Hydrophobic | Reduces wicking |
Types of Teflon Tape and Which to Pick
Different Teflon tapes vary in thickness and density, which affects how well they seal threaded connections and how many wraps are needed.
They are also color-coded to indicate designed uses—white for general plumbing, yellow for gas, pink for water lines, etc.
Selecting the right tape requires matching thickness/density and color coding to the specific application.
Tape Thickness And Density
For threaded pipe joints, tape thickness and density determine how well the tape fills gaps, resists extrusion, and tolerates pressure and temperature.
Thicker, denser PTFE provides better sealing on coarse threads and high-pressure systems, while thin, low-density tape suits fine threads and fittings where flexibility matters.
Selection balances seal reliability against ease of application; denser tapes may require more effort to wrap but reduce leakage risk.
Consider thread condition, required torque, and operating environment when choosing thickness and density.
Properly matched tape improves longevity and reduces rework.
- Match thickness to thread coarseness.
- Prefer density for high pressure.
- Use thin tape for tight fittings.
- Account for temperature limits.
Color-Coded Uses
After selecting tape thickness and density for a given thread and pressure, attention turns to color-coded PTFE tapes that indicate specific formulations and purpose-built uses.
White tape suits general plumbing and household water lines; it is thin, flexible, and compatible with most fittings.
Yellow tape is thicker and formulated for gas lines, offering improved sealing and durability under pressure.
Pink tape targets water main and larger-diameter fittings with enhanced density.
Green tape contains a lubricant or additives for potable water systems and some HVAC applications.
Choosing by color speeds correct selection, reduces failure risk, and guarantees compliance with codes and manufacturer recommendations.
How Tape Thickness and Density Change Sealing Performance
When applied to threaded joints, tape thickness and density directly affect how well the material fills gaps and resists compression under torque. Thicker tape can fill larger thread imperfections but may bunch or prevent full engagement; denser tape resists extrusion and maintains seal under vibration. Selection balances conformability and structural integrity for joint size and pressure. Proper wrapping technique complements tape properties to avoid over- or under-application.
- Thin, low-density: conforms easily, suited for fine threads and tight fits.
- Thick, low-density: fills gaps but risks overbuild.
- Thin, high-density: durable but less conforming.
- Thick, high-density: robust seal for coarse threads.
Color Codes Explained: White, Yellow, Pink, and More
Typically, Teflon tape comes in distinct colors that indicate purposeful uses and thread compatibility, allowing quick selection on the job.
White is general-purpose, suitable for most household water lines and light-duty threaded fittings.
Yellow indicates gas-rated tape, denser and formulated for fuel and natural gas connections.
Pink denotes thicker tape for water mains and larger fittings, offering improved gap filling on coarse threads.
Other colors—green or gray—signal specialty formulations for oxygen lines or chemical resistance.
Color coding aids correct material choice, reduces cross-use errors, and streamlines inventory for technicians handling varied piping systems.
How Hot/Pressurized Can Teflon Tape Go?
In many plumbing and industrial applications, Teflon (PTFE) tape is chosen for its chemical inertness and low-friction sealing, but its temperature and pressure limits depend on tape grade and application.
Commercial white tape typically withstands continuous temperatures up to about 260°C (500°F) and pressures common in household plumbing (up to several hundred psi), while specialized grades (thicker, filled or high-density) extend pressure and temperature capacity.
Users should match tape type to system service conditions and follow manufacturer ratings.
Overuse or incorrect application can reduce performance; tape is a sealing aid, not a structural gasket.
- Standard white PTFE: ~260°C, household pressures
- Yellow/pipe-grade thicker: higher pressure tolerance
- Filled or high-density PTFE: improved temperature/pressure limits
- Application and manufacturer ratings dictate safe use
Which Pipe Materials Are Compatible With Teflon Tape?
Many common plumbing and industrial pipe materials are compatible with PTFE (Teflon) tape because the tape is chemically inert and resists degradation by most fluids.
It works well on metallic threaded connections such as brass, copper, steel, stainless steel, and iron, providing a durable seal on tapered threads.
PTFE tape also suits many plastic threads including PVC and CPVC when applied correctly, though care with torque is advised to avoid cracking.
Applications include water, gas (appropriate rated tape), and hydraulic systems where manufacturer guidelines permit.
Compatibility with mixed-material joints depends on thread type and assembly practices.
When Not to Use Teflon Tape (And What to Use Instead)
Outside of threaded metal and compatible plastic fittings, PTFE tape is ill-suited for several common sealing situations and can even cause failures if misapplied. Alternatives offer appropriate sealing, strength, or compatibility for different joints.
- Compression fittings: use the correct ferrule and hand-tighten per manufacturer; tape can prevent proper seating.
- Flared fittings: avoid tape; rely on metal-to-metal flare contact and correct torque.
- Water heater unions and appliance connectors: use approved rubber washers or pipe dope specified for potable water to prevent contamination and leaks.
- Large-diameter or flanged connections: use gasket materials and proper bolt tightening patterns instead of tape.
Tools and Supplies You Need Before Starting
Before starting, a concise checklist of required tools—adjustable wrench, pipe cutter or hacksaw, cleaning brush or rag, and thread sealant tape—is presented.
The section also specifies recommended tape types, such as standard PTFE for water lines and thicker or gas-rated variants for fuel and high-pressure applications.
Readers are advised to match the tape grade to the pipe material and service conditions.
Required Tools Checklist
What tools and materials are essential for a reliable Teflon tape seal? A concise checklist helps guarantee proper preparation and application. Items should enable cleaning, measuring, wrapping, and tightening without damaging threads or fittings.
- Clean rag and small wire brush for removing debris and old sealant.
- Precision wrench or adjustable wrench sized to the fitting to avoid rounding corners.
- Tape measure or calipers to confirm thread length and fitting dimensions.
- Quality Teflon tape (plumber’s tape) kept dry and within reach for controlled application and consistent wrap tension.
Recommended Tape Types
When selecting Teflon tape, match the tape’s thickness, density, and purpose to the application: standard thin tape (3–4 mil) suits water and light-duty fittings, thicker tape (5–6 mil or “gas-rated”) is preferred for gas lines and high-pressure connections, and PTFE tapes labeled for chemical resistance or thread sealing paste compatibility are necessary for aggressive fluids or specialized fittings.
Recommended types include general-purpose white tape for plumbing, yellow gas-rated tape for natural gas and propane, pink medium-density tape for higher-pressure potable water, and specialty tapes (chevron, high-density, or PTFE with lubricant) for hydraulic, chemical, or tapered threads.
How to Inspect Threads Before Applying Tape
To guarantee a reliable seal, inspect the male and female threads closely for nicks, burrs, corrosion, or old tape residue that could prevent proper mating.
The inspector notes thread pitch, direction, and completeness; damaged or flattened crests indicate replacement.
Visual checks under good light reveal corrosion pits and deformities; gentle tactile runs with a finger detect burrs.
Avoid forcing parts together during inspection to prevent worsening defects.
- Confirm thread type and direction match.
- Look for missing or deformed thread sections.
- Check for contaminants that block engagement.
- Note any corrosion or cracks needing attention.
How to Clean and Prepare Male and Female Threads
Before applying Teflon tape, the threads should be cleaned thoroughly to remove old sealant, grease, and debris.
Both male and female threads must be inspected closely and any burrs or nicks removed with a file or wire brush.
Proper cleaning and deburring guarantee a tight seal and prevent cross-threading during assembly.
Clean Threads Thoroughly
Properly cleaned threads guarantee a reliable seal and prevent leaks or tape failures. The task requires removing dirt, oil, and old sealant from both male and female threads so Teflon tape can seat uniformly. Use a nylon brush, mild solvent, and a clean rag; flush with water and dry thoroughly.
Avoid abrasive tools that alter thread profile.
- Brush away debris with a nylon or brass brush.
- Apply solvent or degreaser; wipe with a lint-free cloth.
- Rinse and dry threads completely to prevent contamination.
- Verify threads are visibly clean before applying tape.
Inspect And Deburr
Inspect and deburr both male and female threads to remove burrs, sharp edges, and nicks that can prevent a tight seal or damage tape during installation.
Using a small wire brush, hone, or fine file, work gently along the thread profile to smooth raised material without altering thread geometry.
Remove metal shavings and particles with compressed air or a clean cloth.
For plastic fittings, use a sharp utility knife to trim flash carefully.
Confirm threads align and rotate freely; damaged threads should be replaced.
Proper inspection and light deburring guarantee Teflon tape seats evenly and enhances leak-free connections.
How Many Wraps of Teflon Tape to Use by Pipe Size
Typically, the number of Teflon tape wraps varies with pipe diameter because larger threads require more tape to fill gaps and maintain a seal.
Guidance aligns wraps to common pipe sizes: smaller fittings need fewer turns, larger sizes need more. Apply consistent, even layers without bunching.
Excessive wraps can bind threads; too few risk leaks.
Consider tape thickness and thread pitch when adjusting wraps.
- 1/8″–1/4″: two to three wraps for fine threads.
- 3/8″–1/2″: three to four wraps for standard household fittings.
- 3/4″–1″: four to five wraps for larger plumbing.
- 1¼” and above: five to seven wraps, adjust as needed.
Which Direction to Wrap Teflon Tape and Why?
After determining the appropriate number of wraps for a given pipe size, attention turns to the wrapping direction, because it affects how the tape behaves as threads are engaged.
The tape should be applied so its leading edge overlaps in the same rotation direction that the male thread will turn into the female fitting. Wrapping against the thread rotation risks unwrapping during assembly, reducing seal integrity.
Consistent, snug layers follow thread contours and compress under torque, filling gaps and preventing leaks. Correct orientation complements thread engagement, maintains tape placement, and guarantees reliable sealing without bunching or unraveling during tightening.
Step-by-Step: Wrapping Pipe Threads Correctly
Before applying Teflon tape, the installer should clean the threads to remove oil, debris, and old tape for a tight seal.
The tape is then wrapped clockwise around the male threads so it follows the tightening direction and lies flat.
Only two to three snug layers are recommended to avoid overapplication that can prevent proper thread engagement.
Clean Threads First
For effective sealing, the male and female threads must be free of old tape, sealant, dirt, and corrosion before wrapping. The technician inspects threads for debris and damaged peaks, then selects appropriate tools: a wire brush, rag, solvent, and a small pick. Cleaning restores proper thread engagement and prevents uneven tape lay.
After loosening residues, drying is essential to avoid trapping moisture beneath tape. Minor burrs are gently removed; deep gouges warrant part replacement. Clean threads reduce cross-threading risk and make certain tape adheres smoothly, producing a reliable mechanical seal when assembly follows.
- Inspect for old tape or sealant.
- Brush away corrosion.
- Solvent-wipe and dry.
- Remove burrs or replace damaged parts.
Wrap Clockwise Direction
With threads cleaned and inspected, the technician orients the male fitting so its threaded end faces away and begins wrapping the tape clockwise—matching the direction the fitting will turn when tightened—so the tape does not unwind during assembly. The tape is stretched lightly and overlapped about half its width, covering threads from end to base. Wrapping follows thread pitch without bridging gaps. Excess tape is torn cleanly and pressed into the threads. Proper clockwise wrapping guarantees the sealant stays secure during mating and aids consistent torque and alignment when completing the joint.
| Step | Action | Tip |
|---|---|---|
| 1 | Orient fitting | Face threads away |
| 2 | Wrap clockwise | Match tightening |
| 3 | Overlap | Half-width |
Don’t Overapply Tape
A few wraps are usually sufficient to seal most pipe threads, so technicians should resist the urge to pile on extra tape.
Excess tape can bunch, create gaps, and prevent proper metal-to-metal contact, compromising threads and fittings.
Proper technique balances coverage and thickness.
- Count wraps: typically 3–5 thin, even turns around the male thread.
- Tension control: keep light tension to lay tape flat without stretching.
- End placement: finish near the end of the thread so tape stays contained when threading in.
- Inspect fit: tighten slowly and check for leaks; remove and redo if binding or misalignment occurs.
How to Overlap and Tension Tape for a Tight Seal
Begin wrapping the tape by holding the end against the male threads and pulling it taut while overlapping each wrap by about half the tape’s width; this guarantees consistent coverage and creates multiple sealing layers.
Maintain light, even tension to prevent stretching or tearing; tape should conform to thread contours without bunching.
Wrap in the direction of thread engagement so the tape does not unravel during assembly.
For most pipes, three to five snug wraps provide an effective seal; thicker or damaged threads may require an extra wrap.
After wrapping, smooth the tape with a fingertip to seat edges and remove air pockets before threading connections.
How to Handle Tape at Threaded Elbows and Fittings
When applying Teflon tape to threaded elbows and fittings, the tape should be wrapped in the same direction as the thread turn and begun one or two threads back from the end.
Care should be taken to cover the inside threads adequately without bunching, while avoiding excess overlap at sharp corners to prevent bulk that can interfere with seating.
These simple steps guarantee a clean seal and proper fit when assembling angled fittings.
Wrap Direction And Start
Facing the threaded end, the installer should wrap Teflon tape clockwise around the male threads so that the tape tightens as the fitting is turned into the female connection. The wrap should begin at the thread start, overlap evenly, and avoid covering the pipe shoulder. For elbows and close-clearance fittings use shorter strips and tension the tape to conform to thread roots without bunching.
- Begin at the first reachable thread, holding tape under slight tension.
- Overlap each pass by about half the tape width for consistent sealing.
- Make two to three full turns on standard threads; more for coarse threads.
- Smooth the tape toward the fitting before assembly.
Coverage For Inside Threads
For threaded elbows and fittings with internal threads, the installer should make sure tape covers the male threads up to—but not over—the pipe shoulder so the sealant reaches the joint without intruding into the flow path.
The technician applies tape evenly along the thread length, maintaining tension to follow thread contour and avoid gaps.
For tapered threads, overlap slightly more toward the larger-diameter end to maintain compression as fittings tighten.
Smooth edges with fingertips to seat tape in thread roots, then inspect for wrinkles or loose tails.
Proper coverage guarantees uniform sealing pressure and reduces chance of leaks while preserving bore clearance.
Avoid Overlap At Corners
After ensuring tape is seated to the shoulder and thread roots, attention shifts to corners and flanges where fittings change direction; overlapping tape at these bends can bunch, tear, or intrude into the flow path.
- Wrap straight into the elbow, keeping turns aligned with the thread helix to prevent folds.
- Stop short of the outer corner by one to two thread depths so tape won’t protrude into the joint.
- Smooth tape along the thread with a finger or tool to seat edges and remove excess before assembly.
- Inspect post-assembly for gaps or bulges and rewrap if sealing is compromised.
Using Teflon Tape on Tapered (NPT) vs. Straight Threads
When connecting fittings, it’s important to distinguish between tapered (NPT) threads, which seal by wedging together, and straight threads, which rely on a gasket or O-ring for sealing; Teflon tape is appropriate for tapered threads to fill minor gaps and lubricate engagement, aiding a pressure-tight metal-to-metal seal.
For straight threads, tape should not replace the intended gasket or O-ring and is generally unnecessary; wrapping can prevent thread galling but may interfere with proper gasket seating.
Apply tape only to external tapered threads in the direction of tightening, using a few wraps and avoiding buildup that can distort threads.
How to Apply Tape on Fittings With Small Diameters
Often overlooked, applying Teflon tape to small-diameter fittings requires a steady hand and a few adjustments to technique to avoid clogging threads or blocking flow.
- Cut a shorter strip (6–8 inches) to control bulk and prevent overlap that could intrude into the bore.
- Hold the fitting with one hand and stretch the tape gently while wrapping clockwise to follow thread direction, keeping tension light.
- Wrap only 2–3 turns, covering threads without extending past the end; trim any excess flush with the shoulder.
- Press the tape into the threads with a fingertip to seat it before assembly, ensuring a smooth finish.
How to Seal Gas Lines Safely With Yellow Gas-Rated Tape
When working with gas lines, only yellow gas-rated Teflon tape should be used to guarantee compatibility and proper sealing.
The tape must be wrapped in the direction of the threads with the correct number of layers to avoid leaks or interference with fittings.
Attention to both tape selection and wrapping technique is essential for a safe, code-compliant joint.
Proper Tape Selection
In choosing tape for gas fittings, yellow gas-rated PTFE tape should be selected for its thicker, denser construction and manufacturer-rated compatibility with natural gas and propane. Proper tape selection minimizes leakage risk and guarantees code compliance.
Consider material, density, width, and certification when specifying tape for fuel systems.
- Material: confirm PTFE base formulated for gas service, resisting hydrocarbons and aging.
- Density: prefer thicker, heavier grades that fill threads without shredding.
- Width: select tape width matching thread size for complete coverage.
- Certification: verify CSA, UL, or local approvals and manufacturer installation guidance.
Correct Wrapping Technique
Having chosen the correct yellow gas-rated PTFE tape, attention turns to the wrapping technique that creates a reliable seal on threaded gas fittings.
The installer cleans threads, inspects for damage, and holds the tape taut.
Wrap clockwise around male threads so tape advances with the fitting during assembly, starting at the second thread to avoid excess at the face.
Apply two to three full wraps, overlapping by half the tape width for even coverage.
Smooth the tape into grooves without bunching.
Assemble fittings by hand, then tighten to specified torque.
Test connections with approved leak detection solution before restoring service.
How to Use Teflon Tape on Water Supply Lines
A supply line connection requires proper sealing to prevent leaks and guarantee reliable water flow; for threaded fittings, Teflon (PTFE) tape is a fast, effective choice.
The installer inspects threads, cleans debris, and selects tape rated for potable water. Wrap clockwise from the end, overlapping by about half the tape width for three to four turns, avoiding excess that could shred or contaminate the line. Tighten fittings to manufacturer torque, testing under low pressure first. If leaks appear, disassemble, remove old tape, and rewrap.
- Inspect and clean threads.
- Use potable-water PTFE tape.
- Wrap clockwise, 3–4 turns.
- Test and retighten as needed.
Sealing Compressed-Air Fittings With PTFE Tape
Sealing compressed-air fittings with PTFE tape follows the same basic steps as for water lines but uses tape and techniques suited to pressurized gas.
The technician cleans male threads, inspects fittings for damage, and selects thicker, gas-rated PTFE tape (often 3–5 mil) or tape labeled for pneumatic use.
Wrap tape clockwise, overlapping by about 50% and covering threads without obstructing the first thread.
Three to five wraps are typical for standard fittings; heavier-duty or high-pressure systems may require more.
Reassemble fittings hand-tight, then wrench-tighten per manufacturer torque.
Test with soapy water or leak detector and rewrap if any bubbles appear.
Sealing Shower Heads and Bathroom Fixtures With Tape
When installing or replacing shower heads and bathroom fixtures, technicians commonly use PTFE (Teflon) tape to guarantee a watertight seal on threaded connections. The tape prevents leaks, eases assembly, and resists degradation from hot water and cleaning chemicals.
Wrapping should cover male threads clockwise, two to three turns, avoiding buildup that prevents proper seating. After wrapping, hand-tighten then wrench to specification; overtightening can crack fittings.
Inspect joints for leaks after first use and retape if necessary. Use plumber’s grease sparingly on rubber washers, not on threaded tape seals.
- Clean threads before taping.
- Wrap clockwise, 2–3 turns.
- Tighten to spec carefully.
- Test and retape if leaking.
Sealing Outdoor Plumbing and Hose Fittings
Outdoor hose and plumbing connections demand durable thread sealing to withstand weather, pressure changes, and seasonal use.
Apply Teflon tape to clean, dry male threads, wrapping clockwise three to five turns for standard fittings, ensuring smooth, even coverage without overlapping the end.
For garden hoses and spigots, use thicker tape or specialized PTFE for hose threads to improve compression.
Inspect fittings for corrosion or damaged threads before sealing.
Tighten joints securely but avoid over-torquing.
Periodically check outdoor connections after freeze/thaw cycles and replace tape when leaks or deterioration appear to maintain reliable, weather-resistant seals.
How to Combine Teflon Tape With Pipe Dope Correctly
Combining Teflon tape with pipe dope can enhance thread sealing when done correctly, creating both a mechanical barrier and a lubricated, gap-filling layer that resists leaks.
The practitioner first wraps tape clockwise around clean, dry male threads, covering threads without extending past the end.
A thin, even coat of compatible pipe dope is then brushed onto the taped threads; excess is avoided to prevent squeezing into the line.
Assemble and tighten to recommended torque.
Allow curing time per dope instructions before pressurizing.
- Clean threads
- Wrap tape clockwise
- Apply compatible dope thinly
- Tighten and cure before use
How to Remove Old Teflon Tape Without Damaging Threads
Before reapplying sealant, the old Teflon tape and any residue should be carefully inspected to assess how firmly it adheres to the threads.
A gentle approach using fingers, a plastic scraper, or a soft-bristled brush will remove most tape without nicking or cross-threading.
Stubborn bits can be loosened with a mild solvent applied sparingly, taking care not to corrode the fitting.
Inspect Threads Closely
When preparing to remove old Teflon tape, the installer inspects the threads closely to identify remaining tape, adhesive residue, nicks, or corrosion that could compromise a seal; this assessment determines whether gentle scraping, a soft-bristle brush, or solvent softening is appropriate to clear the surface without damaging the thread profile.
A focused inspection guides method choice, documents damage, and sets cleaning safety precautions.
Proper lighting and magnification reveal subtle defects.
Record findings for repair or replacement decisions.
Follow thread direction when testing fit to avoid cross-threading.
- Check for tape fragments and stuck adhesive.
- Look for gouges, deformations, or burrs.
- Note corrosion or pitting depth.
- Verify mating parts for matching damage.
Gently Remove Residue
Begin by loosening and peeling away loose tape fragments by hand, working with the thread direction to prevent cross-thread damage; use gentle scraping with a plastic pick or a fingernail for stubborn pieces.
Remaining residue is dissolved with a cloth dampened with isopropyl alcohol or acetone, applied sparingly and allowed to soften adhesive briefly.
Avoid steel tools or harsh abrasives that can nick threads.
For interior fittings, compressed air or a soft-bristled brush clears loosened particles.
After cleaning, inspect threads under good light and wipe dry.
Proper, gentle removal preserves thread integrity and guarantees a secure, leak-free reseal with fresh tape.
How to Reapply Tape After Repeated Disassembly
After repeated disassembly, inspect the threads for damage, corrosion, or old tape residue and clean them thoroughly with a wire brush and solvent to guarantee a smooth sealing surface. Once dry, the technician evaluates thread integrity; replace fittings if threads are stripped or deformed. Reapply fresh PTFE tape starting at the first full thread, wrap clockwise to match tightening direction, and overlap 50% on each turn. Make certain three to five snug wraps for standard fittings; increase wraps for larger or damaged threads.
Before assembly, hand-start the joint to prevent cross-threading, then tighten to specification to secure the seal.
- Clean and inspect
- Replace if damaged
- Wrap clockwise, 3–5 turns
- Hand-start, torque to spec
How to Spot a Poor Tape Application Quickly
Once the joint is reassembled, a quick visual and tactile check will reveal most poor tape applications. The inspector notes uneven edges, exposed threads, or bulging tape. Lightly run a finger around the coupling: catches, gaps, or loose ends indicate rewrapping is needed. Look for tape that overlaps inconsistently or bunches at the thread start. Clean, uniform layers sit flush without wrinkles. Avoid testing under pressure here; this is only a pre-press check.
| Visual cue | Sensation |
|---|---|
| Exposed threads | Rough snag |
| Wrinkles | Bump under finger |
| Loose tail | Flaps when tapped |
| Uneven overlap | Audible snap when stretched |
Troubleshooting Leaks After Wrapping Tape
When a joint still leaks after tape is applied, first confirm the tape was wrapped in the same direction the fitting turns to tighten.
Next inspect the threads for damage, dirt, or old sealant that could prevent a proper seal.
If threads are sound, remove the tape and reapply correctly, using the recommended overlap and number of wraps.
Check Tape Wrap Direction
Frequently, leaks persist because the tape was wrapped against the thread direction; the correct wrap follows the thread’s tightening rotation so the tape compresses as the fitting is screwed in.
Proper orientation prevents unravelling and guarantees tape fills thread valleys.
To verify, hold the fitting and rotate the tape-wrapped pipe as if tightening; tape should tighten, not loosen.
If incorrect, remove and rewrap.
- Identify thread rotation (usually clockwise to tighten).
- Anchor tape at pipe end and overlap by half-width.
- Wrap with light, even tension in tightening direction.
- Smooth edges and trim excess before assembly.
Inspect Thread Condition
After confirming the tape was wrapped in the correct tightening direction, the next step is to inspect the threads themselves for damage or contamination that can undermine a seal. The inspector looks for burrs, flattened crests, cross-threading, corrosion, and debris. Any irregularity prevents uniform tape contact and proper mating. Clean threads gently, remove corrosion if possible, and decide if repair or replacement is needed for severely damaged fittings. The following table summarizes common thread conditions and their impact to aid assessment:
| Condition | Likely Impact |
|---|---|
| Burrs | Prevents tight seal |
| Flattened crests | Reduces engagement |
| Cross-threading | Misalignment, leaks |
| Corrosion | Pitting, poor fit |
| Debris | Blocks mating, gaps |
Reapply With Proper Technique
In troubleshooting persistent leaks, the technician must strip the old tape and evaluate both threads and sealant before reapplying; residue, stretched or misaligned wrap, and embedded debris are common causes of failure. Proper reapplication restores sealing integrity: clean threads with a brush, dry completely, align tape at the thread start, and maintain tension while wrapping.
Apply three to five smooth wraps in the thread direction, covering threads without overhang. Reassemble fittings hand-tight plus wrench as recommended, then test under pressure, watching for seepage. If leaking persists, inspect thread damage or consider alternative sealants.
- Clean threads thoroughly
- Start at thread root
- Wrap with tension, directionally
- Test under pressure
How Tight Should You Torque Fittings With Tape?
How tight should fittings be when wrapped with Teflon tape? The installer should hand‑tighten, then add a measured wrench turn—commonly 1 to 3 turns—until snug and leak-free. Excessive torque risks stripping threads or crushing tape; insufficient torque can leak. For metal threads, aim for firm resistance without distortion; for plastic, err on the gentler side. Test under pressure and recheck for seepage. If leaks persist, disassemble, inspect tape placement, and reapply correctly.
| Material | Torque approach | Common turns |
|---|---|---|
| Brass | Moderate | 2 |
| Steel | Firm | 2–3 |
| Plastic | Gentle | 1–2 |
When Over-Wrapping Causes Problems and How to Avoid It
Excessive layers of Teflon tape can over-tighten threads, increasing stress on fittings and risking cracks or strips.
Built-up sealant may intrude into the passage, reducing flow or clogging small orifices.
Over-wrapped joints also become difficult to disassemble, complicating future maintenance or repairs.
Too Much Wrap Tightens Threads
Over-wrapping pipe threads with Teflon tape can compress joint seating and distort thread engagement, causing fittings to tighten more than planned and increasing the risk of cross-threading or stripping.
Excess tape changes thread fit, reduces metal-to-metal contact, and can hide misalignment until damage occurs.
Proper technique preserves thread geometry and guarantees predictable torque.
- Count wraps: three to five thin, snug turns for most inch-based threads.
- Apply tension: keep tape flat and smooth to avoid bulking.
- Direction: wrap clockwise from the pipe shoulder so tape lays during assembly.
- Inspect: remove and redo if tape bunches or overlaps unevenly.
Sealant Build-Up Blocks Flow
Why does excess tape sometimes cut off flow? Excess PTFE tape can intrude into the bore at tapered or machined fittings, narrowing the passage and creating turbulence.
Strips compressed into the thread crevices may shear and shed fragments that lodge in valves, screens, or narrow ports.
Performance drops include reduced flow rate, pressure loss, and noisy operation.
To prevent buildup, apply only the recommended 2–3 wraps in the direction of thread engagement, keep tape tight and smooth, and avoid overlapping into the opening.
Inspect and clear any loose tape before final assembly to maintain proper internal diameter and flow.
Hard-to-Disassemble Joints
Apply PTFE tape sparingly and with attention to thread direction, because too many wraps can jam fittings and make future disassembly difficult.
Excess tape compresses into grooves, creating a deformable mass that binds threads and resists loosening.
To prevent hard-to-disassemble joints, follow practical limits and techniques.
- Use 2–3 snug wraps, aligned with thread spiral.
- Avoid overlapping past the pipe shoulder to prevent bunching.
- Inspect and remove old tape before reapplying to guarantee clean engagement.
- Torque fittings to manufacturer specs; overtightening amplifies tape compression and seizing risk.
How to Protect Tape on Exposed Outdoor Threads
When exposed outdoor threads are wrapped with Teflon tape, protecting the seal from sunlight, abrasion, and moisture extends the lifespan and maintains a leak-free joint.
Apply a thin layer of silicone or pipe thread compound over the tape for UV and moisture resistance, avoiding excess that could contaminate systems.
Fit a threaded weather cap or protective boot to shield against physical wear and debris.
Use corrosion-resistant fittings and hose clamps to secure covers.
For buried or concealed runs, route and seal connections inside junction boxes or use protective conduit.
Inspect periodically and replace damaged covers promptly.
How Long Does Teflon Tape Last Once Applied?
Typically, Teflon (PTFE) tape maintains an effective seal for many years under stable, dry, and non-abrasive conditions.
- Lifespan varies with application: indoor plumbing on low-pressure water lines can last decades, while frequent disassembly shortens effectiveness.
- Environmental factors: UV exposure, chemical contact, temperature cycling, and abrasion degrade tape faster; sheltered, moderate environments preserve it longer.
- Performance signs: leaks, loosening fittings, or visible tape deterioration indicate replacement; proactive inspection during maintenance helps avoid failures.
- Best practice: treat tape as part of a joint’s consumable components and replace whenever a joint is opened or when signs of wear appear.
Safety Tips for Using Teflon Tape on Gas and Fuel Lines
Always exercise caution: Teflon (PTFE) tape can be used on some gas and fuel line fittings, but only the correct gas-rated tape and proper technique should be employed to prevent leaks and safety hazards. Inspect fittings for compatibility; use yellow-striped tape specified for gas, not general-purpose white tape.
Wrap threads clockwise with two to three snug turns, avoiding overlap into the pipe bore. Do not use tape on flare, compression, or soft-seal fittings.
After assembly, perform a certified leak test—soap solution or electronic detector—and follow local codes. When in doubt, consult a licensed gas technician for installation or inspection.
Environmental and Health Considerations for PTFE Tape
Because polytetrafluoroethylene (PTFE) tape is chemically inert and durable, its environmental and health impacts stem primarily from production, disposal, and high‑temperature degradation rather than routine use on threaded fittings.
- Manufacturing consumes energy and fluorinated precursors, carrying potential emissions and workplace exposure risks.
- Disposal in landfill or incineration can persist; incineration may release toxic fluorinated compounds if not properly controlled.
- High‑temperature degradation (above recommended limits) can generate fumes hazardous to humans and pets; avoid overheating joints.
- Handling and normal installation present minimal risk; gloves and good ventilation are sensible precautions during cutting and trimming.
Buying Guide: What to Look for in Teflon Tape Brands
When comparing Teflon tape brands, attention should focus on tape thickness and density for proper thread fill and seal integrity.
Temperature and chemical resistance ratings inform suitability for hot water, steam, or aggressive fluids.
Roll size and ease of use, including backing and unwind behavior, affect job efficiency and waste.
Tape Thickness And Density
How thick is the tape needed depends on the joint type and thread condition: thicker, denser PTFE tape fills larger gaps and damaged threads more effectively, while thinner, less dense tape conforms better to fine threads and precision fittings. Selection balances sealing ability with ease of application.
Higher density tapes resist compression and shear, offering durability on coarse threads; low-density tapes wrap smoothly and reduce buildup on fine fittings. Consider tape width relative to thread size to avoid overlap or insufficient coverage. Quality brands specify thickness in mils and density ratings, aiding choice for specific plumbing tasks.
- Match thickness to thread coarseness.
- Prefer denser tape for damaged threads.
- Use thin, low-density tape for precision fittings.
- Check manufacturer mil and density specs.
Temperature And Chemical Resistance
For selecting PTFE tape, temperature and chemical resistance are key specifications that determine suitability for different systems.
The tape’s usable temperature range—often from −200°C to +260°C for standard PTFE—dictates applications in hot water, steam, or cryogenic lines.
Chemical compatibility charts indicate which acids, bases, solvents, or fuels can contact the tape without degradation.
High-temperature or chemically aggressive environments may require thicker, virgin PTFE or specialized formulations.
Verify manufacturer data for continuous and peak temperature limits, swelling or embrittlement with specific chemicals, and any certification for industrial or marine use to guarantee long-term seal integrity.
Roll Size And Ease-Use
In selecting PTFE tape, roll size and ease-of-use directly affect job speed, waste, and the quality of the seal. Consider compact rolls for occasional home repairs and larger rolls for professional use; width should match thread size to avoid overwrap or coverage gaps. Easy-tear formulations save time, while wound-on reels reduce handling frustration. Adhesion and flexibility determine conformity around tapered threads. Choose dispenser designs that fit hand size and workspace. Storage durability prevents contamination. Balance cost against expected consumption to minimize waste. Evaluate brands by user reviews focused on application performance and consistency.
- Match roll width to thread size.
- Prefer easy-tear or dispenser options.
- Select durable, contaminant-resistant packaging.
- Weigh roll length versus job frequency.
How to Read Product Labels and Certifications
Why does the tiny print on a roll of Teflon tape matter?
Labels identify material (PTFE), temperature and pressure limits, and intended purpose—plumbing, gas, or chemical.
Certification marks (ASTM, NSF, UL) signal third-party testing and compliance with safety standards.
Look for compatibility notes: potable water safe, pipe thread types, and any solvent or chemical warnings.
Net thickness and length guide application quantity.
Manufacturer contact and batch codes aid traceability if defects occur.
Clear, legible labeling reduces risk of mismatched tape and improper installation, ensuring the product performs as expected under specified conditions.
Cost vs. Performance: Economy Tape vs. Premium Tape
When comparing economy and premium Teflon tape, buyers should weigh upfront cost against long-term performance and safety margins. The choice hinges on application frequency, pressure ratings, chemical exposure, and warranty expectations.
Economy tape suits occasional, low-pressure tasks; premium tape justifies higher expense for critical, high-pressure, or corrosive systems. Consider lifecycle costs: failures, rework, and liability can outweigh initial savings.
Inspect specifications for thickness, density, and temperature range. Match tape type to system demands rather than price alone.
- Economy: low cost, suitable for light-duty, short-term use.
- Premium: higher cost, engineered for durability and wider ratings.
- Specify by pressure and media compatibility.
- Budget for risk and maintenance.
How to Store Teflon Tape for Long Shelf Life
After selecting the appropriate grade of Teflon tape based on cost and performance, proper storage preserves its sealing properties and prevents waste.
Store rolls in a cool, dry place away from direct sunlight and heat sources to prevent degradation and loss of flexibility.
Keep original packaging or seal rolls in airtight plastic bags to block dust, oils, and moisture.
Avoid compressing rolls or placing heavy objects on them, which can deform the tape and impede unwind.
Label containers with purchase date and grade to rotate stock.
When stored correctly, Teflon tape maintains effectiveness for years, reducing material waste and service interruptions.
Quick-Reference Cheat Sheet for Common Pipe Sizes
Which tape width matches a given pipe size? A concise cheat sheet maps common pipe diameters to recommended PTFE tape widths and wrap counts, aiding quick selection without extra measurement. Typical guidance follows practical trade usage.
- 1/8″–1/4″ pipes: 1/2″ tape, 2–3 wraps.
- 3/8″–1/2″ pipes: 3/4″ tape, 3–5 wraps.
- 3/4″–1″ pipes: 1″ tape, 4–6 wraps.
- 1¼”–2″ pipes: 1¼”–1½” tape, 5–8 wraps.
This reference assumes standard threads; adjust wraps for damaged or coarse threads.
Pro Tips Plumbers Use for Stubborn Thread Leaks
Recognizing that standard PTFE tape and a few wraps won’t always stop a persistent leak, experienced plumbers rely on targeted techniques—proper surface prep, tape orientation and tension, thread compound selection, and selective mechanical fixes—to seal stubborn threads without overbuilding joints.
They clean threads of old tape, corrosion, and debris, inspect for galling or damage, then apply PTFE with three to six wraps in the direction of tightening, keeping tension consistent. For metallic fittings they may use a joint compound compatible with PTFE or anaerobic sealant on tapered threads.
If threads are scored, they prefer replacing or using a fitting adapter rather than overtightening.
When to Call a Pro Instead of DIY Sealing
When simple measures and the plumbers’ techniques still fail to stop a leak or the situation presents added risk, it is time to call a professional.
A contractor assesses hidden damage, compromised fittings, and pressure issues beyond tape’s scope. Complex materials, corroded threads, soldered joints, or gas lines require licensed intervention. Insurance, permits, and safety protocols also favor pros. Avoid escalating problems by guessing.
- Corrosion, cracked fittings, or metal fatigue.
- Gas line leaks or any flammable fluid involvement.
- Repeated failures after correct tape application.
- Structural damage, water migration, or inaccessible piping.
Real-World Examples: Fixes for Typical Household Leaks
Addressing common household leaks often starts with identifying the connection type and selecting the correct sealing method; the following examples show straightforward fixes using Teflon tape for threaded joints, alternative approaches for compression fittings, and when to replace valves or call a pro.
A leaking shower arm: remove, clean threads, wrap tape clockwise 3–5 times, rethread snugly.
A dripping garden spigot with male threads: replace worn washer, apply tape on threads, tighten.
A leak at a compression joint: avoid tape; retighten nut or replace ferrule.
Corroded shutoff valves: replacement recommended rather than tape.
Test leaks after restoring water.
Document Repairs for Warranty and Safety Records
After completing a repair such as wrapping Teflon tape on a leaking shower arm or replacing a worn washer on a spigot, documenting the work creates a clear record for warranty purposes and long-term safety.
The record should note date, location, parts used, and observed condition before and after repair.
Include photos of the joint and any serial numbers.
Save receipts and tape brand/type for future reference.
Maintain a log accessible to homeowners or contractors to track recurring issues and validate warranty claims.
- Date, location, and technician initials
- Parts, tape type, and quantities
- Before/after photos and notes
- Receipts, warranty IDs, and storage location
How to Teach Someone Else to Wrap Threads Correctly
Demonstrate the technique step by step so the learner sees the correct tape orientation, number of wraps, and tension.
An instructor shows tape direction following the thread pitch, counts three to five snug wraps, and maintains moderate tension to avoid stretch or bunching.
Use a clear visual: close-up view of tape edge aligned with thread crest.
Have the learner practice on scrap fittings, then inspect for coverage and smoothness.
Provide corrective feedback: adjust angle, add or remove a wrap, or redo if wrinkles occur.
Reinforce safety: clean threads first and discard damaged tape.
Assess competence before permitting unsupervised work.
Conclusion
Teflon tape triumphs as a tiny, tenacious tool for thread-tightening tasks, transforming tentative twists into trustworthy, leakless links. When technique takes top tier — tension, turns, and trailing trim — taps, toilets, and taps stay temperate and tidy. Training teaches tradespeople and tenants to turn trials into tidy triumphs; timely testing and thorough tracking thwart trouble. Still, tricky threads or persistent puddles prompt professionals to protect plumbing peace.