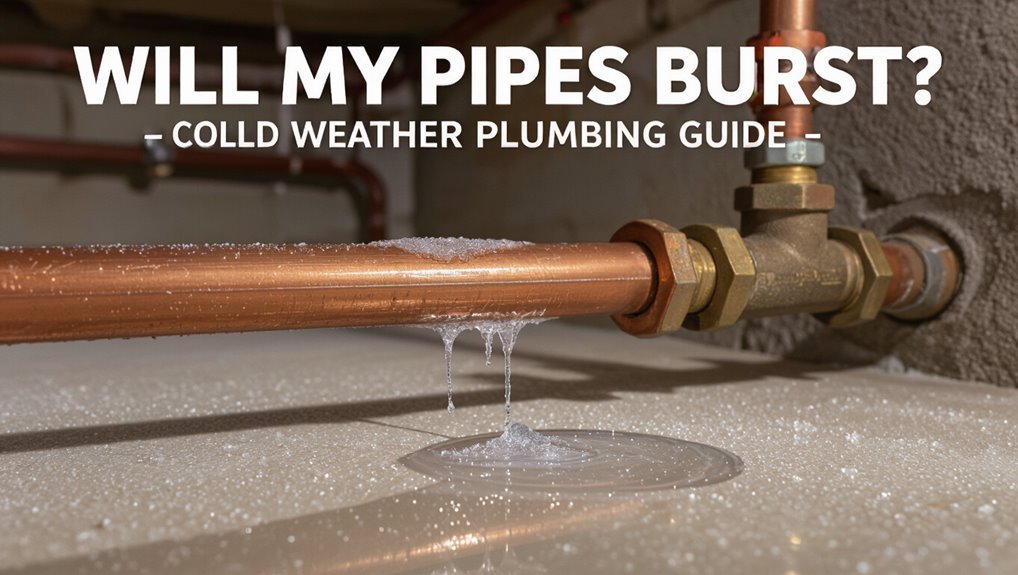
What Temperature Will Pipes Burst? Cold Weather Plumbing Guide
Pipes can burst when the temperature drops to 32°F (0°C) or below, but the risk of bursting depends on several factors including how long the pipes are exposed to the cold, the material of the pipes, their insulation, and their location. For example, thin metal pipes on exterior walls can start to freeze within hours in extreme cold, while insulated or flexible PEX pipes can withstand lower temperatures for longer. When water freezes, it expands and creates pressure that can crack joints or pipe walls. To prevent pipe bursts, homeowners should take action before extended periods of subfreezing temperatures. This guide will cover the timing, signs of freezing, prevention methods, and solutions for frozen pipes.
Quick Answer: Will My Pipes Burst?
Determining whether pipes will burst depends primarily on the temperature, the duration of exposure, pipe material, and insulation. A concise assessment notes risk increases as temperatures fall below freezing for prolonged periods.
Metallic pipes tolerate stress differently than PVC or PEX; older, corroded, or poorly supported pipes are more vulnerable. Insulation, pipe location (exposed exterior walls, crawlspaces, attics), and whether water remains stagnant influence outcomes.
Short cold snaps pose less danger than multi-day freezes. Preventive measures reduce likelihood, but risk cannot be judged solely by ambient air temperature; situational specifics determine the real probability of rupture.
How Freezing Water : Not Cold Air : Breaks Pipes
By expanding as it freezes, water exerts outward pressure on pipe walls rather than the cold air itself causing the breakage. Ice formation inside a confined pipe increases volume and creates high localized pressures that exceed a pipe’s tensile limits.
Cracks typically start at weak points—joints, fittings, corrosion—and propagate as freezing progresses. The liquid between ice plugs transmits pressure, forcing seams apart even if ice does not fully fill the bore. Thermal contraction of the pipe plays a minor role compared with hydraulic forces from freezing water.
- Ice expansion generates pressure.
- Weak points fail first.
- Trapped liquid transmits force.
Temperatures and How Fast Pipes Actually Freeze
Freezing begins when water inside a pipe reaches 32°F (0°C), but the process and consequences depend on the pipe material and wall thickness.
Metal pipes conduct cold more quickly than plastic, altering how fast a column of ice forms and where stresses concentrate.
Typical time-to-freeze estimates vary from a few hours to a day or more depending on ambient temperature, insulation, and water movement.
When Water Freezes
How cold must it get before water in a pipe turns to ice, and how quickly does that happen? Water freezes at 32°F (0°C), but moving water, dissolved minerals, and pipe surroundings affect timing. Stagnant water in uninsulated pipes can begin forming ice crystals when temperatures dip just below freezing; full blockage and solid ice take longer.
Factors controlling freeze rate include ambient temperature, exposure duration, and thermal conductivity of surrounding materials.
- Ambient temperature: colder means faster freezing.
- Exposure time: hours at or below freezing increase risk.
- Water movement: flowing water delays ice formation.
Pipe Material Effects
Materials used for pipes markedly influence both the temperature at which ice begins to form inside them and the speed of freezing because thermal conductivity, wall thickness, and flexibility alter heat loss and stress distribution.
Metal pipes (copper, steel) conduct heat rapidly, so their contents cool faster but they tolerate some expansion differently than plastics.
PVC and CPVC insulate better yet become brittle at lower temperatures, raising fracture risk when ice expands.
PEX offers flexibility, absorbing expansion forces and delaying rupture despite faster internal freezing in thin sections.
Joint types, fittings, and insulation compatibility further modify freezing behavior and burst susceptibility.
Time-to-Freeze Estimates
In exposed sections of a plumbing system, the interval from subfreezing air to solid ice inside a pipe depends chiefly on air temperature, pipe material and diameter, water flow, and insulation.
Estimates show thin metal pipes can freeze in under an hour at −10°C (14°F) with still water, while thicker plastic pipes and flowing systems take several hours.
Insulation and ambient wind dramatically alter timing; circulating water or trace heating extends safe intervals.
Predictive models use heat-transfer rates and Newtonian cooling to approximate freeze times for planning winterization.
- Metal, thin: fastest
- Plastic, thick: slower
- Flowing water: slowest
Inside vs. Outside Pipes: Who Freezes First?
Contrary to instinct, interior pipes can freeze before exterior ones when cold penetrates poorly insulated walls and pockets of stagnant water lose heat.
Exterior pipes remain vulnerable where they are exposed to wind and subzero air, but insulation and ambient indoor heat often give outside lines a temporary advantage. Comparing heat loss rates and insulation effectiveness clarifies which sections of a plumbing system are most at risk.
Interior Pipes Freeze First
Often, interior pipes freeze before exterior ones because enclosed spaces cool differently and trap still air that accelerates heat loss from plumbing.
The phenomenon occurs where insulation is lacking, circulation is poor, or heating is uneven; basements, crawlspaces, and interior walls with shallow cavities are vulnerable.
Moisture, low ambient temperature, and thermal bridging speed freezing.
The consequence is pressure build-up and potential rupture before exterior lines show signs.
Preventive measures focus on improving ambient warmth, insulating lines, and maintaining minimal flow.
Key considerations include:
- Insulation adequacy and gaps
- Airflow and heat distribution
- Continuous low-temperature exposure
Exterior Exposed Vulnerability
While interior pipes frequently freeze due to trapped cold and poor circulation, exterior exposed lines face a different set of risks driven by direct environmental exposure. Outside pipes, including yard hydrants, hose bibs, and service lines, are subject to ambient temperature swings, wind chill, and radiant heat loss to night sky.
They cool faster and reach freezing thresholds sooner than interior plumbing, especially when buried shallowly or routed along unheated walls. Mechanical damage and tree roots can compromise protective coverings, increasing vulnerability. Visible frost, reduced flow, or bulging fittings signal imminent failure and require prompt attention to avoid rupture.
Heat Loss And Insulation
Compared by exposure and insulation, interior pipes retain heat longer and consequently resist freezing better than exterior lines.
Heat loss depends on temperature gradient, wind, and insulating materials; outside pipes lose heat rapidly and reach freezing sooner.
Insulation slows conductive and convective losses; air gaps, dampness, and poor seams reduce effectiveness.
Thermal bridging at joints and uninsulated supports creates weak points.
Preventive measures focus on continuity of insulation and minimizing exposure.
- Insulate exposed runs with foam or wrap to reduce conduction.
- Seal drafts where pipes pass through walls or crawlspaces.
- Maintain slight water flow during extreme cold to prevent standing ice.
Do Pipe Materials (Copper, PEX, PVC) Change Freeze Risk?
Different pipe materials — copper, PEX, and PVC — influence freeze risk through their thermal conductivity, flexibility, and jointing methods, which affect how quickly water inside cools, how the pipe responds to ice expansion, and where leaks are likely to form.
Copper conducts heat rapidly, so it cools and freezes faster but resists rupture less predictably due to rigid walls and soldered joints.
PEX is more flexible, tolerates ice expansion better, and often survives freeze–thaw cycles without bursting.
PVC is brittle at low temperatures and can crack, especially at glued joints.
Installation quality and exposure remain decisive factors.
Real‑World Risk Thresholds by Location and Time
Across climates and seasons, the risk that pipes will freeze and burst depends on local temperature patterns, exposure duration, and the timing of cold snaps relative to typical building use.
Risk thresholds vary: northern homes face prolonged subfreezing stretches where even insulated pipes can freeze; temperate regions see risk during brief but severe cold snaps, especially overnight; and arid high‑altitude areas combine low humidity and rapid temperature drops that hasten freezing.
Occupancy, heating setbacks, and pipe placement (exterior walls, crawlspaces) modulate risk.
Practical planning uses local historical minima and forecasted duration to prioritize protection measures.
- Historical local minima matter
- Duration of subzero events
- Building occupancy and pipe location
Early Warning Signs a Pipe Is Freezing
Knowing local risk thresholds and building vulnerabilities helps homeowners and building managers recognize the earliest physical and behavioral signs that a pipe is beginning to freeze.
Indicators include unusually cold wall or floor surfaces near pipe routes, frost or condensation on exposed pipes, and a drop in water pressure or trickling flows at taps.
Intermittent sputtering, discolored water, or unusual noises such as banging or creaking can signal ice formation and expanding stress.
Repeatedly colder readings from indoor thermometers in crawlspaces, basements, or unheated closets also warn of risk.
Documenting and monitoring these signs permits timely assessment before rupture.
Immediate Steps If You Think a Pipe Is Frozen
When freezing is suspected, the first task is to identify the section of pipe that is cold to the touch or shows frost accumulation.
Once located, apply gentle, controlled heat—such as a hair dryer, heat lamp, or warm towels—moving from the warm end toward the frozen area to encourage thawing. Avoid open flames and excessive heat, and keep nearby valves open to allow water to flow as ice melts.
Locate The Frozen Section
To locate the frozen section, inspect exposed pipes first—look for frost, bulging, or discoloration along runs in unheated areas such as basements, crawl spaces, attics, and exterior walls.
Next, trace from the nearest faucet toward the meter; flow reduction pinpoints the frozen segment.
Listen for hollow or muted sounds when tapping along the pipe.
Check valves and joints for stiffness.
If multiple branches are affected, the freeze may be at a main line or near an exterior wall.
- Follow reduced flow from faucet to source.
- Visually identify frost, swelling, or discoloration.
- Tap and listen for changes in sound.
Thaw Pipes Safely
Before applying heat, confirm the pipe is actually frozen and shut off the main water supply to limit flooding if a crack appears; then open nearby faucets to relieve pressure and provide an outlet for melted water. The homeowner should warm the pipe gradually from the faucet toward the frozen section, using a hair dryer, heat gun on low, or warm towels. Do not use open flames. Monitor for leaks and stop if cracking or water escape occurs. If thawing fails within 30 minutes or damage is suspected, contact a professional plumber immediately.
| Cold | Fear | Relief |
|---|---|---|
| Pale | Tense | Warm |
| Silent | Anxious | Flow |
How to Safely Thaw a Frozen Pipe
In cold climates, thawing a frozen pipe requires deliberate, cautious steps to prevent bursts, water damage, or injury. One should locate the frozen section, shut off water at the main if necessary, open nearby faucets to relieve pressure, and apply gentle, even heat moving from warm areas toward the freeze. Avoid open flames; use hair dryers, electric space heaters, heat lamps, or warm towels.
If pipes are inaccessible or show bulging, call a licensed plumber. After thawing, run water and check for leaks, then restore insulation and monitor closely for any pressure or drips.
- Locate and isolate
- Apply safe heat
- Call a professional
Prevent Frozen Pipes: Insulation, Heat Tape, Sealing Gaps
Preventing frozen pipes begins with insulating vulnerable runs, especially those in unheated basements, attics, and exterior walls.
Applying heat tape to exposed sections provides targeted warmth where insulation alone may be insufficient.
Sealing gaps and chases that allow cold air to reach pipes completes the approach by reducing drafts and heat loss.
Insulate Vulnerable Pipes
Insulating vulnerable pipes combines simple materials and targeted techniques to keep water flowing during cold snaps. The approach reduces freeze risk by conserving heat and preventing exposure.
Materials include foam sleeves, fiberglass wrap, and self-regulating heat tape; selection depends on pipe location, diameter, and temperature exposure. Installation follows manufacturer guidelines: snug coverage, sealed seams, and secure fastenings.
Electricity-powered heat tape requires grounded circuits and periodic inspection. Exterior and unheated-area pipes benefit most.
Regular checks and prompt replacement of degraded insulation maintain protection; professional assessment is advised for complex or hard-to-reach plumbing runs.
- Foam sleeves
- Fiberglass wrap
- Self-regulating heat tape
Seal Air Leaks
When cold drafts reach pipe runs, small gaps around vents, utility lines, and foundation seams can turn modest chill into freezing conditions that stress plumbing; sealing those openings with caulk, foam sealant, or weatherstripping reduces convective heat loss and lowers freeze risk.
A focused survey identifies entry points in attics, crawlspaces, basements, and exterior walls. Use low-expanding foam for larger voids and silicone or acrylic caulk for narrower cracks. Around penetrations, install foam gaskets or pipe collars. Combine sealing with insulation and approved heat tape for all-around protection.
Regular inspections and quick repairs maintain thermal continuity and minimize the chance of frozen, burst pipes.
Winter Plumbing Checklist for Storms and Freezes
How should homeowners prepare their plumbing for approaching storms and extended freezes? A concise checklist helps reduce freeze and burst risk: drain exterior hoses, insulate vulnerable pipes, and verify heating continuity in unheated spaces.
Inspect visible pipes for cracks and secure loose sections to reduce stress. Clear gutters and downspouts to prevent ice dams that shift roof and wall plumbing.
Make sure outdoor faucets have frost-free valves or are properly drained. Stock basic repair items—pipe tape, insulation sleeves, and a reliable thermometer to monitor vulnerable areas during prolonged cold spells.
- Drain and insulate
- Inspect and secure
- Stock repairs and monitor
When to Shut Off Water and Protect Fixtures
Shut off the main water supply and isolate vulnerable fixtures before a prolonged freeze or severe storm to minimize flood damage if pipes split. Homeowners should also close valves to outdoor spigots, irrigation lines, and seldom-used sinks.
Shutoff timing: when forecasts predict sustained subfreezing temperatures, issued freeze warnings, or travel advisories that prevent prompt response. Drain lines and open faucets to relieve residual pressure after shutting water.
Leave heat on at a low setting and insulate exposed pipes as additional protection. Keep a wrench and labeled shutoff location accessible so water can be stopped quickly if a leak is suspected.
Repairing Burst Pipes: Cost and Repair Timelines
Evaluating and repairing a burst pipe typically involves immediate temporary measures, professional diagnosis, and staged restoration that together determine cost and timeline. Assessment pinpoints location, material, and damage extent; temporary shutoff and drying limit secondary loss. Costs vary: simple patching or section replacement is lower; extensive wall, floor, or system repairs raise totals. Timelines span hours for small repairs to days or weeks when structural drying and reconstruction are required. Insurance coverage, access difficulty, and parts availability affect both cost and schedule.
- Quick fixes: hours, low cost.
- Sectional replacement: a day to several days.
- Major repairs: days–weeks, higher expense.
When to Call a Plumber vs. DIY?
When is a homeowner justified in tackling a burst pipe themselves versus calling a professional? A homeowner may handle minor, accessible leaks if water can be shut off, temporary repairs (pipe clamps, epoxy, rubber and hose clamps) stop flow, and damage is limited.
DIY is appropriate when confidence, basic tools, and local code knowledge exist. Call a plumber when leaks are large, hidden, involve gas lines, sewer backups, frozen mains, compromised structural elements, or when water damage is widespread.
Professionals should be engaged for uncertain causes, repeated failures, or when permits and permanent repairs are required to guarantee safety and code compliance.
Quick Prep Checklist: Protect Your Plumbing This Winter
Before the cold sets in, a concise winter plumbing prep checklist helps homeowners prioritize actions that reduce freeze risk and limit damage. The list highlights immediate, effective steps to safeguard pipes, fixtures, and systems before temperatures fall.
Regular inspection, targeted insulation, and shutting off vulnerable lines are emphasized. Professional evaluation is recommended for complex setups or repeated freezes.
Clear labeling and a simple emergency plan shorten response time if trouble arises. The checklist balances prevention and practical readiness, minimizing disruption and repair costs during cold snaps.
- Inspect and insulate exposed pipes.
- Drain and shut off unused outdoor lines.
- Test heat and monitor thermostats.
Conclusion
Cold temperatures don’t ask permission; they creep into pipes, freeze water, and split metal and plastic alike. Understanding that water — not air — breaks pipes, and knowing which lines freeze first, lets homeowners act before disaster strikes. Shutoffs, insulation, and timely winterizing are small defenses that prevent large repairs. Like a cautious sentinel standing watch through the night, prudent preparation preserves plumbing and spares the cold, costly aftermath of burst pipes.