How to Remove a Broken Pipe Thread: Easy DIY Fixes & Tools
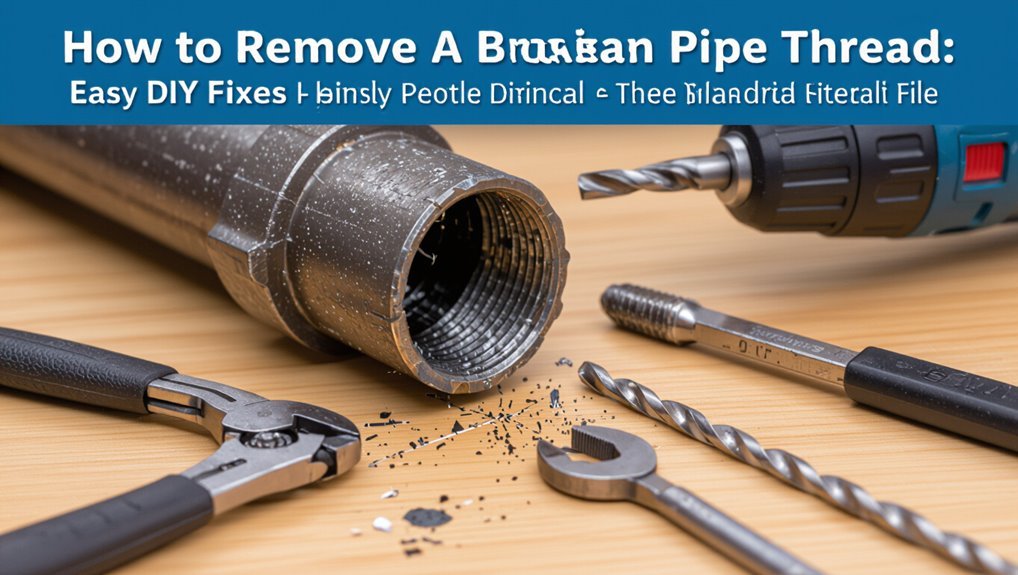
If you’re dealing with a broken pipe thread, the first step is to shut off the nearest valve to stop any water flow. Then, open downstream fixtures to relieve pressure and collect any spilled water with buckets and rags. After the area is dry, inspect it for signs of corrosion and ensure you can access the damaged thread. To remove or bypass the broken thread, you will need simple tools like pliers, a pipe wrench, a thread extractor, and replacement fittings or couplings. Always check for electrical hazards and ensure the area is thoroughly dried before proceeding. Follow this guide for step-by-step instructions, tool recommendations, and repair options.
Quick Steps to Stop the Leak and Triage a Broken Pipe Thread
What should be done first when a pipe thread breaks and begins leaking? The responder isolates water at the nearest shutoff, opens downstream fixtures to drain pressure, and contains runoff with buckets and rags.
After drying the area, they assess accessibility and note thread type and pipe material without diagnosing causes. Protective gear is donned.
Temporary measures—pipe clamp, rubber patch with hose clamps, or epoxy putty—are applied only if immediate professional repair is unavailable.
Tools and replacement parts are gathered for definitive work: wrench set, extractor, thread sealant, and appropriate replacement fittings.
Documentation and photos are taken for reference.
What a Broken Pipe Thread Is and Why It Fails
A broken pipe thread occurs when the helical ridge that seals fittings is compromised, often from over-tightening, corrosion, cross-threading, or mechanical damage.
Typical failure modes include stripped threads, cracked fittings, and worn seals that lead to leaks or connection loss.
Proper torque, cleaner installation, compatible materials, and routine inspection reduce the risk of future stripping.
Causes Of Thread Damage
Often subjected to repeated stress, pipe threads fail when mechanical overload, corrosion, improper installation, or material defects compromise their integrity.
Mechanical overload occurs from overtightening, cross-threading, or excessive vibration that strips or deforms threads. Corrosion attacks metal surfaces chemically or galvanically, weakening crests and roots.
Improper installation — wrong thread type, mismatched fittings, inadequate lubrication, or poor alignment — creates stress concentrations and premature wear. Material defects such as inclusions, porosity, or inconsistent heat treatment produce brittle or weak sections.
Environmental factors like temperature cycling and abrasive particulates accelerate deterioration. These causes often act together, reducing holding strength and increasing likelihood of breakage.
Common Failure Modes
Having outlined the primary causes of thread damage, it is important to distinguish the typical ways threads actually fail during service. Threads can shear, strip, crack, or seize; each mode has distinct signs and consequences. Shearing removes material under overload, stripping deforms crest and root geometry, cracking propagates from stress concentrators, and seizure fuses mating surfaces via corrosion or galling. Diagnosis guides removal technique and tooling selection. Quick identification reduces further damage and expedites repair decisions.
| Failure Mode | Typical Sign |
|---|---|
| Shear | Sudden break, missing segments |
| Strip | Rounded peaks, loose fit |
| Crack | Visible fissures, leak paths |
| Seize | Stuck joint, corrosion buildup |
Preventing Future Stripping
Frequently, prevention of future thread stripping begins with understanding that a broken pipe thread is not merely a local defect but the end result of interacting factors: improper torque, misalignment, incompatible materials, lack of lubrication, and corrosive environments.
To prevent recurrence, specify correct material pairings and inspect threads for wear before assembly. Use calibrated torque tools and follow manufacturer torque specs to avoid over- or under-tightening. Apply appropriate thread sealants or lubricants compatible with media and coatings. Make certain proper alignment and support to minimize bending loads. Implement routine corrosion protection and periodic inspections to catch early degradation and address it promptly.
When It’s Safe to Try DIY Broken Thread Removal
A homeowner may consider DIY removal when appropriate tools are available, such as extractors, taps, and vises.
Small, non-pressurized systems present lower risk and are thus better candidates for a DIY approach.
The procedure is most likely to succeed when the remaining threads are intact enough to engage extraction tools.
When You Have Proper Tools
With the right extractor set, taps, and a quality drill, DIY removal of a broken pipe thread becomes a realistic option for a competent homeowner or hobbyist. Confidence depends on tool quality, steady hands, and understanding thread sizes.
Inspect fragments, match extractor and tap sizes, and secure the fitting before drilling. Use cutting oil, slow speeds, and incremental withdrawal to avoid binding.
If resistance, visible damage, or complex fittings appear, stop and consult a professional to prevent further harm.
- Confirm extractor and tap match thread size.
- Secure pipe to prevent rotation.
- Drill straight, use lubricant.
- Stop if binding occurs.
Small, Non-Pressurized Systems
In low-pressure, isolated systems—such as garden hoses, sink supply lines disconnected from mains, or small appliance connections—attempting DIY removal of a broken pipe thread is reasonable provided the user confirms there is no pressurization or fluid present.
The operator should verify isolation, drain residual fluid, and wear eye protection and gloves.
Use simple tools: locking pliers, extractor kits sized for small fittings, or a tapered drill plus left-hand bits.
Work slowly to avoid worsening damage.
If corrosion or brittle materials are present, stop and consult a professional.
Test the repair for leaks before returning the component to service.
When Threads Aren’t Severely Damaged
After confirming isolation and draining the line as described above, consider attempting removal only when the remaining threads are largely intact and the break is limited to a short section.
The likelihood of a successful DIY extraction rises when at least three to four full threads remain above the break, no corrosion undermines adjacent metal, and the fitting seats cleanly.
Inspect with magnification and light; test engagement with a matching fitting or nut without forcing.
If resistance is uniform and threads align, proceed with gentle extraction techniques.
Stop and call a professional if cross-threading, cracking, or significant deformation appears.
- Verify thread count and condition
- Check for corrosion or cracking
- Test engagement with a trial fitting
- Proceed only with gentle, controlled extraction
Essential Safety Gear Before You Start
Before beginning work on a broken pipe thread, one should always assemble and don the appropriate safety gear: safety glasses to protect against metal shavings and debris, cut-resistant gloves for handling sharp pipe edges, and hearing protection if power tools will be used.
A dust mask or respirator prevents inhalation of fine particles when grinding or drilling.
Sturdy work boots reduce slipping and foot injury from dropped tools.
Long sleeves and close-fitting clothing protect skin without risking entanglement.
Proper lighting and a headlamp improve visibility.
Inspect gear for damage and replace compromised items before starting to guarantee consistent protection.
Shut Off Water and Relieve Pipe Pressure Safely
Before attempting to remove a broken pipe thread, the main water valve must be shut off to stop supply to the affected line.
Any remaining pressure should then be relieved by opening a nearby tap or a drain valve until flow ceases.
These steps minimize water discharge and reduce the risk of injury or further damage.
Shut Off Main Valve
To begin, locate and close the building’s main shutoff valve to stop incoming water; this prevents additional pressure from forcing water out of the broken thread. The operator should confirm valve type (gate, ball, or curb) and use the correct tool or handle to turn it fully off. Notify occupants before shutting down, then check visible fixtures to guarantee flow ceases. Note valve condition and accessibility for future repairs. After closing, secure the area and label the valve if needed to aid others.
- Identify valve location and type.
- Notify occupants.
- Turn valve fully off with proper tool.
- Document and label.
Bleed Remaining Pressure
Open nearby faucets and fixtures to release trapped water and lower residual pressure in the isolated section. After shutting the main valve, the technician should open both hot and cold taps at lowest and highest points to drain lines.
Flush toilets and operate outdoor spigots if present. Observe pressure relief at a visible gauge or by feeling flow; persistent flow indicates incomplete shutoff or a second valve.
Cap or plug exposed openings to prevent contamination. Once flow stops and no hissing is detected, confirm zero pressure with a pressure gauge before cutting threads or disassembling fittings to guarantee safe, controlled work conditions.
Protect Nearby Finishes and Piping During Work
When working on a broken pipe thread, adjacent surfaces and exposed piping should be shielded to prevent scratches, dents, chemical damage, or contamination from debris and tools.
Use tape, cloth, and barriers to isolate finishes and nearby fixtures. Cover floors and cabinets, and wrap exposed runs to avoid tool slips and metal shavings contacting other pipes. Keep protective materials secured so they won’t shift during extraction.
- Use painter’s tape and soft cloth over nearby finishes.
- Wrap adjacent pipes with foam or rags.
- Lay drop cloths to catch debris and fluids.
- Secure covers with clamps or zip ties.
Identify Pipe Material: Brass, Steel, Copper, or Galvanized
Before removing a broken thread, the technician should determine the pipe material—brass, steel, copper, or galvanized—since each responds differently to tools and heat and requires specific extraction methods.
Visual cues help: brass appears yellowish and softer; copper has a reddish-brown tint and greenish patina when aged; steel is gray, magnetic, and often heavier; galvanized steel shows dull zinc coating and may flake.
Magnet testing distinguishes steel from nonferrous metals.
Assess hardness by light tapping or applying a center punch.
Note coatings and corrosion which affect gripping methods.
Correct identification guides tool choice, heating approach, and anti-corrosion precautions.
Diagnose Whether the Thread Is Stripped, Snapped, or Corroded
Examine the damaged connection visually and by feel to determine whether the fault is a stripped thread, a snapped stub, or corrosion-locked threading. The observer notes thread profile, remaining length, and any irregular metal fragments. Light probing with a pick reveals rounded ridges (stripped), a clean break with internal stub (snapped), or stubborn, crusted deposits and fused metal (corroded). Movement tests under slight torque show slippage versus immobility. Record findings before attempting removal to guide tool choice and protect mating fittings.
- Inspect thread peaks, valleys, and continuity.
- Probe for internal stub length and alignment.
- Look for rust, white salt, or verdigris buildup.
- Test slight rotation to check grip versus seizure.
Choose Extraction vs. Replacement for a Broken Pipe Thread
Deciding between extraction and replacement hinges on the condition of the remaining thread, accessibility, and the value of the surrounding assembly.
If threads retain enough engagement and the pipe body is sound, extraction preserves components and costs less; specialized extractors or internal thread taps can restore function.
When damage is extensive, corrosion widespread, or access prevents safe extraction, full replacement guarantees reliability and prevents leaks.
Consider material compatibility, downtime, and skill level: extraction suits skilled DIYers aiming to salvage parts, while replacement favors long-term integrity and simplicity.
Weigh parts cost versus risk of repeat failure before selecting a method.
Use Penetrating Oil to Free a Seized Thread
Often a seized pipe thread will respond to a quality penetrating oil, which seeps into microscopic gaps to dissolve rust and break up corrosion bonds without forceful torque. The technician applies oil around the broken thread, allows dwell time, and re-applies as needed. Proper access, patience, and repeat applications increase success; keep surrounding areas protected from runoff.
After penetration, gentle turning with appropriate tools often frees the thread; avoid excessive force that could worsen damage. If oil fails after multiple attempts, consider mechanical extraction methods or replacement.
- Clean area of debris and loose rust.
- Apply penetrating oil generously.
- Wait 15–30 minutes; reapply if needed.
- Attempt gentle turning with correct tools.
Use Heat Safely to Loosen a Stuck Pipe Thread
If penetrating oil does not free the seized thread, controlled application of heat can expand metal, break corrosion bonds, and make removal easier.
Use a propane torch or heat gun appropriate for the pipe material, keeping flame or hot air moving to avoid overheating a single spot. Protect surrounding surfaces with heat shields and wet rags; shut off and drain lines first.
Once heated, apply wrench force steadily—thermal expansion often loosens the joint. Cool the area slowly if needed.
Avoid plastic fittings, nearby combustibles, and gas lines; if uncertain, stop and consult a professional to prevent damage or injury.
Cut Away a Damaged Fitting With a Hacksaw
When a fitting is too damaged to unscrew, selecting a hacksaw with a fine-toothed blade helps guarantee a clean cut.
The pipe should be clamped securely in a vise or with pipe grips to prevent slipping and protect adjacent plumbing.
After cutting, the remaining edges must be filed smooth to remove burrs before installing a replacement fitting.
Choose The Right Hacksaw
Select a hacksaw that matches the pipe material and the precision required for the job: a bi-metal blade (18–24 TPI) for metal pipes, a coarser blade (around 14–18 TPI) for thicker steel, and a fine-tooth blade for thin-walled or delicate fittings. The appropriate frame rigidity and blade tension affect cut straighness and tracking. A comfortable grip and adjustable frame aid control in tight spaces. Blade length should suit reach and clearance. Consider tooth set and kerf to minimize vibration and burrs; replace worn blades to keep cuts efficient and reduce effort.
- Blade tooth count and type
- Frame stiffness and length
- Handle ergonomics
- Blade condition
Secure The Pipe Firmly
Before cutting, the pipe must be clamped securely to prevent movement that could cause an uneven cut or injury.
A sturdy bench vise or pipe clamp holds the pipe steady; padding such as a cloth or rubber jaw cover prevents surface damage and preserves alignment.
Position the damaged fitting accessible and level with the saw blade, leaving sufficient pipe length for a firm grip.
Confirm the clamp is tight by applying gentle manual force to the pipe. Recheck tools, blade tension, and stance before starting.
Proper securing reduces vibration, improves control during hacksawing, and minimizes the risk of slips or miscuts.
Cut And Smooth Edges
With the pipe securely clamped and the damaged fitting clearly exposed, the technician uses a sharp hacksaw to cut the fitting free, maintaining a steady, controlled stroke perpendicular to the pipe to guarantee an even cut.
After removal, edges are deburred and smoothed with a file or emery cloth to prevent leaks and make certain proper seating of new fittings.
Metal filings are brushed away and the area inspected for remaining damage before installation.
Appropriate eye protection and gloves are worn throughout.
- Mark cut line for accuracy
- Use steady, perpendicular strokes
- File burrs smooth and round
- Clean debris and inspect
Remove a Broken Nipple With Vise Grips
Grip the exposed portion of the broken nipple firmly with locking pliers, ensuring the jaws bite squarely into metal to prevent slippage; steady pressure and small turning motions will begin to loosen seized threads so the nipple can be unscrewed. The operator applies penetrating oil, waits, then alternates twisting and gentle taps to free corrosion. If the nipple rotates, continue until fully removed; if it rounds, reposition or use pipe vise grips designed for plumbing. Work slowly to avoid fracturing remaining pipe.
| Tool | Action |
|---|---|
| Vise grips | Clamp firmly |
| Penetrating oil | Soak threads |
| Hammer taps | Shock loosen |
Remove a Broken Pipe Thread With a Screw Extractor
A screw extractor can remove a broken pipe thread when careful selection and setup are observed.
The technician first selects an extractor sized to the pipe’s thread and hardness, then establishes a centered pilot hole with the correct drill bit.
After extraction, the remaining threads are cleaned and inspected before reinstalling a new fitting.
Choosing The Right Extractor
How should one select an extractor for a broken pipe thread? The choice hinges on pipe size, material, and extractor type. Hardened steel extractors resist wear; tapered or straight-fluted designs suit different bite and torque needs. Match extractor diameter to the broken stud or core; a set with progressive sizes improves odds. Consider extractor length to clear surrounding fittings and corrosion.
- Confirm pipe material compatibility.
- Measure broken thread diameter precisely.
- Choose fluted style (tapered for grip, straight for less expansion).
- Prefer hardened steel and a matched-size set for controlled removal.
Proper Drill Bit Setup
In preparing to remove a broken pipe thread with a screw extractor, the operator must select and set the drill bit so it centers accurately and cuts straight into the remaining stud; correct bit size, sharpness, and secure chucking prevent wander and minimize heat or further damage.
The operator confirms bit type—high-speed steel or cobalt—matches material, then marks the center with an awl or punch.
A drill press offers best alignment; when using a hand drill, steady two-handed support and low speed reduce walking.
Apply light, consistent pressure, pause to clear chips, and use cutting fluid to extend bit life.
Removing And Cleaning Threads
When the drill has produced a centered pilot hole and the screw extractor is seated, the operator withdraws the broken stud using steady, counterclockwise torque while keeping axial pressure to prevent the extractor from slipping.
After removal, debris and burrs are cleared with a small brush and compressed air.
Thread condition is inspected with a flashlight and thread gauge; damaged threads are chased or rethreaded as required.
A thread chaser restores form without removing material; a die or tap may be used for corrections.
Final cleaning uses solvent and a lint-free cloth before applying anti-seize or thread sealant.
- Inspect threads
- Brush debris
- Chase or rethread
- Clean and protect
Drill and Tap Out a Broken Pipe Thread (Step‑by‑Step)
Begin by securing the workpiece and clearing debris to make certain accurate alignment for drilling and tapping; the operator should then select the correct drill size and tap matched to the pipe thread standard to be restored.
Mark center, use a pilot bit if needed, and drill straight at low speed with lubricant to prevent galling. Remove chips frequently and inspect the hole for concentricity.
Start the tap perpendicular, apply steady forward pressure, and back off every half turn to break chips. Clean the newly cut threads, verify fit with a test plug or fitting, and apply appropriate thread sealant before reassembly.
Use a Rotary Tool (Dremel) for Precise Thread Removal
A rotary tool fitted with a small carbide or diamond burr allows precise removal of damaged pipe threads without disturbing surrounding metal. It is ideal for cleaning shallow burrs, removing high spots, and restoring thread profiles prior to rethreading or installing a new fitting.
Work slowly with light pressure, keep the tool perpendicular to the thread axis, and cool the area periodically to avoid alloy softening. Use eye protection and a dust mask; secure the pipe in a vise with soft jaws to prevent marring.
- Select correct burr size and grit.
- Mark damaged thread limits.
- Run tool at moderate speed.
- Inspect frequently and stop.
Remove Broken Threads Inside a Coupling Without Enlarging Bore
The technician first assesses the extent of thread damage to determine if conservative extraction is possible.
Next, a broken insert or fragment is carefully removed using appropriate pullers or extraction tools that do not enlarge the coupling bore.
Finally, the remaining threads are chased or tapped as needed before reassembling the coupling to restore a sealed connection.
Assess Thread Damage
When inspecting a coupling after a broken fastener, the technician should first determine the extent and orientation of remaining thread material to decide whether internal repair tools or thread inserts can be used without enlarging the bore. Visual and tactile assessment identifies missing crests, deformed roots, and cross-threading. Measure pitch and depth with gauges; note corrosion or contamination. Decide if repairable in situ or if preservation of bore integrity requires specialized torsion tools.
- Record thread pitch, diameter, and handedness.
- Inspect for partial shear, burrs, and displaced material.
- Check alignment of mating parts.
- Evaluate corrosion and contamination levels.
Extract Broken Insert
Having assessed thread condition and bore integrity, the technician proceeds to extract the broken insert while preserving the original diameter of the coupling.
Using a small carbide or diamond-tipped probe, they clear debris and locate fragment edges. A set of micro-grip extractors or custom-made hooked picks engages shards without expanding the bore. Light, controlled taps with a nylon mallet loosen seized pieces; clockwise and counterclockwise motions free threaded remnants. Vacuum and compressed air remove particles continuously to prevent contamination. Progress is checked visually and with a bore gauge to confirm no scoring or enlargement occurred before cleaning and preparing the coupling for reassembly.
Tap And Reassemble
Begin tapping and reassembly with a backing plan that preserves the original bore size and restores usable threads without introducing burrs or misalignment. The technician assesses damage, selects the correct-size hand tap, and secures a sacrificial backing plug to support threads.
Light cutting fluid and slow, controlled taps prevent chatter; back out to clear chips frequently. After tapping, clean thoroughly, inspect with a thread gauge, and trial-fit the mating pipe.
If engagement is satisfactory, apply appropriate sealant and reassemble. If not, consider a thread insert sized to original dimensions to avoid enlarging the coupling.
- Inspect and choose tap
- Install backing plug
- Tap with lubrication
- Clean, gauge, reassemble
Gentle Methods for Removing Broken Threads From Brass Fittings
In delicate plumbing work on brass fittings, removing broken threads requires methods that minimize further damage while restoring functionality. The practitioner first cleans the area and assesses thread extent.
Manual extraction with hand taps or small, sharp picks removes burrs without enlarging the bore. A fine-threaded nut turned onto the remaining stud can pull fragments straight out when combined with steady backing pliers.
For internal thread repair, a thread chaser (not a cutter) reforms profiles gently. Throughout, low torque, steady alignment, and intermittent inspection prevent cracking. If irreversible, replacement of the fitting is advised.
Techniques for Corroded or Rusted Pipe Threads
Before attempting extraction, the technician assesses the extent of corrosion to determine whether threads can be restored or require replacement.
If salvage appears feasible, a penetrating lubricant is applied and given time to work into the rusted crevices.
When lubricant has penetrated, controlled heat and measured torque are used to break the bond without further damaging the fitting.
Assess Corrosion Extent
Accurate assessment of corrosion extent is critical to selecting the right method for extracting a broken, rusted pipe thread. The observer should inspect visible rust, flaking, pitting, and deformation, noting whether threads retain enough metal for gripping. Tap the fitting lightly to detect hollow sounds indicating internal corrosion. Measure remaining thread depth with a caliper when possible and compare to replacement part specifications. Document observations before proceeding; severe loss suggests cutting and replacement rather than extraction.
- Visual inspection for rust, pitting, flaking.
- Tap test for internal voids.
- Caliper measurement of thread depth.
- Record findings for repair decision.
Apply Penetrating Lubricant
With careful application, penetrating lubricant can loosen seized or rusted pipe threads by breaking down corrosion and displacing moisture.
The technician sprays or soaks the affected joint, allowing the formula to penetrate crevices; low-viscosity, capillary-action products work best.
After application, a dwell period of 10–30 minutes is recommended, with longer soak times for heavy rust.
Repeat applications may be necessary, wiping away loosened debris between attempts.
Use a cloth to protect surrounding finishes and avoid over-saturation of nearby seals.
After sufficient penetration, test for movement with gentle force, then proceed with thread-removal tools as required.
Use Heat And Torque
Apply focused heat and controlled torque to free severely corroded or rusted pipe threads when penetrating lubricant alone is insufficient. The technician heats the fitting with a propane torch to expand metal, then applies steady, incremental torque using a pipe wrench or breaker bar.
Heat should be localized, avoiding seals and nearby combustibles. Alternate short heating cycles with attempts to turn; overheating can damage threads or fittings. If the pipe remains stuck, cool briefly and reapply lubricant before the next cycle.
Safety gear and fire precautions are mandatory. When metal yields, back out corroded fragments and inspect threads for repair or replacement.
- Heat locally with a torch
- Apply steady incremental torque
- Cycle heat, torque, and lubricant
- Prioritize safety and inspect threads
Use an Internal Pipe Wrench on Tight Fittings
When a pipe nipple or fitting breaks flush with the inside wall, an internal pipe wrench offers a compact, reliable option for gripping and turning from within; its expanding collet bites into the metal to provide purchase where external wrenches cannot.
The tool is inserted into the remaining pipe stub, then expanded by turning the drive nut so hardened teeth engage the inner surface.
Backing out the fragment requires steady counterclockwise torque and occasionally penetrating oil to ease stubborn corrosion.
Choose an internal wrench sized to the pipe ID and avoid excessive force that risks scoring or collapsing the parent pipe.
Cut Out and Replace a Short Pipe Section Safely
Cut out the damaged section and prepare to install a replacement by first isolating the water supply and fully draining the line to prevent leaks.
Mark cut points clear of threads, score pipe to guide a straight cut, and use the correct cutter or saw.
Deburr and clean ends, measure accurately for a snug replacement length, and select compatible material.
Use appropriate connectors or couplings rated for the pipe type.
Test the repair under low pressure, inspect joints for leaks, then restore full supply and recheck.
Follow safety: eye protection, ventilation, and secure supports during work.
- Verify isolation and drain
- Make precise cuts
- Prepare and fit replacement
- Pressure-test before finishing
Repair Coupling vs. New Threaded Fitting: Which to Choose?
Faced with a short damaged pipe section, the decision between a repair coupling and a new threaded fitting hinges on pipe material, available space, pressure demands, and future accessibility.
A repair coupling (slip or compression style) offers rapid installation, minimal cutting, and works well when threads are inaccessible or wall clearance is limited; it suits temporary or lower-pressure needs.
A new threaded fitting restores original connection strength and is preferable for high-pressure systems, long-term reliability, or when matching existing thread types.
Cost, corrosion compatibility, and code compliance influence selection. Evaluate leak risk, mechanical load, and ease of future maintenance before choosing.
Prepare the Pipe End and New Thread Surface Correctly
Before installing a new fitting, the pipe end must be cut square and any burrs removed to guarantee a proper seal.
The technician should smooth edges with a file or deburring tool and wipe the surface clean.
Any surface rust must be treated or removed to prevent future corrosion and guarantee good thread engagement.
Clean Cut End
With a clean, square end the new threads will seat properly and form a reliable seal; achieving this begins by removing any remaining jagged metal and old thread remnants so the mating surface is uninterrupted.
The pipe end must be cut true, checked for perpendicularity, and free of deformation. A guide block or lathe guarantees an even face. Inspect with a straightedge and magnifier; measure diameter to confirm material loss is within threadable limits.
Protect the bore from debris. If the cut exposes thin or scored walls, consider replacing the section rather than attempting repairs.
- Verify square cut with straightedge
- Measure diameter accurately
- Remove loose fragments and clean bore
- Protect end from damage during work
Remove Burrs Smoothly
When removing burrs, a steady hand and the right tools guarantee the mating surfaces are clean and undamaged; small, controlled strokes with a fine file or deburring tool eliminate raised edges without reducing thread-diameter or cutting into the pipe shoulder.
The practitioner inspects the cut end under good light, rotating the pipe to locate minute lips and metal shards.
A slim file, carbide deburrer, or chamfering bit removes imperfections while preserving the seating face. Work progresses slowly, checking fit frequently with the mating fitting.
Final wiping removes filings and oil; avoid aggressive grinding or altering thread runout.
Surface Rust Treatment
Regularly inspecting and treating surface rust on the pipe end and new thread surface preserves fit and prevents accelerated corrosion at the joint.
The procedure begins with mechanical removal: wire-brush loose rust, then use fine emery cloth for remaining spots.
Degrease with a solvent, rinse, and dry thoroughly.
Apply a thin layer of anti-corrosion primer or rust converter where pitting is present.
For threads, use a nylon brush and a light application of thread lubricant or anti-seize; avoid excess that attracts debris.
Store treated components in a dry environment and recheck before assembly to confirm continued protection.
- Wire-brush and sand
- Solvent clean and dry
- Primer or rust converter
- Light anti-seize on threads
How to Apply Thread Sealant and PTFE Tape the Right Way
Apply thread sealant or PTFE (Teflon) tape precisely to threaded pipe joints to guarantee a tight, leak-free connection without contaminating the sealant or creating uneven coverage.
Clean threads of debris, oil, and old sealant with a wire brush and solvent.
For PTFE tape, wrap clockwise from the first full thread, overlapping 50% and using 3–4 turns for standard fittings; avoid tape on the first exposed thread.
For paste sealant, apply a thin, even coat to male threads only.
Assemble fittings hand-tight, then finish with the appropriate wrench turns.
Inspect for leaks after pressurizing and retighten if necessary.
Re‑Thread a Pipe With a Die and Guide (How‑To)
Re-cutting damaged pipe threads with a die and guide restores a reliable seal and extends the fitting’s service life.
The process uses a correctly sized split die, adjustable guide, and steady, aligned pressure.
Clean the pipe, secure it in a vise with soft jaws, and mount the guide to keep the die square.
Apply cutting oil, start the die straight, and advance with even turns, reversing occasionally to clear chips.
Inspect threads for uniform depth and fit with the mating fitting; re-cut until the fitting seats smoothly without gaps.
Finish by removing burrs and applying appropriate thread sealant.
- Choose correct die and guide
- Secure and align pipe
- Use cutting oil; cut with even turns
- Clean, inspect, deburr, seal
Avoid Cross‑Threading When Reinstalling Fittings
When reinstalling fittings, the installer should begin threads straight and engage them by hand to guarantee proper alignment.
Careful hand-starting reduces the risk of cross-threading and damage to the re-cut threads.
Once aligned, applying the appropriate thread sealant or tape helps seat the fitting and protects the joint against leaks.
Start Threads Straight
Before threading a fitting back onto a repaired pipe, the installer aligns the threads squarely and begins them by hand to prevent cross‑threading. The installer inspects both male and female threads for burrs, cleans debris, and orients the fitting so engagement is smooth.
Gentle clockwise rotation confirms correct start; resistance indicates misalignment and prompts removal and realignment. Once hand‑started, a short snugging with the appropriate wrench finishes seating without forcing.
- Visually inspect threads for damage or debris.
- Hand‑start fittings to confirm correct engagement.
- Back off and realign at first sign of resistance.
- Use steady, controlled torque to finish.
Use Thread Sealant
Thread sealant application prevents leaks and reduces the chance of cross‑threading by creating a controlled lubricating layer that helps fittings seat evenly.
The technician applies a compatible paste or tape to male threads, avoiding excess that can contaminate the bore.
Lubrication eases initial engagement, allowing threads to align without force; this lowers risk of cross‑cuts and stripped threads.
After hand‑starting, fittings are tightened to specified torque with appropriate tools.
For dissimilar metals or pressurized systems, a sealant rated for the materials and service conditions is selected.
Proper cleaning before application guarantees reliable sealing and repeatable removal if needed.
Test Repaired Threads and Connections for Leaks
Always verify repaired threads and fittings under the same pressure and flow conditions they will face in service to make certain the repair holds.
Inspect visually for misalignment, residual sealant, or gaps.
Pressurize gradually while monitoring gauges and observe for drops.
Use a non-corrosive leak detection solution or soapy water to reveal small bubbles at joints.
Restrict flow to expected operational rates before final acceptance.
- Confirm system isolation and safe test parameters.
- Apply recommended test medium and incremental pressure.
- Watch fittings for visible movement or seepage.
- Record pressure stability for the required dwell time.
Troubleshoot Persistent Leaks After Thread Repair
Often leaks persist after a thread repair due to incomplete seating, contaminated sealing surfaces, incorrect sealant choice, or unseen damage to the mating parts; troubleshooting focuses on isolating the root cause methodically rather than repeating the repair. The technician inspects seals, cleans threads, retests with low pressure, and swaps sealant types. If leakage continues, the joint is disassembled for visual inspection of cracks, burrs, or misalignment. Record findings and actions, then pressure-test again. If damage is beyond thread repair, consider component replacement.
| Step | Check | Action |
|---|---|---|
| 1 | Visual | Clean threads |
| 2 | Sealant | Change type |
| 3 | Fit | Re-seat joint |
| 4 | Damage | Inspect |
| 5 | Test | Pressure test |
Removing Broken Threads From Copper Pipe (Methods)
When broken threads occur on copper pipe, technicians often begin by using thread chasing tools to restore damaged grooves without removing excess material.
If chasing proves insufficient, attention shifts to pipe end repair techniques such as cutting back to sound metal and re-facing the end for a new fitting or coupling.
Selection between chasing and end repair depends on thread condition, remaining pipe length, and downstream connections.
Thread Chasing Tools
Thread-chasing tools provide a controlled way to restore damaged or broken threads on copper pipe without cutting back to a new fitting. A tap-like chase straightens deformed threads, removing burrs and corrosion while preserving pipe length. Use lubrication and steady alignment to avoid cross-threading.
Hand-held thread files can reshape flattened crests where taps cannot reach. For internal damage, split dies or valve-seat reamers correct profiles.
Inspect threads with a gauge or mating fitting; reject if metal loss is excessive. Proper tool selection and gentle technique often salvage connections, saving time and preventing unnecessary pipe replacement.
- Tap-style thread chaser
- Hand-held thread file
- Split die or die nut
- Thread gauge/inspection tools
Pipe End Repair
In repairing a copper pipe with broken threads, the goal is to restore a clean, concentric thread profile or create a new, serviceable end without shortening the run unnecessarily.
Options include re-cutting threads with a precision die to chase and reshape remaining form, using a tubing cutter and reaming to remove damaged length then reflare or sweat on a fitting, or installing a compression sleeve or repair coupling that bridges the damaged area without threading.
For severe damage, replace the section with a short coupling or insert adapter.
Proper deburring, alignment, and leak testing guarantee durable, watertight results.
Tools to Keep in Your DIY Pipe‑Repair Kit
A compact toolkit of the right tools makes removing a broken pipe thread faster and safer: needle-nose pliers, adjustable wrenches, extraction taps, screw extractors, a rotary tool with cutting and grinding bits, a set of drill bits, and penetrating oil form the core.
Additional useful items include thread sealant, a torch for heat where safe, wire brushes, and protective gear.
Components should be organized for quick access; quality and matching sizes reduce damage risk.
Regularly inspect and replace worn bits.
Recommended extras help adapt to different materials and tight spaces without escalating to specialist intervention.
- Inspection tools and lights
- Precision cutters and files
- Tap and die sets
- Safety gloves and goggles
Remove Leftover Thread Fragments Without Damaging the Pipe
Before attempting repairs, the remaining thread area should be inspected and cleaned to remove debris and reveal any hidden damage.
A properly sized thread chaser is then used to gently restore and align the threads without cutting away pipe material.
Careful, incremental passes with the chaser prevent further distortion and preserve the pipe’s integrity.
Inspect And Clean Threads
With the broken fitting removed, the technician inspects the pipe threads closely for nicks, metal shards, and compressed threads that could prevent a seal. He brushes debris with a soft wire brush, using light strokes to avoid further damage. Compressed or deformed threads are gently teased open with a pick, extracting tiny slivers. A thorough wipe with solvent removes grease and metal dust. Final inspection uses bright light and magnification to verify cleanliness and intact crest profiles before any corrective work or replacement.
- Remove loose fragments with a brush.
- Pick out embedded slivers carefully.
- Solvent wipe to remove residue.
- Magnify and recheck threads.
Use A Thread Chaser
After verifying the threads are clean and undamaged, the technician reaches for a thread chaser to remove any remaining fragments without cutting new threads.
The chaser, a hardened tool shaped like a die but with tapered entry, is aligned carefully and turned by hand or wrench to re-seat, realign, and clear damaged material.
Light oil lubricates the cuttings and prevents galling; work slowly to avoid cross-threading.
Inspect progress frequently, wiping debris and testing fit with the mating part.
If resistance or distortion appears, stop and reassess to prevent further damage.
A properly used chaser restores function while preserving original threads.
Workarounds for Tight or Confined Spaces
In cramped locations where a broken pipe thread cannot be accessed directly, technicians rely on compact tools and alternative extraction techniques to avoid enlarging the opening or causing further damage.
They prefer low-profile screw extractors, flexible shaft drivers, and mini-grip pliers to work within tight clearances. Lighting and steady support improve control; conservative torque prevents sudden slips.
When visibility is poor, feel-based methods and incremental tightening-checking cycles reduce risk. Magnets and vacuum-retained bits can retrieve small fragments without enlarging fittings.
- Flexible shaft extractor for awkward angles
- Mini tap wrenches with low-profile extractors
- Magnetized retrieval tools for ferrous shards
- Support braces to stabilize workpiece
Adapting Thread Removal Techniques for Gas Lines vs. Water
When working on pipe threads, technicians must treat gas lines and water lines differently due to distinct safety risks, sealing requirements, and regulatory standards.
For gas, prioritize leak prevention: use approved fittings, thread sealants specified for gas, and minimal thread removal to preserve integrity.
Work with system depressurized and tested with a gas detector and soap solution.
For water, tolerate more aggressive extraction and file or chase threads for sealing; PTFE tape or pipe dope rated for potable water is acceptable.
Always follow local codes, shutoffs, and permit rules.
When unsure, defer to licensed gas contractors for repairs.
Salvage Expensive Fixtures With Minimal Damage
With careful technique and the right tools, technicians can remove a broken pipe thread while preserving high-value fixtures for reuse.
Focused assessment identifies attachment points and damage extent before intervention.
Precision tools and controlled force limit surface marring and maintain sealing surfaces.
When necessary, use protective clamps, soft-jaw pliers, or sacrificial adapters to transfer stress away from visible finishes.
- Inspect fixture and surrounding fittings to plan noninvasive access.
- Choose extraction tools sized to avoid contact with decorative surfaces.
- Apply penetrating lubricant sparingly to ease seizure without staining.
- Test-fit replacement fittings off-fixture to confirm alignment before final assembly.
Prevent Future Thread Breakage and Corrosion
By prioritizing material compatibility, proper installation torque, and routine maintenance, future thread breakage and corrosion can be greatly reduced.
Select fittings and pipes of compatible metals or use dielectric unions to prevent galvanic corrosion.
Apply appropriate thread sealants or tapes rated for the service (water, gas, or chemical) and avoid over-tightening; torque to manufacturer specifications when available.
Inspect threaded joints periodically for leaks, rust, or loosened fittings.
Replace compromised components promptly and consider upgrading to corrosion-resistant materials like stainless steel or brass in aggressive environments.
Proper drainage and ventilation also minimize moisture-related deterioration over time.
How to Protect Adjacent Piping and Finishes During Work
During pipe repair or removal, protecting adjacent piping and finished surfaces is essential to prevent accidental damage, contamination, and costly rework. The worker isolates the area, drains and depressurizes lines, and clears loose debris.
Surfaces are covered with drop cloths or foam pads; metal straps and clamps are wrapped with tape to avoid scratches. Small parts are contained to prevent contamination of potable lines.
- Use non-abrasive covers for counters and floors.
- Wrap nearby pipes with foam or cloth to prevent tool slips.
- Isolate and cap live lines to avoid contamination.
- Keep a clean work tray for fasteners and scraps.
When to Call a Professional Plumber
In cases where a broken pipe thread is seized, leaking persistently, or inaccessible without removing significant structure, a professional plumber should be contacted.
A plumber evaluates risk to structural elements, water damage potential, and code compliance, offering safe extraction, thread repair, or replacement. Call when specialized tools (extractors, pipe vises, oxy-acetylene for stubborn fittings) or skills (soldering, brazing, welding, complex threading) are required, or when multiple connections are compromised.
Also seek help if water mains, gas lines, or high-pressure systems are involved, or when previous repairs failed.
Prompt professional intervention minimizes collateral damage and assures reliable, code-compliant restoration.
Estimate Time and Cost for DIY Broken Thread Removal
When estimating time and cost for a DIY broken thread removal, one should consider the pipe material, access difficulty, and required tools, since these factors largely determine whether the job takes a quick afternoon or several sessions over a weekend.
Typical scenarios: shallow accessible threads may take 1–3 hours; recessed or corroded threads can need 3–8 hours.
Basic tools cost under $50; specialty extractors or thread files raise expenses to $75–150. Replacement fittings and sealant add $5–40.
Total DIY cost typically ranges $10–150, excluding potential waste and unexpected repair time.
- Assess access and condition
- List required tools
- Estimate parts needed
- Allocate contingency time
Choosing Replacement Materials: Brass, Stainless, or PVC
How should one choose between brass, stainless steel, or PVC for a replacement fitting? Selection depends on application, fluid, pressure, temperature, and compatibility.
Brass resists corrosion, suits potable water, and offers good machinability; avoid with ammonia or certain acids.
Stainless steel excels under high pressure, heat, and corrosive environments but costs more and may gall with dissimilar metals.
PVC is lightweight, inexpensive, and corrosion-resistant for cold, low-pressure, non-potable or drainage use; it isn’t suitable for hot water or combustible fluids.
Consider joint type, available space, and code requirements; match material to service conditions for durable, safe repairs.
Document the Repair for Warranty or Inspection
For warranty or inspection purposes, the repair should be documented with clear, dated records that identify the broken component, the materials used for the replacement, and the exact procedures performed.
Photographs before, during, and after the repair should be included, showing serial numbers or location markers where applicable.
Receipts for parts and any calibration or pressure tests must be attached.
Signatures of the person performing the work and, if required, an inspector should be recorded with contact information.
- Photographic evidence with timestamps
- Parts list and receipts
- Step-by-step procedure and test results
- Technician signature and contact
Recycle or Dispose of Removed Metal Fittings Responsibly
After documenting the repair, attention should turn to the proper handling of removed metal fittings to meet environmental and regulatory obligations.
Collect fittings, separate materials (brass, copper, steel) and remove nonmetal debris like rubber seals to improve recyclability.
Check local rules for hazardous residues—oily or lead-containing parts may need special handling.
Use designated scrap metal drop-offs or municipal recycling centers; obtain receipts if required for disposal records.
If fittings remain reusable, offer them to salvage services or donate to community workshops.
Avoid landfill disposal when recycling options exist, and follow local guidelines to minimize environmental impact.
Build Confidence: Quick Practice Projects for Future Repairs
With a few targeted practice projects, a homeowner can build the practical skills and confidence needed for future pipe and fitting repairs.
Short, focused exercises reinforce tool use, threading technique, sealant application, and safe removal. Practice reduces mistakes and speeds real repairs.
- Assemble threaded fittings on scrap pipe, tighten to proper torque, then disassemble to learn thread alignment.
- Cut and rethread a short pipe segment using a die to master clean, square threads.
- Apply and remove various sealants on test joints to observe sealing and cleanup.
- Simulate a stuck fitting removal using seized threads and proper extractor techniques.
Conclusion
After heroic attempts to coax the stubborn thread into compliance, the reader discovers that patience, the right tool, and a dash of humility fix what brute force could not. Ironically, the simplest solution often proves the most respectable: shut water off, replace the fitting, and document the work — no glory, just function. The pipe, indifferent to human drama, resumes its job; the leak is gone, ego slightly dented, and skills quietly improved.