Pipe Dope Harden Guide: How to Properly Harden Thread Sealant for Pipes
To properly harden thread sealant for pipes, follow the manufacturer’s cure window, ensure threads are clean and dry, and choose the appropriate chemistry for your specific application. Hardened compounds develop strength through solvent evaporation or polymer crosslinking, which can take anywhere from minutes to days, influenced by factors such as temperature, humidity, and ventilation. Remember that anaerobic pastes require metal-to-metal contact, while PTFE remains pliable. Insufficient curing can lead to leaks, while over-curing may hinder future adjustments. For practical steps, troubleshooting, and product selection guidance, refer to the detailed sections that follow.
Quick Answer: When to Wait Before Pressurizing
When fittings are assembled with thread sealant, the joint should not be pressurized until the manufacturer’s recommended cure time has elapsed. The wait period varies by product formulation, ambient temperature, humidity, and thread fit.
Typical cure windows range from minutes for rapid-setting compounds to 24 hours for heavier pastes. Users should consult technical data sheets for specific dwell times and any required assembly torque.
Partial cures can create false security; full cure guarantees intended chemical bonding and sealing integrity. If immediate service is necessary, select a fast-curing sealant specified for the application rather than bypassing recommended cure times.
What “Pipe Dope Harden” Means for Threaded Pipes
After the recommended cure time has passed, the term “pipe dope harden” describes the chemical and physical changes the sealant undergoes as it sets on threaded pipe joints.
It refers to solvent evaporation, polymer cross-linking, or filler consolidation that transforms a paste into a resilient, adherent gasket.
Hardened compound fills thread voids, resists extrusion under torque, and creates a pressure- and chemical-resistant barrier.
Hardening also stabilizes the joint’s mechanical friction, helping prevent loosening.
The extent and nature of hardening vary by formulation—PTFE-based, anaerobic, or solvent-based compounds—affecting elasticity, shear strength, and long-term compatibility with service fluids.
How Cure Time Affects Seal Strength and Leak Risk
During the cure period, seal strength develops progressively as the compound shifts from a pliable paste to a load-bearing gasket, and insufficient time in this phase increases the likelihood of leaks. Proper cure time allows molecular crosslinking and solvent evaporation to reach design strength; premature pressurization causes extrusion, microgaps, or joint movement that compromise sealing. Ambient temperature and humidity alter cure rates, so specifications and visual inspection guide readiness. Slow curing can leave temporary tackiness; overcure rarely weakens but may reduce reworkability. Monitor cure and pressure-test only after recommended dwell to minimize leak risk.
| Factor | Effect |
|---|---|
| Temperature | Alters rate |
| Pressure | Tests integrity |
| Humidity | Influences cure |
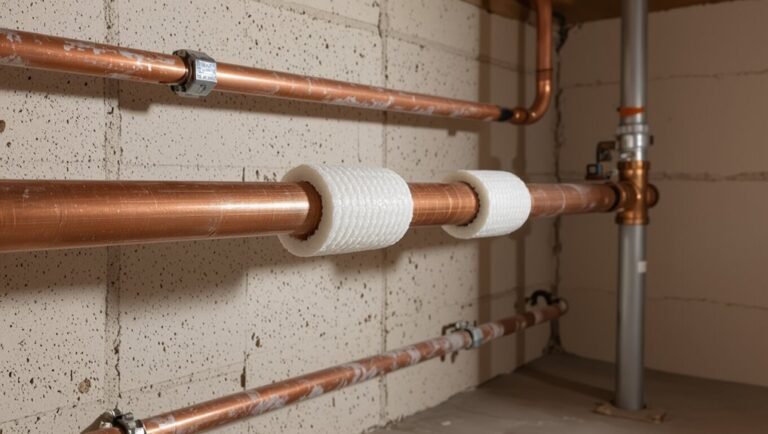
Types of Pipe Dope That Harden vs Stay Pliable
The guide contrasts two main categories of pipe dope: formulations that harden after curing and those that remain pliable.
Hardened pipe dopes form a rigid seal that can resist high pressure and temperature but may crack under movement.
Pliable thread sealants maintain flexibility to accommodate vibration and thermal cycling, trading some structural strength for resilience.
Hardened Pipe Dopestuff
Different formulations of pipe dope either cure to a hard, rigid seal or remain soft and pliable, and selecting between them depends on application requirements such as pressure, temperature, and the need for future disassembly.
Hardened pipe dopestuff typically contains epoxy, anaerobic resins, or thermosetting fillers that polymerize to form a durable, immobile joint. These compounds resist vibration, high pressure, and chemical attack, providing long-term leak prevention where movement is minimal.
Installation requires proper application and cure time; removal often demands mechanical methods or chemical solvents.
Hardened types suit permanent assemblies in plumbing, gas, and industrial piping where longevity outweighs serviceability.
Pliable Thread Sealants
Contrast pliable thread sealants with hardened dopes by emphasizing flexibility and serviceability: these formulations remain soft or semi-soft after application to accommodate movement, vibration, and thermal expansion while maintaining a reliable seal.
Pliable sealants use non-curing or slow-curing chemistries—polymeric pastes, silicone-based compounds, and PTFE-laden greases—that resist cracking and permit disassembly.
They suit dynamic joints, repair work, and systems needing periodic maintenance.
Performance varies by temperature range, chemical compatibility, and pressure rating; users select products based on pipe material and media.
Proper application requires clean threads, correct thickness, and following manufacturer drying or seating guidance to guarantee leak-free service.
Solvent-Based vs Anaerobic vs PTFE Pastes: Key Differences
The discussion contrasts solvent-based pastes, which rely on evaporating carriers and often harden as solvents leave, with anaerobic compounds that cure in the absence of air and PTFE pastes that remain largely non-curing and lubricious.
Solvent-based options can become brittle or shrink, anaerobic sealants provide rigid, gap-filling bonds, and PTFE stays pliable and tolerant of disassembly.
Comparing these behaviors helps determine suitability for threaded joints, repair work, or reusable connections.
Solvent-Based Paste Traits
When exposed to air, solvent-based pipe sealants dry and harden as their carrier evaporates, leaving behind a tacky, adhesive film that fills threads and seals minor imperfections; this behavior contrasts with anaerobic and PTFE pastes, which cure chemically or remain as a solid lubricant.
Solvent-based pastes offer rapid skin-over and moderate cure times influenced by temperature, humidity, and ventilation.
They provide good initial sealing, ease of application, and compatibility with dissimilar metals, but can shrink slightly and lose elasticity over time.
Residue can attract dirt and resist high-pressure vibration.
Surface prep and proper ventilation are important for reliable performance.
Anaerobic Vs PTFE
Having summarized solvent-based paste behavior, attention shifts to comparing anaerobic and PTFE alternatives alongside solvent types to highlight how each seals, cures, and performs under service conditions.
Anaerobic adhesives cure in metal-to-metal, oxygen-deprived gaps forming rigid, pressure-resistant seals suited to steel fittings; they resist vibration but require clean surfaces.
PTFE pastes remain inert films that lubricate threads, prevent galling, and accommodate disassembly but do not cure and can creep under pressure.
Selection hinges on required permanence, compatibility with media, and temperature.
Consider application cleanliness, torque behavior, and leak risk when choosing between curing and non-curing options.
- Anaerobic: rigid, gap-sensitive cure
- PTFE: non-curing, lubricating film
- Solvent-based: intermediate tack and set
Choosing the Right Dope for Metal and Plastic Threads
Select a compound based on thread material, service conditions, and compatibility: metal threads typically require a lubricant-sealant blend that resists galling and corrosion at operating temperatures and pressures, while plastic threads demand low-solvent, non-reactive formulations that prevent stress cracking and excessive softening. Choices hinge on temperature, media, and assembly torque limits. For metals, petroleum- or synthetic-based pastes with anti-seize properties are common; for plastics, PTFE-based or waterborne pastes minimize chemical attack. Selection also considers regulatory approvals and long-term stability. Visualizing options:
| Metal Dope | Plastic Dope |
|---|---|
| Anti-seize paste | PTFE paste |
| High-temp synthetic | Waterborne low-solvent |
| Corrosion inhibitor | Non-reactive polymer |
Surface Prep: Cleaning Threads for Reliable Curing
Before applying pipe dope, threads should be free of oil and grease to prevent inhibition of the curing process.
Any dirt or debris must be cleared from the thread crests and roots to guarantee full contact and sealant distribution.
Threads should then be dried completely so moisture does not interfere with adhesion or cure.
Remove Oil And Grease
Oil and grease left on pipe threads block sealant adhesion and inhibit proper curing, so thorough removal is essential.
The surface must be degreased using a compatible solvent or commercial degreaser, applied with lint-free cloths or brushes.
Allow solvent to evaporate fully before applying pipe dope.
Avoid contaminating cleaned threads with oily hands or tools; wear gloves and handle only non-contact areas.
Inspect visually and by touch for residual slickness.
Proper degreasing reduces failures and speeds consistent curing.
- Use approved solvents and follow ventilation precautions.
- Wipe until cloth shows no oil transfer.
- Replace contaminated rags immediately.
Clear Dirt And Debris
When preparing threads for pipe dope, removing dirt and debris is essential to guarantee intimate contact and proper curing; loose particles can create gaps that prevent a continuous seal and trap moisture or solvents.
The technician inspects threads visually and with a brush, dislodging grit, old sealant flakes, and corrosion.
Compressed air or a stiff nylon brush removes fine particles from crevices.
For stubborn deposits, a plastic scraper or mild solvent applied sparingly dissolves residues without harming metal or coatings.
After brushing, a final sweep with air or lint-free cloth confirms surfaces are free of particulate contaminants before applying sealant.
Dry Threads Completely
After removing grit and residues, the technician makes certain threads are completely dry to allow pipe dope to adhere and cure uniformly. Moisture trapped in crevices prevents bonding and can cause delayed curing or contamination.
A quick inspection with a flashlight verifies dryness; compressed air and lint-free cloths expedite the process. Attention to adjacent surfaces prevents recontamination. Proper drying reduces the need for rework and assures predictable joint performance under pressure.
- Use oil-free compressed air and short bursts to clear moisture.
- Wipe threads with a clean, lint-free cloth; repeat if needed.
- Allow a brief dwell time after drying before applying sealant.
Removing Oil, Dirt, and Old Sealant Safely
Before applying new sealant, the joint must be free of oil, dirt, and old compound to guarantee proper adhesion and curing.
Remove loose debris with a brass or nylon brush, avoiding steel that can scratch or contaminate threads.
Wipe surfaces with a clean rag soaked in a suitable solvent (isopropyl alcohol or a manufacturer-recommended cleaner) to dissolve oils; allow complete evaporation.
For stubborn compound, use a plastic scraper or dental pick, working gently to prevent thread damage.
Inspect threads under good light and repeat cleaning until no residue remains.
Dispose of solvent-soaked rags following local regulations.
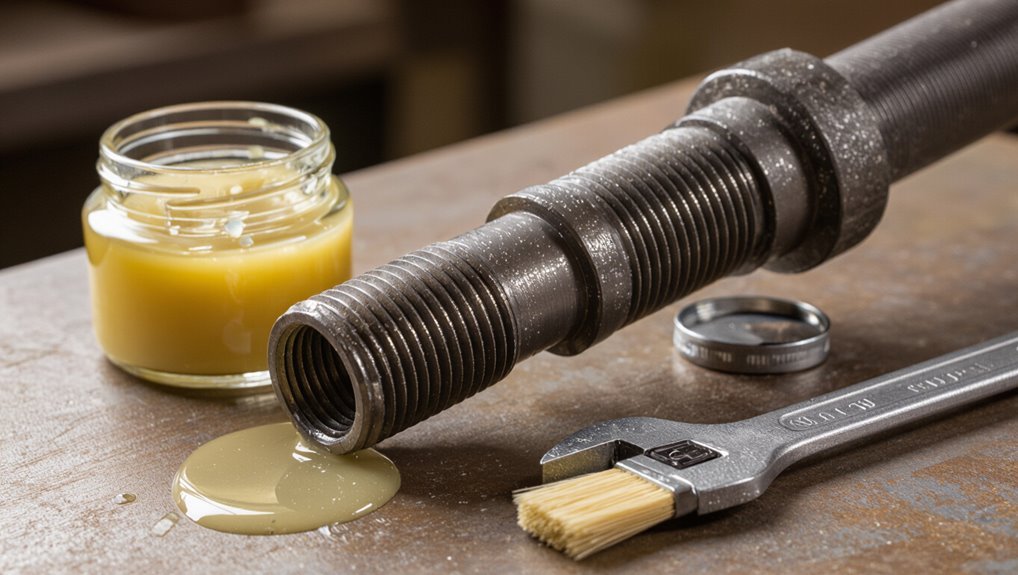
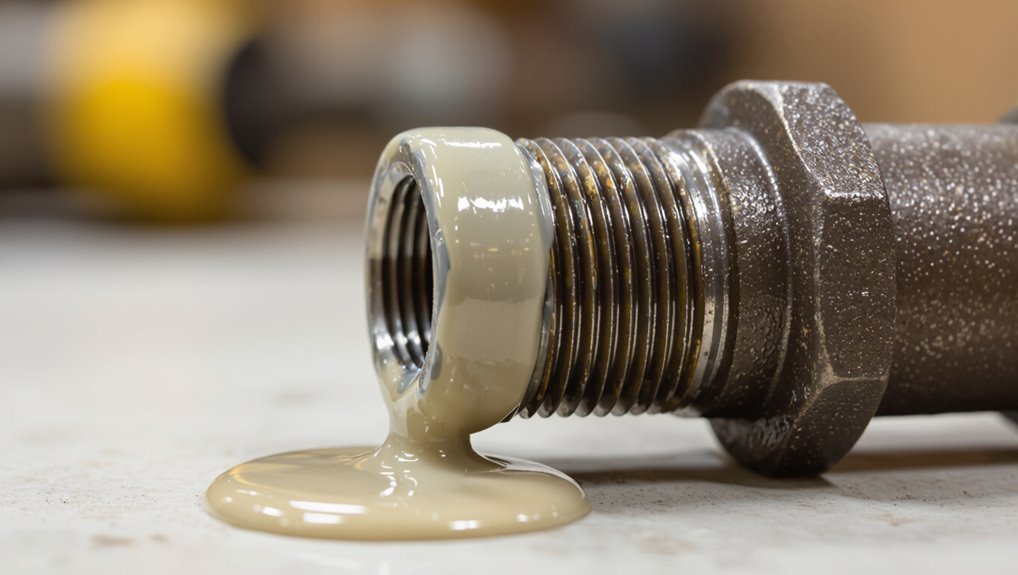
How Much Dope to Apply for an Effective Cure
For a reliable cure, apply enough pipe dope to coat threads thinly and evenly without creating excess that can be pushed into the bore.
The correct amount guarantees full contact between mating surfaces and promotes consistent curing without wasting material.
Coverage should follow thread crests and roots while leaving no gaps; thin layers cure more predictably than thick globes.
Allow recommended dwell time after assembly for solvent evaporation or chemical set.
Monitor initial joints for seepage and recheck torque if needed.
Consider pipe size, thread pitch, and sealant type when estimating quantity to balance seal integrity and cure performance.
- Match layer thickness to thread size and pitch
- Use minimal excess to prevent intrusion into flow
- Factor manufacturer cure times when planning assembly
Correct Application Techniques to Avoid Over‑Coverage
Apply the sealant sparingly and methodically to thread crests and roots, maintaining a thin, continuous film that fills thread voids without forming beads or globules.
Technicians should use a small brush or applicator, advancing along threads with steady strokes and avoiding excess at the pipe shoulder.
Rotate the fitting briefly to distribute evenly, then inspect for drips or pooled material and remove immediately with a rag.
For tape-compatible joints, apply minimal tape directionally from the lead end without overlapping excessively.
Clean surfaces before application and work in controlled strokes to prevent contamination and assure uniform curing across the joint.
Thread Engagement and Torque’s Role in Sealing
Thread engagement depth determines how much metal-to-metal contact is available to support the seal and distribute stress.
Appropriate torque compresses the joint enough to form a reliable seal without overstressing threads or squeezing out pipe dope.
Balancing engagement and torque is essential for consistent sealing performance.
Thread Engagement Depth
Across the mating surfaces, proper engagement depth determines how threads share load and compress sealing compound, directly affecting joint integrity.
Engagement depth controls contact area, prevents overstressing roots, and sets the mechanical squeeze that embeds pipe dope without relying solely on torque.
Insufficient depth yields channeling and leaks; excessive depth induces galling and distorts sealant film.
Designers balance thread length, pitch, and fit class to optimize sealing surfaces while allowing predictable compound distribution.
Inspectors verify engagement visually and by measurement before hardening occurs, ensuring long-term leak resistance and mechanical stability without overdependence on tightening.
- Measure engagement versus thread form.
- Match compound volume to contact area.
- Avoid bottoming out or undercutting.
Torque And Seal Integrity
Balance torque carefully to convert axial clamping into consistent sealant compression without overstressing threads.
Proper torque guarantees thread engagement generates uniform pressure on the hardened pipe dope, filling gaps and maintaining a leak-free barrier.
Insufficient torque permits micro-movements and gaps; excessive torque risks thread deformation, sealant extrusion, or cracking.
Torque specifications depend on material, thread form, and dope properties; calibrated tools and stepwise tightening help achieve targets.
After initial cure, rechecking torque can verify integrity, especially in cyclic loads or thermal cycles.
Documented torque values and inspection records support reliable long-term sealing performance and safe operation.
Temperature Ranges That Affect Pipe Dope Cure
How do ambient and material temperatures influence pipe dope curing? Temperature governs chemical reaction rates and viscosity, altering cure time and final hardness. Lower temperatures slow polymerization, prolonging tackiness and delaying pressure testing.
Elevated temperatures accelerate curing but can reduce working time and risk brittle seals if too rapid. Manufacturers specify ideal ranges; installers should monitor both air and pipe surface temperatures to predict performance and adjust procedures.
- Typical cold-limit effects: extended cure, poor flow into threads.
- Typical hot-limit effects: shortened pot life, potential shrinkage.
- Mid-range ideal: consistent cure, predictable strength and flexibility.
How Humidity and Environment Change Cure Time
Ambient humidity directly influences the cure chemistry of many pipe dopes, with high moisture accelerating some formulations and slowing others.
Temperature interacts with humidity to alter reaction rates, making expected cure times variable across conditions.
Airflow and ventilation further modify surface drying and solvent evaporation, so site-specific environmental control is critical for accurate hardening predictions.
Ambient Humidity Effects
Considering humidity levels is essential because moisture in the air directly alters the chemical reactions and physical drying of pipe dope, with high humidity generally accelerating cure for water-curing formulations and slowing solvent evaporation for solvent-based types.
Ambient humidity influences tack time, final hardness, and the risk of incomplete cure; condensation can cause surface softening while very low humidity prolongs cure of moisture-activated products.
Practitioners should monitor relative humidity and select formulations accordingly to maintain predictable cure schedules and joint integrity.
- Measure RH near the worksite and record during cure.
- Use desiccation or ventilation to modify local humidity.
- Match product type to expected environmental humidity.
Temperature And Cure
Humidity interacts with temperature to define the kinetics of pipe dope curing: higher temperatures generally speed chemical reactions and solvent evaporation, while lower temperatures slow them and can prevent full cure.
Temperature alters reaction rates exponentially; many sealants cure fastest within manufacturer-specified ranges, often between 15–35°C.
Outside those bounds, tackiness persists or crosslinking is incomplete. Cold substrates draw heat away, extending cure, while warm ones accelerate it but may reduce working time.
Thermal cycling can induce stress and uneven hardening. Practical curing predictions require combining temperature data with humidity conditions and product-specific cure charts for reliable scheduling.
Ventilation And Airflow
In enclosed spaces with poor air movement, solvent evaporation and moisture exchange at the sealant surface slow, prolonging tackiness and extending cure time.
The guide notes that relative humidity, ventilation rate, and airflow direction each alter polymerization or solvent loss. High humidity can accelerate cures for moisture-curing formulations but stalls solvent-based products. Stagnant air increases off-gassing accumulation, potentially trapping moisture and contaminants against threads.
Controlled airflow promotes uniform drying; exhaust reduces vapors.
Installers should assess environment before application and adjust ventilation or select a formula suited to ambient conditions to achieve predictable hardening and reliable seals.
- Measure RH and airflow before applying.
- Use fans or exhaust for solvent-based compounds.
- Choose moisture-curing sealants in damp settings.
Reading Manufacturer Cure and Handling Instructions
Why read the manufacturer’s cure and handling instructions carefully?
Manufacturers provide specific cure times, temperature and humidity ranges, substrate preparation steps, and safe handling practices critical to reliable sealant performance.
Following instructions guarantees chemical compatibility, correct application thickness, and avoidance of contaminants that impede curing.
Safety data sheets warn about vapors, skin contact, and required PPE.
Deviations can cause incomplete cure, weakened bonds, or toxic exposure.
Inspect labels for post-application testing recommendations and any required rework windows.
Document adherence to instructions for maintenance records and warranty compliance.
Accurate interpretation reduces failures and supports predictable, code-compliant installations.
Minimum and Recommended Cure Windows by Product Type
Different product chemistries require distinct minimum and recommended cure windows to achieve full mechanical strength and chemical resistance. Users should follow manufacturer specifications, noting that ambient temperature, humidity, and joint geometry affect cure times. Generally, anaerobic pastes, PTFE-based tapes, and solvent-based compounds present different profiles and handling precautions. Typical guidance helps plan pressure testing and service entry without compromising seals.
- Anaerobic pastes: often minimum 15–60 minutes, recommended 24–72 hours for full properties.
- PTFE tapes: immediate seal but full bedding depends on torque and may stabilize over 24–48 hours.
- Solvent compounds: tack-free in minutes, full cure 24–72 hours.
How to Tell Whether Pipe Dope Has Cured Enough
After following the manufacturer’s cure windows, evaluating whether pipe dope has reached sufficient hardness and adhesion requires simple, practical checks tailored to the product type and conditions.
Inspect visually for uniform color and surface sheen changes specified by the manufacturer. Gently probe an inconspicuous area with a fingernail or non‑marring tool: cured sealant resists deformation and does not smear. Check tackiness—fully cured dope should feel dry, not sticky. Confirm thread-to-thread bonding by feeling for movement under light torsion; cured joints resist slippage. Document ambient temperature and humidity during inspection, as conditions influence cure and interpretation of these indicators.
Pressure‑Testing After Cure: Safe Procedures
After cure is confirmed, the guide outlines recommended pressure limits to avoid overstressing joints during testing.
It then describes systematic leak detection procedures, including visual inspection, soapy solution checks, and monitoring pressure decay.
Safety precautions for gradually ramping pressure and isolating test sections are emphasized to prevent damage and guarantee accurate results.
Recommended Pressure Limits
A clear set of pressure limits is essential before conducting any post‑cure pressure test to prevent joint damage and guarantee safety.
Recommended limits depend on sealant specifications, pipe material, and system design.
Testing at pressures above operational maximum risks thread deformation; testing too low may miss weaknesses.
A conservative approach uses 1.5× the normal operating pressure for noncritical systems and lower multipliers for brittle materials.
Monitor pressures gradually, hold for the manufacturer‑specified dwell time, and record results.
If any signs of stress appear, cease testing and inspect assemblies.
- Confirm manufacturer maximum working pressure and cure time.
- Apply gradual ramp to target pressure.
- Use safety relief and monitoring equipment.
Leak Detection Procedures
How should leaks be detected once pipe dope has cured and pressure testing begins? The inspector applies incremental pressure up to the rated test value, monitoring gauges for stability.
Visual inspection focuses on joints, fittings, and connections for wetness or bead separation. A non‑corrosive soap solution is brushed on suspect areas to reveal bubbles; care is taken to avoid solvents that could degrade the sealant.
For inaccessible joints, electronic ultrasonic or acoustic leak detectors are used. Any detected leak prompts depressurization, repair or retightening, and a repeat cure interval before retesting.
All results are recorded and retained for compliance.
If the Dope Is Still Tacky: Step‑By‑Step Fixes
What to do when pipe dope remains tacky instead of curing through? A technician assesses conditions, isolates the joint, and avoids loading or rotating fittings. First, verify compatibility and age of the compound; expired or wrong-grade dope may never harden.
Next, remove softened material with a suitable solvent and clean threads thoroughly, following manufacturer guidance. Inspect threads for corrosion or contamination, then reapply correct sealant sparingly and assemble to specified torque.
Finally, allow extended undisturbed cure time and perform a controlled leak test before placing into service.
- Confirm product suitability and expiry
- Clean threads using recommended solvent
- Reapply correctly and retest
Accelerating Cure Safely Without Harming Threads
The section examines methods to speed pipe‑dope curing by applying controlled heat and using approved chemical accelerants.
It outlines temperature limits, safe application techniques, and compatibility checks to protect thread integrity.
Practical precautions and monitoring steps are presented to prevent softening, distortion, or chemical damage.
Speeding Cure With Heat
Applying controlled heat can shorten pipe dope cure times while preserving thread integrity, but it requires careful temperature management and even distribution to avoid softening sealants or damaging coatings.
Technicians should use low, consistent heat sources (heat guns on low, heated blankets) and monitor surface temperature with an infrared thermometer, keeping temperatures within manufacturer limits.
Avoid concentrated flames, rapid thermal cycling, and prolonged exposure.
Allow gradual cooling before pressure testing to prevent stress on the sealant.
Document temperatures and durations for repeatability and warranty records.
- Use even, low-grade heat and monitor with a thermometer.
- Protect nearby coatings and components.
- Follow manufacturer temperature limits.
Safe Chemical Accelerants
After covering heat-based methods, attention shifts to chemical accelerants that speed pipe dope cure times without degrading thread strength or coatings.
Short-chain amines, tertiary amines, and approved peroxide catalysts are discussed for their efficacy, applied sparingly to avoid overcure or brittle seals.
Compatibility with base sealant and pipe metallurgy must be confirmed via manufacturer guidance or small-scale testing.
Protective coatings and plating resist many accelerants; when uncertainty exists, choose neutral, low-reactivity additives.
Ventilation, gloves, and eye protection are essential.
Proper dosing and curing verification—torque tests and leak checks—ensure accelerated cures meet mechanical and sealing requirements safely.
Using Heat to Speed Cure: When and How to Apply It
When is supplemental heat appropriate for accelerating pipe dope cure, and how should it be applied to avoid damage or compromised sealing? Supplemental heat suits temperature-sensitive cure formulas when ambient conditions are below manufacturer recommendations. Apply controlled, uniform warmth to speed polymerization without degrading adhesives, substrates, or base metals. Use indirect methods and monitor temperature closely.
- Use low, even radiant or convective heat sources; avoid open flames near sealant.
- Target recommended temperature ranges from product data sheets; employ infrared thermometers or thermocouples.
- Limit exposure duration; allow gradual cooling to room temperature before pressure testing or handling.
When to Avoid Heat or Solvents During Curing
The guide outlines circumstances when applying external heat is counterproductive, such as near open flames, hot pipes, or confined spaces where temperatures exceed the adhesive’s rated limits.
It also highlights that exposure to solvents or cleaning agents during the cure can inhibit polymerization and weaken the joint.
These precautions help guarantee the compound cures fully and achieves designed strength.
Avoid Heat Sources
Typically, pipe dope should not be exposed to direct heat or solvent vapors during its curing period, as elevated temperatures and chemical solvents can alter cure chemistry, cause premature skin formation, or weaken the final seal.
The guide emphasizes keeping assemblies away from heat sources—hot pipes, heaters, welding operations—and from forced drying methods that disrupt proper crosslinking.
Controlled ambient conditions promote uniform cure and predictable strength.
Inspect surroundings before and during cure, and postpone operations that introduce heat until full hardening is achieved.
Proper staging reduces rework and leak risk.
- Identify nearby heat sources and pause work
- Use ambient curing whenever possible
- Schedule hot work after full cure
Skip Solvent Exposure
Avoiding solvent exposure during pipe dope curing preserves intended chemical crosslinking and prevents surface-softening or delayed hardening.
The curing window should exclude solvents, strong cleaners, and volatile contaminants that can swell polymers or leach reactive components.
Solvent contact may alter viscosity, reduce adhesion, or create tacky films requiring rework.
Where ventilation or nearby solvent use is unavoidable, isolate assemblies with covers or delay solvent tasks until full cure time elapses per manufacturer data.
Small heat sources can amplify solvent effects; avoid them concurrently.
Inspect joints after recommended cure intervals and repeat manufacturer-recommended cleaning only if specified to avoid compromising final strength.
Risks From Over‑Hardening: Cracking and Brittle Seals
When pipe compound cures beyond its intended hardness, sealant layers can lose flexibility and develop hairline fractures that compromise joint integrity.
Excessive rigidity transfers stress to threads and fittings, increasing leak risk under thermal cycling or vibration.
Inspections may reveal brittle flakes or gaps where sealant no longer conforms, reducing sealing surface contact.
Remediation often requires removing and replacing the hardened compound to restore proper compression and resilience.
- Accelerated embrittlement from high heat leads to microcracks and sudden failure.
- Mechanical shock can propagate existing fractures through rigid seals.
- Chemical incompatibility can exacerbate hardness and reduce toughness.
Common Mistakes That Prevent Proper Curing
Common mistakes that hinder proper curing include inadequate surface preparation and applying too much sealant.
Contaminants, oil, or residual tape prevent adhesive bonds from forming, while uneven or insufficient cleaning leaves the joint compromised.
Overapplication of pipe dope creates thick layers that trap solvents and slow curing, increasing the risk of soft or uncured seals.
Incorrect Surface Preparation
At the heart of poor pipe-dope curing lies inadequate surface preparation: contaminants, corrosion, and uneven finishes block adhesive contact and interfere with chemical bonding.
Surfaces must be clean, dry, and mechanically sound; oil, dust, rust, or old sealant films prevent proper wetting and curing.
Inaccessible threads or micro-gaps trap moisture and solvents, altering curing kinetics.
Proper tooling, degreasing, and abrasion restore profile and promote uniform polymerization.
Inspection before application saves rework and leakage risk.
- Remove oils, greases, and remnants of prior sealants thoroughly
- Mechanically clean corrosion to bare metal where feasible
- Make certain threads are dry and free of particulates
Excessive Sealant Application
Why apply only what the joint needs? Excessive sealant creates thick layers that inhibit solvent evaporation and curing, trap solvents, and increase cure time unevenly. It can squeeze into the flow path, clog valves, or break loose as debris. Technicians should meter bead size and follow manufacturer coverage guidelines; less often cures faster and more reliably.
| Problem | Effect |
|---|---|
| Over-application | Delayed curing |
| Sealant extrusion | Internal contamination |
| Thick layers | Incomplete polymerization |
| Waste | Increased cleanup/time |
Proper dosing guarantees predictable cure, secure threads, and minimal maintenance.
Dissimilar Metals: Effects on Cure and Long‑Term Seal
When pipe dope is applied between different metals—such as brass threads mating with steel or stainless fittings—chemical and electrochemical interactions can alter cure rate and long‑term seal performance.
Metallic galvanic pairs may accelerate corrosion at interfaces, changing local pH and hindering polymer crosslinking.
Surface oxides and passivation layers influence wetting and mechanical interlock, affecting initial tack and ultimate hardness.
Thermal expansion differences impose cyclic stresses that can open microgaps over time.
Proper surface prep and selecting formulations tolerant of metal ions reduce risk, while monitoring joint integrity in service detects evolving failures early.
- Galvanic corrosion impacts cure chemistry and adhesion
- Oxide layers alter wetting and mechanical bonding
- Differential expansion causes long‑term microgap formation
Compatibility With Thread Seal Tape and Adhesives
In evaluating compatibility between pipe dope and other thread‑sealing materials—such as PTFE tape, anaerobic adhesives, or cyanoacrylate—chemical interactions, physical displacement, and cure inhibition must be considered. The guide notes that PTFE tape is generally inert but can prevent adhesion; anaerobic sealants may cure poorly if pipe dope contains oils or fillers; cyanoacrylates can bond to certain dopes unpredictably. Selection should match service conditions and cure mechanisms. Testing on sample fittings is recommended before field use. Compatibility charts and manufacturer data sheets aid decisions; surface cleanliness and application sequence are critical to reliable seals.
| Material | Interaction Notes |
|---|---|
| PTFE tape | Inert; may block adhesion |
| Anaerobic | Cure inhibited by oils |
| Cyanoacrylate | Variable bonding |
| Solvent‑based dope | May dissolve adhesives |
| Manufacturer data | Essential for confirmation |
Removing Hardened Pipe Dope Without Damaging Threads
Removing hardened pipe dope without damaging threads requires a controlled approach that balances mechanical removal with appropriate chemical softening. Careful assessment precedes action: identify material type, age, and thread condition.
Begin with gentle scraping using plastic or brass tools, then apply a compatible solvent sparingly to soften residue. Work incrementally, inspecting threads frequently to avoid gouging. After removal, neutralize and clean residues with a mild detergent, then dry thoroughly before reuse.
- Use nonferrous tools and fine brushes to protect thread profiles.
- Test solvents on a small area to confirm compatibility.
- Proceed slowly, prioritizing thread integrity over speed.
Repairing Joints Where Dope Hardened Incorrectly
Diagnose the joint thoroughly before attempting repairs: assess whether the dope cured hard in the seal area, filled the thread root, or caused misalignment that prevents proper engagement.
If hardened material blocks engagement, disassemble and remove cured dope mechanically with picks, brushes, and appropriate thread files, avoiding thread form damage.
For partial fills, re-cut or chase threads with the correct tap or die to restore profile.
Clean surfaces with solvent compatible with the pipe material.
Refit using proper application thickness and torque.
If threads are irreparably damaged or misaligned, replace the affected components to guarantee a reliable, leak-free joint.
Long‑Term Performance: How Hardened Dope Ages
Over months to years, hardened pipe dope undergoes chemical and physical changes that affect seal integrity and joint performance. Polymers may cross-link further, volatiles can evaporate, and fillers redistribute, altering elasticity and adhesion.
Thermal cycling and pressure fluctuations accelerate microcracking and embrittlement; UV exposure degrades binders where exposed. Predictable aging informs maintenance intervals and inspection focus, while compatibility with pipe materials influences long-term stability.
Monitoring for leaks, stiffness changes, and residue migration helps determine whether joints remain serviceable or require remediation.
- Observe changes in flexibility and tack at regular intervals.
- Track leak history and pressure stability for early signs.
- Sample residue to assess polymer breakdown.
Corrosion Concerns From Hardened Compounds
When hardened pipe dope remains in contact with metal surfaces, it can create microenvironments that promote galvanic and crevice corrosion by trapping moisture, salts, and oxygen-depleting compounds against the substrate.
Hardened residues can also concentrate corrosive agents and hold them at interfaces where electrochemical gradients form.
Incompatible sealant chemistries may accelerate anodic or cathodic reactions on dissimilar metals.
Mechanical cracking in aged dope exposes fresh metal while retaining corrosives.
Inspection should target crevices and threaded joints for corrosion indicators.
Mitigation includes selecting nonreactive formulations, ensuring proper cure and removal of excess material, and using appropriate corrosion inhibitors or barriers.
Industrial vs Residential Cure Requirements and Specs
Industrial and residential applications impose distinct cure-time, temperature, and specification demands on pipe dopes due to differences in operating pressures, environmental exposure, and maintenance access. Industrial settings prioritize rapid full cure, higher temperature tolerance, and compliance with rigorous mechanical and chemical specifications; residential contexts often accept slower cures, lower temp ranges, and consumer-grade approvals. Selection balances expected service pressure, chemical contact, and downtime costs.
Application technique and substrate cleanliness remain critical to meet specified cure performance in either setting.
- Compare pressure and temperature ratings before selection.
- Verify cure schedule versus expected service startup.
- Match chemical compatibility to fluid service.
Regulatory and Safety Labels to Check (MSDS, NSF, VOCs)
Why check labels and safety documents before selecting pipe dope? Manufacturers’ safety data sheets (MSDS) detail composition, hazards, and first aid; NSF certification verifies potable-water suitability; VOC ratings indicate regulatory compliance and indoor air impact. Inspect curing times, temperature limits, and whether solvents or isocyanates are present. Confirm compatibility with system materials and local codes. Store and handle per MSDS instructions. Use labels to determine required PPE and disposal methods. Quick reference table:
| Document | Purpose | Key item |
|---|---|---|
| MSDS | Hazard info | PPE, cleanup |
| NSF | Potable approval | Material safety |
| VOC | Emissions | Regulatory limit |
Tool Selection for Applying and Tightening During Cure
For applying pipe dope and achieving proper thread engagement during curing, selecting the right tools is critical to control torque, prevent contamination, and avoid damaging fittings. The chosen applicator should deliver consistent bead size; rags or bare hands risk contamination.
For tightening, calibrated torque wrenches allow adherence to manufacturer torque specs, preventing under- or over-tightening that affects sealant cure. Use non-reactive, clean tools—brass or stainless applicators and protected jaws on wrenches—to avoid marring surfaces or introducing contaminants.
Inspect tools for debris before use and avoid power tools that overshoot torque limits.
- Calibrated torque wrench
- Non-reactive applicator
- Protected-jaw spanner
Jobsite Checklist to Ensure Proper Curing Every Time
How can crews consistently guarantee pipe dope cures correctly on every joint? A concise jobsite checklist reduces variability: verify ambient temperature and humidity within manufacturer limits; confirm substrate cleanliness and dry threads; select correct compound and amount; apply consistent thread coverage and assembly torque per specs; allow specified dwell and cure times before pressurization; isolate joints from solvents or fluids that impede curing; log batch numbers, application time, and inspector initials; provide PPE and training for applicators; use labeled curing area maps for staged work; perform random visual inspections and document results for quality records and traceability.
Troubleshooting Flow: Tacky, Brittle, or Leaking Seals
Even with a strict jobsite checklist in place, crews will encounter joints that cure improperly; a systematic troubleshooting flow helps identify whether tacky, brittle, or leaking seals stem from application, material, or environmental causes.
Inspect residue, cure time, and ambient conditions. Verify correct product choice against temperature, pressure, and media. Recreate the failure on a test fitting to isolate variables. Document each step and outcome to guide corrective action—recleaning, reapplication, or product change—while preserving system integrity.
When leaks persist under controlled retest, escalate to supplier technical support for formulation-specific guidance.
- Check surface cleanliness and torque consistency
- Record temperature, humidity, and cure intervals
- Compare failed joint to manufacturer tolerances
Case Studies: Successful Cures and What They Did Right
When crews documented real-world fixes, patterns emerged that distinguish repeatable successes from ad hoc corrections. Case reviews highlighted preparation: cleaned threads, correct compound selection, and proper application thickness. Successful teams torqued fittings to specification and allowed recommended cure times before pressure testing.
Environmental control—moderate temperature and minimized moisture—appeared repeatedly. Documentation and inspection checkpoints prevented shortcutting procedures. Failures often traced to contamination, over-application, or premature pressurization; successful cures avoided these.
Training and adherence to manufacturer instructions correlated with longevity. These studies show that predictable outcomes depend on disciplined processes rather than improvisation, yielding durable, leak-free joints.
Eco‑Friendly and Low‑VOC Pipe Dopes That Still Cure Well
Increasingly, installers and specifiers seek eco-friendly, low‑VOC pipe dopes that deliver reliable cures without compromising health or performance. The market offers formulations based on vegetable oils, synthetic esters, and waterborne carriers that harden adequately for common plumbing pressures. Performance depends on substrate, thread fit, temperature, and cure time; some low‑VOC options match petrochemical dopes when applied per instructions. Certifications (low‑VOC, Green Seal) and clear safety data help selection. Maintenance crews appreciate reduced odors and safer storage. Testing on representative joints before deployment guarantees compatibility and expected cure.
- Vegetable‑oil ester dopes: good for general plumbing.
- Waterborne blends: low odor, moderate cure.
- Synthetic esters: balance cure speed and ecology.
Buying Guide: What to Look For in Fast‑Curing Pipe Dope
Having considered low‑VOC and eco‑friendly options, buyers looking for fast‑curing pipe dope should focus on a handful of measurable criteria: cure time at expected ambient and pipe temperatures, compatibility with thread materials and sealants, pressure ratings after full cure, VOC and safety profiles, and application ease (brushability, gap filling).
Evaluate technical data sheets for pot and tack times, maximum operating pressure, and chemical resistance. Prefer products with third‑party certification or ASTM/ISO references.
Assess packaging size for job scale and storage stability. Consider manufacturer support, warranty terms, and user reviews reporting real‑world cure performance under similar conditions.
Conclusion
One interesting statistic: up to 30% of residential plumbing leaks trace to improperly cured thread sealants. To sum up, the guide emphasizes understanding cure type and time—solvent‑based, anaerobic, and PTFE pastes behave differently—so users select the correct product and wait the recommended period before pressurizing. Proper curing maximizes seal strength, reduces rework, and prevents failures. Following material labels and simple tests (tack check, visual inspection) yields reliable, long‑lasting threaded joints.