When Can Pipes Freeze? Winter Temp Guide to Prevent Burst Pipes
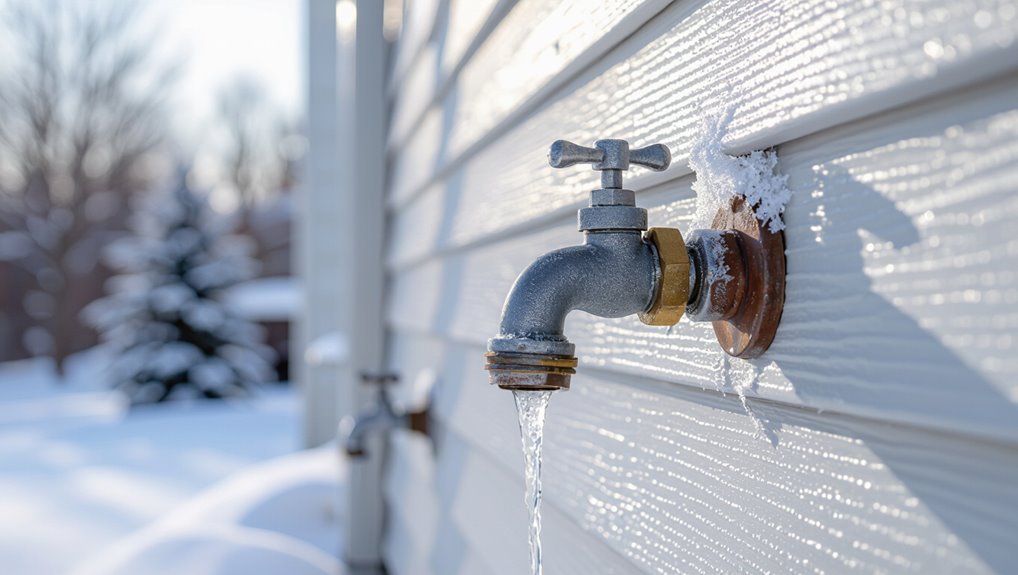
Pipes can start to freeze when temperatures drop to around 20°F (-7°C), especially if they are uninsulated or located in exterior areas. However, when temperatures reach 0°F (-18°C), exposed pipes can freeze in less than two hours. To prevent this, ensure pipes are insulated, use heat tape, allow faucets to drip, and seal any drafts. These measures significantly reduce the risk of pipe bursts during frigid weather.
Quick Answer: How to Prevent and Handle Frozen Pipes
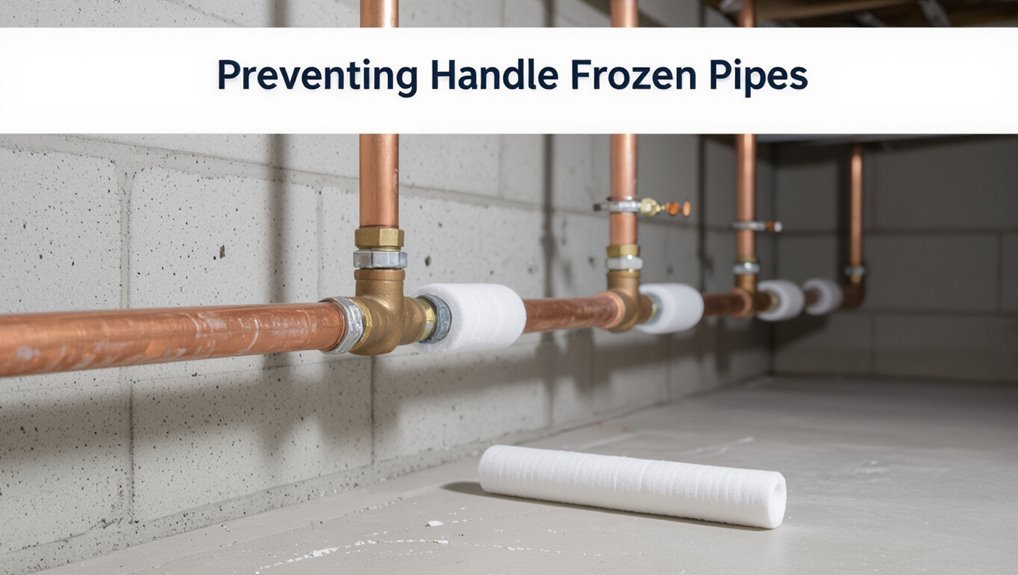
In cold weather, homeowners should act promptly to reduce the risk of pipe freezing and respond effectively if it occurs. The guidance emphasizes insulating exposed pipes, sealing drafts, maintaining steady heat, and allowing faucets to drip during extreme cold.
If freezing is suspected, occupants are advised to open cabinet doors, apply gentle heat with a hair dryer or space heater, and shut off water at the main valve if pipes burst. Professional plumbing assistance should be sought for persistent blockages or damage.
Timely inspection after a freeze helps detect cracks and prevent long-term water damage, minimizing repair costs and disruption.
At What Temperature Do Pipes Start to Freeze?
Pipes commonly begin to freeze when ambient temperatures fall to about 20°F (-7°C) or lower for extended periods, though exposed or poorly insulated pipes can freeze at higher temperatures.
Factors such as wind chill, pipe material, insulation quality, and proximity to exterior walls or unheated spaces can lower the effective freeze point.
Understanding these thresholds and influences helps assess freeze risk for specific plumbing locations.
Typical Freezing Thresholds
At what temperature do water-filled lines typically begin to form ice? Pipes commonly begin freezing around 20°F (-7°C) under prolonged exposure, though localized conditions vary.
Below are typical thresholds to illustrate risk levels.
- 32°F (0°C): Surface water freezes; poorly insulated exterior lines can begin to ice when contact with freezing air is sustained.
- 20°F (-7°C): Many household pipes, especially in unheated spaces, show significant ice formation after several hours.
- 0°F (-18°C): Rapid freezing and deeper penetration occur; even better-insulated runs become vulnerable during extended cold snaps.
Factors Lowering FreezePoint
Those temperature benchmarks provide a baseline, but actual freeze points can be lower when several factors reduce heat loss or alter water behavior. Insulation around pipes, buried depth, and placement within interior walls or heated spaces raise local temperatures, delaying freezing. Flowing water resists ice formation; intermittent taps or trickle flows keep lines warmer than stagnant ones. Pipe material affects thermal conductivity—plastic holds heat differently than copper.
Solar gain, residual heat from appliances, and wind shielding reduce conductive and convective cooling. Additionally, dissolved salts or antifreeze additives depress freezing point, meaning pipes may withstand colder ambient temperatures before freezing occurs.
Pipe Materials: Which Freeze Faster and Why
Different pipe materials affect how quickly water inside them loses heat and freezes. Metal pipes conduct heat away faster than most plastics, but insulation and installation details can override raw conductivity.
Comparing metal versus plastic and the role of insulation clarifies why some systems freeze sooner than others.
Metal Vs. Plastic
Many homeowners notice that pipes made from different materials respond differently to cold: metal pipes conduct heat rapidly and tend to equalize with ambient temperatures faster, while plastic pipes are poorer conductors and change temperature more slowly.
Observers note freeze risk varies with material, wall thickness, and water movement. Metal may freeze sooner when exposed; plastic can retain warmer water longer but still freezes under sustained cold.
Consider durability differences: metal can burst from ice pressure; some plastics expand slightly. Maintenance and installation contexts influence outcomes more than material alone.
- Metal: fast thermal response, higher immediate freeze risk.
- Plastic: slower cooling, delayed freeze.
- Context: exposure, flow, and age govern results.
Insulation And Conductivity
Several factors determine how insulation and material conductivity affect pipe-freezing: thermal conductivity of the pipe wall, insulating layer effectiveness, and the presence or absence of airflow. Metals conduct heat rapidly, so uninsulated metal pipes equalize with cold ambient air faster than plastics.
Proper insulation slows conductive and convective losses; thicker, closed-cell foams and insulating wraps create thermal resistances that delay freezing. Gaps, compressions, or wet insulation dramatically reduce performance. Air movement accelerates cooling by disrupting boundary layers.
Consequently, material choice plus continuous, correctly installed insulation and minimizing drafts together determine how quickly a pipe reaches freezing temperature.
Why Exposed and Uninsulated Pipes Freeze First
Exposed and uninsulated pipes cool faster because they lose heat directly to the surrounding air without barriers that slow conductive and convective transfer. The metal or plastic surface equilibrates with ambient temperature more rapidly, allowing internal water to reach freezing point.
Lack of insulation also permits radiation and drafts to accelerate heat loss. Moisture on surfaces promotes ice nucleation. Pipes with continuous exposure experience thermal bridging to colder structures, reducing residual warmth from building interiors.
- Rapid conductive loss through bare pipe material.
- Convective cooling from air movement and drafts.
- Radiative losses and moisture-assisted ice formation.
Home Locations Most Vulnerable to Frozen Pipes
Because uninsulated piping loses heat quickly, certain areas of a home are inherently more prone to freezing; colder microclimates and limited heat infiltration create conditions where water inside pipes reaches 32°F faster. Basements with unheated corners, crawlspaces, and exterior walls often host supply lines susceptible to rapid cooling.
Attics and rim joists, especially where insulation is thin, expose plumbing to low temperatures. Garages with interior sinks and hoses on exterior walls are at risk when doors remain closed and unheated.
Utility rooms and meter closets lacking direct heat or ventilation can allow standing water in valves and traps to freeze.
How Wind, Drafts and Cold Air Speed Pipe Freezing
When cold air moves through gaps, around eaves, or under doors, it removes heat from nearby pipes much faster than still air, accelerating the drop of water temperature toward freezing.
Cold drafts create localized convection, lowering pipe surface temperature; wind-driven pressure differences draw icy air into cavities; and wind chill effects magnify heat loss from exposed plumbing.
Risk rises where insulation is thin or absent and where pipes run along exterior walls, attics, crawlspaces, or vented soffits.
- Convection intensifies heat loss along exposed pipe sections.
- Pressure-driven airflow pulls cold into wall cavities.
- Wind chill worsens surface cooling of pipes.
Pipe Freeze Times by Temperature (Estimates)
A range of simple estimates can help predict how long water in a pipe takes to freeze at given outdoor temperatures, though exact times depend on pipe material, diameter, insulation, flow, and exposure.
At 20°F (-7°C) uninsulated exterior pipes may freeze within several hours; at 0°F (-18°C) freezing can occur in under two hours.
Near 32°F (0°C) freezing is slow or unlikely absent prolonged cold.
Insulated or indoor pipes extend these times markedly.
These figures are guidelines: local conditions, buried depth, and intermittent heat sources alter outcomes.
Use conservative planning and protective measures when temperatures fall.
How Pipe Diameter and Water Flow Change Freeze Time
Pipe diameter and water flow exert strong, predictable effects on freeze time: narrower pipes freeze faster because they contain less thermal mass and cool through their walls more quickly, while higher flow rates delay freezing by continually replenishing warmer water and disrupting ice formation.
Fluid dynamics and heat transfer combine: thin copper or PEX runs chill to freezing point sooner than larger mains, and stagnant water solidifies far quicker than moving water.
Practical implications hinge on pipe size, material, ambient temperature, and flow intermittency; occasional trickle can substantially extend time to freeze compared with complete stagnation.
- Narrow pipe example: 1/2″ vs 1″
- High flow: continuous trickle
- Stagnant conditions: rapid freeze
Insulation R‑Value: Protecting Pipes From Freezing
In cold conditions, insulation R‑value quantifies a material’s resistance to heat flow and directly affects how long water inside tubing stays above freezing. Higher R‑values slow conductive heat loss from pipes to surroundings, extending the time before water temperature reaches freezing.
Effectiveness depends on installation quality, coverage continuity, and ambient exposure; gaps, compression, or wetting reduce performance regardless of R‑value. For exposed runs, cumulative thermal resistance from multiple layers can be significant.
R‑value provides a design metric to estimate required insulation thickness for a given temperature differential and desired freeze-delay interval, guiding preventive measures without specifying product types.
Best Types of Pipe Insulation and Where to Use Them
Foam pipe insulation is recommended for exposed indoor runs and exterior walls where simple, low-cost thermal protection is sufficient.
Self-regulating heat tape is appropriate for vulnerable or hard-to-insulate sections such as basements, crawl spaces, and exterior faucets, providing active freeze prevention.
Choosing between foam and heat tape depends on location, pipe material, and the level of cold protection required.
Foam Pipe Insulation
Closed-cell insulation sleeves and flexible foam wraps offer fast, effective protection against freezing and heat loss for most household plumbing, combining low thermal conductivity with easy installation.
Foam suits indoor cold-water lines, garage runs and exposed attic plumbing; it resists moisture and compresses into tight spaces. Selection depends on pipe diameter, ambient exposure and required R-value.
Installation requires clean, dry pipes and snug seams; use vapor-resistant tape at joints. Foam is inexpensive and reversible for maintenance, but thicker foam or additional barriers are advised where temperatures plunge or pipes run through unheated cavities.
- Indoor copper and PVC lines
- Garage and attic runs
- Tight spaces and bends
Heat Tape Application
Apply heat tape as an active safeguard where passive insulation might not suffice: self-regulating and constant-wattage electric tapes deliver controlled warmth directly to vulnerable pipe sections, preventing freezing in unheated spaces or during extreme cold snaps.
Selection depends on pipe material, location and power availability; self-regulating tape is safer on mixed-temperature runs and resists overheating, while constant-wattage is simpler for uniform conditions.
Install per manufacturer instructions, avoid overlapping, secure with approved tape, and pair with foam or fiberglass insulation to retain heat.
Use ground-fault protection and weatherproof models outdoors.
Regular inspection confirms functionality and reduces burst-pipe risk.
Finding and Inspecting Hidden, Crawlspace, and Attic Pipes
In unheated or seldom-accessed areas such as attics, crawlspaces, and within walls, locating and examining water pipes is essential to prevent freezing and subsequent damage.
Inspectors should map visible runs, note insulation gaps, and mark shutoff and access points.
Look for condensation, rust, or past leaks as indicators of vulnerability.
Verify insulation integrity and add foam or wrap where minimal.
Safeguard vents and insulation don’t compress pipe coverage.
If identification is unclear, use a moisture meter or thermal camera before intervention.
When in doubt, document locations for future maintenance and consider professional assessment for concealed sections.
- Trace runs and mark access
- Check insulation and gaps
- Use thermal imaging or moisture meter
Outdoor Hose Bibs and Sprinkler Line Winter Risks
Outdoor hose bibs and sprinkler lines present common winter vulnerabilities that require simple preventive steps. Recommended measures include fitting insulated covers on hose bibs, applying protective wraps or insulation to exposed sprinkler piping, and following shutoff-and-drain procedures before freezing temperatures arrive.
Addressing these items reduces the risk of burst fittings and costly repairs.
Hose Bib Protection Steps
When temperatures approach freezing, exposed hose bibs and shallow sprinkler lines become primary points of vulnerability because trapped water can expand and burst fittings or pipes.
To reduce risk, drain and disconnect hoses, shut off interior supply valves, and open bibs briefly to relieve trapped water.
Install simple insulated covers over exterior faucets and replace worn washers to prevent leaks that freeze faster.
Check accessibility to shutoffs and label them for quick winter action.
- Disconnect hoses, drain, and store inside.
- Close interior shutoff, open exterior bib to drain.
- Fit insulated faucet covers and repair leaks.
Sprinkler Line Insulation
Protecting sprinkler lines from freezing requires insulating exposed runs and securing low points where water can collect, because trapped water expands and can crack pipes or fittings.
Insulation foam sleeves, heat tape rated for outdoor use, and protective covers for backflow assemblies reduce freezing risk.
Attention to joints, valves, and shallow sections near foundations matters most; gaps in coverage create vulnerable cold spots.
Sloped routing and short elevation rises help shed residual water away from critical connections.
Regular inspection before cold snaps verifies insulation integrity and identifies damage or settled sections needing correction to prevent winter ruptures.
Shutoff And Drain Procedures
Drain and shut off exposed hose bibs and sprinkler mains before the first hard freeze to prevent trapped water from expanding and cracking fittings. The homeowner isolates outdoor lines at the interior shutoff, opens bibs and drain valves, and uses a short blowout or gravity drain for sprinkler mains.
Any remaining low spots should be checked and cleared. Valves and backflow devices are insulated or removed. Visual checks and a labeled winterization plan reduce missed connections and emergency repairs.
- Interior shutoff, open exterior faucets.
- Drain lines; use air blowout where appropriate.
- Insulate or remove exposed devices.
Does Municipal Water Pressure Affect Freeze Risk?
Municipal water pressure can influence the likelihood of pipes freezing by affecting flow rates and the ability to maintain moving water through vulnerable sections; higher steady pressure helps keep water moving during brief cold snaps, while low or fluctuating pressure can allow stagnation and local cooling.
Pressure alone is not decisive: piping location, insulation, ambient temperature, and pipe diameter also matter. Sudden drops from main breaks or pump failures increase freeze risk by stopping flow.
Conversely, consistent supply pressure reduces localized cooling but cannot prevent freezing in severely cold, uninsulated runs. Monitoring pressure and addressing leaks or supply issues reduces overall risk.
Thermostat Strategies to Reduce Pipe Freezing
Frequently, homeowners can reduce pipe-freezing risk by using thermostat strategies that keep indoor temperatures stable in vulnerable areas. A modest, consistent setback overnight prevents large drops that invite freezing; zoning or smart thermostats maintain warmer minimums near exterior walls and crawlspaces; and temporary daytime boosts during severe cold target unheated corridors and basements.
Programmable schedules should prioritize continuous gentle heat over wide swings. Remote monitoring and alerts help occupants respond to failures before pipes reach critical temperatures. These strategies minimize thermal stress on plumbing while conserving energy when applied with sensible setback limits and accurate sensors.
- Maintain modest setbacks
- Use zoning or smart controls
- Monitor remotely and boost when needed
Open Cabinet Doors: When It Helps and When It Doesn’t
Allowing cabinet doors beneath sinks and along exterior walls to remain open can let warmer room air reach exposed plumbing, reducing the chance of freezing in vulnerable pipes. It helps when interiors are heated and air circulates; it’s less effective in unheated rooms or where insulation is absent. Open cabinets also aid inspection for condensation or drafts. Risks include exposing chemicals to children or pets and reducing aesthetic warmth. Consider targeted measures—insulation, localized heating—when cabinet-opening alone won’t suffice.
| Situation | Effect |
|---|---|
| Heated room | Helpful |
| Unheated room | Limited |
| Insulated pipe | Minimal benefit |
| Child/pet presence | Safety concern |
| Exterior wall pipe | Often helpful |
How to Safely Drip Faucets to Prevent Freezing
Dripping faucets can be an effective short-term strategy to reduce the risk of frozen pipes by keeping water moving through vulnerable lines. The recommended slow, steady drip eases pressure buildup and helps prevent ice blockages when temperatures approach freezing.
Use interior taps supplied by exposed or exterior-facing pipes; open cold and hot slightly until a steady drip forms. Monitor indoor temperatures and stop drips once ambient warmth returns. Conserve water by targeting the most at-risk fixtures and notifying household members.
- Choose taps nearest exterior walls or uninsulated areas.
- Maintain a visible, steady drip—not a stream.
- Track usage and weather forecasts.
When to Use Heat Tape, Cable, or Thermostatic Wraps
When outdoor temperatures consistently approach freezing and insulated or enclosed measures are insufficient, homeowners should consider using heat tape, heating cable, or thermostatic pipe wraps to protect vulnerable plumbing; these products deliver controlled warmth directly to pipes and are particularly useful for sections that cannot be relocated or adequately insulated.
Use them where pipes run through unheated spaces—attics, crawlspaces, exterior walls, and basements—or where insulation is impractical. Thermostatic wraps self-regulate, reducing energy use. Select products rated for wet or indoor conditions as appropriate, follow manufacturer guidelines, and combine with insulation and periodic inspection to guarantee continuous protection during prolonged cold.
Choosing and Installing Pipe Heating Cables Correctly
Select a heating cable rated for the pipe material, environment, and expected low temperatures to guarantee reliable freeze protection.
The installer assesses pipe diameter, insulation type, and exposure, then chooses self-regulating or constant-wattage cable.
Proper installation follows manufacturer layout: run cable along pipe length, avoid overlapping, and secure with approved ties.
Insulate over the cable to retain heat; seal penetrations to prevent moisture.
Test the system before cold weather and register the product for warranty and support.
- Measure pipe runs and select cable length and type.
- Fasten cable per spacing guidelines; do not cross.
- Insulate and test continuity and operation.
Temporary Heat Sources That Protect Exposed Pipes
Temporary, localized heating can protect exposed pipes during cold snaps.
Portable space heaters offer quick ambient warmth for basements or crawlspaces, while heat tape wraps apply direct conductive heat along pipe surfaces.
Each option has specific placement and safety considerations that should be reviewed before use.
Portable Space Heaters
Portable space heaters offer a practical short-term solution for protecting exposed pipes in unheated areas by raising ambient air temperature close to vulnerable plumbing. They are deployed temporarily during cold snaps to reduce freeze risk where insulation or permanent heating is absent.
Selection prioritizes safety features (tip-over shutoff, overheat protection), appropriate output for room size, and stable placement away from combustibles. Continuous monitoring and adherence to manufacturer guidelines prevent hazards. Portable units supplement, not replace, insulation or building heating and are best used until permanent measures are implemented.
- Small ceramic heater near a basement pipe run
- Oil-filled radiator positioned in an unheated garage
- Fan-forced unit warming a crawlspace
Heat Tape Wraps
When space heaters are impractical or unsafe for direct use on pipes, heat tape wraps provide a targeted alternative that applies low-level heat along the length of vulnerable plumbing. They are designed for temporary protection, adhering to manufacturer guidelines to avoid overheating and fire risk. Installation requires clean, dry pipe surfaces and proper electrical connections; some models self-regulate while others need thermostatic control. Regular inspection guarantees insulation integrity and safe operation. Consider power availability and code compliance before use. Below is a concise comparison table to aid selection.
| Type | Power Source | Typical Use |
|---|---|---|
| Self-regulating | Electric | Metal/plastic pipes |
| Constant wattage | Electric | Short runs |
| Thermostatic | Electric with control | Sensitive locations |
| Low-voltage | DC/transformer | Remote areas |
Winterizing Seasonal and Vacant Properties
Preparing seasonal or vacant properties for winter requires a systematic approach that focuses on preventing pipe freeze, water damage, and heat loss while minimizing ongoing maintenance needs. Insulation, controlled thermostat settings, and strategic water management reduce risk.
Exterior openings and crawlspaces should be sealed; pipes in unheated areas insulated; and attic and foundation vents evaluated for cold air intrusion. Routine inspections or a local caretaker can catch problems early.
- Seal and insulate vulnerable pipe runs and access points.
- Maintain a low, consistent heat or monitored environment to deter freezing.
- Securely winterize appliances and exterior water sources to limit leaks.
How and When to Shut Off and Drain Water Lines
Guidance on when to shut off and how to drain water lines focuses on preventing freezing during prolonged cold or vacancy.
The recommendation is to shut the main valve before temperatures approach freezing or when a property will be unoccupied for more than 24–48 hours.
After shutting off, drain fixtures and low points, open faucets, and use drain plugs or compressed air as needed to remove trapped water.
When To Shut Off
How should homeowners decide whether to shut off and drain water lines before a freeze? They assess risk: forecasted temperatures, property readiness, and occupancy. If severe cold, power loss, or extended vacancy is likely, shutting off reduces burst risk. Timing aligns with weather warnings and before pipes reach near-freezing conditions. Final steps include isolating supply, relieving pressure, and notifying occupants.
- Review multi-day forecasts and local advisories to determine urgency.
- Consider building factors: exposed pipes, insulation, and recent repairs.
- Plan shutdown when occupied persons can perform or supervise the procedure safely.
How To Drain Lines
After deciding to shut off supply based on forecast and building risk, the homeowner should follow a clear sequence to drain lines safely and fully. The main water valve is closed, faucets and exterior spigots opened, and any low-point drains or water heaters drained per manufacturer instructions. Air is introduced via indoor taps to encourage flow. Valves are left open until temperatures rise. If unsure, a plumber should be contacted.
| Action | Purpose |
|---|---|
| Close main valve | Stop supply |
| Open faucets | Release pressure |
| Drain heater | Prevent damage |
| Open low drains | Remove trapped water |
| Call plumber | Confirm procedure |
Which Shut‑Off Valves to Test Before Winter
Before winter arrives, homeowners should identify and test the shut‑off valves that control water to outdoor spigots, irrigation systems, and the main supply, since these are the most critical points for preventing freeze damage.
A quick inspection and operation guarantees valves move freely, seals hold, and auxiliary drains function.
Valves inside the house near the main entry, at the irrigation manifold, and at exterior hose bibs deserve priority.
If corrosion or stiffness appears, arrange repair or replacement before freezing temperatures set in.
Document locations and label valves for rapid shutoff during emergencies.
- Main supply valve
- Exterior spigot valves
- Irrigation system valves
How to Spot Early Signs of a Freezing Pipe
Watch for subtle changes that often precede a frozen pipe: reduced or intermittent water flow, unusually cold fixtures or walls near plumbing, and the appearance of frost or condensation on exposed pipes.
Additional signs include gurgling noises, discolored or rusty water, and spiking water pressure when flow resumes.
Regular inspection of crawl spaces, basements, and exterior walls can reveal hairline ice or dampness indicating freeze progression.
Thermostatic irregularities in nearby rooms and repeated need for warmer settings suggest heat loss around pipes.
Documenting when and where symptoms appear aids targeted insulation, sealing gaps, and preventive maintenance before freezing advances.
Immediate Steps If You Suspect a Frozen Pipe
How should one act when a pipe is suspected of freezing? Immediate actions focus on limiting damage and confirming the issue. The area should be accessed safely, water supply managed, and professional help considered if necessary.
- Shut off the main water valve to reduce pressure and prevent a burst; open nearby faucets to relieve trapped pressure and check flow.
- Locate the affected section visually and by touch—cold, stiff, or frost-covered pipe indicates freezing; avoid applying direct heat or force.
- Call a licensed plumber if there is visible cracking, persistent no-flow, or uncertainty about safety; document the situation for later repairs.
How to Thaw a Frozen Pipe Safely (Step‑by‑Step)
Begin thawing a frozen pipe only after confirming the water supply is shut off and the area is safe from electrical hazards.
Locate the frozen section, open nearby faucets to relieve pressure and allow water flow once thawed.
Apply gentle heat: use a hair dryer, heat gun on low, electric space heater, or warming pad; avoid open flames. Move heat slowly along the pipe toward the faucet.
Insulate thawed sections and monitor for leaks. Once water flows steadily, keep faucets open briefly and restore the main supply.
Document any damage and repair or replace compromised pipe insulation to prevent recurrence.
When to Stop DIY and Call a Plumber
Recognize the limits of a homeowner’s skill and tools when thawing frozen pipes to avoid worsening damage or creating hazards. If attempts fail, visible leaks appear, or odors suggest hidden breaks, professional intervention is warranted. A plumber assesses pressure, inspects concealed runs, and mitigates collateral damage safely.
- Multiple unsuccessful thaw attempts or re‑freezing despite precautions.
- Any visible cracking, water seeping from joints, or sudden pressure loss.
- Frozen pipes in inaccessible locations (crawlspaces, inside walls, ceilings) or when electrical or gas heating methods are involved.
Timely calling prevents larger repairs and preserves structural and system integrity.
How to Find a Burst Pipe and Stop the Leak Fast
The reader should begin by scanning for visible water damage—wet spots, stains, or pooling—that indicate a burst pipe.
Next, the main shutoff valve must be turned off immediately to stop the flow and limit further damage.
Finally, contain the leak with buckets or towels and dry the area to prevent mold until professional repairs can be made.
Locate Visible Water Damage
Visible water damage often presents as discolored stains, bulging ceilings, warped flooring, or pooled water that pinpoints a ruptured pipe or joint.
The homeowner scans visible areas: ceilings beneath bathrooms, under sinks, along basement walls and near appliances.
Immediate documentation with photos helps assess spread and informs repairs.
Signs to note include fresh wetness, peeling paint, musty odor, or sagging drywall.
Safety precautions include avoiding electrical contact and clearing the area.
- Ceiling stains or bulges under bathrooms or upstairs plumbing.
- Warped or soft floorboards near laundry, kitchens, or exterior walls.
- Puddles, damp carpets, or steady drips under fixtures.
Shut Off Main Valve
Locate and turn the main water shut-off valve immediately to stop flow when a burst pipe is suspected; this isolates the system, limits water damage, and gives time to locate the break or call a plumber.
Identify the valve location—near the water meter, where the service enters the building, or in a utility area.
Use the proper tool if the valve is stiff; turn clockwise until fully closed.
After shutting off, open faucets to relieve pressure and drain remaining water from pipes.
Record valve condition and time of shutoff for the repair technician.
Do not restore water until repairs are complete.
Contain And Dry Area
After shutting off the main, contain standing water and begin drying the affected area immediately to prevent further damage and mold growth.
The responder assesses visible leaks, blocks flow paths with towels or sandbags, and directs water into drains or buckets.
Electrical hazards are noted; wet items are moved to dry spots.
Dehumidifiers and fans are positioned to accelerate evaporation.
Surfaces are wiped and inspected for hidden moisture in walls and under flooring.
Documentation through photos helps insurance and repair planning.
Temporary barriers isolate undamaged zones while a professional evaluates pipe repair and structural drying needs.
- Towels, buckets, sandbags
- Fans, dehumidifier, heaters
- Photos, notes, inspection
Emergency Steps to Limit Water Damage After a Burst
Shut off the main water supply immediately to stop incoming flow and reduce further flooding; then, if safe, turn off electricity in affected areas to prevent shock or fire hazards.
Next, open taps to drain remaining lines and reduce pressure.
Move valuables and electronics to dry ground and protect floors with waterproof barriers.
Use towels and mops to remove standing water; deploy a wet/dry vacuum and portable fans to speed drying.
Photograph damage for records.
Seal off the affected area to limit cross-contamination.
Contact a licensed plumber to repair the burst pipe and schedule professional water-removal and drying services as soon as possible.
How Homeowner Insurance Typically Handles Frozen Pipes
Homeowner insurance policies often set limits on coverage for damage caused by frozen or burst pipes, and those limits determine how much of repair and replacement costs the insurer will pay.
Policyholders should review exclusions and required deductibles to understand out-of-pocket exposure before filing a claim.
Promptly reporting the loss and documenting damage increases the likelihood of a smoother claims process.
Insurance Coverage Limits
Most standard homeowners insurance policies set specific limits and conditions for damage from frozen pipes, typically covering sudden, accidental ruptures but excluding losses tied to neglect or lack of maintenance.
Coverage often distinguishes between sudden bursts and gradual damage, with policy limits, deductibles, and sub-limits for water damage. Endorsements or flood exclusions may alter protection.
Insureds should note timeframes for reporting and required mitigating actions to prevent further loss.
Replacement cost versus actual cash value affects payouts for damaged structures and contents.
Review of policy language and optional endorsements clarifies exposures before winter events.
- Policy limits, deductibles, sub-limits
- Replacement cost vs. actual cash value
- Endorsements, exclusions, required mitigation
Filing A Claim
Begin the claims process promptly after discovering frozen or burst pipes to preserve coverage and speed recovery.
The homeowner documents damage with photos, notes the time discovered, and shuts off water to limit loss.
They contact the insurer, provide policy details, and request a claim number.
An adjuster inspects damage, verifies cause, and determines covered repairs versus exclusions like lack of maintenance.
Temporary mitigation costs (e.g., emergency repairs) are often reimbursable if reasonable.
Keep receipts, contractor estimates, and communication records.
Disputes over coverage can be escalated through appeal, independent appraisal, or state insurance regulators.
Typical Cost Ranges to Repair Frozen or Burst Pipes
Repairing frozen or burst pipes can range from a quick, inexpensive fix to a costly emergency, depending on the extent of the damage and the location of the pipe.
Typical repairs vary: thawing and minor seal replacement often cost less, while burst sections, water damage repair, and emergency service increase totals.
Insurance, access difficulty, and material type influence final bills.
Homeowners commonly face choices between immediate patching and full section replacement based on long-term reliability.
- Minor thaw and seal repair: $100–$350
- Section replacement and localized drywall repair: $400–$1,200
- Major rupture with extensive water damage: $2,000+
Long‑Term Plumbing Upgrades to Reduce Freeze Risk
Long-term strategies focus on reducing exposure of pipes to cold through targeted upgrades.
Insulating water lines with appropriate wrap or foam and installing heat tape can raise resistance to freezing.
Rerouting vulnerable pipes away from exterior walls or unheated spaces further lowers the risk of future freeze-related failures.
Insulate Water Lines
Insulating water lines reduces conduction of cold into pipes and is one of the most reliable long‑term measures to prevent freezing.
The technique uses foam sleeve, fiberglass wrap, or closed‑cell insulation to maintain pipe temperature above freezing in unheated spaces.
Proper insulation minimizes heat loss, reduces freeze cycles, and lowers energy costs when combined with modest heat sources.
Installation targets exposed lines in basements, crawlspaces, attics, and exterior walls.
Routine inspection replaces compressed or wet materials.
For maximum effectiveness, pair insulation with sealing air leaks around pipe penetrations.
- Foam pipe sleeves
- Fiberglass with vapor barrier
- Closed‑cell spray or tape
Reroute Vulnerable Pipes
Rerouting vulnerable pipes relocates water lines away from exterior walls, unheated attics, crawlspaces, and other cold-prone areas to reduce freeze risk at the source. A professional assesses layout, identifies risk, and plans new routes through conditioned spaces or interior chases. Costs vary but so do long-term benefits: fewer freeze incidents, easier access for maintenance, and improved insulation opportunities. Consider combining reroute with valve upgrades and leak sensors for layered protection. Permit requirements and structural constraints may influence choices; prioritization should focus on mains and supply lines serving critical fixtures.
| Benefit | Consideration |
|---|---|
| Reduced freeze risk | Cost/permits |
| Easier maintenance | Structural limits |
| Compatibility with sensors | Disruption during work |
Best Practices Insulating Basements, Attics, and Crawlspaces
In colder climates, protecting pipes in basements, attics, and crawlspaces requires a strategic combination of air sealing, appropriate insulation materials, and maintaining a minimal heat source to prevent freezing.
The guidance focuses on sealing gaps, insulating around pipe runs, and ensuring conditioned air reaches vulnerable areas.
Use closed-cell spray foam or rigid foam on foundation walls, fiberglass or mineral wool around headers, and pipe insulation sleeves.
Maintain a low-level heat source or allow warm air circulation from the living space.
- Seal gaps and vents to stop cold drafts.
- Insulate walls, ceilings, and exposed pipes directly.
- Provide passive or minimal active heat to spaces.
Preparing Plumbing for Extreme or Prolonged Cold
After sealing gaps, insulating vulnerable cavities, and ensuring modest heat reaches pipe runs, homeowners should take further steps when extreme or prolonged cold is forecast.
They should drain and winterize outdoor hoses and shutoff exterior valves to isolate exposed lines. Interior cabinets housing plumbing can be opened to allow warmer air circulation. Temporary heat sources, thermostatically controlled and safely placed, may be used in unheated areas.
For lengthy cold snaps, consider shutting off and draining nonessential water lines. Maintain steady thermostat settings day and night. Owners should document vulnerable locations and contact a licensed plumber for preemptive pipe heating or other professional interventions.
10‑Step Seasonal Checklist to Winter‑Ready Your Plumbing
Begin a seasonal checklist that prioritizes the highest‑risk plumbing elements—exposed exterior pipes, garage and basement lines, outdoor faucets, and attic runs—and sequence tasks by urgency and ease so homeowners can systematically winter‑proof the system before the first sustained freeze.
The checklist directs inspection, insulation, and preventive shutoffs: inspect for drafts and damage, add foam or heat‑tape where needed, and drain or isolate external fixtures.
Schedule professional servicing for compromised mains.
Document valve locations and emergency shutoff procedures.
Keep temperatures above freezing in vulnerable spaces and maintain a slow trickle during extreme nights.
- Inspect and seal drafts.
- Insulate and heat‑tape.
- Drain/secure outdoor fixtures.
Common Myths About Frozen Pipes: Debunked
Why do so many homeowners rely on ineffective fixes when pipes freeze? Common myths persist: running only a trickle of water prevents freezing, heat lamps are safe for thawing, and frozen sections are always obvious.
In reality, minimal flow may delay but not prevent ice in poorly insulated lines. Heat lamps pose fire hazards and uneven warming can crack pipes. Assuming outdoor faucets freeze first overlooks interior cavities and concealed walls where ice forms.
Professional thawing and targeted insulation are safer. Separating myth from fact reduces damage risk and directs attention toward proven prevention: insulation, controlled heating, and timely professional help.
Temperature Thresholds to Watch by Climate Zone
Accounting for regional climate differences, the temperature at which pipes are at risk of freezing varies widely: in temperate coastal zones, sustained drops below about 20°F (-7°C) pose concern for exposed or poorly insulated lines.
In colder inland areas, risks rise when temperatures fall below 0°F (-18°C) for several hours.
In milder regions, short dips near 25–30°F (-4 to -1°C) can still threaten vulnerable outdoor or unheated plumbing.
Consider these representative thresholds by climate zone:
- Coastal temperate: ~20°F (-7°C) sustained.
- Mild inland/suburban: ~25–30°F (-4 to -1°C) prolonged.
- Cold continental: ~0°F (-18°C) or lower for hours.
Monitoring Tools and Alerts to Catch Freezing Events Early
With automated sensors, weather feeds, and smart-home alerts, homeowners and facility managers can detect freezing conditions before pipes are damaged. Systems combine temperature probes, flow monitors, and external forecasts to trigger warnings, preheat routines, or shutoff protocols. Alerts via text, app, or email enable rapid response; escalation rules reduce false alarms. Integration with thermostats and smart valves automates mitigation. Regular testing and battery checks keep systems reliable. Cost, coverage, and connectivity guide selection for residences or commercial sites.
| Tool | Typical Alert | Purpose |
|---|---|---|
| Temp sensor | Low temp | Prevent freeze |
| Flow meter | No flow | Detect blockage |
| Weather API | Freeze warning | Forecast prep |
| Smart valve | Auto close | Prevent burst |
| Thermostat | Setback alert | Maintain warmth |
Conclusion
As winter tightens its grip, homeowners are reminded that frozen pipes can arrive faster than a blink—often before anyone notices. Vigilant insulation, timely sealing of drafts, and basic monitoring protect plumbing from disaster. Prioritizing exposed lines in basements, crawl spaces, attics, and exterior walls reduces risk. Combining sensible preventive steps with simple alerts and routine checks turns a seasonal threat into a manageable task, preserving property and peace of mind through cold months.