What Are Water Pipes? Simple Guide to Types, Uses & Safety Tips
Water pipes are essential conduits used for transporting potable water under pressure and wastewater through gravity. They are made from various materials such as copper, PVC/CPVC, PEX, galvanized steel, and cast iron, each with specific temperature, durability, and installation limitations. For effective use, supply lines must have pressure-rated, leak-tight joints, while drains require proper slope and venting to function correctly. Factors like corrosion, UV exposure, and heat can impact the lifespan of these pipes, and it’s important to consider code requirements, health regulations, and permit issues. Signs of potential failure include discoloration, leaks, low water pressure, or backups. Read on for practical information about different types, their uses, and important safety tips.
What Is a Water Pipe and How Does It Work?
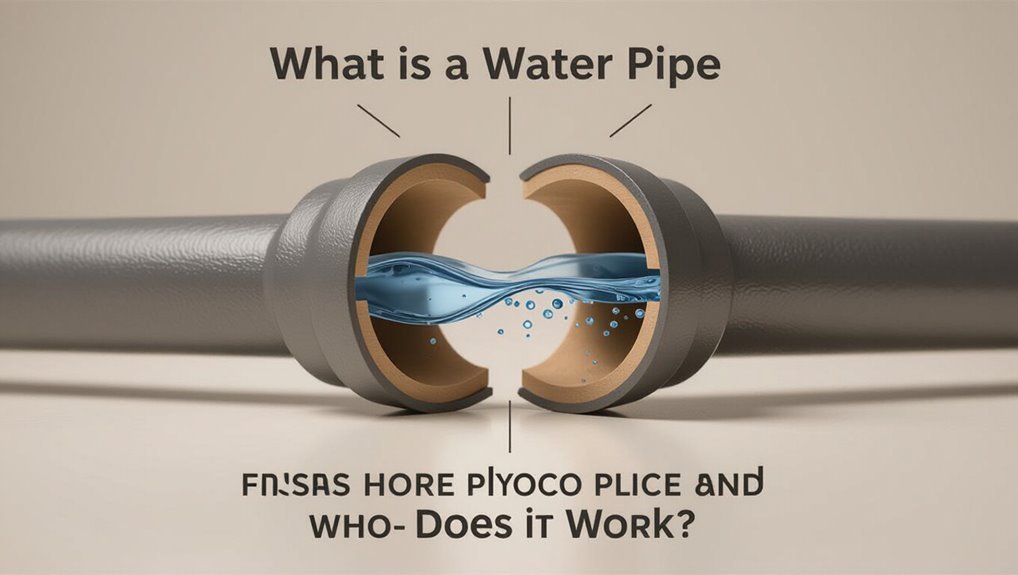
A water pipe is a hollow conduit designed to convey water under pressure or gravity from one point to another. It channels liquid via internal pressure differentials, using fittings and seals to maintain flow and prevent leaks.
Materials—metal, plastic, or composite—offer varying strength, corrosion resistance, and flexibility. Typical components include joints, valves, meters, and supports; each affects hydraulics and maintenance.
Flow depends on diameter, slope, and roughness; pressure losses arise from friction and fittings. Proper installation guarantees efficient delivery, limits contamination, and simplifies repair.
Routine inspection detects wear, blockages, or joint failure before major damage occurs.
Why Knowing Pipe Types Matters for Your Home
Knowing which pipe materials are used in a home helps predict their durability and lifespan.
Material choice also determines compatibility with fixtures and fittings, affecting repairs and upgrades.
Finally, some materials influence water quality and safety, so selection impacts household health risks.
Material Affects Durability
In homes, the material of water pipes determines how long they last and how they perform under stress. Different materials—copper, PEX, PVC, CPVC, galvanized steel—offer distinct resistance to corrosion, chemical degradation, and temperature extremes.
Some metals corrode over decades, reducing flow and risking leaks; plastics can resist rust but may degrade with UV exposure or high heat. Installation quality and water chemistry interact with material properties to influence lifespan.
Selecting appropriate pipe material reduces maintenance frequency, limits failure risk, and affects long-term costs. Understanding these attributes allows homeowners to prioritize durability and plan proactive replacements.
Compatibility With Fixtures
Material choices that influence pipe longevity also determine how well plumbing connects to faucets, valves, water heaters, and appliances.
Matching pipe materials to fixture threads, fittings, and pressure ratings prevents leaks and corrosion at joints. Copper mates with brass fittings and sweat or compression connections; PEX requires compatible crimp, clamp, or push-fit adapters; CPVC uses solvent-weld or threaded connections, while galvanized steel needs appropriate tapered threads and often adapters to modern materials.
Awareness of thermal expansion, bend radius, and flow capacity guarantees proper fixture performance. Correct material selection reduces retrofit complexity, cutting labor, parts costs, and future repair frequency.
Health And Safety
Understanding pipe types directly impacts household health and safety because different materials affect water quality, contamination risk, and exposure to hazardous substances. Knowledge of common materials—copper, PVC, PEX, galvanized steel, and lead-based legacy piping—guides decisions about replacement, treatment, and maintenance.
Each material carries specific risks: corrosion, leaching, bacterial growth, or chemical degradation. Proper selection reduces illness risk and costly remediation.
Regular inspection, water testing for lead and bacteria, and prompt repair or replacement of compromised pipes protect occupants. Certified plumbers should perform work to make certain compliance with codes and safe materials are used for drinking-water systems.
Supply Pipes vs. Drain and Vent Pipes: Key Differences
Supply pipes carry pressurized potable water to fixtures, while drain and vent pipes rely on gravity and air flow to remove wastewater.
They typically differ in material and diameter, with supply lines often smaller and made for pressure tolerance and drains larger and chosen for corrosion and flow resistance.
Understanding these contrasts helps homeowners choose appropriate repairs, replacements, and safety measures.
Pressure Vs Gravity
By force rather than slope, pressurized water lines deliver flow under positive pressure from a source to fixtures, while drain and vent piping rely on gravity and air pressure to remove waste and prevent traps from siphoning.
The contrast shapes installation, function, and failure modes: supply systems require leak-tight joints, pressure-rated components, and pumps or municipal pressure, whereas drain/vent systems need proper slopes, venting paths, and trap integrity.
Design priorities differ: controlling pressure versus ensuring unobstructed downward flow and balanced airflow.
Maintenance focuses accordingly—watching for pressure loss or corrosion in supply, and blockages or improper venting in drainage.
- Supply: constant positive pressure
- Drain: gravity-driven flow
- Vent: air balance for traps
Material And Size
When comparing supply pipes with drain and vent lines, material choice and diameter reflect fundamentally different pressures, flow characteristics, and code requirements.
Supply lines typically use copper, PEX, or CPVC sized by pressure and fixture units; smaller diameters (1/2″–1″) maintain velocity and resist burst risk.
Drain and vent systems employ PVC, ABS, or cast iron with larger diameters (1¼”–4″+) to accommodate gravity flow and prevent clogging.
Materials for drains prioritize abrasion and chemical resistance, while vents must resist weather and condensation.
Codes dictate minimum sizes, slope, joint types, and allowable materials to make certain performance and safety.
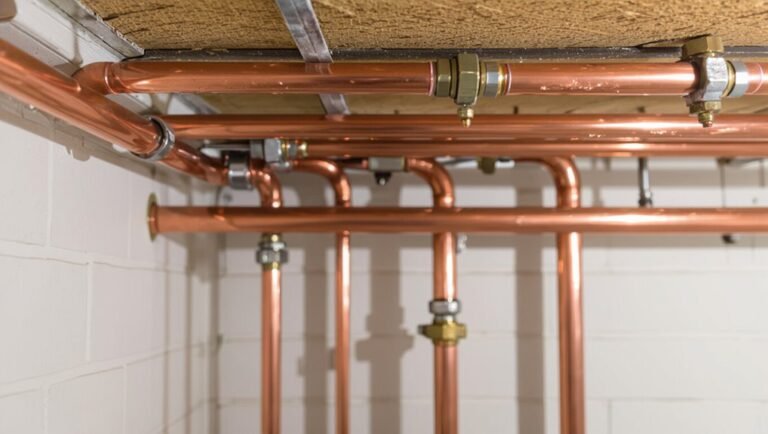
Common Materials: Copper Pipes Explained
How does copper combine durability and corrosion resistance to make it a longstanding choice for plumbing? Copper offers strength, longevity, and natural antimicrobial properties, resisting corrosion in potable water systems.
It tolerates heat, handles pressure well, and adapts to soldered or compression fittings. Installation and repair require skill but rarely demand replacement under normal conditions.
- Reliable for hot and cold lines with predictable thermal performance.
- Resistant to biological growth and many common water chemistries.
- Recyclable material with steady long-term value and minimal environmental breakdown.
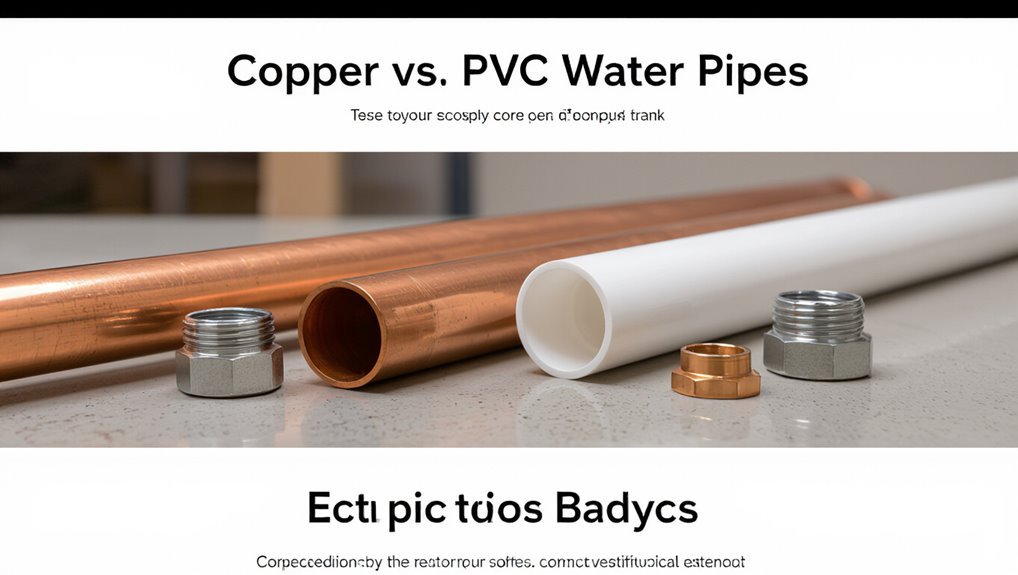
Common Materials: PVC and CPVC Pipes Compared
In comparing plastic piping options, PVC (polyvinyl chloride) and CPVC (chlorinated polyvinyl chloride) present distinct advantages for different plumbing roles: PVC is widely used for cold-water supply and drainage due to its rigidity, chemical resistance, and low cost, while CPVC, with added chlorine in its polymer chain, tolerates higher temperatures and is suitable for hot-water lines.
PVC fittings and solvent-weld joints offer simple installation for venting and exterior drainage; CPVC’s higher heat resistance justifies its use for interior hot-water distribution.
Both resist corrosion and many chemicals, but CPVC costs more and requires temperature-appropriate adhesive and handling.
Common Materials: PEX Pipes – Pros and Cons
PEX pipe is praised for its flexibility and ease of installation, allowing long continuous runs with fewer fittings.
It also offers strong resistance to corrosion and freeze-related damage, contributing to long-term durability.
However, PEX has temperature and UV exposure limits that can restrict use in high-heat applications and outdoor installations.
PEX Flexibility And Installation
Among common modern plumbing materials, cross-linked polyethylene (PEX) stands out for its flexibility and ease of installation. Installers can bend runs around obstacles, reduce fittings, and complete projects faster than with rigid pipe. Connections use crimp, clamp, or push-fit methods, each with specific tools and inspection steps. Manifold-based layouts simplify zoning and service access. PEX also accommodates retrofit work in tight spaces and beneath floors.
- Faster installation with fewer joints reduces leak points.
- Multiple connection systems offer installer choice and adaptability.
- Suitable for long continuous runs, minimizing fittings and labor.
Durability And Temperature Limits
Many homeowners and professionals rely on cross-linked polyethylene for its long service life and resistance to corrosion, but its durability and temperature limits warrant careful consideration.
PEX resists scale, chemical attack, and most freeze-related cracking thanks to flexibility, yet prolonged UV exposure degrades polymer chains. Typical continuous operating temperatures range up to about 82–90°C (180–194°F) depending on grade; short-term higher-temperature exposure is possible but reduces lifespan. Pressure ratings decline as temperature rises, so system design must match expected conditions. Correct insulation, protection from sunlight, and adherence to manufacturer temperature/pressure charts maximize service life and safety.
Galvanized Steel and Cast Iron: Uses and Drawbacks
In older plumbing systems, galvanized steel and cast iron were widely used for their strength and fire resistance, but each presents specific drawbacks that affect longevity and water quality.
Galvanized steel corrodes internally over time, reducing flow and risking rust-colored water and lead release where fittings exist.
Cast iron is durable for drainage and soil lines but is heavy, prone to external corrosion, and can crack with ground movement.
Both materials complicate modern repairs and replacements because of weight and incompatibility with some joining methods.
Consider replacement when corrosion, leaks, or water discoloration appear.
- Galvanized: rust buildup, reduced flow
- Cast iron: heavy, brittle over time
- Replacement often recommended for health and maintenance
Typical Pipe Sizes and What They Mean
When discussing plumbing, pipe size refers to the internal diameter that determines flow capacity, pressure loss, and suitability for specific fixtures or systems.
Common residential sizes include 1/2″, 3/4″, and 1″ for supply lines, with larger mains often 1-2″ or more.
Drain and waste pipes use nominal sizes like 1-1/4″, 1-1/2″, 2″, 3″, and 4″, selected by fixture type and combined load.
Material affects internal diameter and flow—nominal size differs from actual inside measurement.
Proper sizing balances adequate flow, acceptable pressure drop, and future demand while complying with plumbing codes and standards.
Where Household Water Pipes Are Located
After selecting appropriately sized pipes for flow and pressure needs, attention turns to where those pipes are routed through a home.
Water distribution commonly follows accessible, protected paths to balance serviceability and concealment. Main supply lines enter near the meter and branch into trunks feeding fixtures. Hot and cold runs serve kitchens, bathrooms, and laundry, often sharing chases or cavities.
Drain and vent piping follows gravity routes to soil stacks and the sewer connection. Placement considers freezing risk, insulation, and future access for repairs.
- Basements, utility rooms, and crawlspaces
- Interior wall cavities and attics
- Under sinks and behind appliance panels
Identifying Your Pipe Material (Quick Guide)
A quick scan of visible lines can reveal common pipe materials such as copper, PVC, PEX, galvanized steel, and cast iron by their color, fittings, and stiffness.
Simple tests—magnet attraction for steel, flex tests for PEX, and visual inspection for printing or markings—help confirm the material.
Identifying the pipe type guides appropriate repair methods and safety precautions.
Common Pipe Materials
To quickly identify a building’s water pipes, inspect visible runs in basements, crawl spaces, and under sinks for material, color, and markings; these visual cues — such as gray PVC, white CPVC, copper’s reddish tone, or threaded black iron — immediately narrow the likely type and common uses.
Common pipe materials include plastic, metal, and specialty alloys. Each has distinct advantages: PVC/CPVC resist corrosion and suit cold/hot lines respectively; copper offers durability and heat tolerance; steel or galvanized iron handles high pressure but may corrode. Choice depends on water type, temperature, pressure, and local codes.
- Plastic: PVC, CPVC, PEX
- Metal: Copper, galvanized steel
- Specialty: Stainless, brass, CPVC blends
How To Test
Using simple visual checks and a few quick tests, one can reliably identify most residential water pipe materials.
First, inspect color and markings: copper appears reddish-brown, galvanized steel gray with threads, PVC white or cream with printed schedules, CPVC cream/tan with heat-resistant labels, PEX flexible colored tubing marked with size and type.
Magnet test separates ferrous metals from copper and brass.
Tap or bend—metal rings, plastic dulls.
Scratch a small, inconspicuous spot: copper reveals metallic sheen, PVC whitens.
For uncertainty, consult a plumber or submit a sample to a local building inspector before repairs or replacements.
Choosing Pipes for Potable Water
Selecting pipes for potable water requires balancing durability, safety, and cost while complying with local codes and health standards.
Choices hinge on material safety (lead-free, NSF/ANSI certified), expected lifespan, pressure and temperature ratings, and installation complexity.
Maintenance needs and potential for corrosion or leaching inform selections.
Municipal supply, private well, or remodeling constraints may limit options.
Proper joints, fittings, and approved sealants complete a safe system.
Professionals should verify compatibility with water chemistry and local regulations before purchase and installation.
- Choose certified, non-leaching materials.
- Prioritize service life and ease of repair.
- Confirm code compliance and warranties.
Choosing Pipes for Irrigation and Outdoor Use
While potable-water piping emphasizes non‑leaching materials and code-certified fittings, outdoor and irrigation systems prioritize durability against sunlight, soil contact, and seasonal pressure fluctuations.
Selection favors UV-stable polyethylene (HDPE/LDPE) for mains and drip lines, rigid PVC or CPVC for buried lateral runs where stiffness matters, and galvanized or polymer-coated steel where mechanical protection is needed.
Frost resistance, abrasion tolerance, root intrusion resistance, and chemical exposure from fertilizers determine material choice and wall thickness.
Design accounts for pressure ratings, expansion/contraction, and ease of repair.
Cost, local climate, expected service life, and maintenance access guide final selection.
Pipe Joining Methods: Fittings, Soldering, Crimping, and Clamps
When connecting pipes, the chosen joining method must match the material, service conditions, and expected stresses to guarantee a reliable, leak‑free system.
Common approaches include threaded or solvent‑weld fittings for PVC and ABS, soldering (brazing) for copper, crimping or press‑fit connectors for PEX and flexible lines, and hose clamps for temporary or low‑pressure assemblies.
Selection depends on pressure, temperature, accessibility, and permanence.
Proper surface preparation and compatible sealants or flux assure integrity.
Inspection and pressure testing confirm joints.
Consider corrosion, thermal expansion, and maintenance access when specifying methods for long‑term performance.
- Threaded, solvent, or push‑fit
- Soldering/brazing for copper
- Crimps, presses, clamps
Basic Overview of Pipe Installation Steps
For a sound installation, the sequence of steps—planning, measuring, cutting, joining, supporting, testing, and finishing— must be followed deliberately to make certain a leak‑free, code‑compliant system.
Installers assess layout, material suitability, and local codes before purchasing.
Accurate measurements and marked cuts prevent waste and misalignment.
Clean, deburred ends make certain proper joints whether soldered, glued, or mechanically fastened.
Adequate supports and correct spacing limit stress and thermal movement.
Pressure and leak tests verify integrity prior to insulation and concealment.
Final documentation, labeling, and compliance checks complete the process, facilitating future maintenance and inspection.
When to Call a Plumber vs. Do-It-Yourself Pipe Work
Decision-making about plumbing work hinges on scope: complex leaks, sewage issues, or jobs requiring code compliance and permits warrant a licensed plumber.
Simple tasks like replacing a faucet washer, tightening fittings, or swapping a section of accessible pipe can be handled by a competent homeowner with basic tools.
Safety, local permit requirements, and the potential for hidden damage should guide whether to proceed DIY or call a pro.
When To Call
How can a homeowner judge whether a leak or clog is a manageable DIY task or requires a professional? A clear threshold is safety and scope: emergencies, structural risk, or unknown causes demand a licensed plumber.
Routine stoppages, minor drips, or accessible valve issues may be DIY if tools and confidence exist. Consider permits, warranties, and materials (older pipes, gas-adjacent work). When in doubt, stop and call to avoid escalation.
Signs to call include:
- Persistent leaks, spreading water, or mold growth
- Sewage backup, foul odors, or repeated clogs
- Burst pipes, major pressure loss, or unfamiliar fittings
Simple DIY Fixes
When faced with a minor drip or clogged sink, a homeowner can often resolve the issue with basic tools and straightforward steps, but clear limits should guide the attempt: simple tasks like tightening fittings, replacing a washer, clearing a P-trap, or shutting off an accessible valve are reasonable DIY projects, whereas hidden leaks, gas-adjacent work, cast-iron repairs, or any situation involving structural damage, sewage, or uncertain pipe materials require a licensed plumber.
Small repairs should begin with water shutoff and inspection, using appropriate wrenches, plumbers’ tape, and replacement parts. If confidence, time, or correct parts are lacking, call a professional.
Safety And Permits
Homeowners should regularly weigh safety, legal requirements, and skill level before attempting pipe work, because small repairs can quickly escalate into hazards or code violations.
Determining whether to hire a licensed plumber hinges on complexity, potential water damage, and permit needs.
Simple tasks—tightening fittings, replacing faucets, clearing accessible clogs—suit competent DIYers.
Major actions—moving mains, altering gas or sewer lines, replacing pressurized sections, or work requiring inspections—demand professionals.
Liability, warranty, and insurance considerations favor hiring for uncertain situations.
When in doubt, consult local building departments and obtain required permits before starting.
- Assess risk and permit requirements
- Prioritize licensed plumbers for complex jobs
- Keep records and receipts
Common Pipe Problems: Leaks, Bursts, and Corrosion
Frequently, plumbing systems exhibit three recurring issues—leaks, bursts, and corrosion—that account for the majority of pipe failures.
Leaks often arise from loose fittings, degraded seals, or hairline cracks, causing water waste and potential mold.
Bursts occur when freezing, age, or sudden pressure surges overwhelm material strength, producing rapid, extensive damage.
Corrosion develops gradually on metal pipes via chemical reactions, leading to pitting, reduced flow, discolored water, and eventual perforation.
Each problem demands timely diagnosis: small leaks may require localized repair, bursts usually need immediate shutdown and replacement, and corrosion often necessitates material upgrade to prevent recurrence.
How to Find a Hidden or Slow Leak
To locate hidden or slow leaks, one effective first step is to check the water meter for unexplained continuous flow when no fixtures are in use.
Next, visible fixtures and exposed pipes should be inspected for dampness, stains, or corrosion that indicate seepage.
If the source remains unclear, using food coloring or specialized dye in toilets and sinks or employing leak-detection equipment can pinpoint the problem.
Check Your Water Meter
Using the water meter is a quick, reliable way to detect hidden or slow leaks before they cause significant damage or high bills.
The inspector notes the meter reading with all water sources off, waits 30–60 minutes, then compares the reading.
Any movement usually indicates leakage in supply lines or fixtures.
Outdoor meters often have a small leak indicator; indoor digital meters may show flow rate.
If the meter confirms continuous flow, the next step is to isolate sections to locate the leak or call a professional for repairs.
- Record initial and final readings clearly.
- Make sure no appliances run during the test.
- Check the meter’s leak indicator.
Inspect Visible Fixtures
After confirming continuous flow at the meter, the inspector moves to visible fixtures to narrow the leak’s location. Faucets, exposed pipes, hose bibs and toilet bases receive systematic checks for drips, dampness, corrosion or mineral buildup. The inspector listens for hissing, taps pipes for hollow sounds and feels joints for moisture.
Water stains on cabinetry, warped flooring or persistent mold near fixtures signal concealed seepage. Exterior spigots and irrigation connections are examined while fixtures are shut off to isolate zones. Findings are documented with photos and notes to prioritize repairs or professional assessment without invasive actions.
Use Dye And Detection
Employing dye and detection methods helps locate hidden or slow leaks that visual inspection misses.
Colored dye, food coloring, or commercial tracer dyes reveal toilet, drain, and fixture leaks by showing unexpected color migration.
Electronic leak detectors and listening devices pick up water movement behind walls, under floors, and along buried pipes.
Pressure testing isolates sections to confirm leak presence and approximate location.
Professionals combine methods for accuracy.
- Use nonstaining food-grade dye for toilets and sinks to avoid damage.
- Employ a listening device to narrow suspect areas before opening walls.
- Schedule pressure tests when dye or sound suggests a leak.
Temporary Fixes for Leaks
When a pipe begins to leak, quick temporary measures can limit water damage and buy time until a permanent repair is made.
Apply a clamp or rubber patch (rubber piece plus hose clamps) over small pinholes; twist on a pipe repair clamp for larger cracks.
Wrap leaking joints with self-fusing silicone tape or plumber’s epoxy putty for short-term sealing.
Shut off the water supply to the affected section when practical and drain the line before applying fixes.
Use drain plugs or bucket placement to control runoff.
These stopgaps reduce harm and allow scheduling of proper replacement or professional repair.
Preventing Frozen Pipes and Winter Preparation
Winter preparation for plumbing frequently saves homeowners from costly damage by minimizing the risk of pipe freezing and bursting. The section outlines practical steps: insulating vulnerable pipes, maintaining steady indoor temperatures, and locating main shutoff valves.
Pipes in unheated spaces benefit from foam sleeves or heat tape; faucets can be left dripping during severe cold to prevent pressure buildup. Attic and crawlspace access should be checked for drafts and sealed.
Emergency plans include knowing how to shut off water and keeping repair contacts. Seasonal checks reduce surprises and extend pipe longevity while lowering repair costs.
- Insulate exposed pipes
- Keep cabinets open during cold snaps
- Know the main shutoff location
How Old Pipes Affect Water Quality
Age degrades plumbing materials, and aging pipes can introduce sediment, corrosion byproducts, and mineral buildup into household water, altering taste, color, and safety. Older metal pipes may leach lead or iron; galvanized steel collects rust and scale; cracked joints admit contaminants. Reduced flow, discolored water, and metallic or musty odors often indicate deterioration. Regular testing identifies contaminants; targeted replacement or filtration mitigates risks. Prioritization depends on material, age, and symptoms. The table summarizes common issues, causes, and indicators for quick assessment.
| Issue | Likely Cause | Common Indicator |
|---|---|---|
| Discoloration | Rust/iron | Brown or red water |
| Metallic taste | Metal leaching | Bitter/metallic flavor |
| Cloudiness | Sediment | Suspended particles |
| Odor | Organic contamination | Musty or earthy smell |
How to Flush and Maintain Your Home Plumbing
Recognizing signs of pipe deterioration informs the next step: regular flushing and basic maintenance to restore water quality and prolong system life.
Homeowners should flush cold and hot lines monthly by running taps several minutes, starting at highest fixture and ending at lowest to clear sediment.
Inspect visible pipes for leaks, corrosion, and loose fittings; tighten or document issues for a plumber.
Replace aerators and clean strainers to improve flow.
Maintain water heater per manufacturer instructions to reduce scale buildup.
- Flush fixtures top-to-bottom monthly
- Check for leaks and corrosion visually
- Clean aerators and strainers regularly
Safety Rules for Working Near Water Pipes and Electricity
Working near water pipes and electrical systems requires strict separation of wet and live elements to prevent shocks and equipment damage.
Practitioners are advised to keep water and power paths physically apart and to make certain electrical circuits near plumbing are protected.
Ground-fault protection devices should be installed and tested regularly to cut power instantly if a fault occurs.
Keep Water And Power Separate
Always keep water and electricity physically separated to prevent shock, fire, and equipment damage.
Work areas should be assessed for wet conditions and electrical sources; cords and devices must remain dry and elevated.
Valves, fixtures, and junction boxes need clear spacing and labeled boundaries.
If leaks occur, isolate water and power before repairs.
Contractors should coordinate to schedule shutdowns and use barriers to keep accidental contact from happening.
Personal protective equipment appropriate to dry or damp conditions is required.
Communication and simple rules reduce risk greatly.
- Inspect and mark wet zones before starting work.
- Elevate electrical equipment away from potential drips.
- Coordinate shutdowns between trades.
Use Ground-Fault Protection
Employing ground-fault protection markedly reduces the risk of electric shock when water and electrical systems are near one another.
The article recommends installing ground-fault circuit interrupters (GFCIs) on outlets and circuits serving bathrooms, kitchens, outdoor areas, basements and any location with potential pipe contact.
GFCIs detect imbalance between hot and neutral conductors and interrupt power within milliseconds, preventing current from flowing through a person to ground.
Regular testing and monthly inspections confirm functionality.
Only qualified electricians should install or replace protection devices.
Labeling protected circuits and educating occupants on GFCI operation further enhances safety around water pipes and electrical equipment.
Health and Legal Considerations: Lead, Codes, and Inspections
Frequently, concerns about health risks and legal obligations shape decisions about water piping; lead exposure, compliance with plumbing codes, and routine inspections are central issues that determine which materials and installation methods are acceptable.
Municipal and federal regulations limit allowable lead content in pipes and fittings; professionals recommend replacing suspect materials and testing water for lead.
Licensed plumbers make sure installations meet local codes, which protect public health and property.
Regular inspections catch deterioration, cross-connections, and code violations before contamination or failure occurs.
- Test water and replace lead-containing components promptly.
- Hire licensed, code-knowledgeable plumbers.
- Schedule periodic inspections and document compliance.
Cost Factors: Pipe Material, Labor, and Replacement vs. Repair
Beyond health and legal considerations, cost often determines which piping options are selected and when repairs or replacements are scheduled. Material choice (copper, PEX, PVC) affects upfront and lifecycle costs; labor varies with access and complexity; decisions weigh repair frequency against replacement longevity. Budgeting considers parts, skilled labor rates, permit fees, and disposal. Cost-benefit analysis guides whether patching is economical or full-line replacement is warranted, considering expected remaining service life.
| Element | Typical Cost Range | Impact on Decision |
|---|---|---|
| Material | Low–High | Affects longevity |
| Labor | Variable | Drives total cost |
| Repair vs Replace | Short vs Long term | Determines value |
Signs It’s Time to Replace Whole Plumbing Lines
When should an entire plumbing system be replaced rather than patched? A full replacement is warranted when recurring failures, widespread corrosion, or systemic contamination compromise safety and function.
Patch fixes become impractical or costlier over time, and aging materials like galvanized steel or lead pose health risks.
Noticeable signs include frequent leaks in multiple locations, chronic low water pressure throughout the building, and visible rust or scale inside exposed piping. Replacement restores reliability and protects water quality.
- Repeated leaks across different rooms or floors
- Persistent discoloration, metallic taste, or contamination alerts
- Extensive corrosion, brittle or collapsed pipes
Quick Checklist for Hiring a Plumber or Contractor
How should a homeowner evaluate plumbers or contractors quickly and confidently? A concise checklist guides decision-making: verify license and insurance, confirm local code familiarity, and request detailed estimates with material and labor breakdowns.
Check references and recent reviews, prioritizing similar projects. Ask about warranties, emergency availability, and expected timeline. Confirm use of certified fixtures and safe disposal practices.
Discuss permits and inspection responsibilities upfront. Compare at least three bids to spot anomalies. Trust clear communication and written contracts. If doubts persist, consult local trade associations or consumer protection agencies before hiring.
Conclusion
Knowing what a water pipe is, how it works, and which materials suit a home brings clarity, confidence, and safety; understanding supply versus drain, recognizing corrosion, and following codes prevents damage, illness, and fines; weighing costs, spotting replacement signs, and checking credentials saves money, time, and stress. With practical knowledge, careful choices, and timely action, homeowners protect property, preserve health, and secure peace of mind.