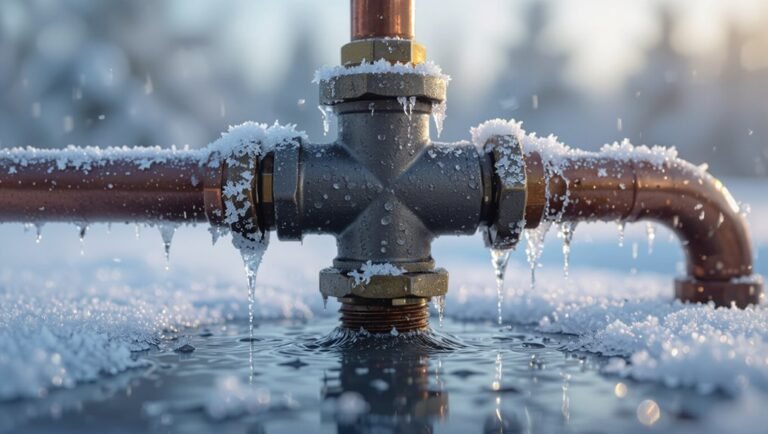
At What Temperature Do Water Pipes Freeze? Winter Plumbing Tips
Water pipes can freeze at temperatures well above 32°F if they are exposed to cold air, poorly insulated, or in contact with cold surfaces like masonry. When sustained air temperatures drop to around 20°F (-6°C) or lower, the risk of freezing for exposed pipes significantly increases. Factors such as the pipe’s location, material, diameter, and whether water is flowing can affect their vulnerability. Early warning signs of freezing include reduced water flow, sputtering, or frost forming on the pipes. If you suspect your pipes may be freezing, take immediate steps: shut off the water supply, open faucets to relieve pressure, and contact a plumber for any inaccessible or burst sections.
At What Temperature Do Water Pipes Freeze?
How cold does it need to get for pipes to freeze? Temperatures at or below 20°F (-6°C) markedly raise freeze risk for exposed or poorly insulated pipes; however, vulnerability depends on pipe location, duration of cold, and water movement.
Pipes in unheated spaces—crawlspaces, attics, exterior walls—freeze more readily than interior lines. Moving water resists freezing, so stagnant sections freeze faster. Insulation, heat tracing, and maintaining modest indoor heat reduce risk even during colder spells. Rapid drops in temperature and wind chill accelerating heat loss can precipitate freezing despite ambient readings slightly above typical thresholds.
Signs a Pipe Is Starting to Freeze
Listen for subtle changes and watch for physical cues indicating a pipe is beginning to freeze. A muffled or rushing sound when faucets run, reduced flow, or intermittent sputtering are early signs. Frost or condensation on exposed pipes, cold walls near piping, and visible bulging or discoloration suggest ice formation. Temperature drops in unheated spaces correlate with risk. The tone remains observational; avoid immediate-action advice here. The table below summarizes indicators and typical locations for quick reference.
| Indicator | Typical Location |
|---|---|
| Reduced flow | Kitchen sink |
| Sputtering | Bathroom |
| Frost on pipe | Basement |
| Bulging | Exterior walls |
| Cold wall | Crawlspace |
Immediate Steps If You Suspect a Frozen Pipe
Act quickly but calmly: when a frozen pipe is suspected, the occupant should first shut off the main water supply to limit pressure and potential flooding from a burst section.
Next, open nearby faucets to drain remaining water and relieve pressure.
Inspect visible pipes for bulging, cracking, or frost without touching cold metal.
Locate the frozen section and note access points for professionals.
Call a licensed plumber if any damage, persistent freezing, or signs of a leak appear.
- Fear of damage
- Urgency to protect home
- Helplessness faced with cold pipes
- Relief when action reduces risk
- Reassurance from professional help
Safe Ways to Thaw a Frozen Pipe
After shutting off the main and opening faucets to relieve pressure, attention turns to safely thawing the frozen section without causing further damage.
Professionals recommend applying gentle, consistent heat beginning nearest the faucet and moving toward the frozen area. Suitable methods include electric space heaters, heat lamps, or a hair dryer; heated towels can supplement these.
Maintain ventilation and monitor the pipe for leaks as ice melts. If pipes are within walls or inaccessible, a licensed plumber should be contacted.
Once flow returns, keep faucets moderately open briefly to flush residual ice and check for hidden cracks or slow leaks before restoring normal water service.
What NOT to Do When Thawing Pipes
When thawing frozen pipes, what should be avoided is as important as what should be done: using open flames, applying excessive heat, or attempting repairs beyond simple thawing can cause leaks, burns, or structural damage.
One should not ignore signs of pressure buildup, assume all sections are thawed, or restart water forcefully. Untrained attempts at cutting or soldering risk worse rupture.
If thawing fails or damage appears, stop and call a professional. Safety protocols matter: turn off electricity where necessary, ventilate, and keep children and pets away until pipes and surroundings are inspected.
- Panic-driven actions
- Risky improvisation
- Ignoring odors
- Delayed reporting
- Overconfidence
Why Pipes Can Freeze Above 32°F (Explain Mechanisms)
Even when the ambient air reads above 32°F, pipes can lose heat through conduction into colder surrounding materials, causing the water inside to cool below freezing.
Restricted flow or low pressure allows stagnant water to chill and form ice, while localized cold spots — such as poorly insulated wall cavities or exterior-facing runs — create pockets where freezing occurs first.
These mechanisms often act together, producing frozen sections even in relatively mild conditions.
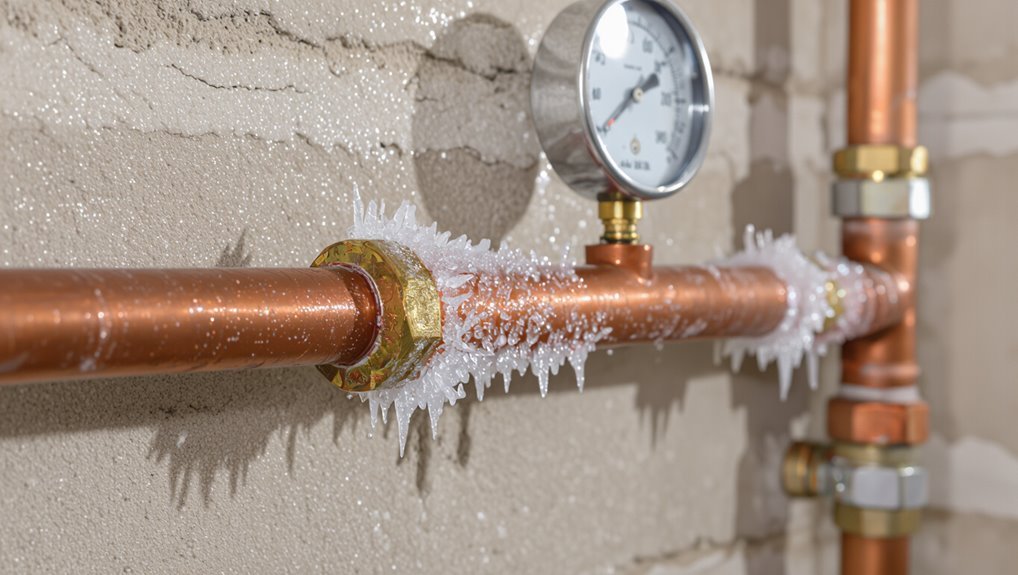
Heat Loss Through Conduction
Because metal and water readily conduct heat, a pipe can lose warmth to its colder surroundings faster than the flowing water can replace it; this conduction across the pipe wall and into adjacent materials can lower the internal water temperature below freezing even when ambient air a few feet away reads above 32°F.
Heat transfers from warm fluid to colder metal, through insulation gaps, into framing, and toward colder exterior surfaces. Thin walls, buried fittings, and contact with masonry accelerate loss. Thermal bridges create cold spots where ice nucleation begins despite mild room readings, risking blockages and bursts.
- Panic at unexpected bursts
- Frustration over hidden cold spots
- Anxiety about costly repairs
- Urgency to insulate properly
- Relief when vulnerability is addressed
Pressure And Water Flow
Heat sucked away through metal and framing creates cold spots, but pressure dynamics and flow behavior determine whether those chill pockets actually produce ice.
When flow is stagnant or very slow, localized cooling can lower water temperature below freezing even if ambient air reads above 32°F. Reduced inlet pressure encourages vapor formation and localized expansion, which promotes nucleation.
Conversely, steady flow delivers warmer water that resists freezing by advective heat transport. Pressure drops from closed valves, partially frozen sections, or long dead-ends increase residence time and risk.
Therefore, maintaining positive pressure and occasional flow prevents the thermal conditions required for ice formation.
Localized Cold Spots
Forming along metal joints, recessed framing, and pipe bends, localized cold spots arise where conductive and convective heat losses outpace the warming effects of water flow and surrounding air.
Thermal bridges conduct heat away rapidly; gaps in insulation expose small pipe sections; slower flow or stagnation reduces advection; cold air infiltration through cracks cools specific zones; and moisture-driven evaporative cooling intensifies loss.
These mechanisms let water linger near freezing even when ambient temperatures exceed 32°F, causing ice to nucleate and expand, blocking flow and stressing fittings.
Recognition and targeted insulation can prevent hidden freezing before damage occurs.
- Panic at a sudden burst
- Helplessness when pipes creak
- Frustration over hidden drafts
- Anxiety about freezing nights
- Relief after targeted repairs
How Pipe Material Changes Freeze Risk
Different pipe materials influence freeze risk through their thermal conductivity, rigidity, and susceptibility to microfracture. Metal pipes (copper, steel) conduct cold rapidly, increasing freeze speed but tolerate pressure differently than plastics.
Copper is stiff and can crack under ice expansion; galvanized steel resists impact but corrodes, altering wall thickness and freezing behavior. Plastic pipes (PEX, PVC) are more flexible, accommodating ice expansion and reducing rupture likelihood, though they still freeze internally.
Composite or insulated-lined pipes slow heat loss. Material choice interacts with installation, age, and exposure; selecting appropriate material and protective measures lowers freeze-related failures without guaranteeing prevention.
Does Pipe Diameter Affect Freezing?
Pipe diameter influences how quickly water in a pipe reaches freezing temperature because larger diameters contain more water and consequently more thermal mass.
The greater water volume in wide pipes can slow the onset of ice formation, but increased surface area may also increase heat loss to the environment.
Evaluating the balance between volume-related thermal inertia and heat loss helps predict freeze time for different pipe sizes.
Pipe Diameter And Freeze Time
A single physical factor—pipe diameter—plays a direct role in how quickly flowing water or standing water inside a conduit will reach freezing point. Narrower pipes cool faster because less water mass loses heat to cold surroundings more rapidly; larger pipes contain greater thermal inertia, delaying freeze onset. Conductive materials and insulation modify this effect, but diameter remains a predictable variable: small bore runs are more vulnerable during prolonged cold snaps, while larger mains resist brief dips yet still freeze if exposure persists. Practical prevention targets vulnerable small-diameter branches and exposed sections first.
- Anxiety over sudden bursts
- Helplessness in black winter nights
- Relief when insulated
- Urgency to act
- Calm after fixes
Water Volume Versus Freezing
Many factors determine how quickly water in a conduit freezes, but volume — the amount of water contained — is central: smaller volumes cool and reach 0°C faster due to reduced thermal mass, while larger volumes store more heat and resist temperature change. Pipe diameter influences contained volume per length, so narrower pipes will freeze through more rapidly under identical ambient conditions. Flow rate, water renewal, and contact with cold surfaces modify this effect. Practical implications guide insulation and preventive measures.
| Pipe SizeVolume/ftFreeze Risk | ||
|---|---|---|
| Small | Low | High |
| Medium | Moderate | Medium |
Heat Loss In Large Pipes
Diameter-dependent heat loss governs how quickly large conduits surrender stored thermal energy to the environment: as diameter increases, the surface-area-to-volume ratio decreases, reducing normalized heat loss per unit of contained water and slowing overall cooling.
Larger pipes retain warmth longer, but insulation, flow, and external exposure alter outcomes; stagnant water in oversized lines can still freeze from the walls inward. Predictive models must combine geometry, material conductivity, and ambient conditions to estimate freeze times accurately. Practical mitigation prioritizes insulating vulnerable runs and maintaining flow.
- Alarmed by silent ice forming within
- Frustration at unexpected bursts
- Relief when prevention works
- Anxiety over costly repairs
- Satisfaction from simple fixes
How Flow Rate and Standing Water Change Freeze Risk
When water moves steadily through a pipe, higher flow rates carry heat from warmer sections and the source, reducing the chance of freezing. Lower velocities allow thermal boundary layers and cooling; stagnant pockets lose heat to surroundings and freeze faster. Short, periodic taps can help but may not prevent ice if ambient temperature and exposure are severe. Pipe material and insulation interact with flow effects; thin metal pipes cool quicker than insulated plastic. Monitor and maintain minimal continuous flow during cold snaps for vulnerable runs.
| Condition | Freeze Risk |
|---|---|
| High flow | Low |
| Low flow | Moderate |
| Standing water | High |
| Intermittent flow | Variable |
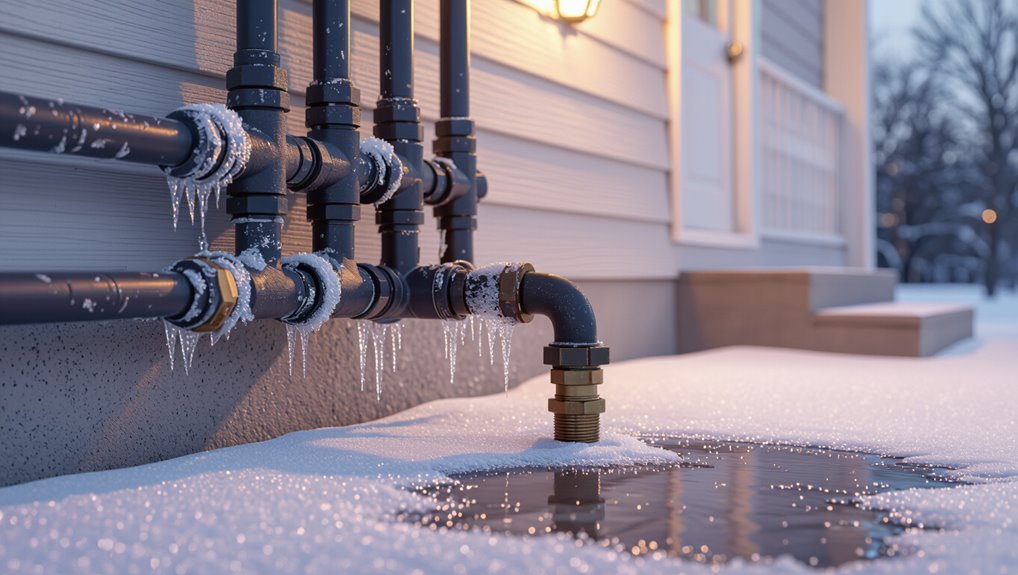
Which Home Pipe Locations Freeze First
Certain pipe locations are consistently more vulnerable to freezing than others.
Exterior hose bibs are exposed to cold and often lack insulation, making them frequent failure points.
Pipes along uninsulated interior walls also cool rapidly and commonly freeze before those in protected, heated spaces.
Exterior Hose Bibs
Often exposed and inadequately insulated, exterior hose bibs are among the first plumbing fixtures to freeze because they sit outside the heated envelope and connect directly to indoor supply lines.
They can crack, cause leaks, and flood interiors when thawing begins.
Simple preventive steps reduce risk: shutoff valves, insulation, and draining lines.
Attention to these small fixtures prevents costly repairs and inconvenience.
- Frustration when sudden leaks ruin belongings
- Anxiety over frozen, burst spigots in deep cold
- Urgency to act before thawing causes water damage
- Relief after installing frost-free valves and covers
- Pride in winterizing routine maintenance
Uninsulated Interior Walls
In homes with uninsulated interior walls, pipes routed through narrow cavities can chill rapidly because there is little thermal buffer between the fixture and the exterior cold. Cold transfer through studs and sheathing lowers pipe temperature quickly, especially where HVAC ducts or living spaces do not warm the cavity. Baseline risks rise near exterior-facing bathrooms, laundry rooms, and closets.
Reduced air circulation prevents heat infiltration. Preventive measures include adding insulation, relocating lines away from exterior walls, installing pipe insulation sleeves, and using low-level heat sources or thermostatic-controlled heat tape. Regular inspection during cold snaps identifies vulnerable runs before freezing and rupture occur.
Why Unheated Basements and Crawlspaces Freeze First
Because they sit at the coldest edge of a building’s envelope, unheated basements and crawlspaces reach freezing temperatures before living areas do.
Cold soil, perimeter exposure, minimal insulation, and stack effect draw heat away, leaving pipes vulnerable. Moisture and cold surfaces condense and ice over, increasing risk of bursts. Limited airflow prevents warm air circulation; intermittent heating upstairs seldom penetrates.
Vulnerability concentrates where plumbing runs near external walls, under floors, or along foundation lines. Awareness of these dynamics guides targeted insulation, pipe routing, and protective measures to prevent freezing and costly damage.
- Dread of sudden bursts
- Isolation from warmth
- Silent, creeping frost
- Anxiety over hidden damage
- Urgency to act
Interior Wall and Attic Plumbing Vulnerabilities
Moving from basements and crawlspaces, attention shifts to interior wall and attic plumbing, which face different but significant freezing risks.
Pipes within insulated walls or unconditioned attics can be deceptively vulnerable because insulation may be incomplete, damaged, or bypassed by framing gaps. Attic lines exposed to cold air and radiant cooling lose heat rapidly, especially near eaves and roof penetrations. Long runs through exterior walls increase exposure time and freeze points.
Detecting vulnerabilities requires inspecting insulation continuity, sealing gaps, and verifying that warm-air pathways reach pipe cavities. Preventive measures focus on improving thermal protection and reducing cold-air infiltration.
Outdoor Hose Bibs and Exposed Supply-Line Risks
Along exterior walls and eaves, outdoor hose bibs and exposed supply lines present some of the most straightforward freeze points on a property. They sit outside thermal envelopes, often with minimal insulation, and can freeze quickly when temperatures drop.
Failure leads to split fittings, hidden leaks, and costly repairs. Regular winterizing—draining hoses, shutting valves, and installing insulated covers—reduces risk.
Attention to accessible shutoffs inside and routine inspections before cold snaps limits surprise damage. Homeowners who ignore these fixtures expose structures to water damage and stress.
- Frustration at unexpected bursts
- Helplessness when pipes split
- Anxiety before cold nights
- Relief after simple fixes
- Regret over neglected maintenance
How Wind and Wind Chill Affect Exposed Pipes
Exposure to wind compounds the freezing risk for outdoor plumbing by stripping heat from pipe surfaces and accelerating ice formation. Wind chill lowers the effective temperature at the pipe surface, increasing conductive and convective heat loss. Exposed metal and uninsulated lines cool faster than buried or sheltered pipes, shortening the time to freeze. Gusts can drive colder air into sheltered gaps, defeating passive barriers. Protective measures include wind-resistant insulation, sealed enclosures, and strategic routing to reduce exposure. Monitoring vulnerable spans during windy cold snaps prioritizes mitigation before internal temperatures reach freezing.
| Factor | Effect | Mitigation |
|---|---|---|
| Wind speed | Increases heat loss | Windproof insulation |
| Exposure | Shortens freeze time | Enclosures |
| Material | Metal cools faster | Route/shelter |
Do Water Chemistry and Salts Affect Freezing?
Water chemistry, particularly dissolved salts and other solutes, alters the freezing behavior of water in pipes by lowering the freezing point and changing ice formation dynamics. Salted or mineral-rich water resists ice formation longer than pure water; higher concentration equals greater depression of freezing point.
Corrosion products and organic matter can modify nucleation sites, affecting where and how ice begins to form. Municipal treatment, road salt intrusion, or intentional antifreeze change risk profiles for burst pipes. Understanding local water composition helps predict freeze thresholds and informs mitigation choices without relying solely on ambient temperature readings.
- Unease when unexpected salts appear
- Relief from knowing composition
- Frustration at corrosive effects
- Hope in preventive measures
- Vigilance against hidden risks
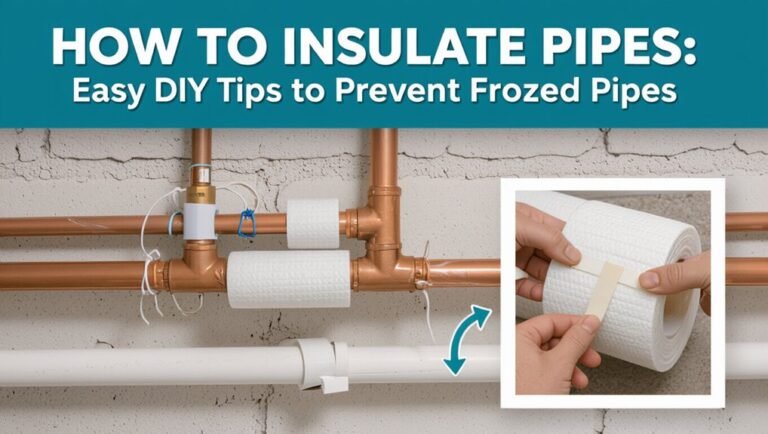
The Role of Insulation R-Value on Freeze Time
By slowing heat loss from a pipe to its surroundings, insulation R-value directly influences how long water remains unfrozen under cold conditions. Higher R-values reduce conductive and convective heat transfer, extending the time before internal water reaches freezing.
Time-to-freeze depends on pipe material, diameter, initial water temperature, and ambient temperature gradients; R-value interacts with these variables to change the thermal time constant. In practice, incremental R-value increases yield diminishing returns: each additional unit provides smaller delays. Designers assess target freeze delay and select insulation thickness accordingly, balancing cost, installation constraints, and the marginal benefit of higher R-values.
Insulation Types: Foam, Wrap, and Heat Tape Compared
Foam pipe insulation offers high R-value per inch and simple installation, making it an efficient first-line defense against freezing.
Comparatively, wrap-style insulation conforms to irregular fittings while heat tape provides active heat for vulnerable sections or when ambient temperatures are extremely low.
Evaluating foam’s passive protection against the targeted application of heat tape and the flexibility of wrap helps determine the best choice for specific pipe runs.
Foam Insulation Benefits
Pipe protection choices—foam, wrap, and heat tape—each offer distinct approaches to preventing freezing and heat loss.
Foam insulation provides a lightweight, rigid barrier that fits snugly around pipes, reducing conductive heat loss and slowing freeze progression.
Closed-cell foam resists moisture and compresses for tight seals around joints.
Installation is fast and often tool-free, lowering labor time and cost.
Foam’s thermal performance improves overall system efficiency and reduces condensation-related corrosion risk.
Durable and low-maintenance, it suits exposed and semi-enclosed spaces where passive protection is preferred.
- Relief
- Confidence
- Security
- Ease
- Prudence
Heat Tape Versus Wrap
Compare heat tape and wrap by their function: heat tape actively supplies warmth through an electric heating element, while wrap provides passive insulation to slow heat loss.
Heat tape is effective for exposed, hard-to-insulate runs and can prevent freezing when powered and installed per instructions.
Wraps—fiberglass, foam, or reflective—reduce conduction and are ideal for sheltered or continuous coverage.
Heat tape requires electrical access and careful installation to avoid hazards; wraps require correct thickness and moisture protection to maintain R-value.
Combining both is sometimes recommended: heat tape for critical spots, wrap for broader thermal protection, improving overall freeze resistance.
Heat Cable for Frozen Pipes: Selection and Safety
Selecting an appropriate heat cable is a critical step in preventing pipe freeze and ensuring safe operation; choices hinge on pipe material, length, location, and local temperatures. The article explains self-regulating versus constant-wattage cables, matching cable output to pipe diameter, and the need for UL listing.
Proper installation, GFCI protection, and avoidance of overlapping cable prevent overheating. Insulation placement complements cable performance; manufacturers’ installation instructions must be followed.
Periodic inspection for damage and secure fastening extend service life. Professional consultation is advised for complex runs or high-risk situations.
- urgency: protect family and home
- relief: restore warmth quickly
- confidence: choose certified products
- caution: respect electrical risks
- comfort: peace of mind with maintenance
Pipe Routing to Reduce Freeze Risk
Proper routing of water pipes is a key preventive measure against freezing.
Pipes are best run through interior walls and kept close to heat sources such as furnace ducts or hot water lines.
Whenever possible, runs along exterior walls should be avoided or insulated and relocated to reduce exposure to cold.
Route Pipes Through Interior Walls
Routing pipes through interior walls keeps them closer to the home’s conditioned spaces, reducing exposure to cold and lowering freeze risk.
This approach positions water lines away from exterior sheathing and uninsulated cavities, minimizing thermal bridges and delayed heat loss.
Placing pipes within insulated wall assemblies also facilitates easier access for maintenance via interior panels. Contractors and homeowners should plan routing during design to avoid unnecessary bends and to maintain sufficient clearance from electrical fixtures.
Proper routing complements insulation and preventive measures without relying on supplemental heat.
- Quiet relief knowing pipes are sheltered
- Calm assurance of fewer surprises
- Comfort in predictable performance
- Confidence during cold snaps
- Pride in thoughtful design
Keep Pipes Near Heat Sources
Near heat sources such as furnaces, water heaters, and interior living spaces, piping experiences higher ambient temperatures that markedly reduce the risk of freezing. Positioning supply lines and return runs close to these heat sources leverages steady warmth and minimizes exposure to cold drafts.
Keeping pipes within conditioned zones, securing them to warm walls or running them through heated mechanical rooms, reduces insulation needs and freeze risk. Where proximity isn’t possible, route lines to benefit from radiant heat paths and avoid cold pockets.
Plumbers should plan layouts prioritizing heat access while maintaining code compliance, serviceability, and protection from physical damage.
Avoid Exterior Wall Runs
Along exterior walls, water pipes face greater exposure to cold and are at higher risk of freezing during prolonged low temperatures.
To reduce freeze risk, plumbing is routed away from outer walls toward interior spaces, basements, and heated areas.
When relocation isn’t feasible, insulate pipes thoroughly, seal gaps where cold air intrudes, and allow slight heat transfer from adjacent living spaces.
Professionals assess building layout to minimize exterior runs and recommend rerouting during renovations.
Thoughtful planning lowers emergency repairs and water damage.
- Fear of burst pipes in the night
- Frustration at frozen faucets
- Relief from preventative action
- Hope for uninterrupted heat
- Confidence in reduced risk
Best Ways to Protect Outdoor Faucets and Hose Bibs
To prevent outdoor faucets and hose bibs from freezing and bursting during cold spells, homeowners should employ targeted insulation, timely shutoff practices, and simple protective accessories.
First, disconnect hoses and drain residual water; stored hoses reduce backflow and ice build-up. Install insulated faucet covers or foam sleeves rated for outdoor use to block wind chill.
Consider frost-free spigots when replacing fixtures; their valve design keeps water inside the warmer interior wall. Close interior shutoff valves feeding exterior taps and drain the lines.
Check seals and replace deteriorated washers to prevent leaks. Inspect covers and valves periodically during prolonged freezes.
When to Leave a Trickle Running : and How Much
When temperatures threaten to drop below freezing, leaving a slow trickle of water running from an indoor faucet can prevent pipes from freezing by keeping water moving and relieving pressure buildup from any ice blockages.
Aim for a steady drip from a faucet served by exposed or vulnerable lines; one to two drips per second is usually sufficient.
Prioritize faucets farthest from the main supply and those on exterior walls.
Monitor water usage and shut off when temperatures recover.
This method buys time but is not a substitute for insulation or professional repairs.
- Anxiety eased by simple action
- Relief in steady sound
- Confidence in prevention
- Frustration avoided
- Reassurance preserved
Thermostat and Zone Settings to Protect Plumbing
Keeping the thermostat at a consistent, modest temperature and using zoned controls reduces the risk of frozen pipes by preventing cold spots and maintaining steady heat where plumbing runs.
Homes with multiple zones can prioritize warmer settings for areas containing water lines—basements, crawlspaces, and exterior walls—while lowering heat in unused rooms.
Programmable thermostats should avoid wide overnight setbacks that allow temperatures near freezing.
Remote monitoring and smart schedules help maintain minimum safe temps when occupants are away.
Regular verification of thermostat calibration and clear labeling of zones guarantees reliable operation and rapid adjustment during cold snaps.
Sealing Drafts and Air Leaks Near Plumbing Lines
Along exterior walls and where pipes enter attics, basements, and crawlspaces, sealing drafts and air leaks is one of the most effective ways to prevent pipes from freezing. Attention to gaps around vents, utility penetrations, windows, and door frames reduces cold infiltration and keeps pipe cavities closer to indoor temperature. Use caulk, foam sealant, weatherstripping, and insulated collars; prioritize areas with noticeable drafts.
Inspect annually and after storms. Proper sealing minimizes heat loss, lowers risk of burst pipes, and reduces heating costs, creating a calmer, safer home through simple, proactive measures.
- Relief that danger is reduced
- Confidence in a warmer home
- Pride in preparedness
- Security for belongings
- Calm through prevention
Temporary Fixes Until a Plumber Arrives
Before professional help arrives, homeowners can take a few targeted temporary actions to reduce the chance of a frozen pipe bursting and limit water damage.
Shut off the main water supply to stop pressure buildup, then open faucets to drain trapped water and relieve pressure.
Apply gentle heat to accessible pipe sections using a hair dryer, heat lamp, or warm towels—avoid open flames.
Wrap exposed pipes with insulation or towels soaked in warm water while monitoring for thaw.
Place containers beneath suspected leaks and remove valuables.
Record observations and take photos to inform the plumber, maintaining a safe distance from electrical hazards.
How to Locate the Exact Spot of a Frozen Pipe
A homeowner can locate a frozen pipe by checking for unusually cold spots along walls and floors where pipes run.
Visible piping in basements, crawlspaces, and exterior walls should be inspected for frost, condensation, or bulging.
Marking the coldest point helps target thawing efforts or guide a plumber.
Check For Cold Spots
Where precisely is the pipe frozen? The observer scans along accessible runs, feeling for sudden cold and noting temperature shifts near walls, floors, and exterior-facing areas. A noncontact infrared thermometer or simple touch reveals abrupt drops that pinpoint the ice blockage. Listen for muted flow beyond the cold section and watch faucets for reduced output to corroborate location. Mark the spot and surrounding supports before attempting thawing or professional help.
- A sudden chill that halts routine comforts
- The dread of a hidden crack forming
- Relief at finding a single, fixable spot
- Anxiety over inaccessible runs
- Urgency to act before damage spreads
Inspect Visible Piping
Having pinpointed a suspicious cold spot, the observer next inspects all exposed piping runs to locate the precise frozen section. Visual signs include frost buildup, bulging, or ice on fittings; tactile checks reveal an abrupt hard, cold area compared with adjacent pipe warmth.
Work from the nearest valve or fixture toward the supply main, feeling along lengths, behind insulation, and at bends where flow constriction concentrates. Note any sound changes when tapping—duller tones may indicate ice. Mark the spot for thawing attention and record surrounding conditions: proximity to exterior walls, drafts, and missing insulation to guide repair and preventive measures.
Tools Homeowners Can Use Safely Right Away
Basic hand tools and common household items can provide immediate, safe options for homeowners facing the risk of frozen pipes.
A flashlight, adjustable wrench, towels, a hair dryer, and a space heater used cautiously help address cold spots, slow freezes, and minor leaks.
Items should be used per manufacturer instructions, avoiding open flames.
Gentle, consistent warmth and insulation prevent damage without aggressive force.
Monitoring progress and shutting off water if a pipe bursts limits harm.
Emotional reassurance comes from preparedness and calm action; small tools often restore a sense of control until temperatures stabilize or professional help arrives.
- Flashlight
- Adjustable wrench
- Towels
- Hair dryer
- Space heater
When to Call a Plumber vs. DIY
A homeowner should call a plumber when pipes are visibly burst, water is flowing uncontrollably, or when repeated freezing occurs despite precautions.
For minor concerns—slow drips, localized frost on exposed pipes, or temporary cold snaps—simple DIY steps like opening cabinets, applying gentle heat, and shutting off the main valve can be effective.
Clear criteria for escalating to a professional help prevent costly damage and unsafe attempts at repair.
When To Call
When should a homeowner attempt thawing frozen pipes and when is professional help required? A plumber should be called when signs indicate risk beyond simple DIY: persistent no-water conditions, visible pipe bulging, frost inside walls, repeated freezes, or gas/structural hazards. Licensed technicians offer safe thawing, leak detection, and emergency repairs that prevent bursts and mold. Homeowners should prioritize safety and act quickly; delaying can escalate damage and costs. Emergency response preserves property and health. Consider professional assessment after any severe freeze event or if confidence and tools for safe, limited intervention are lacking.
- Fear of burst pipes
- Cold despair at no water
- Anxiety over hidden leaks
- Urgency to protect family
- Relief from professional aid
DIY Safe Steps
Evaluating the situation calmly helps homeowners decide whether to attempt pipe thawing themselves or call a plumber.
Homeowners should shut off water at the main and open faucets to relieve pressure. Apply gentle heat with a hairdryer, heat lamp, or electric space heater—never open flame—and work from the faucet toward the frozen section. Insulate exposed pipes and monitor for leaks as ice melts. Avoid using high heat, welding torches, or electrical appliances in standing water.
If pipes are inaccessible, frozen inside walls, show cracking, or thawing fails after a short attempt, contacting a licensed plumber is prudent and safe.
Typical Repair Costs for Frozen or Burst Pipes
Repair costs for frozen or burst pipes vary widely depending on damage extent, pipe location, material, and required access. Typical repairs range from minor thawing and patching to extensive replacement and water damage remediation. Labor, emergency call fees, and drying/restoration add to totals. Municipal permits or specialty parts can increase expenses. Homeowners may face temporary relocation or loss of belongings when damage is severe. Prompt response reduces costs; delayed action compounds them. Clear estimates from licensed plumbers help set expectations.
- Panic at midnight calls for help
- Relief when a quick fix suffices
- Frustration over hidden structural damage
- Anxiety about unexpected bills
- Gratitude after thorough restoration
What Homeowners Insurance Usually Covers for Bursts
After addressing repair logistics and costs, attention turns to how homeowners insurance typically responds to pipe bursts. Policies commonly cover sudden, accidental water damage from burst pipes—repairing damaged structural elements, replacing ruined belongings, and paying for temporary living expenses if the home is uninhabitable.
Coverage often excludes damage from neglected maintenance, gradual leaks, or freezing that results from homeowner inaction. Policy limits, deductibles, and specific endorsements (such as additional water or sewer backup coverage) influence payouts.
Prompt mitigation, documented claims, and compliance with policy conditions improve recovery chances; policyholders should review terms and consult their insurer after a burst.
How to Inspect for Hidden Freeze Damage After Thawing
Following a thaw, homeowners should systematically check for hidden freeze damage before restoring full water service. A visual and tactile inspection can reveal hairline cracks, warped fittings, and compromised pipe insulation.
Begin at exterior connections, then follow interior runs, looking for stains, drips, and bulges. Test fixtures slowly, watching pressure and unusual noises. If any doubt exists, shut water off and call a professional to avoid larger failure.
- Discovering a slow leak can provoke anxious urgency.
- Finding frost-damaged insulation may feel discouraging.
- A silent crack can breed creeping worry.
- Unseen water stains spark sinking dread.
- Hearing stress noises causes immediate alarm.
Preventing Mold and Water Damage After a Burst
Once the immediate plumbing issues have been located and temporary shutoffs applied, attention should turn to preventing mold growth and limiting water damage from any remaining moisture.
Assess soaked materials and remove unsalvageable porous items; salvageable items require thorough drying.
Use dehumidifiers, air movers, and heat to lower humidity and speed evaporation, and open windows if outdoor conditions permit.
Disinfect affected surfaces with appropriate cleaners to inhibit microbial growth.
Monitor moisture levels with a meter and repeat drying as needed.
Document damage and remediation for insurance.
Engage a restoration professional when contamination, structural compromise, or persistent dampness is present.
Long-Term Upgrades: Rerouting or Relocating Vulnerable Pipes
Long-term mitigation may require moving exposed supply lines into conditioned interior walls to reduce freeze risk.
Reconfiguring pipe runs can shorten vulnerable runs and route water away from cold exterior-facing areas.
Adding accessible access panels guarantees future inspections and repairs without opening finished walls.
Move Pipes Inside Walls
Placing vulnerable water lines inside exterior walls reduces their exposure to cold air and is a durable way to prevent freezing. Moving pipes into insulated wall cavities limits temperature swings and cuts reliance on temporary fixes. Professional assessment guarantees structural integrity, code compliance, and proper venting. Homeowners gain long-term peace of mind and lower risk of bursts, but should weigh cost and disruption. Careful planning coordinates insulation, access panels, and freeze-resistant materials. Periodic inspection confirms continued protection and detects shifts or moisture.
- Anxiety eased by reliable protection
- Relief from winter worry
- Confidence in fewer emergencies
- Satisfaction with lasting investment
- Comfort in safer homes
Reconfigure Pipe Runs
When vulnerable supply lines run through cold or exposed areas, rerouting or relocating them provides a permanent solution that reduces freeze risk and simplifies winter maintenance.
Homeowners and contractors may redesign pipe routes to keep lines within conditioned spaces, consolidate runs along interior walls, or raise them above slab level to avoid cold floors. Choices consider accessibility, insulation needs, and local code.
Although more invasive than short-term fixes, reconfigurations minimize reliance on heat tape and reduce emergency repairs. Proper planning includes mapping, selecting durable materials, and coordinating with HVAC and structural concerns to guarantee long-term reliability against freezing.
Install Accessible Access Panels
As part of rerouting vulnerable pipes, installing accessible access panels provides a controlled, code-compliant way to reach shutoffs, unions, and inspection points without damaging finishes. The homeowner benefits from reduced repair time, clearer inspection access, and minimized emergency wall demolition.
Panels should be placed where pipes are most at risk: exterior walls, crawlspaces, and near appliances. Durable, insulated panels improve thermal protection and can be lockable for safety.
Coordination with contractors guarantees panels meet building codes and aesthetic goals, preserving finishes while improving long-term pipe management and freeze-response readiness.
- Relief at quick fixes
- Confidence in preparedness
- Comfort from preserved interiors
- Pride in smart upgrades
- Calm during cold snaps
Winterizing Seasonal and Vacation Properties
Before closing up for the season, owners of seasonal or vacation properties should follow a clear checklist to prevent frozen pipes, water damage, and costly repairs.
Drain plumbing lines, open faucets, and flush toilets to remove standing water. Shut off and depressurize the main water supply, and use non-toxic antifreeze in traps and fixtures where needed.
Insulate exposed pipes, especially in unheated spaces, and close crawlspace vents. Maintain a minimal heating schedule or use thermostatically controlled heat tapes where power is reliable.
Secure exterior hoses, winterize irrigation, and document valve locations for emergency access by caretakers or contractors.
How Smart Sensors Can Detect Freezing Risks Early
By monitoring temperature, humidity, and pipe-surface conditions in real time, smart sensors provide early warning of freezing risks long before visible damage occurs.
They detect rapid drops, localized cold spots, and moisture that indicate impending ice formation, sending alerts so homeowners or property managers can act.
Integration with heating controls and remote notifications enables automatic mitigation like activating heat or shutting valves.
Data logs help identify vulnerable runs and optimize insulation or routing.
Affordable, battery-backed units reduce false alarms through trend analysis and thresholds tuned to plumbing materials, improving response while minimizing disruption.
- Anxiety eased by instant alerts
- Relief from avoided disasters
- Confidence in remote oversight
- Urgency transformed into action
- Trust in measurable protection
Climate Zones and Regional Freeze Risk Differences
Regional temperature thresholds determine how frequently and how long pipes are exposed to freezing conditions.
Localized microclimates — such as urban heat islands, valleys, or coastal breezes — can raise or lower that risk compared with broader climate zones.
Exposure factors like building orientation, insulation, and elevation further modulate freezing likelihood within the same region.
Regional Temperature Thresholds
Climate zones and local climate variability determine the outdoor temperature thresholds at which water pipes are likely to freeze: colder continental and polar regions commonly see pipe freeze risk when temperatures fall below about 20°F (−7°C) for sustained periods, while milder maritime and subtropical areas typically face risk only during brief dips below 32°F (0°C) coupled with wind or radiational cooling.
Regional infrastructure, building practices, insulation standards, and historical frost depth inform local guidance. Residents should consult regional advisories and design codes to assess risk and protective measures appropriate to their zone.
- Anxiety about sudden loss
- Urgency to act quickly
- Pride in preparedness
- Relief after prevention
- Frustration at damage
Microclimates And Exposure
Beyond broad climate-zone guidance, local microclimates and a pipe’s exposure determine freeze risk at a much finer scale. Factors such as elevation, wind patterns, sun exposure, and nearby structures create temperature variations that can make pipes in one house vulnerable while neighbors remain unaffected.
Pipes in uninsulated exterior walls, crawl spaces, attics, or near drafty vents face higher risk. Urban heat islands may reduce freezing frequency, while shaded valleys increase it.
Assessments should consider hourly lows, wind chill effects on exterior surfaces, and thermal bridges. Targeted insulation, sealing drafts, and localized heat sources mitigate these specific exposure risks.
Checklist: Winter Plumbing Prep in One Hour
With a focused hour, a homeowner can complete a short, prioritized checklist to reduce freeze risk and limit winter plumbing damage. A calm, efficient sweep addresses vulnerable pipes, insulation, and simple controls; the tone is practical yet urgent, conveying care for home and family.
- Inspect exposed pipes and feel for cold spots that signal vulnerability.
- Add foam insulation to accessible pipes and secure loose wraps.
- Seal gaps where cold air enters around foundations and crawlspaces.
- Set faucets to a slow drip in at-risk areas when night temperatures fall.
- Test and label shutoff valves for quick action if trouble appears.
Quick Do-This Checklist When Temperatures Drop
Act quickly when temperatures start falling: follow a short, prioritized checklist to protect pipes and maintain water access. The list focuses on immediate actions: open cabinet doors, drip faucets, set thermostats, insulate exposed lines, and know shutoff locations. Execution is simple, timed, and repeatable until temperatures stabilize.
| Action | Target | Time |
|---|---|---|
| Open cabinets | Under sinks | 1 min |
| Drip faucets | Vulnerable taps | 2–3 min |
| Set thermostat | Night/day | 1 min |
| Insulate pipes | Exposed areas | 5–10 min |
| Locate shutoff | Whole house | 2 min |
Conclusion
Pipes commonly begin to freeze at about 20°F (−7°C), though exposure, pipe location and insulation influence that threshold. A striking statistic: frozen-pipe claims cost U.S. homeowners over $5 billion annually—underscoring the high stakes of prevention. With prompt detection, simple insulation, and sensible heat-retention strategies, many incidents are avoidable. Practical winter checks and smart sensors markedly reduce risk, making proactive preparation far cheaper and less disruptive than emergency repairs during prolonged cold spells.