How to Test a Furnace Pressure Switch: Step-by-Step Guide for Homeowners
To test a furnace pressure switch, start by cutting off power and gas, then visually inspect the tubing and diaphragm. Use a multimeter to check continuity across the switch while the furnace is off. Observe the switch during an ignition cycle or employ a hand vacuum pump to verify it opens and closes at the specified vacuum levels. Look for any leaks, delays, or abnormal readings. For further guidance on diagnostics, replacement, and preventive measures, continue reading.
What a Furnace Pressure Switch Is and Why It Matters
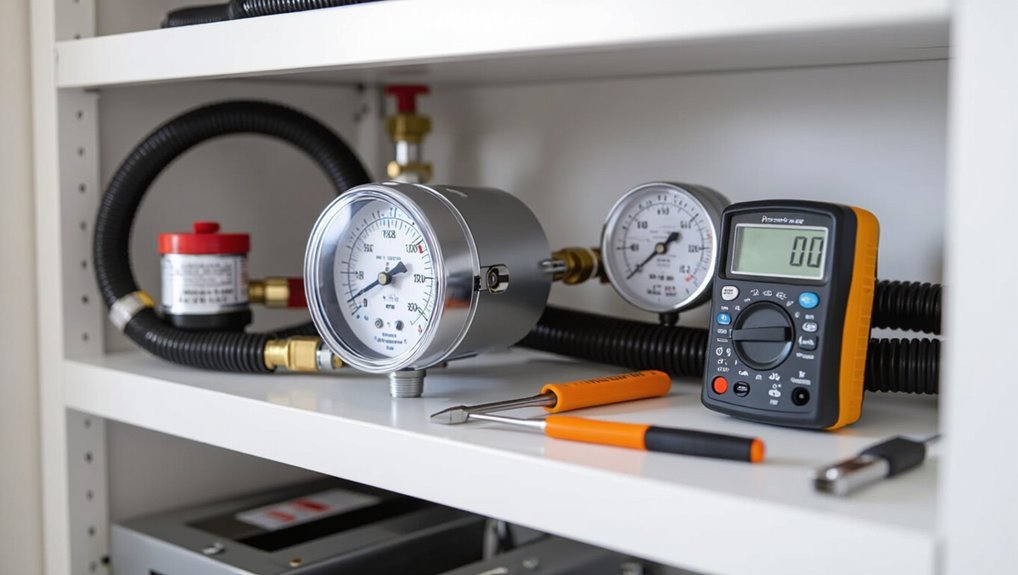
A furnace pressure switch monitors combustion airflow and prevents the system from operating if venting or draft conditions are unsafe.
Signs of a failing switch include intermittent ignition, the blower running without heat, or frequent lockouts.
Basic testing can be performed by a competent homeowner, but persistent faults or uncertain results warrant a professional technician.
Purpose of the pressure switch in the furnace safety system
Pressure switches serve as a critical safety gate in a furnace, detecting whether the induced draft blower and venting system are creating the correct airflow before ignition.
They prevent burner operation if venting is blocked or blower fails, reducing carbon monoxide and fire risk.
Understanding this role helps homeowners prioritize inspections and know when to consult a technician or learn how to test a furnace pressure switch.
Common symptoms of a failing pressure switch
When the draft blower or venting begins to falter, the pressure switch often gives early clues through measurable faults in furnace behavior.
Signs include repeated ignition lockouts, furnace cycling on and off, failure to light, unusual delayed burner ignition, and error codes or blinking lights.
Intermittent operation, reduced heating performance, and audible hissing from the vent pathway also indicate possible switch failure.
When to test vs. when to call a professional
How should one decide between attempting a DIY pressure-switch test and calling a professional?
A homeowner may perform basic checks—visual inspection, hose condition, multimeter continuity—if comfortable, safe, and the furnace is under warranty.
Call a licensed HVAC technician when gas components, complex diagnostics, repeated failures, electrical hazards, unclear results, or restricted access exist, or when local codes require professional service.
Safety Precautions Before Testing a Furnace Pressure Switch
Before testing a furnace pressure switch, the technician should gather the required tools and equipment and confirm the workspace is well-lit and clear of obstructions.
Power and gas must be shut off at their sources and verified with appropriate meters or test devices.
The technician should wear suitable personal protective equipment and maintain a stable, ventilated work area.
Tools and equipment you will need
A concise set of tools and safety equipment is essential for testing a furnace pressure switch to guarantee the task is performed accurately and without injury.
Necessary items include basic diagnostic and protective gear to inspect, measure, and handle components safely.
- Multimeter (with continuity and voltage)
- Manometer or vacuum gauge
- Insulated screwdrivers and pliers
- Safety glasses and gloves
Turning off power and gas safely
With tools and protective gear gathered, the next step is to shut off both the furnace power and the gas supply to eliminate electrical and combustion hazards.
Turn off the furnace at the service switch and shut power at the breaker.
Close the gas valve on the furnace or at the appliance connection.
Verify power is off and gas is secured before proceeding.
Personal protective equipment and safe workspace setup
Donning appropriate personal protective equipment and arranging a clear, well-lit workspace reduces the risk of injury and contamination while testing a furnace pressure switch.
The technician should wear safety glasses, insulated gloves, and a dust mask. Remove loose clothing and jewelry, secure tools in a tray, guarantee stable footing, and keep a fire extinguisher nearby.
Maintain ventilation and clear access to switches and panels.
How to Locate the Pressure Switch on Different Furnace Models
The guide explains where pressure switches are typically mounted on various furnace types to help identify them quickly.
On single-stage furnaces, the switch is usually near the draft inducer or on the burner compartment, while high-efficiency condensing models often mount it adjacent to the secondary heat exchanger and condensate trap.
It also describes how to recognize the small vacuum tubing and vent connections that link the switch to the venting system.
Typical pressure switch location on single-stage furnaces
When identifying the pressure switch on a single-stage furnace, technicians typically look near the draft inducer or flue connection where the switch mounts to the blower housing or plenum.
It often appears as a small round or rectangular device with a vacuum hose attached. Accessible from the furnace front panel, its electrical leads connect to the control board; placement prioritizes sensing induced draft pressure.
Typical pressure switch location on high-efficiency condensing furnaces
Single-stage furnaces often locate the pressure switch near the draft inducer or flue connection; high-efficiency condensing furnaces, however, place it differently to accommodate their sealed combustion and condensate management.
The switch typically mounts on or adjacent to the sealed combustion chamber or the inducer assembly, often behind an access panel.
It remains accessible but positioned to integrate with condensate traps and sealed venting components.
Identifying the vacuum tubing and vent connections
Locate the pressure switch by tracing the small-diameter vacuum tubing and vent connections from the inducer motor and combustion chamber to where they terminate at the switch body.
The tubing is flexible, rubber or silicone, often clipped to the cabinet; vents are rigid PVC or metal.
Note any splits, lint, cracks, or blockages.
Label connections before disconnecting for testing and reassembly.
Step-by-Step Guide to Testing a Furnace Pressure Switch
The following steps outline a concise procedure for testing a furnace pressure switch, beginning with a visual inspection of the tubing, diaphragm, and electrical terminals for damage or blockage.
Next, the technician performs a continuity check with a multimeter while the furnace is off.
Then, the technician observes switch operation and voltage readings during a normal ignition cycle.
If needed, a hand-held vacuum pump can simulate induced draft to confirm switch actuation and to help interpret multimeter readings and switch voltages.
Visual inspection: tubing, diaphragm, and electrical terminals
Before any electrical testing begins, a careful visual inspection of the pressure switch assembly is essential:
The technician checks the plastic tubing for cracks, kinks, blockages, or loose connections.
The diaphragm is inspected for warping, tears, or oil contamination.
Electrical terminals are examined for corrosion, looseness, frayed wires, or burnt insulation.
Any defects are noted for repair or replacement before further testing.
Continuity test with a multimeter while furnace is off
Power down the furnace and verify all power sources are disconnected to guarantee safety before testing.
Using a digital multimeter set to continuity or ohms, remove the switch’s harness and probe the terminal pair. A closed switch at rest shows near-zero ohms; an open switch shows infinite resistance.
Record readings and compare with manufacturer specifications to determine if replacement is needed.
Testing switch operation during a normal ignition cycle
With continuity confirmed while the furnace is off, proceed to observe the pressure switch during an actual ignition cycle to verify it opens and closes under operating conditions.
Start the furnace, watch inducer fan startup, and monitor the switch terminals with a multimeter or voltage tester.
Confirm the switch closes when adequate draft is present and opens after shutdown.
Note any delayed, intermittent, or failed changes.
Using a hand-held vacuum pump to simulate induced draft
Using a hand-held vacuum pump allows the technician to safely and accurately simulate the inducer’s draft and observe the pressure switch response without running the furnace.
The procedure is concise and controlled:
- Attach pump to switch vacuum port securely.
- Gradually increase vacuum until switch closes.
- Note any leaks or delayed response.
- Release vacuum and confirm switch reopens promptly.
Interpreting multimeter readings and switch voltages
After verifying the pressure switch actuates reliably with a hand-held vacuum pump, the technician next interprets multimeter readings and switch voltages to determine electrical continuity and control circuit behavior.
They measure across switch terminals for open/closed states, verify coil or control voltage during call-for-heat, and check for stable readings without voltage drops.
Abnormal values indicate wiring, relay, or switch failure needing replacement.
Diagnostic Scenarios and What the Results Mean
The following diagnostic scenarios map common pressure switch behaviors to likely causes and next steps.
Observations include a switch that shows continuity when it should be open, a switch that never closes during the ignition sequence, intermittent or delayed switching, and false trips from clogged venting or inducer problems.
Each result points to different failures—switch diaphragm, wiring or control faults, airflow/inducer issues, or vent obstruction—and guides whether to clean, repair, or replace components.
Switch shows continuity when it should be open
If a furnace pressure switch registers continuity when it should be open, it indicates the switch contacts are closed despite conditions that should keep them separated. This points to a malfunction either within the switch itself or in the control circuitry.
Possible causes include failed internal contacts, shorted wiring, or stuck actuator. This condition can bypass safety interlocks and requires prompt inspection and component replacement.
Switch never closes during the ignition sequence
Diagnose why the pressure switch never closes during ignition by observing when the inducer motor runs, the vent draft develops, and whether the switch sees sufficient negative pressure to actuate;
check for blocked vents, clogged condensate traps, collapsed or disconnected tubing, failed inducer motor, or faulty switch diaphragms.
Measure vacuum at the switch during startup and verify continuity only when proper negative pressure is present.
Intermittent operation or delayed switching
Intermittent pressure-switch operation or delayed closing during ignition often indicates marginal vacuum generation, intermittent tubing leaks, or a failing switch diaphragm that only actuates under stronger-than-normal negative pressure.
Technicians should observe multiple ignition cycles, inspect and gently flex tubing for cracks, verify inducer speed consistency, and test switch response with a manometer.
Intermittency suggests progressive wear or intermittent air leaks needing timely repair.
False trips caused by clogged venting or inducer issues
Several common fault patterns produce false pressure-switch trips when venting is clogged or the inducer fan is malfunctioning.
Blocked flues or bird nests restrict exhaust, preventing correct draft and causing low-pressure readings. A weak or failing inducer motor yields insufficient airflow or intermittent vacuum.
Technicians should inspect vents, clear obstructions, verify inducer RPM and amperage, and retest switch response before replacing components.
Common Causes of Pressure Switch Failure and How to Fix Them
Common pressure switch failures often trace to obstructed vent pipes or condensate drains, damaged or disconnected vacuum tubing, or inducer motor and airflow faults.
Each cause produces specific symptoms and can usually be resolved by clearing blockages, repairing or replacing tubing, or addressing inducer and airflow issues.
When the switch itself is defective, replacement following a proper step‑by‑step procedure restores reliable operation.
Clogged or blocked vent pipes and condensate drains
Blockages in vent pipes or condensate drains are a frequent source of pressure switch failures because they prevent proper airflow and condensate removal, causing pressure imbalances that the switch interprets as unsafe conditions.
Homeowners should inspect vents for debris, nests, or ice and clear condensate lines of sludge or algae.
Regular cleaning, proper slope, and secure fittings restore flow and often resolve false pressure switch trips.
Damaged or disconnected vacuum tubing
After clearing vent and condensate obstructions, attention should turn to the small vacuum tubing that links the inducer assembly to the pressure switch. This thin hose is a frequent failure point because it is exposed to heat, chemical residue, and movement.
Inspect for cracks, pinholes, kinks or disconnection. Replace brittle or damaged tubing with correct diameter HVAC tubing; verify secure fittings and airtight seals before retesting.
Faulty inducer motor or airflow problems
Investigate the inducer motor and overall airflow when the pressure switch fails to close despite clear tubing and vents. A weak or failing inducer, blocked exhaust, or clogged filters reduce draft, preventing switch actuation.
Check and address these items:
- Inspect inducer motor for noise or failure
- Verify exhaust and intake paths are clear
- Replace dirty filters
- Confirm blower operation and belt condition
Replacing a defective pressure switch: step-by-step
If the inducer, vents, and airflow checks rule out external causes, attention shifts to replacing a defective pressure switch.
Power is disconnected, gas and thermostat off. Note wiring, remove tubing, unfasten mounting screws, and replace with the exact model.
Reconnect tubing and wires, restore power, then run the furnace to verify proper closing and operation. Test multiple cycles.
When Replacement Is Necessary and How to Choose the Right Part
Replacement is warranted when a switch fails testing, shows physical damage, or repeatedly malfunctions despite cleaning and troubleshooting.
The technician should match pressure and electrical ratings and terminal type to the original unit, weigh OEM versus aftermarket options for compatibility and warranty, and consider estimated costs and expected lifespan when deciding.
Prioritizing correct specifications and realistic cost-life expectations reduces repeat failures and safety risks.
Matching specifications: pressure rating, electrical ratings, and terminal type
Choosing a replacement pressure switch requires verifying three key specifications: the pressure setpoint and range (usually given in inches of water column), the electrical ratings (voltage, current, and whether it’s single- or double-throw), and the terminal style or connector type to guarantee proper wiring. Match numbers precisely; wrong specs risk malfunction or hazard.
| Spec | Importance | Feeling |
|---|---|---|
| Pressure | Critical | Unease |
| Electrical | Safety | Relief |
| Terminals | Fit | Confidence |
OEM vs. aftermarket pressure switches
After confirming pressure, electrical, and terminal specifications, the decision between an OEM and an aftermarket pressure switch centers on compatibility, warranty, and long-term reliability.
OEM parts match factory tolerances and preserve manufacturer warranties; aftermarket options can offer lower cost and broader availability but require careful review of ratings and return policies.
Choose parts with documented specifications and, when uncertain, consult the furnace manufacturer or a qualified technician.
Estimated costs and expected lifespan
When a pressure switch fails or shows intermittent faults, homeowners can expect replacement costs to vary by part type and labor—typically $40–$150 for the switch itself and $75–$250 for professional installation depending on local rates and furnace accessibility.
Expected lifespan is roughly 5–15 years; environmental factors and cycling frequency shorten life.
Choose OEM for guaranteed fit, or quality aftermarket with matching pressure specs and warranty.
Preventive Maintenance to Keep the Pressure Switch Working
A concise preventive maintenance plan helps keep the furnace pressure switch functioning reliably.
It should include a routine inspection checklist, seasonal tasks such as clearing condensate lines and checking venting, and guidance on signs to watch for between professional tune-ups.
Monitoring subtle changes—intermittent failures, unusual noises, or pressure hose deterioration—enables timely intervention.
Routine inspection checklist
Although often overlooked, a concise routine inspection checklist guarantees the furnace pressure switch remains reliable and prevents costly failures. It should cover visual inspection of tubing and connections, verification of vacuum and electrical continuity, cleaning of vent and combustion air pathways, and confirmation that mounting and seals are intact.
- Inspect tubing for cracks, kinks, and secure fittings
- Test vacuum and switch continuity with meter
- Clear vents and combustion air passages
- Verify switch mounting and gasket integrity
Seasonal maintenance tasks to prevent failures
Moving from routine inspections to seasonal maintenance broadens the focus from immediate checks to scheduled tasks that prevent wear and failure over time.
Seasonal tasks include cleaning condensate drains, replacing filters, clearing intake and exhaust vents, verifying correct vent piping and seals, and testing blower operation under load.
Documenting performed maintenance and scheduling professional tune-ups reduces unexpected pressure switch failures.
Signs to monitor between professional tune-ups
When homeowners track a few key indicators between professional tune-ups, early pressure switch problems are often caught before they cause a system shutdown.
Observe unusual furnace cycling, delayed ignition, weak or no draft, soot or moisture around the inducer, and error codes on the control board.
Note rattles or air-restriction signs (dirty filters, blocked vents).
Log anomalies and report them at the next service.
Troubleshooting Checklist: Quick Reference for Homeowners
Need a quick guide to pinpoint common pressure-switch issues? A concise checklist helps homeowners assess faults before deeper testing.
- Verify power and thermostat call for heat.
- Inspect vent/condensate for blockages.
- Listen for air inducer operation and vacuum hose integrity.
- Test switch continuity with multimeter when safe.
Follow sequence, record findings, and proceed to step-by-step testing if issues persist.
Additional Resources and When to Call a HVAC Technician
A concise list of questions to ask a technician can help clarify diagnosis, repair options, and cost estimates.
Homeowners are advised to document test procedures, measurements, and any error codes or photos to support repairs or warranty claims.
Knowing when to call a licensed HVAC technician and having organized records improves outcomes and speeds service.
Questions to ask your technician
Curious about what to ask a technician before they inspect a furnace pressure switch?
Homeowners should request a clear diagnosis, ask whether the switch needs cleaning, adjustment, or replacement, and inquire about parts, labor estimates, and warranty coverage.
Also confirm safety procedures, expected testing steps, timeframe, and whether a written estimate will be provided prior to work commencing.
How to document tests and findings for repairs or warranties
Document tests and findings methodically to protect warranty claims and streamline future repairs.
Records should include date, model/serial numbers, observed symptoms, test procedures, measurements (voltages, pressures), tools used, and outcomes.
Note any parts replaced and technician contact details. Retain photos, labeled diagrams, and receipts.
Store digital copies and backups; provide copies to service providers or warranty administrators when requested.
Conclusion
In summary, the pressure switch stands as the furnace’s quiet sentinel—small but essential. Homeowners who learn its location, test it safely, and interpret readings gain control over common heating failures and prevent unsafe operation. If tests show inconsistency, replacement with the correct, OEM-specified switch is prudent. Routine cleaning and annual inspections keep the switch reliable. When uncertainty or complex faults arise, calling a qualified HVAC technician guarantees both safety and lasting repair.