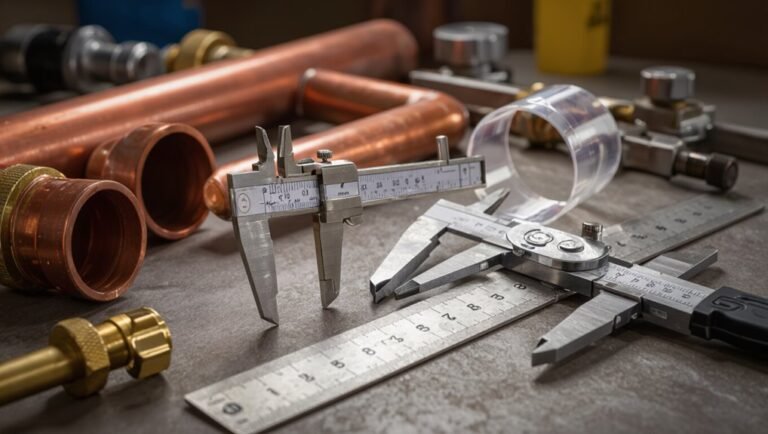
How to Remove an Anti-Scald Valve From a Bathtub: Step-By-Step Guide for DIY Safety
To safely remove an anti-scald valve from a bathtub, follow these steps: First, check local plumbing codes, then shut off the water supply to the tub. Drain and depressurize the lines, and proceed to remove the trim and handle to expose the valve. Document the orientation of any components before disconnecting the supply fittings. Use the appropriate tools to withdraw the cartridge or assembly, and remember to bag any small parts. Inspect seals, springs, and the valve body for any damage, replacing components as needed. Additional instructions will guide you through troubleshooting, safety checks, and advise when to call a professional.
What an Anti-Scald Valve Is and Why You Might Remove It
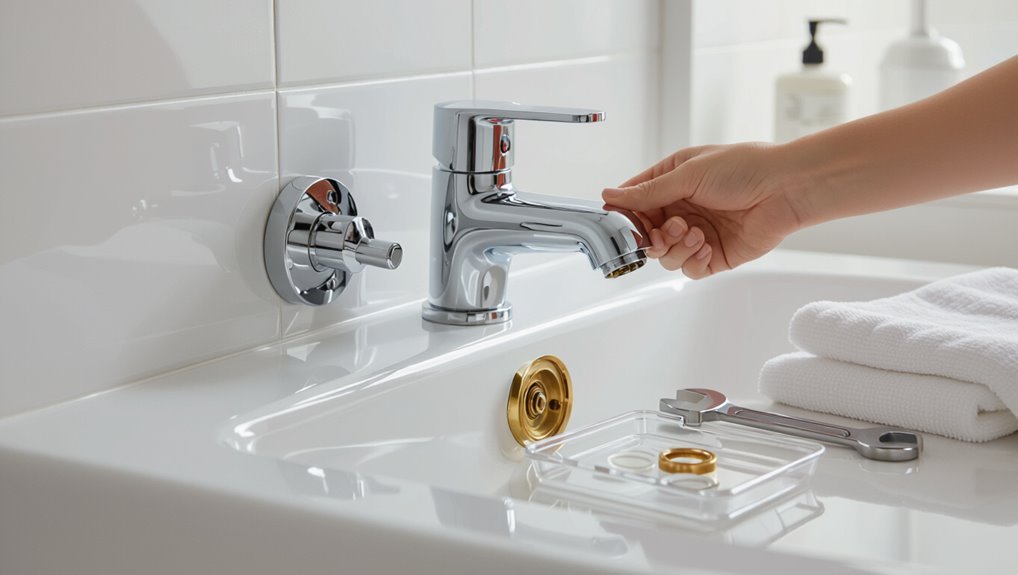
An anti-scald valve regulates mixed water temperature to prevent sudden hot surges at the tub spout.
Homeowners may remove or replace the valve because it malfunctions, restricts flow, or to accommodate a different fixture or preference for hotter water.
Before removal, local codes, fixture warranties, and safety risks—especially for children and vulnerable adults—should be assessed.
Purpose and function of anti-scald valves in bathtubs
Safety and comfort in a bathtub often depend on a small but essential component: the anti-scald valve. It regulates mixed hot and cold water, limiting maximum temperature and responding to pressure changes to prevent sudden scalding.
Understanding this mechanism helps inform decisions about how to remove anti-scald valve bathtub systems safely, ensuring correct reinstallation or replacement without compromising homeowner safety.
Common reasons homeowners remove or replace them
Homeowners often remove or replace anti-scald valves when the device fails, restricts flow, or no longer meets household needs.
Common reasons include persistent temperature fluctuations, mineral buildup causing reduced water pressure, aging components leaking or sticking, compatibility issues with new fixtures, aesthetic or accessibility preferences, and desire for different temperature control behavior.
These practical concerns prompt repair or replacement decisions.
Safety and legal considerations before removal
Before removing an anti-scald valve, confirm local plumbing codes and building regulations as well as household safety implications. Disabling or altering temperature-limiting devices can create scald risks and may violate code or void warranties.
Consult a licensed plumber or inspector, document existing settings, notify household members, and verify manufacturer guidance.
Consider liability, permit requirements, and required replacement with compliant devices to maintain safety and legal compliance.
Quick Overview: Can You Safely Remove an Anti-Scald Valve?
Removing an anti-scald valve is reasonable when the valve is irreparably seized, incompatible with new trim, or creating persistent flow or temperature issues; replacement is preferable when the mechanism is repairable or required for code and safety.
Safe removal requires basic plumbing tools, knowledge of shutoff and pressure-relief procedures, and comfort with cartridge or valve-body work; complex or unfamiliar situations warrant a licensed plumber.
The choice should balance safety, local code, and the homeowner’s skill level.
When removal is advisable versus when replacement is better
Assess whether an anti-scald valve should be removed or replaced by evaluating age, condition, and local code requirements.
Removal may suit malfunctioning, obsolete valves in systems requiring unrestricted flow or where codes permit.
Replacement is preferable for worn, intermittently failing, or code-mandated devices to guarantee safety and reliability.
Consider water pressure, occupant risk, and warranty implications before deciding.
Tools and skills required for a safe removal
Determine whether the task is within one’s skillset by matching required tools and basic plumbing knowledge to the specific valve type:
Common tools include adjustable wrenches, basin wrenches, screwdrivers, channel-lock pliers, a cartridge puller or hex keys for some models, plumber’s tape, replacement O-rings or seals, and a bucket and rags to contain water.
Basic skills: shutoff valve use, leak diagnosis, gentle disassembly, and reassembly.
Required Tools, Materials, and Safety Equipment
A concise inventory of hand and specialty plumbing tools frames the task, from adjustable wrenches and screwdrivers to cartridge pullers and basin wrenches.
Potential replacement parts—new cartridges, seals, and washers—should be identified before starting in case the valve or fittings need swapping.
Appropriate personal protective equipment and straightforward safety precautions, such as shutting off water and protecting surrounding finishes, complete the preparatory checklist.
List of hand tools and specialty plumbing tools
Several essential hand and specialty plumbing tools are required to remove an anti-scald valve safely and efficiently. The technician should assemble durable, correctly sized tools to avoid damage and guarantee control.
Typical items include:
- Adjustable wrench and basin wrench for confined nuts
- Screwdrivers (flat and Phillips) for trim removal
- Channel-lock pliers for grip and turn
- Cartridge puller or valve socket for extraction
Replacement parts you may need after removal
Gather replacement parts before reassembly to guarantee a smooth, uninterrupted repair.
The technician should confirm compatibility and have common spares on hand to prevent delays.
- Replacement anti-scald cartridge or assembly
- O-rings and seat washers (various sizes)
- Valve bonnet or retaining clip
- Supply-line compression nuts and ferrules
Verify model numbers and thread types before purchase.
Personal protective equipment and safety precautions
Before beginning work, the technician must don appropriate personal protective equipment and follow basic safety precautions to prevent injury and water damage.
Protective gear minimizes risk while handling valves, tools, and hot water. Recommended items include:
- Safety glasses to protect eyes from debris and splashes
- Nitrile gloves for grip and chemical resistance
- Knee pads for prolonged kneeling
- Water-absorbent towels to contain leaks
Preparing the Work Area and Turning Off Water
Before any disassembly begins, the homeowner should locate and shut off the correct water supply—either the local shutoff valves for the tub or the main house valve—and confirm which one controls the bathtub.
Next, they should drain the fixture and open nearby faucets while protecting the tub and bathroom surfaces with towels or a drop cloth to catch residual water and debris.
Finally, they must verify there is no remaining water pressure at the valve by testing the faucet and checking for any flow.
How to locate and shut off the correct water supply
One clear first step is to identify which shutoff controls serve the bathtub — typically individual angle stops behind an access panel, a dedicated branch valve near the water heater, or the home’s main shutoff — and confirm which handle or lever corresponds to hot and cold.
Verify by testing briefly, mark the correct valves, and turn them fully clockwise. Use a wrench if stiff.
Draining lines and protecting the tub and bathroom surfaces
With the water supply secured, drain the bathtub and any exposed faucet lines to minimize residual water that could spill when removing the anti-scald valve.
Place towels and a waterproof drop cloth around the tub, tape seams, and protect fixtures with soft covers.
Set a bucket beneath access panels to catch drips.
Remove loose items and guarantee good lighting for a clean, contained workspace.
Verifying no water pressure before starting
Shut off the main and local shutoffs, then open the nearest hot and cold taps to relieve trapped pressure and confirm flow has stopped; a quick check of adjacent fixtures—running a sink or flushing a toilet—helps verify no residual pressure remains in the lines.
Then place a towel over the tub drain, partially remove the valve cover, and observe for any drips; test again after a minute before proceeding.
Step-by-Step Removal Procedure
The technician begins by removing the trim plate and handle to expose the valve assembly and determine the valve type and mounting method.
Next, hot and cold supply lines are disconnected using appropriate shutoff verification and line protections before the cartridge or pressure‑balancing/thermostatic assembly is extracted.
Finally, the valve body and adjacent plumbing are inspected for corrosion, leaks, or damage that may affect replacement or repair.
Accessing the valve (trim plate and handle removal)
Begin by removing the visible trim to expose the valve assembly: loosen and take off the handle, then unscrew the trim plate fasteners and carefully pull the plate away from the wall to reveal the escutcheon and valve body beneath.
Support fragile tiles, keep screws and small parts organized, and note orientation. Use appropriate tools and gentle force to avoid damaging the wall or plumbing components.
Identifying the valve type and mounting method
Once the trim is removed, inspect the exposed valve body to determine its type and how it is mounted: cartridge, ball, or rotary/directional valves each have distinctive shapes and fasteners, and may be secured with a retaining clip, bonnet nut, screws, or mounting plate.
Note visible markings, fastener types, and orientation. Photograph configuration for reference.
Identify any access panels or mounting brackets before removal.
Disconnecting hot and cold water lines safely
With the valve type and mounting method documented, attention shifts to isolating and disconnecting the hot and cold supplies.
The main water and individual shutoffs are closed and verified by opening a faucet to relieve pressure. Protective eyewear is used.
Flexible lines or copper connections are drained, capped, and marked hot/cold. Appropriate wrenches loosen fittings; fittings are supported to prevent stress on plumbing.
Removing cartridge or pressure-balancing/thermostatic valve assembly
Carefully extract the cartridge or pressure‑balancing/thermostatic assembly by first removing any escutcheon and retaining clips.
Then document the orientation and any indexing marks to guarantee correct reinstallation.
Once exposed, use the manufacturer‑specified tool or an adjustable wrench on the cartridge nut, applying steady, even force while supporting the valve body to prevent movement.
Lift the cartridge straight out, inspecting seals, springs, and seats for wear or debris.
Remove O‑rings and retainers, note spring positions, and bag small parts for reassembly.
Inspecting valve body and surrounding plumbing for damage
Inspect the exposed valve body and adjacent plumbing for corrosion, cracks, mineral buildup, or loose fittings before proceeding.
Document visible damage, worn threads, or solder joint issues.
Check for leaks, water staining, and compromised seals.
Verify pipe alignment and support brackets.
Note debris inside ports and measure for excessive play or loosened retaining clips that could affect reassembly or require replacement.
Temporarily capping or replacing the valve to restore function
Begin by shutting off the water supply to the bathtub at the local shutoff or main valve.
Then drain any residual water by opening the tub spout and nearby faucet.
The installer makes a temporary cap or installs a replacement mixing valve matching pipe size and threading.
Uses appropriate fittings and sealant, tests for leaks, and verifies hot/cold balance before restoring finish trim and full water service.
Reinstalling or Replacing After Removal
After removal, the homeowner can choose to reinstall the original anti-scald valve, replace it with a standard cartridge, or upgrade to a newer thermostatic or pressure-balanced model.
Selection should be based on fixture compatibility, valve dimensions and connections, and desired temperature control features.
Installation requires following manufacturer torque and sealant specs, pressure-testing for leaks, and verifying temperature limits and mixing performance before restoring regular use.
Options: reinstall original, install standard cartridge, or upgrade
Decide which path best matches the tub’s needs and the homeowner’s comfort with plumbing work:
Options include reinstalling the original anti-scald valve for familiar operation, replacing it with a standard cartridge for simpler parts and broader availability, or upgrading to a modern pressure-balancing or thermostatic valve for improved safety and control.
Each choice balances cost, complexity, reliability, and future maintenance requirements.
How to select a compatible replacement valve
Several factors determine a compatible replacement valve: the existing valve type and mounting configuration, pipe size and material, trim and handle compatibility, desired control features (pressure balance, thermostatic, or simple cartridge), and local plumbing codes.
The homeowner should verify valve brand/model markings, measure inlet spacing, confirm supply pressure limits, match cartridge dimensions, and choose finishes and functions that align with trim and code requirements.
Steps to install and test the new valve for leaks and temperature control
Begin by shutting off the water supply and preparing the work area so the rough-in is accessible.
Install the replacement valve per manufacturer torque and alignment specs, secure retaining clips, and reconnect hot and cold lines with new fittings or sealant.
Restore water, operate handles to purge air, inspect all joints for leaks, and verify anti-scald function by measuring outlet temperature and adjusting the stop limit as needed.
Common Problems and How to Troubleshoot Them
Common issues after removing an anti-scald valve include stuck or corroded components that resist extraction, leaks following reassembly, and altered temperature or pressure balance.
The article outlines practical extraction techniques for seized valves, sealing methods to stop post-reassembly leaks, and diagnostic steps to identify and correct temperature or pressure changes.
Readers are guided through troubleshooting priorities to restore safe, reliable operation.
Stuck or corroded valves and extraction techniques
When an anti-scald valve becomes seized by mineral deposits or corrosion, removal often requires more than simple twisting; technicians must assess the cause, degree of seizing, and surrounding material before applying force or heat.
Techniques include penetrating lubricants, calibrated heat to loosen corrosion, gentle tapping to break mineral bonds, and using purpose-built extractors or strap wrenches.
Protective measures prevent damage to trim and plumbing.
Leaks after reassembly and sealing tips
Reassembled tubs can still leak if seals, fittings, or seating are imperfect. Diagnosing post-reassembly leaks requires systematic inspection of joints, cartridge interfaces, and trim for visible gaps, loose fasteners, or misplaced O-rings.
Dry-run tests, pressurize lines, and apply soapy water to detect bubbles. Reseat or replace damaged O-rings, tighten fittings to spec, and use appropriate plumber’s grease and a single bead of silicone where recommended.
Temperature imbalance or pressure changes after removal
Although removing an anti-scald valve can restore flow, it may also upset the balance between hot and cold supply pressures or alter temperature limits, producing unpredictable temperature swings or reduced hot water delivery.
The homeowner should check supply pressures, inspect check valves and mixing cartridges, adjust water heater temperature, and consider reinstalling a pressure-balancing device or installing a thermostatic mixing valve to restore stable, safe temperatures.
When to Call a Professional Plumber
If the removal reveals hidden damage, corroded components, or an unfamiliar complex valve type, a professional plumber should be engaged.
Homeowners should prepare and ask about diagnosis fees, experience with anti-scald systems, estimated labor and parts costs, and expected timeline.
The plumber’s assessment will clarify whether repair or full replacement is required and what guarantees are offered.
Signs the job is beyond DIY (hidden damage, complex valve types)
When hidden corrosion, extensive mineral buildup, or inaccessible valve configurations appear during removal, the task quickly exceeds typical DIY scope and warrants a professional plumber.
Other clear signs include damaged piping, fused or proprietary cartridge assemblies, evidence of previous poor repairs, persistent leaks after partial disassembly, or required demolition to access the valve.
In such cases, licensed expertise prevents further damage and guarantees safe restoration.
Questions to ask a plumber and what to expect for service
What should be asked and expected when a plumber is called for an anti-scald valve removal?
A homeowner should ask about licensing, experience with specific valve brands, estimated cost and timeline, warranty on parts and labor, and whether water will be shut off.
Expect diagnosis, safe removal or replacement, potential leak checks, clear explanation of findings, and a written estimate before work begins.
Preventive Tips and Maintenance After Valve Work
After valve removal or replacement, routine maintenance such as periodic inspections and lubrication can extend the component’s service life.
Safety checks for temperature limits and pressure settings should follow any change to prevent scalding.
Clear documentation of the work, parts used, and test results helps future homeowners or inspectors verify safe operation.
Regular maintenance to extend valve life
Regular inspection and simple upkeep greatly extend an anti-scald valve’s service life.
Periodic attention prevents buildup and wear, preserving function and reducing replacement needs.
- Flush lines to remove sediment
- Lubricate moving parts with manufacturer-approved lubricant
- Replace worn O-rings and seals promptly
- Schedule annual visual checks for corrosion and leaks
Consistent, minimal maintenance sustains reliable valve performance.
Safety checks to prevent scalding after changes
When any adjustments or repairs are made to a bathtub anti-scald valve, a focused series of safety checks should follow to confirm correct temperature regulation and prevent burns.
Test hot and cold limits, verify maximum outlet temperature with a thermometer at full and mixed flow, inspect for leaks, confirm stable temperature over several minutes, and guarantee trim and stops are properly seated before returning the fixture to regular use.
Documenting work for future homeowners or inspectors
Documentation provides a clear record for future homeowners or inspectors detailing what was changed, why it was done, and how the anti-scald valve now operates.
Include date, installer name, part numbers, photos of original and final assemblies, test results (temperatures, pressure), and any calibration steps.
Store copies with home maintenance files and inform occupants of locations and recommended inspection intervals to guarantee ongoing safety.
Tools and Parts Cost Comparison
Typical retail prices for wrenches, cartridge pullers, and sealant range from modest ($20–$60) to higher for specialized tools, while replacement anti-scald cartridges commonly cost $15–$80 depending on brand.
Comparing total DIY expenses against a professional service fee—often $150–$350 including parts—helps quantify savings versus risks.
The decision should weigh upfront cost, skill level, time, and potential for additional repairs if mistakes occur.
Typical cost ranges for DIY tools and replacement valves
Budgeting for removing and replacing an anti-scald valve requires comparing likely costs for basic tools and replacement parts so homeowners can decide between DIY and hiring a pro. Typical DIY tool kits run $25–$75; common replacement valves cost $30–$150 depending on brand and compatibility. Consider modest extras like seals and plumber’s tape.
| Item | Typical Cost |
|---|---|
| Basic tools | $25–$75 |
| Replacement valve | $30–$150 |
| Seals/gaskets | $5–$20 |
| Misc (tape) | $2–$10 |
Cost vs benefit of DIY removal versus professional service
Frequently, homeowners weigh the immediate outlay for tools and parts against the labor and guarantee provided by a professional when deciding whether to remove and replace an anti-scald valve themselves. DIY saves labor cost but risks error and voided warranties; professionals add expense but offer speed, warranty, and liability coverage.
| Item | Typical Cost |
|---|---|
| Basic tools | $20–$60 |
| Replacement valve | $30–$120 |
| Professional labor | $100–$300 |
| Warranty/peace of mind | Included with service |
Conclusion
In the end, the homeowner discovered that removing the anti-scald valve was like finding a hidden coin in a couch cushion—unexpectedly simple yet oddly satisfying. Coincidentally, the neighbor whose dog once chewed a wrench appeared to borrow the same tool, turning a solitary task into a brief, shared victory. With pipes inspected and temperature restored, the small, cautious gamble proved manageable, though it quietly affirmed that some plumbing puzzles still merit a pro’s steady hand.