
How to Add Plumbing to a Shed: Step-by-Step Guide for Water, Drainage, and Sewage
To successfully add plumbing to your shed, start by planning your layout and securing necessary permits. Determine your water source—whether it’s municipal, well, or rainwater—and size your supply lines accordingly. Design your drainage system with the right slopes and vents, and choose a sewage solution that fits your needs, such as tying into existing lines, using a septic system, or installing a macerator. Utilize PEX for water supply lines and PVC or ABS for waste. Conduct thorough pressure or water tests to ensure functionality. Always adhere to local building codes, schedule inspections, and set aside contingency funds for unexpected expenses. For detailed layouts, material lists, and testing procedures, follow the step-by-step guide.
Overview of Adding Plumbing to a Shed: What to Expect
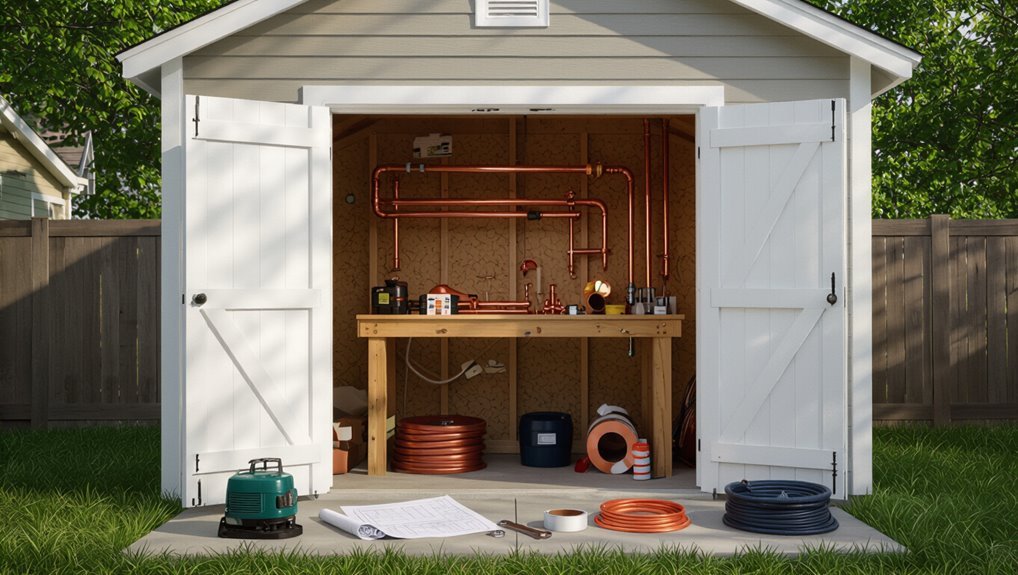
Homeowners add water, drainage, and sewage to a shed most often to create a workshop with a sink, a bathroom, or a laundry area.
The process generally involves planning and permits, running supply and waste lines, tying into existing systems or installing a septic solution, and can take anywhere from a weekend for simple hookups to several weeks for major work.
Costs vary widely based on distance to main lines, fixture choice, local labor and permit fees, and whether excavation or a septic/tank installation is required.
Common reasons to add water, drainage, and sewage to a shed
When a shed needs more than storage—whether for a workshop, guest suite, or hobby room—adding water, drainage, and sewage becomes practical rather than optional.
Common reasons include creating a bathroom or kitchenette, enabling power tools with water cooling, facilitating cleaning and irrigation connections, and increasing property value.
Homeowners researching how to add plumbing to a shed often cite convenience, code compliance, and expanded usable space.
Quick summary of steps and typical timeline
Plan the project in clear phases: assessment and permits, supply and waste routing, rough-in plumbing, fixtures and connections, inspections, and finishing.
Expect preliminary work and permits (1–2 weeks), rough-in and trenching (1–3 days), inspections and adjustments (a few days to a week), fixture installation and finishing (2–5 days).
Overall timeline typically spans two to six weeks, depending on scope and approvals.
Typical costs and factors that influence budget
Budgeting for shed plumbing hinges on several predictable cost centers: permits and design, materials and fixtures, excavation and site work, labor, and inspections.
Costs vary with distance to mains, soil/terrain, fixture quality, local codes, and whether sewer connection or septic work is required.
- Distance and site complexity
- Fixture quality and materials
- Labor, permits, and inspections
Legal, Permits, and Site Considerations
Before any pipes are run, the author recommends confirming whether local permits and code approvals are required and contacting the municipal building department for specific requirements.
They should arrange utility locating to identify underground lines, verify easements and setback rules, and confirm limits tied to septic or municipal connections.
Site accessibility, frost depth, and local climate must also be evaluated to determine pipe depth, insulation, and material choices.
When permits are required and how to check local codes
When must permits be obtained for adding plumbing to a shed depends on local regulations, the scope of work, and how the structure will be used. Minor projects like running a short water line for an outdoor sink may be allowed without a permit in some jurisdictions, while installing full potable water, sewer connections, or gas appliances typically triggers permit and inspection requirements.
Research municipal building and plumbing codes, contact the local building department, and review zoning and septic regulations.
Request application requirements, fee schedules, inspection timelines, and required drawings to guarantee compliance before work begins.
Utility locating and avoiding underground lines
Locating underground utilities is a critical step that protects workers, property, and public services by preventing accidental strikes on gas, water, sewer, electric, and communication lines.
Contractors should contact national and local one-call services, obtain utility maps, and mark lines before digging.
Use hand digging near marked runs, employ professional locators for ambiguous traces, and document clearances to satisfy inspectors and reduce liability.
Easements, setback rules, and septic/municipal connection limits
Easements, setback rules, and connection limits define where plumbing may be installed and how it can tie into municipal or private systems, so compliance with these legal constraints is essential.
Property deeds, local codes, and utility agreements determine allowable placement, minimum distances from property lines, wells, and septic fields, and whether hookup to municipal sewer or septic expansion is permitted.
Permits and inspections enforce compliance.
Accessibility, frost line, and climate impacts on plumbing choices
How deep must lines run and how accessible must fixtures be to ascertain reliable service and legal compliance? The writer notes local frost line dictates burial depth for water and sewer; insulation, heat tracing, or raised/routed piping may be required.
Accessibility mandates service access panels, shutoffs, and trap cleanouts.
Climate-driven material selection and slope ascertain freeze protection, drainage, and permit adherence.
Decide Which Plumbing Services Your Shed Needs
The owner should first identify the potable water option that fits the site—tap‑in, independent well, or rainwater harvesting—and then match drainage needs, from a simple sink trap to a floor drain or broader stormwater management.
Next, sewage solutions must be chosen: sewer tie‑in, septic connection, or a macerating toilet system with discharge considerations.
Finally, any electrical requirements for pumps, heaters, or macerators should be evaluated alongside plumbing choices.
Potable water supply options: tap-in vs. independent well vs. rainwater harvesting
Considering access, cost, and long-term maintenance, choosing a potable water source for a shed typically falls to three options: tapping the municipal supply, installing an independent well, or using rainwater harvesting with filtration.
Municipal tap offers reliability and code compliance but requires trenching and permits.
A well provides autonomy and water table dependence.
Rainwater reduces utility bills but needs proper storage, treatment, and seasonal planning.
Drainage needs: simple sink drain, floor drain, or stormwater management
After choosing a potable source, attention shifts to managing wastewater and runoff: a shed’s plumbing needs can range from a single sink drain to a full floor drain and integrated stormwater controls.
Determine fixture types and expected flow, gravity vs. pumped drainage, local code for discharge, and soil permeability.
Include gutters, soakaway or swales for roof runoff and a trap for graywater fixtures.
Sewage options: tie-in to sewer, tie-in to septic, or macerating toilet systems
When deciding sewage connections for a shed, owners should weigh three practical routes: tying into an existing municipal sewer, connecting to a septic system, or installing a macerating (upflush) toilet system.
Each choice differs in permitting, distance to mains or septic field, excavation needs, and long‑term maintenance.
Consider site constraints, local regulations, cost, and expected usage to select the most suitable option.
Electrical needs that interact with plumbing (pump, heater, macerator)
Although plumbing choices determine water and waste routing, the electrical infrastructure must be planned in parallel to power pumps, water heaters, and macerators reliably and safely.
Assess load requirements, voltage, and circuit protection for each device. Include GFCI protection, dedicated circuits for high-draw equipment, proper conduit and wire sizing, and consider battery backup or generator connections for pumps and macerators in outages.
Tools, Materials, and Estimated Quantities
For a shed plumbing project, a concise list of common tools (pipe cutters, crimpers, wrenches, auger) and materials (PEX for supply, PVC/ABS for waste, couplings, vents, traps) sets expectations for scope and cost.
Sizing guidelines for supply, drain, vent lines, and fixture connections should be stated up front to match fixture counts and local code.
Recommended personal protective equipment and proper disposal supplies for cuttings, solvents, and old pipe help guarantee a safe, compliant job.
Common tools required for water, drain, and sewage work
Gathering the right tools is essential before beginning water, drain, and sewage work in a shed; this list focuses on items commonly required for small-scale installations and repairs.
Essential tools include:
- Adjustable wrench, pipe wrench, basin wrench, and pliers for fittings and fixtures.
- Pipe cutters, hacksaw, and tubing cutter for clean cuts.
- Drill, hole saws, measuring tape, level, and plumber’s snake.
Typical materials and fittings (PEX, PVC/ABS, couplings, vents, traps)
Materials and fittings for shed plumbing combine durability and code-compatibility to guarantee reliable water supply and proper drainage.
Typical choices include PEX for supply, PVC/ABS for drains, and metal or plastic fixtures.
Recommended items:
- PEX tubing, manifolds, shutoffs, and crimp fittings.
- PVC/ABS drain pipe, couplings, wyes, and solvent cement.
- Vents, traps, trap adapters, and accessible cleanouts.
Sizing guidelines for pipes, vents, and fixtures
Sizing for shed plumbing hinges on matching fixture demand and run lengths to pipe and vent diameters, ensuring adequate flow and trap seal protection.
Use fixture unit tables to size supply (typically 1/2″ or 3/4″ PEX) and drainage (1-1/4″ lavatory, 1-1/2″ shower, 2″ sink/toilet).
Vent pipes generally mirror drain sizes; minimize long horizontal runs and include cleanouts.
Recommended safety equipment and disposal materials
Several essential safety items and disposal supplies are recommended before beginning shed plumbing work.
Protective gear: safety glasses, nitrile gloves (box of 50), respirator (P100), ear protection, steel-toe boots.
Disposal materials: labeled biohazard bags, chemical spill absorbent pads (10), heavy-duty trash bags (25), sealed utility containers for solvent and waste water.
First aid kit and fire extinguisher (ABC) complete the list.
Preparing the Site and Shed for Plumbing Installation
Before any pipes are laid, the routes for supply, drainage, and venting should be clearly marked on the site and the shed floor to guarantee proper slopes and clearances.
Excavation must follow local depth and frost-protection requirements with suitable bedding material, while slab or floor penetrations receive sleeves and sealants to protect piping.
Access panels and serviceable runs should be planned and installed now to allow future maintenance without major demolition.
Marking routes for supply, drainage, and venting
When laying out plumbing in the shed, the installer marks clear, scaled routes for potable supply, wastewater drainage, and vent piping so each line follows the most direct, code-compliant path while avoiding structural members and electrical runs.
The plan locates fixtures, shutoffs, cleanouts, and vent terminations, notes required slopes, pipe sizes, and access panels, and flags burial points and wall chases for later excavation.
Excavation basics: trench depth, bedding, and frost protection
A clear excavation plan sets the foundation for reliable underground plumbing: trenches must reach the correct depth for pipe diameter and local frost lines, rest on uniform bedding to prevent settling, and include measures to prevent freeze damage where required by climate.
Contractors compact subgrade, place sand or granular bedding, maintain consistent slope for drainage runs, and protect pipes with thaw insulation or increased cover per code.
Installing slab or floor penetrations and sleeves
After trenches are set and bedding compacted, attention shifts to where plumbing will pass through the shed slab or floor.
Precisely locate penetrations, install rigid sleeves sized for pipe plus insulation and sealant, maintain slope continuity, and set sleeves flush with future slab elevation.
Protect sleeves from concrete intrusion, secure anchors, and verify alignment and clearance for valves and fittings before pouring the slab.
Preparing for future maintenance and access panels
Several key access points and clearances should be planned before finishing the shed to guarantee routine maintenance and emergency repairs can be performed without disruptive demolition.
Identify valve, trap, and cleanout locations; provide removable panels or access doors sized for hand and tool access; mark hidden runs on as-built drawings; leave service clearance around fixtures; route wiring and hoses to simplify future upgrades and isolations.
Installing the Water Supply System
The water supply phase begins with routing plans and calculations for required pressure and flow to guarantee fixtures operate correctly.
Whether tapping a municipal main—observing shutoff, meter, and backflow requirements—or installing a well and pump for off-grid service, the chosen source dictates components and layout.
Finally, durable piping (PEX or copper) must be laid and joined, with strategic shutoffs, pressure regulation, and appropriate filtration or softening equipment installed.
Planning the supply route and calculating pressure/flow needs
When planning the supply route and calculating pressure and flow needs for a shed’s water system, a clear assessment of source pressure, expected demand, and pipe routing constraints is essential.
Determine fixture unit equivalents, peak simultaneous demand, and friction losses by length, fittings, and elevation.
Size pipe and select pressure-regulating or booster equipment accordingly.
Plan accessible shutoffs and avoid long, convoluted runs.
Connecting to municipal water: shutoff, backflow prevention, and meter considerations
Before connecting a shed to municipal water, the installer verifies the main shutoff accessibility, selects and positions backflow prevention devices to meet local codes, and confirms meter placement and requirements with the utility.
Then they coordinate permits, choose approved backflow assembly types, plan a frost‑protected meter/run, size service piping to meet demand, and document tie‑in details for inspection and utility approval.
Installing a well or pump system for off-grid supply
For properties without municipal service, attention shifts from utility tie‑ins to establishing a reliable off‑grid water source by installing a well or pump system.
Professionals assess site hydrogeology, select well type and depth, obtain permits, and drill or retrofit a casing.
Choose appropriate pump (submersible or jet), pressure tank, control switch, and filtration.
Guarantee electrical supply, frost protection, and compliant signage.
Laying and joining PEX or copper supply lines
Begin by mapping the route for the supply lines from the source to the shed, choosing PEX or copper based on durability, flexibility, local code, and budget.
Trenches, conduits, or barn-raising runs are planned to avoid damage. Use appropriate fittings: crimp or cinch rings for PEX, solder or compression for copper.
Support, slope, and insulation prevent stress, freezing, and leaks. Test system pressure before burying.
Installing shutoffs, pressure regulators, and water filtration/softener options
Install shutoffs, pressure regulation, and filtration components at the shed’s incoming water point to control flow, protect fixtures, and condition water to required standards.
A main shutoff and individual fixture valves allow isolation for maintenance. Install a pressure-reducing valve if supply exceeds fixture ratings.
Select filtration or softening based on water tests: sediment, carbon, UV, or ion-exchange systems, sized for flow and serviceability.
Installing Drainage and Waste Lines
Attention to pipe slope and an efficient layout is essential for reliable gravity drainage.
The discussion covers installation of traps, vents and branch lines, choices for final discharge (storm drains, dry wells or French drains), and proper connection methods.
Finally, testing procedures for leaks and flow guarantee the system functions as designed.
Determining slope and layout for gravity drainage
A clear, consistent slope is essential for gravity drainage: waste lines should generally fall 1/4 inch per foot for 3–4 inch pipes and 1/8 to 1/4 inch per foot for 2-inch lines to guarantee proper flow without solids settling.
Plan straight runs with minimal bends, align outlets to the main sewer or septic invert, mark elevations, and verify grade with a level or laser before trenching.
Installing sink/drain traps, vents, and branch lines
Begin by fitting traps, vents, and branch lines in the planned layout so each fixture has a properly sized trap, a vent within code distance, and branch piping that maintains the slope determined earlier.
Install P-traps with cleanouts, connect branch lines to the main stack using appropriate fittings, maintain slope and support, space vents to prevent siphoning, and pressure-test the system before concealment.
Connecting to stormwater drains vs. dry wells vs. French drains
How runoff and greywater from a shed be routed—into a municipal stormwater system, a dry well, or a French drain—depends on site conditions, local regulations, and the anticipated water fate.
Municipal connections require permits and protect downstream systems.
Dry wells suit small volumes with permeable soils.
French drains manage dispersed runoff and shallow groundwater.
Selection balances infiltration capacity, maintenance, setback requirements, and contamination risk.
Testing drains for leaks and proper flow
Pressure-testing and flow-checking drain and waste lines confirm system integrity before backfilling or final connections.
Technicians cap outlets, pressurize with air or water to specified PSI, and monitor for pressure loss.
For flow checks, temporary fittings and water runs verify slope, traps, and venting prevent siphonage and guarantee smooth discharge.
Any leaks or slow flow require immediate repair and retest.
Installing Sewage Disposal Options
The section outlines practical sewage disposal choices for a shed, including tying into municipal sewer systems with required cleanouts, connection standards, and inspection steps.
It also covers legally compliant connections to existing septic systems and the option of installing macerating toilets or pump stations where gravity drainage is impractical.
Emergency overflow measures and alarm systems for pumped installations are highlighted to guarantee safe, code‑compliant operation.
Tying into municipal sewer: cleanouts, connection details, and inspections
Connecting a shed’s plumbing to a municipal sewer requires careful coordination of cleanouts, proper connection methods, and compliance with inspection protocols to guarantee a legal, reliable discharge.
Plans must follow local codes, use approved fittings and backflow prevention, and place accessible cleanouts at required intervals.
Licensed contractors submit permits, arrange inspections, and verify pipe slope, bedding, and connections meet utility and inspector standards before final approval.
Connecting to an existing septic system safely and legally
Tap into an existing septic system only after confirming capacity, location, and owner permissions, and after reviewing local regulations that govern accessory connections.
A site evaluation, percolation history, and tank/field maps determine feasibility.
Obtain required permits and engage licensed contractors for tie-in work.
Protect system integrity by matching flows, using watertight fittings, avoiding additional loading on drainfields, and scheduling inspections before use.
Installing macerating toilet systems and pump stations
When tying into an existing septic system proves impractical or is restricted by capacity or permitting, a macerating toilet with an integrated pump or a separate pump station offers an alternative for shed sewage disposal.
Installers should select units sized for expected load, guarantee proper venting, run discharge to sewer or septic at required slope and depth, and follow electrical, backflow, and local code requirements.
Emergency overflow and alarm systems for pump installations
Several key safeguards—an overflow bypass, high‑level alarm, and fail‑safe discharge pathway—are essential for pump installations to prevent sewage backups and environmental releases.
The system should include a secondary overflow line routed to a safe containment or daylighted discharge, redundant float or pressure sensors triggering audible/visual alarms, battery backup power, and periodic testing protocols.
Installers must document responses and maintenance intervals.
Venting, Insulation, and Freeze Prevention
Proper venting must be planned and routed through the roof to guarantee drain systems function and prevent traps from siphoning.
Pipes should be insulated and, in cold climates, protected with heat tape or trace systems to maintain flow.
For seasonal sheds, simple winterization—draining lines, isolating fixtures, and keeping minimal heat—reduces freeze risk and damage.
Proper venting requirements and routing vents through roofs
Because vents maintain airflow and prevent trap siphoning, a shed’s plumbing venting must meet both code requirements and practical roof-routing strategies to guarantee reliable performance and freeze resistance.
Vents should size per fixture unit counts, rise vertically with minimal offset, extend above roofline per local code, use flashing and storm collars for watertight seals, and avoid obstructions or shared vents that impair ventilation.
Insulating pipes and heat trace options for cold climates
In cold climates, effective pipe insulation and targeted heat tracing are essential to prevent freezing, maintain flow, and protect fixtures and vents from damage.
Use closed‑cell foam or fiberglass with vapor barrier on water and drain lines; insulate vent stacks where they pass through unheated spaces.
Electric self‑regulating heat tape or thermostatic cable is recommended for exposed runs; follow manufacturer instructions and local electrical codes.
Strategies to winterize shed plumbing for seasonal use
Prepare the shed for seasonal shutdown by addressing venting, insulation, and freeze prevention to minimize damage and simplify reopening.
Seal vents to reduce drafts while maintaining minimal airflow to prevent condensation.
Drain water lines, shut off and depressurize systems, and install insulating jackets or foam around exposed pipes.
Add heat tape where required, elevate fixtures from cold floors, and document shutoff locations for spring recommissioning.
Testing, Inspection, and Commissioning
The final phase verifies that all systems perform and meet code before regular use.
Pressure testing confirms water supply integrity while smoke or water tests reveal leaks in drains and vents; electrical and pump startup checks guarantee safe, reliable operation.
Coordination with local inspectors and obtaining final sign-off completes commissioning.
Pressure testing water supply lines
Before commissioning a shed’s plumbing, conduct a pressure test on the water supply lines to verify integrity and locate leaks.
The procedure involves isolating the system, attaching a calibrated pressure gauge and hand or pneumatic pump, pressurizing to code-specified levels, monitoring for pressure loss over the required duration, and inspecting joints and fittings.
Repair any leaks and retest until stable.
Smoke or water testing drain and vent integrity
Verify drain and vent integrity using either smoke or water testing to guarantee the sanitary system is sealed and functions under operational conditions.
For smoke testing, introduce non-toxic smoke at cleanouts and observe leaks at joints, fittings, and vent terminations.
For water testing, cap fixtures, fill traps and stacks to required head, then monitor for drop or seepage.
Record defects and correct before final approval.
Electrical and pump startup checks
Begin by performing a systematic electrical and pump startup inspection to confirm that wiring, controls, grounding, and mechanical components are installed per plans and ready for commissioning.
Verify correct voltage, phase, and overload protection; test control circuits, float switches, and alarms; guarantee motor rotation and coupling alignment; check seals, pressure settings, and flow rates; observe for vibration, leaks, or unusual noise during initial run.
Working with inspectors and obtaining final sign-off
A final inspection and commissioning review brings together documentation, test results, and on-site verification to secure official approval.
Inspectors confirm code compliance, proper venting, leak-free connections, and pump operation.
Provide permits, as-built drawings, pressure and backflow test records, and drainage verification.
Address punch-list items promptly.
Obtain written sign-off and retain certificates for future occupancy, insurance, and resale documentation.
Common Problems and How to Fix Them
Common plumbing issues in a shed typically include low water pressure and restricted flow.
Drain backups or slow drains are often caused by debris and root intrusion.
Sewage pump failures can occur, often accompanied by alarm conditions.
Leak detection protocols and clear emergency shutoff procedures are essential to limit water damage and contamination.
The following section outlines troubleshooting steps, remedies, and when to call a professional for each of these problems.
Low water pressure and flow troubleshooting
Diagnose low water pressure by systematically checking supply, fittings, and fixtures to locate the restriction.
Inspect shutoff valves, pressure regulator, and meter for partial closures or faults.
Examine supply lines for kinks, corrosion, or mineral buildup; flush and descaler where needed.
Test individual fixtures for clogged aerators, cartridges, or supply stops.
Replace failing components or increase pipe size to restore adequate flow.
Drain backups, slow drains, and root intrusion solutions
Address drain backups, slow drainage, and root intrusion promptly to prevent damage, foul odors, and sanitary hazards.
Inspect traps and vents, clear hair and debris with a drain snake or enzyme-based cleaners, and avoid chemical overuse.
For tree root intrusion, use mechanical rooters or hydro-jetting and apply targeted herbicide only when permitted.
Replace damaged pipe sections with root-resistant materials and maintain regular inspections.
Sewage pump failures and alarm responses
Sewage pump failures and alarm activations demand immediate attention to prevent backups and health hazards.
The guide recommends inspecting power, float switches, and pump impellers; testing alarms and backup power; clearing clogs; and replacing corroded components.
If alarms persist after basic checks, contact a licensed plumber.
Record events and maintenance to identify recurrent failures and plan preventative replacement or system upgrades.
Leak detection and emergency shutoff procedures
After handling pump failures and alarms, attention should turn to detecting leaks and knowing how to shut systems off quickly to limit damage.
Inspect fittings, joints, and fixtures regularly; use moisture sensors near vulnerable areas. Clearly label main water and sewage shutoff valves and train occupants to operate them.
For suspected leaks, isolate sections, stop water, and call a qualified plumber to assess and repair.
Maintenance Schedule and Long-Term Care
A concise maintenance schedule helps preserve shed plumbing performance and prevent costly repairs.
Routine inspections and a preventive checklist should cover leaks, fixtures, pipe insulation, and seasonal tasks for cold climates such as draining lines and protecting exposed pipes.
Clear criteria distinguishing DIY fixes from issues requiring a licensed plumber—like persistent leaks, gas-line work, or complex sewer problems—guides timely professional intervention.
Regular inspections and preventive maintenance checklist
Regular inspections form the backbone of a shed’s plumbing maintenance plan, ensuring small issues are caught before they require costly repairs.
A concise preventive checklist guides routine care and documents findings.
- Inspect fixtures, hoses, and joints for leaks; tighten or replace as needed.
- Test drains and traps for slow flow; clear blockages.
- Verify shutoff valves and pressure; service or replace malfunctioning components.
Seasonal tasks for cold climates
Because freezing temperatures and thaw cycles accelerate wear and create rupture risks, seasonal tasks for cold climates prioritize winterization, inspection after thaw, and staged reopening procedures to protect pipes, fixtures, and water supplies.
Tasks include draining lines, insulating exposed piping, securing valves, adding heat sources or tape, checking seals and vents post-thaw, repairing minor damage, and gradually repressurizing systems while monitoring for leaks.
When to call a professional vs. DIY fixes
Determine when a DIY approach suffices and when a licensed plumber is required by evaluating risk, skill level, and code implications.
Routine tasks—shutoff checks, minor leak tightening, trap cleaning, insulation—are suitable for competent owners.
Call a professional for gas lines, main supply or sewage connections, permit-required work, persistent leaks, slope or venting issues, or if local code, warranty, or complexity exceeds homeowner expertise.
Cost Breakdown and Financing Options
Typical cost ranges for common setups—tap-in to a municipal line, septic tie-in, or a macerator system—are outlined to help estimate initial expenses and running costs.
Practical ways to reduce expenses and prioritize essential upgrades are presented alongside trade-offs between performance and price.
Financing options, permit requirements, and insurance implications are summarized so the reader can plan compliance and payment strategies.
Typical cost ranges for common setups (tap-in, septic tie-in, macerator)
Budget is a primary consideration when planning plumbing for a shed, and costs vary considerably by connection type and site conditions. Typical ranges: municipal tap-in $500–$4,000; septic tie-in $1,000–$6,000; macerator unit installation $700–$3,500. Permit, excavation, and labor influence totals; obtain quotes.
| Setup | Typical Cost | Notes |
|---|---|---|
| Tap-in | $500–$4,000 | Meter, trenching |
| Septic tie-in | $1,000–$6,000 | Site-dependent |
| Macerator | $700–$3,500 | Minimal slope needed |
Ways to reduce costs and prioritize upgrades
Many homeowners can lower plumbing expenses by prioritizing essential fixtures, phasing work, and comparing connection options; focusing on a basic water supply and toilet first, then adding features like a shower or hot water later, reduces upfront costs and spreads financing needs.
- Choose simple fixtures and standard fittings to cut material costs.
- Phase installations to match use and budget.
- Opt for modular solutions (macerators, prefabricated drain kits).
Financing, permits, and insurance considerations
Planning for financing, permits, and insurance frames the true cost of adding plumbing to a shed, since permit fees, contractor charges, inspection costs, and potential insurance adjustments can quickly exceed initial material estimates.
Owners should obtain permit quotes, compare contractor bids, explore small‑loan or home‑equity options, and notify insurers to update coverage.
Contingency funds of 10–20% mitigate unforeseen regulatory or repair expenses.
Practical Project Examples and Layout Templates
The section presents three practical layouts: a small shed with a sink and outdoor hose, a shed converted to living space with a full bathroom and its special requirements, and an off-grid shed using rainwater capture plus a composting toilet alternative.
For each example, a simple materials list and a basic floorplan template are provided to guide sizing, drainage, and venting decisions.
Readers are encouraged to compare templates against local codes and site constraints before proceeding.
Small shed with sink and outdoor hose layout and materials
One practical small-shed configuration pairs a compact utility sink inside the structure with an outdoor hose bib and routed supply lines, delivering hand-washing, tool cleaning, and garden access without full bathroom infrastructure.
Supply lines use PEX with isolation valves; a small electric pump or gravity feed provides pressure.
A 2″ drain into a drywell or greywater soakaway, frost-proof bib, and basic venting complete the layout.
Shed converted to living space with full bathroom layout and special requirements
Moving from a simple utility-sink-and-hose arrangement to a shed designed for full-time occupancy requires rethinking plumbing as a complete residential system rather than a minimal wash station.
Plans should show potable supply, pressurized hot water, wastewater routing, venting, vented trap placements, and an approved sewage connection or grinder pump.
Accessibility, insulation, frost protection, local code compliance, and inspection readiness are mandatory considerations.
Off-grid shed with rainwater and composting toilet alternative configuration
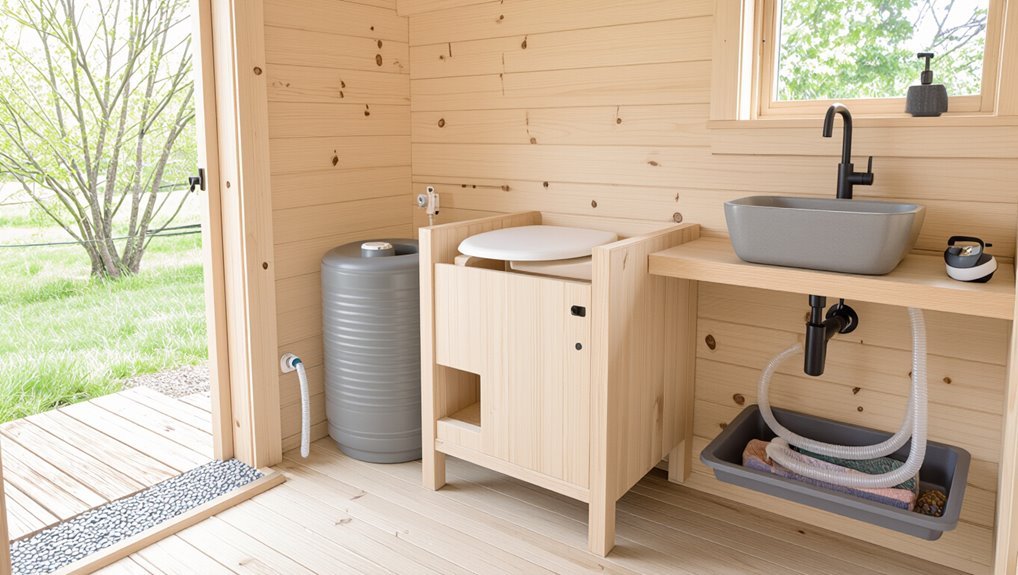
Several practical layouts demonstrate how an off-grid shed can rely on harvested rainwater and a composting toilet system to meet basic sanitation and water needs without municipal services.
Designs include gutter-fed storage, gravity or pump delivery to a small sink and shower, greywater dispersal to planted beds, and a ventilated, accessible composting toilet enclosure.
Consider filtration, freeze protection, and maintenance access.
Tips to Save Time, Money, and Avoid Mistakes
Smart planning of pipe routes and allowance for future expansion can reduce labor and rework.
The text highlights common DIY mistakes—poor slope, inadequate support, and improper jointing—and explains straightforward ways to prevent them.
It also clarifies when to call licensed plumbers, electricians, or excavation contractors to guarantee code compliance and avoid costly corrections.
Best practices for planning pipe routes and future expansion
When planning pipe routes and allowances for future expansion, the installer should prioritize direct runs, accessible shutoffs, and clearances that accommodate additional fixtures or rerouting without demolition.
Map current and potential fixture locations, consolidate drains to common stacks, slope lines correctly, and route supply lines within accessible chases.
Label and document as-built layouts, leave service loops, and install isolation valves for phased upgrades.
Common DIY mistakes and how to avoid them
Planning that leaves room for future fixtures and accessible shutoffs reduces many headaches, but common DIY mistakes still undermine otherwise sound layouts.
Common errors include poor slope, undersized vents, and tight access. To avoid them, follow concise checks:
- Verify drain slopes and vent placement.
- Size pipes per fixture units and local code.
- Maintain clear access panels and shutoff labeling.
When to hire licensed plumbers, electricians, or excavation contractors
Some projects clearly require licensed tradespeople: any work involving connections to the main water or sewer, electrical panel changes, or deep excavation should be handed to a plumber, electrician, or excavation contractor respectively.
Hire professionals for permits, pressure testing, sewage tie-ins, trenching near utilities, or complex condensate/drain systems. This minimizes code violations, costly repairs, insurance issues, and safety risks while ensuring inspections pass.
Conclusion
Adding plumbing to a shed transforms it into a functional living or working space but requires planning, permits, and ongoing care. For example, a homeowner in Portland converted a backyard shed into a studio by running a cold and hot water line from the main house, installing a compact tankless heater, and connecting a macerating toilet to the sewer—financing the project with a small home improvement loan. Proper preparation and professional inspections guaranteed a safe, code-compliant result.
