How to Pass a Plumbing Inspection: 12 Expert Tips to Ensure Approval
To successfully pass a plumbing inspection, ensure your work meets code requirements and is well-organized. Inspectors will evaluate various systems, including supply lines, waste lines, and fixtures, focusing on critical aspects like slope, supports, and leak-free joints. To prepare, stage necessary permits, test pressure, check vent terminations and cleanouts, and clearly label valves. Address any existing issues, such as undersized piping or blocked vents, before the inspection. For intricate or hidden systems, consider hiring a licensed plumber. Follow our step-by-step checklist and expert tips for guaranteed approval.
What a Plumbing Inspection Covers
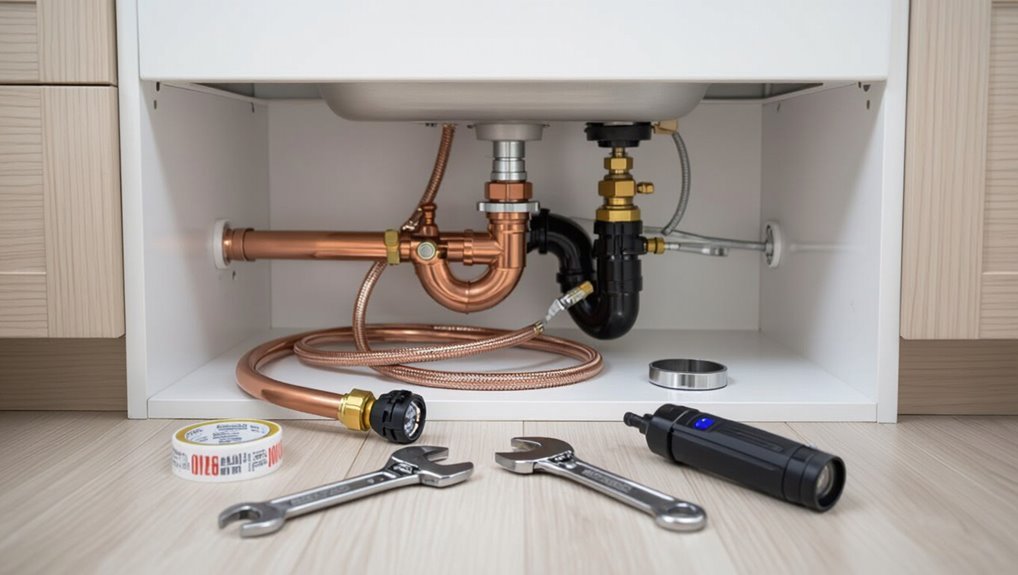
A plumbing inspection typically checks common residential components such as supply and waste lines, fixture installation, venting, traps, and water heaters for proper materials and installation.
Inspectors reference applicable codes and standards—most commonly the IPC or UPC—plus any local amendments that modify requirements.
Requirements differ between rough‑in inspections, which verify concealed piping and layout, and final inspections, which confirm functioning fixtures, connections, and system performance.
Common inspection checkpoints for residential systems
Although often routine, a residential plumbing inspection systematically evaluates fixtures, water supply, drains, vents, and visible piping to confirm functionality, safety, and code compliance.
Inspectors check fixture installation, water pressure, supply shutoffs, pipe support and slope, trap integrity, vent connections, backflow prevention, and visible leaks.
Understanding these checkpoints helps homeowners and contractors learn how to pass plumbing inspection through targeted corrections and documentation.
Codes and standards inspectors reference (IPC, UPC, local amendments)
Many jurisdictions base plumbing inspections on a mix of model codes and local amendments, most commonly the International Plumbing Code (IPC) or the Uniform Plumbing Code (UPC).
Inspectors verify compliance with applicable code editions, referenced standards (ANSI, ASME), approved materials, venting and trap requirements, fixture counts, and backflow prevention.
Permit conditions and municipal amendments often dictate specific installation or testing protocols.
Differences between rough-in and final inspections
Distinguishes between two primary inspection stages—rough-in and final—clarifying when each occurs and what inspectors examine. The rough-in verifies concealed piping, slope, support, and venting before walls are closed. The final confirms fixtures, drains, water heaters, traps, and leak-free operation. Compliance and accessibility are checked; permits closed only after all tests pass and documentation is approved.
| Stage | Focus |
|---|---|
| Rough-in | Piping, slope, venting |
| Final | Fixtures, tests, operation |
| Outcome | Approval or corrective list |
How to Prepare Before the Inspector Arrives
Before the inspector arrives, all relevant documentation—permits, plans, and invoices—should be assembled and easily accessible.
A concise pre-inspection checklist for homeowners and contractors helps guarantee fixtures, vents, cleanouts, and shutoffs are ready for review.
The property owner should confirm the appointment and any local permitting requirements by communicating with the permitting office ahead of time.
Documentation to have ready (permits, plans, invoices)
When preparing for a plumbing inspection, the responsible party should gather all required documentation—permits, approved plans, and related invoices—so the inspector can quickly verify compliance; organized paperwork reduces delays and prevents on-site disputes.
Include permit copies, stamped and dated plan sets, change orders, material receipts, appliance specifications, subcontractor certificates, and any prior inspection reports.
Present documents in a clear, accessible folder.
Pre-inspection checklist for homeowners and contractors
Having documentation ready, the next step is a practical pre-inspection checklist that confirms the site is accessible, safe, and inspection-ready.
- Clear access paths, opened panels, and visible work areas
- Verify fixtures are installed, capped, and water supply is on/off as required
- Remove debris, secure loose wiring, and confirm ventilation
- Have tools, test results, and responsible party present for questions
Scheduling and communication tips with your local permitting office
Why confirm the permit status and inspector availability in advance? The contractor verifies permit approval, inspection type, and any special requirements.
They schedule a mutually convenient time, request inspector contact details, and confirm site access. Clear communication prevents delays: provide permit numbers, plans, and change notices.
If issues arise, they promptly reschedule and document conversations for accountability and compliance.
Step-by-Step Readiness for Rough-In Inspection
The contractor reviews pipe supports, slope, and sizing to confirm compliance with code before inspection.
Venting layouts, trap placement, and backflow prevention methods are checked and temporary tests are scheduled to verify watertightness and proper airflow.
Known rough-in failure points are identified and corrected so the system meets inspector expectations.
Proper pipe supports, slopes, and sizing requirements
A clear understanding of pipe supports, slopes, and sizing is essential for a successful rough‑in inspection because these elements determine system function and code compliance.
Inspectors expect correct hanger spacing, secure anchoring, and materials rated for use. Drain slopes must meet minimum fall to prevent standing water.
Pipe diameters should match fixture units and anticipated flow per code tables to avoid backups and pressure loss.
Venting layout and trap installation essentials
Several key elements determine whether venting and traps pass a rough‑in inspection: correct trap type and orientation, proper trap arm length and slope, adequately sized and placed vents, and installation that prevents siphonage and backflow.
Install traps level with accessible cleanouts, maintain fixture trap distances per code, pitch trap arms correctly, size vents to serve the fixture units, and avoid sags or unsupported runs.
Backflow prevention and temporary testing procedures
Prepare to verify backflow prevention and perform temporary pressure tests by gathering required devices, isolating sections, and reviewing applicable code limits.
Inspect assemblies for correct installation, orientation, and accessible shutoffs.
Secure temporary caps or test plugs, pressurize zones with air or water per code, monitor for hold times and leaks, document readings, and tag tested backflow devices for final inspection.
Common fail points during rough-in and how to fix them
Having verified backflow assemblies and completed temporary pressure testing, attention turns to common fail points observed during rough-in inspections and practical fixes to address them.
Typical issues include improper slope, unsupported runs, incorrect venting, undersized traps, and mixed materials without dielectric fittings.
Corrective actions: re-pitch drains, add supports, reconfigure vents, replace traps to code, and install proper connectors to guarantee compliance.
Step-by-Step Readiness for Final Inspection
The final inspection checklist focuses on completed fixtures and their connections, including faucets, toilets, and drain lines.
It verifies water heater installation details—temperature/pressure relief valve operation, expansion tank presence—and confirms vent terminations and cleanout accessibility.
Gas plumbing receives a last round of fittings and leak testing to guarantee safe, code-compliant operation.
Fixture installation, faucet and toilet hookup checks
Begin the fixture inspection by confirming that all faucets and toilets are securely mounted, properly connected to supply and drain lines, and free of leaks. Check operation, shutoffs, trap seals, and vent clearances. Verify flange condition and caulking. Ascertain pressure balancing and no cross-connections.
| Item | Checkpoint |
|---|---|
| Faucets | Supply, aerator, leaks |
| Toilets | Flange, wax seal |
| Valves | Isolation, operation |
| Drains | Trap, venting |
Water heater installation, relief valve and expansion tank verification
After verifying fixture connections and leak-free operation, attention shifts to the water heater and its safety devices to secure system integrity for final inspection.
Inspectors confirm proper venting, secure mounting, correct temperature-pressure relief valve orientation and discharge piping to safe drain location.
Expansion tank presence, proper sizing, correct isolation and precharge, plus visible leak-free joints and accessible shutoffs guarantee compliance and pass readiness.
Drain testing, vent termination, and cleanout accessibility
Confirm drainage integrity, vent termination, and cleanout accessibility systematically to secure reliable operation and code compliance before the final inspection.
Inspect trap seals, slope, and test drains for slow flow or leaks using water and required test media.
Verify vent terminations clear roof obstructions and meet height/spacing codes.
Ascertain all cleanouts are accessible, labeled, and properly capped for maintenance and inspector review.
Gas plumbing final checks and leak testing
Perform a systematic sequence of gas plumbing final checks and leak tests to guarantee safe, code-compliant operation before inspection.
Inspect fittings, joints, and appliance connectors for correct materials and support.
Isolate sections, apply approved test pressure, and monitor gauges for the required hold time.
Use approved soap or electronic detectors on joints.
Document results, correct deficiencies, and retest until readings remain stable.
12 Expert Tips to Ensure Approval
The inspector’s eye often rests on a few common details that determine approval, so following expert tips reduces surprises.
Precision with plans, materials, access, and testing demonstrates compliance and readiness. Attention to traps and venting prevents functional failures that will trigger corrective orders.
- Follow the approved plans precisely.
- Use code-compliant materials and label them.
- Keep work areas accessible and clear.
- Perform pressure and leak tests before inspection; verify trap seals and venting distances.
Tip 1 Follow the approved plans precisely
Adhere strictly to the approved plans to guarantee that every pipe run, fixture location, and venting detail matches what was submitted for review; deviations, even minor, can trigger failing marks or require costly rework.
Inspectors compare work to drawings, so contractors should verify dimensions, offsets, and elevations before rough-in.
Document any required plan changes and obtain written approvals prior to altering installed systems.
Tip 2 Use code-compliant materials and label them
Select materials listed or recognized by the applicable plumbing code and clearly mark them on-site to streamline inspection and prevent disputes.
The contractor guarantees fittings, pipes, fixtures, and sealants carry approved labels, data sheets, or tagging.
Inspectors verify listings and compatibility with system pressure, temperature, and chemical exposure.
Unlabeled or noncompliant items are replaced before approval to avoid reinspection.
Tip 3 Keep work areas accessible and clear
Keep pathways, access panels, and work zones unobstructed so inspectors can quickly view, test, and document installations.
Clearance around equipment, shutoffs, and cleanouts enables efficient inspection and reduces delays.
Remove tools, debris, and temporary barriers; provide safe footing and lighting.
Mark or temporarily open access doors.
Maintain tidy, labeled staging areas for parts and documentation to streamline the inspector’s review.
Tip 4 Perform pressure and leak tests before inspection
Before the inspector arrives, conduct thorough pressure and leak tests on new and modified piping systems to verify integrity and compliance.
Document test methods, durations, and results, maintaining required pressures and holding times.
Repair any deficiencies, retest, and record corrective actions.
Provide clear test reports and accessible shutoffs during inspection so officials can confirm system performance without delay.
Tip 5 Verify proper trap seals and venting distances
After confirming system integrity with pressure and leak tests, attention should shift to trap seals and venting distances, since these govern odor control and proper drainage.
Inspectors look for correct trap depth, unobstructed vents, and compliant distances from fixture outlets to vent entries. Ascertain traps retain the required water seal, vents prevent siphoning, and materials and fittings meet code specifications for reliable performance.
Tip 6 Secure and document backflow prevention devices
Secure documented backflow prevention devices are essential for protecting potable water and demonstrating code compliance.
Inspectors expect approved device types, correct installation orientation, and accessible test ports.
Installers should register devices when required, perform and record initial and periodic tests, and retain manufacturer instructions.
Clear labeling, test reports, and permit documentation expedite approval and show ongoing maintenance responsibility.
Tip 7 Ensure proper slope and pipe support spacing
With backflow devices documented and accessible, attention shifts to gravity and support: proper pipe slope and hanger spacing determine flow performance and long-term integrity.
Drain lines require consistent fall per code; vent and waste piping must avoid sags.
Use specified hanger types, spacing, and materials to prevent deflection, noise, and joint strain.
Verify runs, correct deviations, and record compliance for inspection.
Tip 8 Label shutoffs, valves, and service panels
When shutoffs, valves, and service panels are clearly labeled, inspectors can quickly verify isolation points and access requirements without unnecessary probing or delays.
Labels should be durable, legible, and placed adjacent to each control, indicating function and served fixture or zone. Consistent terminology and color-coding simplify inspection.
Include panel diagrams where multiple valves exist and update markings after modifications.
Tip 9 Address corrosion and strain relief on water lines
A plumber’s inspection will scrutinize exposed water lines for corrosion and inadequate strain relief because both can lead to leaks or sudden failures.
Addressing surface rust, pitting, sacrificial anode depletion, and improper support reduces the likelihood of rejection. Inspectors expect replaced or repaired degraded sections, proper clamps, flexible connectors routed without tension, and dielectric fittings where dissimilar metals meet.
Provide documentation of corrective actions.
Tip 10 Coordinate with other trades to avoid concealed defects
Following repair of visible corrosion and proper securing of water lines, attention should shift to interactions with other trades to prevent defects hidden behind walls or ceilings.
Coordination guarantees electricians, HVAC, and carpenters avoid damaging seals, misrouting pipes, or creating access barriers.
Clear plans, marked penetrations, and joint inspections reduce concealed leaks, structural conflicts, and rework, expediting approval.
Tip 11 Prepare for inspector questions and walk-through
Why prepare for questions and a systematic walk-through? Inspectors expect clear answers and a logical route through the job.
Designates should review plans, verify installations, and rehearse concise explanations for choices, deviations, and materials.
During the walk-through, point out completed work, accessible shutoffs, and compliance features.
Professional, informed responses reduce rechecks and demonstrate project competence.
Tip 12 Keep records of tests, photos, and corrections
Document tests, photos, and corrections meticulously to create an auditable trail that expedites approval and limits disputes.
Inspectors, contractors, and owners benefit from dated test results, clear images of fixtures and repairs, and concise correction notes.
Store records digitally and offsite backups. Present organized folders during inspections to verify compliance, demonstrate timely remediation, and resolve questions efficiently, reducing reinspection delays and liability.
Common Reasons for Inspection Failure and How to Correct Them
Common inspection failures often stem from improper venting or trap configuration, undersized or misrouted drain and supply lines, and lack of access to valves, cleanouts, or appliances.
Inspectors also flag unapproved materials, missing permits, and gas leaks or incorrect gas appliance installations.
Each of these issues has clear corrective actions—reconfiguring vents and traps, resizing or rerouting piping, providing access, replacing materials or obtaining permits, and repairing or reinstalling gas systems to code.
Improper venting and trap issues
Inspectors frequently cite improper venting and trap defects because they directly affect fixture performance and health-safety standards. The report notes common faults: missing vents, blocked vents, incorrect trap seals, and improper trap arms. Corrective actions include installing proper venting, restoring trap seals, ensuring trap arm lengths, and removing obstructions.
| Fault | Cause | Fix |
|---|---|---|
| Missing vent | Design error | Add vent |
| Blocked vent | Debris | Clear vent |
| Shallow trap | Installation | Replace trap |
| S-trap | Improper routing | Re-pipe |
Undersized or misrouted drain and supply lines
Undersized or misrouted drain and supply lines often cause slow drainage, backups, pressure loss, and premature system strain, leading to inspection failures when they do not meet code flow and sizing requirements.
Inspectors verify pipe diameters, slopes, fixture units, and route efficiency.
Corrective actions include upsizing to code, regrading drains for proper pitch, reducing unnecessary bends, and relocating runs to optimize flow.
Inadequate access to valves, cleanouts, and appliances
Problems with pipe sizing and routing often reveal a secondary issue: access to valves, cleanouts, and appliances is frequently overlooked.
Inspectors flag obstructed shutoffs, buried cleanouts, and blocked appliance service spaces.
Corrective actions include relocating components, adding access panels, maintaining required clearances, and labeling shutoffs.
Proper placement guarantees routine maintenance, emergency shutoff capability, and inspection compliance, preventing costly rework and delays.
Unapproved materials or missing permits
Failing to use approved materials or to obtain required permits is a common and easily preventable cause of inspection failure. Inspectors reject unlisted fittings, improper pipe types, and work done without permits. Corrective action includes replacing components with code-listed products and securing retroactive permits. Documentation and manufacturer listings expedite approval.
| Issue | Fix |
|---|---|
| Unapproved fittings | Replace with listed parts |
| Missing permit | Obtain permit |
| Noncompliant pipe | Swap to approved material |
| No documentation | Provide listings |
Gas leak or improper gas appliance installation
Any detectable gas leak or incorrect installation of gas appliances presents an immediate safety hazard and is a frequent reason for failed plumbing inspections.
Inspectors require certified gas fittings, correct venting, and proper clearances.
To correct failures, shut off supply, hire a licensed gas plumber, replace faulty connectors, test with approved leak-detection methods, and obtain required certifications before reinspection to guarantee compliance and safety.
How to Handle Reinspection Efficiently
The contractor compiles clear documentation of all corrections and notifies the inspector of updates and availability.
Fixes are prioritized to address items most likely to trigger another visit, reducing time and cost.
A brief reinspection timeline and checklist are prepared to guarantee readiness on the scheduled date.
Documenting corrections and communicating updates
Documenting corrections and communicating updates should follow a clear, auditable process: list each failed item, describe the corrective action taken, note materials and dates, and attach photos or receipts as evidence.
Records should be concise, legible, and stored accessibly. Notify the inspector and responsible parties promptly with a summary and supporting files.
Maintain versioned logs to track status until final approval.
Prioritizing fixes to minimize additional inspections
When time or budget is limited, prioritize corrections that are likely to pass a reinspection on their own and those that unblock other required fixes.
Triage items by safety impact, code criticality, and inspection visibility. Address obvious, easily testable faults first, then dependencies enabling larger repairs.
Document completed work and provide clear notes to inspectors to reduce ambiguity and repeat visits.
Sample reinspection timeline and preparation checklist
A simple, practical reinspection timeline helps contractors and homeowners move from failed items to a verified pass with minimal delay.
The timeline outlines immediate repairs, verification steps, documentation, and scheduling to streamline reinspection. Clear roles and deadlines reduce repeat visits and costs.
- Repair within 48–72 hours
- Self-check against failure list
- Photograph and document fixes
- Schedule reinspection within week
Tools, Materials, and Tests Inspectors Expect to See
The article outlines the essential tools and materials inspectors expect, including appropriate fittings, test plugs, and calibrated gauges.
It summarizes standard pressure, smoke, and dye tests, noting typical pass criteria and common failure modes.
Guidance is provided on how to record, interpret, and present test results clearly to the inspector.
Essential tools and materials for compliance
Proper preparation relies on a compact set of approved tools, certified materials, and specific test equipment that inspectors routinely expect to see on site.
The contractor should present calibrated gauges, labeled piping materials, approved sealants, and organized documentation demonstrating compliance.
- Calibrated pressure gauges and test plugs
- Labeled copper, PEX, or approved PVC
- Code-approved sealants, fittings, and hangers
- Material certifications and permit paperwork
Standard pressure, smoke, and dye tests explained
Thorough testing—pressure, smoke, and dye—verifies system integrity by isolating leaks, blockages, and improper flows before fixtures are concealed.
Pressure tests confirm airtight and watertight seals using air or water at code-specified psi.
Smoke tests detect cross-connections and venting faults.
Dye tests trace concealed leaks and fixture connections.
Technicians document procedures, durations, and observations for inspector review.
How to interpret and present test results to the inspector
Following pressure, smoke, and dye testing, inspectors expect a concise presentation that ties observed data to code requirements and repair decisions.
The plumber should summarize test methods, recorded values, duration, pass/fail criteria, and any anomalies.
Include labeled photos, calibrated gauge readings, dated logs, and proposed corrective actions with timelines.
Clarity and documented compliance expedite approval.
When to Hire a Licensed Plumber vs. DIY
Determining whether to call a licensed plumber hinges on the scope and complexity of the job—permit-required work, main-line repairs, gas connections, and any hidden or structural plumbing typically demand a professional.
Attempting complex repairs can risk failed inspections, code violations, water damage, or voided warranties when done incorrectly.
When a pro is needed, the consumer should verify license and insurance, check recent references or inspection-ready examples, and obtain a clear written estimate and scope of work.
Scope and complexity indicators that require a pro
When water damage, structural changes, or code compliance are at stake, a licensed plumber should be engaged rather than attempting a DIY fix.
Complex indicators include main-line work, gas plumbing, permits required, hidden access or wall openings, multifixture redistribution, backflow prevention installation, and commercial systems.
If diagnostic tools, pressure testing, or coordinated inspections are necessary, professional expertise guarantees correct, code-compliant completion.
Risks of DIY plumbing in relation to inspections
Those complex indicators—main-line work, gas connections, permitted alterations, and hidden-access repairs—also mark the situations where DIY efforts most threaten passing inspection.
Unpermitted or improper work risks failed inspections, costly rework, fines, and voided warranties. Inexperience can cause code violations, safety hazards, and concealed leaks.
Hire licensed professionals for high-risk, regulated, or concealed systems to guarantee compliance and documented workmanship.
How to vet and hire a licensed plumber for inspection-ready work
Select a licensed plumber with care: inspectors and contractors expect documented permits, code-compliant installations, and clear scope-of-work descriptions for any project that could affect mains, gas, structural elements, or concealed systems.
Verify license status, insurance, and local references. Request written estimates, itemized scopes, permit handling, and warranty terms.
Prefer contractors experienced with municipal inspections and responsive to correction orders.
Local Variations and How to Verify Requirements
Local rules and permit conditions can differ considerably between municipalities, so homeowners should research local code amendments and specific permit requirements before beginning work.
Useful verification methods include consulting municipal websites, online permit portals, and contacting the local building department for clarifications.
Prior to starting a project, asking an inspector concise questions—such as required inspections, acceptable materials, and documentation needed—reduces the risk of noncompliance.
Researching municipal code amendments and permit requirements
Because municipal codes and permit processes routinely diverge between jurisdictions, contractors and homeowners must confirm the exact amendments and filing requirements that apply to their project address.
Review local ordinance updates, effective dates, and any adopted state or federal references.
Identify required plan details, fee schedules, inspection triggers, and conditional exceptions.
Document sources and retain copies to demonstrate compliance during plan review and inspection.
Using online resources and local building department contacts
When municipal code language or permit checklists are unclear, contractors and homeowners should turn to official online resources and direct building-department contacts to confirm requirements for a specific address.
Use municipal websites, searchable code libraries, permit portals, and uploaded inspection notes.
Verify zoning, approved materials, and local amendments.
Record guidance, reference permit numbers, and follow any document submission or appointment procedures specified by the department.
Sample questions to ask your local inspector before starting work
Which specific codes, materials, and inspection steps apply to a given address should be confirmed with the inspector before work begins; asking targeted questions helps reveal local amendments, sequencing requirements, and documentation expectations.
Suggested questions:
- which code edition and local amendments govern this site,
- required permits and fees,
- preferred materials or brands,
- mandatory inspection sequence and hold points,
- paperwork and testing standards,
- common reasons for failed inspections,
- and contact protocol for clarifications.
Final Walk-Through Checklist to Ensure Approval
A final walk-through compiles a short, targeted checklist to catch any inspection-day items and confirm that all work matches code and plans.
It also outlines a concise photo and documentation routine so records are complete and easy to present to the inspector. This simple pre-inspection review reduces the chance of unexpected failures and speeds approval.
- Verify fixtures operate, drains are clear, and visible joints show correct fittings and support.
- Confirm venting and cleanouts are accessible and unobstructed.
- Photograph key connections, tag locations, and note measurements with date-stamped images.
- Assemble permits, test logs, product data sheets, and a brief punch list for the inspector.
Quick inspection-day items to verify
Several clear checkpoints should be reviewed immediately before the inspector arrives to prevent last-minute failures. Verify visible leaks, accessible shutoffs, clear trap access, and functional fixtures. Confirm tests are complete and drains run freely. Make certain vents are unobstructed and water heater settings are safe. Present work neatly for easy inspection.
| Item | Check | Status |
|---|---|---|
| Leaks | Visual inspection | OK |
| Shutoffs | Accessible | OK |
| Vents | Clear | OK |
| Fixtures | Functional | OK |
Photo and documentation checklist for record-keeping
After the final visible checks, documenting conditions with clear photos and organized paperwork helps protect against disputes and speeds approval.
A concise record should include date-stamped images, labeled locations, permit and fixture IDs, and signer names. Store digital backups and a printed summary for inspectors.
- Date-stamped wide and detail photos
- Location and fixture labels
- Permit numbers and manufacturer info
- Signed walkthrough summary
Conclusion
When the inspector’s clipboard morphs into a crown and the permit sticker gleams like a royal seal, the homeowner’s journey ends triumphantly — or at least sensibly. Following the checklist, bracing every joint, and running every test transforms chaotic plumbing into bureaucratic poetry. With permits in hand and fixtures behaving, approval feels inevitable. Yet one sensible truth persists: meticulous prep, licensed help when needed, and local-code respect are the real magic behind that green light.