How to Tell If a Faucet Is Frost-Proof: Simple Tests and Signs to Check
To determine if a faucet is frost-proof, look for a long stem that positions the shutoff valve inside the heated wall. Key features include a handle close to the wall, minimal exposed pipe, a threaded spout, a packing nut near the body, and a prominent escutcheon or collar. The handle-to-wall distance should be about 3–6 inches. Simple wiggle and visual checks can often confirm its frost-proof status, with additional tests and winterization steps available for further assurance.
How to Recognize a Frost-Proof Faucet Quickly
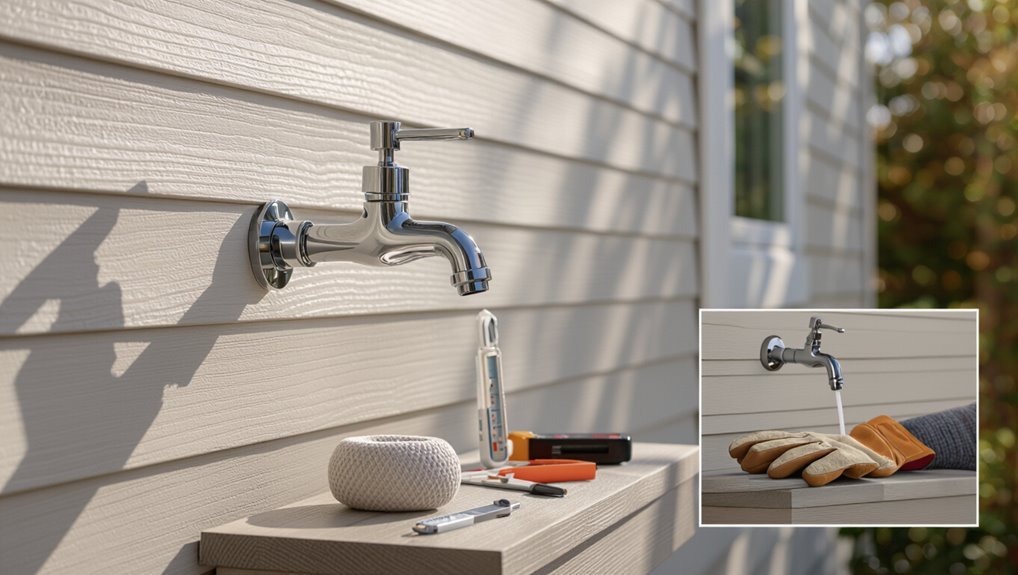
A concise one-sentence checklist can help a reader spot frost-proof features at a glance.
Key markers include a long stem, backflow prevention, and a wall-mounted shutoff inside the house.
Correctly identifying a frost-proof faucet prevents frozen pipes and costly repairs.
One-sentence identification checklist
When identifying a frost-proof faucet at a glance, look for a long stem that places the shutoff valve deep inside the wall, a noticeably angled or extended spout, a threaded outdoor outlet for a hose bib, minimal exposed pipe between the wall and faucet body, and a handle that sits close to the wall rather than on an extended riser.
How to tell if faucet is frost proof:
- Long stem
- Close-to-wall handle
- Threaded spout
Why identifying frost-proof matters for your plumbing
Spotting the long stem, close-to-wall handle, and threaded spout does more than identify hardware; it informs decisions that affect water safety, repair costs, and winter preparedness.
Recognizing frost-proof faucets prevents frozen pipes, limits indoor water damage, and guides proper winterization.
Accurate identification helps prioritize replacements, set appropriate maintenance schedules, and avoid unnecessary excavation or valve upgrades before cold weather arrives.
Key Features of Frost-Proof Faucets
A frost-proof faucet is defined by several practical features that signal its freeze-resistant design.
Look for an extended stem that places the valve well inside the heated wall cavity, a handle positioned away from the buried valve, and durable materials such as brass or stainless steel often paired with protective collars.
Also note the presence of a packing nut and a shutoff configuration that allows indoor isolation for winter.
Extended stem design and how it works
The extended stem is a key mechanical feature that positions the valve seat and operating mechanism well inside the heated wall cavity, keeping those components out of the outdoor water line so they remain above freezing even when the exterior spout is exposed to cold air.
A long rigid tube connects the indoor valve to the outdoor spout, transmitting motion while locating vulnerable seals and seats indoors to prevent freeze damage.
Handle location vs. valve location explained
Often the visible handle on a frost-proof faucet does not align with the actual valve assembly; the handle operates a long stem that reaches back into the warmed interior wall where the valve seat and seals are located.
This separation keeps water valves protected from freezing. Observers should note handle position relative to body length: a distant or recessed handle often indicates the extended-stem mechanism and frost-proof design.
Materials and build indicators (brass, stainless, protective collars)
Beyond handle placement and stem length, material choices and visible build features offer quick clues about frost-proof design.
Frost-proof faucets often use solid brass or stainless components for corrosion resistance and thermal mass. A long, robust spout and thicker wall tubing are common.
Protective collars or escutcheons around the inlet indicate extended stems and insulation continuity, signaling intentional freeze protection.
Presence of a packing nut and shutoff design
A visible packing nut near the faucet body and an accessible shutoff valve are practical indicators of a true frost-proof design: the packing nut secures a long stem and seal that keeps water well back inside the heated wall cavity, while a dedicated shutoff—either an integral stop or a nearby isolating valve—allows drainage and maintenance without exposing the extended stem to freezing temperatures.
Inspect for tight seals.
Simple Physical Tests You Can Do Without Tools
A few quick, tool-free checks can help identify whether an outdoor faucet is frost‑proof.
One can visually inspect for a long stem and threaded escutcheon, measure the distance from the handle to the wall, and gently wiggle the handle to feel for extended stem movement.
Noting a threaded sleeve or visible long stem strongly suggests frost‑proof construction.
Visual inspection steps
When inspecting a faucet for frost-proof features, start with straightforward visual checks and simple touch tests that require no tools.
Examine body length, look for a long shank or insulated casing, and check for a packing nut near the wall. Note sturdy materials and concealed valve placement.
- Look for shank length
- Check for packing nut
- Verify visible valve concealment
Measure the distance from handle to wall or mounting surface
Several inches of clearance between the faucet handle and the wall indicate the extended shank typical of frost-proof models.
Measure visually from handle base to mounting surface; a gap around 3–6 inches suggests the valve sits inside the wall where freezing risk is reduced.
Smaller clearances often mean a short shank. Document measurements and compare with manufacturer specs when possible.
Wiggle-and-feel test for extended stem movement
One simple tactile check is to gently wiggle the faucet handle and feel for longitudinal movement along the stem; frost-proof fixtures have extended stems that allow a slight in-and-out play not present on short-shank valves.
The tester notes subtle axial give without loosening the handle. Absence of this play suggests a short stem; detectable travel supports the likelihood of frost-proof construction.
Checking for a threaded sleeve or escutcheon indicating frost-proofing
After feeling for axial play along the stem, inspection moves outward to the faucet body where a threaded sleeve or a decorative escutcheon often signals frost-proof design.
The sleeve appears as a long, exposed tube with visible threads or a snug collar covering the packing nut.
Presence of these features indicates an extended stem and wall-mounted installation typical of frost-proof faucets.
Tests Using Common Tools
A few simple tools can confirm frost-proof features more reliably than visual inspection alone.
A tape measure checks whether the spout reaches the frost line. Removing the handle cap allows safe inspection of the cartridge, and a flashlight with a small mirror helps view backflow paths and valve position.
These quick tests help distinguish true frost‑proof construction from lookalike fixtures.
Using a tape measure to confirm frost-proof length standards
Measure the faucet from the exterior wall surface to the valve stem to determine whether it meets frost-proof length standards.
A tape measure verifies that the stem extends beyond the insulated wall cavity; typical frost-proof models require several inches of clearance.
Record the measurement, compare it to manufacturer or local code specifications, and note any shortfall indicating potential freeze risk or need for replacement.
How to remove the handle cap and inspect the cartridge safely
Start by shutting off the water supply and opening the faucet to relieve pressure; then use a flat screwdriver or a trimmed utility knife to gently pry off the decorative handle cap.
Remove the retaining screw, pull the handle straight off, and expose the cartridge.
Inspect for corrosion, mineral buildup, and damaged seals.
Photograph orientation, note parts, and replace components or order matching replacements as needed.
Using a flashlight and mirror to view backflow and valve position
With the handle removed and the cartridge exposed, use a bright flashlight and a small inspection mirror to examine the valve seat, backflow passages, and the orientation of the internal components.
Angle the mirror to reveal recesses; note corrosion, mineral buildup, or misalignment.
Observe whether valves seal fully when closed and trace any visible reverse paths suggesting backflow risk or improper assembly affecting frost resistance.
How to Differentiate Frost-Proof from Non to Frost-Proof Models
A direct comparison highlights differences in body length, stem design and mounting that distinguish frost‑proof faucets from standard models.
Typical placement—through exterior walls or on deep sill locations—also signals a frost‑proof installation.
Caution is advised because similar finishes, handle styles or exposed spouts can masquerade as frost‑proof features.
Side-by-side comparison of construction and installation
Comparing frost-proof and standard outdoor faucets reveals key differences in how each is built and installed: frost-proof units incorporate a long stem and inward-mounted valve seat that keep the water-control mechanism well inside the heated wall cavity, while non–frost-proof faucets place the valve near the exterior, exposing it to freezing temperatures.
| Feature | Frost-proof | Standard |
|---|---|---|
| Stem length | Long | Short |
| Valve location | Interior | Exterior |
| Installation depth | Deep in wall | Shallow |
Typical installation locations that suggest frost-proof design
Several common mounting locations reliably indicate a frost-proof faucet: exterior walls where the spout aligns with an indoor warm cavity (basement or heated garage walls), recessed hose bibs set deep into wall studs, and installations that penetrate the wall several inches rather than terminating near the siding.
Other indicators include higher mounting above grade, placement near insulated utility chases, and through-wall mounts centered over conditioned spaces.
Common lookalike features that can cause misidentification
While certain external cues—such as a long projecting stem or a raised mounting height—may resemble frost-proof faucets, these lookalike features can belong to conventional bibs or decorative models and consequently are unreliable as sole identifiers.
Surface length, insulated-looking covers, and metal collars can be cosmetic.
True frost-proof models feature a long valve stem extending into heated space and factory-sealed packing nuts—verify internally.
Signs a Faucet Is NOT Frost-Proof
A faucet that is not frost‑proof often has a short valve stem with the shutoff mechanism located close to the exterior, rather than set back inside the wall.
Visible gaps, exposed packing, or a thin spout body are physical clues that the assembly is vulnerable to freezing.
Repeated leaks, cracked bodies, or failure to drain after cold weather further indicate the unit is not designed for freeze protection.
Short valve stems and internal valve location
Short valve stems that terminate close to the exterior wall usually indicate the valve mechanism sits inside the house, a clear sign the faucet is not frost-proof.
Short stems offer little distance for water to drain away from the exterior.
Inspect stem length visually; if the packing nut and handle are near the wall, cold can reach the valve, risking freezing and interior pipe damage.
Vulnerability clues: visible gaps, exposed packing, and thin bodies
Visible gaps, exposed packing nuts, and unusually thin faucet bodies are clear indicators that a spigot is not frost-proof. These features expose internal components to cold and indicate a short stem or external valve.
Corroded seams, loose mounting, or visible threads further suggest inadequate insulation. Such physical clues help distinguish vulnerable outdoor faucets from purpose-built, frost-resistant models before winter arrives.
Failure symptoms after cold weather exposure
How can one tell a faucet suffered from freezing rather than routine wear?
Cracked housing, split or bulged spindles, and fractured solder joints after a cold snap indicate ice damage.
Sudden leaks at seams, distorted handles, and bent mounting shanks appearing only post-freeze point to frost-induced stress.
Rapid onset corrosion around breaks, and water spray from formerly sealed areas, confirm freeze failure rather than gradual aging.
What to Do If Your Faucet Is Not Frost-Proof
If a faucet is not frost-proof, immediate winterizing steps—such as shutting off the supply, draining the line, and insulating or covering the spigot—can prevent freezing and damage.
The homeowner must then weigh repair options: retrofit kits and insulated covers for temporary protection versus full replacement when the existing valve is corroded or the inlet sits inside a cold wall.
When replacing, choosing a true frost-proof model requires matching dimensions, selecting durable materials, and checking frost ratings to guarantee reliable performance in the local climate.
Temporary winterizing steps to prevent freezing
Begin temporary winterizing by shutting off the indoor shutoff valve that serves the exterior faucet and draining any remaining water from the line; this prevents trapped water from freezing and expanding inside the pipe.
Then insulate and protect the exterior fixture and nearby pipe.
Recommended actions:
- Drain and open the faucet.
- Insulate with foam or wrap.
- Cover with a waterproof bib.
When to replace versus when to retrofit
When an exterior faucet lacks frost-proof features, homeowners must decide whether to replace the unit entirely or retrofit it with protective measures. The choice hinges on the faucet’s condition, the age and accessibility of the supply line, budget, and how long the solution is expected to last.
Replace if corrosion, internal damage, or frequent freezes suggest recurring failures; retrofit for accessible, sound valves using insulated covers, heat tape, or rerouting.
How to choose a frost-proof replacement (dimensions, materials, frost ratings)
Choosing the right frost-proof replacement requires matching functional measurements, durable materials, and adequate frost ratings to the installation.
Measure from wall to valve center, thread size, and inlet type.
Select brass or stainless bodies with ceramic cartridges for longevity.
Verify frost rating (minimum to local freeze depth) and insulation length.
Confirm mounting compatibility, shutoff location, and warranty before purchase and installation.
Installation and Maintenance Tips for Frost-Proof Faucets
Proper installation requires correct mounting depth and a reliable backflow preventer to keep the frost-proof stem clear of cold air.
Routine checks and a concise winter-preparation checklist—draining lines, closing valves, and insulating exposed connections—help prevent freeze damage.
If leaks or sticking stems appear, prompt troubleshooting and replacement of worn seals or cartridges restore function and prevent further problems.
Proper mounting depth and backflow prevention
A correct mounting depth—measured from the exterior wall surface to the faucet’s stop—is essential to guarantee the frost-proof stem extends past the heated interior wall into warm space, preventing freeze-related damage.
Installers should also verify that the spigot’s angle and clearance allow a straight, unobstructed shutoff inside the building.
Additionally, install approved vacuum breakers or backflow preventers per code, ensuring secure connections and periodic inspection.
Routine checks and winter preparation checklist
Several simple checks before freezing weather can prevent faucet damage and costly repairs.
Inspect mounting depth, verify shutoff valve operation, and clear debris around the spout. Drain exterior lines if applicable and insulate exposed piping.
Follow this quick checklist:
- Confirm indoor shutoff closes fully.
- Remove hoses and drain spigot.
- Insulate exposed sections and cover faucet.
Troubleshooting leaks and sticking stems
After completing the winter checklist, attention should turn to diagnosing leaks and sticking stems that can compromise a frost-proof faucet’s performance.
Inspect packing nuts, valve seats, and stem bushings for wear; tighten or replace components as needed.
Clear mineral buildup with vinegar or a descaler.
Test operation after service, confirming smooth rotation and absence of drips; replace cartridge or stem if problems persist.
Signs of Wear and When to Call a Professional
Visible corrosion, persistent leaks, or damaged stems indicate a frost‑proof faucet may be failing and warrant closer inspection.
Such issues can signal internal deterioration that temporary fixes will not resolve. Homeowners should weigh repair versus professional inspection or replacement costs before proceeding.
Corrosion, persistent leaks, or damaged stems
Inspecting a frost-proof faucet for corrosion, persistent leaks, or a damaged stem helps determine when repair or replacement is necessary.
Visible rust, pitting, or scale on the valve body indicates metal deterioration.
Leaks that continue after tightening or replacing seals point to internal damage.
A bent, seized, or worn stem impairs shutoff and requires professional assessment to prevent further water damage and failure.
Costs and considerations for professional inspection or replacement
When corrosion, persistent leaks, or a damaged stem are identified, homeowners must weigh repair versus replacement and consider professional inspection to accurately assess scope and cost.
A plumber’s diagnostic fee ranges regionally; expect inspection estimates, labor, parts, and potential pipe repairs.
Replacement often costs more but reduces recurrence.
Obtain written quotes, check licenses and warranties, and prioritize long-term reliability over minimal upfront savings.
Quick Reference: Fast Tests and Indicators Summary
A concise checklist of easy, rapid checks helps determine whether a faucet is frost‑proof without dismantling it:
The reader follows a short series of observations and simple tests to assess length, handle position, and insulation or shutoff location. Quick indicators reduce uncertainty and guide next steps.
- Measure spout-to-wall distance.
- Inspect handle alignment.
- Locate interior shutoff.
Conclusion
Determining frost-proof status saves winter headaches and costly repairs. For example, a homeowner in Minnesota replaced a leaking sillcock after noticing a short stem and exposed packing nut; post-replacement, outdoor water line remained dry and intact through months of subzero temperatures. By checking stem length, valve position, and whether water is inside the exterior flange, one can quickly decide if a faucet is frost-proof and act—repair, insulate, or hire a pro—before freeze season.