How to Quiet a Loud Heat Pump: 9 Proven Fixes to Reduce Noise Quickly
If your heat pump is loud, it may be due to loose panels, warped fan blades, worn bearings, refrigerant line vibration, or airflow issues. To quiet it quickly, start by power-cycling the unit, tightening any visible fasteners, and adding anti-vibration pads. For long-term solutions, consider replacing or lubricating bearings, balancing or replacing fan blades, insulating refrigerant lines, cleaning coils and filters, and installing spring isolators or an acoustic barrier. Upgrading to a variable-speed compressor can further reduce noise. Regular inspections and seasonal maintenance are essential to prevent future issues. Detailed repair options and costs can be explored as needed.
Why Your Heat Pump Is Loud: Quick Diagnosis and What to Expect
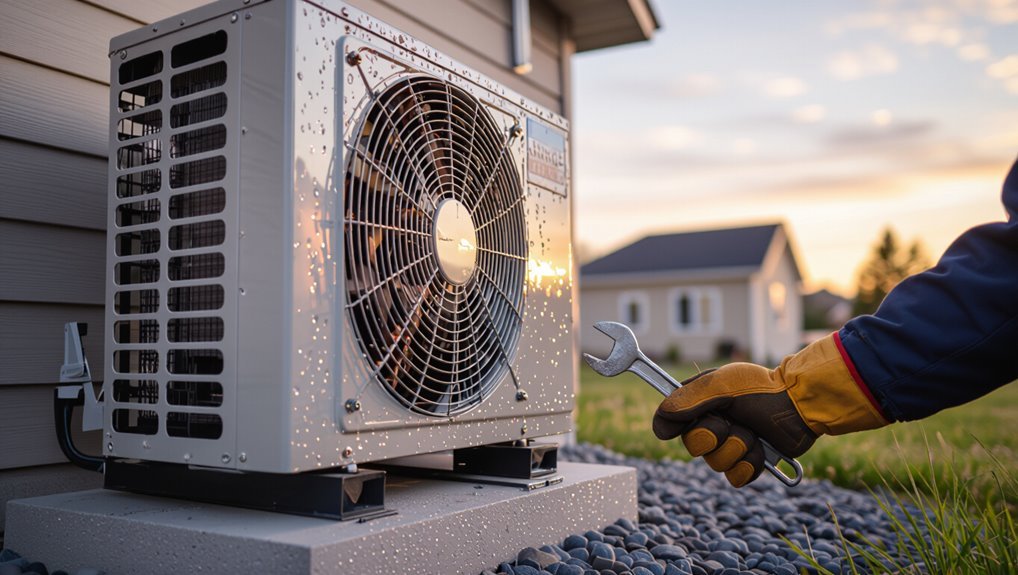
A quick overview identifies common noise sources—fan blades, the compressor, refrigerant lines, loose or vibrating panels, and disrupted airflow.
A brief inspection from outside (listening near the unit and checking mounting and fan operation) and inside (noting unusual rattles or airflow changes) often reveals the culprit.
Distinguishing normal operational sounds from signs of imminent failure (squealing, grinding, or sudden loud knocks) guides whether immediate service is required.
Typical noise sources in heat pumps (fan, compressor, refrigerant lines, vibration, airflow)
When a heat pump produces excessive noise, several distinct components commonly reveal the source: the outdoor fan, the compressor, refrigerant lines, mounting points that transmit vibration, and disrupted airflow through coils or ducting.
Typical causes include bent fan blades, worn compressor bearings, refrigerant line pulsation, loose mounts transferring vibration, and restricted airflow.
Guidance on how to quiet a loud heat pump targets these areas.
How to perform a fast noise inspection from outside and inside
Having identified common noise sources—fan, compressor, refrigerant lines, mounts, and airflow—the next step is a quick, systematic inspection from both outside and inside to pinpoint the offender.
Outside, observe for loose panels, bent fins, visible refrigerant vibration, and mount gaps.
Inside, listen at vents, check airflow obstructions and duct rattles, and note when noise changes with mode or fan speed.
When noise indicates urgent failure vs. normal operation
How can a homeowner distinguish between routine operating sounds and noises that signal imminent failure?
Routine sounds include steady hums, soft clicks during cycling, and occasional airflow whoosh.
Warning noises are loud grinding, screeching, banging, or rapid rattling and abrupt changes in pitch or volume.
Persistent abnormal sounds, burning smells, or loss of function warrant immediate shutdown and professional service.
Immediate Quieting Actions You Can Do Right Now
The homeowner can start with a quick power cycle to see if noise levels change, then inspect and tighten any accessible panels or fasteners.
If safe to do so, temporarily lowering fan speed or adjusting thermostat setpoints can reduce noise immediately.
Placing lightweight sound barriers near the unit—carefully so airflow is not blocked—provides short-term noise relief while longer fixes are arranged.
Power cycling and observing changes
Power cycle the heat pump by shutting it off at the thermostat and breaker for a full two minutes, then restore power to see if the noise level changes.
Observe startup sounds, fan spin-up, compressor engagement, and any abnormal vibrations.
Note whether intermittent noises disappear or persist.
Record conditions (outdoor temperature, load) and repeat if needed to determine if noise is transient or requires further inspection.
Tightening visible loose panels and fasteners
After confirming whether a power cycle changed the noise profile, attention shifts to visible panels and fasteners that commonly rattle under operation.
Inspect panels, louvers, and access covers for loose screws, bolts, or clips. Using appropriate tools, snug fasteners without over-tightening.
Replace missing or damaged hardware. Recheck after running the unit briefly to verify noise reduction and guarantee no new vibrations were introduced.
Temporarily reducing fan speed or thermostat setpoints safely
Lowering fan speed or nudging the thermostat setpoint down a few degrees can provide immediate noise relief without complex tools.
The homeowner should use the thermostat or fan control to reduce blower RPM, monitor system response, and avoid freezing in cold weather.
Check manufacturer limits and allow several minutes for pressure and temperature to stabilize.
Restore settings if performance or comfort suffers.
Placing temporary sound barriers without blocking airflow
Several simple barriers can reduce heat pump noise immediately when placed to deflect or absorb sound without blocking intake or exhaust airflow.
Use freestanding acoustic panels, folded moving blankets on sawhorses, or temporary baffles positioned at least 2–3 feet from unit openings.
Guarantee gaps for ventilation, avoid enclosing the compressor, and secure materials against wind.
Monitor temperature and remove barriers if performance changes.
9 Proven Fixes to Reduce Heat Pump Noise
A series of targeted repairs and adjustments can cut most heat pump noise at the source.
Typical fixes include servicing or replacing worn fan motor bearings, balancing or swapping warped blades, and fitting anti-vibration pads or spring isolators beneath the unit.
Additional measures—tightening or replacing loose panels, screws, and mounts, and insulating and securing refrigerant lines and pipes—further reduce rattles and mechanical noise.
Replace or oil worn fan motor bearings
Inspecting and addressing worn fan motor bearings restores smooth rotation and cuts one of the most common sources of humming or grinding in heat pumps.
Technicians should check for play, roughness, or noise, then lubricate serviceable bearings with manufacturer-approved oil or replace sealed bearings or the motor if corrosion or wear is severe.
Proper mounting torque and electrical disconnection reduce risk during service.
Balance or replace a warped fan blade
Balance and straightening of a warped fan blade restore even airflow and eliminate vibration-driven noise that can transfer through the heat pump cabinet and mounting.
Technicians inspect blades for bends, use blade balancers or add small counterweights, and replace blades with corroded or cracked edges.
After adjustment, they verify quiet operation, ensuring clearance from the housing and secure blade mounting to prevent recurrence.
Install anti-vibration pads and spring isolators under the unit
Reduce structure-borne noise by installing anti-vibration pads or spring isolators beneath the heat pump to decouple its chassis from the mounting surface.
Properly sized neoprene pads or compression springs absorb vibration frequencies and prevent transmission into walls, foundations, or brackets.
Select mounts rated for the unit’s weight, level the appliance, and periodically inspect for compression, cracking, or corrosion to maintain long-term isolation performance.
Tighten and replace loose or broken panels, screws, and mounts
After isolating the unit from its mounting surface, attention turns to the cabinet and fasteners that hold components in place.
Technicians inspect panels, brackets, screws, and rubber mounts for looseness, corrosion, or breakage. Tightening, replacing stripped screws, swapping warped panels, and installing new mounts eliminates rattles and resonance.
Re-check after a brief run to confirm noise reduction and secure fit.
Insulate and secure refrigerant lines and pipes
Secure and insulate refrigerant lines and associated pipes to prevent vibration transfer and minimize airflow turbulence that produces noise.
Use closed-cell foam or rubber insulation sleeves sized to fit lines, secure with nonabrasive straps or clamps, and add isolation pads where lines contact framing.
Check for kinks, loose fittings, or corrosion and tighten or replace components to eliminate rattles and reduce mechanical noise.
Clean or replace clogged filters and coils to reduce airflow noise
Inspecting and maintaining air filters and coils is a straightforward, high-impact step to cut airflow-related noise from a heat pump.
Clogged filters and dirty evaporator or condenser coils restrict airflow, forcing the fan to work harder and generate turbulence.
Regularly clean or replace filters, gently brush or coil-clean with appropriate solutions, and schedule professional coil servicing to restore proper airflow and reduce noise.
Upgrade to a variable-speed fan or compressor (if compatible)
Once airflow is restored through clean filters and coils, homeowners can consider upgrading to a variable-speed fan or compressor to further cut noise and improve comfort.
Variable-speed components run at lower, steadier RPMs, reducing start/stop thumps and tonal hum.
Compatibility, warranty impact, and electrician or HVAC technician assessment matter; installation yields smoother operation, better efficiency, and noticeably quieter outdoor and indoor sound levels.
Add a perimeter soundproofing fence or acoustic barrier
A well-designed perimeter soundproofing fence or acoustic barrier can greatly reduce perceived heat pump noise by blocking and absorbing sound before it reaches neighboring living spaces.
It should combine mass, absorption, and damping while maintaining airflow and service access.
- Dense materials (mass-loaded vinyl, concrete)
- Absorptive facing (acoustic panels)
- Decoupled mounting to reduce vibration transfer
- Adequate height and staggered layout
Reposition the outdoor unit for better clearance and reduced resonance
Although often overlooked, relocating the outdoor heat pump can noticeably cut noise by improving airflow, increasing distance from occupied rooms, and reducing structure-borne resonance.
A firm, level pad on vibration isolators, clearances for intake and exhaust, and mounting away from shared walls minimize rattles and tonal amplification.
Positioning downslope of living areas and using soft landscaping further dampens sound transmission to interiors.
How to Inspect and Diagnose Specific Noise Types
Common noise signatures point to different faults: a high-pitched squeal or squeak often indicates bearing wear or refrigerant issues, while loud rattling or banging usually signals loose parts or mounting problems.
Humming or buzzing tends to come from electrical faults or compressor strain, and whistling or whooshing suggests airflow restrictions or duct leaks.
Intermittent noises require timed observation and repeat testing, whereas continuous noises call for steady-state inspection and component isolation.
High-pitched squeal or squeak likely bearings or refrigerant
Inspecting a high-pitched squeal or squeak begins with distinguishing whether the sound originates from mechanical bearings or from the refrigeration circuit.
Visually check fan and motor bearings for wear, wobble, or lack of lubrication.
Listen near the compressor and service valves for pitch changes during startup and load shifts indicating refrigerant flow or valve noise.
Record frequency, timing, and location for technician diagnosis.
Loud rattling or banging loose parts or mounting issues
Begin by identifying whether the rattling or banging is continuous, intermittent, or tied to specific events like startup or compressor cycling.
Inspect mounting brackets, isolation pads, fan blades, and loose panels.
Tighten fasteners, replace degraded rubber mounts, and secure wiring.
Check for foreign objects in the fan and damaged sheet metal.
Re-test after each correction to confirm the noise source and effectiveness.
Humming or buzzing electrical issues or compressor strain
Listen for pitch, consistency, and timing to distinguish humming or buzzing from mechanical rattles: electrical hums are typically steady and frequency-dependent (often tied to fan motors, transformers, or loose laminations), while compressor-related buzzes may change with load, start-up, or when the unit cycles.
Inspect mounts, electrical connections, capacitors, and relay chatter. Use a stethoscope or phone audio to isolate source before repair.
Whistling or whooshing airflow restrictions or duct leaks
When airflow meets a restriction or escapes through a gap, it produces distinct whistling or whooshing tones that change with fan speed and load. Identifying whether the sound originates at the unit, at a grille, or inside duct runs is the first diagnostic step.
Technicians check filter cleanliness, blower wheel condition, grille edges, damper alignment, and duct joints. They use smoke, tissue, or low-frequency audio to pinpoint leaks.
Intermittent noises vs. continuous noises: diagnostic approach
Because intermittent and continuous noises often stem from different sources and mechanisms, distinguishing between them is a critical first diagnostic step:
Intermittent sounds—clicks, bangs, or rattles—suggest loose components, failing relays, or refrigerant cycling; continuous hums or whines point to motor bearings, compressor issues, or airflow restrictions.
Observe timing, correlate with operation modes, and isolate components to pinpoint and prioritize repairs.
Tools, Materials, and Costs for Each Fix
A concise checklist of basic DIY tools—screwdrivers, wrenches, a multimeter, and vibration pads—sets readers up for most minor heat pump repairs.
Typical replacement parts and materials (fan blades, rubber mounts, refrigerant seals) are listed with broad price ranges to help budget the job.
Guidance is provided on when to call a professional and the expected service costs for diagnostics and labor.
Basic DIY tools checklist
Practicality guides the list of basic tools and materials needed for common heat-pump noise fixes. This paragraph outlines essential items, typical costs, and which repairs they support.
Essential tools: socket set, screwdrivers, adjustable wrench, pliers, tape measure, level, rubber mallet, cordless drill.
Materials: vibration pads, silicone sealant, hose clamps, electrical tape.
Typical costs range from budget hand tools to modest power tools.
Parts and materials list with typical price ranges
When tackling common heat-pump noise issues, a concise parts-and-materials list helps homeowners match fixes to costs and avoid unnecessary purchases. Typical items: anti-vibration pads, foam soundproofing, fan motor mounts, replacement fan blades, and rubber grommets. Estimated ranges guide budgeting.
| Item | Typical Price |
|---|---|
| Anti-vibration pads | $10–$40 |
| Foam panels | $15–$60 |
| Motor mounts | $20–$80 |
| Fan blades | $15–$70 |
| Rubber grommets | $5–$20 |
When to call a professional and expected service costs
How should a homeowner decide whether a noisy heat pump merits DIY attention or a professional visit?
Minor issues—loose panels, debris, simple mounting—suit DIY with basic tools ($0–$75).
Complex problems—compressor, refrigerant leaks, motor bearings, capacitor or electrical faults—require licensed HVAC service.
Expect diagnostic fees $75–$150; common repairs $150–$600; major replacements $800–$4,000 depending on parts and labor.
Safety Precautions Before You Start Any Repairs
Before attempting any fixes, the technician confirms electrical shutdown and follows lockout/tagout procedures to eliminate shock hazards.
They handle refrigerant lines only with proper certification and awareness of legal requirements to avoid leaks and regulatory violations.
Personal protective equipment is worn and ladder use follows safety best practices to prevent falls and injuries.
Electrical shutdown and lockout procedures
Any service on a heat pump requires a complete electrical shutdown and verified lockout to prevent accidental energization.
Technicians must isolate power at the disconnect, circuit breaker, and service panel, tag lockout devices, and test that circuits are de-energized with a properly rated meter.
Only authorized personnel should remove locks.
Documentation of lockout steps and communication with occupants prevents unexpected restart and guarantees safety during repairs.
Safe handling of refrigerant lines and legal considerations
Handle refrigerant lines with care and full compliance: refrigerants are hazardous to health, flammable in some blends, and subject to strict environmental and licensing regulations.
Only certified technicians should access, repair, or recover refrigerant. Unauthorized venting, adding, or altering charges can violate laws and void warranties.
Confirm local codes, proper documentation, and legal disposal of recovered refrigerant before proceeding with any repairs.
Personal protective equipment and ladder safety
Wear appropriate personal protective equipment and use ladders correctly to reduce risk when working on heat pump repairs.
Technicians should wear safety glasses, gloves, hearing protection, and steel-toed boots.
Use a stable, rated ladder positioned on level ground; secure it and maintain three points of contact.
Inspect PPE and ladder before use.
If tasks exceed safe reach or capability, hire a qualified professional.
Long-Term Maintenance Plan to Keep Noise Low
A long-term maintenance plan outlines a seasonal inspection checklist to catch wear, debris, and mounting issues before they worsen.
It specifies recommended maintenance frequency for filters, fan motors, refrigerant checks, and vibration mounts, plus guidelines for record-keeping to track findings and actions.
The plan also indicates when records or persistent symptoms warrant scheduling professional tune-ups to preserve quiet operation.
Seasonal inspection checklist
Seasonal inspections establish a routine for spotting developing issues before they amplify into noisy failures.
A concise checklist guides technicians and homeowners through visual and operational checks to prevent vibration, airflow, and mechanical wear.
- Inspect mounting pads and fasteners for looseness
- Check fan blades and motor for damage
- Clean coils and clear debris around unit
- Test refrigerant lines for insulation and leaks
Recommended maintenance frequency for key components
Having established a routine checklist for spotting developing issues, the discussion now turns to how often each component should be inspected and serviced to keep operational noise to a minimum.
Inspect filters and coils monthly during heavy use; clean or replace quarterly.
Check refrigerant lines, insulation, and electrical connections biannually.
Lubricate motors and fan bearings annually.
Verify mounting, vibration isolators, and case integrity every six months.
Record-keeping and when to schedule professional tune-ups
When should records be kept, and what triggers a professional tune-up? A concise log of inspections, dates, findings, replaced parts, and noise measurements should be maintained after each service or anomaly.
Schedule professional tune-ups annually and immediately after persistent unusual noises, efficiency loss, or repeated minor fixes.
Records guide diagnostics, validate warranties, and help prioritize repairs to prevent escalating noise and damage.
Comparing Noise-Reduction Options: DIY vs. Professional Upgrades
A concise comparison of DIY fixes versus professional upgrades helps clarify trade-offs in effectiveness, cost, and required downtime. The table below summarizes key differences and highlights warranty and longevity implications to guide decision-making. Readers should weigh short-term savings against long-term performance and coverage.
| Factor | DIY | Professional |
|---|---|---|
| Effectiveness | Moderate | High |
| Cost & Downtime | Lower cost, variable downtime | Higher cost, shorter controlled downtime |
| Warranty & Longevity | Limited or none | Manufacturer/installer-backed, longer lifespan |
Effectiveness, cost, and downtime comparison
Choosing between DIY fixes and professional upgrades requires weighing effectiveness, cost, and downtime to find the best balance for a particular heat pump and household.
DIY measures (insulation, vibration pads, simple fan tweaks) are low-cost, quick, and offer moderate noise reduction.
Professional upgrades (compressor replacement, advanced mounts, custom enclosures) deliver greater, lasting results but incur higher expense and longer service interruptions.
Warranty and longevity implications
Warranty terms and equipment lifespan can shift considerably depending on whether noise-reduction measures are DIY or professionally installed.
Manufacturers often void warranties if unauthorized tampering occurs, while certified installers preserve coverage and document work.
Professional upgrades typically use OEM parts and correct procedures, extending component life; DIY fixes may be cheaper short-term but risk accelerated wear, costly failures, or denied claims.
Real-World Examples and Success Stories
Three brief case studies illustrate practical outcomes: one homeowner stopped persistent rattling by installing isolation mounts.
Another eliminated a high-pitched whine after a compressor replacement.
A third reduced neighborhood disturbance by relocating the outdoor unit.
Each example highlights a different cause and a targeted solution.
Readers can compare these outcomes when considering their own noise-reduction approach.
Case 1: Fixed rattling with isolation mounts
Technicians resolved a persistent rattling in multiple residential heat pumps by installing rubber isolation mounts between the compressor housing and the unit frame.
The mounts absorbed vibration, eliminated metal-to-metal contact, and reduced noise by several decibels. Measurements confirmed lower vibration transfer to the casing.
Homeowners reported immediate improvement.
Installation required minimal disassembly and standard tools, offering a cost-effective, durable solution for common rattling complaints.
Case 2: Resolved whining with compressor replacement
Replaced a failing compressor in a suburban home after diagnostic testing identified high-frequency bearing noise as the source of the persistent whining.
Technicians installed a matched OEM compressor, verified refrigerant charge and electrical connections, and balanced mounting to prevent vibration transfer.
Post-replacement measurements showed noise reduction from 62 dB to 38 dB and restored efficient operation, eliminating tenant complaints and preventing further system damage.
Case 3: Neighborhood noise reduced by relocating unit
While the compressor swap addressed an indoor whining issue, other noise problems stem from unit placement rather than mechanical failure.
A homeowner moved the outdoor heat pump away from a shared fence, added a vibration-isolating pad, and installed a simple acoustic barrier.
Neighbors reported considerably less chatter and vibration. The relocation reduced reflected noise and improved neighborhood relations without costly internal repairs.
Final Checklist: Quiet Your Heat Pump Today
A concise action checklist guides homeowners through immediate steps to reduce heat pump noise, from simple maintenance to temporary sound barriers.
A separate contact checklist summarizes key details to provide an HVAC technician, including observed noises, timing, recent changes, and prior fixes tried.
Together these lists prepare the homeowner for efficient DIY work and an informed service call.
Step-by-step action checklist for homeowners
Begin with a concise inspection: the homeowner should power down the heat pump, visually scan for loose panels, debris, and damaged fan blades, and note any unusual rattles, gaps, or oil leaks to prioritize repairs.
Then follow a clear, safe sequence before deciding on DIY fixes or professional help:
- Tighten visible fasteners and replace damaged panels
- Clear surrounding debris and trim vegetation
- Lubricate accessible fan bearings per manual
- Level unit and add vibration pads as needed
Contact checklist for HVAC professionals (what to tell the technician)
When contacting an HVAC professional, homeowners should provide a focused summary of symptoms, recent DIY steps taken, and any safety concerns so the technician can diagnose and prioritize fixes efficiently.
Include model and age of the unit, duration and timing of noises, specific sound descriptions (rattling, buzzing, grinding), recent maintenance records, photos or videos, location access details, and preferred availability for inspection and repairs.
Conclusion
A hushed home may seem like a small victory, yet quieting a loud heat pump transforms daily life. With quick fixes, targeted repairs, and routine care, noise can shift from intrusive clatter to gentle background hum. Like tuning an orchestra, each adjustment—fan blade, mounting pad, refrigerant charge—brings harmony. By blending DIY steps and professional upgrades as needed, residents reclaim comfort, reduce wear, and enjoy a calmer, more efficient living space.