How to Overhaul My Gas Hot Water Heater: Step-by-Step Guide for DIY Safety and Efficiency
To effectively overhaul your gas hot water heater, follow these steps: First, conduct a thorough inspection and ensure the gas, power, and water supply are turned off. Next, drain the tank and clean or replace essential components such as the burner, pilot assembly, thermocouple, anode rod, and T&P valve. Always wear proper personal protective equipment (PPE) and perform gas leak tests, as well as checks for venting and carbon monoxide (CO) levels. Use the correct tools and OEM parts, and document your work for future reference. After reassembling the heater systematically, conduct pressure, combustion, and leak tests. Finally, monitor the system for 48–72 hours to ensure safe and efficient operation.
Overview of Overhauling a Gas Hot Water Heater
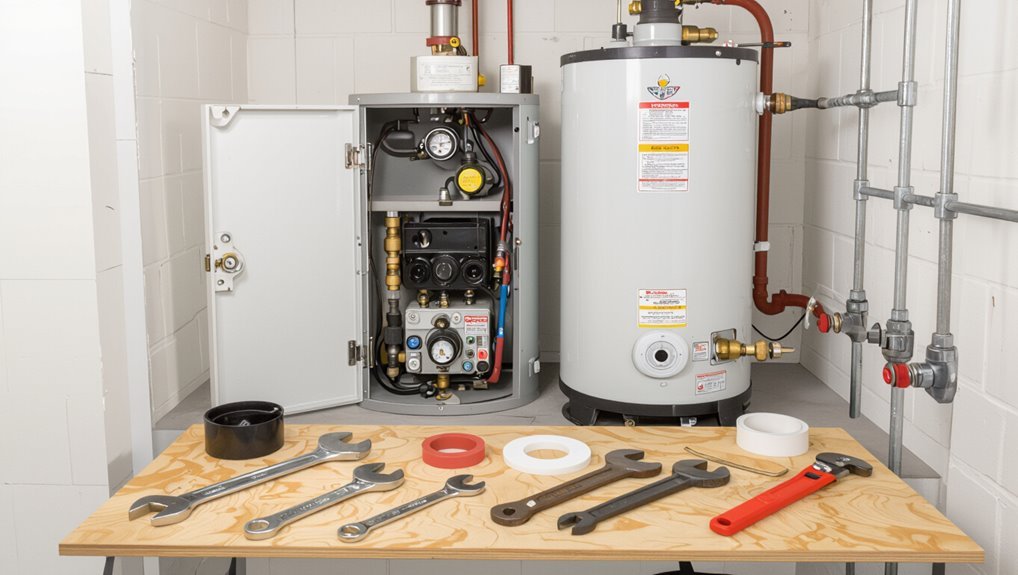
An overhaul of a gas hot water heater refers to an extensive service that inspects, cleans, repairs, and replaces key components such as the burner, thermocouple, pilot assembly, anode rod, and sediment-affected elements.
It is warranted when persistent performance problems, safety concerns, or age-related deterioration exceed the scope of routine maintenance; simple tasks like periodic flushing or thermostat adjustment typically do not qualify.
Depending on unit condition and homeowner skill, an overhaul can take a few hours to a full day, cost from a modest parts-only expense to several hundred dollars for replacement components, and may require intermediate mechanical and gas-safety knowledge for DIYers.
What “overhaul” means for a gas hot water heater
Overhauling a gas hot water heater involves a thorough set of inspections, repairs, and component replacements designed to restore safe, efficient operation and extend service life.
The process documents inspection of burner, thermocouple, gas valve, anode, tank condition, drain, and venting; replaces worn parts, seals, and controls; tests safety features and performs efficiency tuning.
It guides how to overhaul my gas hot water heater systematically.
When an overhaul is necessary vs. simple maintenance
Decide between simple maintenance and a full overhaul by comparing the heater’s symptoms, age, and service history against the extent of corrective work required.
Routine issues—minor leaks, sediment buildup, pilot outages—often need targeted maintenance.
Recurrent failures, corrosion, loss of efficiency, or safety concerns indicate overhaul.
Consider frequency of repairs, visible tank damage, and failed diagnostics to justify thorough disassembly and component replacement.
Expected time, cost range, and skill level for DIY overhaul
Several factors determine the time, cost, and skill required for a DIY gas hot water heater overhaul: the model and age of the unit, extent of corrosion or damage, whether the burner assembly, dip tube, or thermostat needs replacement, and the homeowner’s mechanical experience.
Typical overhauls take 3–8 hours, cost $150–$800 in parts, and suit intermediate DIYers; complex issues warrant a professional plumber for safety.
Safety Precautions and Preparations
Before beginning work, the technician guarantees appropriate personal protective equipment is worn and the workspace is arranged for safe access and spill containment.
Gas and electrical supplies are shut off following manufacturer and local code procedures, and the gas line is verified fully closed using both the shutoff valve and a leak detection method or meter.
Finally, the area is checked for adequate ventilation and carbon monoxide risks, with monitoring equipment used as needed before proceeding.
Personal protective equipment and workspace setup
Wear appropriate personal protective equipment and arrange the workspace to minimize hazards: safety glasses, heat-resistant gloves, long sleeves, and steel-toed boots protect against hot surfaces, flying debris, and dropped tools, while a respirator is recommended if rust, insulation, or sealant residues are present.
Guarantee good ventilation, clear floor space, stable lighting, non-slip footing, a fire extinguisher nearby, and organized tools for safe, efficient work.
Gas and electrical shutoff procedures
Shut off all fuel and electrical sources to the water heater and lock or tag controls to prevent accidental re-energizing: close the gas supply valve at the appliance or main gas line, turn off the water heater’s electrical breaker at the service panel, and, if present, shut off the pilot gas or gas control knob.
Confirm isolation of water heater circuits, label controls, and inform household members.
How to verify the gas is completely off
With fuel and electrical sources secured and controls tagged, the next step is to confirm that the gas supply is truly off.
The technician visually checks the shutoff valve position, listens for leaks, uses a handheld gas detector, verifies pilot flame extinguished, and confirms meter reads zero flow. Steps are documented before proceeding.
- Visually inspect valve position
- Listen for hissing
- Use a gas detector
- Check pilot status
- Verify meter/no flow
Ventilation and carbon monoxide safety checks
Several simple checks guarantee the work area remains safe from dangerous combustion byproducts. The technician inspects ventilation paths, clears obstructions, and confirms flue and chimney integrity.
A calibrated carbon monoxide detector is placed nearby and tested before work begins. Continuous monitoring occurs during overhaul.
If CO rises or ventilation is compromised, work stops immediately and a qualified professional addresses the hazard.
Tools and Materials Needed
A concise list of required tools—wrenches, pipe cutters, multimeter, gas leak detector, and socket sets—prepares the reader for a complete overhaul.
The section also notes replaceable parts and consumables to have on hand, such as thermostats, gas valves, T&P valves, anode rods, gaskets, and plumbing sealant.
Guidance is provided on choosing compatible replacements by matching model and serial numbers and verifying specifications against the manufacturer’s parts list.
Required tools for a full overhaul
Prepare a concise set of tools and materials before beginning the overhaul to guarantee each step proceeds efficiently and safely.
- Adjustable wrench and pipe wrench for fittings and unions
- Multimeter and non-contact voltage tester for electrical checks
- Pipe cutter, tube brush, and Teflon tape for plumbing work
- Screwdrivers, nut drivers, and hex keys for panels and burners
- Portable work light and safety gear (gloves, goggles, respirator)
Replaceable parts and consumables to have on hand
Stock essential replacement parts and consumables before beginning the overhaul to minimize downtime and avoid unsafe improvisation.
The homeowner should gather common wear items and safety-critical consumables to complete repairs efficiently and prevent repeat service calls.
- Anode rod
- T&P relief valve
- Gas control valve or thermocouple
- Flexible supply connectors
- Plumber’s tape, thread sealant, and replacement gaskets
How to choose compatible replacement parts (model/serial matching)
How can a homeowner guarantee replacement parts will fit and function correctly with an existing gas hot water heater?
Record model, serial, manufacture date, and exact part numbers from labels and manuals.
Cross-reference OEM schematics, use manufacturer websites or authorized dealers, and compare physical dimensions, connection types, and ratings (BTU, pressure).
When uncertain, consult OEM tech support or a licensed plumber before ordering.
Pre-Overhaul Inspection and Diagnosis
Before beginning work, a thorough pre-overhaul inspection identifies leaks, corrosion, improper venting, and other visible defects.
The technician then tests key components—thermostat, gas control valve, pilot assembly, and burner—to confirm function and measure performance.
Interpreting common failure signs, such as rusted tank walls, weak pilot flame, or inconsistent burner ignition, guides the decision whether to repair or replace each part.
Visual inspection checklist (leaks, corrosion, venting)
A systematic visual inspection focuses on identifying leaks, corrosion, and venting issues that indicate urgent repairs or unsafe operating conditions.
Check for water pooling, drips at fittings, and staining around tank seams.
Inspect corrosion on tank, pipes, and sacrificial anode.
Verify vent pipe alignment, secure joints, proper clearances, signs of soot, and adequate roof/chimney termination for combustion gas evacuation.
Testing components: thermostat, gas control valve, pilot assembly, burner
Begin by verifying the operational status of key controls and combustion components to pinpoint failures that simple adjustments can fix versus parts that require replacement.
- Confirm thermostat response with a multimeter and temperature change.
- Inspect gas control valve for leaks and proper outlet pressure.
- Light and observe pilot assembly stability and flame shape.
- Check burner ignition and uniform flame pattern.
- Verify safety interlocks and thermocouple voltage.
How to interpret common failure signs and decide what to replace
Several observable symptoms—unusual noises, fluctuating temperatures, soot or yellow flames, persistent pilot outages, and gas odors—offer direct clues about which components are failing and whether repair or replacement is warranted.
Correlate noise and sediment indicators with tank flushing or replacement; flame color and soot suggest burner or ventilation service; pilot issues indicate thermocouple or control valve faults; gas smell mandates immediate shutdown and professional intervention.
Step-by-Step Overhaul Procedure
The overhaul procedure proceeds in a logical sequence to guarantee safety and thoroughness.
First, gas, power, and water are shut off and the tank drained before access panels, the burner assembly, and pilot components are removed.
Next, burner and pilot parts are cleaned or replaced, the thermocouple or igniter inspected, the tank flushed and descaled with sediment and the anode rod checked.
Finally, the anode rod, T&P valve, and other sacrificial parts are replaced as required.
Step 1 Turn off gas, power, and water supply; drain the tank
Shut off the gas supply, power, and cold-water inlet before any disassembly to eliminate ignition, electrical, and flooding hazards; then attach a hose to the drain valve and empty the tank to a safe level for access and inspection.
Verify gas is secured at the shutoff and electrical breaker is off. Open a hot tap to relieve pressure, monitor drainage, and close the valve when finished.
Step 2 Remove access panels, burner assembly, and pilot components
Begin by removing the outer access panels to expose the burner compartment.
Then detach the burner assembly and pilot components in a logical sequence to prevent damage or misalignment.
Label fasteners and tubing, document orientation with photos, and use appropriate tools.
Cap or plug open gas fittings, support heavy parts during removal, and set components on a clean, protected surface for inspection or cleaning.
Step 3 Clean or replace burner and pilot; inspect and clean thermocouple/igniter
With the burner assembly and pilot components removed and laid out, attention turns to cleaning or replacing those parts and inspecting the thermocouple or igniter for proper operation.
Use a soft brush, compressed air, and mild solvent to remove soot and corrosion. Replace excessively worn burners or pilot jets.
Verify thermocouple continuity and clean its tip; replace if voltage output is low or intermittent.
Step 4 Flush and descale the tank; remove sediment and check anode rod
Drain the tank to clear accumulated sediment that reduces heating efficiency and accelerates corrosion.
After shutting gas and water, attach a hose to the drain valve, open a hot faucet, and flush until clear.
Use a descaling solution for mineral build-up if necessary.
Inspect the exposed anode rod for heavy pitting or depletion, documenting condition for potential replacement decisions later.
Step 5 Replace the anode rod, T&P valve, and sacrificial parts if needed
Proceed to replace the anode rod, temperature-and-pressure (T&P) valve, and other sacrificial components as identified during inspection to restore corrosion protection and safety function.
Use compatible, correctly sized replacements; apply thread sealant where required. Tighten to manufacturer torque, avoiding overtightening.
After installation, refill and pressurize the tank, check for leaks, and test the T&P discharge to verify proper operation before restoring normal service.
Step 6 Inspect and repair or replace gas control valve and thermostat
Begin by shutting off the gas supply, ensuring the pilot is extinguished and electrical power to any electronic controls is disconnected.
The technician inspects the gas control valve and thermostat for corrosion, leaks, or erratic operation.
Tests continuity and proper temperature cutoffs with a multimeter.
Replace faulty components with manufacturer-specified parts, ensuring correct settings.
Verify gas fittings and venting remain secure before proceeding.
Step 7 Reassemble, reconnect water and gas, and refill tank
With all components verified and replacements secured, the technician reverses the disassembly sequence: reinstalling the burner assembly, thermostat and control covers, insulation, and access panels in the factory order while torquing fasteners to specified values.
Flexible water and gas lines are reconnected with approved fittings and pipe sealant. Cold supply is opened slowly to fill the tank, bleeding air at fixtures until steady flow indicates full charge.
Step 8 Relight pilot, test burner operation, and check for leaks
Once the tank is full and the gas supply is confirmed isolated, the technician relights the pilot following the manufacturer’s sequence.
Then, the technician observes burner ignition and flame characteristics while checking all joints and fittings for leaks.
After stable ignition, the technician cycles the thermostat call to verify consistent ignition.
The technician inspects venting for proper draft and applies a leak detector solution to exposed gas connections.
Step 9 Adjust thermostat and verify proper temperature and pressure
The technician adjusts the thermostat to the manufacturer’s recommended setting, typically around 120°F (49°C). He then monitors the water temperature and pressure to verify the system operates within safe limits.
He verifies thermostat accuracy with a calibrated thermometer, checks the pressure relief valve and system gauge, confirms stable readings during demand cycles, and documents settings.
Final adjustments guarantee efficiency, safety, and code compliance.
Post-Overhaul Testing and Verification
After reassembly, a methodical testing sequence confirms system safety and performance.
This includes gas-connection leak checks, combustion and venting assessments, verification of water temperature and pressure, and testing of the temperature-and-pressure relief valve.
A concise monitoring checklist for the first 48–72 hours captures any emerging issues for prompt correction.
Safety leak testing for gas connections
Begin by isolating and depressurizing the gas supply before any leak testing proceeds.
Inspect fittings, apply approved soapy solution, restore low-pressure gas, watch for bubbles, and monitor for at least five minutes.
If bubbles appear, shut off gas and tighten or replace fittings. Record results and notify a licensed technician for unresolved leaks.
- Use approved soap solution
- Test under low pressure
- Check all joints
- Monitor duration
- Document findings
Combustion and venting performance checks
Initiate combustion and venting performance checks to confirm safe, efficient operation following overhaul work.
Inspect burner flame pattern and color, ensuring steady blue flame without yellow tipping.
Measure flue draft and CO levels at appliance and vent termination.
Verify vent pipe integrity, joints, clearances, and proper termination height.
Document readings and correct any backdrafting, soot, or combustion anomalies before returning heater to regular service.
Water temperature, pressure, and T&P valve functionality tests
One set of essential checks focuses on verifying water temperature, system pressure, and the Relief (T&P) valve function to guarantee the heater operates safely and within manufacturer specifications.
Measure outlet temperature at a tap, confirm thermostat setting and anti-scald devices.
Check static and running pressure against recommended ranges.
Manually lift the T&P valve lever briefly to verify discharge and reseal; replace if leaking or sticking.
Monitoring checklist for the first 48 to 72 hours
During the first 48 to 72 hours after overhaul, perform scheduled checks to verify stable operation and catch early faults:
- Inspect for leaks at all joints and fittings every 4–8 hours.
- Verify burner ignition and flame stability during initial heat cycles.
- Monitor outlet temperature and pressure under both static and running conditions.
- Check T&P valve seating after each heat cycle.
- Log any unusual noises, odors, or cycling behavior for immediate correction.
Continue hourly visual inspections during active heating.
- Record temperatures and pressures after each cycle.
- Guarantee pilot or ignition remains reliable.
- Confirm venting is clear and exhaust temperatures normal.
- Address any deviations promptly.
Common Problems During Overhaul and How to Fix Them
The overhaul can reveal several common faults that require targeted fixes.
Typical issues include difficulty lighting the pilot or intermittent ignition, persistent leaks after reassembly, sediment-related noises or banging after refilling, and low hot water volume or temperature fluctuations.
The following section outlines straightforward diagnostic steps and corrective actions for each.
Difficulty lighting pilot or intermittent ignition
Troubleshooting a pilot that’s hard to light or a burner that ignites only sporadically requires methodical checks of the ignition components and gas delivery.
Inconsistent ignition often stems from clogged pilot orifice, weak thermocouple response, faulty pilot tubing, or intermittent ignition modules.
Inspect and clean the pilot orifice, verify thermocouple voltage and tip placement, check tubing for kinks/leaks, and test/replace ignition module before reassembly.
Persistent leaks after reassembly
Recheck fittings and seals immediately when a water heater still leaks after reassembly, because remaining drips usually trace to a few predictable mistakes: improperly seated gaskets, loose connections, damaged threads, or missed corrosion beneath replacement parts.
Systematically tighten joints, replace compromised gaskets, apply appropriate thread sealant or tape, and inspect flanges and tank surfaces.
Pressure-test at operating pressure to confirm leak resolution.
Unusual noises or banging after refilling (sediment-related)
After verifying and sealing visible leaks, attention should shift to noises that begin once the tank is refilled; popping, banging, or rumbling often signals disturbed sediment.
Sediment accumulation beneath the burner can trap steam pockets and cause loud knocks. Flushing the tank, using a garden hose and full drainage until clear water appears, typically resolves the issue.
Repeat annually if heavy buildup recurs.
Low hot water volume or temperature fluctuations
Inspecting hot water volume and temperature behavior can quickly reveal issues like partially closed valves, clogged fixtures, failing thermostats, or mineral buildup inside the tank and heat exchanger; each produces distinct symptoms — reduced flow, rapid temperature swings, or a steady drop in peak temperature — and should be addressed in sequence from simple to complex so the underlying cause is isolated efficiently.
Check valves, clean aerators, test thermostats, flush tank, descale heat exchanger, and replace compromised components, verifying improvements after each action to confirm resolution and avoid unnecessary parts replacement.
Maintenance Schedule and Preventive Tips
A clear maintenance schedule helps preserve performance and prevents costly failures by specifying inspection and service intervals.
Monthly checks like pressure relief valve tests and annual tasks such as tank flushing and burner inspection can greatly extend the heater’s life.
Persistent issues—repeated leaks, strange noises, poor heating, or frequent pilot outages—indicate the need for professional service or replacement.
Recommended inspection and maintenance intervals
Because routine checks catch small problems before they escalate, a clear schedule of inspections and preventive tasks is essential for reliable operation and safety.
Recommended intervals prioritize safety and longevity: annual professional inspection, biennial combustion and venting check, sediment assessment every 2–3 years, pressure-relief valve testing per manufacturer, and corrosion/pipe inspections during major service visits.
- Annual professional inspection
- Biennial combustion/vent check
- Sediment assessment (2–3 years)
- Pressure-relief valve testing
- Corrosion and pipe inspection
Simple monthly and annual tasks to extend heater life
Monthly and annual tasks keep a gas hot water heater running efficiently and reduce the risk of sudden failures.
Monthly: check for leaks, test the temperature-pressure relief valve, inspect venting and pilot light, and confirm proper thermostat setting.
Annually: flush the tank to remove sediment, inspect and clean burner assembly, check anode rod condition, tighten fittings, and verify gas connections for safety and efficiency.
Signs that indicate professional service or replacement is needed
When should a homeowner call a professional or consider replacement?
Persistent leaks, rusty or discolored water, strange noises, inconsistent temperature, frequent pilot outages, or a failing pressure relief valve all warrant professional inspection.
Age over 10–15 years, repeated repairs, visible corrosion, or sediment buildup reducing capacity indicate replacement.
Prioritize safety—gas odors or carbon monoxide concerns require immediate service.
Cost-Benefit Considerations and When to Replace Instead
When evaluating whether to overhaul, make a partial repair, or replace a gas hot water heater, cost comparisons should weigh immediate expenses against projected future repairs and operating costs.
The unit’s age, expected remaining lifespan, and efficiency losses influence whether investment in repairs yields adequate long-term savings.
Safety concerns and environmental impacts—such as corrosion risks, venting failures, and poorer fuel efficiency—can justify replacement even when repair seems cheaper up front.
Comparing overhaul cost vs. partial repairs vs. full replacement
Several factors determine whether an overhaul, partial repair, or full replacement of a gas hot water heater is the most economical choice. Cost, age, damage extent, and safety risks guide decisions: minor leaks favor targeted repairs; corroded tanks require replacement; extensive component failure often justifies overhaul if unit is mid-life.
| Option | Typical outcome |
|---|---|
| Repair | Low cost, short-term |
| Overhaul | Moderate cost, extended life |
| Replace | High cost, long-term fix |
Lifespan factors and energy-efficiency implications
Although proper maintenance can extend service life, a gas hot water heater’s longevity and operating cost hinge on age, water quality, usage patterns, and component condition.
Older or corroded tanks and inefficient burners raise fuel consumption and repair frequency.
Calculating remaining useful life, projected energy bills, and repair costs helps determine if replacing with a high-efficiency model yields lower lifetime expense and improved performance.
Environmental and safety reasons to replace an aging unit
Consider replacing an aging gas hot water heater when rust, leaks, frequent pilot outages, or persistent combustion-soot indicate compromised safety and rising environmental impact.
Deteriorating tanks and inefficient burners increase the risk of carbon monoxide release, gas leaks, and water contamination while also wasting fuel and raising greenhouse-gas emissions.
Cost-benefit analysis should weigh repair frequency, efficiency loss, potential liability, and long-term energy savings from a modern, low-emission unit.
Resources, Parts Sources, and When to Hire a Professional
Finding compatible parts and reputable suppliers is essential to a successful overhaul, so homeowners should verify model numbers, OEM part lists, and supplier reviews before purchasing.
Hiring a licensed gas technician is recommended for tasks involving gas lines, combustion adjustments, or code compliance, with qualifications including proper licensing, insurance, references, and clear written estimates.
After work is completed, the homeowner should retain a service log, part receipts, and any permits or inspection reports for warranty and future maintenance records.
How to find compatible parts and reputable suppliers
Start by verifying the heater’s make, model, and serial number—this baseline information determines which replacement parts will fit exactly and which can be adapted safely.
Then seek OEM parts, certified aftermarket equivalents, and vendors with clear return policies. Compare prices, reviews, and shipping times.
- Manufacturer OEM parts
- Certified aftermarket brands
- Local plumbing supply houses
- Online marketplaces with ratings
- Warranty and return checks
Criteria for hiring a licensed gas technician
A qualified gas technician should be selected based on documented licensing, current insurance, and demonstrable experience with the specific heater make and model.
Proof of a state or local gas contractor license and general liability (plus workers’ compensation, if applicable) validates legal authority and financial protection, while references, job-specific certifications, and recent work examples confirm technical competence.
Pricing transparency, written estimates, warranty terms, and clear safety protocol guarantee responsibility.
Documentation to keep after an overhaul (service log, part receipts)
Record and retain concise documentation after an overhaul to guarantee safe operation, simplify future maintenance, and protect warranty rights.
Maintain a dated service log noting performed tasks, measurements, and technician or DIY initials.
Keep part receipts, model and serial numbers, and photos of installations.
Store documents digitally and physically.
Provide copies to service professionals and retain for warranty claims and resale disclosure.
Conclusion
Overhauling a gas hot water heater restores safety and efficiency when done methodically. Following precautions, proper tools, and diagnostic steps minimizes risk; “measure twice, cut once” applies to planning and parts replacement. Routine maintenance prevents common failures, but cost-benefit analysis can justify replacement for old, corroded tanks. When doubts arise or complications occur, hiring a professional guarantees code compliance and peace of mind, turning a risky DIY into a safe, long-lasting system.