
How to Locate a Water Main Break Fast: Step-by-Step Detection & Repair Tips
To quickly locate a water main break, start by identifying visible signs such as sinkholes, pooled water, or pavement collapse. Listen for sounds like gushing or hissing water. Once you’ve spotted these indicators, secure the area, shut off valves, and notify relevant utilities. Cross-check maps of the area and perform perimeter scans to mark potential zones. Utilize tools like acoustic correlators, pressure tests, tracer dyes, or thermal imaging to accurately pinpoint the leak. Control the water flow with temporary clamps or bypass pumping before proceeding with trench or trenchless repairs. Follow further guidelines for detailed steps, necessary tools, and safety considerations.
How to Quickly Identify a Water Main Break: Immediate Signs to Watch For
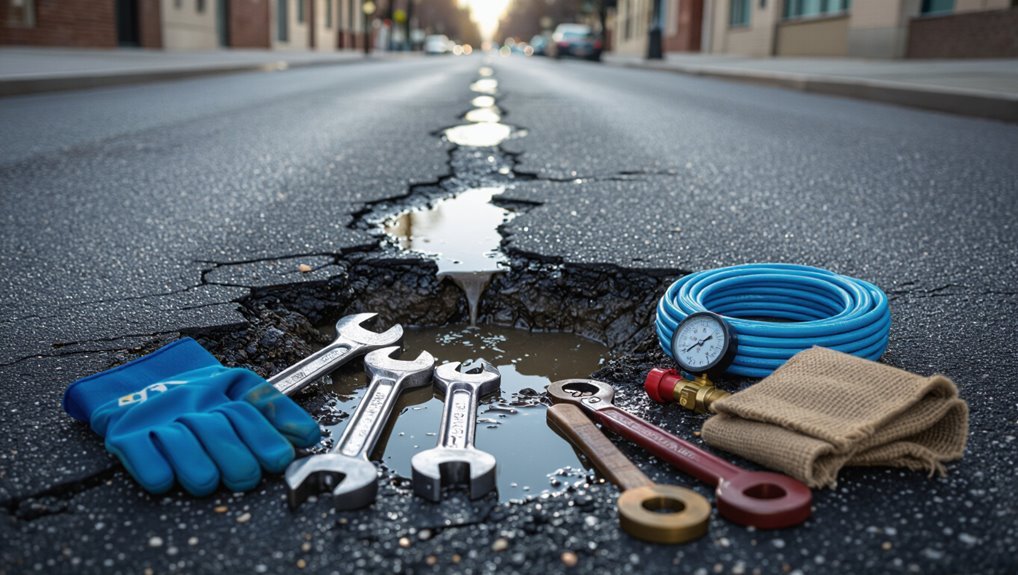
Visible signs such as sinkholes, pooled water, or collapsing pavement often mark the scene of a water main break.
Auditory cues like gushing or rushing water and sudden drops in household pressure provide immediate confirmation, while rusty or muddy water indicates contamination from pipe damage.
These events commonly occur after freeze–thaw cycles, heavy rain, or nearby construction, so timing and frequency help narrow the likely source.
Visible indicators at the scene (sinkholes, pooled water, pavement collapse)
Signs at the scene often make a water main break immediately apparent: sudden sinkholes or depressions in the ground, pooled or gushing water on streets and sidewalks, and buckled or collapsed pavement where subsidence has undermined the surface.
Observers note flow direction, turbidity, and staging of collapse to prioritize response. These visible cues guide crews on how to locate a water main break quickly and safely.
Auditory and pressure signs (gushing sounds, sudden low pressure)
How can a water main break be detected before damage becomes obvious to the eye?
Listeners may hear persistent gushing, hissing, or rumbling near streets or in basements.
Simultaneously, sudden drops in household or neighborhood water pressure—weak faucets, failing toilets—signal a possible main rupture.
These auditory and pressure changes warrant immediate inspection and notification of utilities to prevent escalation.
Water quality and discoloration signals (rusty or muddy water)
When a water main breaks, discoloration in taps and showerheads often provides an early warning: water may run brown, yellow, or cloudy as sediment, rust, and soil are drawn into the system.
Residents may notice metallic taste, staining on laundry, or particles settling in containers.
Such changes indicate disturbance in supply lines and warrant avoiding consumption, reporting the issue, and flushing systems after repairs.
Timing and frequency clues (after freeze/thaw, heavy rain, nearby construction)
Because pipes are especially vulnerable to rapid environmental changes, breaks often follow predictable triggers: thawing after a freeze, prolonged heavy rain that saturates soil and undermines bedding, or nearby excavation and heavy equipment operations that disturb or stress mains.
Operators should note clustering of incidents after such events, increased call volumes, and repeat failures at the same location, which indicate weakened sections needing prioritized inspection and repair.
First Actions to Take When You Suspect a Water Main Break
On noticing signs of a possible water main break, the first priority is to secure the area and keep people away from standing water and unstable ground.
Nearby meters, shutoff valves, and building water supplies should be turned off if it can be done safely, then utility companies and emergency services notified.
The scene should be photographed and notes taken to assist authorities and insurers.
Ensure safety and secure the area
Clear the immediate area and prioritize human and electrical safety before attempting any investigation.
Emergency responders or utility personnel should cordon off hazards, keep bystanders back, and mark unstable ground.
De-energize nearby electrical sources only via qualified crews.
Watch for contamination, fast-moving water, and sinkholes.
Document conditions for responders but avoid entering flooded zones or touching downed wires.
Shut off nearby meters, valves, and building water supply
After securing the scene and keeping people and equipment away from hazards, attention should turn to isolating water flow to limit damage and simplify repairs.
Personnel locate and close nearby stop valves, service meters, and building shutoffs in a logical sequence to prevent backflow and flooding.
Document valve positions, tag closed valves, and coordinate temporary isolation to preserve supply to unaffected areas while repairs proceed.
Notify utility companies and emergency services
Contact utility providers and emergency services immediately to guarantee a coordinated response and rapid mitigation.
The responder notifies the water utility, gas and electric companies if nearby infrastructure could be affected, and emergency dispatch for hazards or flooding.
Provide precise location, observed damage, estimated leak size, and any risks to public safety.
Await professional instructions and avoid re-entering unsafe areas.
Document the scene for authorities and insurers
Photograph and record conditions immediately to preserve evidence for authorities and insurers: take wide-angle shots of the overall scene, close-ups of the break, visible damage to infrastructure or property, timestamps or a timestamped device, and notes on weather and observed leak behavior.
- Capture overall context
- Detail the break and damage
- Note time, date, and weather
- Preserve original files and logs
Step-by-Step Detection Workflow for Locating the Break
The detection workflow begins with assembling maps, service records, and utility plans to establish a baseline for investigation.
A visual perimeter scan and marked zones guide targeted use of acoustic listening, correlators, pressure and isolation tests.
Tracer dye and smoke testing are then employed to confirm leak paths and pinpoint the break.
Gather maps, service records, and utility plans
Several key documents must be assembled before field work begins: as-built maps, service records, utility plans, and any recent repair logs.
These inform pipe locations, material types, valve positions, and previous failure points.
Cross-reference GIS layers with paper plans, note discrepancies, extract customer complaints tied to addresses, and flag confined spaces or critical services.
Prepare copies for crews and emergency responders.
Perform a visual perimeter scan and mark affected zones
Begin a systematic visual perimeter scan by circling the suspected area at a consistent distance while observing for signs of surface water, depressions, wet soil, sinkholes, unusual vegetation stress, and active leaks.
Record findings, photograph locations, and mark affected zones with flags or spray paint.
Note utilities, access points, and hazard indicators.
Establish a clear perimeter for crews and secure the scene.
Use acoustic listening techniques and correlators
Activate acoustic equipment and establish a systematic listening protocol to pinpoint the break with precision.
Technicians place ground microphones, contact sensors, and correlators along prioritized lines, recording noise signatures.
Correlation analysis isolates leak location by time-delay comparison between sensors.
Repeat measurements across frequencies and routes to confirm results.
Log coordinates and confidence levels for targeted excavation or further testing.
Conduct pressure testing and isolation tests
Perform controlled pressure testing and isolation to confirm suspected leak locations and narrow the search area.
Isolate sections with valves, record baseline pressures, then sequentially shut segments and monitor pressure decay.
Compare different isolation patterns to identify where loss persists. Document readings, times, and valve positions.
Use portable gauges and data loggers, and repeat tests after temporary repairs to verify restoration of system integrity.
Employ tracer dye and smoke testing for leak paths
Tracer dye and smoke testing provide visual confirmation of leak paths by introducing a detectable tracer into the system or surrounding soil and observing where it emerges.
Technicians inject non-toxic dye into isolated sections or force smoke into sewer or void spaces, then inspect surfaces, vents, and soft ground for stains or smoke plumes.
Document locations, photograph evidence, and mark points for excavation or further targeted testing.
Deploy remote sensing: ground-penetrating radar and infrared
After documenting dye stains and smoke emergence points, technicians expand inspection with remote sensing to map subsurface anomalies and thermal signatures indicative of a water main break.
GPR and infrared complement surface clues, refining depth and leak location before excavation.
- Use ground-penetrating radar for voids and pipe disturbances
- Scan with infrared for active cooling patterns
- Correlate datasets spatially
- Prioritize targets for potholing
Tools and Equipment Needed for Fast and Accurate Detection
A concise inventory of tools and equipment frames the search for a water main break and guarantees responses are fast and accurate.
Essential items range from basic hand tools and personal protective equipment to specialized acoustic leak detectors and correlators.
Supporting instruments include pressure gauges, data loggers, valve exercisers, tracer dyes, smoke machines, flow meters, and geophysical tools such as GPR, infrared cameras, and CCTV inspection systems.
Hand tools and safety gear
Several essential hand tools and basic safety gear enable fast, accurate detection of a water main break. Technicians rely on shovels, pry bars, pipe wrenches, adjustable pliers, and tapping keys for excavation and access.
Handheld flashlights, inspection mirrors, and levels aid visual checks.
Safety essentials include hard hats, high-visibility vests, gloves, steel-toe boots, hearing protection, and gas monitors for confined-space risk mitigation.
Acoustic leak detectors and correlators
Detecting subterranean leaks often begins with acoustic leak detectors and correlators, specialized instruments that translate and analyze the sound signatures of escaping water.
Technicians employ ground microphones, contact sensors, and correlating units to pinpoint leak locations between two sensors. These tools improve detection speed and accuracy, reduce excavation, and assist decision-making by providing audible cues, waveform displays, and time-delay correlation data for precise targeting.
Pressure gauges, data loggers, and valve exercisers
Effective leak location relies on precise measurement and control tools such as pressure gauges, data loggers, and valve exercisers to capture transient events, document trends, and manipulate system flow for testing.
Pressure gauges verify static and dynamic pressures; data loggers record time-stamped anomalies for analysis; valve exercisers guarantee isolation, confirm responsiveness, and reduce false positives by enabling staged shutoffs and pressure stabilization during diagnostics.
Tracer dyes, smoke machines, and flow meters
Apply tracer dyes, smoke machines, and flow meters to pinpoint leaks quickly and validate suspected break locations: dyes reveal seepage paths in open water or accessible trenches, smoke machines force visible signs out of underground conduits and service lines, and flow meters quantify anomalies in system throughput to prioritize search areas.
Operators should follow safety, environmental, and regulatory protocols, calibrate instruments, and document readings for targeted excavation.
Geophysical tools: GPR, infrared cameras, and CCTV inspection
Geophysical tools such as ground-penetrating radar (GPR), infrared cameras, and CCTV inspection provide complementary, non-invasive methods to locate and assess water main breaks with speed and precision.
GPR maps subsurface anomalies; infrared detects thermal contrasts from leaking water; CCTV inspects interior pipe conditions and pinpoint leak locations.
Combined, they reduce excavation, confirm damage extent, and guide targeted repairs for faster restoration.
How to Locate the Precise Break Point in Different Environments
Locating the exact break point requires different tactics depending on the setting: urban streets and asphalted areas often need acoustic listening and pavement scanning, while residential yards may allow visual inspection and shallow excavation.
Commercial and industrial sites demand coordination with facility maps and careful work around heavy infrastructure to avoid further damage.
Frozen ground and winter conditions call for thermal imaging, thawing techniques, and adjustments for reduced surface signs.
Urban streets and asphalted areas
When a water main breaks beneath urban streets or asphalted areas, responders must rapidly identify the exact break point despite surface coverings and traffic constraints.
Crews use sounding, ground-penetrating radar, and acoustic correlators from manholes or exposed valves.
Traffic control and pavement saw-cutting target isolated zones.
Temporary trenching and probe holes confirm voids before permanent excavation and repair, minimizing disruption and collapse risk.
Residential yards and lawns
In many residential yards and lawns, visible signs such as soggy patches, depressions, or unusually lush vegetation guide responders toward the likely area of a water main break.
Inspectors also listen for subsurface gurgling, check meter pits, and follow wet trails toward utility markers.
Probe carefully near sidewalks, driveways, and irrigation lines to pinpoint softened soil and the pipe cavity without damaging property.
Commercial and industrial sites with heavy infrastructure
After evaluating residential indicators, responders shift focus to commercial and industrial sites where heavy infrastructure obscures typical surface clues.
Teams rely on acoustic correlators, pressure loggers, and valve isolation zones; utility maps, as-builts, and CCTV inspections narrow search areas.
Coordination with site managers secures equipment shutdowns and access.
Safety protocols and traffic control protect crews while pinpointing breaks beneath pavement and structural slabs.
Frozen ground and winter-specific challenges
Responders adjust techniques for frozen ground and winter hazards, where frost heave, ice crusts, and snow cover mask seepage and alter acoustic signatures.
They prioritize thermal imaging, ground-penetrating radar, and acoustic sensors tuned for attenuated signals.
Probe holes and melted test patches confirm locations while avoiding thaw-induced collapse.
Coordination with utilities, careful shoring, and timed thawing minimize excavation risk and service disruption.
Repair Options Once the Break Is Located
Once the break is located, repair strategies range from immediate temporary measures—such as clamps, saddle repairs, and bypass pumping—to permanent solutions like trench excavation and full pipe replacement.
Where excavation is impractical, trenchless options such as slip-lining, pipe bursting, and cured-in-place pipe (CIPP) offer less disruptive alternatives.
Additional work may include valve replacement and reconnection of service lines to restore system integrity.
Emergency temporary fixes: clamps, saddle repairs, and bypass pumping
Stabilize the scene by isolating the damaged section and evaluating pressure and flow before applying any temporary repair.
Clamps, saddle fittings, and bypass pumping serve as short-term measures to stop leaks, maintain service to critical customers, and allow crews to plan permanent repairs.
Technicians select clamp size/material, seat saddles over clean pipe, monitor for seepage, and deploy bypass pumps with redundancy until a scheduled permanent restoration.
Trench excavation and full pipe replacement
Excavate a controlled trench around the failed segment to expose the pipe, verify the extent of damage, and provide safe access for replacement crews.
Remove compromised pipe and bedding, assess adjacent fittings and valves, and prepare sound ends for connection.
Install new pipe matching material, diameter, and pressure rating.
Backfill in layers with proper compaction, restore surface, and pressure-test the replaced section before returning to service.
Trenchless repair methods: slip-lining, pipe bursting, cured-in-place pipe (CIPP)
Consider trenchless repair methods when surface disruption must be minimized or rapid restoration is needed: slip-lining, pipe bursting, and cured-in-place pipe (CIPP) each rehabilitate or replace a damaged main without full open-cut excavation.
Slip-lining inserts a smaller carrier pipe; pipe bursting fractures the old pipe while pulling a replacement; CIPP creates a seamless cured resin liner inside the existing pipe, restoring structural integrity and flow.
Valve replacement and service line reconnections
After deciding whether trenchless rehabilitation or replacement is appropriate, attention turns to restoring control and service at the affected location: valves that fail or leak and damaged service connections commonly require direct replacement or reconnection to reestablish safe, reliable flow.
Technicians isolate the zone, excavate minimal exposure, swap leaking valves, replace corroded fittings, and reconnect or renew service lines with tested joints and pressure verification.
Prioritizing Repairs and Managing Water Service During Work
Decision-making on repairs is guided by clear criteria distinguishing emergency interventions (threats to life, major service loss, or structural risk) from scheduled work addressing lower-risk leaks.
Crews stage bypass pumps and temporary connections to maintain supply while communicating outages, safety notices, and expected timelines to affected customers.
Restoration follows controlled procedures for pressure recovery and system flushing to guarantee safe, reliable service before normal operations resume.
Criteria for emergency vs. scheduled repairs
When evaluating a suspected water main failure, utilities classify incidents as emergencies or scheduled repairs based on immediate public safety risk, the extent of service disruption, and potential for rapid deterioration.
High-priority emergencies include large leaks undermining roadways, uncontrolled flooding, contamination threats, and losses of service to critical facilities.
In contrast, smaller, contained leaks with low risk to infrastructure or health can be deferred for planned outages and coordinated repairs.
Emergency criteria also consider traffic hazards, environmental impact, vulnerable populations affected, weather conditions, resource availability, and regulatory reporting obligations.
These factors guide immediate mobilization versus scheduled interventions to minimize risk and restore service efficiently.
Staging bypass pumps and temporary supply connections
Deploying bypass pumps and arranging temporary supply connections require coordinated planning to maintain service continuity, protect public health, and enable safe excavation and repair.
Field teams assess flow rates, pressure needs, and isolation points, then stage pumps, hoses, manifolds, and fittings.
Temporary services are labeled, chlorinated, and monitored for pressure and contamination.
Records document connections, decommissioning, and restoration sequencing.
Communicating outages and safety notices to customers
Notify affected users promptly and clearly about planned or emergency outages and any safety precautions required, using multiple channels (automated calls, texts, social media, website updates, and local media) to reach diverse populations.
Communications should state expected duration, alternative resources, health advisories, and contact info.
- Estimated outage timeframe
- Alternative water access locations
- Boil or health advisories
- Dedicated hotline and updates schedule
Restoring service and controlled pressure recovery procedures
Prioritize repairs by safety risk and critical service needs, restoring potable supply first to hospitals, emergency services, and facilities serving vulnerable populations;
coordinate isolated repairs to limit affected areas and keep pressure zones stable.
Implement controlled pressure recovery: slowly reintroduce flow, monitor for leaks, air pockets, and pressure surges.
Verify water quality, flush mains, and approve reconnection only after tests confirm safe pressure and potable standards.
Common Causes of Water Main Breaks and How They Affect Detection
Common causes of water main breaks include corrosion and material failures, external stresses from traffic, construction, and ground movement, freeze/thaw cycles, and aging infrastructure compounded by inaccurate maps.
Each cause produces distinct leak signatures and complicates detection methods such as acoustic listening, pressure monitoring, and visual inspection.
Understanding these patterns helps prioritize diagnostic techniques and target likely pipe segments.
Corrosion and material failure patterns
Examine how corrosion and material fatigue undermine pipe integrity, producing cracks, perforations, and joint failures that often originate invisibly within the pipe wall.
Metal loss, pitting, and galvanic reactions reduce thickness and promote brittle fracture; cast iron and older mains develop hairline fissures.
Detection shifts toward acoustic anomalies, pressure transients, and localized leakage mapping to pinpoint concealed deterioration before catastrophic failure.
External stresses: traffic, construction, and ground movement
When subjected to surface loads and ground movement, water mains develop localized stresses that accelerate cracking, joint separation, and abrasion at contact points.
Traffic vibrations, heavy vehicle loads, and nearby excavation induce fatigue and misalignment.
Soil settlement and lateral shifting change support conditions, concentrating bending and shear.
These external forces complicate leak detection by creating intermittent flow patterns, false noise signatures, and unpredictable failure locations.
Freeze/thaw cycles and seasonal factors
Although temperature swings are cyclical, freeze/thaw processes impose acute mechanical and hydraulic stress on buried water mains, causing pipe material contraction and expansion, frost heave, and ice lens formation that can crack pipe walls or open joints.
Seasonal ground saturation, rapid thaw runoff, and repeated freeze cycles accelerate deterioration, obscure leak signatures, alter pressure patterns, and complicate acoustic or infrared detection efforts.
Aging infrastructure and map inaccuracies
Because decades of service progressively weaken materials and joints, aging water mains are a primary source of unexpected breaks and present distinct detection challenges.
Corroded pipes, brittle fittings, and hidden fatigue failures increase leak likelihood.
Compounding this, outdated or inaccurate utility maps mislead crews, delaying pinpointing and access.
Accurate records, routine inspections, and updated GIS layers improve response speed and repair precision.
Preventive Strategies to Reduce Future Breaks and Speed Detection
Effective prevention combines asset management, monitoring technology, and operational controls to both reduce break frequency and shorten detection time.
Regular condition assessments and targeted replacement programs, continuous leak detection with telemetry, and disciplined valve and pressure management including transient protection form the core actions.
Accurate records, updated maps, and ongoing staff training guarantee those measures are implemented quickly and consistently.
Regular condition assessment and proactive replacement programs
Implementing regular condition assessments and proactive replacement programs reduces the incidence and impact of water main breaks by identifying vulnerable pipes before failure.
Utilities prioritize inspections, prioritizing age, material, failure history, and soil conditions.
Targeted rehabilitation, pipe replacement, and scheduled capital planning extend system life.
Transparent risk scoring and staged investments optimize budgets, minimize emergency repairs, and improve network reliability for consumers.
Leak detection monitoring systems and telemetry
Alongside planned inspections and targeted replacements, continuous leak detection monitoring and telemetry provide real‑time visibility into pipeline performance and accelerate response to emerging failures.
Networked acoustic sensors, pressure and flow meters, and correlating software detect anomalies, localize leaks, and prioritize alerts. Remote dashboards and automated notifications shorten dispatch times.
Data trends support targeted maintenance, validate repairs, and guide system optimization to reduce future breaks.
Valve management, pressure control, and transient protection
Manage valves and control pressure to reduce stress on mains and limit the scope of failures.
Operators should zone systems, use valve exercises to guarantee operability, and implement pressure-reducing and surge-relief devices.
Maintain stable setpoints, monitor transient events with sensors, and install air chambers or surge suppressors.
Coordinated valve operations and automatic pressure controls speed isolation and minimize pipe fatigue, reducing break frequency.
Record keeping, mapping updates, and staff training
After stabilizing pressure and ensuring reliable valve operation, attention must shift to documentation, mapping, and personnel competence to sustain those gains and accelerate future fault response.
Regularly updated GIS maps, standardized incident logs, and scheduled training drills reduce response time and repeat failures.
- Maintain centralized incident records with timestamps and repairs
- Update GIS and as-built maps after each intervention
- Train crews on detection tools and valve operations
- Audit procedures and performance quarterly
Cost, Time, and Resource Considerations for Detection and Repair
Typical detection methods and repair types carry a range of costs that should be compared against budget constraints and expected service life.
Emergency repairs are completed on accelerated timelines with higher labor and material premiums, while planned repairs allow cost savings and staged resource deployment.
Effective response requires assigning personnel, equipment, and contractors in advance to minimize downtime and control expenses.
Typical cost ranges for detection methods and repair types
Several common detection methods and repair approaches span a broad range of costs and timelines depending on pipe material, access difficulty, and local labor rates. Typical detector costs: acoustic/sonic meters $100–$1,000; leak correlation $500–$3,000. Repair types vary: small patch $200–$2,000; section replacement $1,000–$10,000; full main replacement $10,000+.
| Service | Typical cost range |
|---|---|
| Detection | $100–$3,000 |
| Repair | $200–$10,000+ |
Expected timelines for emergency versus planned repairs
When a water main failure poses immediate hazards to property or public safety, emergency repairs are mobilized within hours to days and prioritize rapid isolation and temporary fixes.
Planned repairs, by contrast, follow a schedule that allows for design, permitting, traffic coordination, and full materials procurement, typically taking weeks to months from assessment to completion.
Emergency timelines compress assessment and temporary restoration; planned projects allow thorough diagnostics, permanent repairs, and staged reinstatement.
Resource allocation and contractor coordination
Shifting from timelines to the practicalities of implementation, managers must balance cost, time, and available skillsets when allocating resources for detection and repair.
Prioritization focuses on critical infrastructure, rapid-response teams, and necessary equipment. Contracting decisions weigh price, certification, and local availability.
Clear scopes, staged payments, and communication protocols minimize delays and cost overruns while ensuring regulatory compliance and efficient restoration.
Real-World Examples and Short Case Studies
Several brief case studies illustrate contrasting challenges: an urban response to a break beneath a busy arterial, a rural main with long-distance detection and limited access, and a winter incident where frozen ground complicated locating and repair.
Each example highlights specific tactics, equipment choices, and logistical trade-offs. These scenarios ground the preceding discussion in practical lessons for planning and response.
Rapid urban response: locating a break under a busy road
Responders mobilized quickly to pinpoint a leak beneath a congested arterial, balancing speed with public safety and traffic control.
Crews used acoustic correlators, ground-penetrating radar, and pressure-log analytics to narrow the zone.
Coordinated lane closures, real-time traffic rerouting, and utility markings minimized disruption.
Excavation located a fractured joint; temporary bypass and expedited repair restored service within hours, limiting collateral damage and customer outages.
Rural main break: long-distance detection and access challenges
When a water main fails miles from the nearest crew and beneath unpaved terrain, detection and access require a different set of tactics than urban incidents.
Crews rely on pressure analytics, acoustic loggers deployed from vehicles, and aerial surveys to pinpoint leaks.
Access often demands temporary roads, hauling equipment over rough ground, coordinating with landowners, and staging portable pumps and fittings for remote emergency repairs.
Wintertime break case: frozen ground solutions
Crews faced with water main failures in winter often contend with frozen soil, iced-over surface water, and brittle pipe joints that complicate leak detection and repair.
The following short case studies illustrate practical adaptations—heated excavation tents, insulated trench boxes, and the use of thawing blankets and hydronic heaters—to restore service quickly while minimizing collateral damage to infrastructure and landscapes.
One city used portable steam thawing to locate a hidden split; a utility deployed insulated cofferdams and rapid-fit couplings, reducing outage duration and restoring pressure without extensive daylighting.
Checklist for Responders: Fast-Action Steps and Equipment Inventory
Responders should follow a concise checklist that prioritizes safety, swift diagnostics, and immediate containment.
Essential items include a detection equipment quick-pack and a repair and safety materials pack to enable rapid action.
Suggested contents and steps are summarized below for quick reference:
- Immediate responder checklist
- Detection equipment quick-pack
- Repair and safety materials pack
- Communication and documentation tools
Immediate responder checklist
Begin by isolating the affected zone and establishing a secure perimeter to protect personnel and the public while initial assessments proceed.
Responders confirm shutoff valves, notify dispatch, and assess hazards (traffic, gas, electrical).
Assign roles: safety officer, lead inspector, communications.
Document conditions, control water flow, and initiate temporary repairs or containment.
Prepare for handover to repair crews with concise incident log.
Detection equipment quick-pack
After the perimeter is secured and roles assigned, attention shifts to assembling a compact detection equipment quick-pack to accelerate locating the break and minimizing downtime.
The pack contains acoustic leak correlators, ground microphones, portable pressure gauges, thermal cameras, pipe locators, GPS-enabled mapping tablet, spare batteries, signal clamps, ear protection, and waterproof flashlight.
Items are organized for rapid deployment and chain-of-custody logging.
Repair and safety materials pack
Assemble a compact repair and safety materials pack tailored to the specific pipe type and site conditions, ensuring crews can shift from detection to secure, effective remediation without delay.
Include pipe clamps, repair sleeves, gasket kits, couplings, sealants, hose and valve isolation gear, adjustable wrenches, torque tools, emergency shutoff tags, spill absorbents, PPE (gloves, eye protection, high-visibility vests), and portable lighting.
Conclusion
To summarize, responders treat a water main break like a sudden storm: swift assessment, coordinated action, and precise tools cut through confusion. Rapid identification, a clear detection workflow, and environment-specific locating techniques minimize damage and downtime. Investments in training, monitoring, and preventive maintenance repay quickly through faster repairs and lower costs. With checklists and the right gear at hand, teams can move from uncertainty to control with predictable speed and efficiency.
