
How to Disconnect a Gas Fireplace Safely: Step-by-Step DIY Guide
To safely disconnect a gas fireplace, follow these key steps: isolate the gas at the main valve, shut off electrical power, and ventilate the area. Use a gas detector to confirm zero pressure. Wear appropriate personal protective equipment (PPE) and utilize the right tools. Relieve any remaining gas, then disconnect and cap the line with approved fittings. Check and seal vents, and test joints with a leak solution. Always adhere to local codes and schedule a licensed inspection. For detailed procedures, diagrams, and troubleshooting tips, continue reading.
Quick safety summary and when to disconnect a gas fireplace
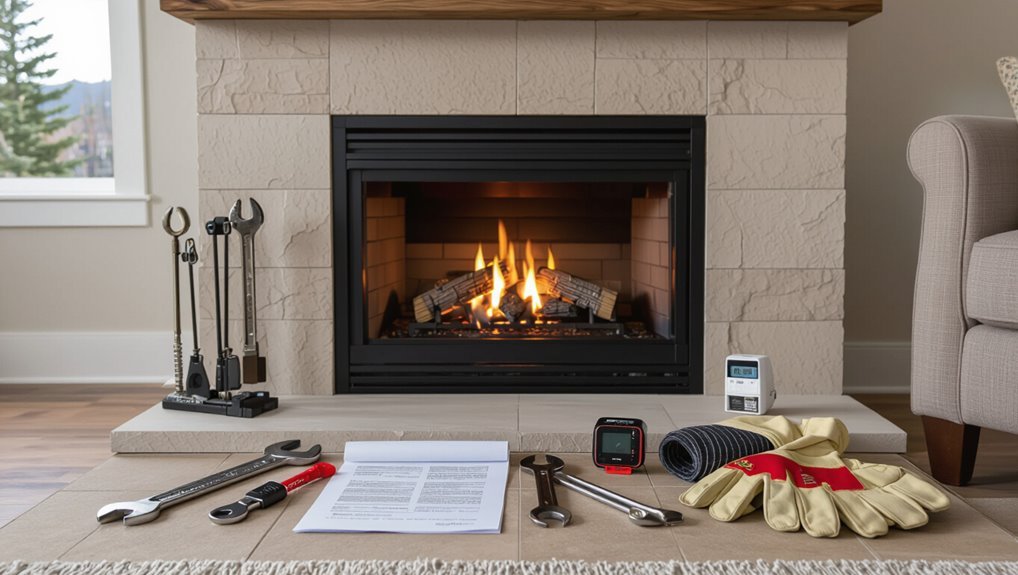
Improper disconnection can cause gas leaks, fire, or carbon monoxide exposure and should be treated as a safety hazard.
A professional disconnect is recommended whenever the unit is being installed, replaced, undergoing significant maintenance, or moved.
Clear, immediate precautions—shutting off the gas supply and ventilating the area—are essential before any work begins.
Immediate risks of improper disconnection
Disconnecting a gas fireplace without proper precautions can cause gas leaks, fire, carbon monoxide exposure, or damage to the appliance and piping.
When learning how to disconnect a gas fireplace, users face immediate risks: uncontrolled gas release, ignition sources nearby, toxic fume buildup, and compromised seals or valves.
Prompt detection and controlled shutdown are essential to prevent injury, property loss, or lingering contamination.
Situations that require disconnecting (installation, replacement, maintenance, moving)
Several common situations call for shutting off and disconnecting a gas fireplace: new installations, appliance replacement, routine or corrective maintenance, and relocating the unit during a home move or renovation. Disconnecting prevents leaks, guarantees technician safety, and complies with codes. Decisions hinge on project scope, gas shutoff access, and appliance condition.
| Situation | Reason |
|---|---|
| Installation | New connections |
| Maintenance | Safety checks |
Tools, materials, and safety gear needed
The section lists the specific tools and supplies required for a safe disconnection, including wrenches, pipe sealant, and a gas-capable shutoff cap.
It also covers essential personal protective equipment and recommended ventilation steps to minimize inhalation and fire risks.
Finally, clear criteria are given for when the job should be handed to a licensed professional rather than attempted as a DIY project.
Required tools and supplies
Before beginning any work, gather the specific tools, materials, and personal protective equipment required for safely disconnecting a gas fireplace to guarantee the job proceeds efficiently and without unnecessary risk.
Essential items include:
- Adjustable wrench and pipe wrench for gas fittings
- Screwdrivers (Phillips and flathead) for panels
- Gas-capable leak detector solution and sealing tape
- Flashlight and drop cloth for workspace illumination and protection
Personal protective equipment and ventilation precautions
With tools and materials assembled, attention shifts to protective gear and ventilation measures that reduce injury and inhalation risks during disconnection.
The person dons appropriate PPE, guarantees airflow, and stages extinguishing equipment.
Visualize required items:
- Thick work gloves resisting cuts and heat
- Safety goggles sealing around eyes
- NIOSH-rated respirator for gas/soot
- Portable fan or open windows for cross-ventilation
When to call a professional instead of DIY
When uncertainty exists about gas line integrity, appliance age, or hidden damages, a qualified technician should perform the disconnection. Professionals handle leak testing, valve replacement, and code compliance. Call a pro for corroded fittings, unknown piping, high carbon monoxide risk, or when permits are required.
| Tool | Role |
|---|---|
| Leak detector | Identify leaks |
| Wrench | Secure fittings |
| Valve kit | Replace shutoffs |
| CO monitor | Safety check |
| Permit | Legal compliance |
Preparing the area and preliminary checks
Before any disconnection work begins, the technician locates the gas shutoff valve and confirms the fireplace model and fuel connection type.
The thermostat or remote should be switched off and the pilot assembly extinguished to prevent accidental ignition.
The area is then checked for the odor of gas and scanned with a gas detector; if gas is present, work is halted and the gas company contacted.
Locate gas shutoff valve and verify appliance type
Locate the appliance’s gas shutoff valve and confirm the fireplace type before any disconnection begins. Visually trace the gas line from the wall or floor to find the shutoff; note valve orientation. Verify if the unit is natural gas or propane and classify model (built‑in, insert, or freestanding). Record findings and take photos for reference.
| Item | Action |
|---|---|
| Valve | Locate and note orientation |
| Fuel | Identify natural gas vs propane |
| Model | Classify fireplace type |
Turn off the thermostat/remote and pilot assembly
Power down any thermostat or remote control and extinguish the pilot assembly to eliminate active ignition sources before working on the fireplace.
Confirm power to electronic ignition is off and remove batteries from remotes. Allow pilot components to cool.
Note pilot labels or markings for later reassembly. Keep ignition switches in the OFF position and secure controls to prevent accidental reactivation during disconnection.
Check for gas smell and use a gas detector
Any lingering odor of gas should be checked before any disassembly begins: the technician visually inspects the area for signs of leaks and then sniffs cautiously from a safe distance, avoiding direct inhalation. A handheld gas detector is then used to confirm concentration levels; if readings exceed safe thresholds, evacuation and utility shutoff follow.
| Step | Action |
|---|---|
| 1 | Visual check |
| 2 | Cautious sniff |
| 3 | Detector scan |
| 4 | Evacuate if high |
| 5 | Call utility/pro |
Step-by-step gas fireplace disconnection process
The disconnection process proceeds in a clear sequence to guarantee safety and prevent leaks.
First, the main gas supply is shut off and pressure confirmed, followed by any electrical disconnection.
Remaining gas is bled and the line capped before flexible connectors or unions are removed and the unit or log set is safely taken out.
Step 1 Shut off the main gas supply and confirm pressure is off
Begin by locating and turning off the home’s gas shutoff valve that supplies the fireplace, then verify the line is depressurized before proceeding.
Confirm the valve is fully closed, then open a nearby appliance or test port to bleed residual gas.
Use a manometer or soapy-water check at fittings to guarantee no pressure remains.
If uncertainty exists, contact a licensed technician before continuing.
Step 2 Turn off and disconnect electrical supply (if applicable)
Shut off power at the circuit breaker and confirm the fireplace is electrically dead before touching wiring or components.
Disconnect the appliance from its electrical source: remove fuses or switch off the dedicated breaker, then test with a multimeter or non-contact tester.
Label wires, photograph connections, and detach wiring at the junction box.
Secure exposed conductors with wire nuts and close the access panel.
Step 3 Relieve remaining gas from the line and cap the line
Relieve any remaining gas pressure in the line before making permanent closures by locating and closing the appliance shutoff valve, then venting the downstream pressure at a designated test port or by slowly opening a downstream appliance connection while following local codes.
After pressure is verified zero, clean and thread the pipe end, apply approved pipe sealant, and install a permanent cap or plug.
Verify no leaks.
Step 4 Disconnect flexible connector or union fittings
Disconnect the flexible connector or unscrew the union fitting to separate the fireplace from the household gas line, working only after the downstream pressure has been confirmed zero. The installer loosens fittings, uses two wrenches, and inspects threads and seals. Any damaged connector is replaced; loose debris is cleared. Test for leaks at the capped line before proceeding.
| Tool | Action | Check |
|---|---|---|
| Wrench | Loosen | Threads |
| Rag | Clean | Seals |
Step 5 Remove the fireplace unit or gas log set safely
Lift the fireplace unit or carefully extract the gas log set following confirmation that the supply is isolated and the flexible connector or union has been removed.
Support the unit to prevent tipping, remove mounting screws or brackets, and lift straight out to avoid snagging venting or surround.
For log sets, handle ceramics gently, storing components on a padded surface.
Inspect for damage and debris before disposal.
Step 6 Seal or cap venting and chase penetrations
Begin by identifying all vent and chase openings that penetrated exterior walls or the roof during the fireplace installation.
Cap metal vents with appropriate end caps and seal joints with high-temperature silicone or metal tape.
Install chimney or chase caps where applicable, insulate gaps to prevent drafts, and apply exterior-grade sealant or flashing.
Label sealed penetrations and document work for future inspections.
Step 7 Test for leaks after capping using soapy water or detector
After capping and sealing the gas lines and vents, verify the integrity of every connection by testing for leaks using either a soapy-water solution or a calibrated gas detector. Inspect bubbles or detector readouts slowly, re-tighten or re-seal any suspect joints, and ventilate area if leaks are found. Document results and do not restore service until all tests are clear.
| Method | Indicator |
|---|---|
| Soapy water | Bubbles |
| Detector | PPM rise |
| Visual | Moisture/damage |
| Action | Re-seal/retest |
Detailed guidance for common fireplace types
The section outlines specific disconnection considerations for common gas fireplace types.
It contrasts direct-vent units, which often require attention to sealed vent connections and coaxial piping, with vent-free log sets that have unique combustion air and regulatory requirements.
It also addresses natural draft/B-vent fireplaces where chimney inspection, cap removal, and safe vent handling are priorities.
Direct-vent gas fireplaces disconnection nuances
When disconnecting a direct-vent gas fireplace, attention to the sealed combustion system and its dual-vent configuration is essential to maintain safety and avoid damage.
The technician should shut off gas, cap supply, and verify no pressure.
Preserve sealed vent integrity by not disassembling coaxial pipes without manufacturer guidance.
Label components, document orientations, and consult the manual for reassembly or replacement parts.
Vent-free gas log sets special considerations
Although vent-free gas log sets offer installation flexibility, they demand specific precautions because they intentionally release combustion byproducts into the living space.
Disconnecting one requires ensuring the gas supply is shut off, verifying oxygen depletion safety devices and pilot assembly removal, and avoiding sealed-room operation.
Technicians should check local codes, label disconnected valves, cap lines properly, and test for leaks before restoring service or leaving the unit idle.
Natural draft / B-vent gas fireplaces chimney and vent handling
Address chimney and B-vent systems by evaluating clearances, draft characteristics, and termination conditions before disconnecting or servicing a natural-draft gas fireplace.
Inspect chimney liner, cap, and flue for obstruction, creosote, or damage.
Verify proper draft with smoke or draft gauge.
Confirm vent connectors are intact, sealed, and slope correctly.
Seal or cap terminals per code after gas isolation; document findings.
Safety checks and verification after disconnection
After disconnection, a soap-bubble leak test should be applied to all fittings and joints to reveal any escaping gas.
A manometer or electronic gas detector can provide quantitative confirmation of zero pressure or trace gas presence.
The area should be checked for odor and monitored for 24 to 48 hours to guarantee no delayed leakage.
How to perform a soap-bubble leak test
Begin by ensuring the gas supply is shut off and the appliance is depressurized.
Then mix a solution of mild dish soap and water in a spray bottle or brushable container.
Apply to joints and fittings, watch for steady bubble formation, and reapply if needed.
If bubbles appear, tighten connections or cap the line and contact a professional.
- glistening soap film
- tiny expanding bubbles
- seams and coupling threads
- slow persistent froth
Using a manometer or gas detector for assurance
Verify pressure and absence of leakage with a manometer or an electronic gas detector before leaving the fireplace isolated.
A manometer confirms zero or stable residual pressure at the shutoff; follow manufacturer ranges.
An electronic detector scans fittings, valves, and unions for trace gas; hold near connections and seams.
Record readings, note instrument sensitivity, and repeat after a short interval to ascertain stability before concluding the check.
Confirming no odor and monitoring for 24 to 48 hours
How should one proceed once instruments show no leaks?
The person should ventilate the area, open windows, and avoid ignition sources.
They must perform a careful sniff test, checking concealed spaces and vents.
Continue passive monitoring for 24–48 hours, rechecking periodically and after temperature or pressure changes.
If any odor returns, stop, evacuate, and contact the gas utility or a licensed technician immediately.
Troubleshooting and common problems
The guide next outlines common issues encountered after shutoff, starting with how to respond if a gas smell persists and when to evacuate and call professionals.
It then addresses techniques for freeing stuck or seized fittings safely without causing leaks or damage.
Finally, it explains signs that a valve or pipe is compromised and the circumstances requiring replacement by a qualified technician.
Persistent gas smell after shutoff
What should be done when a faint or strong gas odor persists after the fireplace has been shut off?
The homeowner should evacuate occupants, avoid ignition sources, and call the gas utility or emergency services immediately.
Do not attempt repairs.
If the utility confirms a leak, have a licensed technician locate and repair the source, then ventilate and only resume use after official clearance.
Stuck or seized fittings and safe removal techniques
After a confirmed leak is addressed and the area declared safe, attention may turn to fittings that will not budge during disconnection.
Apply penetrating oil, allow dwell time, then use properly sized wrenches with steady force.
Heat can free rusted joints but avoid excessive temperature near seals.
If fittings remain seized, cap the line and consult a qualified technician rather than forcing removal.
Damaged valve or pipe requiring replacement
Inspecting for a damaged valve or pipe begins with a visual and tactile survey of fittings, joints, and the valve body for corrosion, hairline cracks, deformation, or evidence of leakage such as soot, staining, or odor.
If damage is confirmed, shut off gas, relieve pressure, cap or plug lines, and document parts.
Replacement should follow manufacturer specs; consult a licensed plumber or gas technician for final installation and leak testing.
Regulations, permits, and documentation
Local building codes and permit requirements govern how and when a gas fireplace can be disconnected, and these rules vary by jurisdiction.
A licensed gas fitter or inspector may be required to perform or sign off on the work to guarantee safety and code compliance.
Clear documentation of the disconnection, including permits and inspection records, should be kept for future homeowners and resale.
Local code considerations and permit requirements
Why check municipal codes and permit requirements before disconnecting a gas fireplace? Local regulations determine permitted DIY actions, required permits, inspection timelines, and disposal rules.
Homeowners should research municipal building codes, gas safety ordinances, and utility company policies.
Failure to comply can result in fines, insurance complications, or mandatory rework.
Obtain necessary permits and follow documented procedures to remain compliant.
When a licensed gas fitter or inspector must sign off
After confirming municipal codes and obtaining any necessary permits, attention turns to the specific moments when a licensed gas fitter or inspector must formally sign off.
Typically sign-off is required after valve isolation, pressure testing, and leak verification.
Final inspection often follows appliance removal and termination of the gas line.
Documentation of the inspector’s approval completes legal compliance and closure of the permit.
Documenting the disconnection for future homeowners
When a gas fireplace is disconnected, clear documentation guarantees future homeowners understand the work performed, the safety status of the line, and any remaining responsibilities.
Records should include permit numbers, contractor and inspector names, dates, photos of capped lines, and test results.
File copies with property records and provide originals to the homeowner.
Note any required future actions or restrictions on reactivation.
Preventive tips and safe storage or disposal
When preparing a disconnected gas fireplace for reuse or sale, the unit should be cleaned, inspected for damage, and any manufacturer labels or service records retained.
Gas logs, valves, and fittings that cannot be reused must be disposed of according to local hazardous-waste rules or returned to a certified recycler.
To prevent accidental reconnection, gas lines should be permanently capped or removed and clearly labeled, and the appliance’s shutoff should be documented for future occupants.
Preparing the fireplace for reuse or sale
If the fireplace is to be kept for future use or sold, it should be left in a condition that guarantees safety and easy inspection.
Clean surfaces, remove debris, and label disconnected gas lines and electrical connections. Cap or valve off gas supply per code, document recent maintenance, and store removed parts with fasteners.
Provide clear instructions and records for the next owner or technician.
Safe disposal of gas logs and components
Several simple precautions can prevent hazards during the disposal or storage of gas logs and their components: guarantee all logs are fully cooled and free of soot, shut off and cap the gas supply per local code, and disconnect electrical igniters with their batteries removed.
Label parts, contain loose debris in sealed bags, follow local hazardous-waste rules, recycle metal components, and use licensed disposal services for suspect or damaged items.
Preventing accidental reconnection
After securing and labeling removed logs and components, steps must be taken to prevent accidental reconnection of the gas supply.
The homeowner should render fittings unusable, store parts separately, and document actions.
Suggested measures:
- Cap and tape gas lines visibly
- Lock supply valve or remove handle
- Store logs in sealed, labeled containers offsite
- Photograph and file disconnection records
Conclusion
Like an old ship finally anchored after a long voyage, the fireplace is quieted with care and attention. Having followed the checklist—tools, shutoffs, leak tests, and secure fittings—the task rests in orderly silence, neither neglect nor haste to blame. Regulations observed and documentation filed, the space holds the calm of a well-tended hearth gone dark. Future hands will know its history; safety, not spectacle, remains the lasting legacy.
