
How to Stop AC Vent From Dripping: Quick Fixes and Preventive Tips
If your AC vent is dripping, it’s likely due to high indoor humidity, a clogged condensate drain, inadequate duct insulation, or issues with the coils. To address this, first cut the power and dry the area to prevent water damage. Then, check the drain pan and condensate line for any clogs. Insulate any exposed ducts, replace damaged drain pans, and change your air filters regularly. If dripping persists or you suspect frozen coils or refrigerant problems, it’s best to contact a licensed HVAC technician. Read on for detailed fixes, preventive measures, and guidance on when to seek professional help.
Why Your AC Vent Is Dripping Right Now
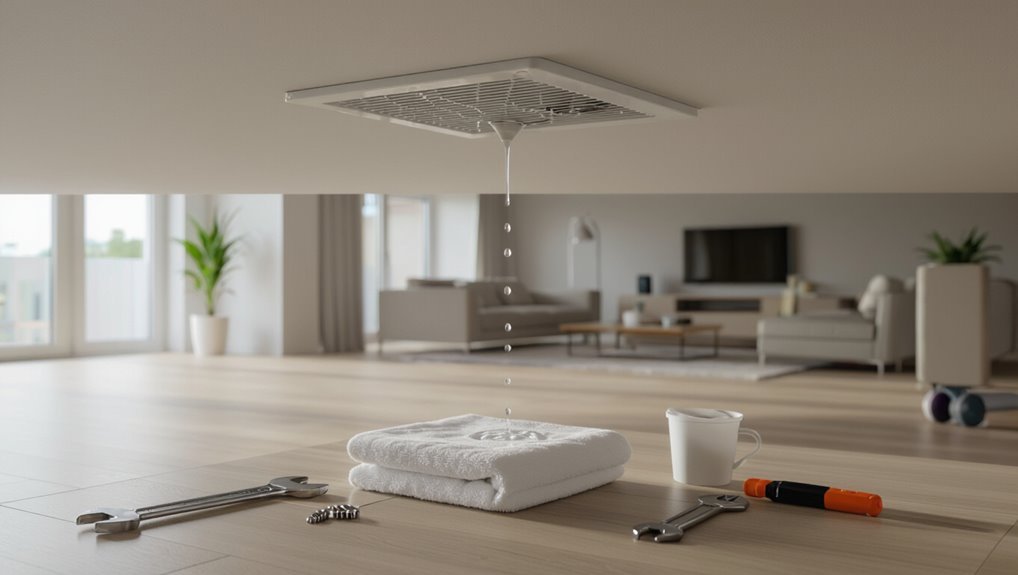
The text explains common causes of vent condensation and dripping, including high indoor humidity, blocked insulation, and clogged condensate drains.
It shows how to tell condensation from roof, plumbing, or HVAC leaks by checking timing, odor, and water source.
It also outlines when dripping indicates an urgent repair, such as water pooling near electrical components or continuous leaks.
Common causes of vent condensation and dripping
A leaking air-conditioning vent often signals a few predictable problems: excessive indoor humidity, blocked condensate drains, frozen evaporator coils that thaw, or poorly sealed ductwork allowing warm air to reach cold surfaces.
Common causes also include inadequate insulation around ducts, clogged air filters reducing airflow, and incorrect refrigerant charge.
Addressing these factors explains how to stop ac vent from dripping and prevents recurring moisture.
How to distinguish condensation from leaks and plumbing issues
Distinguishing condensation from a genuine plumbing or HVAC leak begins with observing where and how water appears: condensation typically forms as fine beads or steady dripping along cold duct surfaces and vents during high humidity or poor insulation.
In contrast, leaks from plumbing or damaged refrigerant lines produce pooled water, staining, or persistent wet spots that persist regardless of indoor humidity levels.
Check timing, odor, and nearby fixtures.
When a dripping vent means an urgent repair
When water appears suddenly from an AC vent and persists despite normal humidity levels, it often signals an urgent mechanical problem such as a clogged condensate drain, a cracked drain pan, or a refrigerant leak that requires immediate attention.
These issues can lead to ceiling damage, mold growth, or compressor failure if left unaddressed.
A licensed HVAC technician should inspect, diagnose, and perform repairs—especially for refrigerant or structural failures.
Quick, Immediate Fixes You Can Do Right Away
When a vent starts dripping, the first actions are to shut off the AC and safely dry the surrounding area to prevent water damage.
They can temporarily catch or redirect the drip with a safe container and use insulation or tape to reduce immediate leakage while adjusting thermostat and fan settings to lower humidity.
If a loose duct or seam is visible, a short-term DIY patch can be applied to slow or stop the drip until a permanent repair is arranged.
Turn off the AC and dry the area safely
Shut off the air conditioner immediately and cut power at the thermostat or breaker to prevent further moisture discharge and any electrical hazard.
Once powered down, ventilate the space and blot pooled water with absorbent towels or a wet/dry vacuum.
Use fans and dehumidifiers to dry ducts and surrounding surfaces.
Inspect for mold, and wear gloves and eye protection while handling wet materials.
Temporarily redirect or catch the drip safe container and insulation tricks
Catch or redirect the drip immediately using a small bucket, plastic container, or a temporary hose that leads to a floor drain to prevent water damage.
Then insulate exposed duct joints and condensate lines with foam tape or fiberglass wrap to reduce sweating.
Secure containers and hoses to avoid spills.
Monitor frequently, empty containers as needed, and schedule permanent repairs to address the underlying leak.
Adjust thermostat and fan settings to reduce moisture buildup
Adjusting the thermostat and fan settings can quickly reduce indoor humidity and prevent condensate from forming on AC vents.
Set thermostat a few degrees lower to shorten runtime cycles that encourage moisture accumulation.
Switch fan from “auto” to “on” intermittently to improve airflow and dry duct surfaces, but avoid constant high fan speeds that may cool vents below dew point and reintroduce dripping.
Short-term DIY patch for loose ducts or seams
If airflow tweaks and thermostat changes don’t stop visible dripping, a short-term DIY patch for loose ducts or seams can provide an immediate remedy until a professional repair is arranged.
Inspect joints, clean surfaces, apply HVAC foil tape or mastic sealant to gaps, and reinforce with sheet metal screws if accessible.
Monitor for leaks and schedule a qualified technician for permanent correction.
Step-by-Step Inspection to Find the Root Cause
A focused, methodical inspection helps identify why an AC vent is dripping and what repairs are needed.
The process typically starts with basic tools (flashlight, wrench, wet/dry vacuum, and a moisture meter) and moves through the indoor unit and evaporator coil, drain pan, condensate line or pump, ductwork and vent registers, and attic connections.
Final checks confirm insulation and air-seal integrity around vents to rule out condensation from poor insulation or leaks.
Tools you’ll need for a basic inspection
Before beginning the inspection, assemble a concise set of tools and safety gear so the process is efficient and safe.
Required items include a flashlight, screwdriver set, adjustable wrench, multimeter, and small mirror.
Add disposable gloves, safety glasses, a towel or bucket for water, and a camera or phone to document findings.
Optional: coil cleaner and a telescoping inspection mirror.
Inspecting the indoor unit and evaporator coil
Begin the inspection by turning off power to the indoor unit at the thermostat and the breaker.
Then remove the access panel to expose the evaporator coil and drain pan.
Visually scan the coil for frost, heavy dirt, or oil residue.
Check for bent fins, loose insulation, and disconnected refrigerant lines.
Note unusual odors or visible refrigerant leaks and document findings for technician reference.
Checking drain pan, condensate line, and condensate pump
With the evaporator coil and indoor unit inspected, attention shifts to the drain pan, condensate line, and condensate pump to locate where collected moisture is escaping or backing up.
The technician checks the pan for cracks or rust, verifies the line is clear and pitched properly, tests the condensate pump for operation and clogs, and confirms proper drainage to prevent overflow and dripping.
Examining ductwork, vent registers, and attic connections
One section at a time, the technician inspects ductwork, vent registers, and attic connections to trace moisture pathways and identify breaches that allow condensation or leaks into conditioned spaces.
He checks joints for gaps, damaged insulation, and sagging runs; examines registers for blockages or loose fittings; inspects attic penetrations and flashing for seal failures, documenting defects and marking areas for targeted sealing or repair.
Testing for poor insulation or air leaks around vents
To pinpoint whether poor insulation or air leaks are causing vent-side condensation, the technician performs a focused, step-by-step inspection of the immediate vent area and surrounding surfaces.
They use a thermal camera or infrared thermometer, smoke pencil or incense, and tactile checks for cold drafts.
Identified gaps are sealed with foam or caulk and insulation is added or upgraded to eliminate temperature differentials.
Proven Permanent Repairs and How to Do Them
The following section outlines proven permanent repairs for common causes of a dripping AC vent, including cleaning or replacing clogged condensate drain lines and addressing damaged drain pans.
It also covers fixing duct seams, reconnecting loose ducts, reinsulating ducts and vents to stop condensation, and criteria for replacing a failing condensate pump.
Each repair is described with the key steps and signs indicating when professional replacement is needed.
Cleaning or replacing clogged condensate drain lines
Begin by locating and evaluating the condensate drain system to determine whether a clog is present and whether cleaning or replacement is required.
Flush the line with a wet/dry vacuum or a garden hose; use a pump or flexible brush for stubborn blockages.
Inspect PVC for cracks or sagging; replace damaged sections and guarantee a proper downward pitch.
Test flow and reinstall access covers.
Repairing or replacing damaged drain pans
Inspecting the drain pan for cracks, corrosion, or rusted seams determines whether repair or full replacement is necessary; small hairline cracks and surface rust can often be permanently sealed with epoxy or a polymer coating, while extensive corrosion, warped pans, or pans that have lost structural integrity require replacement to guarantee reliable condensation management.
Properly fit replacement pans restore slope, secure mounting, and reconnect the drain to prevent future leaks.
Fixing duct seams and reconnecting loose ducts
Repairing duct seams and reconnecting loose sections restores proper airflow and eliminates condensation pathways that cause vent drips.
Technicians inspect joints, remove old tape, and secure seams with mechanical fasteners and UL-listed foil or mastic.
Collars and slip joints are realigned and sealed; flex ducts get tightened at collars with clamps.
Results: reduced leaks, stable pressure, and a permanent stop to drip sources.
Reinsulating ducts and vents to prevent condensation
Reinsulating ducts and vents eliminates surface cooling that leads to condensation by restoring continuous thermal and vapor barriers along the entire run.
Technicians remove damaged insulation, clean surfaces, apply appropriate closed-cell insulation or foil-faced wraps, and seal joints with vapor-retardant tape.
Proper insulation thickness and sealed seams prevent moisture accumulation, improve system efficiency, and stop recurring drips when paired with correct airflow and drainage practices.
When to replace a failing condensate pump
A failing condensate pump should be replaced when signs of mechanical wear, electrical faults, persistent leaks, or repeated clogs indicate the unit can no longer reliably remove condensate.
Delaying replacement risks water damage, mold growth, and interrupted cooling.
Replacement is warranted if the pump cycles excessively, fails to activate, emits grinding noises, or its check valve leaks.
Choose a correctly sized, compatible replacement and test operation.
When to Call a Professional HVAC Technician
If mold growth, recurrent dripping after attempted fixes, or suspected refrigerant leaks are present, a professional HVAC technician should be called.
The technician will inspect system components, test refrigerant levels, provide a written diagnosis, and outline recommended repairs and timelines.
Homeowners can expect estimates for labor and parts up front, with common repairs typically taking one to several hours and costing from modest service fees to higher amounts for compressor or coil work.
Signs the problem is beyond DIY (mold, persistent leaks, refrigerant issues)
When visible mold, recurring drips despite basic fixes, or suspected refrigerant problems appear, the issue has likely exceeded casual homeowner repairs and warrants a professional HVAC technician.
Professionals diagnose coil damage, blocked drain lines, compressor or refrigerant leaks, and hidden insulation failure.
Persistent water stains, musty odors, reduced cooling efficiency, or ice buildup signal need for trained inspection and safe, code-compliant remediation.
What to ask and expect from an HVAC service visit
How should a homeowner prepare for an HVAC service visit and what should they expect from the technician?
The homeowner should clear access to the unit, note symptoms and timing, and gather maintenance records.
The technician will inspect drain lines, condensate pans, insulation, and system airflow.
They will identify causes, explain findings, recommend corrective actions, and provide safety and maintenance advice before leaving.
Typical repair costs and time estimates
Estimate repair costs and timeframes based on the problem’s cause and the technician’s findings. Typical fixes range from simple condensate drain cleaning to coil repairs or refrigerant service. Small jobs often finish within an hour; major repairs may take several hours or require parts and follow-up. Below is a quick reference:
| Issue | Typical Cost | Time Estimate |
|---|---|---|
| Drain cleaning | $75–$150 | 0.5–1 hr |
| Filter replacement | $20–$75 | 0.25–0.5 hr |
| Coil repair | $200–$800 | 1–4 hrs |
| Refrigerant recharge | $150–$400 | 1–2 hrs |
Preventive Maintenance to Keep Vents Dry Year-Round
A concise preventive maintenance routine helps homeowners keep vents dry year-round by following a simple checklist of filter changes, drain inspections, and duct checks.
Seasonal adjustments—raising target humidity during humid months and optimizing cooling cycles in summer—combined with correct thermostat settings and balanced airflow minimize condensation.
Upgrades such as programmable thermostats, smart humidity sensors, and improved insulation further reduce the risk of future drips.
Regular maintenance checklist for homeowners
When preventive tasks are scheduled and performed consistently, homeowners can markedly reduce the risk of AC vent condensation and leaks.
A concise checklist focuses inspections, cleaning, and timely repairs to maintain airflow and drainage.
Recommended routine:
- Inspect and tighten duct connections, seals, and insulation.
- Clean vents, filters, and drain pans; clear condensate lines.
- Schedule professional HVAC tune-ups and refrigerant checks annually.
Seasonal adjustments: cooling season vs. humid months
Many homeowners adjust HVAC settings seasonally, but targeted strategies for cooling season versus humid months are essential to prevent vent condensation.
During cooling season, prioritize proper dehumidification, clean coils, and guarantee drainage lines are clear.
In humid months, incorporate a standalone dehumidifier, inspect insulation on ducts, and seal gaps to minimize moisture ingress.
Regular monitoring adapts responses before dripping occurs.
How proper thermostat settings and airflow reduce condensation
Shifting from seasonal measures, proper thermostat settings and balanced airflow provide continuous, day‑to‑day defense against vent condensation.
Maintaining moderate temperature differentials, avoiding overly cold setpoints, and ensuring consistent fan circulation minimize coil freezing and excess moisture.
Regularly checking filters, vents, and dampers preserves designed airflow patterns so condensate drains properly, reducing pooling and drips without relying on reactive fixes.
Upgrades that prevent future drips (programmable thermostats, smart sensors, better insulation)
A handful of targeted upgrades can substantially reduce vent condensation by regulating temperature, monitoring humidity, and improving insulation.
Programmable thermostats maintain consistent setpoints, minimizing rapid cooldowns that cause moisture. Smart humidity sensors trigger dehumidifiers or fan adjustments when levels rise.
Upgrading duct and attic insulation prevents thermal bridging. Together, these measures lower condensation risk, extend equipment life, and reduce maintenance frequency.
Health and Safety Risks of Ignoring a Dripping Vent
A persistent dripping AC vent can promote mold and mildew growth, degrading indoor air quality and aggravating allergies or respiratory issues.
Over time, moisture can weaken structural materials and create electrical hazards where water contacts wiring or fixtures.
Ignoring the problem also reduces HVAC efficiency and raises long-term repair and energy costs.
Mold, mildew, and indoor air quality impacts
How can a persistent drip from an AC vent affect indoor air quality?
Continuous moisture promotes mold and mildew growth on ducts, insulation, and surrounding surfaces.
Spores and volatile compounds released into the air can trigger allergies, asthma exacerbations, respiratory irritation, and odors.
Vulnerable occupants—children, elderly, immunocompromised—face higher risk.
Prompt mitigation and mold remediation reduce health impacts and indoor contaminant levels.
Structural damage and electrical hazards
Several inches of persistent water from an AC vent can quickly undermine building materials and create electrical risks if left unaddressed.
Water soaks drywall, insulation and wooden framing, weakening structures and causing rot. It can bridge connections, corrode wiring and short circuits, increasing fire and shock hazards.
Immediate containment and professional inspection prevent collapse, wiring damage and associated safety emergencies.
Long-term HVAC performance and energy cost consequences
Beyond immediate structural and electrical dangers, persistent vent dripping gradually undermines HVAC system function and raises operating costs.
Corrosion, insulated coil damage, and microbial growth reduce efficiency and lifespan. Compressors and fans work harder, increasing energy consumption and repair frequency.
Higher utility bills and premature component replacement result. Ignoring leaks shifts costs from occasional maintenance to chronic expenditures and potential full system replacement.
Cost-Effective Materials and Tools for DIY Repairs
A concise list of cost-effective sealants, HVAC tape, and insulating materials helps homeowners choose products that stop leaks without overspending.
Recommended basic tools—flashlight, screwdriver set, tape measure, utility knife, and caulking gun—make inspection and common repairs feasible.
Comparing material costs to typical contractor fees clarifies when DIY repairs are economical and when professional help is worth the investment.
Recommended sealants, tapes, and insulation types
When moisture accumulates around an AC vent, selecting the right sealants, tapes, and insulation can stop drips quickly and affordably.
Recommended options include silicone caulk for gaps, butyl or HVAC foil tape for duct seams, and closed-cell foam insulation for condensation control.
Choose weather-resistant, mold-inhibiting products sized to vent dimensions and rated for HVAC use.
- Silicone caulk
- Butyl/foil tape
- Closed-cell foam
Basic tools for inspection and repair
Gather basic hand tools and inexpensive diagnostic gear before attempting vent repairs to guarantee efficient, safe work and avoid unnecessary trips or expenses.
Essentials include screwdrivers, pliers, utility knife, drill with bits, flashlight or headlamp, moisture meter, and a compact multi-meter.
Add insulation tape, foam sealant applicator, replacement screws, and a small vacuum or brush for cleaning accessible ducts and drip pans.
When buying materials saves money versus hiring pros
Many homeowners can cut costs by buying specific materials and simple tools when the leak stems from common, low-complexity issues—clogged condensate drains, loose vent screws, or poorly sealed duct joints—because parts like PVC fittings, foam sealant, replacement screws, and a small condensate pump are inexpensive and straightforward to install with basic skills.
DIY saves money when diagnostics and repairs are simple; complex issues still warrant professionals.
Real-World Scenarios and Solutions
Common patterns in dripping provide clues for targeted fixes.
If condensation appears only on humid days, moisture management and insulation are likely remedies; if dripping starts after short runtime, airflow or refrigerant issues should be checked.
When the problem is intermittent and limited to specific vents, isolating duct runs and inspecting individual registers often pinpoints the cause.
Drip only during humid days likely causes and fixes
When an air-conditioning vent only drips on humid days, the problem usually stems from excess condensation overwhelming the system’s drainage or insulation rather than a constant leak.
Diagnosing the cause requires observing when and where moisture forms, checking refrigerant and drainage performance, and inspecting insulation and duct joints for gaps that let humid air condense on cold surfaces.
Solutions include improving insulation, clearing drains, servicing refrigerant levels, and sealing ducts.
Drip after system runs for a short time targeted troubleshooting
If the vent starts dripping shortly after the system cycles on rather than only during prolonged humid periods, the cause often lies in rapid condensation or early-stage drainage/insulation failures that manifest once cold surfaces form.
Technicians should inspect nearby insulation, duct seals, and condensate pan alignment, verify airflow and evaporator coil condition, and clear or regrade drain lines; replace compromised insulation and reseal joints to stop early dripping.
Intermittent dripping tied to specific vents isolating the problem
Although intermittent dripping may seem random, patterns tied to specific vents usually reveal localized faults rather than whole-system failures.
Technicians inspect drainage pan alignment, clogged condensate drains, and nearby insulation gaps. Damp spots often indicate refrigerant line sweating or poorly sealed duct joints.
Isolating the vent, running the unit, and monitoring pinpoint the source; targeted repairs or sealing typically stop recurrence without major system replacement.
Quick Reference Troubleshooting Flowchart
A concise troubleshooting flowchart guides the reader through stepwise decisions to identify the cause of a dripping AC vent.
Each branch directs to a specific inspection or corrective action based on observed symptoms.
The chart enables quick prioritization of fixes, from simple filter checks to calling a professional for condensate or refrigerant issues.
Stepwise decision guide to identify cause and next action
How should one proceed when an AC vent is dripping? A concise stepwise guide isolates source, assesses severity, and directs action: inspect filters, check drain line, examine insulation, and evaluate coil. Use the table below to map findings to next steps.
| Finding | Recommended Action |
|---|---|
| Clogged filter | Replace and test |
| Blocked drain | Clear or snake |
| Damaged insulation | Rewrap |
| Coil frost | Thaw; service |
Conclusion
In the end, the dripping vent that once promised cool relief becomes a lesson in domestic humility: the homeowner learns that ice dams, clogged drains, or sagging insulation can turn comfort into indoor rain. Ironically, fixing it often requires less drama than fretting—just a few tools, persistent inspection, or a sensible call to a technician. When neglected, small leaks escalate; attended to, they vanish, leaving only the memory of having been mildly heroic.
