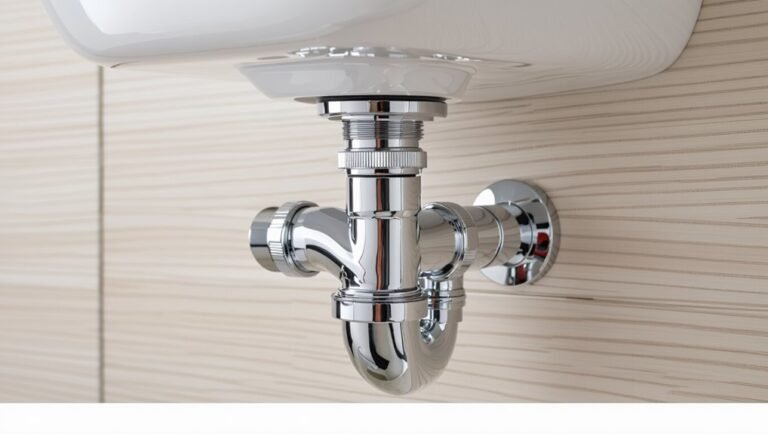
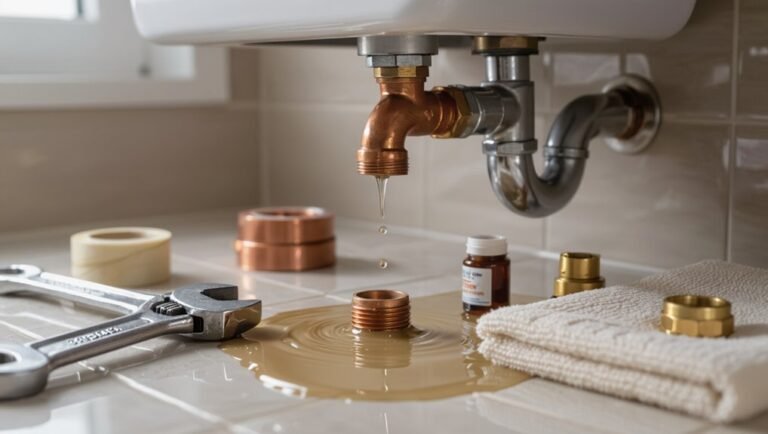
How to Plumb a Wall-Mounted Faucet: Step-by-Step Guide for DIYers
To successfully plumb a wall-mounted faucet, you’ll need to follow a structured process that includes careful planning, precise measurements, and secure connections. Start by inspecting the wall cavity and marking the center-to-center distance and depth for installation. After shutting off and draining the water supply, mount the valve bodies with appropriate blocking. Route and connect the hot and cold water supplies using code-approved fittings, then pressure-test the system. Finally, finish the wall before installing the trim and spout. These steps ensure a leak-free setup and allow for easy maintenance. For further guidance, additional detailed techniques and troubleshooting tips are available.
Overview of Wall-Mounted Faucet Plumbing
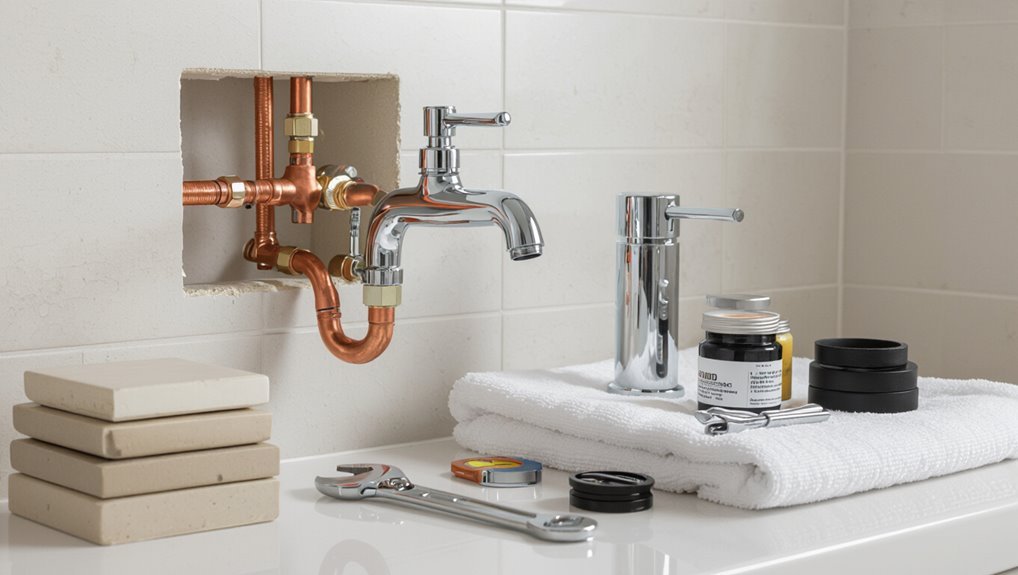
A wall-mounted faucet is a fixture attached to the wall above a sink or basin, commonly used in kitchens, bathrooms, and utility rooms for a cleaner countertop and easier cleaning.
It offers advantages such as increased counter space and streamlined aesthetics, but also presents limitations including routing supply lines inside the wall and stricter mounting and alignment requirements.
Typical components and terminology include in-wall supply lines, shutoff valves, escutcheons, spouts, and mixing cartridges or valves.
What a wall-mounted faucet is and where it’s used
Wall-mounted faucets are fixtures installed directly into a wall above a sink or basin, with plumbing concealed behind the wall surface. They save counter space, simplify cleaning, and present a distinct aesthetic.
Typically found in bathrooms, kitchens, utility rooms, and commercial wash stations, they require planning for piping, mounting studs, and water supply alignment—essential considerations when learning how to plumb a wall mounted faucet.
Advantages and limitations of wall-mounted faucets
Although offering a sleek, space-saving profile and easier countertop cleaning, wall-mounted faucets also present trade-offs in installation complexity and maintenance access.
Proper in-wall plumbing and secure mounting are required, often needing studs and concealed shutoffs. They allow flexible sink placement and modern aesthetics but complicate retrofit projects, increase labor and material costs, and can hinder quick repairs without opening the wall.
Typical components and terminology
Moving from installation trade-offs to the hardware itself, the overview covers the parts, fittings, and terms commonly encountered when plumbing a wall-mounted faucet.
Key components include the spout, valve body, mixing cartridge, escutcheon, and supply stub-outs.
Essential fittings: shutoff valves, unions, NPT or sweat adapters, and compression fittings.
Terms: center-to-center, rough-in depth, flow rate, and backflow prevention.
Quick checklist: Tools, materials, and safety equipment
Before beginning work on a wall-mounted faucet, a concise checklist helps guarantee the job proceeds smoothly and safely.
- Essential tools for the job
- Required plumbing materials and fittings
- Safety gear and preparatory steps
Each item should be confirmed and organized so the installer can work efficiently and avoid interruptions.
Essential tools for the job
A concise checklist of tools, materials, and safety gear streamlines installation and prevents costly delays:
Plumbers’ tape, adjustable wrench, basin wrench, pipe cutter, tubing bender, soldering torch or crimp tool (as applicable), deburring tool, level, measuring tape, screwdriver set, channel-lock pliers, and compression tool.
Safety items include gloves, safety glasses, and a respirator for soldering or solvent work.
Required plumbing materials and fittings
Materials and fittings for a wall-mounted faucet installation should be selected to match the chosen supply line type and local plumbing codes.
Required items typically include shutoff valves, copper/PEX/CPVC supply tubing, compression or sweat fittings, mounting brackets, escutcheons, thread sealant or PTFE tape, pipe straps, adapters, and a backflow preventer if required.
Quantities depend on layout and wall thickness.
Safety gear and preparatory steps
Several essential tools and safety items should be gathered and checked for condition before work begins.
Protective gloves, goggles, and hearing protection are required.
Pipe wrenches, adjustable wrenches, tubing cutter, torch (if soldering), plumber’s tape, flux, solder, and pipe fittings must be present.
Verify shutoff valves, main water isolation, and electricity isolation if near outlets.
Clear workspace and adequate lighting complete the checklist.
Assessing existing setup and planning the installation
Before cutting or opening walls, the installer inspects the wall cavity, studs, and existing water supply lines to determine access and structural constraints.
They measure and mark the faucet centerline and mounting height, verify water pressure and locate shut-offs, and decide whether this will be a new install, a replacement, or a retrofit.
These initial assessments guide the required parts, support framing, and any rerouting or isolation work.
Inspecting wall cavity, studs, and water supply lines
Begin by opening an access panel or removing drywall to expose the wall cavity where the faucet will mount; this allows a clear view of studs, blocking, and any existing supply lines.
The inspector notes stud spacing, identifies suitable blocking or plans for reinforcement, traces hot and cold runs, checks for corrosion or leaks, and verifies accessibility for valves and future servicing.
Measuring and marking faucet centerline and mounting height
A clear centerline and precise mounting height are established to guarantee the faucet aligns with the basin and meets ergonomic and code requirements.
Measure basin center and spline to wall; transfer centerline onto drywall or stud.
Determine spout height above rim per manufacturer and local code.
Mark hot/cold inlet spacing, verify stud locations, and note any obstacles before cutting or anchoring.
Verifying water pressure and shut-off locations
One essential step is verifying water pressure and locating shut-off valves to guarantee the new wall-mounted faucet can be serviced and will operate within manufacturer specifications.
Measure static and dynamic pressure at designated supply points, note valve accessibility and type, and confirm isolation for both hot and cold.
Document pipe materials, distances to shut-offs, and any pressure-reducing devices before proceeding.
Deciding between new install, replacement, or retrofit
How should the project proceed: as a new installation, a straight replacement, or a retrofit?
The installer evaluates existing plumbing layout, wall access, stud spacing, and valve condition.
New installs require rough‑in framing and supply runs.
Replacements need matching connection types and brief demolition.
Retrofits demand adaptors, relocation planning, and possible rerouting.
Choose the approach minimizing cost, disruption, and code complications.
Pre-installation preparations
Before any cutting or connections begin, the water supply should be shut off and lines drained to prevent leaks and water damage.
The installer then gains access to the wall cavity, creating minimal access panels as needed to reach studs and rough-in locations.
Finally, supply runs are measured and selected (copper, PEX, or CPVC), with shut-off valves and test fittings installed to allow pressure testing and future service.
Shutting off water and draining lines
Shut off the main supply or the specific branch valves feeding the fixture, then verify water is off by opening the existing faucet or nearby fixture until flow stops.
After isolation, open all related hot and cold taps and any nearby low points to drain residual water.
Use a bucket and rags, relieve pressure by loosening a fitting if needed, and plug or cap exposed lines.
Accessing the wall cavity and creating access panels
With the lines isolated and drained, attention turns to gaining safe, unobstructed access to the wall cavity where the new faucet and its support will sit.
Inspect studs, insulation, and existing plumbing behind drywall.
Mark and cut a neat access panel aligned with framing, using appropriate tools and protective gear.
Remove debris, label components, and brace surrounding drywall to facilitate installation and future servicing.
Routing and sizing supply lines (copper, PEX, CPVC)
Several key decisions determine how supply lines will be routed and what size and material are appropriate for a wall‑mounted faucet: anticipated water demand, available space inside the wall cavity, local code requirements, and the chosen piping type (copper, PEX, or CPVC).
Measure run length, minimize bends, and choose pipe size (typically 1/2″ for single fixtures, 3/4″ for longer runs).
Account for thermal expansion and secure support.
Installing shut-off valves and test fittings
Begin by locating and marking the inlet lines and desired valve positions within the wall cavity, ensuring accessibility for future maintenance and clearance for the faucet escutcheon.
Install shut-off valves on hot and cold feeds, securing to studs or blocking.
Fit test caps or temporary tees downstream, pressurize system to check for leaks, then drain and note valve orientation before closing wall.
Step-by-step installation for a new wall-mounted faucet
The installer proceeds through a focused sequence to set up the new wall-mounted faucet, ensuring alignment, secure connections, and leak-free joints.
- Install outlet fittings and supply stubs; position and secure the mounting plate or valve body.
- Connect hot and cold supplies to the faucet valve, apply thread sealant or make solder/crimp connections, and pressure test the rough-in before closing the wall.
Installing outlet fittings and supply stubs
Install outlet fittings and supply stubs with accurate alignment and secure connections to guarantee a leak-free, code-compliant wall-mounted faucet installation.
Measure centers, cut and deburr supply lines, then dry-fit fittings.
Apply appropriate thread sealant or solder joints per material and local code.
Torque fittings evenly, support supply stubs with blocking or straps, and pressure-test the assembly before closing the wall.
Positioning and securing the mounting plate or valve body
Positioning the mounting plate or valve body requires verifying alignment, depth, and secure anchoring before final connections.
The installer checks stud spacing, marks centerlines, and confirms finished-wall offsets so handles and spout sit flush. Fasteners engage solid framing or rated anchors; level and plumb are verified.
Compression or solder joints remain accessible. Torque is applied per manufacturer specs to prevent movement or leaks.
Connecting hot and cold supplies to the faucet valve
Begin by shutting off the building’s main or local supply valves and relieving pressure from the lines.
Then confirm that the hot and cold shutoffs at the rough-in are fully closed.
Verify inlet orientations on the valve, align supply runs without twisting, support piping to prevent strain, and gently bring flex lines or pipes to the valve.
Check clearances for escutcheons and handle movement.
Applying thread sealant, soldering, or crimping connections
Carefully choose the appropriate joint method—thread sealant for tapered threads, solder for copper sweat connections, or crimp for PEX—to guarantee a reliable, leak-free connection between the supply lines and the faucet valve.
Apply PTFE tape or thread compound correctly, braze or sweat with proper flux and heat control, or use manufacturer-approved crimp rings and tools.
Inspect joints visually and for proper seating.
Pressure testing the rough-in before closing the wall
Perform a pressure test on the rough-in to verify all joints and connections are watertight before sealing the wall.
Close test valves, attach a pressure gauge and a pump or use house supply pressure, then pressurize to recommended psi (typically 50–80 psi).
Monitor gauge and inspect all fittings for 15–30 minutes.
Release pressure slowly, repair any leaks, and retest until stable.
Repairing the wall and finishing trim installation
With the pressure test confirming a dry rough-in, the focus shifts to restoring the finished wall surface and fitting the trim kit.
Patch drywall or cement board, sand flush, and apply primer and paint or tile.
Secure escutcheon and trim per manufacturer torque specs, connect spout and handles, then operate valves to verify smooth movement and leak-free operation before final caulking and cleaning.
Replacing an existing wall-mounted faucet: step-by-step
Replacing a wall-mounted faucet begins with carefully removing trim and the old body to preserve surrounding finishes.
The process should address seized fittings or corrosion, consider valve upgrades and differing connection types, then proceed to install and adapt the new hardware.
Final assembly must be tightened to specification and pressure-tested for leaks before finishing.
Removing trim and old faucet body without damaging finishes
Begin by protecting surrounding finishes: cover the sink, countertop, and adjacent wall with clean drop cloths or soft towels to catch debris and prevent scratches.
Loosen decorative escutcheons and handles gently with appropriate tools, using tape to protect chrome. Support the faucet body while unfastening mounting nuts.
Remove components slowly, inspecting for hidden set screws or caulk. Clean surfaces immediately to preserve finish.
Handling seized fittings and corroded pipes
Tackle seized fittings and corroded pipes methodically to prevent damage and guarantee a safe replacement.
Apply penetrating oil, allow dwell time, then use appropriate wrenches and heat if brass or copper.
Protect surrounding finishes and support plumbing to avoid stress.
Cut out severely corroded sections and prepare clean ends for soldering, compression sleeves, or push-fit couplings while checking for hidden leaks.
Upgrading valves and adapting to different connection types
Upgrade the valves and adapt connections by first confirming the existing supply types (sweat, threaded, compression, or push-fit) and the condition of the wall studs and mounting block.
Select compatible shutoff valves and adapters, replacing corroded fittings.
Use soldered or compression joints where required, employ proper adapters for push-fit to threaded conversions, secure valve bodies to framing, and seal joints with appropriate methods and materials.
Reassembling and testing the new faucet
With the new valve assembly and supply lines secured, the installer aligns the faucet body to the mounting studs.
Threads or slides on the escutcheon and hand-tightens the mounting nuts to hold the fixture in place.
Final torque is applied, handles and aerator are fitted, and water is slowly turned on.
The assembly is checked for leaks, correct flow, and smooth operation before finishing trim.
Common connection methods and when to use them
When choosing how to connect a wall-mounted faucet, the technician weighs sweat (solder), compression, push-fit, and PEX crimp against the job’s access, longevity, and leak risk. Material choices—copper, PEX, and CPVC—bring distinct pros and cons for durability, flexibility, and heat resistance that influence the connection method. The following quick comparison frames those trade-offs for practical selection.
| Connection/Material | Emotional cue |
|---|---|
| Sweat (solder) | Confidence |
| Compression | Caution |
| Push-fit | Relief |
| PEX crimp | Assurance |
Sweat (solder) vs compression vs push-fit vs PEX crimp
Connecting a wall-mounted faucet requires choosing among several reliable joint methods—sweat (solder), compression, push-fit, and PEX crimp—each with distinct trade-offs in skill, tools, reliability, and suitability for materials and access.
Sweat offers durable metal-to-metal joints but needs torch skills; compression suits retrofit metal fittings; push-fit requires no tools and excels in tight spaces; PEX crimp provides flexible routing and strong seals with crimp rings.
Pros and cons of copper, PEX, and CPVC for wall-mounted faucets
Choosing piping for a wall-mounted faucet involves balancing durability, ease of installation, flexibility, and water quality considerations.
Copper: durable, heat-resistant, solderable, but pricier and requires skill.
PEX: flexible, cost-effective, easy to route and crimp, but sensitive to UV and less heat-tolerant.
CPVC: inexpensive, rigid, chlorine-resistant, good for hot water, yet brittle and needs solvent welding.
Troubleshooting common problems
The section addresses typical post-installation issues such as leaks at the wall or connections and the straightforward fixes for them.
It also covers causes and remedies for low water pressure, misaligned spouts or uneven water flow, and persistent dripping after installation.
Practical troubleshooting steps and when to call a professional are summarized.
Leaks at the wall or connections and how to fix them
Inspect leaks at the wall or connections promptly to prevent water damage and worsening fittings.
Identify source: supply lines, compression nuts, solder joints, or flange seals.
Shut water, dry area, tighten loose fittings, replace damaged washers or O-rings, re-solder or re-seat joints, and apply thread sealant or new tape.
Test under pressure and monitor for persistent drips; replace corroded components.
Low water pressure causes and resolutions
Low water pressure at a wall-mounted faucet can stem from several sources—restricted supply lines, partially closed shutoffs, clogged aerators or cartridges, mineral buildup in valves, or issues with the building’s main supply—each requiring a different diagnostic step and remedy.
Inspect shutoff positions, remove and clean aerators, flush supply lines, test pressure upstream, and disassemble cartridges to descale or replace.
If building pressure is low, contact utility or plumber.
Misaligned spout or uneven water flow
Realignments and uneven streams at a wall-mounted faucet often indicate loose mounting hardware, warped escutcheons, clogged or damaged aerators, or mispositioned supply connections; diagnosing which requires observing the spout’s angle, checking for wobble at the wall plate, and running the water to note flow patterns and interruptions.
Tighten fasteners, realign or replace the escutcheon, remove and clean or replace the aerator, and adjust supply fittings to restore straight, even flow.
Dripping faucet after installation
A persistent drip after installing a wall-mounted faucet signals an incomplete seal or a faulty internal part rather than normal settling.
The technician checks tightening of connections, cartridge or valve seat integrity, and compression ring condition. Debris or misaligned O-rings are common.
Isolate supply, inspect and replace worn cartridges or seals, clean sediment, then retighten and test under pressure to confirm repair.
Code, permits, and best-practice considerations
Before beginning work on a wall-mounted faucet, the installer should review local plumbing codes and determine whether a permit is required for relocation, new rough-ins, or alterations to supply lines.
Attention must be paid to backflow prevention and cross-connection control to protect potable water.
The layout should also respect required clearances and minimum distances from electrical wiring, outlets, and other fixtures.
Typical local code requirements and permit triggers
When plumbing a wall-mounted faucet, local building codes and permit requirements determine acceptable materials, wall access, fixture support, shutoff placement, and inspection points. Compliance guarantees safety, prevents costly rework, and avoids penalties.
Typical triggers include altering water supply, moving drains, changing fixture count, rough-in work, and concealed piping. Permit approval often requires plans, licensed trades, and staged inspections before concealment.
Backflow prevention and cross-connection control
Having covered permit triggers and inspection points, attention shifts to backflow prevention and cross-connection control as integral safety components for wall-mounted faucet installations.
Codes typically require approved backflow preventers, vacuum breakers, or air gaps to protect potable supply.
Installers should verify local device types, labeling, and testing intervals, document compliance for inspection, and avoid unprotected hose or utility connections that could create contamination risks.
Recommended distances from electrical and other fixtures
One clear rule is that wall-mounted faucets must maintain safe clearances from electrical devices, gas appliances, and other plumbing fixtures to prevent shock, fire, and contamination hazards.
Codes typically require several inches between water outlets and electrical receptacles, and separation from gas vents. Local codes and permit requirements vary; always consult inspectors.
Maintain accessible shutoffs and avoid routing near combustible materials.
Time, cost estimates, and when to hire a pro
Typical DIY wall-mounted faucet installs take a few hours for simple replacements and a day or more for rough-in work or rerouting supply lines.
Material and tool costs commonly range from $50–$300 for parts and basic tools, rising if specialty valves, fittings, or professional-grade tools are needed.
If the work involves complex rerouting, unknown pipe conditions, water damage, or local code entanglements, a licensed plumber should be contacted.
Typical DIY timeframes by project type
For a homeowner weighing whether to tackle a wall‑mounted faucet, estimated time and cost vary by complexity: simple replacement of visible fixtures can take 1–3 hours and cost $50–$200 in parts, while installing new in‑wall supply lines or relocating hookups often requires 4–12+ hours, drywall repair, and $300–$1,200+ in materials.
Hire a licensed plumber when work involves moving water lines, opening walls in multi‑unit buildings, unknown pipe materials, or when local code and permit requirements apply.
Minor jobs (1–3 hours): replace spout/handles, tighten connections.
Moderate (4–6 hours): add shutoffs, patch small wall sections.
Major (8–12+ hours): reroute supply, relocate valves, or full wall reconstruction—hire if unsure.
Estimated material and tool costs
Budgeting for a wall‑mounted faucet project depends largely on whether the work is cosmetic, involves limited access to existing connections, or requires opening walls and altering supply lines.
Typical DIY parts range $75–$400 (valve, trim, fittings). Tools and consumables add $30–$150 if purchases are needed.
Allow contingency for unexpected parts and extra labor; higher costs suggest hiring a professional.
Signs you should call a licensed plumber
After outlining likely parts and tool costs, homeowners should recognize specific signs that a wall‑mounted faucet job has crossed into professional territory.
Extended unforeseen pipe replacement, active leaks behind walls, gas or sewer line proximity, loss of water pressure across fixtures, complex soldering or copper repiping, inaccessible shutoffs, or permit requirements all justify hiring a licensed plumber.
Expect higher hourly rates and quicker resolution.
Long-term care and maintenance
A simple routine inspection schedule—checking for leaks, loose fittings, and proper drainage every few months—helps catch problems early.
Guidance on servicing cartridges, seals, and aerators explains when to clean, tighten, or replace components to maintain smooth operation.
Seasonal precautions, including winterizing and freeze protection for exposed wall-mounted faucets, prevent burst pipes and costly repairs.
Routine inspection schedule and quick checks
Establishing a consistent inspection schedule helps prevent small issues with a wall-mounted faucet from becoming costly repairs.
Inspect monthly for visible leaks, loose mounting bolts, water stains, and mineral buildup.
Check water pressure and handle operation quarterly.
After any unusual noise or performance change, perform a quick visual and tactile check.
Record findings and schedule professional attention if abnormalities persist.
How to service cartridges, seals, and aerators
Service cartridges, seals, and aerators on a regular schedule to maintain performance and prevent leaks: clean aerators every three to six months, inspect rubber seals and O-rings for cracking or flattening annually, and rebuild or replace cartridges when handles become stiff, leak, or lose precise temperature control.
Use appropriate tools, replace worn parts with manufacturer-approved components, lubricate O-rings with plumber’s grease, and test valves after reassembly.
Winterizing and freeze protection for wall-mounted faucets
How should a wall-mounted faucet be prepared for freezing temperatures to prevent burst pipes and costly repairs?
Drain external lines, shut off and isolate interior supply valves, open faucets to relieve trapped water, and insulate exposed pipes and the wall cavity with foam or heat tape rated for plumbing.
Consider installing freeze-proof fixtures or adding a frost-proof spout and schedule regular inspections before winter.
Useful tips, shortcuts, and mistakes to avoid
Practical guidance helps prevent common pitfalls and speeds up installation while protecting the finish.
- Check fittings and alignment to avoid rookie errors.
- Use templates, the right tools, and organized parts for efficiency.
- Choose brass or stainless finishes and proper sealants to resist corrosion.
Common rookie errors and how to prevent them
Avoiding common rookie errors saves time and prevents costly rework when installing a wall-mounted faucet.
Misreading measurements, omitting support braces, overtightening fittings, and skipping pressure tests cause leaks or alignment issues.
Use proper measuring tools, secure mounting to studs, follow torque recommendations, and test systems before finishing walls.
Double-check valve orientation and pipe slope to prevent future maintenance headaches.
Efficiency tips for cleaner, faster installs
Start by organizing the workspace and staging all parts and tools before cutting or soldering pipe: laying out fittings, gaskets, and fasteners in sequence reduces trips back to the truck and prevents interruptions that slow the job.
Use proper clamps and temporary supports, pre-measure and mark runs, deburr and clean joints, apply flux sparingly, and test progressively.
Avoid rushed cuts, improvising parts, and skipping leak checks.
Recommendations for durable finishes and corrosion resistance
Once the work area is organized and joints are clean, attention should shift to selecting finishes and protective measures that extend service life and resist corrosion.
Choose solid-brass or stainless-steel fittings, high-quality nickel or chrome plating, and NSF/ANSI-approved seals.
Apply corrosion-inhibiting paste on threads, avoid dissimilar metals without dielectric unions, and inspect for pitting during periodic maintenance to prevent leaks.
Conclusion
A concise wall-mounted faucet installation rewards careful planning, correct tools, and adherence to code. A homeowner familiarized with supply lines and mounting techniques can complete most projects, but surprises—hidden studs or older plumbing—raise complexity. For example, a DIYer replacing a kitchen faucet discovered corroded copper inside the wall; hiring a plumber prevented leaks and code violations. To conclude, preparation and a willingness to call a pro when needed guarantee a durable, leak-free result.