How to Make a Plumbing Loop Vent: Step-by-Step Guide for DIYers and Pros
To create a plumbing loop vent, follow these essential steps: measure the trap arms, select code-approved materials, and ensure a 1/4″ per foot slope. Dry-fit your components, connect to the branch or main vent with cleanouts, and check for leaks and airflow. Always secure necessary permits and verify compliance with local codes. This guide offers detailed instructions for both DIYers and professionals.
What a Plumbing Loop Vent Is and When You Need One
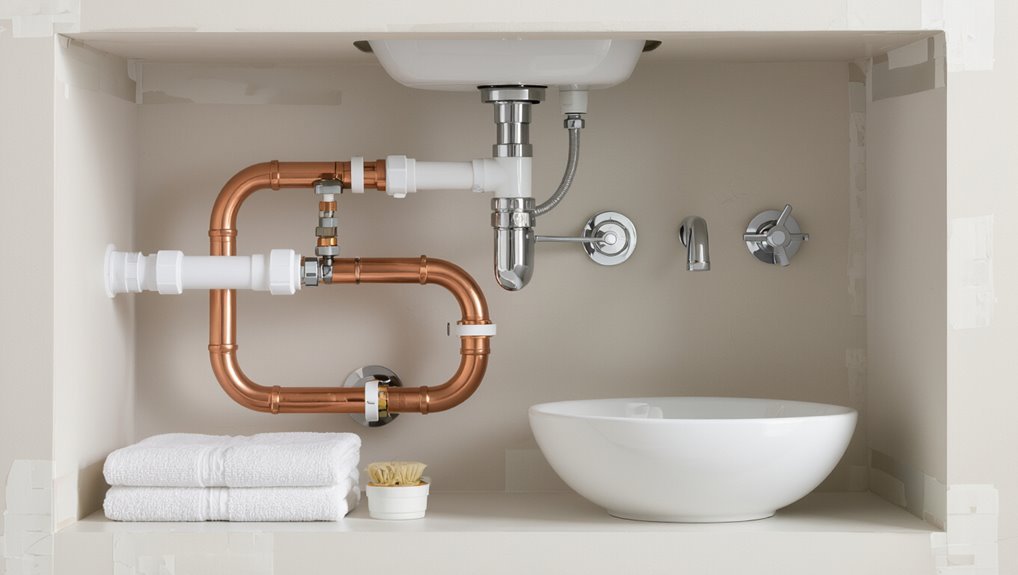
A plumbing loop vent is a horizontal vent configuration that maintains atmospheric pressure in a fixture trap by connecting back to the vent system before entering the soil stack.
It is typically used where conventional venting is impractical, such as island sinks or runs serving multiple fixtures, to prevent siphoning and allow proper drainage.
Whether a loop vent is permitted or required depends on local plumbing codes and fixture count, so compliance with sizing, slope, and termination rules must be confirmed.
Definition and basic function of a loop vent
Plumbing loop vents are a specialized venting arrangement that connects two trap-armed fixtures to the building’s vent system via a short loop of pipe, preventing trap seal loss and maintaining proper air pressure as wastewater flows.
The loop vent equalizes pressure between fixtures, protects traps from siphoning or backpressure, and allows code-compliant venting.
DIYers learning how to make a plumbing loop vent must follow local codes and sizing rules.
Common scenarios that require a loop vent (island sinks, multi-fixture runs)
When fixtures are positioned away from wall vents or share a common drain run, a loop vent becomes the practical solution to maintain trap seals and balanced air pressure.
Typical cases include island sinks lacking nearby vertical vents, clusters of bathroom fixtures on a single branch, and long fixture runs where backpressure or siphoning risks increase.
Loop vents provide localized venting without distant vent stacks.
Code considerations and when a loop vent is permitted or required
Because building codes vary by jurisdiction, determining whether a loop vent is permitted or required depends on specific code provisions, fixture configuration, and pipe sizes.
Local plumbing codes, amendments, and inspector interpretations dictate acceptability.
Key factors include trap arm length, required vent size, distance to a stack, and whether fixtures are island-mounted.
Always consult local code and obtain permits; installers may need engineered approval.
Key Terms, Parts, and Tools You’ll Use
The section defines essential plumbing components—trap, trap arm, vent stack, loop vent, and dry vent—to clarify their roles in a loop vent installation.
It also lists the tools and materials required and notes common pipe sizes and fittings used for loop vents.
Readers will gain a concise reference to prepare for the step-by-step work ahead.
Plumbing components explained (trap, trap arm, vent stack, loop vent, dry vent)
A clear grasp of key plumbing components—trap, trap arm, vent stack, loop vent, and dry vent—is essential before attempting a loop vent installation; each part has a specific role in preventing sewer gas entry, maintaining water seals, and equalizing pressure.
The trap holds water to block gases. The trap arm connects to the drain. The vent stack vents the system. A loop vent balances pressure; a dry vent serves fixtures without water.
Required tools and materials checklist
One concise checklist lists the essential parts, tools, and safety items needed to install a loop vent correctly.
The list covers fittings, cutting and joining tools, sealants, and protective gear. Items guarantee code compliance, leak-free connections, and safe work. Choose quality materials matched to local codes and plumbing type.
- Pipe cutter, deburring tool, and tape measure
- Appropriate fittings and adapters
- Solvent cement or thread sealant
- Gloves, eye protection, and mask
Common pipe sizes and fittings for loop vents
Several common nominal pipe sizes and fittings are used for loop vents, typically 1 1/4″, 1 1/2″, and 2″ branches depending on fixture load and local code.
Common fittings include 45° and 90° elbows, sanitary tees, street tees, wyes, couplings, reducers, and slip joints.
Materials: PVC, ABS, cast iron, or copper per code.
Use proper hangers and cleanouts.
Planning and Measuring Before You Start
Before cutting pipe, the installer reviews local code and secures any required permits to guarantee compliance.
Accurate measurements of trap arm lengths, distances to the vent connection, and the vent’s required height and slope are recorded.
A simple sketch showing the parts layout and critical dimensions is prepared to guide installation.
How to read local code and get permits
When planning a plumbing loop vent, the installer must consult local building codes and obtain any required permits to guarantee the work complies with jurisdictional safety, sizing, and venting standards.
This typically involves reviewing municipal plumbing codes, zoning regulations, and any amendments or referenced standards.
Then, contacting the local building department to confirm permit requirements and submission procedures is essential.
The installer should document code references, application forms, fee schedules, inspection timelines, and required drawings.
Measuring trap arm lengths and distances to vent connection
Accurate measurement of trap arm lengths and the distance to the vent connection is essential to assure proper drain flow and compliance with code limits.
The installer records fixture unit counts, measures straight-line trap arm distances from trap weir to vent entry, notes pipe diameters, and guarantees maximum run lengths per code.
Marking positions and verifying clearances prevents rework and assures proper vent performance.
Determining vent height and slope requirements
To establish correct vent height and slope, the installer calculates required vertical rise from the highest fixture connection to the roof penetration, accounts for local code minimums for vent termination above roof surfaces, and determines the necessary slope for horizontal vent runs (typically 1/4 inch per foot unless code specifies otherwise).
Confirm pipe sizes, offsets, and cleanout locations to maintain airflow and prevent siphoning.
Sketching a simple plan and parts layout
Having established vent heights and slopes, the installer should produce a simple plan showing fixture connections, vent routing, pipe sizes, and roof penetration points.
The sketch labels fittings, cleanouts, and supports, notes measurements and elevations, and indicates materials and join types.
It highlights obstacles, access panels, and inspection points.
Copies go to the work crew and permit submission as needed.
Step-by-Step: Installing a Plumbing Loop Vent
The installer begins by shutting off water and clearing the work area before any cuts or fittings are made.
Existing trap arms are removed or altered as required, then the vent loop piping is installed with the proper slope toward the vent connection.
Finally, the loop is tied into the main or branch vent and required cleanouts and access points are fitted.
Step 1 Shut off water and prepare the workspace
Shut off the main water supply and relieve pressure before any work begins.
The area should be cleared, well-lit, and ventilated.
Gather tools, replacement parts, pipe supports, and safety gear—gloves, eye protection.
Protect floors and nearby fixtures with drop cloths.
Locate shutoff, verify no flow at fixtures, and place buckets to catch residual water.
Confirm access to electrical outlets for tools.
Step 2 Remove or modify existing trap arm if needed
Begin by exposing the existing trap arm and evaluating its length, slope, and connection to the fixture tailpiece and waste line.
If too short, excessively sloped, damaged, or improperly sized, remove the section back to a clean, accessible joint.
Cut squarely, deburr, and clean fittings.
Retain required trap seal distance and local code clearances when planning any replacement or extension.
Step 3 Install and slope the vent loop piping toward the vent connection
With the trap arm prepared to code and any extensions secured, attention turns to laying out the vent loop piping and establishing the required slope toward the vent connection.
The installer measures run length, cuts pipe, and dry-fits fittings.
Confirm a continuous 1/4″ per foot slope back to the trap weir for condensation drainage, support at code intervals, and secure joints before final alignment.
Step 4 Tie the loop vent into the main vent stack or branch vent
Tie the loop vent into the main vent stack or a suitable branch vent by locating an access point at the proper elevation and making a neat connection that preserves code-required clearances.
Cut and fit pipe, deburr ends, and use approved fittings and seals.
Confirm pitch continuity, support adjacent piping, and test the junction for leaks and unobstructed airflow before restoring insulation and finishes.
Step 5 Install cleanouts and access points where required
Install required cleanouts and access points at specified locations to allow inspection, maintenance, and removal of blockages in the loop vent system.
Position cleanouts at base of verticals, junctions, and upstream of traps per code. Use accessible, labeled fittings and caps with compatible materials.
Guarantee proper sealing, slope, and clearance for tools. Record locations on as-built drawings for future service.
Step 6 Reconnect fixtures, test for leaks, and verify vent performance
After cleanouts and access points are in place and documented, fixtures can be reconnected and the system prepared for testing.
Water supply is restored, fixtures operated, and joints inspected for leaks.
Perform a static water test and air-pressure or smoke test per code.
Observe vent flow during multiple fixture operations to confirm proper siphon prevention and unrestricted venting.
Record results and correct deficiencies.
Visual Guidance and Typical Configurations
The section presents common loop vent layouts for kitchen and island sinks, highlighting how placement and appliance proximity affect routing.
It contrasts vertical and horizontal loop arrangements, noting when each is preferred and code implications.
Typical connection points to the main vent stack are summarized to show practical tie-in locations and clearance requirements.
Common loop vent layouts for kitchen and island sinks
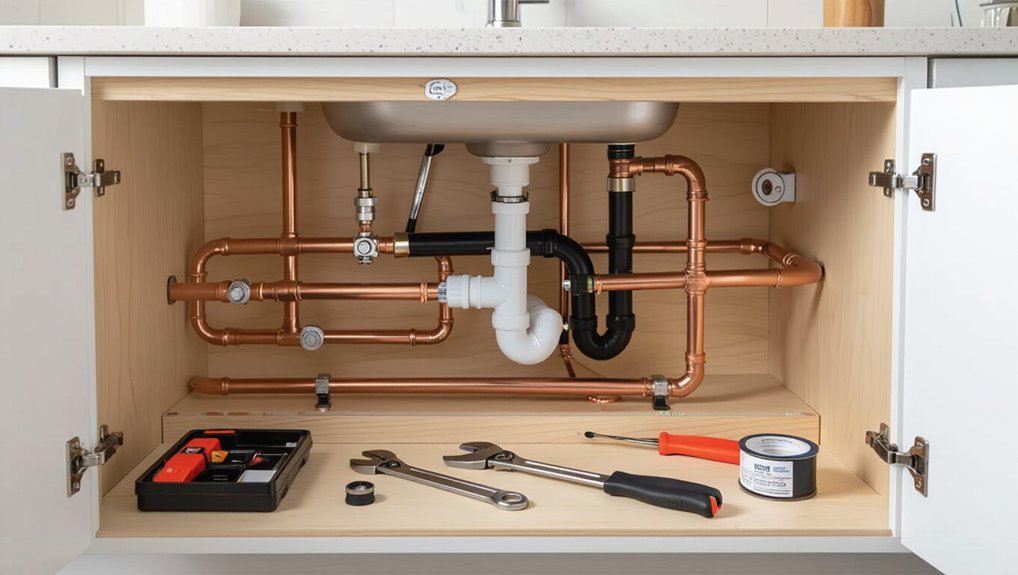
How can a loop vent be arranged to serve both a kitchen sink and an island sink without violating code or creating trap siphonage?
Common layouts use a continuous loop rising above flood level rims, connecting fixtures to a single vented branch or separate loops tied into a stack.
Keep slopes, cleanouts, and minimum heights per code, and avoid shared distal vents that risk backflow or siphoning.
Examples of vertical vs. horizontal loop vents
While both vertical and horizontal loop vents serve to protect traps from siphonage, they differ in appearance, routing constraints, and installation practices:
Vertical loops rise above the fixture base, compact and gravity-reliant, suited where ceiling space allows.
Horizontal loops run level or slightly sloped within cabinets or walls, requiring longer runs and careful pitch.
Illustrations show clear dimensional and access differences.
Typical connection points to main vent stack
Connection points to the main vent stack are typically located where loop vents can join at a stable, accessible branch—commonly at a stack hub, a dedicated vent stack takeoff, or a horizontal wet vent run—so that airflow, cleanout access, and slope requirements are maintained. Typical configurations balance code, clearance, and flow.
| Location | Notes |
|---|---|
| Stack hub | Central, accessible |
| Takeoff | Dedicated, straightforward |
| Wet vent run | Requires slope compliance |
Troubleshooting and Testing After Installation
After installation, simple water and smoke tests verify that the loop vent provides proper airflow and that traps remain sealed.
Common symptoms such as gurgling, slow drains, or siphoning are described with diagnostic steps to isolate issues like improper slope, blockages, or airlocks.
Recommended corrective actions include regrading piping, clearing or reconfiguring vents, and installing anti-siphon devices where needed.
How to perform a water and smoke test for venting
Begin by verifying that all joints are secured and traps are filled before conducting water and smoke tests for the plumbing loop vent; these tests confirm vent continuity and identify leaks or back-pressure issues.
Perform a water test by filling fixtures and observing drainage; inspect for siphonage.
Use a smoke pencil or smoke testing kit at access points to detect airflow, leaks, or blockages, sealing defects promptly.
Diagnosing common problems (gurgling, slow drains, siphoning)
When vents or traps fail to function properly, common symptoms such as gurgling, slow drains, and siphoning reveal distinct causes that can be isolated through systematic observation and simple tests.
Inspect vent openings, listen for air noises during drainage, check multiple fixtures for shared symptoms, run localized dye or bucket tests to detect trap seal loss, and note intermittent versus constant issues to narrow diagnosis.
Fixes for improper slope, blocked vents, or airlock
Address improper slope, blocked vents, and airlocks through targeted inspection and measured corrections to restore reliable flow and venting.
Verify pipe pitch with a level; adjust hangers or regrade sections to achieve 1/4″ per foot.
Clear vents using rods, water blast, or snake; replace collapsed venting.
Remove airlocks by introducing venting or temporary high-flow flushing.
Retest for smooth, gurgle-free drainage.
Code Compliance, Safety, and When to Call a Professional
The installer should review local plumbing codes to avoid common pitfalls such as improper vent sizing, incorrect trap distances, and unapproved materials.
Before cutting supply or drain lines, basic safety steps—shutting off water, relieving pressure, and protecting nearby wiring—must be followed to prevent injury and damage.
If work involves structural openings, complex rerouting, or permits, a licensed plumber should be engaged.
Typical code pitfalls and how to avoid them
Although loop vent installations can seem straightforward, they often run afoul of code requirements that vary by jurisdiction, material, and fixture configuration.
Common pitfalls include incorrect trap arm length, improper vent sizing or slope, using prohibited fittings or unlisted materials, and failing to maintain required clearances.
Avoid violations by consulting local codes, following manufacturer specs, obtaining permits, and seeking professional inspection when uncertain.
Safety precautions for cutting into supply/drain lines
When cutting into supply or drain lines, professionals should first isolate and depressurize the system, shut off valves, and drain remaining water to prevent flooding and injury.
They should verify power to electrically heated components is off, ventilate confined spaces, use proper PPE, support pipe ends to prevent collapse, deburr cuts, and test joints at low pressure.
Keep a clear work area and follow local codes.
When a job exceeds DIY scope and requires a licensed plumber
After following isolation and safety checks, professionals should recognize situations that exceed typical DIY skill, equipment, or legal allowances and call a licensed plumber.
Complex venting layouts, structural penetrations, sewer tie-ins, gas proximity, inaccessible traps, code interpretations, permit requirements, or persistent leaks demand licensed expertise.
A plumber guarantees compliance, pressure-tested integrity, correct materials, and liability coverage, preventing failures, fines, or safety hazards.
Cost Estimates, Timeframe, and Material Alternatives
A basic DIY plumbing loop vent typically involves modest material and tool costs plus potential permit fees, which can vary by locality and complexity.
Planning and installation commonly require a few hours to a full weekend for experienced DIYers, with added time for inspections or unforeseen issues.
Material choices—PVC, ABS, and copper—offer tradeoffs in cost, durability, ease of joining, and code acceptance that should be weighed before proceeding.
Typical DIY cost breakdown (materials, tools, permits)
Budgeting a plumbing loop vent project requires itemizing materials, tools, permit fees, and a realistic labor timeframe to produce reliable cost estimates and identify cheaper alternatives. Typical DIY breakdown lists PVC fittings, pipe, sealant, basic tools, and permit charges; optional tool rental reduces purchase cost but adds time. Compare material grades for savings and confirm local permit requirements.
| Item | Typical Cost |
|---|---|
| PVC pipe | $10–$40 |
| Fittings | $5–$30 |
| Sealant | $3–$10 |
| Tools/rental | $0–$80 |
| Permit | $0–$200 |
Estimated time for planning and installation
When homeowners plan a plumbing loop vent, they should allow time for site assessment, permit approval, materials sourcing, and the actual installation.
These steps typically span from half a day for a straightforward retrofit to two full days for more complex layouts.
Inspection scheduling, drying or curing periods for sealants, and unexpected adjustments can extend timelines; allocate a buffer of one additional day.
Material options (PVC vs. ABS vs. copper) and pros/cons
Following the scheduling and permitting considerations, selection of pipe material becomes the next practical decision, with PVC, ABS, and copper offering distinct trade-offs in cost, installation time, durability, and code acceptance.
PVC: inexpensive, easy to join, widely accepted;
ABS: tougher, cold-resistant, limited in some jurisdictions;
copper: durable, costly, soldering required;
alternatives include CPVC or galvanized in older systems.
- Cost differences
- Installation time
- Longevity and maintenance
- Code and compatibility
Common Mistakes and Tips to Ensure Long-Term Performance
Common mistakes—such as incorrect slope, improper vent tie-in, or an undersized vent—compromise function and can lead to code violations.
Recommended best practices include following local code for sizing and placement, using durable materials, and verifying slope and tie-in details during installation.
Routine maintenance—periodic inspections, clearing obstructions, and checking seals—helps guarantee long-term, code‑compliant performance.
Mistakes to avoid (incorrect slope, improper vent tie-in, undersized vent)
Several frequent errors can compromise a plumbing loop vent’s function and longevity, especially incorrect slope, improper vent tie-in, and undersized vent piping.
Improper slope causes trap siphoning or solids buildup; incorrect tie-ins allow backflow or block venting; undersized vents restrict air movement, increasing noise and pressure issues.
Inspect gradients, join points, and pipe diameters against specifications to prevent failures and premature repairs.
Best practices for durable, code-compliant installations
Guarantee correct materials, clear layout, and adherence to code requirements from the start to produce a durable, code-compliant plumbing loop vent.
Install approved pipe types and fittings, maintain proper slopes, and follow manufacturer and local code specifications. Confirm secure support and accessible cleanouts.
- Use code-listed materials and sizes
- Verify slope and trap distances
- Anchor pipes and protect joints
- Provide inspection access
Maintenance tips to keep the vent working properly over time
Routine inspection and simple maintenance steps keep a plumbing loop vent functioning reliably and prevent common failures.
Periodically check for blockages, ice, debris, or bird nests at terminations. Verify joints and supports are secure and leak-free.
Flush accessible sections to remove sediment. Replace worn seals and corrosion-prone components promptly.
Document inspections and schedule professional evaluation if flow or odors reappear.
Conclusion
A plumbing loop vent restores fixture drainage balance by admitting air and preventing traps from siphoning; skilled DIYers and professionals alike follow measured planning, correct fittings, and code to guarantee reliability. The guide’s stepwise approach—tools, layout, installation, testing, and troubleshooting—reduces surprises, though ancient wisdom and modern codes must coexist: like a scribe consulting both scroll and tablet, one must respect safety, permit requirements, and know when to summon a licensed plumber for complex or questionable situations.