How to Convert Hot Water Heater to Tankless: a Step-By-Step DIY Guide
Converting your traditional tank water heater to a tankless system can enhance energy efficiency and provide a continuous supply of hot water. This process involves removing the old tank, selecting the right tankless unit based on your peak flow and temperature needs, and upgrading necessary components like venting and gas or electrical service. You will also need to install condensate drains, pressure relief components, and corrosion-resistant fittings, followed by thorough testing for leaks and proper combustion. Be aware that permits and potentially professional assistance may be required. This guide offers a detailed step-by-step approach to installation, testing, maintenance, costs, and troubleshooting, ensuring you have all the information needed to successfully complete the conversion.
Overview of Converting a Tank Water Heater to Tankless
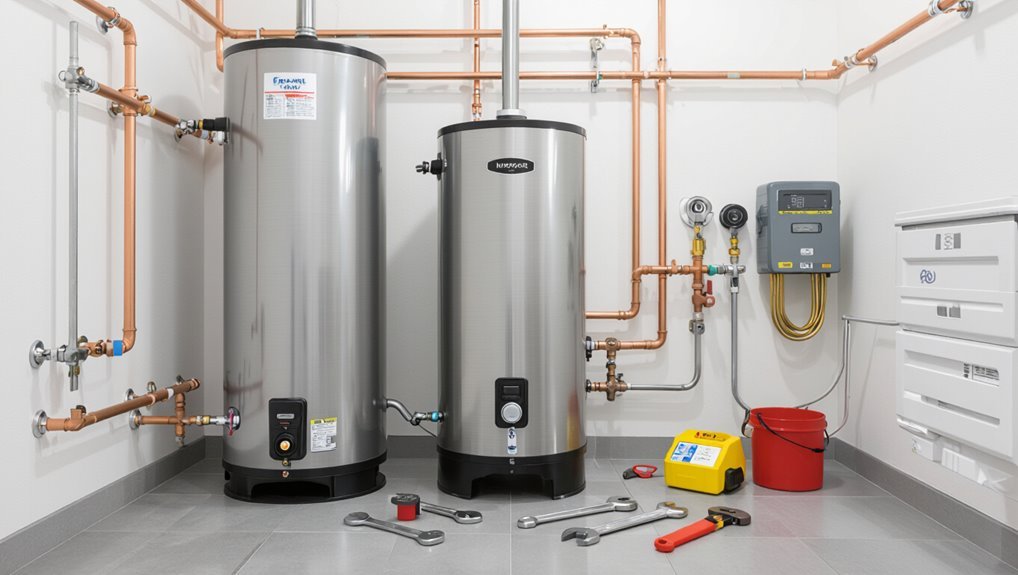
Converting a tank water heater to tankless can mean a full replacement or a partial retrofit, depending on existing fuel, venting, and electrical or gas capacity.
The switch typically yields higher energy efficiency and endless hot water but may involve higher upfront costs, space and installation constraints, and variable flow limits.
Typical installation costs range widely—often several thousand dollars—with payback periods influenced by household usage, utility rates, and available incentives.
What “converting” means: replacement vs. retrofit
Switching from a traditional tank water heater to a tankless system can mean either a straightforward replacement or a more involved retrofit; the distinction hinges on how much of the existing equipment and infrastructure is reused.
Replacement swaps the unit and uses existing gas, venting, and plumbing.
Retrofit modifies venting, gas lines, or electrical service.
Guidance on how to convert hot water heater to tankless clarifies decision points.
Key benefits and drawbacks of switching to tankless
After outlining whether a job will be a simple replacement or a more involved retrofit, an appraisal of benefits and drawbacks helps determine if a tankless system fits the household’s needs.
Benefits:
- continuous hot water
- smaller footprint
- improved energy efficiency
- longer lifespan.
Drawbacks:
- higher upfront complexity
- possible need for gas or electrical upgrades
- reduced flow for simultaneous fixtures
- maintenance sensitivity to hard water.
Typical cost range and return on investment
Cost estimates for replacing a tank-style water heater with a tankless unit typically span a wide range because of equipment choice and installation complexity.
Typical residential installations cost between $1,500 and $5,000 for electric units and $2,500 to $7,500 for gas, including labor.
Payback varies by usage, energy prices, and incentives, often 5–15 years; higher upfront cost offsets long-term savings.
Is Your Home a Good Candidate for Tankless Conversion?
Determining whether a home suits a tankless conversion begins with identifying the existing fuel type—natural gas, electric, or propane—and confirming compatible supply lines.
The assessment should quantify household hot water demand and required flow rates while inspecting available installation space, venting options, and clearance requirements.
Finally, an evaluation of electrical panel capacity and gas line sizing will reveal whether upgrades are needed to support a tankless unit.
Assessing existing fuel type: gas, electric, propane
Which fuel source currently supplies a home—natural gas, electricity, or propane—determines much of the feasibility and cost of switching to a tankless water heater.
Natural gas and propane often support higher-flow tankless units but may need updated venting and gas-line sizing.
Electric models require adequate electrical capacity and panel upgrades.
Verify local codes, utility availability, and installation costs before choosing a fuel type.
Evaluating hot water demand and flow rate requirements
After confirming fuel availability and any required gas, venting, or electrical upgrades, the next step is to measure a household’s hot water needs and peak flow rates to see if a tankless system can meet demand.
Calculate simultaneous fixture use (showers, dishwasher, laundry) in gallons per minute, note required temperature rise, and compare totals to tankless unit specifications to determine suitability and sizing.
Inspecting installation space, venting, and clearance needs
A careful assessment of the proposed installation area, venting options, and required clearances is essential to determine whether a home is a practical candidate for a tankless water heater conversion.
The installer must verify wall space, indoor vs. outdoor mounting, direct or power-vent configurations, exhaust termination paths, combustion air access, and manufacturer minimum clearances to combustibles and service access to guarantee code compliance and safe operation.
Checking electrical panel capacity and gas supply line sizing
Because tankless units demand concentrated bursts of power, evaluating a home’s electrical panel capacity and gas supply sizing is critical before committing to conversion.
A qualified electrician verifies available amperage, circuit space, and potential panel upgrades.
For gas models, a plumber measures supply pressure and line diameter to confirm required BTU flow; undersized wiring or piping necessitates costly upgrades and affects performance and safety.
Required Permits, Codes, and Professional Involvement
Permitting and local building codes often dictate gas line, venting, electrical, and installation standards for tankless conversions and should be checked with the municipal building department.
A licensed plumber or electrician is typically required for any work that alters gas, water, or electrical systems to guarantee code compliance and safe operation.
Homeowners should also verify how professional installation affects insurance coverage and manufacturer warranties before proceeding.
Common permit requirements and local code considerations
When converting to a tankless water heater, homeowners should verify required permits, code updates, and any municipal inspections before work begins.
Typical requirements include mechanical or plumbing permits, gas line approvals, electrical permits for high‑amp circuits, and venting specifications.
Local codes may mandate seismic strapping, condensate disposal, or combustion air provisions.
Confirm submission documents, inspection timelines, and permit fees with the authority.
When to hire a licensed plumber or electrician
Many homeowners will need to hire a licensed plumber or electrician for a tankless water heater conversion whenever scope, code, or safety requirements exceed basic DIY skills.
Professionals are required for gas line changes, high‑capacity electrical upgrades, complex venting, and code compliance documentation.
Hire licensed trades for permit inspections, structural modifications, or when local regulations mandate certified installation to guarantee safety and pass inspections.
Insurance and warranty implications
Beyond technical and safety reasons for hiring licensed trades, homeowners must also consider how permits, code compliance, and professional involvement affect insurance coverage and product warranties.
Insurers may deny claims for unpermitted work; manufacturers often require certified installation to honor warranties.
Proper permits, inspections, and documented contractor credentials protect claim eligibility, maintain warranty validity, and reduce liability exposure after conversion to a tankless system.
Tools, Materials, and Equipment Needed
A clear inventory of tools, safety gear, and parts is essential before beginning a tankless water heater conversion.
This includes common hand and power tools, personal protective equipment, the chosen tankless unit and appropriate venting kits, fittings, and any required gas regulators.
Optional accessories such as water softeners, recirculation pumps, and smart controls should also be considered for system performance and convenience.
List of common tools and safety gear
Before beginning the conversion, assemble the essential tools, materials, and protective gear so work proceeds efficiently and safely.
A concise kit prevents delays and reduces hazards. Typical items include hand and power tools, plumbing supplies, and safety equipment. Confirm quality and compatibility before starting.
- Adjustable wrench, pipe cutter, and drill
- Pipe fittings and thread sealant
- Safety goggles and gloves
- Carbon monoxide detector
Materials and parts: tankless unit types, venting kits, fittings, gas regulators
When selecting materials and parts for a tankless conversion, homeowners should match the unit type, venting system, fittings, and gas controls to the home’s capacity and code requirements.
Choose between condensing and non‑condensing units, confirm venting kit compatibility, select copper or stainless fittings, and size gas regulators and lines for peak demand.
- Condensing vs non‑condensing unit
- Direct or concentric vent kit
- Corrosion‑resistant fittings
- Properly sized gas regulator
Optional accessories: water softeners, recirculation pumps, smart controls
Several optional accessories can enhance a tankless water heater’s performance and longevity, including water softeners to prevent scale buildup, recirculation pumps to reduce wait times for hot water, and smart controls for temperature management and diagnostics.
Consider compatibility, installation complexity, and maintenance needs when selecting options.
- Water softener for mineral control
- Recirculation pump for instant hot water
- Smart thermostat/control module
- Inline sediment filter
Step-by-Step Conversion Process
The conversion process begins with preparing the work area, shutting off utilities, and safely removing the existing tank unit.
Next steps focus on sizing and selecting a tankless heater based on required flow rate and temperature rise, then upgrading or installing the appropriate gas or electrical supply.
The sequence concludes with fitting the chosen unit and installing proper venting or a concentric vent system.
Preparing the work area and shutting off utilities
Begin by clearing and organizing the immediate work area to guarantee unobstructed access to the existing water heater, gas line, electrical panel, and venting paths.
Next, locate and shut off the main water supply and close appliance isolation valves.
Turn off the gas supply at the meter or appliance shutoff and switch off relevant breakers.
Verify all utilities are secured and post warning signs.
Removing the old tank water heater safely
With utilities secured and the work area cleared, attention shifts to safely removing the existing tank water heater.
The technician drains the tank, disconnects water, gas or electrical lines, and vents. Tank supports and mounting are detached, then the unit is lifted out with assistance.
All fittings, insulation, and debris are removed; the area is inspected for leaks or damage before proceeding.
Sizing and selecting the right tankless unit (flow rate and temperature rise)
How much hot water will be needed and how much must the unit raise the incoming water temperature are the two calculations that drive tankless selection.
Calculate peak simultaneous flow by totaling fixture GPM.
Determine required temperature rise: desired outlet minus incoming cold.
Match a unit whose rated GPM at that temperature rise covers peak demand.
Consider efficiency and future needs when choosing capacity.
Upgrading or installing gas line or electrical supply
After sizing the unit, attention turns to supplying the necessary gas or electrical capacity to support it.
Determine required gas BTU or electrical amperage from manufacturer specs. For gas, calculate pipe size and run length; install shutoff and pressure test.
For electric, verify panel capacity, install dedicated breaker and appropriately sized conductors.
Permit, inspection, and licensed tradesperson involvement guarantee safety and code compliance.
Installing venting or concentric vent systems
Begin by identifying the manufacturer’s venting requirements and site limitations to determine the appropriate vent type—direct-vent, power-vent, or concentric—along with clearances, termination location, and maximum run length.
Then plan route, size ducting per spec, install approved materials, slope horizontal runs toward outdoors, seal joints with manufacturer-approved sealant, secure supports, install termination cap and verify draft, leak-free connections, and code compliance.
Mounting the tankless unit and connecting water lines
With venting secured and terminations verified, attention turns to mounting the tankless unit and connecting the water lines.
The unit is leveled and anchored to studs or a rated bracket at recommended height.
Supply and hot lines are cut, deburred, and fitted with isolation valves.
Use appropriate fittings, follow flow-direction markings, torque connections to spec, and pressure-test the system for leaks.
Installing condensate drain and pressure relief components
Install the condensate drain and pressure-relief components next to guarantee safe handling of acidic condensate and overpressure events.
Fit a corrosion-resistant condensate trap and routed PVC or CPVC to a suitable drain with a neutralizer if required.
Mount a temperature and pressure relief valve on the hot outlet, piped to a safe discharge.
Test fittings for leaks and secure all connections.
Performing initial startup, commissioning, and vent/combustion tests
After confirming condensate and pressure-relief plumbing are secure and leak-free, the installer proceeds to initial startup, commissioning, and vent/combustion testing to verify safe operation.
The technician follows manufacturer purge and ignition sequence, checks gas and water pressures, validates error codes, measures flue draft and CO levels, inspects vent seals and termination, and documents settings and readings for warranty and safety records.
Checking for leaks and testing hot water delivery at fixtures
Begin by visually inspecting all accessible piping, fittings, valves, and appliance connections for signs of moisture, drips, or wetness. Then tighten any loose fittings and rectify observable faults.
Open faucets and showers sequentially, check flow and temperature stability, and observe for new leaks while the system is under pressure.
Test each fixture hot supply and document any anomalies for immediate repair or adjustment.
Comparison: Common Tankless Options and Retrofits
The section compares common tankless configurations to help determine the best fit for a given home and retrofit scenario. It contrasts gas and electric units, evaluates point-of-use versus whole-house sizing and placement, and outlines partial or hybrid retrofit pathways for phased upgrades. The goal is a concise decision framework linking fuel type, unit scope, and practical retrofit choices.
| Aspect | Typical Benefits | Retrofit Considerations |
|---|---|---|
| Gas vs Electric | Higher flow rates (gas); simpler electrical needs (electric) | Venting, gas line capacity vs. panel/amp upgrades |
| Point-of-use vs Whole-house | Targeted supply, lower install cost vs. full coverage | Multiple units vs. single high-capacity unit and routing |
| Partial/Hybrid Retrofits | Phased investment, immediate problem fixes | Compatibility, balancing existing storage with new units |
| Common Trade-offs | Efficiency, installation complexity, upfront cost | Space, permits, serviceability |
Gas vs Electric tankless pros and cons
Many homeowners weigh gas and electric tankless systems against factors such as installation complexity, operating cost, performance in cold climates, and maintenance needs.
Gas units deliver higher flow rates and better cold-weather performance but require venting and gas-line upgrades.
Electric units are simpler to install, cheaper upfront, and cleaner but may need substantial electrical upgrades and provide lower peak output.
Maintenance differs by fuel type.
Point-of-use vs whole-house units
Homeowners choosing between point-of-use and whole-house tankless systems should weigh flow requirements, installation complexity, and budget.
Point-of-use units serve single fixtures, offer lower upfront cost, simpler installation, and reduced heat loss.
Whole-house units deliver simultaneous demand for multiple outlets, require higher capacity, more complex plumbing and venting, and greater initial expense but simplify maintenance and central control.
Retrofit scenarios: partial upgrades and hybrid systems
Consider retrofit strategies that blend existing tank systems with tankless units to balance cost, performance, and disruption.
Partial upgrades target high-demand zones—kitchen or master bath—using point-of-use units while retaining the main tank.
Hybrid systems pair a small buffer tank with a tankless heater to reduce cold-water sandwich and peak load stress.
This approach minimizes plumbing changes and upfront expense.
Troubleshooting and Common Problems After Conversion
After conversion, common issues include no hot water or low flow, temperature swings and the “cold water sandwich,” and persistent error codes related to venting or combustion.
Mineral buildup and neglected maintenance often cause reduced performance or premature failures.
The following section outlines how to diagnose these symptoms and typical corrective actions.
No hot water or low flow issues
When a newly installed tankless water heater delivers no hot water or poor flow, the issue often traces to installation errors, incorrect settings, or supply constraints; diagnosing the cause quickly prevents damage and restores performance.
The homeowner should verify inlet water supply, isolation valves, filters, and minimum flow activation.
Check gas or electrical supply, correct venting, and unit error codes; trace and fix identified faults.
Temperature fluctuations and cold water sandwich
Diagnose temperature fluctuations and the “cold water sandwich” by recognizing their typical pattern: brief bursts of hot water separated by sudden cold water spikes when flow changes.
Causes include oversized burner response, delayed heat exchanger stabilization, or low minimum flow rates triggering intermittent heating.
Remedies involve adjusting flow controls, confirming proper minimum activation, tuning temperature rise settings, and ensuring consistent demand or installing a buffer loop.
Venting or combustion errors and error codes
Check the venting and combustion system immediately if the tankless unit displays error codes or exhibits irregular flame behavior, as these issues commonly signal blocked vents, incorrect vent termination, inadequate combustion air, or flue gas recirculation.
Consult the unit’s code list, inspect vent runs for obstructions or improper slope, verify termination clearances and fresh-air intake, and correct any sealing or draft problems promptly.
Mineral buildup and maintenance-related failures
After confirming the combustion and venting system is operating correctly, attention should shift to mineral buildup and routine maintenance failures, which are among the most common causes of reduced performance in tankless water heaters.
Scale restricts heat exchanger flow, triggers error codes, and reduces efficiency.
Regular descaling, inlet filters, and annual professional inspections prevent deposits, corrosion, and premature component failure.
Maintenance Schedule and Long-Term Care
A clear maintenance schedule helps preserve efficiency and extend the lifespan of a tankless water heater.
Regular descaling and flushing, routine cleaning of filters, inlet screens, and burners, and seasonal checks can prevent buildup and performance loss.
Professional service should be scheduled for annual inspections or whenever recurring issues, unusual noises, or error codes appear.
Descaling and flushing frequency and methods
Longevity depends largely on regular descaling and flushing to prevent mineral buildup that reduces efficiency and can damage components.
Annual flushing is recommended for moderate hardness; every 3–6 months in hard-water areas.
Use manufacturer-approved descaling solution and follow pump-flush procedure: isolate unit, circulate solution per instructions, rinse until clear, restore water and power.
Record dates and results for ongoing maintenance.
Filter, inlet screen, and burner maintenance
Inspect and clean the inlet filter, screen, and burner at regular intervals to maintain efficiency and safety.
Remove debris and sediment from the sediment trap and inlet screen; rinse or replace as needed.
Gently brush burner ports and vacuum loose particles from the combustion chamber.
Check for corrosion, soot, or flame irregularities.
Record maintenance dates and parts replaced to track long-term performance.
Seasonal checks and when to call a pro
Routine cleaning of inlet screens and burners sets the stage for seasonal checks that address system-wide wear and changing conditions.
Inspect venting, pressure relief valve, and water connections quarterly; flush scale annually.
Test ignition and safety controls before high-demand seasons.
If corrosion, gas leaks, persistent error codes, or irregular flow appear, engage a licensed technician promptly to prevent failure and preserve warranty.
Cost Breakdown and Energy Savings Analysis
A concise cost breakdown compares upfront expenses—unit price, installation, and any necessary electrical or plumbing upgrades—with annual operating costs across fuel types.
The analysis then contrasts expected energy use and fuel bills for tankless versus tank systems to estimate realistic savings.
Representative payback-period examples illustrate when the initial investment is likely to be recovered.
Upfront costs: unit, installation, upgrades
Converting to a tankless water heater requires a clear accounting of upfront costs: the unit itself, professional installation, and any necessary home upgrades such as gas line enlargement, venting, or electrical service changes.
Units vary widely by capacity and fuel type; installation labor depends on complexity. Budget additionally for permits, possible water treatment, and minor plumbing rerouting.
Obtain multiple quotes before deciding.
Annual operating costs and fuel comparisons
Many homeowners see lower energy bills with tankless systems, but actual annual operating costs depend on fuel type, usage patterns, and system efficiency.
Electric units have predictable rates and lower maintenance; gas units offer lower per‑unit energy cost but require venting, periodic burner servicing, and standby losses for condensing models.
Fuel price volatility, local utility rates, and household hot‑water demand determine comparative annual expenses.
Payback period examples and energy-saving estimates
Several concrete examples clarify typical payback timelines and energy savings for homeowners considering tankless water heaters.
A 50-gallon electric replacement costing $1,200 saves $150/year (8-year payback).
A gas tank unit replaced by $2,000 condensing tankless saves $250/year (8-year payback).
Higher-efficiency installs, regional fuel prices, and household usage can shorten payback to 4–6 years; realistic estimates help informed decisions.
Safety Considerations and Best Practices
Safety considerations are paramount when converting to a tankless water heater, including proper gas hookups, awareness of carbon monoxide risks, and correct vent clearance.
Electrical safety and appropriate breaker sizing must be verified to handle the unit’s power draw.
Temperature controls should be set and anti-scald measures used to prevent scalding while maintaining efficiency.
Gas safety, carbon monoxide risks, and vent clearance
Because tankless gas units burn fuel on demand, proper installation and ventilation are critical to prevent carbon monoxide buildup and other hazards.
Installers should follow manufacturer venting paths, maintain required clearances from openings and combustibles, and guarantee sealed combustion where specified.
Install gas leak detectors, schedule professional pressure and combustion testing, and comply with local codes and permit requirements to minimize risk.
Electrical safety and breaker sizing
Prioritize correct electrical setup when installing a tankless water heater: these units often require dedicated circuits, specific breaker types, and wiring sized to handle high continuous current.
A qualified electrician should calculate load, select appropriately rated breakers (often multi-pole), use correct gauge conductors, guarantee proper grounding, install surge protection, and comply with local codes and permit requirements to prevent overheating, fire, or nuisance tripping.
Preventing scalding and setting safe temperature limits
Prevent scalding by setting a tankless water heater’s maximum temperature to a level that balances comfort and safety, typically 120°F (49°C) for most households, while recognizing vulnerable occupants—infants, elderly, or those with reduced sensitivity—may require lower limits.
Install thermostatic mixing valves at fixtures, label controls, test temperatures regularly, and educate occupants on risks and emergency shutoff procedures to guarantee ongoing protection.
Tips for a Smooth DIY Conversion
A concise pre-purchase checklist and accurate measurements are essential before beginning a tankless conversion to guarantee proper unit sizing and compatible connections.
The section also highlights common rookie mistakes—improper venting, undersized gas lines, and inadequate water flow—that can compromise performance or safety.
Clear criteria are provided for when to stop and hire a professional, such as complex gas work, electrical upgrades, or permit requirements.
Pre-purchase checklist and measurements
Before buying components, the homeowner should verify existing utility capacities, physical clearances, and local code requirements to guarantee the chosen tankless unit and installation method will fit and comply.
Measure cold-water flow rates, peak hot-water demand, venting path and clearance, gas line size or electrical service capacity, and mounting space.
Compile model specifications, necessary fittings, and permit requirements before purchase.
Common rookie mistakes to avoid
Expect unexpected hurdles when converting to a tankless system; novices often underestimate venting complexity, fuel and electrical upgrades, and the importance of correct flow and temperature settings.
Common mistakes include undersized gas lines, inadequate electrical capacity, poor vent routing, ignoring water hardness, skipping permits, and misreading installation clearances.
Careful planning, accurate measurements, proper parts, and following manufacturer instructions prevent costly rework.
When to stop and hire a professional
When should DIY work stop and a pro step in? If permits, gas line modifications, major electrical upgrades, venting design, structural changes, or persistent leaks are required, hiring a licensed contractor is advised.
Also consult a professional when local codes or warranty conditions demand certification, when pain points exceed personal skill, or when safety risks—carbon monoxide, fire, flooding—cannot be confidently mitigated.
Recommended Resources and Manufacturer Support
Manufacturer websites and authorized dealers are the primary sources for unit manuals, installation guides, and instructional videos, while third-party forums and trade organizations can offer additional perspectives.
Prospective installers should verify credentials through licensing boards and seek manufacturer-certified technicians to guarantee warranty compliance. Checking warranty terms and registration procedures before purchase protects against future disputes.
- Manufacturer product pages with downloadable manuals and video tutorials
- Authorized dealer portals and certified installer locators
- State or provincial licensing boards and trade association directories
- Written warranty documents, registration instructions, and service requirements
Where to find unit manuals, installation guides, and videos
Where can installers and homeowners locate reliable manuals, installation guides, and instructional videos for a tankless water heater?
Manufacturer websites host PDF manuals, wiring diagrams, and step-by-step install guides.
Authorized dealer portals and product support pages offer model-specific downloads.
OEM YouTube channels and installer training sections provide videos.
Major retailers and independent plumbing forums often link official resources; always match model number to documents.
How to verify installer credentials and warranties
Confidence in a tankless water heater installation rests on two verifiable pillars: qualified installers and valid warranties.
Verify installers via licenses, trade certifications, insurance, and local reviews; request references and written estimates.
Confirm warranty coverage, duration, registration requirements, and transferability; obtain manufacturer-authorized service terms in writing.
Keep copies of contracts, receipts, and warranty documents for future claims and maintenance.
Conclusion
Converting a conventional tank heater to a tankless system can offer long-term savings, greater efficiency, and continuous hot water, but it requires careful planning, code compliance, and sometimes professional help. Is the investment—and the necessary electrical or gas upgrades—worth the upfront cost and effort? Homeowners who assess load, permits, and ventilation needs, follow safety steps, and use proper tools will find the shift manageable and rewarding, provided they respect local regulations and manufacturer guidelines.