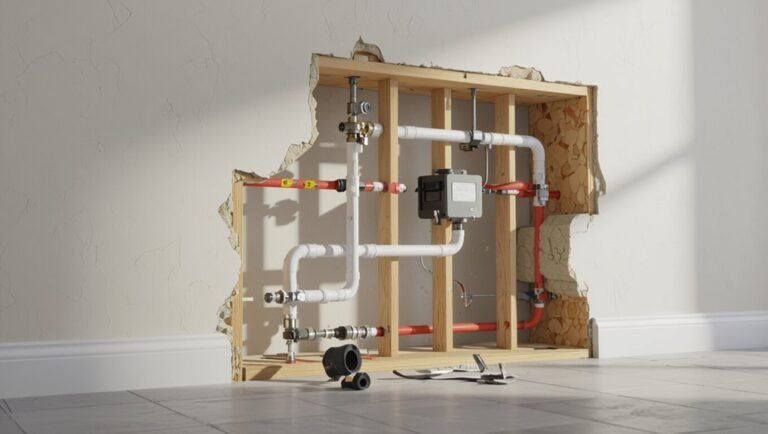
How to Repair Plumbing Under Slab: Step-by-Step Guide for DIY and Pros
Repairing plumbing under a slab involves a systematic approach to identify and fix leaks effectively. Start by confirming the presence of a leak through meter checks and visual indicators like warm concrete or damp spots. Use noninvasive detection methods such as acoustic, thermal, tracer gas, or pressure testing to locate the exact line. For minor issues, temporary solutions like epoxy or clamps may suffice. However, significant failures will necessitate more extensive work, including tunneling, cutting the slab, or rerouting pipes, along with full pipe replacement and proper restoration of concrete. Be mindful that permits, soil conditions, and accessibility will influence costs and methods. Follow this guide for detailed techniques, essential tools, and professional tips to ensure a successful repair.
Understanding Slab Plumbing and Why Repairs Are Needed
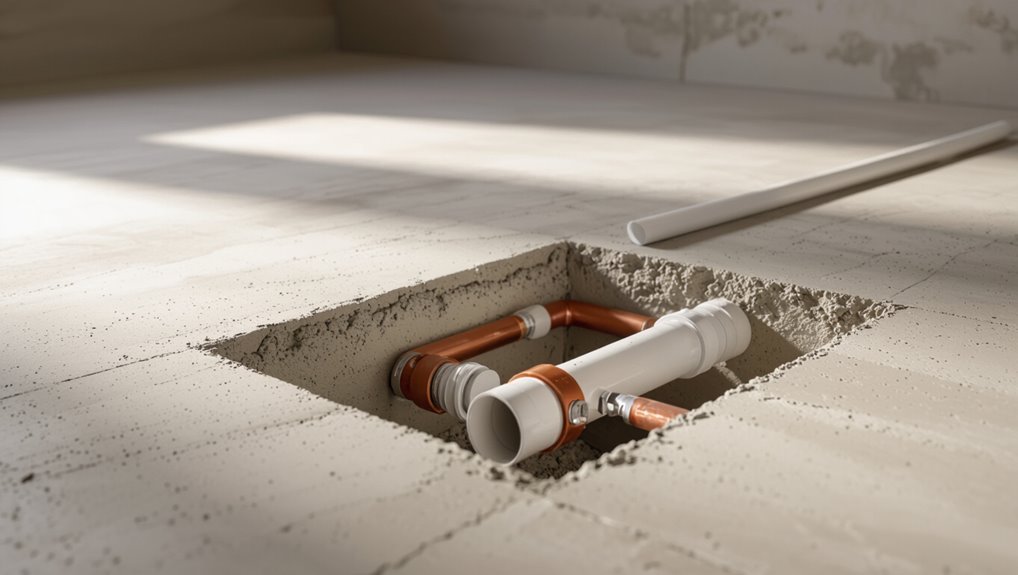
Plumbing under slab refers to water supply and drain lines routed beneath a concrete floor, typically found in slab-on-grade foundations and arranged as branch and main runs or continuous loops.
Failures commonly result from corrosion, shifting soil, poor installation, and invasive roots, with leaks often indicated by unexplained wet spots, sound of running water, or unusually high water bills—signs that differ from visible household leaks.
Prompt repair is important because delayed action increases structural damage, mold risk, and repair complexity and cost.
What “plumbing under slab” means and common configurations
A home’s drain, waste, and supply lines that run beneath the concrete slab form the system known as slab plumbing, connecting fixtures to the municipal sewer or septic tank and to the water service.
Configurations include single-stack stacks, branching mains, and localized runs to kitchens, bathrooms, and HVAC.
Understanding layout aids in planning access, diagnostics, and how to repair plumbing under slab efficiently.
Typical causes of slab plumbing failures (corrosion, shifting soil, poor installation, tree roots)
Failures of slab plumbing commonly stem from a handful of predictable causes: corrosion of metal pipes, soil movement and settling, substandard installation practices, and intrusion by tree roots.
Corrosion weakens joints and causes pinholes; shifting soil stresses fittings and cracks pipes; poor installation yields improper slopes, unsupported runs, or incompatible materials; tree roots exploit joints and fractures, enlarging damage over time.
Signs you have a slab leak vs other plumbing leaks
How can a homeowner tell a slab leak from more common leaks under sinks or in walls?
Slab leaks often produce unexplained increases in water bills, warm spots on concrete floors, persistent sound of running water with no visible source, and localized dampness or mold on slabs.
In contrast, cabinet or wall leaks usually show visible dripping, staining, or localized fixture-related moisture.
Risks of delaying slab plumbing repairs
Delaying repairs for slab plumbing can quickly compound minor leaks into extensive structural, health, and financial problems.
Untreated leaks erode concrete, weaken foundations, and cause floor settling or cracks.
Moisture fosters mold, pests, and indoor air hazards.
Corrosion enlarges failures, increasing repair complexity and cost.
Prolonged water loss raises utility bills and risks catastrophic floods, forcing emergency remediation and potential displacement.
Quick Assessment: Confirming a Slab Leak
Signs such as unexplained wet spots, warm floor areas, or persistent hissing can point to a slab leak and should be noted alongside any sudden increases in water usage.
Homeowners can run simple non-invasive checks—monitor the water meter with all fixtures off, listen near walls and floors, and inspect for fresh stains or mold.
If these quick checks suggest a leak or the source remains unclear, a professional leak detection service should be contacted.
Visual and audible indicators inside the home
A few clear visual and audible cues inside the home can quickly point to a slab leak: unexplained wet spots on floors or carpets, persistent damp or moldy odors, warm areas on concrete or unusually warm flooring, sudden drops in water pressure, and the sound of running or hissing water when no fixtures are in use.
Additional signs include peeling paint, warped baseboards, and localized ceiling stains.
Monitoring water meter and usage patterns
Check the water meter to quickly verify whether a leak is active: record the meter reading with all indoor water sources off, avoid using irrigation systems, then recheck after 30–60 minutes; any unexplained change indicates water is flowing somewhere under or within the slab.
Track daily and weekly consumption on bills or a log to spot gradual increases. Correlate spikes with household activity timelines.
Simple non-invasive checks homeowners can perform
After confirming unusual meter activity or rising usage patterns, homeowners can perform a few straightforward, non-invasive checks to help determine whether water is escaping beneath the slab.
Inspect visible pipes, fixtures and drywall for dampness, stains or warping.
Listen for continuous water sounds when all fixtures are off.
Compare yard or slab areas for unexplained wet spots, sinkage or warm surfaces indicating possible subsurface flow.
When to call a professional leak detection service
When should a homeowner engage a professional leak detection service? A professional is warranted if water bills spike, unexplained damp spots or warm floor areas appear, low water pressure persists, or non-invasive checks fail to locate the source.
Technicians use acoustic, thermal, and tracer gas methods to confirm slab leaks accurately, minimizing unnecessary concrete removal and guiding targeted repairs.
Leak Detection Methods and Tools
A range of detection methods and tools helps locate slab leaks with varying accuracy, speed, and cost.
Common approaches include electronic acoustic listening devices, thermal imaging/infrared cameras, pressure testing with isolation procedures, and tracer gas or smoke testing.
Each method carries specific pros, cons, and price implications that determine suitability for different leak scenarios.
Electronic leak detection (acoustic listening devices)
Though often used in conjunction with other methods, electronic leak detection via acoustic listening devices offers a noninvasive way to pinpoint leaks beneath concrete slabs by amplifying and analyzing the sound of escaping water.
Technicians scan floors, fittings, and access points with sensitive microphones and correlators to locate continuous or intermittent leaks. Results guide targeted slab cuts, minimizing excavation and repair time while improving accuracy.
Thermal imaging and infrared cameras
Acoustic methods often narrow the search area by identifying probable leak zones; thermal imaging and infrared cameras then provide a complementary, noncontact means to visualize temperature differences caused by escaping water beneath slabs.
Operators scan floors for cool or warm anomalies, correlate patterns with plumbing layouts, document findings photographically, and mark investigation points.
Results guide targeted excavation or further verification with probes or moisture meters.
Pressure testing and isolation procedures
Several controlled pressure tests, combined with systematic isolation procedures, form the backbone of leak confirmation beneath slabs.
Technicians isolate zones, cap branches, and pressurize lines with water or air while monitoring gauges for decay.
Sequentially opening and closing segments pinpoints affected piping. Recorded pressure drops, corroborated with auditory or moisture checks, guide targeted repairs and minimize unnecessary excavation.
Tracer gas and smoke testing
After pressure testing and isolation have narrowed the search area, technicians often employ tracer gas and smoke testing to locate otherwise undetectable leaks beneath slabs.
Inert tracer gases (helium or hydrogen mixes) are introduced into lines; gas migration is detected with sniffer probes.
Smoke testing uses noncorrosive smoke to reveal entry points at joints, cracks, or utility penetrations for targeted excavation and repair planning.
Pros, cons, and costs of each detection method
Understanding the trade-offs among detection methods is essential for choosing the most effective and economical approach. Each technique offers different accuracy, intrusiveness, required skill, and cost; choices depend on leak size, location, and budget. Below is a concise comparison.
| Method | Pros / Cons / Typical Cost |
|---|---|
| Acoustic listening | Non‑invasive; skill‑dependent; $100–$400 |
| Thermal imaging | Quick; surface‑limited; $200–$800 |
| Tracer gas | Accurate; regulatory limits; $300–$900 |
| Smoke testing | Cheap; less precise; $50–$200 |
| Pressure testing | Definitive; may require isolation; $50–$300 |
Options for Repairing Plumbing Under a Slab
A range of repair strategies exists for plumbing under a slab, including patching, tunneling, slab jacketing, traditional excavation and replacement, and non-invasive options such as pipe lining and epoxy relining.
Alternatives also include rerouting lines above the slab or through a crawlspace to avoid slab work.
The following discussion compares these methods by cost, disruption, longevity, and suitability for different failure scenarios.
Repair strategies overview: patching, rerouting, tunneling, slab jacketing
When slab plumbing fails, several repair strategies are available—patching localized leaks, rerouting lines above grade, tunneling to access buried sections, or executing slab jacketing to encase and protect repaired pipes.
Each approach balances cost, disruption, longevity, and accessibility: patches suit minor leaks, reroutes avoid future slab work, tunneling targets precise repairs, and jacketing reinforces vulnerable runs.
Selection depends on damage extent, soil, and budget.
Non-invasive solutions: pipe lining and epoxy relining
Although less intrusive than excavation, non-invasive pipe lining and epoxy relining provide durable ways to repair compromised sewer and drain lines beneath slabs by restoring structural integrity from the inside.
Technicians inspect and clean lines, insert cured-in-place liners or spray epoxy coatings, then cure to seal leaks, gaps, and root intrusion.
These methods minimize surface disruption, reduce cost and downtime, and extend pipe life.
Rerouting plumbing above the slab or through crawlspace
Consider rerouting plumbing above the slab or through an existing crawlspace to bypass damaged lines without breaking concrete.
This approach relocates supply and drain runs to accessible zones, using new vents, supports, and insulation. It minimizes slab demolition, reduces cost and downtime, and can simplify future maintenance.
Assess structural constraints, code compliance, slope requirements, and professional permitting before proceeding.
Traditional excavation and replacement under the slab
Excavate directly beneath the slab to access and replace damaged pipes when rerouting is impractical or code requires original routing.
This method involves cutting concrete, removing soil, exposing lines, replacing sections or full runs, and pressure-testing new piping.
Restore bedding, backfill, and pour new slab or patch.
It suits complex layouts or multiple failures but demands permits, heavy equipment, and experienced contractors for structural safety.
Comparative summary of methods by cost, disruption, longevity, and suitability
Several common repair approaches—trench excavation, tunneling, pipe bursting, rerouting above slab, and cured-in-place lining—can be compared across cost, disruption, longevity, and suitability to help homeowners and contractors choose the best method for a given failure. A concise comparison follows:
| Method | Cost | Disruption |
|---|---|---|
| Excavation | High | High |
| Tunneling | Medium | Medium |
| Pipe bursting | Medium | Low |
| Rerouting | Low | Medium |
| CIPP lining | Medium | Low |
Step-by-Step Guide for DIY Minor Repairs and Temporary Fixes
Before attempting any work, the homeowner must confirm water and electrical shutoffs, check permit requirements, and follow basic safety precautions.
The process then focuses on precisely locating the leak with simple tools, isolating the affected section, and creating temporary shutoffs or access points.
For small repairs, practical options include cutting a concrete access hatch, using epoxy or mechanical clamps for temporary seals, and planning permanent repair steps.
Safety precautions before starting (shutoff, electricity, permits)
Begin by securing all utility controls and confirming required permits to guarantee work proceeds safely and legally.
Shut off main water, isolate affected branch, and drain lines.
De-energize nearby electrical circuits and lock/tag breakers if work approaches wiring.
Notify local authorities or building management of planned disturbance.
Verify permit approvals and inspections schedule; document compliance before excavation or concrete cutting begins.
Locating the leak precisely using basic tools
With utilities secured and permits confirmed, the next step is to pinpoint the leak using simple tools so minor repairs or temporary fixes can be applied accurately.
A pressure gauge, hose bib tester, and audible leak detector help identify sections losing pressure.
Combine with soil probing, moisture meter scans, and dye tests at fixtures.
Mark locations, measure distances to known reference points for excavation planning.
Temporary shutoff and isolation techniques
Isolate the affected line and secure water flow to the work area by shutting individual fixture valves, closing the nearest branch shutoff, or turning off the main supply if needed; verify isolation with a pressure gauge and by opening downstream fixtures to confirm no flow.
Cap or plug isolated pipe ends, relieve trapped pressure, and label shutoffs. Use hose bibs or temporary bypass lines to preserve essential service safely.
Small-section repair methods accessible to homeowners (access hatch, concrete cutting)
After confirming the line is shut and capped, the homeowner can proceed to small-section repairs by exposing only the immediate problem area rather than breaking up large portions of slab.
Options include installing an access hatch in a closet or utility area, or cutting a small concrete patch with a diamond blade.
Mark, cut, remove minimal slab, perform repair, then backfill and reseal for a neat, discreet finish.
Applying epoxy or mechanical clamps for temporary fixes
Begin by confirming the water supply is fully shut off and the pipe is depressurized; then clean and dry the damaged area thoroughly to guarantee proper adhesion.
For small cracks, apply an appropriate epoxy putty or resin per manufacturer instructions, shaping and curing fully.
For pinholes or quick containment, use a mechanical clamp or repair sleeve rated for the pipe material, tightening evenly to avoid stress.
When a DIY attempt should stop and a pro is required
Once temporary measures such as epoxy patches or mechanical clamps are in place, there are clear signs indicating the homeowner should stop and call a professional:
leaks that persist or recur despite repairs, evidence of ongoing water movement under the slab (soft spots, new staining, or unexplained dampness), multiple or large-diameter pipe failures, sewage contamination, or inability to access or properly secure the damaged section.
A pro assesses structural risk, performs permanent repairs, and guarantees code compliance.
Step-by-Step Guide for Professional-Grade Repair or Full Replacement
The professional-grade procedure begins with site preparation and permit acquisition to guarantee compliance with local codes.
Excavation or tunneling is then planned with precise mapping and shoring before damaged slab pipes are exposed, removed, and replaced or rerouted.
Finally, changes and connections (including PEX options) are installed, followed by careful backfilling, compaction, and slab restoration to industry best practices.
Preparing the site and obtaining permits
Clearing the work area and securing the necessary permits are essential first steps before any under-slab plumbing repair or replacement.
Professionals verify utility locations, mark protected zones, and arrange traffic or neighbor notifications. They submit detailed permit applications with scope, materials, and engineered plans, obtain inspections schedule, and confirm insurance and contractor licensing.
Proper documentation prevents delays, fines, and safety lapses.
Excavation or tunneling approach: mapping and shoring
With permits approved and utilities located, professionals shift focus to locating the exact pipe run and planning access points for either open excavation or tunneling.
They create scaled maps, mark entry/exit pits, and select shoring systems based on soil type and depth.
Temporary bracing, trench boxes, and dewatering strategies are specified to protect workers, adjacent structures, and the slab during controlled access operations.
Removing and replacing damaged pipe sections under slab
Begin by exposing the identified pipe section to a clean, stable work area: contractors remove slab and subgrade only to the extent required, keeping openings square and shoring edges as planned to prevent collapse.
Cut deteriorated pipe back to sound material, deburr and clean ends, measure and fit replacement segment.
Use compatible couplings, secure supports, pressure-test assembly, backfill in controlled lifts and restore slab per structural specifications.
Installing reroutes, PEX transitions, and connections to existing system
After exposing and replacing the damaged slab pipe section, focus shifts to rerouting lines, installing PEX connections, and integrating the new run with the existing system.
Professionals plan a continuous route avoiding stress points, secure PEX with proper clips and insulation, use approved junction fittings and manifolds, pressure-test assemblies, and document tie-in locations and valve orientations for future service and code compliance.
Backfilling, compaction, and slab repair best practices
Complete backfilling, proper compaction, and slab repair guarantee the longevity and safety of a slab-level plumbing restoration.
Technicians should backfill in layers, compact each lift to specified density, and use clean, non-reactive fill.
Control moisture, avoid organic material, and protect piping.
Repair slab with appropriate reinforcing, joint preparation, and curing regimen to restore structural integrity and prevent settling.
Post-repair testing and final inspections
Verify system integrity and performance through a structured regimen of post-repair testing and final inspections that target leaks, pressure stability, drainage, and slab restoration quality.
Conduct pressure and leak tests on repaired lines, verify flow and drainage, inspect joint seals and backfill compaction, confirm concrete cure and surface finish, and document findings.
Address deficiencies immediately and obtain required permits or sign-offs before occupancy.
Tools, Materials, and Equipment Checklist
A concise inventory of tools, materials, and equipment is essential before beginning any under-slab plumbing repair.
This checklist covers detection and diagnostic instruments, cutting, excavation, and concrete tools, compatible pipe types and fittings (copper, PVC, CPVC, PEX), and repair materials such as epoxy liners, clamps, sleeves, and sealants.
It also notes required protective gear and site-restoration supplies to guarantee safety and a professional finish.
Detection and diagnostic tools
Gather the right detection and diagnostic tools before breaking concrete to minimize guesswork and unnecessary excavation.
Essential items include electronic leak detectors, acoustic listening devices, infrared thermal cameras, pipe locators with sonde capability, and moisture meters.
Add a borescope for visual inspection through small probes and a pressure testing kit to confirm leaks.
Calibration and operator training guarantee accurate readings.
Cutting, excavation, and concrete tools
Once leaks are located and pressures confirmed, attention shifts to the cutting, excavation, and concrete tools required to access underground piping.
Essential items include concrete saws or jackhammers for slab removal, pneumatic or electric breakers, shovels, pickaxes, tampers, and wheelbarrows.
Hand tools—chisels, pry bars, and cold chisels—plus safety gear (respirators, ear protection, gloves, eye protection) and dust control measures complete the checklist.
Pipe types and fittings for slab repairs (copper, PVC, CPVC, PEX)
Repairing slab plumbing requires selecting pipe materials and fittings that match existing systems, soil conditions, and local code. Common choices include copper, PVC, CPVC, and PEX, each with distinct joining methods, durability, and cost profiles.
Copper offers soldered or press fittings and longevity. PVC/CPVC use solvent weld or threaded connections. PEX relies on crimp, clamp, or push-fit fittings and resists corrosion and freeze damage.
Repair materials: epoxy liners, clamps, sleeves, sealants
After selecting compatible pipe types and fittings, attention turns to the specific repair materials used to seal and reinforce slab lines: epoxy liners, repair clamps and sleeves, and specialty sealants.
Epoxy liners cure to form seamless barriers for pinhole leaks. Stainless clamps and split sleeves mechanically secure sections.
Polyurethane and silicone sealants fill gaps and bond to metal or plastic, chosen for chemical compatibility and cure time.
Protective gear and site-restoration supplies
Personal protective equipment and site-restoration supplies form the backbone of a safe, code-compliant slab repair operation: hard hats, safety glasses, cut-resistant gloves, respirators rated for dust and chemical vapors, and steel-toe boots protect workers during excavation and chemical application, while knee pads and waterproof overalls reduce fatigue and contamination risk.
Alongside PPE, stock durable tarps, erosion-control fabric, barrier fencing, soil compaction tools, replacement topsoil, seed or sod, and appropriate disposal containers to restore the site promptly and minimize environmental impact.
- Hard hats and eye protection
- Respirators and chemical-resistant gloves
- Tarps, erosion fabric, barrier fencing
- Soil compaction tools, topsoil, seed
Cost Estimates, Timeframes, and Factors That Affect Both
Typical cost ranges vary widely—from relatively low expenses for non-invasive fixes, moderate costs for rerouting, to substantially higher prices for full slab replacement—while financing or budgeting choices can help spread those outlays.
Time estimates also differ: detection may take hours to a day, repairs from a day to several days, and slab restoration may add days to weeks depending on curing and finishing.
Key variables that raise cost or extend time include access difficulty, soil conditions, original pipe material, and local permit requirements.
Typical cost ranges for non-invasive, reroute, and full replacement
Costs for repairing plumbing under a slab fall into three broad categories—non-invasive (spot repairs and trenchless methods), partial reroutes, and full slab replacement—each with distinct price ranges, timelines, and variables that drive them.
Non-invasive jobs commonly run $500–$5,000; partial reroutes typically cost $2,000–$10,000; full replacements often reach $10,000–$30,000+.
Factors include access, pipe material, square footage, permits, and unforeseen damage.
Time estimates for detection, repair, and slab restoration
Several stages comprise the timeline for slab plumbing work: detection, active repair, and slab restoration, each with its own expected duration and potential delays.
Typical detection takes hours to a couple of days. Repairs range from a single day for spot fixes to several days for reroutes.
Slab cutting, concrete pour, and curing commonly add three to seven days, sometimes longer for scheduling.
Variables that increase cost or time (access, soil type, pipe material, permits)
After outlining how detection, repair, and slab restoration generally break down by time, attention turns to factors that can greatly increase both cost and schedule.
Limited access (tight crawlspaces, interior demos), reactive or expansive soils, corrosive or brittle pipe materials, and required permits or inspections each add labor, specialized equipment, disposal, and delays.
Unforeseen complications compound estimates and extend timelines.
Budgeting and financing options
How much should a homeowner set aside for slab plumbing work depends on scope, soil conditions, pipe material, and access constraints.
Typical repairs range from localized pipe patching at a few hundred dollars to full slab replacement that can exceed tens of thousands.
Obtain multiple estimates, factor contingencies (15–30%), and consider financing: home equity, personal loan, credit, or contractor payment plans.
Timeframes vary with complexity.
Permits, Codes, and Hiring a Qualified Contractor
Permitting and code compliance are essential steps, as most municipalities require permits, scheduled inspections, and adherence to local plumbing and structural standards before work begins.
Homeowners should verify contractors’ licenses, insurance, and slab-repair experience, request written estimates detailing scope and materials, and ask about references and previous projects.
Clear warranty terms and proof of liability and workers’ compensation coverage should be obtained and documented before any contract is signed.
Typical permit requirements and inspection processes
Permits and inspections are central to any slab plumbing repair, ensuring work complies with local building codes and protects structural integrity and occupant safety.
Typical requirements include a plumbing permit application, detailed scope and plans, permit fees, and contractor license verification.
Inspections occur at rough-in, pressure test, and final stages; inspectors verify materials, joints, trenching, backfill, and restoration before approval and permit closure.
How to vet and select a licensed plumber or slab-repair specialist
Who is qualified to repair plumbing under a concrete slab, and what checks separate a competent contractor from a risky hire?
A qualified professional holds a current plumbing or slab-repair license, insurance, and local permit familiarity.
Verify references, recent slab repair portfolio, code knowledge, and bonding.
Confirm warranty terms, inspection compliance, and clear written scope before engagement.
Questions to ask contractors and what to request in written estimates
After verifying licenses, insurance, references, and warranty terms, the homeowner should prepare a focused set of questions and a clear checklist of items to require in written estimates.
Ask about scope, materials, timeline, permit handling, code compliance, subcontractors, cleanup, and change-order policies.
Require itemized costs, permit fees, inspection responsibilities, start/end dates, payment schedule, and proof of liability and workers’ compensation coverage.
Warranty expectations and insurance considerations
While securing permits and meeting code requirements establishes a project’s legal baseline, clear warranty expectations and adequate insurance are what protect a homeowner from future cost and liability.
Therefore, they should be confirmed before work begins. Verify contractor liability and workers’ compensation insurance, confirm warranty scope and duration in writing, and understand homeowner policy coverage for damage or secondary issues before authorizing slab plumbing repairs.
Preventive Measures and Maintenance to Avoid Future Slab Leaks
Routine inspections and monitoring of water use help detect pressure changes and slow leaks before they damage a slab.
Proper soil management and careful landscaping reduce ground movement and root intrusion that stress buried pipes.
Specifying durable pipe materials during renovations and adding shutoff valves and accessible repair points make future issues easier and less invasive to fix.
Routine inspection and water usage monitoring
Establishing a regular inspection schedule and tracking household water use can catch early signs of slab leaks before they escalate.
Homeowners should check visible plumbing, fixtures, meters, and flooring for moisture, drips, or unexpected meter movement.
Log daily or monthly consumption to spot anomalies.
Promptly investigate spikes or unexplained dampness; early detection minimizes damage, repair complexity, and long-term costs.
Soil and landscaping practices to reduce pipe stress
Manage soil and landscaping intentionally to minimize ground movement and root intrusion that can stress pipes beneath a slab.
Maintain consistent moisture by directing irrigation away from foundations, using drip lines and timers.
Plant shallow-rooted, noninvasive species and place root barriers between vegetation and the slab.
Avoid heavy fill or compacted zones near the foundation and guarantee proper surface drainage to prevent pooling and soil erosion.
Recommended pipe materials and installation practices for renovations
When renovating plumbing that will run beneath a concrete slab, select durable materials and follow installation practices that minimize future leaks and make repairs easier; common choices include PEX for its flexibility and corrosion resistance, copper for high-temperature durability where allowed, and A/C-coated or HDPE sleeves for protection where pipes cross or enter the slab.
Install continuous runs, limit joints, use proper bedding, and slope drains correctly.
Installing shutoff valves and access points for future repairs
After selecting durable piping and minimizing joints beneath the slab, attention turns to providing accessible shutoff valves and service points that isolate sections without cutting concrete.
Install manifold systems, labeled shutoffs, and stub-outs routed to crawlspaces or utility chases. Use corrosion-resistant valves, accessible boxes with removable lids, and clear documentation.
Routine checks and exercised valves prevent deterioration and speed future repairs.
Common Pitfalls, Mistakes, and How to Avoid Them
Homeowners who attempt slab repairs without proper tools or diagnosis can inadvertently worsen leaks and increase repair scope and cost.
Contractors who cut corners or lack slab-specific experience often leave behind temporary fixes, hidden damage, or inconsistent estimates that should raise red flags.
Choosing quick patchwork over full replacement may reduce immediate expense but frequently leads to repeated failures, higher lifetime costs, and structural risks.
DIY errors that worsen slab leaks
Attempting quick fixes to a slab leak can unintentionally make the problem worse; common DIY errors—misdiagnosing the leak source, using incorrect materials, or disturbing the slab without proper support—often escalate damage and repair costs.
Inexperienced attempts include improper pipe patching, inadequate moisture control, and failure to locate multiple leak points.
Careful diagnosis, correct materials, and controlled excavation prevent worsening conditions.
Costly contractor mistakes and red flags
While inexperienced homeowners can exacerbate slab leaks, hiring the wrong contractor poses its own set of costly risks.
Common red flags include vague written estimates, lack of permits, no insurance, pushy sales tactics, and refusal to provide references.
Mistakes like improper pipe sizing, poor concrete repair, or shortcutting diagnostics inflate future costs.
Verify credentials, get multiple bids, and insist on clear warranties.
Long-term consequences of patchwork vs proper replacement
Longevity often hinges on the choice between quick fixes and full replacement: patchwork can mask symptoms but rarely addresses underlying causes, leading to recurring leaks, progressive slab deterioration, mold growth, and escalating repair bills.
By contrast, proper replacement sacrifices more time and upfront cost for lasting reliability, improved system performance, and clearer warranties.
Patchwork often reduces resale value, increases inspection failures, and multiplies future disruption.
Real-World Examples and Typical Scenarios
The section presents concise case studies illustrating common repair paths: a non-invasive relining success story and a full excavation with slab replacement walkthrough.
Each example highlights costs, timeline, and typical complications encountered.
A brief decision guide follows to show when rerouting is more practical than replacing.
Case: non-invasive relining success story
A homeowner in a mid-century bungalow discovered a recurring sewer leak beneath the slab and chose cured-in-place pipe (CIPP) relining instead of demolition.
A licensed contractor inspected via camera, cleaned the line, and installed a resin-saturated liner cured in place.
The repair restored flow, sealed cracks, avoided slab disruption, and completed in a day with minimal landscaping impact and a multi-year warranty.
Case: full excavation and slab replacement walkthrough
Undertaking a full excavation and slab replacement is the most direct remedy when subsurface sewer or water lines are extensively damaged, inaccessible for trenchless methods, or when multiple concurrent repairs make piecemeal fixes impractical.
The walkthrough outlines site evaluation, permit procurement, demolition, careful trenching, pipe replacement with durable materials, backfill compaction, new slab pouring, curing, and final inspections to restore structural and plumbing integrity.
Decision guide: when rerouting is better than replacing
When is it smarter to reroute plumbing instead of replacing under a slab?
Rerouting suits localized failures, frequent joint leaks, shallow runs obstructed by utilities, or when minimizing disruption matters.
Examples: a single bad branch, corroded copper near foundation edges, or repeated repairs where access costs exceed new lateral installation.
Choose reroute for cost, speed, and reduced structural impact.
Final Checklist Before Closing the Job
The technician performs verification tests and records all repair details, including pressure checks and photos, to create a clear service record.
Flooring is restored and the work area is cleaned to standard, ensuring no debris or hazards remain.
The homeowner receives concise instructions and a recommended maintenance schedule to prevent future slab plumbing issues.
Verification tests and documenting repairs
Begin by running a structured series of verification tests to confirm all repairs function as designed and no new leaks or drainage issues remain.
Pressure-test lines, cycle fixtures, and inspect joints with dye or moisture meters.
Record test results, materials, diagrams, and photos.
Note warranty details, technician names, dates, and follow-up recommendations.
Compile documentation for homeowner and future service records.
Restoring flooring and final cleanup
After verification tests confirm system integrity and documentation is complete, attention shifts to restoring flooring and performing final cleanup.
Subfloor repairs, concrete patching, and vapor barriers are installed per code. Flooring materials are re-laid, seams sealed, and connections aligned.
Debris, dust, and tools are removed; disposal follows local regulations. Final walkthrough verifies aesthetics, odor-free environment, and unobstructed access to service points.
Homeowner instructions and maintenance schedule
Provide the homeowner with a concise packet detailing operation, care, and a maintenance schedule for the repaired under-slab plumbing, including warranty information, emergency shutoff locations, and contact numbers for the contractor.
The packet should explain routine inspections, signs of leaks, and service intervals.
Include clear instructions for emergency response and recordkeeping.
- Routine inspection checklist
- Recommended service intervals
- Emergency procedures
- Warranty and service contacts
Conclusion
The guide concludes that repairing plumbing under a slab requires measured assessment, appropriate tools, and sound technique. Investigating the theory that most slab leaks stem from corrosion or shifting soil proved partially true: many cases originate from those causes, yet installation defects and freeze-thaw cycles are frequent culprits too. Successful outcomes hinge on accurate detection, choosing the right repair method, and prioritizing prevention. With careful work and vigilance, long-term slab integrity is achievable.