How to Unhook a Gas Stove Safely: Step-by-Step Guide for Disconnecting and Reconnecting
To safely unhook a gas stove, start by identifying the fuel type and shutting off the main gas valve. Ensure there’s no gas flow by confirming zero pressure. Next, ventilate the area, wear appropriate safety gear, and use the right tools to loosen the flexible connector or pipe. Cap or seal the gas line, carefully move the stove using sliders, and inspect all fittings for damage. When reconnecting, utilize approved connectors and pipe sealant, start threads by hand, and perform a leak test with soapy water or a detector. Follow these steps for a safe disconnection and reconnection, and consult a professional if you’re uncertain or encounter issues.
What You Need to Know Before Unhooking a Gas Stove
Before unhooking a gas stove, one should recognize that correct disconnection and reconnection are essential for personal safety and code compliance.
Homeowners must distinguish tasks suitable for DIY from those requiring a licensed professional.
Local regulations, permits, and inspection requirements should be confirmed before beginning any work.
Why proper disconnection and reconnection matter for safety and compliance
Unplugging a gas stove involves more than disconnecting a hose; improper disconnection or reconnection can create gas leaks, fire hazards, carbon monoxide exposure, and code violations.
Proper procedures protect occupants, preserve appliance integrity, and guarantee legal compliance. Clear labeling, leak testing, correct fittings, and adherence to local codes reduce risk.
Guidance on how to unhook a gas stove emphasizes safety, inspection, and documentation.
When to call a professional vs. when it’s safe to DIY
When is professional help warranted and when can a homeowner safely proceed alone?
A homeowner may DIY for simple tasks: turning off the gas, loosening a flexible connector, and capping a valve when confident and equipped.
Call a licensed technician if leaks, corrosion, rigid piping, appliance replacement, odor persistence, unclear shutoffs, or any uncertainty arise.
Safety overrides saving time.
Legal and code considerations (permits, inspections, local regulations)
After determining whether a job can be handled personally or requires a technician, homeowners should check local legal and code requirements that govern gas appliance work.
Regulations may mandate permits, licensed installers, pressure testing, or mandatory inspections. Failure to comply can void insurance or create safety liabilities.
Consult municipal building departments and gas utility providers for applicable rules, documentation, and approved procedures before unhooking a stove.
Tools, Materials, and Preparations
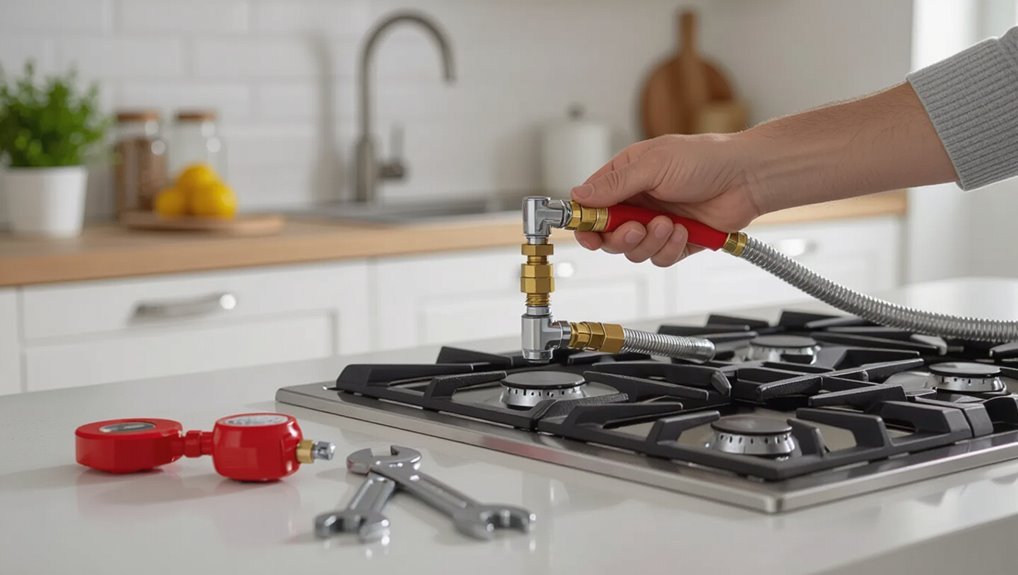
A concise list of required tools and supplies — including adjustable wrenches, pipe thread tape, a gas appliance connector, and a bucket or rags — should be assembled before work begins.
Appropriate safety gear and emergency items such as gloves, eye protection, a working CO detector, a fire extinguisher, and a portable gas leak detector are recommended and kept within reach.
The workspace must be prepared with good ventilation, cleared clearances and ignition sources removed, and the gas supply components (main shutoff valve, flex line, and appliance connector) located and identified before any disconnection.
Required tools and supplies
Several essential tools and supplies are required to unhook a gas stove safely. Required items enable proper shutoff, disconnection, and leak checks without covering personal protective equipment.
Gather sturdy tools, appropriate fittings, and basic diagnostic supplies before starting.
- Adjustable wrench and pipe wrench
- Replacement flare or flexible connector and thread sealant
- Soapy water solution and flashlight
Recommended safety gear and emergency items
One set of personal protective equipment and emergency items should be kept on hand whenever unhooking a gas stove.
Gloves, eye protection, and a mask protect against debris and odors.
Have emergency tools and supplies readily accessible:
- Fire extinguisher (class B/C or multipurpose)
- Gas leak detector or soapy water and flashlight
- First aid kit and emergency contact list
How to prepare the workspace (ventilation, clearances, fire prevention)
Before starting, make certain the area is well-ventilated by opening windows and running an exhaust fan to disperse any residual gas, and confirm that all ignition sources—pilot lights, candles, lighters, and electrical tools—are turned off or removed.
Clear surrounding surfaces and combustible materials, maintain a 3-foot work clearance, keep a charged fire extinguisher nearby, and guarantee unobstructed exit routes.
How to locate and identify gas supply components (shutoff valve, flex line, appliance connector)
Locate the gas shutoff valve, flexible gas line, and appliance connector visually and by touch to confirm their positions and condition before any disconnection work begins.
Inspect the valve (usually near the stove or in an adjacent wall), trace the corrugated or braided flex line from supply to appliance, note connection types (threaded, flare), check for corrosion, dents, kinks, or signs of leakage, and document fittings for reconnection.
Step-by-Step: Safely Disconnecting a Gas Stove
The procedure begins with confirming the stove type and identifying whether the supply is natural gas or LP.
Then, locating and shutting off the main gas valve.
Once the flow is stopped, the technician verifies zero gas flow and performs a leak test before any fittings are disturbed.
The final steps cover safely disconnecting the flexible connector or rigid pipe, and temporarily capping or sealing the line if required.
Confirming the stove type and fuel connections (natural gas vs. LP)
When preparing to disconnect a gas stove, verify whether it uses natural gas or liquefied petroleum (LP) and identify the exact type of fuel connection, because the procedures, fittings, and safety precautions differ considerably.
Inspect labels, model plate, owner’s manual, regulator type and hose markings.
Note pipe thread sizes, flare vs. compression fittings, and any quick-connects.
Photograph connections for reference during reconnection.
Turning off the gas supply at the source
Shut off the gas at its primary source before any disconnection work begins: this is the single most important safety step.
Locate the household shutoff valve or service meter valve, turn it clockwise to close, and guarantee tool access if valves are stiff.
Notify others in the home, document valve position, and, if unsure, contact the gas utility to perform or confirm the shutoff.
Verifying zero gas flow and testing for leaks before starting
Verify there is no gas flow before touching fittings: after the main valve is closed, check stovetop burners and pilot lights for flame, listen for hissing, and use a manometer or calibrated gas meter at the appliance connection to confirm zero pressure.
Apply a non-corrosive leak detection solution to joints and fittings, observe for bubbles, and ventilate if any indication of leakage appears.
Disconnecting the flexible connector or rigid pipe (detailed steps)
Begin by preparing tools and workspace: make certain the main gas supply is closed, the area is ventilated, and appropriate personal protective equipment (gloves and eye protection) is worn.
Inspect connection type. Use the correct wrench to hold the appliance fitting, then loosen the connector nut turning counterclockwise. Support the pipe to prevent twisting.
Remove the connector, inspect threads and fittings, and set aside hardware for reassembly.
Capping or sealing the gas line temporarily if required
If a temporary seal on the gas line is needed, the technician selects an appropriate cap or plug rated for the line material and pressure.
After shutting off the supply and verifying zero pressure, they install the cap using approved thread sealant or fittings.
They torque to manufacturer specifications and inspect for leaks with soapy water or an electronic detector.
The cap is tagged and dated for future removal.
Safely moving the stove after disconnection
Move the stove carefully onto a dolly or low-friction surface, keeping all casters locked and hands clear of pinch points to prevent tipping or injury.
Confirm gas remaining has been capped and electrical power disconnected.
Tilt minimally with two people, using straps to secure the appliance.
Protect floors with plywood or sliders.
Move slowly, watch for obstacles, and set stove level in its new position before reconnecting utilities.
Step-by-Step: Reconnecting a Gas Stove
Before reattaching a gas stove, the condition of fittings, hoses, and connections should be inspected and any damaged parts identified for replacement.
The installer must select correct replacement fittings and then follow precise steps to attach the flexible connector or rigid pipe, making secure thread or compression connections.
After restoring gas supply, initial checks and a leak test using soapy water and an electronic detector should confirm a safe, gas-tight system.
Inspecting fittings, hoses, and stove connections for damage
Carefully inspect every fitting, hose, and connection on the stove and supply line for signs of wear, cracking, corrosion, dents, or loose clamps.
Note brittle or softened areas, hairline cracks, fraying, rusted threads, kinks, and oil or soot that may hide damage.
Document any irregularities and mark components requiring replacement before reconnection to guarantee a safe, leak-free installation.
Choosing the correct replacement parts and fittings
After documenting damaged hoses, fittings, or clamps, attention shifts to selecting replacement parts that match the stove’s specifications and local codes.
The technician verifies thread types, pressure ratings, material compatibility (e.g., stainless steel, brass), connector lengths, and approved flexible connector standards.
Only certified, code-compliant parts and proper-size shutoff valves are chosen; original equipment manufacturer (OEM) components are preferred when available.
Properly connecting the flexible connector or pipe (detailed steps)
One set of preparatory checks and tools must be completed before making any gas connections: verify the chosen connector matches the appliance inlet and shutoff valve threads, confirm thread sealant is approved for gas use (or use an approved gas-rated pipe joint compound), guarantee the valve is fully closed, and have a wrench and leak-detection solution ready.
Align threads, hand-start fittings, tighten to manufacturer torque, support connector to avoid strain.
Turning the gas back on and initial checks
When the connector is secured and fittings tightened to specification, the technician opens the main gas valve slowly to restore flow, watching the connector and joints for any immediate signs of leaks or hissing.
He then checks appliance valves off, verifies regulator orientation, confirms meter activity matches expectations, inspects burner alignment and igniter function, and guarantees ventilation is unobstructed before proceeding.
Performing a leak test with soapy water and electronic detectors
Begin the leak test by applying a light solution of soapy water to all joints, fittings, and the connection between the hose and stove.
Then observe for steady bubbles that indicate escaping gas.
Next, use an electronic gas detector to scan the same areas slowly; heed audible/visual alarms.
If any leak is detected, shut off gas immediately and tighten or replace fittings before retesting.
Lighting burners and testing stove operation
After confirming there are no leaks, proceed to light the burners and verify overall stove operation.
Ignite each burner individually, observing steady blue flames and prompt ignition.
Check oven and broiler functions if applicable.
Monitor flame stability while adjusting knobs through full range.
Listen for unusual sounds and smell for gas.
If anomalies appear, shut off supply and consult a qualified technician immediately.
Troubleshooting and Common Problems
If a gas odor is detected, the guide instructs immediate evacuation and notifying the gas supplier or emergency services rather than attempting further work.
It outlines methods for addressing stubborn fittings or seized connectors and steps to troubleshoot ignition and low-flame performance after reconnection.
It also explains when persistent leaks or pressure abnormalities require professional inspection and service.
What to do if you detect a gas smell
Detecting the unmistakable odor of gas demands immediate, calm action to reduce risk: ventilate by opening windows and doors, evacuate everyone from the premises without operating electrical switches or phones inside, and contact the gas company or emergency services from a safe location to report the leak.
Once authorities advise it is safe, have a qualified technician inspect lines, valves, and appliance connections before restoring service.
Handling stubborn fittings or seized connectors
Encountering stubborn fittings or seized connectors is a common obstacle when unhooking a gas stove and requires a methodical, safety-first approach.
Shut off gas, ventilate, and confirm zero pressure.
Apply penetrating oil, allow dwell time, then use properly sized wrenches with steady torque.
Avoid excessive force that can damage threads or valves; if immobile, stop and consult a qualified technician.
Fixing burner ignition or low-flame issues after reconnection
After stubborn fittings are freed and the appliance is reconnected, attention turns to burner ignition and flame strength, which commonly reveal issues overlooked during reconnection.
Technicians inspect electrode gaps, clean clogged ports, verify proper burner alignment, and guarantee valves fully open.
Electrical spark systems are checked for continuity and moisture; gas flow is confirmed steady.
Adjustments restore consistent blue flames and reliable ignition.
When reconnection causes persistent leaks or pressure problems
When reconnection leads to persistent leaks or pressure irregularities, the technician systematically isolates sources by checking all fittings, hose connections, and valve seals with a soapy solution or an approved gas leak detector.
They also monitor supply pressure with a manometer to identify drops or surges. If detected, components are tightened or replaced, regulators inspected, and the utility notified for upstream issues.
Testing repeats until stable.
Safety Checks, Testing, and Documentation
Before returning the area to regular use, a final safety checklist verifies valve shutoff, leak-free connections, and proper ventilation.
The technician or homeowner should record actions taken, parts replaced, and test results for future reference or inspections.
If any uncertainty remains or if a pressure test is required, a licensed gas professional should be scheduled immediately.
Final safety checklist before regular use
Although the major connections are complete, a concise final safety checklist ascertains the stove is safe for everyday use:
Confirm no gas odor; verify burners ignite cleanly and flame is steady.
Check regulator and flexible line for leaks with soapy solution; tighten fittings if needed.
Guarantee ventilation operates and controls return correctly.
- Confirm no gas odor; steady burner flame
- Leak test all fittings
- Verify ventilation and controls function
How to document the work for records or inspections
Document the completed safety checks and tests clearly and concisely to create a reliable record for future reference or inspection.
Record date, time, technician name, actions performed, test results, component condition, and any corrective steps.
Note serial numbers and photos of connections.
Store logs digitally and as hard copy where required.
Include signatures and contact details for accountability and traceability during audits.
When to schedule a professional inspection or pressure test
After logging all safety checks and test results, determine when a professional inspection or pressure test is warranted to verify system integrity beyond routine documentation.
Schedule a licensed technician if leaks are suspected, if joints or flexible connectors were replaced, after prolonged disuse, following unusual odours or pressure fluctuations, or to satisfy local code and insurance requirements.
Keep the inspection report with project records.
Best Practices and Preventive Maintenance
A routine inspection schedule for gas lines and connectors helps identify wear, corrosion, and loose fittings before they become hazards.
Proper care—such as avoiding kinks, using correct torque, and replacing flexible connectors at manufacturer-recommended intervals—extends the life of connectors and fittings.
Clear labeling, careful packing during moves, and using temporary gas shutoffs for repairs minimize risk during future relocations or service.
Regular inspection schedule for gas lines and connectors
Routine inspections of gas lines and connectors establish the foundation for safe stove operation by identifying wear, corrosion, or loose fittings before they become hazards.
Inspect visually and manually every three to six months, checking connections, clamps, and visible piping.
Record findings, note replacement dates, and escalate any suspected leaks immediately to a qualified technician.
Maintain clear access and consistent scheduling.
How to extend the life of flexible connectors and fittings
Preserve flexible connectors and fittings through regular care and simple preventive steps that minimize stress, corrosion, and contamination.
Inspect for kinks, abrasion, and leaks; replace at manufacturer-recommended intervals.
Guarantee proper routing and support to avoid strain, use compatible sealants and torque, and keep connections clean and dry.
Protect from heat sources and chemical exposure.
Document maintenance and promptly address any deterioration.
Tips to minimize risk during future moves or repairs
Several straightforward precautions can substantially reduce the risk of damage or leaks during future moves or repairs:
always shut off and test the gas, label and photograph connections, unplug or cap lines with approved fittings, secure and protect flexible connectors from kinks, transport the appliance upright, use a qualified technician for reconnection, and schedule periodic inspections to verify seals and fittings remain tight and corrosion-free.
Comparison of DIY vs. Professional Service Options
When deciding whether to unhook a gas stove, homeowners must weigh the cost savings and immediacy of a DIY approach against the safety, code compliance, and liability protections offered by a licensed technician. DIY suits simple, confident tasks; professionals handle complex, high-risk situations. Below is a brief comparison:
| DIY | Professional |
|---|---|
| Lower upfront cost | Certified expertise |
| Faster scheduling | Permits, compliance |
| Requires tools/skill | Warranty/insurance |
| Greater personal responsibility | Reduced liability |
HH3: Cost, risk, time, and situations recommended for each option
Building on the DIY versus professional comparison, the choice hinges on four practical factors: cost, risk, time, and the specific circumstances of the job.
DIY minimizes expense but raises leak and permit risks and often takes longer for inexperienced people.
Professionals cost more, reduce safety and code violations, and save time—recommended for complex hookups, older systems, unclear fittings, or lack of confidence.
Quick Reference: One-Page Checklist for Disconnecting and Reconnecting
Use this one-page checklist as a compact, actionable guide to safely disconnecting and reconnecting a gas stove: it summarizes required tools, safety checks, step-by-step shutoff and reconnection actions, testing procedures for leaks, permit and inspection reminders, and when to call a professional.
- Verify supplies, shutoff, and ventilation.
- Follow stepwise disconnection, cap lines, reconnect with approved fittings.
- Perform leak test, restore power, document permits, and schedule inspection or call a pro if unsure.
Conclusion
Careful planning and respect for gas safety transform a risky job into a manageable task; like a steady hand guiding a compass, clear steps—shutting the supply, testing for leaks, and properly sealing connections—keep hazards at bay. Whether tackling routine maintenance or a full appliance swap, following best practices, using the right tools, and knowing when to call a professional guarantees peace of mind and a reliably functioning stove for years to come.