How to Use Metal Hanger Strap: Practical DIY Tips for Securing, Hanging, and Repairing Fast
A metal hanger strap is a versatile tool for securing, hanging, and repairing various items, such as pipes, conduits, and shelves. To effectively use it, select either galvanized or stainless steel based on your environment and load requirements. Match the strap’s width and gauge to the weight it will support, and use appropriate fasteners like screws, anchors, or lag bolts for installation. To prepare the strap, safely cut, bend, and deburr it, then predrill holes and ensure it’s level before tightening. Common applications include reinforcing stripped holes and isolating dissimilar metals. For detailed guidance on tools, techniques, and best practices, continue reading.
What a Metal Hanger Strap Is and When to Use It
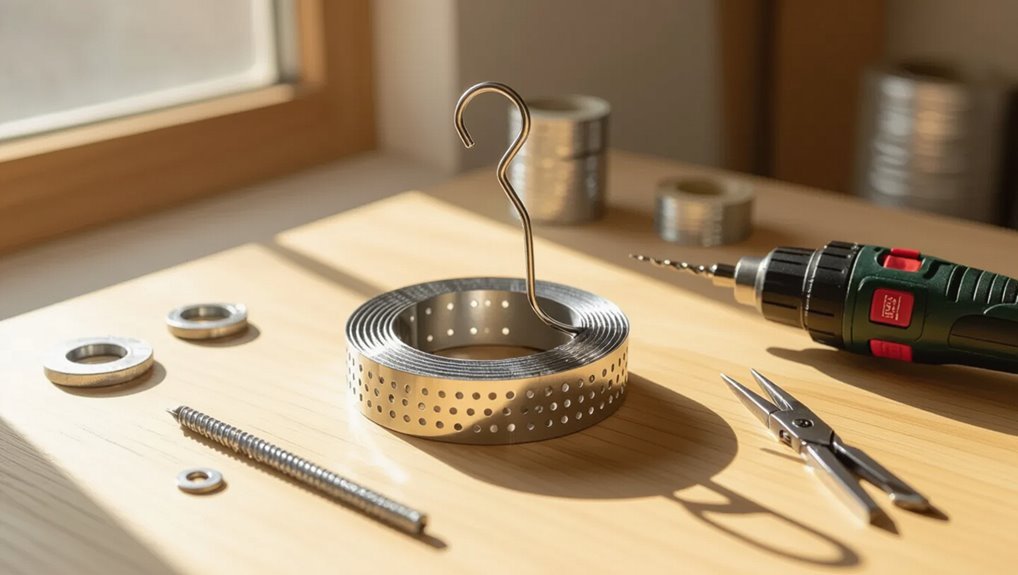
A metal hanger strap is a flat or perforated steel strip—often galvanized or stainless—used to secure, support, or suspend components.
It is produced in common widths and thicknesses with specified load ratings to match applications.
Typical uses include fastening pipes and ducts, bracing framing in workshops, and hanging equipment in residential and construction settings.
Definition and common materials
Metal hanger straps are thin, typically perforated lengths of metal used to support, secure, or suspend pipes, ducts, conduit, and other building components.
Manufactured from galvanized steel, stainless steel, or zinc-plated steel, they resist corrosion and offer varying flexibility.
Selection depends on environment and compatibility; users following guidance on how to use metal hanger strap choose material for strength, longevity, and exposure conditions.
Typical sizes, thicknesses, and load ratings
Hanger straps come in a range of standard widths—commonly 1/2″, 3/4″, 1″, and 1-1/2″—and thicknesses from about 18 gauge (≈1.2 mm) up to 10 gauge (≈3.4 mm), with perforation patterns that affect flexibility and fastening options.
Manufacturers cite load ratings per strap length and gauge; light straps may support a few pounds, heavier gauges and wider straps reach several hundred pounds when properly anchored.
Common applications in home, workshop, and construction
Many households, workshops, and job sites rely on hanger straps as simple, versatile connectors for securing pipes, ducts, conduit, lumber, and suspended fixtures.
Typical uses include plumbing pipe support, HVAC duct hangers, electrical conduit runs, shelving reinforcement, and temporary bracing.
Contractors and DIYers choose appropriate widths, thicknesses, and corrosion-resistant finishes to match load, environment, and fastening method for reliable, long-term performance.
Quick Overview: Choosing the Right Metal Hanger Strap for Your Task
Choosing the correct metal hanger strap begins with matching width and thickness to the expected load so the strap will support weight without bending or failing.
Corrosion resistance and coating—galvanized, stainless, or painted—should be selected based on environment and longevity needs.
Finally, the fastener pattern matters: decide between pre-drilled options for quick installation or custom-cut straps and bolt patterns for specific mounting requirements.
Matching strap width and thickness to load
When the load to be supported is identified, matching strap width and thickness to its weight and contact area guarantees safe, long-lasting performance.
Select wider straps for distributed loads and thicker gauges for higher tensile demands. Consider strap overlap, fastening method, and dynamic forces.
Verify manufacturer load ratings and add safety margin.
- Width vs load distribution
- Gauge vs tensile strength
- Fastener compatibility
- Safety factor
Corrosion resistance and coating options (galvanized, stainless, painted)
After matching strap dimensions and fasteners to the load, environmental exposure becomes the next determinant of longevity and performance.
Galvanized straps resist rust via zinc coating, suitable for damp indoor or mild outdoor use.
Stainless steel offers superior corrosion protection for coastal or chemically aggressive environments.
Painted or powder‑coated straps provide aesthetic finish and limited protection but rely on intact coating to prevent corrosion.
Selecting screw or bolt patterns and pre-drilled vs. custom-cut
Selecting the correct screw or bolt pattern and deciding between pre‑drilled and custom‑cut straps determine both ease of installation and long‑term reliability.
Standard hole spacing suits common fasteners and speeds fitting; heavy loads require larger bolts and reinforced spacing.
Pre‑drilled straps save time and guarantee consistent alignment; custom cutting allows exact hole placement for irregular substrates but needs proper tools and corrosion protection.
Essential Tools and Safety Precautions
The next section outlines the essential tools for cutting, bending, and fastening metal hanger strap, including shears, pliers, and appropriate fasteners.
It also covers required personal protective equipment and concise safe-handling practices to prevent cuts and eye injuries.
Finally, it addresses surface preparation and anchoring considerations for wood studs and masonry to guarantee secure installation.
Tools required for cutting, bending, and fastening
Equip the workspace with a compact set of tools tailored to cutting, bending, and fastening metal hanger strap:
aviation snips or a hacksaw for clean cuts,
a vise or bench clamp for secure holding,
a metal file or deburring tool to remove sharp edges,
locking pliers or a bending brake for controlled bends,
plus self-tapping screws or rivets and an appropriate drill or rivet gun for fastening.
- Measure and mark tools
- Cutting tools
- Bending fixtures
- Fastening equipment
Personal protective equipment and safe handling tips
Personal protective equipment and disciplined handling practices reduce injury risk when cutting, bending, and fastening metal hanger strap.
Gloves protect against sharp edges; safety glasses prevent eye injury from flying fragments. Hearing protection is advised during power tool use. Long sleeves and sturdy footwear minimize cuts and dropped-object harm.
Maintain a clear workspace, secure the strap before cutting, and follow tool manufacturers’ safety instructions.
Preparing surfaces: anchors, studs, and masonry considerations
Identify and assess mounting surfaces before installing metal hanger strap to guarantee secure anchoring and prevent structural damage.
Inspect for studs using a detector; mark stud locations for wood screws.
For drywall without studs, select toggle or molly anchors rated for load.
For masonry, use masonry anchors or sleeve anchors with appropriate drill bits and dust removal.
Verify load ratings and follow manufacturer instructions.
Step-by-Step: Installing a Metal Hanger Strap for Hanging Pipes and Conduits
The procedure begins with measuring and marking hanger locations according to pipe run and load requirements.
Installation methods differ for wood studs versus masonry, with appropriate anchors and fasteners chosen for each substrate.
Once secured, the strap is fastened around the pipe, alignment checked, and spacing adjusted to distribute weight per recommended intervals.
Measuring and marking hanger locations
Measure twice before making any marks: begin by determining hanger spacing based on pipe diameter, weight, and local code requirements, then transfer those distances along the run.
Use a tape measure and chalk or pencil to mark centers; verify level and alignment with a laser or spirit level.
Mark mounting points for each strap, allow clearance for insulation, and recheck measurements before drilling.
Securing to wood studs versus masonry
When fastening metal hanger straps, installers must choose anchors and fasteners appropriate to the substrate—wood studs call for wood screws or lag bolts, while masonry requires masonry anchors, sleeve anchors, or concrete screws rated for the load. Use pilot holes in wood; drill correct-size masonry holes, clean debris, and torque anchors to spec. Match anchor size to strap load and pipe weight.
| Substrate | Fastener |
|---|---|
| Wood | Wood screw |
| Wood | Lag bolt |
| Masonry | Sleeve anchor |
| Masonry | Concrete screw |
Fastening the strap around pipes and checking alignment
Wrap the metal hanger strap snugly around the pipe, ensuring the strap sits flat against the pipe surface with the threaded end accessible for fastening.
Position the strap so the pipe remains level and parallel to nearby runs.
Fasten the nut or screw hand-tight, then use tools to secure firmly.
Recheck alignment, adjust before final tightening, and inspect for contact points that could cause vibration.
Weight distribution and spacing recommendations
Proper weight distribution is critical to prevent sagging and overstress on hangers. Pipe supports should be spaced according to pipe material, diameter, and the contents’ temperature and density.
Use manufacturer spacing charts or code tables: closer intervals for plastic, large-diameter, or hot lines.
Place supports at joints, changes in direction, and near heavy fixtures.
Inspect and adjust after load changes.
Step-by-Step: Using Metal Hanger Straps to Hang Shelves, Signs, and Decorative Items
The process begins by choosing secure anchor points and appropriate supporting hardware rated for the item’s weight.
Next, the strap is fastened to both the mounting surface and the item using suitable screws or bolts.
Final steps include leveling the item and making any tension or position adjustments to guarantee stable, even support.
Selecting anchor points and supporting hardware
Begin by identifying strong, stable anchor points that align with the weight and load distribution of the shelf, sign, or decorative item to be hung.
Choose anchors rated for expected loads, matching wall material (studs, masonry, drywall anchors).
Select supporting hardware—screws, bolts, washers, and suitable hangers—corrosion-resistant when needed.
Verify spacing and load-sharing to prevent concentrated stress and guarantee long-term stability.
Attaching strap to mounting surface and item
Attach the metal hanger strap by aligning it with preselected anchor points, ensuring the strap’s holes match the planned fastener locations and that any bent or notched sections sit flush against the mounting surface.
Fasten with appropriate screws or bolts through each hole, tighten evenly, and secure the opposite end to the item using matching hardware or rivets.
Check for firm, gap-free contact.
Leveling and final adjustments
Once the strap and item are secured, attention turns to leveling and final adjustments to confirm proper alignment and load distribution.
A spirit level verifies horizontal or vertical position; slight strap tension is adjusted at fasteners.
Tighten screws incrementally, recheck level, and make sure straps sit flat against surfaces.
Confirm load balance and test gently before leaving the installation unattended.
Repairing and Reinforcing with Metal Hanger Straps
Metal hanger straps provide a practical solution for stabilizing sagging shelves and cabinets by redistributing load and securing loose mounts.
They also serve for quick repairs when original straps break, offering options for replacement or temporary reinforcement.
Additionally, straps can reinforce joints, beams, and furniture connections to restore structural integrity without extensive disassembly.
Stabilizing sagging shelves and cabinets
Reinforcing sagging shelves and cabinets with hanger straps provides a simple, low-profile method to restore structural support and prevent further bowing.
Install straps beneath the shelf, anchoring to studs or solid framing and fastening to the cabinet underside with screws.
Tension straps evenly across the span, add a center support if long, and check level and fastener tightness to avoid renewed sagging.
Repairing broken straps and replacement options
Begin by evaluating the damaged hanger strap for bends, cracks, or torn mounting holes to determine whether repair is feasible or replacement is required.
Small bends can be straightened and holes re-drilled; cracked or severely corroded straps should be replaced.
Match gauge, length, and coating when sourcing replacements.
Use appropriate fasteners and guarantee alignment to restore load-bearing capability and prevent recurrence.
Reinforcing joints, beams, and furniture connections
Strengthening joints, beams, and furniture connections with hanger straps provides a fast, reliable method to restore structural integrity without extensive rebuilding.
Hanger straps wrap or plate weak spots, distribute loads, and resist racking when properly sized and fastened.
Installation requires matching strap thickness, using corrosion-resistant material, and fastening with recommended screws or nails.
Periodic inspection guarantees continued performance and safety.
Cutting, Bending, and Customizing Metal Hanger Straps
The section covers safe methods for cutting and trimming metal hanger straps, including appropriate tools and personal protective equipment.
It also outlines bending techniques and tools for achieving tight fits without weakening the strap.
Finally, it examines ways to create custom holes and slots to accommodate nonstandard fasteners.
Safe methods for cutting and trimming
When cutting and trimming metal hanger straps, workers should prioritize controlled techniques and proper protections to prevent injury and guarantee accurate results.
Use marked measurements, clamp straps to a stable surface, and cut with appropriate tools—aviation snips for light gauge, hacksaw or cutoff wheel for thicker metal.
Deburr edges with a file or rotary tool and wear gloves, eye protection, and hearing protection throughout.
Bending techniques and tools for tight fits
After cutting and deburring to size, attention shifts to shaping straps for secure, space‑efficient installs. Bends must match mounting geometry; small radii reduce clearance, large radii increase strength.
Use bench vises, bending pliers, tubing or mandrels for consistent curves. Gradual, incremental bends prevent cracks.
For tight corners, heat with a propane torch on thicker straps; cool slowly and recheck fit before final fastening.
Creating custom holes and slots for nonstandard fasteners
Measure twice and mark precisely: creating custom holes and slots adapts hanger straps to nonstandard fasteners, odd clearance requirements, or retrofit situations.
Use center punch, drill press or step bit for clean holes; file or rotary tool for slots.
Deburr edges, test fit, and strengthen cut areas with adhesive or small reinforcing plates if needed.
Match hole size to fastener tolerances and material thickness.
Comparison of Common Hanger Strap Types and Fasteners
Different hanger strap materials and finishes—galvanized, stainless, and painted—offer varying corrosion resistance and strength for specific environments. Fastener choice (screws, bolts, anchors, toggles) should match the strap type and the substrate to guarantee secure connections. The table below outlines common pairings and recommended combinations for typical substrates.
| Strap Type | Recommended Fasteners/Substrates |
|---|---|
| Galvanized | Wood: wood screws; Concrete: sleeve anchors |
| Stainless | Marine or corrosive: stainless bolts, through-bolts |
| Painted | Indoor, dry: sheet‑metal screws; Drywall: toggles/anchors |
Galvanized vs. stainless vs. painted straps
Choosing between galvanized, stainless, and painted hanger straps hinges on environment, load requirements, and budget:
Galvanized straps offer cost-effective corrosion resistance for most indoor and mildly wet conditions;
stainless provides superior longevity and rust immunity for harsh or marine environments;
painted straps prioritize appearance and light protection but can chip, exposing substrate.
Selection balances durability, maintenance, and initial cost.
Screw types, bolts, anchors, and toggle options
When selecting fasteners for hanger straps, the choice of screws, bolts, anchors, or toggles determines load capacity, installation method, and suitability for substrate materials.
Wood screws offer shear strength for timber; machine bolts suit metal connections.
Expansion anchors and sleeve anchors grip masonry; plastic or metal wall anchors work for hollow drywall.
Spring toggles and heavy-duty toggles provide high pull-out resistance in cavities.
Recommended combinations for different substrates
Matching hanger-strap types and fasteners to the substrate guarantees mechanical compatibility and maximizes load performance.
For wood, use hot-dipped galvanized or stainless straps with wood screws or lag bolts.
For masonry, choose stainless straps with sleeve anchors or masonry screws.
For drywall, use plasterboard anchors or toggle bolts with light-gauge straps.
For metal framing, self-drilling screws with gusseted straps provide secure connections.
Troubleshooting Common Problems
Common failures with metal hanger straps include strap pull-through and stripped anchors, which require proper repositioning, reinforcement, or replacement of fasteners.
Corrosion and rust are addressed through material choice, protective coatings, and regular inspection.
Vibration-related loosening is prevented by using lock washers, thread-locking compounds, or properly torqued fasteners.
Strap pull-through and stripped anchors: fixes
If a metal hanger strap pulls through its mount or the anchor strips out, the fix depends on the cause—oversized holes, insufficient anchor type, or weakened substrate—and should prioritize restoring a secure connection rather than simply replacing the fastener.
Solutions include using larger or longer anchors, switching to toggle or chemical anchors, reinforcing substrate with backing plates or epoxy, relocating to solid material, and verifying load ratings before reuse.
Corrosion and rust prevention strategies
Prevent corrosion by selecting compatible materials, applying protective coatings, and controlling environmental exposure to moisture and salts.
Inspect straps regularly for early rust, clean affected areas, and remove loose corrosion with a wire brush.
Use galvanic-isolating pads where dissimilar metals join, apply rust-inhibiting primer or paint, and consider stainless or galvanized straps in humid or coastal locations to extend service life.
Vibration loosening and how to prevent it
How does vibration cause metal hanger straps to loosen over time? Repeated motion induces micro‑movement at fasteners and bends, gradually working threads and connections apart.
Prevention includes using lock washers, thread‑locking adhesives, nylock nuts, or safety wire; increasing clamp tension to manufacturer torque; adding vibration‑damping pads or rubber lining; and periodic inspection with retightening schedules to catch early loosening.
Time-saving Tips and Best Practices for Durable Installations
Efficient, long-lasting hanger strap installations depend on a few practical techniques that save time and prevent rework. Pre-drilling to proper depths, following torque guidelines, and performing load testing guarantee secure connections.
Consistent marking and template methods speed repeat jobs, while organized storage and routine maintenance of spare straps and hardware reduce downtime.
- Pre-drill pilot holes, use specified torque settings, and conduct straightforward load checks after installation.
- Create and use templates or jigs for marking repeat attachment points to maintain alignment and speed work.
- Keep spare straps, fasteners, and common tools stored and labeled for fast access on-site.
- Implement a simple maintenance schedule for inspecting stored hardware and replacing corroded parts.
Pre-drilling, torque guidelines, and load testing
Begin by marking and pre-drilling pilot holes sized to the hanger strap and fastener manufacturer’s recommendations to guarantee accurate alignment and reduce splitting in wood or thread stripping in masonry.
Apply specified torque using a calibrated driver to avoid under- or over-tightening.
Perform incremental load testing after installation, observing fastener movement and strap deformation.
Record results and adjust fastener type or spacing if failures or excessive deflection occur.
Marking and template methods for repeat installations
After confirming pilot holes, torque, and load performance, installers can save time and guarantee consistency by using marking techniques and simple templates for repeat hanger strap placements.
Templates—cardboard, plywood, or metal—should align hole centers and edge distances. Mark fixed datum points on structures, transfer measurements quickly, and label templates for orientation.
Regularly verify template accuracy against actual straps to prevent cumulative error.
Storage and maintenance of spare straps and hardware
Store spare hanger straps and associated hardware in clearly labeled, climate-controlled containers or shelving to prevent corrosion, deformation, and loss; segregate by size, finish, and fastener type, and keep an inventory with minimum-reorder thresholds to avoid job delays.
Inspect periodically for rust, bends, and stripped threads; rotate stock by age, apply light rust inhibitors to exposed surfaces, and document disposal of compromised items.
Example Projects and Material Lists
The section presents concrete example projects and concise material lists to guide common hanger strap uses.
It outlines a simple pipe hanger installation checklist with required parts, a heavy shelf plan including parts, spacing, and load considerations, and a compact repair kit for on-the-spot fixes.
Each example pairs step-by-step actions with exact materials and quantities for quick reference.
Simple pipe hanger installation step checklist and parts
Several concise checklists and parts lists help streamline simple pipe hanger installations, whether for a short run of water line or a small HVAC branch.
A focused step checklist and minimal parts reduce errors and time. Typical items include strap, saddle, fastener, and insulation; sequencing covers measuring, mounting, securing, and testing.
- Measure and mark supports
- Select strap and saddle
- Install fasteners
- Verify alignment and leak-free fit
Hanging a heavy shelf parts, spacing, and load plan
Moving from simple pipe hanger checklists to a heavier load application, the same emphasis on correct parts and sequencing applies when planning a heavy shelf: accurate measurement, appropriate fasteners, and calculated spacing determine safety and performance.
Materials and layout should match load per bracket, wall type, and shelf depth.
- Load calculation per linear foot
- Stud spacing and alternate anchors
- Hanger strap gauge and length
- Fastener type and embedment depth
Quick repair kit for on-the-spot fixes
Assemble a compact, purpose-driven repair kit that keeps metal hanger strap fixes quick and reliable on site.
The kit should fit a small case and prioritize durability: corrosion-resistant straps, fasteners, basic tools, and protective gear for immediate, safe repairs.
Include clear labeling and spare measurements for common projects to speed diagnosis and installation.
- Stainless straps
- Self-tapping screws
- Mini hacksaw & pliers
- Safety gloves
Conclusion
Metal hanger straps are indispensable, nearly magical helpers for quickly securing, hanging, and repairing a wide range of items. When chosen and installed correctly—using the right strap type, fasteners, and safety precautions—they deliver reliable, long-lasting support for pipes, conduits, shelves, signs, and décor. Following best practices and troubleshooting tips prevents common failures and saves time. With careful planning and the proper tools, even small DIYers can achieve professional-strength results.