
How to Update Plumbing in an Old House: A Step-by-Step Renovation Guide
Updating plumbing in an old house involves assessing existing pipes and fixtures for issues like lead or corrosion, and developing a clear plan that outlines the scope of work—whether it’s targeted repairs, partial repiping, or full replacement. Key steps include selecting appropriate materials (like PEX, copper, or CPVC), minimizing wall damage by utilizing existing chases, replacing supply lines, and testing for leaks. Proper maintenance, along with hiring experienced professionals, is crucial for preserving the home’s value. This guide covers each step in detail to ensure a successful plumbing update.
Why Updating Plumbing in an Old House Matters Now
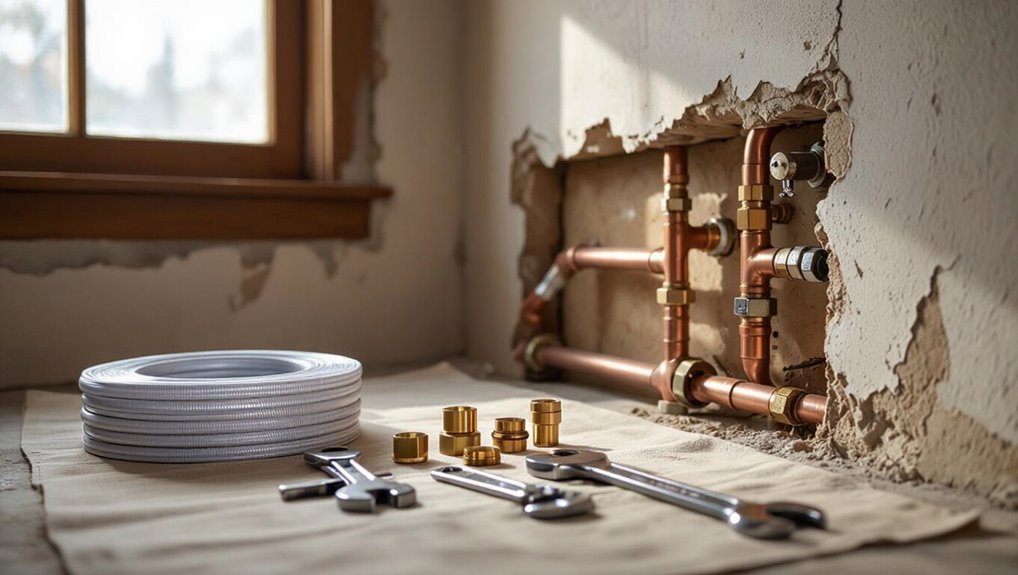
Outdated plumbing increases risks such as leaks, corrosion, and contamination that can damage structure and health.
Modernizing pipes and fixtures improves water quality, efficiency, and long-term cost savings.
Homeowners should weigh project scope and safety considerations to decide which tasks are suitable for DIY and which require a licensed professional.
Common risks of outdated plumbing systems
Many older homes carry plumbing systems that pose clear and immediate hazards: corroded pipes, lead or galvanized lines, failing joints, and worn fixtures can all cause leaks, contamination, and sudden failures.
Inspectors note risks including water damage, mold growth, reduced water pressure, and health hazards from lead.
Homeowners researching how to update plumbing in an old house should prioritize assessment and risk mitigation.
Benefits of modernizing pipes and fixtures
Replacing old pipes and fixtures delivers immediate and long-term advantages: improved water quality and pressure, reduced risk of leaks and costly repairs, and lower utility bills through more efficient fixtures.
Upgrading materials and layout increases home value, simplifies maintenance, and guarantees code compliance.
Modern systems enhance safety by preventing contamination, support higher-flow appliances, and reduce insurance premiums tied to aging plumbing.
When to DIY and when to hire a pro
Decide carefully which jobs a homeowner can tackle and which require a licensed plumber, because the wrong choice can worsen damage or void insurance.
Small tasks—replacing faucets, unclogging traps, installing fixtures—suit competent DIYers.
Major work—moving pipes, replacing mains, gas connections, or permitting—demands professionals.
Prioritize safety, code compliance, insurance, and long-term reliability when choosing between DIY and hiring a pro.
Assessing Your Current Plumbing System
A basic visual inspection should start in basements, crawlspaces, under sinks and at visible fixtures to note leaks, corrosion, water stains and any signs of sewer backup.
Attention should be paid to performance issues such as low pressure or discolored water that indicate hidden problems.
Identifying pipe materials—lead, galvanized steel, copper, PEX or PVC—and knowing their typical lifespans will guide priorities for repair or replacement.
How to perform a visual home plumbing inspection
Many homeowners begin a plumbing inspection by systematically surveying visible fixtures, fittings, and pipe runs to establish a baseline condition.
They note material types, age indicators, and accessible connections, check drain alignment and trap accessibility, verify shutoff valves and service access, document venting routes and visible supports, and photograph areas for reference.
Findings guide priorities, further testing, or professional evaluation.
Signs of trouble: leaks, low pressure, discolored water, sewer backups
Several clear indicators reveal when an older home’s plumbing needs attention: persistent leaks, sustained low water pressure, discolored or odorous water, and recurring sewer backups.
Each symptom signals different problems—hidden pipe corrosion, blockages, bacterial contamination, or failing sewer lines.
Prompt evaluation, diagnostic testing, and targeted repairs prevent structural damage, health risks, and escalating repair costs, prioritizing safety and system reliability.
Identifying pipe materials and their lifespan (lead, galvanized steel, copper, PEX, PVC)
Visible symptoms like discolored water or recurring backups often point back to the type and condition of the pipes themselves, so identifying what materials run through the walls and floors is the next practical step. Inspect accessible runs: lead (unsafe, short lifespan), galvanized (corrodes), copper (durable), PEX/PVC (modern, long-lasting).
| Material | Typical lifespan |
|---|---|
| Lead | 20–40 years |
| Copper/PEX | 50+ years |
Planning the Renovation: Scope, Budget, and Permits
The homeowner must define whether the work requires a targeted repair, a partial repipe, or a full system replacement, as scope drives every other decision.
A realistic budget should account for materials, labor, contingencies, and major cost drivers like wall access or fixture upgrades.
Local codes, permit fees, inspection schedules, and a clear timeline with contractor availability all shape the final plan.
Determining project scope: partial vs full repipe
How should homeowners decide between a partial repipe and replacing all supply lines? A systematic assessment of pipe condition, material (lead, galvanized, polybutylene), leak frequency, water quality, and renovation extent guides the choice.
Partial repiping targets localized failures; full repiping addresses widespread degradation, outdated materials, and long-term reliability.
Consider access, code compliance, and expected lifespan when determining scope.
Creating a realistic budget and cost drivers
Budgeting a plumbing overhaul begins with a clear inventory of scope-driven costs: materials, labor, permits, and unforeseen contingencies.
Itemize fixture replacements, pipe types, access and demolition, and specialized trades. Obtain multiple contractor estimates, factor regional labor rates, and include a 10–20% contingency.
Account separately for temporary water solutions, disposal, and project duration impacts on labor and supply-price volatility.
Local codes, permits, and inspection requirements
Compliance shapes every stage of a plumbing renovation: local building codes, permit requirements, and inspection schedules dictate what work can be done, by whom, and to what standard.
Contractors verify applicable codes, submit permit applications, and schedule required inspections. Plans must show compliance with safety, venting, backflow, and material standards.
Failure to obtain permits risks fines, forced alterations, or invalidated insurance coverage.
Timeline and scheduling considerations
After securing permits and scheduling required inspections, a realistic timeline becomes the framework for the project.
The plan sequences demolition, rough plumbing, inspections, fixture installation, and finishing, incorporating supplier lead times and contractor availability.
Contingency buffers for hidden issues and weather are essential.
Regular milestone reviews keep budget and scope aligned, enabling prompt adjustments and clear communication with all trades and the homeowner.
Choosing Materials and Layout Options
The homeowner should weigh pipe materials—copper, PEX, and CPVC—against factors like durability, cost, and compatibility with existing systems.
Decisions must also separate approaches to supply lines versus drain-waste-vent (DWV) systems, since material and routing needs differ.
Fixture selection should prioritize water efficiency and match the chosen layout and materials to guarantee code compliance and long-term performance.
Pipe material comparison: pros, cons, and typical uses
Selecting pipe materials requires balancing durability, cost, compatibility with existing systems, and local code requirements. The guide compares common options by lifespan, ease of installation, corrosion resistance, and typical applications, highlighting trade-offs for repairs versus full replacements.
| Attribute | Notes |
|---|---|
| Lifespan | Varies widely |
| Installation | Skill and tools differ |
| Corrosion | Material-dependent |
| Typical use | Supply vs. drain |
Recommended materials for old houses (PEX, copper, CPVC)
Considerations for updating plumbing in an older house center on materials that balance durability, compatibility with existing systems, and ease of installation.
PEX, copper, and CPVC each offer distinct advantages and limitations that make them better suited to specific scenarios.
PEX is flexible, freeze-resistant, and fast to install.
Copper is long-lasting and corrosion-resistant in many homes.
CPVC is cost-effective for hot water but less flexible.
Updating supply lines vs drain-waste-vent (DWV) systems
After weighing material pros and cons for fittings and piping, attention shifts to how those choices differ between supply lines and drain-waste-vent (DWV) systems.
Supply lines prioritize pressure-rated, corrosion-resistant materials and shorter runs with fewer joints; DWV demands larger-diameter, gravity-friendly piping, proper slope, and venting.
Layout planning separates hot/cold routing, minimizes fittings, and preserves access for future maintenance.
Fixture selection and water efficiency considerations
Many homeowners find that choosing fixtures and prioritizing water efficiency yields the greatest long-term gains in comfort, utility costs, and system longevity.
Selection favors low-flow toilets, aerated faucets, efficient showerheads, and WaterSense-certified appliances.
Materials should match system pressures and supply lines.
Consider fixture placement to minimize piping runs and heat loss; prioritize durable finishes for longevity and maintenance savings.
- Low-flow toilets
- Aerated faucets
- Efficient showerheads
- WaterSense appliances
Step-by-Step Guide to Replacing or Upgrading Plumbing
The step-by-step process begins with preparing the workspace, shutting off the main water supply, and ensuring power and ventilation are safe.
Next comes removal of old pipes and fixtures using appropriate safety measures before installing new supply lines, whether PEX with crimp fittings or soldered/brazed copper.
Finally, attention turns to replacing or repairing drain and sewer lines, connecting fixtures, and conducting pressure and leak tests to confirm a watertight system.
Preparing the workspace and shutting off water
Clear the immediate area and gather tools so work can proceed safely and without interruption.
The operator locates and labels main and branch shutoffs, notifies occupants, and drains lines by opening faucets and relieving pressure.
Protective covers, drop cloths, and adequate lighting are installed.
Electrical sources near work are secured.
A contingency plan for accidental leaks and access to shutoff valves and shutoff tools is kept ready.
Removing old pipes and fixtures safely
Begin by evaluating each fixture and pipe route to identify materials, connection types, and any visible corrosion or previous repairs. This survey directs the removal sequence and tool selection.
Then isolate sections by draining lines and closing valves. Label removed parts, cut or unscrew fittings with appropriate tools, support pipes to prevent collapse, remove debris safely, and inspect surrounding structures for damage before disposal or recycling.
Installing new water supply lines (techniques for PEX and copper)
Installers should choose between PEX and copper based on budget, durability, local code, and the house’s existing layout before cutting into walls or floors. Each material has distinct tools, fittings, and joining techniques that determine planning, routing, and required clearances.
PEX offers flexibility, fewer joints, and crimp/expansion fittings.
Copper requires soldering or press fittings, rigid supports, and corrosion checks.
Follow manufacturer and code installation practices.
Replacing or repairing drain and sewer lines
Replacing or repairing drain and sewer lines requires careful evaluation of pipe material, slope, access points, and connection types before any digging or demolition.
The guide outlines inspection with cameras, locating cleanouts, evaluating root intrusion and corrosion, and choosing replacement methods—sectional repair, relining, or full replacement.
It emphasizes proper fall, venting considerations, permit requirements, and coordinating with utility locators and contractors.
Connecting fixtures and testing for leaks
After drain and sewer lines have been secured, attention turns to connecting fixtures and verifying system integrity.
Install faucets, toilets, tubs, and lavatories using proper seals and manufacturer torque specs.
Attach supply lines, open shutoffs, and pressurize the system incrementally.
Inspect joints, traps, and connections for drips or moisture.
Repair or tighten immediately, and document locations of shutoffs and any replaced components.
Final inspection and obtaining sign-off
When pressure testing and visual checks confirm leak-free operation and fixtures are securely fastened, a thorough final inspection guarantees the work meets code, manufacturer requirements, and the homeowner’s expectations.
This includes verifying proper venting, accessible shutoffs, correct trap seals, and compliant fixture clearances before requesting official sign-off.
Inspectors confirm permits, review as-built changes, verify water heater settings, ascertain backflow prevention, and issue the completion certificate.
Structural and Finish Considerations for Older Homes
When updating plumbing in an older house, care must be taken to work around plaster, lath, and other historic finishes to avoid unnecessary damage.
Pipes should be routed to preserve character while coordinating with existing electrical and HVAC runs.
After plumbing work, walls, floors, and trim must be restored to match original materials and details.
Working around plaster walls, lath, and historic finishes
Carefully traversing plaster walls, wood lath, and historic finishes requires balancing structural integrity with preservation goals.
Contractors assess condition, document finishes, and plan minimally invasive access. Small test openings, vibration control, and hand tools reduce damage.
Where repairs are unavoidable, match materials and textures. Communication with preservation authorities and homeowners guarantees compliant, respectful interventions that retain character while enabling necessary plumbing updates.
Routing pipes to minimize damage and preserve character
Route pipes to follow existing voids and seams, minimizing cutting through plaster, trim, or historic moldings.
Contractors plan runs along basements, attics, closets, and behind cabinets to conceal work and preserve finishes.
Use short, reversible interventions: chases in floor joists, surface-mounted runs painted to match, or behind removable trim.
Document locations for future restoration and limit new penetrations of original fabric.
Integrating with electrical and HVAC systems
After locating plumbing runs within existing voids and behind trim, the next concern is coordinating those new lines with electrical and HVAC systems to avoid structural conflicts and preserve finishes.
Plan clearances to maintain code-required separations, route supply and waste to prevent interference with ducts and wiring, and label penetrations.
Engage electricians and HVAC contractors early to sequence work, protect insulation, and minimize invasive cutting.
Restoring walls, floors, and trim after plumbing work
Begin by evaluating the extent of repairs needed where plumbing penetrations and chases were opened. Document damaged drywall, lath, flooring, and trim so restoration can proceed in a prioritized, code-compliant sequence.
Stabilize framing, replace or repair lath and plaster or drywall, patch flooring and subfloor, and reinstall trim.
Match historic profiles and finishes, use proper fasteners and sealants, and verify moisture mitigation before closing walls.
Common Problems During Plumbing Updates and How to Solve Them
Plumbing updates in older homes often uncover corroded or seized fittings that require cutting, penetrating oils, or replacement with compatible materials.
Contractors also frequently encounter hidden rot, mold, or pest damage behind walls, necessitating remediation and structural repairs before pipe work can proceed.
Limited access in crawlspaces or basements complicates repairs and diagnostics such as low water pressure or noisy pipes, so assessment with proper tools and targeted remedies (pressure checks, air eliminators, or isolation of failing sections) is essential.
Dealing with corroded or stuck fittings
Tackle corroded or seized fittings methodically, since years of mineral buildup, galvanic corrosion, or thread damage can make disassembly difficult and risky; apply penetrating oil, allow soak time, and use proper-sized wrenches or strap tools to reduce rounding.
Heat may free brass joints; avoid excessive force on cast iron.
When threads are damaged or removal fails, cut out and replace the fitting or section.
Handling unexpected rot, mold, or pest damage behind walls
When stubborn fittings finally come apart, renovators often find the real trouble hidden in cavities: rot, mold, or evidence of pests behind walls that were masked by years of slow leaks.
Assess structural members, photograph damage, and test for active mold or infestation.
Remove compromised material, dry and treat surfaces, replace framing or sheathing as needed, and coordinate with specialists for remediation and proper documentation.
Navigating limited access in crawlspaces and basements
Accessing pipes in cramped crawlspaces and low-clearance basements forces renovators to balance limited maneuvering room, poor lighting, and obstructed lines with the need for safe, code-compliant repairs.
Strategies include using compact tools and telescoping or flexible fittings, installing temporary lighting and ventilation, creating access panels, planning staged sections to minimize work area, and documenting clear paths for inspections and future maintenance.
Troubleshooting low pressure and noisy pipes
Diagnose low water pressure and noisy pipes systematically to distinguish between supply issues, fixture problems, and piping faults.
Check main shutoff and pressure regulator, test pressure at multiple fixtures, and inspect for leaks or partial blockages.
Replace failing fixtures, clean aerators, flush sediment from hot-water tanks, and secure or add pipe insulation and clamps to eliminate water hammer, vibration, and expansion noises.
Cost-Saving Strategies and Long-Term Maintenance
A homeowner should prioritize high-impact upgrades—such as replacing failing mains or antiquated fixtures—that provide the best balance of cost and long-term benefit.
Decisions about full repiping versus targeted repairs depend on pipe material, the extent of corrosion or leaks, and budget constraints.
Establishing a preventive maintenance schedule, keeping warranties and insurance documentation, and thoroughly recording all work will reduce future expenses and simplify claims or resale.
Prioritizing high-impact upgrades
When evaluating plumbing upgrades, homeowners should focus first on interventions that reduce recurring costs and prevent major failures—such as replacing corroded supply lines, updating aging fixtures to water-efficient models, and repairing compromised sewer connections—because these measures deliver the greatest long-term savings and minimize disruption.
Prioritize targeted repairs, add accessible shutoffs, and install durable valves and traps to lower maintenance, water bills, and emergency risks efficiently.
When to repipe whole house versus partial fixes
How should homeowners decide between repiping an entire house and pursuing targeted repairs?
Evaluation of pipe material, age, leak frequency, water quality, and plumbing layout guides the choice. Widespread corrosion, multiple failure points, or incompatible materials favor full repipe for long-term reliability.
Isolated leaks, single-line issues, or budget constraints justify staged or targeted repairs with careful inspection and documented risk assessment.
Preventive maintenance schedule and tips
Regularly scheduled preventive maintenance preserves plumbing function and reduces costly emergency repairs.
Inspections, sediment flushing, valve exercises, and gasket checks extend system life. Seasonal tasks prevent freeze damage and leaks. Homeowners benefit from simple record-keeping and prioritized repairs to avoid escalation.
- Inspect pipes and joints quarterly
- Flush water heater annually
- Operate shutoff valves semiannually
- Replace worn seals as needed
Warranties, insurance considerations, and documenting work
Beyond routine checks and seasonal tasks, homeowners should treat warranties, insurance policies, and clear documentation as integral parts of a long-term plumbing strategy.
Track serial numbers, receipts, contractor licenses, and warranty terms; store digital copies.
Verify homeowner and contractor insurance coverages before work begins.
Regularly update records after repairs or upgrades to support claims, preserve resale value, and streamline future maintenance decisions.
Hiring Professionals: What to Ask and Contract Checklist
Selecting the right plumber or contractor requires careful vetting of licenses, insurance, references, and past work on older homes.
The homeowner should ask targeted questions about experience with vintage systems, documented problem-solving on similar projects, and timelines for permits and inspections.
A written contract must spell out scope of work, materials, payment schedule, change-order procedures, and a clear method for comparing detailed quotes.
How to vet plumbers and contractors
Why hire a licensed professional instead of attempting major plumbing work alone?
The text advises verifying licenses, insurance, and bonding; checking references and recent local project photos; confirming permits and code familiarity; obtaining detailed written estimates and timelines; clarifying warranties and change-order procedures; comparing multiple bids; and documenting payment schedules.
A vetted contractor reduces risk, guarantees compliance, and protects property value.
Key questions about experience with old houses
How will the contractor handle the quirks of century-old plumbing systems?
Questions should probe specific experience with cast iron, galvanized, and lead pipes; past projects of similar age and scope; references and photos; diagnostic methods for hidden failures; familiarity with preservation vs. replacement choices; coordination with historical guidelines; licensing and insurance for older-structure work; and contingency approaches for unexpected discoveries.
What to include in a written contract and scope of work
Require a clear, detailed written contract and scope of work that defines exactly what will be done, by whom, on what timeline, and at what cost.
The document should assign responsibilities, specify materials and codes, include payment schedule, change-order process, permits, insurance, and warranty terms.
Confirm signatures, start/end dates, and dispute resolution are explicit.
- Work description and materials
- Timeline and milestones
- Payments and change orders
- Permits, insurance, warranty
Estimating and comparing quotes
After securing a clear contract and scope of work, the next step is to obtain and compare professional estimates to guarantee the project aligns with budget, schedule, and quality expectations.
Obtain at least three detailed bids, verify licenses and insurance, compare line-item costs, warranties, and timelines, and check references.
Negotiate, clarify exclusions, change-order procedures, and payment milestones before signing to avoid surprises.
Real-World Examples and Before-and-After Scenarios
The article presents three concise case studies to illustrate common outcomes: a small-bathroom update showing quick wins and a typical scope of work.
A full repipe example outlines the main challenges encountered and the resulting improvements in performance and reliability.
A historic-home restoration highlights approaches that modernize plumbing while preserving original features.
Small-bathroom update: quick wins and typical scope
Start by identifying high-impact, low-disruption changes that modernize function and appearance without gutting the space.
Typical scope includes swapping fixtures for water-efficient models, replacing old valves and supply lines, updating showerheads and faucets, improving lighting, and installing a compact vanity or recessed medicine cabinet.
Examples show minimal tile repair, clever storage, and modest layout tweaks delivering noticeable comfort and resale value.
Full repipe case study: challenges and outcomes
Examine a full repipe project that converted a century-old home from corroded galvanized and lead lines to modern PEX, documenting access strategies, unexpected obstacles, cost drivers, and measurable outcomes.
This case highlights junction points where water quality, pressure, and reliability improved, while revealing trade-offs in disturbance, timeline, and budget.
The report details phased demolition, hidden corrosion, permit delays, material/labor breakdowns, and quantified performance gains.
Historic home restoration: preserving original features while modernizing
Balancing preservation and modernization, historic homeowners and contractors showcase projects that retain original moldings, staircases, and period fixtures while discreetly integrating updated plumbing, electrical, HVAC, and insulation systems.
Photographs compare water-damaged bathrooms restored with salvaged vanities to modern wet rooms; hidden pipe chases preserve plaster; vintage radiators receive retrofit valves; period-appropriate fixtures conceal efficient hardware, demonstrating respectful upgrades that maintain character and functionality.
Final Steps After Renovation
After work is complete, the plumbing system should be tested for water quality and overall performance to confirm fixtures, pressure, and filtration are functioning properly.
The homeowner’s records and home documentation ought to be updated with as‑built diagrams, warranty information, and maintenance schedules.
Finally, practical tips for regular inspections and early warning signs are offered so future issues can be caught and addressed promptly.
Testing water quality and system performance
One clear final step is to verify both water quality and system performance to assure the renovated plumbing meets safety and functionality standards.
Professionals or homeowners should collect water samples for lead, bacteria, chlorine, and hardness testing, inspect pressure and flow at fixtures, check for leaks, exercise valves, and confirm proper drainage.
Documented test results and corrective actions assure reliable operation.
Updating home documentation and maintenance records
With water quality confirmed and system performance verified, attention shifts to updating home documentation and maintenance records to preserve a clear history of the renovation.
Photographs, diagrams, permits, warranties and contractor contacts are compiled. A schedule for routine checks and service dates is logged.
Materials and fixture specifications, locations of shutoffs and valve maps are recorded for future reference and resale documentation.
Tips for monitoring and catching future issues early
Vigilance pays dividends: establishing a simple, consistent monitoring routine helps catch leaks, corrosion, and performance declines before they become costly.
Periodic visual inspections, water meter checks, and listening for unusual noises are recommended. Document findings and set reminders for seasonal reviews. Engage a licensed plumber for annual assessments.
- Inspect visible pipes and fixtures monthly
- Record meter/usage weekly
- Note pressure/temperature changes
- Schedule yearly professional check
Conclusion
Like a weathered compass reset to true north, the renovated plumbing guides the house toward renewed reliability. Pipes once creaking with age become silent streams, carrying comfort and safety through walls that remember years of use. This renewal symbolizes stewardship—honoring history while investing in the future—so that every faucet, drain, and joint reflects care, resilience, and a deliberate choice to let the home flow forward with steadiness and grace.
