How to Sanitize Your RV Water Tank: Step-by-Step Guide for Clean, Safe Water
How to Sanitize Your RV Water Tank: Step-by-Step Guide for Clean, Safe Water
Sanitizing your RV water tank is essential for ensuring clean and safe drinking water. The process involves draining the tank, removing debris, and inspecting for any damage. You’ll then mix a measured bleach solution and circulate it through all faucets until you detect the chlorine odor. After allowing it to sit for several hours, flush the system thoroughly until the chlorine levels are safe. Regular maintenance records can help prevent future issues. Follow this guide for detailed steps and expert tips to keep your water tank in top condition.
Why Sanitizing Your RV Water Tank Matters for Health and RV Maintenance
RV freshwater systems commonly harbor bacteria, algae, sediment, and mineral buildup that can contaminate stored water.
Untreated water can cause gastrointestinal illness, skin infections, and exacerbate existing health conditions among occupants.
Regular sanitizing also prevents scale and corrosion, preserving plumbing, pumps, and appliances.
Common contaminants in RV freshwater systems
Contaminants in freshwater systems range from harmless sediments to harmful microbes and chemical residues, all of which compromise water quality and pose risks to health and plumbing.
Common issues include biofilm, bacteria, algae, mineral buildup, and residual disinfectants or fuel/antifreeze traces.
Identifying these informs decisions about how to sanitize water tank in rv and which cleaning agents and filters to employ.
Health risks of untreated RV water
Neglect of freshwater systems carries tangible health and maintenance consequences.
Untreated RV water can harbor bacteria, protozoa, and viruses causing gastrointestinal illness, skin infections, and respiratory problems. Chemical residues and biofilms increase exposure risk.
Vulnerable occupants—children, elderly, immunocompromised—face greater danger.
Prompt sanitization reduces infection risk, prevents foul odors, and helps maintain safe potable water for drinking, cooking, and hygiene.
How sanitizing extends the life of your plumbing and appliances
Sanitizing the freshwater system prevents scale, biofilm, and mineral buildup that gradually clog lines, valves, and fixtures, preserving flow and pressure for sinks, showers, and appliances.
Regular disinfection reduces corrosion, foul odors, and bacterial colonies that can degrade seals and pumps.
Consistent maintenance minimizes repairs, extends component lifespan, and maintains efficiency, lowering long‑term costs and downtime for RV owners.
Signs Your RV Water Tank Needs Sanitizing
Visible symptoms such as unpleasant taste, musty or chlorine-like odors, and discolored water often indicate contamination in the RV water tank.
Performance issues like reduced flow, frequent clogs, or repeated filter replacements can also signal the need for sanitizing.
Regular preventive schedules and specific triggers—after storage, repairs, or suspected contamination—should guide when sanitizing is performed.
Visible symptoms: taste, odor, discoloration
A handful of clear, sensory clues often signal that an RV’s water tank requires attention: an off taste, unusual odors, or discoloration in the water.
Bitter, metallic, or chlorine-like flavors; musty, rotten, or sulfurous smells; and cloudy, yellow, brown, or green tints indicate contamination, algae, or sediment.
These visible and sensory signs justify prompt inspection and sanitization to protect health and plumbing.
Performance signs: low flow, clogs, recurring filter issues
Detecting diminished water performance—weak flow from faucets, frequent clogs, or rapid fouling of inline filters—often points to contamination or buildup inside the RV’s water tank and supply lines.
Sediment, biofilm, mineral deposits, or algae restrict passages and accelerate filter exhaustion.
Regularly inspect aerators, showerheads, and inline filters; persistent issues after cleaning indicate tank sanitization and line flushing are necessary to restore reliable flow.
When to sanitize: routine schedule and event triggers
When should an RV water tank be sanitized, and how often; the answer depends on both routine preventive intervals and specific events that raise contamination risk.
Generally, sanitize at least annually and after long storage.
Also sanitize after sourcing unknown water, illness aboard, visible contamination, plumbing repairs, or persistent odors/taste issues.
Increase frequency in warm climates or heavy use to prevent bacterial growth.
Essential Safety Precautions Before You Begin
Before starting sanitization, the operator should wear appropriate personal protective equipment and guarantee adequate ventilation to avoid inhalation or skin exposure.
Chemicals must be handled and stored according to label instructions, kept away from children and pets, and separated from food and flammable materials.
Fixtures, seals, and interior surfaces should be protected or removed as recommended to prevent damage from concentrated sanitizers.
Personal protective equipment and ventilation
Wear appropriate personal protective equipment and secure adequate ventilation to minimize exposure to chemical disinfectants and biohazards when sanitizing an RV water tank.
Protective gloves, splash-resistant goggles, and a respirator for strong bleach fumes are recommended.
Make certain windows and vents are open, run fans, and avoid confined spaces.
Dispose of contaminated PPE safely and wash hands thoroughly after completing the task.
Handling and storing sanitizing chemicals safely
Store and handle sanitizing chemicals with clear separation, proper labeling, and strict adherence to manufacturer instructions to prevent accidental exposure, reactions, or leaks.
Keep chemicals in original containers, locked and upright, away from heat and food. Use secondary containment for spills, store incompatible substances separately, and maintain an accessible SDS.
Dispose of expired or unused chemicals according to local regulations.
Protecting fixtures, seals, and RV surfaces
Because sanitizing solutions can corrode metal, stain finishes, or degrade rubber, RV owners should protect faucets, seals, countertops, and cabinetry before beginning treatment.
Cover exposed fixtures with plastic or tape, remove or shield delicate items, and apply compatible lubricants to rubber seals afterward.
Rinse protected surfaces promptly after sanitizing and inspect seals and fittings for deterioration before refilling the tank.
Tools and Materials You’ll Need
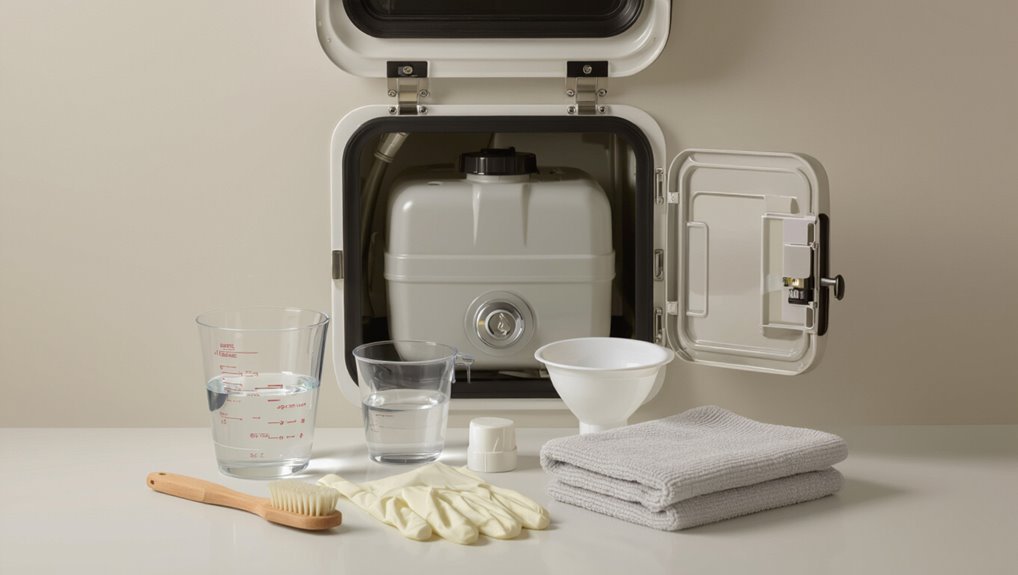
A concise inventory of supplies helps guarantee the tank-sanitizing process proceeds smoothly, including hoses, gloves, brushes, and a clean water source.
Recommended sanitizers—such as household bleach at proper concentrations or RV-specific disinfectants—should be identified and measured precisely.
Optional items for more thorough cleaning, like a pump, pressure sprayer, and water test strips, can improve effectiveness and verification.
List of basic supplies
Before beginning the sanitizing process, gather the essential tools and materials so the job proceeds efficiently and safely.
Necessary basic supplies include protective gloves, a hand pump or hose adapter, a bucket, non-abrasive brushes, and potable water.
Suggested items:
- Rubber gloves
- Hose adapter or pump
- Bucket
- Soft brush
- Disposable towels
Recommended sanitizers and concentrations
Select sanitizers that are proven safe for potable water and match them to the tank size and contaminant level; common choices include household bleach (sodium hypochlorite) at 50–200 ppm free chlorine for routine disinfection, hydrogen peroxide (stabilized, food-grade) at manufacturer-recommended concentrations for people preferring chlorine-free options, and commercial RV-specific sanitizing products formulated for freshwater systems.
Always follow label instructions and verify final concentrations with test strips or a digital chlorine meter. Use dosing charts.
Optional tools for thorough cleaning (pump, pressure sprayer, test strips)
Several useful tools can make sanitizing an RV water tank faster and more effective. A utility pump speeds drainage and circulation of cleaning solution.
A pressure sprayer helps reach interior surfaces and dislodge biofilm. Test strips verify residual sanitizer levels and confirm rinsing completeness.
Optional wands, hoses, and brushes improve access to seams and corners, reducing manual effort and ensuring thorough sanitation.
Step-by-Step Guide to Sanitizing an RV Water Tank
The procedure begins with preparing the RV, emptying the tank, and removing any visible debris while inspecting the interior for damage.
Next, a disinfectant is mixed at the correct ratio and added to the tank, then circulated through plumbing and fixtures so all lines are treated.
Finally, the system is left for the required contact time before flushing and refilling.
Preparing the RV and emptying the tank
Before any sanitizing chemicals are introduced, the RV must be prepared and the fresh water tank fully emptied to remove sediment and stagnant water that can harbor bacteria.
Disconnect shore power, close intake valves, open tank drain and city water bypass, then run faucets until empty.
Note all access panels and document fittings for reassembly.
Guarantee proper disposal of drained water.
Cleaning physical debris and inspecting the tank interior
Begin by removing loose debris and sediment from the empty tank using a wet/dry vacuum or a hand pump.
Then visually inspect the interior surfaces through access ports or with a flashlight and mirror to identify residue, corrosion, or biological growth.
Scrub accessible areas with a soft brush and mild detergent, rinse thoroughly, and note any damage or persistent contamination requiring repair or professional cleaning.
Mixing and adding the sanitizing solution with correct ratios
A measured bleach solution is prepared and added to the tank to achieve effective disinfection without harming plumbing components.
Calculate dosage based on tank capacity (commonly 1/4 to 3/4 cup unscented household bleach per 15 gallons).
Mix bleach with potable water in a separate container, then pour slowly into the tank.
Cap and gently agitate to distribute the solution evenly.
Running sanitizer through the plumbing and fixtures
With the bleach solution mixed and the tank sealed, the next step is to circulate that sanitizer through the RV’s plumbing so every faucet and fixture is treated.
Open all faucets — hot and cold — including shower, exterior, and low-flow outlets, until bleach-scented water appears.
Operate appliances like the ice maker briefly if connected.
Close faucets and note treated fixtures for later flushing.
Contact time: how long to let the sanitizer work
How long should the bleach solution remain in the tank and plumbing to reliably kill bacteria and disinfect surfaces?
A contact time of at least four hours is recommended, with overnight exposure (8–12 hours) preferable for stubborn contamination.
Guarantee the system remains sealed and unused during this period.
Shorter durations reduce efficacy; longer contact provides increased microbial kill without harming common RV plumbing materials.
Flushing the system thoroughly until clean water runs clear
After the contact period is complete and the system has remained sealed, the sanitizer must be fully flushed from the tank and plumbing until water runs clear and scent-free.
Open all faucets, including shower and exterior outlets, and drain until odor and discoloration disappear.
Refill with fresh potable water, flush again, and repeat as needed to guarantee residual sanitizer is removed before regular use.
Final testing for residual sanitizer and water quality
Begin testing by collecting samples from multiple outlets—kitchen tap, shower, and an exterior spigot—to check for any remaining sanitizer and overall water clarity.
Use chlorine test strips or a digital meter to verify residual levels are below 0.5 ppm. Inspect for odor, taste, and turbidity.
If results exceed limits, repeat flushing and retest until readings and sensory checks confirm safe potable water.
Alternative Sanitizing Methods and When to Use Them
The article next outlines alternative sanitizing options, beginning with precise bleach ratios and application steps for routine disinfection.
It then compares hydrogen peroxide — noting effectiveness, safety, and limitations — and describes UV and ozone systems suited to more advanced setups.
Finally, guidance is given on situations warranting a professional sanitation service.
Bleach sanitizing method with step-by-step ratios
Many RV owners rely on household bleach as an effective, economical sanitizer for freshwater tanks; this section outlines precise bleach-to-water ratios and a stepwise procedure to achieve safe potable-water levels without damaging plumbing.
Use 1/4 cup (4 tsp) of 6%–8.25% bleach per 15 gallons.
Fill tank, circulate solution through taps, wait four hours, drain, flush until no chlorine odor remains.
Hydrogen peroxide method and pros/cons
Consider hydrogen peroxide when homeowners seek a bleach-free sanitizer for RV freshwater tanks: it disinfects effectively without leaving chlorine taste or producing harmful chlorinated byproducts.
Use food-grade 3–35% solutions diluted per manufacturer guidance, circulate through plumbing, then flush thoroughly.
Pros: nonchlorinated, biodegradable, effective against bacteria.
Cons: higher cost, shorter residual protection, careful handling required for concentrated grades.
UV and ozone treatments for advanced systems
Two high-tech options—ultraviolet (UV) and ozone—offer chemical-free disinfection for RV freshwater systems, using different mechanisms and suited to different applications:
UV lamps in-line irradiate flowing water, inactivating microbes immediately but requiring clear water and power;
ozone generators oxidize and disinfect stored water, offering residual effect but demanding careful dosing, ventilation, and materials compatibility to prevent corrosion and off‑tastes.
When to hire a professional sanitation service
When is it worth hiring a professional sanitation service for an RV water system?
Professionals are recommended when contamination persists after DIY treatment, mold or biofilm is visible, complex plumbing or filters require disassembly, chemical exposure risks exist, or the owner lacks time or confidence.
Technicians offer thorough inspection, specialized equipment (ozone, UV), and documentation, ensuring safe potable water and compliance with warranty or park regulations.
Post-Sanitization Checks and Maintenance
After sanitizing, the water should be tested for residual chlorine, bacterial contamination, and pH to confirm it meets safety levels.
Filters and fittings must be inspected and replaced or tightened as needed to prevent recontamination.
Sanitation dates, test results, and any maintenance performed should be recorded for future reference and regulatory compliance.
How to test water for safety (chlorine, bacteria, pH)
Although a successful sanitization reduces contamination risk, verifying water safety through testing is essential to confirm chlorine levels, bacterial absence, and acceptable pH before use.
- Use test strips for free chlorine and pH readings.
- Collect sterile samples for lab bacterial culture if uncertain.
- Use a portable ATP or bacterial kit for rapid checks.
- Compare chlorine to recommended ppm ranges.
- Record results and repeat tests after any system changes.
Replacing filters and checking fittings after sanitizing
Inspect filters and fittings immediately following tank sanitization to confirm the disinfection process is not compromised by clogged cartridges, weakened seals, or disturbed connections.
Replace disposable or fouled filters, clean reusable elements, and verify O-rings for cracks.
Tighten hose clamps and threaded fittings to proper torque.
Run water to confirm flow and check for leaks.
Reinspect after initial use to validate integrity.
Record-keeping: documenting sanitation dates and results
Maintain a clear, consistent record of each sanitation event, noting the date, method used (e.g., bleach ppm or commercial sanitizer), contact time, volumes treated, and any deviations from standard procedure.
Include water source, post-treatment test results (chlorine residual or bacterial cultures), technician or owner initials, and follow-up actions.
Store logs digitally and physically for warranty, troubleshooting, and regulatory compliance.
Preventive Measures to Keep Your RV Water Safe Between Sanitizations
Proper storage and careful handling of freshwater minimize the risk of contamination between full sanitizations.
Filling should be done only from known safe sources and with clean hoses or adapters to prevent introducing bacteria.
Performing simple regular maintenance—flushing spigots, inspecting seals, and changing filters—helps keep water quality stable.
Proper storage and handling of freshwater
Store freshwater in a cool, shaded area of the RV and use food-grade containers and fittings to limit contamination and chemical leaching.
Drain and rinse hoses after use, cap inlets, and secure lids to prevent insects and debris.
Label refill dates, rotate stored water every six months, and avoid storing near fuel, cleaning chemicals, or heat sources that accelerate bacterial growth or degrade plastics.
Tips for filling from safe water sources
When filling an RV from an external source, prioritize verified potable supplies and visible, well-maintained hookups to reduce contamination risk; use a dedicated, food-grade hose and an inline filter or backflow preventer to block sediments and bacteria.
Confirm water source signage or provider certification, flush spigots briefly before connecting, avoid stagnant standing water, and store fittings clean and dry between uses.
Regular simple maintenance tasks to reduce contamination
Maintain a short routine of simple checks and touches to keep an RV water system clean between full sanitizations.
Inspect hoses and fittings for wear, replace damaged parts, flush lines after storage or extended use, run faucets briefly daily to prevent stagnation, and use inline filters.
Drain low points and clean screens periodically.
Record dates of cartridge changes and quick rinses.
Common Mistakes and How to Avoid Them
Common errors when sanitizing an RV water tank include using too much or too little sanitizer, failing to flush lines completely, and overlooking seals, vents, and hard-to-reach areas.
Each mistake can reduce effectiveness or introduce contaminants if not corrected.
Clear procedures and careful inspection prevent these issues.
Over- or under-concentrating sanitizers
A surprising number of RV owners either over- or under-concentrate sanitizers, which undermines effectiveness and can damage plumbing or leave harmful microbes behind.
Precise measurement and following product instructions prevent corrosion, lingering odor, and insufficient disinfection. Using a calibrated measuring device, mixing in clean water, and labeling concentrations guarantees safe, repeatable treatment.
When unsure, consult product guidelines or a professional for correct dosing.
Failing to flush lines completely
After correct sanitizer mixing, incomplete flushing remains a frequent mistake that undermines the whole sanitization effort.
Residual sanitizer, dislodged debris, and stagnant water can persist in faucets, showerheads, and low spots if lines aren’t run long enough.
To avoid this, purge until odorless, clear water flows from every outlet, operate hot and cold separately, and check low points and exterior spigots.
Ignoring seals, vents, and less-accessible areas
Because seals, vents, and tucked-away fittings are rarely visible during routine checks, they are often overlooked despite being critical to water-system integrity.
Neglected components harbor contaminants and cause leaks or pressure issues. Inspect and clean seals, vent screens, filler caps, and behind access panels.
Replace worn gaskets, sanitize crevices with appropriate solutions, and document locations to guarantee consistent maintenance and prevent contamination.
Comparing Costs, Effectiveness, and Convenience of Sanitizing Options
A quick comparison of DIY versus professional tank sanitizing highlights differences in cost, time, and required expertise to help owners choose the best option. Effectiveness and safety of common sanitizers (bleach, hydrogen peroxide, specialized products) vary, so matching the method to tank material and water use is important. The table below summarizes key trade-offs at a glance.
| Option | Typical Cost | Notes |
|---|---|---|
| DIY (bleach) | Low | Effective if used correctly; requires handling and proper rinse |
| DIY (commercial) | Moderate | Easier dosing, formulated for tanks, safer for materials |
| Professional service | High | Most convenient; includes inspection and assurance of thorough sanitizing |
Cost breakdown for DIY vs professional services
Budget is a key factor when choosing between DIY sanitizing and hiring a professional for RV water tank maintenance.
DIY costs typically include bleach, test strips, hoses, and time—often $15–$60 total.
Professional services range $75–$250, covering inspection, thorough flushing, and disposal.
Owners should weigh upfront savings against convenience, warranty considerations, and potential need for repeat or corrective service.
Effectiveness and safety comparison of common sanitizers
Compare common sanitizers by weighing their microbial effectiveness, material compatibility, user safety, and required contact time.
Bleach (sodium hypochlorite) is inexpensive, fast, broadly effective, but can corrode fittings and smell.
Hydrogen peroxide is gentler on materials and safer to handle but may need higher concentrations and longer contact.
Chlorine dioxide offers fast, residue-free disinfection but costs more and requires careful dosing.
Troubleshooting Persistent Water Quality Problems
If water quality problems persist after routine sanitizing, the writer recommends investigating recurring bacterial contamination through repeated testing and targeted disinfection.
The discussion should also cover identification and removal of algae, slime, and biofilm buildup that protect microbes and reduce treatment effectiveness.
Finally, criteria for when tank repair or replacement becomes the most reliable solution will be outlined.
Dealing with recurring bacterial contamination
When bacterial contamination keeps recurring despite routine sanitizing, the problem typically stems from hidden sources or inadequate procedures that require systematic troubleshooting.
Inspect inlet filters, fittings, and hoses for leaks or organic buildup.
Verify disinfectant concentration and contact time, flush lines thoroughly, and test water after treatment.
Consider replacing compromised components and retesting periodically until results consistently meet safety standards.
Addressing algae, slime, and biofilm buildup
Many RV owners encounter persistent algae, slime, and biofilm in tanks and plumbing that resist standard sanitizing. These growths adhere to surfaces, shield microbes from disinfectants, and can rapidly recolonize after treatment.
Mechanical scrubbing, flushing with hot water, and using approved biofilm-targeting cleaners or hydrogen peroxide treatments improve removal.
Follow with repeated chlorination cycles, thorough rinsing, and regular maintenance to prevent recurrence.
When tank replacement is necessary
Persistent or recurring contamination that resists repeated cleaning and sanitizing may indicate that the tank itself is compromised beyond practical repair.
Signs include deep pitting, cracks, entrenched odors, discoloration, persistent bacterial tests, or repeated leaks.
When inspection reveals structural damage or persistent microbial reservoirs unreachable by treatment, replacement of the tank and associated fittings is the safest, long-term solution to restore potable water quality.
Checklist: Quick 10-Step RV Water Tank Sanitizing Routine
Start by gathering all necessary supplies—household bleach, a measuring container, a water-pressure-safe hose, a funnel, gloves, and fresh potable water—so the sanitizing process proceeds without interruption.
A concise 10-step checklist guides preparation, treatment, flushing, and testing. Follow safety, concentration, contact time, and rinse protocols precisely.
- Prepare tank and connections
- Measure bleach dose
- Add bleach solution
- Circulate thoroughly
- Flush until clear
Conclusion
Regular sanitizing prevents bacterial growth and prolongs RV plumbing life; a single treatment can reduce coliform presence by over 99%, illustrating how small actions yield large safety gains. Following the guide’s steps keeps water palatable and systems reliable, while routine checks catch issues early. By prioritizing safety, using proper precautions, and avoiding common mistakes, RV owners protect health, prevent costly repairs, and enjoy consistently clean water on every trip.