
How to Fix a Rain Bird Sprinkler Head That Won’t Rotate: Step-by-Step Repair Guide
To fix a Rain Bird sprinkler head that won’t rotate, start by shutting off the zone and relieving pressure. Inspect the nozzle, screen, and riser for any debris or damage. Clean or replace clogged nozzles and O-rings, and manually check for free movement. Ensure there are no water pressure issues or valve restrictions. If necessary, replace worn drive gears or the entire head if it’s cracked. After reassembling, restore water flow and confirm that the sprinkler rotates smoothly and covers the intended area. Follow this step-by-step guide for diagnostics, pressure testing, and part matching.
What to Do First When a Rain Bird Sprinkler Head Won’t Rotate
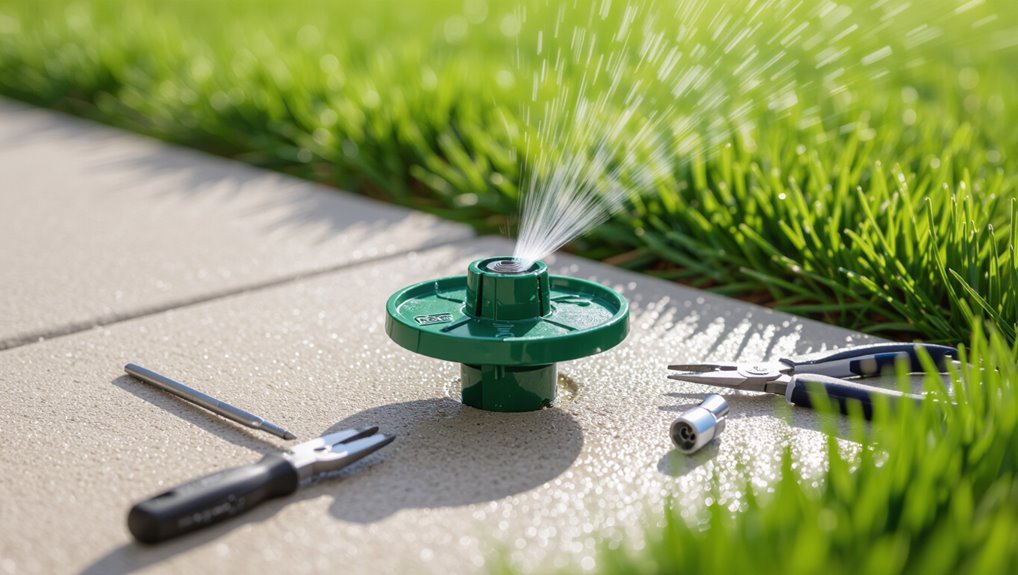
Before any adjustments are made, the technician should shut off the water supply and wear gloves and eye protection to prevent injury.
Gather basic tools and materials—screwdriver, needle-nose pliers, a small wrench, replacement nozzle or riser parts, and a clean cloth—so the inspection can proceed without interruption.
Finally, run the system briefly and note which heads fail to rotate, marking their locations for targeted troubleshooting.
Quick safety and preparation steps
Shut off the irrigation at the controller or main valve and confirm water flow has stopped by activating a nearby zone briefly; this prevents unexpected sprays and reduces pressure on the stuck Rain Bird head.
Next, wear gloves and eye protection, clear the area of children and pets, mark the riser location, and inspect for electrical lines.
These precautions help safely proceed with how to fix a rainbird sprinkler head that wont rotate.
Tools and materials you’ll need
With the zone verified off and the area secured, gather the tools and parts needed to diagnose and repair a Rain Bird sprinkler head that won’t rotate.
Essential items include replacement nozzles, lubricating-safe silicone, and O-rings. Keep basic hand tools ready.
- Flathead and Phillips screwdrivers
- Adjustable wrench and pliers
- Needle-nose pick and small brush
- Replacement nozzle/O-ring kit
How to identify the affected sprinkler heads
How can a malfunctioning head be quickly spotted? The user inspects the zone during operation, noting heads that fail to rotate, spray unevenly, sputter, or remain stuck.
Mark nonrotating units with flags or chalk. Check adjacent heads for reduced pressure and listen for unusual noises.
Record head model and location before shutting the zone off for repair.
Common Causes of a Non-Rotating Rain Bird Sprinkler Head
Common failures that stop a Rain Bird sprinkler head from rotating include physical obstructions like debris in the nozzle or rotating mechanism and hydraulic problems such as low water pressure or clogged filters.
Mechanical wear—broken gears, damaged bearings, a bent riser, or a jammed cap—also commonly prevents rotation.
Improper installation or misalignment can further compromise operation and should be checked alongside the other causes.
Debris and dirt buildup in the nozzle or rotating mechanism
Debris and dirt lodged in the nozzle or rotating mechanism often stop a Rain Bird sprinkler head from turning. Accumulated grit, sand, or organic matter can jam gears, impede the drive pin, or block spray ports.
Regular inspection and careful cleaning—flushing water, removing the nozzle, and picking out particles—restore movement. Persistent residue may require disassembly and thorough rinsing or replacement of worn components.
Low water pressure or clogged filters
If cleaning the nozzle and internal parts does not restore rotation, low water pressure or a clogged filter is often the next area to inspect.
Check system pressure with a gauge at the valve or riser; compare to manufacturer spec.
Inspect and remove debris from inlet and in-line filters, pressure regulator, and pump strainer.
Restore proper flow before further mechanical troubleshooting.
Broken or worn internal gears or drive mechanism
Inspecting the sprinkler’s internal gear train is the next logical step when rotation has ceased despite adequate water flow. Worn teeth, stripped gears, or a fractured drive shaft can all prevent the turret from turning.
A visual inspection after disassembly reveals damage, wear, or misalignment. Replace the affected gear assembly or complete drive unit with manufacturer-compatible parts to restore reliable rotation.
Bent riser, jammed sprinkler cap, or damaged bearings
Check the riser, cap, and bearings for physical deformation or obstruction, since a bent riser can bind the turret, a jammed cap can block rotation, and worn or seized bearings will prevent smooth movement.
Inspect visually, remove debris, and test manual rotation.
Replace a bent riser, cracked cap, or rough bearings; lubricate only when manufacturer permits to avoid seal damage.
Installation or alignment issues
Misaligned or improperly installed components commonly prevent a Rain Bird rotor from turning, because the nozzle, deflector, or turret can be offset, tilted, or seated incorrectly relative to the drive mechanism.
Improper insertion, swapped parts, or loose retaining clips alter gear engagement and spray balance.
Correct alignment, proper seating, and securing of components restore smooth rotation; verify part orientation against manufacturer diagrams.
Seasonal problems: freezing damage and corrosion
After confirming that alignment and component seating are correct, seasonal factors become obvious culprits when a Rain Bird rotor stops rotating.
Freezing expands trapped water, cracking gears or dislodging internal parts; thawed residue can seize movement.
Corrosion from prolonged moisture or fertilizers degrades metal and bearings.
Inspect for visible cracks, replace damaged internals, and clean or lubricate corroded components to restore rotation.
Step-by-Step Repair Guide for a Rotor That Won’t Turn
The repair section begins by shutting off the sprinkler zone and relieving pressure to create a safe workspace.
The technician inspects the exterior for debris, checks cap and riser alignment, and then removes the nozzle and screen for a thorough cleaning following step-by-step instructions.
If the head still resists, a manual rotation test is performed before removing and inspecting the rotor head assembly.
Shutting off the zone and draining pressure
Shut off the sprinkler zone at the controller or by closing the manual valve to isolate the affected rotor.
Then relieve residual pressure by running the zone briefly or opening a test port until water flow stops.
Confirm no pressure remains by activating a nearby faucet or bleed screw.
Wear gloves and eye protection, then proceed only when water flow and pressure are fully neutralized.
Inspecting the exterior: debris, cap, and riser alignment
With the zone drained and pressure relieved, attention turns to the rotor’s external components.
The technician inspects for lodged debris around the cap, checks the cap for cracks or distortion, and verifies the riser is straight and seated properly.
Any bent or misaligned riser can bind rotation.
Loose caps are tightened; damaged caps or risers are replaced before further internal checks.
Cleaning the nozzle and screen (detailed steps)
Begin by removing the rotor head cap to expose the nozzle and filter screen so the technician can access trapped debris; this step is done after confirming the zone remains depressurized and any nearby fittings are secured.
The technician follows precise cleaning:
- Remove nozzle and pull out screen gently.
- Rinse parts with clean water.
- Inspect for damage or corrosion.
- Reinstall, ensuring proper seating and alignment.
Manually rotating the head to test for free movement
Carefully rotate the rotor head by hand to determine whether it moves freely and to locate any binding points; this hands-on check is performed after the nozzle and screen are clean and the zone is depressurized.
The technician applies gentle, even pressure, noting stiffness, grinding, or sticking at specific angles.
Any rough spots indicate internal debris or a damaged bearing requiring further disassembly and inspection.
Removing and inspecting the rotor head assembly
After confirming the rotor head binds at specific angles during the manual rotation test, the technician proceeds to remove the rotor assembly for closer inspection.
Using needle-nose pliers and a wrench, the riser cap and retaining clip are detached. The rotor top is lifted, exposing the drive chamber, seals, and gear teeth.
Components are inspected for debris, corrosion, cracks, or worn teeth before cleaning.
Replacing or repairing the internal drive mechanism
With the rotor assembly removed and its components inspected, the technician proceeds to assess whether the drive mechanism should be repaired or replaced based on visible damage, wear, and part availability.
Worn gears, stripped splines, or damaged motor shafts indicate replacement; minor debris, seized bearings, or lubrication loss can be repaired.
Reassembly follows manufacturer torque and alignment specs, testing rotation and travel before reinstalling.
Replacing the nozzle, nozzle screen, or spray insert
Begin by shutting off the irrigation zone and removing any debris from the rotor housing to expose the nozzle assembly; this guarantees a clean workspace and prevents contamination during replacement.
Unscrew or pull out the old nozzle, inspect and replace a clogged screen, and install the correct spray insert matching model and arc.
Reassemble, test rotation, and fine-tune nozzle alignment for proper coverage.
Fixing low water pressure and checking zone valves
If replacing the nozzle and screen does not restore rotation, the next step is to assess water pressure and the zone valve operation.
Inspect for leaks, partly closed valves, or multiple heads running simultaneously that reduce pressure. Measure static and dynamic pressure at the zone.
Verify the solenoid and diaphragm in the zone valve actuate fully; clean or replace faulty valves to restore adequate flow.
Reassembling the head and testing spray pattern and rotation
Reassemble the rotor by replacing the riser, nozzle and screen, then secure the cap and any retaining clips; make certain O-rings and seals seat properly to prevent leaks.
Restore water and observe spray pattern, adjusting nozzle for coverage and arc.
Confirm smooth rotation through full travel; clear small debris if stuttering occurs.
Recheck for leaks and proper pressure before finalizing.
When to replace the entire sprinkler head
After confirming the rotor is clean, properly sealed, and rotating smoothly yet still fails to operate correctly, replacement of the entire sprinkler head should be considered.
Replace when plastic is cracked, internal gears are stripped, the riser leaks, or repeated repairs fail. Match model, flow rate, and nozzle type.
Turn off water, unscrew old unit, install new head, adjust alignment and test for proper coverage.
How to Diagnose Water Pressure and Flow Issues
The technician begins by measuring zone pressure with a gauge and comparing results to the Rain Bird-recommended ranges to identify low or high-pressure conditions.
Next, the technician inspects filters, solenoid valves, and the mainline for clogs or leaks and adjusts the controller’s zone run times if flow limitations or pressure spikes are found.
If pressure readings remain out of range or blockages aren’t resolved, a plumber or irrigation specialist should be called for further diagnosis and repair.
Measuring zone pressure and recommended pressure ranges
Start by measuring static and dynamic pressure at a representative sprinkler zone to determine whether the system delivers adequate water for spray and rotor heads.
Use a pressure gauge at the zone lateral: static pressure with valves closed, dynamic while a head runs.
Aim for 30–50 psi for rotors and 20–30 psi for sprays; verify consistent readings under load to confirm proper operation.
Checking for clogged filters, valves, and mainline blockages
Having confirmed zone pressures, attention turns to components that can restrict flow: filters, valve assemblies, and the mainline.
Inspect and clean inline and solenoid filters, remove debris from screens, and flush valves individually.
Check valve diaphragms for tears, guarantee solenoids actuate, and isolate the mainline to flush accumulated sediment.
Repair or replace damaged parts to restore proper flow and rotation.
Adjusting the controller and zone run times
Adjusting the controller and zone run times helps isolate whether low pressure or poor coverage stems from scheduling rather than hardware.
The technician should set one zone to run longer, observe head rotation and spray distance, then compare against neighboring zones.
Short cycles or overlapping schedules can reduce effective pressure; extending runtimes or staggering zones reveals whether flow, not the head, requires correction.
When to call a plumber or irrigation specialist
When low pressure or inconsistent spray patterns persist after controller adjustments and basic troubleshooting, it’s time to evaluate professional help. A plumber or irrigation specialist can distinguish between pressure issues originating from the municipal supply, mainline leaks, or system design flaws.
They perform pressure and flow tests, inspect valves and backflow devices, locate hidden leaks, and recommend repairs or system upgrades to restore proper rotation and coverage.
Replacement Parts and Compatible Rain Bird Models
A brief overview identifies common Rain Bird rotor models (such as 5000 and 7000 series) and notes key part differences that affect repair choices.
Guidance on selecting the correct nozzle, filter screen, and drive kit for each model helps guarantee proper fit and spray performance.
The paragraph will next compare affordable replacement options and weigh OEM parts against aftermarket alternatives.
Common Rain Bird rotor models and part differences
Several popular Rain Bird rotor families—such as the 5000, 7000, and 8005/8006 series—share similar operating principles but differ in drive mechanisms, nozzle fittings, and seal/gear designs, which affects which replacement parts are compatible. Differences determine compatible top caps, drive assemblies, seals, and nozzles.
| Model Family | Key Part Differences |
|---|---|
| 5000 | Simple drive, standard nozzles |
| 7000 | Heavy-duty gears, different seals |
| 8005/8006 | High-flow nozzles, distinct drive kits |
How to choose the correct nozzle, screen, and drive kit
Select replacement parts by matching performance specifications, physical fit, and model compatibility to guarantee proper function and longevity.
Identify nozzle flow rate and spray angle to preserve coverage patterns; confirm screen mesh size to prevent debris while fitting housing.
For drive kits, verify splines, gear size, and mounting tabs against the rotor model.
Cross-reference part numbers with Rain Bird compatibility charts before ordering.
Affordable replacement part options and OEM vs aftermarket
Consider budget and compatibility when sourcing replacement parts for Rain Bird sprinklers: OEM components guarantee exact fit and performance but cost more, while reputable aftermarket parts often provide substantial savings if they match key specs (nozzle flow/angle, screen mesh, drive spline pattern) and list compatible Rain Bird models.
Verify materials, warranty, and seller reputation; compare prices for kits versus individual parts and confirm return policies.
Preventive Maintenance to Keep Rotors Rotating Smoothly
A concise preventive maintenance routine keeps Rain Bird rotors operating reliably and extends component life.
It should cover routine cleaning and a seasonal checklist, winterization and reactivation steps to avoid freeze damage, targeted lubrication and corrosion control, and simple monitoring practices to identify wear or blockage early.
Following these tasks on a set schedule reduces failures and eases future repairs.
Routine cleaning schedule and seasonal maintenance checklist
Regular maintenance preserves rotor performance and prevents small issues from becoming costly failures; a predictable routine of cleaning and seasonal checks keeps Rain Bird rotors operating smoothly and extends system life.
- Inspect and remove debris from nozzles and filter screens monthly.
- Lubricate O-rings and moving parts every three months.
- Test spray patterns and adjust alignment before peak season.
- Tighten fittings and check for leaks quarterly.
Winterization and de-winterization tips to prevent freezing damage
When seasonal checks shift toward colder months, attention must turn from routine cleaning to winterization to prevent freeze damage.
Drain lines, shut off and insulate valves, and remove or blow out water from rotors per manufacturer pressure limits.
Mark heads for de-winterization.
In spring, inspect seals, reconnect systems, slowly pressurize, and test rotation for frozen-component damage before full operation.
Lubrication and corrosion prevention best practices
Apply light, consistent lubrication to moving parts and address corrosion proactively to preserve rotor function and extend service life.
Use a silicone-based or PTFE spray safe for plastics and rubber; avoid petroleum solvents.
Clean deposits with a soft brush and mild detergent before lubricating.
Inspect metal components for rust, remove with a wire brush, then apply a corrosion inhibitor.
Schedule quarterly checks.
Monitoring tips to catch problems early
Inspectors should establish a simple monitoring routine that flags subtle changes—reduced rotation speed, uneven spray patterns, popping noises, or minor leaks—before they escalate into failures.
They should record baseline performance, check heads weekly during peak season, verify alignment and pressure, and log anomalies with date and zone.
Promptly replacing worn nozzles, cleaning screens, and adjusting pressure prevents deterioration and costly repairs.
Troubleshooting Scenarios and Solutions
Common malfunction patterns help pinpoint whether a rotor problem is local or systemic.
Causes range from debris or damaged gears for erratic or skipping rotation, to clogged or obstructed nozzles and worn drive components when rotation is slow or stalled under certain outlets.
Intermittent operation may stem from electrical faults or hydraulic issues, and when multiple heads in a zone fail to rotate the controller, wiring, pressure, and valve function should be inspected.
Head spins erratically or skips fixes and causes
When a Rain Bird sprinkler head spins erratically or skips, the symptom typically indicates issues with the drive mechanism, water pressure, or debris interference.
Diagnosing the exact cause requires observing rotation patterns, listening for unusual noises, and checking for visible blockages or damage to the rotor, nozzle, and drive spring.
Common fixes include cleaning debris, replacing worn drive springs or gears, adjusting pressure, and ensuring proper nozzle seating.
Head rotates slowly or not at all under some nozzles
A sprinkler that moves erratically or skips can lead to a separate but related problem: certain nozzles may cause the head to rotate slowly or stop altogether.
Clogged or mismatched nozzles alter flow and pressure, reducing torque. Inspect and clean or replace restricted nozzles, confirm correct nozzle size for the sprinkler model, and test operation.
Replace worn drive gears if low flow persists.
Intermittent rotation electrical vs hydraulic causes
Although intermittent rotation can stem from either electrical faults or hydraulic issues, distinguishing between the two is essential because the diagnostic steps and fixes differ markedly.
Electrical causes include failing solenoids, loose wiring, or controller glitches causing sporadic valve activation.
Hydraulic causes involve fluctuating water pressure, air in lines, or partial clogs.
Test by isolating valves, measuring continuity and pressure, then repair accordingly.
Multiple heads in a zone not rotating systemic checks
Start by evaluating the entire zone as a unit to identify patterns common to all affected heads.
Check valve zones, water pressure, and mainline obstructions that reduce flow.
Inspect the zone’s valve for partial failure or diaphragm damage.
Verify controller scheduling and wire connections to rule out electrical misrouting.
Confirm supply pipe depth and recent landscaping changes causing crushing or kinks.
Tools, Cost Estimates, and Time Required
A concise list of basic hand tools and a few specialized items commonly needed for Rain Bird repairs sets expectations for preparedness.
Typical DIY fixes usually take 15–60 minutes depending on the issue, while more complex replacements may require longer.
Parts generally cost from a few dollars for seals and nozzles to $20–$50 for replacement heads, with professional service ranging from $75–$150 or more per hour.
Basic tool list and specialized tools for repairs
Several essential hand tools and a few specialized items are needed to diagnose and repair most Rain Bird sprinkler heads efficiently.
A concise kit reduces trips and expense.
Recommended tools and approximate costs:
- Screwdrivers, pliers, adjustable wrench ($10–30)
- Wire cutters/needle-nose ($8–20)
- Replacement nozzles and seals ($5–15)
- Flow tester/pressure gauge or small wet/dry vacuum ($20–60)
Typical DIY repair time estimates
Estimate repair times by task complexity and the preparatory tools on hand.
Simple cleanings or debris removal typically take 10–20 minutes per head.
Replacing seals, nozzles, or riser components often requires 20–45 minutes.
More involved rotor disassembly, troubleshooting alignment, or partial pipe access can take 45–90 minutes.
Allow extra time for irrigation shutoff, testing, and minor adjustments.
Cost ranges for parts and professional service
Expect parts for Rain Bird sprinkler head repairs to range from very inexpensive to moderately priced depending on the component: replacement nozzles and O‑rings commonly cost $2–$8 each, pop‑up risers and basic spray bodies typically run $10–$30, while full rotor heads or specialty replacement cartridges can be $30–$80.
Labor for professional service usually adds $50–$150 for a single visit; complex jobs may be $150–$400.
When to Hire a Professional
If a sprinkler head problem involves persistent leaks, broken lateral lines, erratic zone behavior, or repeated failures after basic repairs, it may be beyond typical DIY work.
A professional irrigation technician will diagnose the system, perform pressure and flow tests, replace damaged components, and provide estimates for larger repairs or zone reconfiguration.
Before calling, the homeowner should note system age, recent changes, visible damage, watering schedule, and be prepared to ask about licensing, warranty, estimated costs, and expected timeline.
Signs the issue is beyond DIY repair
Certain problems with a Rain Bird sprinkler head indicate the situation has outgrown simple homeowner fixes and requires a professional irrigation technician.
Signs include persistent rotation failure after cleaning, internal gearbox or motor damage, recurring leaks at the riser or valve, extensive corrosion, buried obstructions, low system pressure despite multiple checks, and complex electrical or controller faults beyond basic troubleshooting.
What to expect from a professional irrigation technician
When hiring a professional irrigation technician, homeowners should anticipate a systematic diagnostic process that identifies root causes rather than temporary fixes.
The technician will inspect valves, controllers, wiring, pressure, and rotor mechanics, perform tests, and provide a written estimate.
Expect trained technicians to recommend lasting repairs or replacements, follow local codes, document work, and offer limited warranties for parts and labor.
Questions to ask and information to provide before service
What essential details should a homeowner have ready before the technician arrives? The homeowner should provide sprinkler model, zone affected, observed symptoms, last maintenance date, and any DIY attempts. Note valve box locations, water source access, and irrigation controller model. Ask about diagnostic fees, estimated repair cost range, warranty on parts/labor, scheduling availability, and required permits or seasonal restrictions.
Visual Aids and Reference Diagrams
An exploded view of a Rain Bird rotor head clarifies the location and names of individual components for disassembly and reassembly.
A diagram highlighting common clog and wear points directs attention to filters, nozzles, seals, and the riser where debris or deterioration typically occurs.
Together, these visuals speed identification of faults and guide targeted repairs.
Exploded view of a Rain Bird rotor head
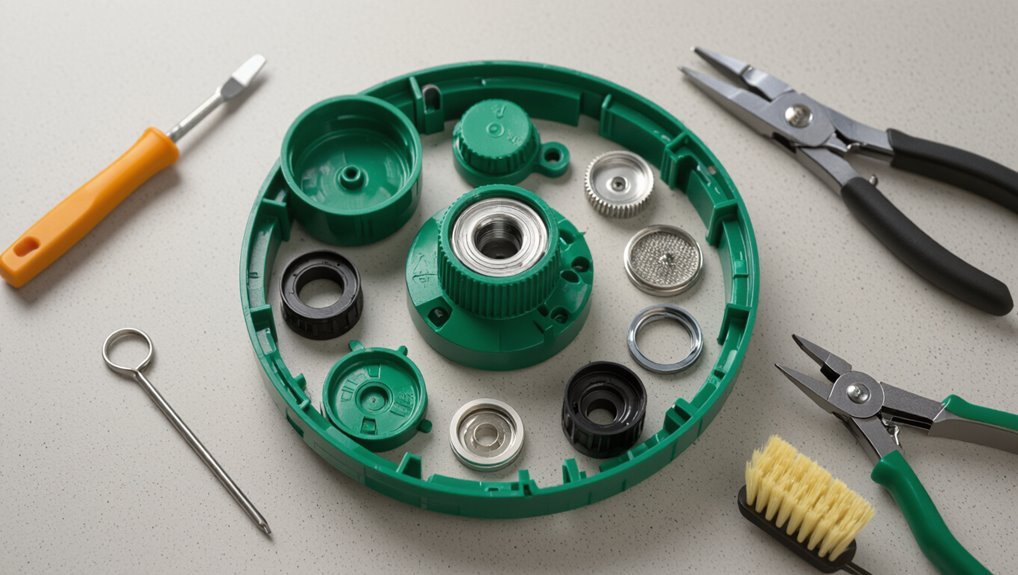
Several labeled components are shown in the exploded view of a Rain Bird rotor head to clarify how each part fits and functions together.
The diagram isolates casing, riser, drive assembly, drive spring, drive gear, turbine, seal, nozzle, diffuser, and mounting threads.
Each label links to part numbers and orientation cues, aiding accurate disassembly, inspection, and ordered replacement without ambiguity.
Diagram showing common clog and wear points
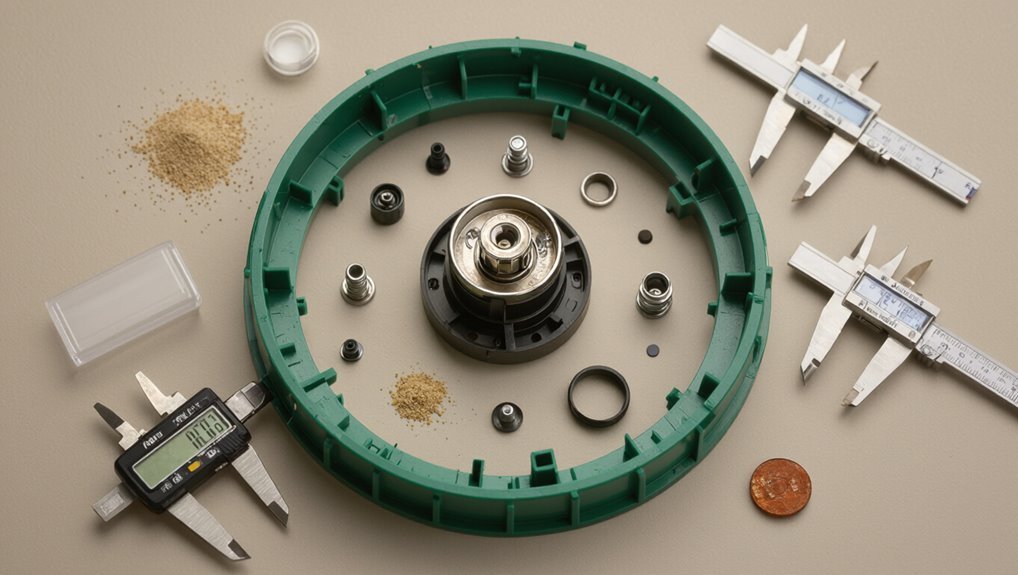
Building on the exploded view, a focused diagram of common clog and wear points maps where debris, mineral buildup, and mechanical abrasion most frequently impair performance.
Labeled callouts identify nozzle orifice, filter screen, rotating gear teeth, drive spring, riser seal, and bearing surfaces.
Color-coded severity markers indicate likelihood of clog versus wear. A legend links symptoms to inspection and targeted corrective actions.
Conclusion
In sum, a stuck Rain Bird rotor usually yields to basic checks and methodical fixes: clear debris, verify pressure, inspect gears and seals, and replace worn parts. While many homeowners can tackle these repairs with common tools, persistent problems may call for professional help to avoid sinking more time than it’s worth. With patience and the right parts, the job is often straightforward — a stitch in time saves nine.
