How to Repair a Toilet Flange: Step-by-Step Fixes for a Stable, Leak-Free Toilet
To repair a damaged toilet flange, follow these essential steps to ensure a stable and leak-free toilet. Begin by inspecting the flange for cracks, wobbling, corrosion, or recessed height. Depending on the damage, you can choose from several repair options: use epoxy or a repair kit for minor breaks, install a spacer for low flanges, or opt for a full replacement if the flange is corroded or missing. The repair process involves cleaning the area, securing the new flange, fitting a proper wax or rubber seal, and testing for leaks. For detailed guidance and tips, continue reading.
What a Toilet Flange Is and Why It Matters
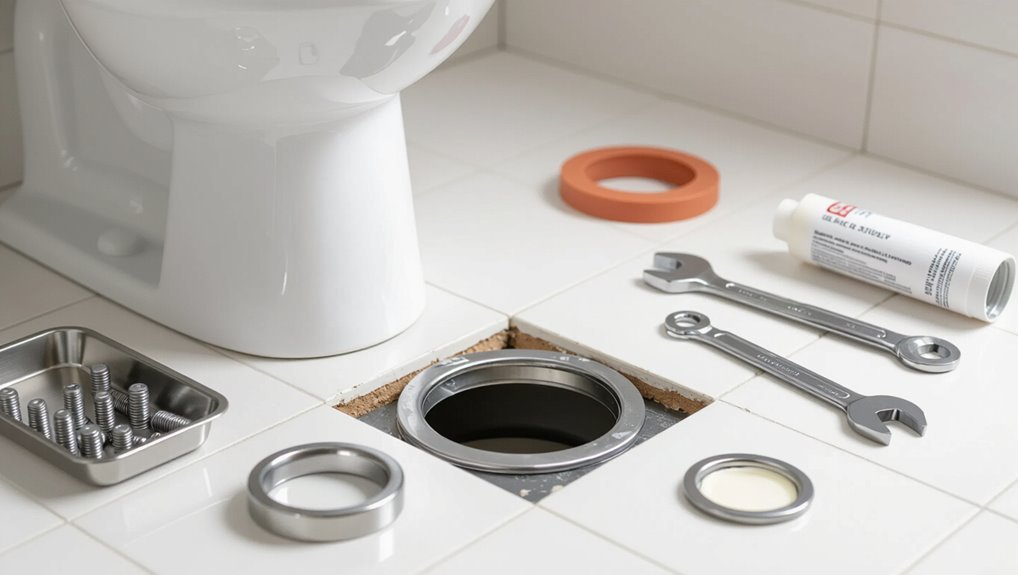
A toilet flange is the circular fitting that secures the toilet to the floor and seals the drain to the sewer line, ensuring proper alignment and a watertight connection.
Common signs of a damaged flange include wobbling toilets, visible cracks or corrosion, and leaks around the base.
Ignoring flange problems can lead to persistent water damage, unstable fixtures, and the escape of sewer gas into the home.
Definition and function of the flange
The toilet flange is a circular fitting that secures the toilet to the floor and creates a sealed connection to the drainpipe, ensuring waste flows properly into the sewer system.
It aligns the outlet, anchors bolts, and holds a wax or rubber seal in place.
Understanding this component is essential when learning how to repair a toilet flange and restore proper alignment and sealing.
Common signs of a damaged flange
With its role in alignment and sealing established, attention turns to recognizing when a flange fails.
Indicators include toilet wobble despite tightened bolts, visible cracks or corrosion on the flange surface, uneven or recessed flange height relative to the finished floor, loose or stripped mounting holes, and persistent water pooling or dampness at the base.
These signs warrant inspection and possible repair.
Risks of ignoring flange problems (leaks, wobble, sewer gas)
Neglecting a damaged toilet flange invites concentrated, often costly problems: persistent leaks that rot subflooring and encourage mold, a loose or wobbly toilet that can crack porcelain or strip mounting hardware, and the escape of sewer gases that pose health and odor hazards.
Left unchecked, structural failure, costly repairs, water damage to ceilings below, and chronic indoor air quality issues become likely, increasing liability and expense.
How to Diagnose Toilet Flange Problems
A concise inspection begins with gathering basic tools and materials—wrench, screwdriver, flashlight, putty knife, replacement bolts or flange kit—and noting visible signs of wear.
The visual checklist includes cracks, corrosion, broken bolt slots, wax seal condition, and any water staining on the floor or subfloor.
Simple movement and leak tests (rocking the toilet, checking for water after flushing) help determine whether it is a DIY repair or requires a plumber for structural or hidden water-damage issues.
Tools and materials for inspection
Begin the inspection by assembling a compact kit of essential tools and materials that enable a thorough, efficient diagnosis of toilet flange issues.
Include a flashlight, mirror, adjustable wrench, screwdriver set, putty knife, tape measure, inspection camera or borescope (optional), plumber’s tape, rubber gloves, absorbent rags, and a moisture meter.
Pack replacement bolts and a spare wax ring for test fitting.
Visual inspection checklist
The inspector should methodically scan the flange area for visible signs of damage, leakage, or misalignment, focusing on cracks, corrosion, warped or broken flange rings, loose or missing mounting bolts, and gaps between the flange and the finished floor.
Note sealant residue, water stains, and flange height relative to flooring.
Record bolt condition, PVC or cast-iron joints, and any odor suggesting sewer gas.
How to test for movement and leaks
Having completed the visual inspection, the next step is to test for movement and leaks to confirm functional integrity.
Gently rock the toilet side-to-side and front-to-back to detect play at the base. Inspect for flange wobble by lifting the bowl slightly.
Place paper towels around the base, flush, and check for moisture.
Observe the drain path for slow draining or gurgling indicating seal compromise.
When to call a plumber vs. DIY
When should a homeowner tackle a flange repair and when is a professional warranted?
Simple flange cracks, loose bolts, or worn wax rings with accessible bolts suit DIYers comfortable with basic tools.
Call a plumber if the flange is corroded, embedded in damaged flooring, misaligned with soil pipe, or if leaks suggest hidden sewer or structural issues.
Safety and plumbing code concerns also justify professionals.
Preparing to Repair a Toilet Flange
Before any work begins, the homeowner should turn off the water supply and wear gloves and eye protection to prevent injury and contamination.
The toilet must be emptied and removed carefully, with bolts and the wax ring handled and stored or discarded as appropriate.
Once the fixture is out, the flange and surrounding floor should be cleaned, inspected for cracks, rot, or corrosion, and measured to determine the appropriate repair method.
Safety precautions and shutoff steps
Safety precautions and shutoff steps are essential to prevent water damage and injury during a toilet flange repair; the technician should first turn off the toilet’s shutoff valve and flush to drain the tank and bowl.
Next, isolate electrical sources nearby, place absorbent towels or a bucket for residual water, wear gloves and eye protection, and guarantee adequate ventilation and stable footing.
Removing the toilet safely
Loosen the closet bolts and lift the toilet straight up to avoid scraping the flange or dislodging the wax seal; a steady, two-person lift is recommended for heavy or elongated bowls.
- Turn off water and drain tank and bowl fully.
- Disconnect supply line and cap the valve to prevent leaks.
- Set the toilet on a drop cloth, upside down if needed, to access mounting and wax removal.
Cleaning and assessing the flange and surrounding floor
Begin by clearing away old wax, debris, and moisture from the flange and surrounding floor to expose the full extent of any damage or corrosion.
Inspect for cracks, rusted bolts, warped flange edges, and rot in the subfloor. Measure flange height relative to finished floor.
Clean with a scraper and solvent, then dry thoroughly. Document findings to determine repair or replacement.
Repair Options Overview and How to Choose
The section compares repairing versus replacing a toilet flange, highlighting factors such as damage extent, cost, and expected lifespan.
It outlines temporary fixes and permanent solutions, noting when each is appropriate.
A brief materials and parts comparison summarizes pros and cons of common options to guide selection.
Repair vs. replace: decision factors
When deciding whether to repair or replace a damaged toilet flange, assess factors such as the extent of corrosion or cracks, the flange’s material and mounting stability, the condition of the surrounding subfloor, and the cost and complexity of repair options versus replacement.
If damage is localized, repair kits or flange extenders may suffice; widespread corrosion, warped subflooring, or repeated leaks indicate replacement and possibly structural repair.
Temporary fixes vs. permanent solutions
Deciding between repair and replacement naturally leads to weighing temporary fixes against permanent solutions: temporary patches buy time but may recur; permanent repairs require more effort.
Consider:
- Short-term: wax rings, epoxy patches — quick, limited lifespan.
- Mid-term: reinforced flange brackets — moderate durability.
- Long-term: replace flange and secure flange-to-drain connection — durable, prevents leaks and wobble.
Materials and parts comparison
Several common materials—PVC, ABS, cast iron, brass, and stainless steel—cover most flange and repair-part options, each offering distinct strengths and trade-offs in cost, corrosion resistance, and ease of installation. Selection depends on plumbing type, budget, and longevity needs.
| Material | Strength | Best use |
|---|---|---|
| PVC | Low cost | Modern homes |
| Cast iron | Durable | Old systems |
| Stainless | Corrosion‑resistant | Coastal areas |
Step-by-Step: Repairing a Cracked or Broken Flange with Epoxy or Flange Repair Kit
This section explains when epoxy or a flange repair kit is the appropriate choice and lists the specific tools and materials required.
It then outlines the concise steps: prepare and dry the surface, apply the epoxy or kit components according to instructions, and observe proper cure times.
Finally, it covers basic testing to confirm a secure, watertight repair before reattaching the toilet.
When this method is appropriate
Epoxy or a flange repair kit is appropriate when the toilet flange has localized cracks, small breaks, or minor corrosion that leave the surrounding floor and pipe sound.
This method suits nonstructural damage, intact bolt patterns, and flange height within ±1/4 inch of finished floor.
It is not suitable for severely crushed, missing sections, extensive corrosion, or compromised subfloor requiring replacement.
Detailed tool and material list
With the flange verified as a candidate for repair, a clear list of tools and materials is provided so the job proceeds efficiently and safely.
Required items include safety gear, cleaning supplies, and the chosen repair system.
- Basic tools: adjustable wrench, screwdriver, utility knife, sandpaper, wire brush.
- Repair materials: epoxy kit or flange repair kit, replacement bolts, flange spacer.
- Consumables: rags, solvent, gloves.
Step 1 Prepare surface and dry the area
Begin by shutting off the water supply and flushing the toilet to empty the bowl.
Then remove any remaining water from the flange and surrounding area using rags or a wet/dry vacuum.
Scrape away old wax, debris, and loose flange fragments with a putty knife.
Sand or file edges until dry, clean, and free of grease or dust.
Confirm ventilation for curing.
Step 2 Apply epoxy or kit components
Mix the epoxy or assemble the flange-repair kit components according to the manufacturer’s instructions, taking care to measure and combine resins and hardeners precisely.
Apply mixed epoxy or adhesive to the cleaned flange crack, filling voids and smoothing edges with a putty knife or applicator.
Seat any reinforcing plates or patch pieces per kit layout, ensuring alignment with bolt holes and proper contact across the damaged area.
Step 3 Cure times and testing
1. Cure times vary by product; follow manufacturer specifications, typically 24–72 hours for full strength.
Allow ambient temperature and humidity to meet recommended ranges.
After curing, inspect the repair visually for gaps or softness.
Perform a water test by briefly running water into the bowl and checking for leaks at the flange.
Re-cure if any issues appear before proceeding.
Reinstalling the toilet and final checks
Carefully lower the toilet back onto the repaired flange, aligning the closet bolts with the base holes and ensuring the wax or rubber seal seats evenly.
Tighten nuts alternately to avoid cracking the bowl.
Reconnect the water supply, refill the tank, and test for leaks by flushing several times.
Inspect base for wobble; shim if needed.
Confirm bolts are capped and floor sealed.
Step-by-Step: Replacing a Flange on Existing Bolts
When the flange is too damaged for repair or no longer seats correctly, it should be replaced entirely. The process requires basic tools and selecting the correct replacement flange type, followed by removing the old flange and hardware, installing the new flange and securing it to the drain, and finally sealing connections and verifying the flange height.
Each step focuses on safe removal, proper attachment to the waste pipe, and a watertight, level seal before reinstalling the toilet.
When to replace the flange entirely
How can one tell if a flange must be replaced rather than repaired?
Severe corrosion, cracks, or missing sections that prevent a secure bolt connection indicate replacement.
Repeated leaks, warped or crumbled material, and flange movement despite previous fixes also justify replacement.
If the flange sits below finished floor level or the drainpipe is damaged, full replacement guarantees reliable sealing and long-term stability.
Tools and replacement flange types
If the flange meets replacement criteria, gather the proper tools and select a compatible replacement before beginning work on existing bolts.
Required items and choices focus on fit, material, and fastening.
- Tools: adjustable wrench, socket set, screwdriver, pry bar, torque wrench.
- Types: PVC, ABS, brass, or stainless steel; offset and repair rings.
- Supplies: wax ring, stainless bolts, silicone sealant, flange extender.
Step 1 Remove old flange and hardware
Begin by shutting off the water supply and draining the toilet bowl and tank to prevent spills while working around the flange.
Remove the toilet and set it aside on a protected surface.
Unscrew and extract old bolts, nuts, and closet flange screws.
Scrape away wax ring residue and clean the flange seating area.
Inspect the drainpipe for damage or corrosion before proceeding.
Step 2 Install new flange and secure to drain
With the old flange removed and the drainpipe inspected, the next task is fitting the replacement flange onto the existing closet bolts and fastening it to the drain.
Slide flange over bolts, align bolt slots, and press onto pipe. Use appropriate gasket or adapter if pipe size varies.
Secure flange with corrosion-resistant screws into the drain or hub, ensuring firm, even contact.
Step 3 Seal connections and ensure proper height
Seal the flange connection carefully and set the flange at the correct height so the finished toilet will sit level and form a reliable wax-free or wax-seal joint.
Apply a bead of sealant or use a rubber gasket per manufacturer instructions, align existing bolts, and verify flange top sits flush with finished floor.
Check horizontal alignment and tighten fasteners evenly without overcompressing the seal.
Reinstalling the toilet and testing for leaks
Lower the toilet onto the repaired flange carefully, aligning the closet bolts with the bowl’s keyholes and keeping the bowl level to prevent displacing the seal.
Press evenly, seat the bowl, and tighten nuts alternately to compress the seal without cracking porcelain.
Reattach supply line, restore water, flush several times, inspect for leaks at base and connections, and retighten if minor seepage appears.
Step-by-Step: Using a Flange Repair Ring or Spacer for Low Flange
When a flange sits below finished floor level and prevents proper toilet sealing, the repair ring or spacer method provides a straightforward corrective option.
Required materials and tools include the appropriately sized ring or spacer, screws, sealant or an extra-thick wax ring, a screwdriver, and a level.
The procedure covers selecting the correct spacer, installing and securing it to raise the flange, then verifying wax ring compression and toilet stability before final reinstallation.
Recognizing a flange that sits too low
How can a flange be identified as sitting too low? Observable signs include visible gap between flange rim and finished floor, wax ring compression or extrusion, toilet rocking despite tightened bolts, repeated wax ring failures, and water leaking at base after flushing.
Measurement confirms low flange when top sits below finished floor level or below toilet horn height, necessitating spacer or repair ring.
Materials and tools needed
Before beginning the repair, gather the specific materials and tools required for installing a flange repair ring or spacer:
a flange repair ring or spacer kit sized to the toilet flange,
wax ring or wax-free seal,
stainless steel or brass flange bolts and washers,
PVC or ABS primer and cement if joining plastic piping,
a hacksaw or oscillating tool for trimming,
a screwdriver and socket wrench set,
a caulk gun and silicone sealant,
a tape measure and straight edge,
a torque-limited wrench or torque wrench for final bolt tightening,
and safety gear (gloves, eye protection).
- Protective gear and measuring tools.
- Fasteners, seal, and repair ring or spacer kit.
- Cutting, joining, and tightening tools.
Step 1 Selecting the correct spacer or ring
Choose a repair ring or spacer that matches the flange diameter, material, and elevation needed to bring the toilet’s horn level with the finished floor.
Verify pipe size (3″ or 4″), flange bolt pattern, and whether plastic, stainless, or brass suits the installation.
Select thickness to restore correct height without compressing the wax seal.
Confirm compatibility with existing flange fasteners.
Step 2 Installing spacer and adjusting flange height
Begin by positioning the repair ring or spacer over the existing flange so its bolt slots align with the flange bolts and the ring sits flat on the finished floor.
Once aligned, seat the ring evenly and mark any pilot holes or fastener locations.
Fasten per manufacturer instructions, using corrosion-resistant screws or bolts.
Verify top surface is level with floor; trim or shim spacer if necessary for a flush, even flange height.
Step 3 Rechecking wax ring compression and toilet stability
With the spacer secured, the installer next verifies that the wax ring will compress evenly and that the toilet will sit stable and level. This involves lowering the toilet onto the flange, applying steady downward pressure to compress the wax, and checking for gaps or tilting.
If uneven, the installer repositions or replaces the ring, retorques bolts incrementally, and confirms no wobble before final caulking.
Step-by-Step: Anchoring a Wobbly Toilet without Replacing Flange
First, the cause of a wobbly toilet should be diagnosed by inspecting the closet bolts and the condition of the flange.
Next, the necessary materials—replacement bolts, shims or repair bolts, anchors, and sealant—are gathered before proceeding.
Then the procedure follows: tighten or replace bolts, add shims or flange repair bolts as needed, and finish with proper torque, caulking, and a stability test.
Diagnosing bolt and closet flange issues
How can one determine whether a wobbly toilet is caused by loose closet-bolts, degraded flange material, or uneven floor mounting?
Inspect bolts for play and corrosion, test tightness while supporting the bowl, and check bolt alignment.
Examine flange edges for cracks, brittleness, or missing sections.
Probe floor around flange for rot, gaps, or unevenness.
Note water stains and movement patterns to pinpoint the source.
Materials for anchoring and stabilizing
After identifying whether the wobble stems from loose closet-bolts, a damaged flange, or an uneven floor, the next step is selecting appropriate materials to anchor and stabilize the toilet without replacing the flange.
Recommended items focus on reinforcement, sealing, and leveling:
- Stainless-steel or brass closet-bolt kits and reinforcing washers.
- High-strength silicone and plumber’s putty for minor gaps.
- Fiberboard shims or composite toilet shims for leveling.
Step 1 Tightening and replacing closet bolts
Begin by cutting off the water supply and flushing the toilet to empty the bowl and tank. Then, place a towel or sponge in the trap to catch residual water.
Inspect existing closet bolts and nuts for corrosion or looseness. Tighten nuts evenly, alternating sides to level the bowl. If damaged, remove bolts, fit new brass or stainless closet bolts with washers and nuts, then torque snugly.
Step 2 Using flange repair bolts or shims
With the closet bolts secured or replaced, attention shifts to stabilizing the flange area using repair bolts or shims to eliminate remaining rocking.
The installer inspects flange edges, fits a repair ring or inserts polymer/metal shims between flange and toilet base, and aligns hardware.
Repair bolts are tightened progressively to transfer load to the ring or shims, restoring a firm, wobble-free connection.
Step 3 Final torque, caulking, and stability test
Complete the final torque, apply a bead of caulk, and perform a stability test to confirm the repair holds.
Torque bolts evenly to manufacturer torque or snug without cracking porcelain.
Wipe excess sealant, let cure per product instructions.
Sit, rock, and inspect for movement and leaks.
Re-torque after initial use if needed.
Document repair and note any lingering issues for future attention.
Testing, Final Checks, and Preventing Future Problems
Once the flange is secured, a clear leak test and a toilet water run test should be performed to confirm a watertight seal and proper flush performance.
The installation must be inspected for correct alignment and absence of wobble, tightening bolts or readjusting shims as needed.
Finally, simple maintenance tips—periodic bolt checks, gasket inspections, and avoiding harsh chemicals—help extend flange life and prevent recurrence.
Leak test and water run test procedure
After the flange repair is set and bolts are torqued to specification, a systematic leak and water-run test confirms the seal integrity and proper alignment.
Perform checks as follows:
- Quietly inspect the base and flange joint for visible moisture after a single flush.
- Run multiple heavy flushes, watching for seepage and listening for gurgles.
- Recheck bolts and wax ring area; tighten or reseal if any dampness appears.
Verifying toilet alignment and wobble-free installation
Check the toilet’s position and stability by gently rocking the bowl, inspecting gaps at the base, and confirming the flange bolts and shims are secure; any movement indicates incomplete seating, uneven subflooring, or insufficient fastening that must be corrected before finishing.
Guarantee the bowl sits flush, bolts torqued evenly, and seal compression is uniform.
Recheck with a level and tighten or adjust shims until wobble-free.
Maintenance tips to extend flange life
With the bowl secured and wobble eliminated, attention turns to prolonging the flange’s service life through routine testing, final verification, and preventive measures.
Regular checks and simple upkeep prevent leaks and corrosion. Recommended actions include:
- Inspect bolts, wax ring, and flange for corrosion or movement quarterly.
- Tighten hardware and reseal as needed after testing.
- Keep drains clear and avoid chemical damage to flange materials.
Troubleshooting Common Complications
After initial repairs, persistent leaks, a crumbling subfloor, or signs of rot beneath the flange require careful evaluation.
Misalignment or corrosion of the drain pipe can complicate sealing and may necessitate further disassembly.
If corrective measures fail or damage is extensive, full flange and possibly flange-seat replacement should be considered.
Persistent leaks after repair
Persistent leaks after a flange repair indicate an incomplete seal or a secondary failure elsewhere in the assembly.
The technician should inspect the wax or rubber gasket, flange alignment, bolt hardware, and toilet base for proper seating.
Check for hairline cracks in the flange, damaged bolts, or misaligned pipe connection.
Replacing the gasket and retorquing bolts often resolves persistent leakage.
Crumbling subfloor or rot under flange
Detecting crumbled subfloor or rot beneath a toilet flange requires prompt attention because compromised support can prevent a proper seal and lead to recurring leaks or structural failure.
Inspection should include probing around the flange, checking joists and plywood, and smelling for mold.
Replace damaged subfloor sections, reinforce framing, and fit a new flange to solid material.
Allow wood to dry and use moisture-resistant materials.
Misaligned or corroded drain pipe
Examine the drain alignment and condition before installing a new flange, since a misaligned or corroded pipe can prevent a tight fit, cause leaks, or shorten the life of repairs.
Inspect for offset joints, crushed or collapsed sections, and rusted metal.
Minor misalignment may be corrected with couplings or short extensions; significant corrosion requires pipe section repair or professional assessment to guarantee a reliable seal.
When repairs fail and full replacement is necessary
When temporary fixes repeatedly fail or signs of structural damage appear—such as ongoing leaks, large cracks in the flange, warped flooring, or a toilet that rocks despite reseating—the situation typically warrants full flange and possibly drain-pipe replacement.
A complete replacement addresses hidden corrosion, ruined sealing surfaces, misaligned or fractured pipes, and compromised subflooring.
Professional assessment, proper pipe adapter selection, and secure anchoring restore a reliable, code-compliant installation.
Cost Estimates, Time Required, and When to Hire a Pro
Typical DIY repairs usually cost between $10 and $150 for parts like wax rings, bolts, and flange repair kits, while professional replacement can run several hundred dollars.
Simple fixes often take 30–90 minutes, while full flange replacement or flange relocation can require several hours and additional materials.
If the flange is badly corroded, the drainpipe is damaged, leaks persist after DIY attempts, or local code permits are required, a licensed plumber should be hired.
Typical DIY cost breakdown
A clear cost picture helps a homeowner decide whether to tackle a toilet flange repair or call a pro. Typical DIY costs cover parts and basic tools; repairs range from simple wax-ring swaps to full flange replacement. If complexity, rot, or sewer-line work appears, professional assessment is prudent.
| Item | Typical DIY Cost |
|---|---|
| Wax ring kit | $5–$20 |
| Repair flange kit | $15–$50 |
| New flange | $20–$60 |
| Tools/misc | $10–$40 |
Estimated time for each repair type
After outlining material costs, attention turns to how long each repair usually takes, because time and skill affect whether a homeowner should attempt the job or hire a professional.
Simple wax-ring replacement: 30–60 minutes.
Tightening or replacing bolts: 15–30 minutes.
Repairing a cracked flange with a repair kit: 1–2 hours.
Replacing a corroded flange or flange-on-floor repair: 2–4 hours, possibly longer for subfloor work.
Signs it’s time to hire a licensed plumber
When should a homeowner call a licensed plumber? A licensed plumber is recommended for severe flange damage, persistent leaks, sewage odor, extensive water damage, or unstable toilets despite DIY attempts.
Expect professional cost estimates varying by region and complexity; typical jobs take one to several hours.
Hire a pro when structural repairs, corroded pipes, or code compliance and warranty concerns exceed homeowner skill.
Useful Products and Parts to Consider
Recommended flange types and trusted brands are outlined, with emphasis on PVC, cast iron repair rings, and stainless-steel options for longevity.
Wax rings, wax-free seals, and alternative gaskets are compared for reliability and ease of replacement.
Essential tools such as flange repair kits, torque-limiting wrenches, and spacer shims are highlighted to simplify the task.
Recommended flange types and brands
A reliable flange anchors the toilet and seals the drain, so selecting the right type and brand matters for longevity and leak prevention.
Recommended options include durable PVC, corrosion-resistant stainless steel, and adjustable cast models. Consider brand reputation, warranty, and compatibility.
- Oatey PVC flange — economical, common.
- Sioux Chief stainless — durable, corrosionproof.
- Fernco adjustable cast — versatile fit.
Wax rings, wax-free seals, and alternatives
Choose the proper seal carefully, as it determines leak prevention, ease of installation, and future maintenance.
Common options suit different flange conditions and preferences:
- Wax rings — traditional, inexpensive, forgiving of minor misalignments.
- Wax-free seals — reusable, cleaner, better for uneven flanges.
- Alternatives (rubber gaskets, flange extenders) — used when flange height or damage prevents a reliable wax-type seal.
Tools that make the job easier
Gathering the right tools streamlines flange repair, reduces mistakes, and shortens time spent on the task.
Essential items improve accuracy and durability:
- Tightening tools (ratchet, wrench, flange bolts) for secure mounting.
- Cutting and cleaning tools (oscillating saw, scraper, wire brush) to remove old material.
- Seal and leveling aids (wax-free ring, shims, torque-limiting screwdriver) for leak-free alignment.
Conclusion
A homeowner once found their toilet wobbling like a loose tooth; after replacing a crumbling flange, calm returned. The flange, often overlooked, is the quiet pivot between stability and mess—studies show flange failures cause most bowl leaks. With careful diagnosis, the right repair option, and routine checks, that small ring can protect floors and peace of mind, keeping a household dry and preventing tiny problems from becoming costly disasters.