
How to Fix a Gate Valve: Step-by-Step Repair Guide for Homeowners
To fix a gate valve, start by determining if repair or replacement is necessary based on signs like leaks, stiffness, corrosion, or seat wear. First, turn off the water supply and relieve any pressure. Test the valve’s operation, apply penetrating lubricant, and gently move it back and forth. If it still doesn’t function properly, consider repacking the stem, replacing the packing, inspecting the seats and bonnet, and swapping out any worn parts or the entire valve. Use heat and cutting tools carefully, ensuring proper safety measures are in place. Follow this guide for detailed steps and safety tips throughout the repair process.
Quick overview: When to repair a gate valve versus replace it
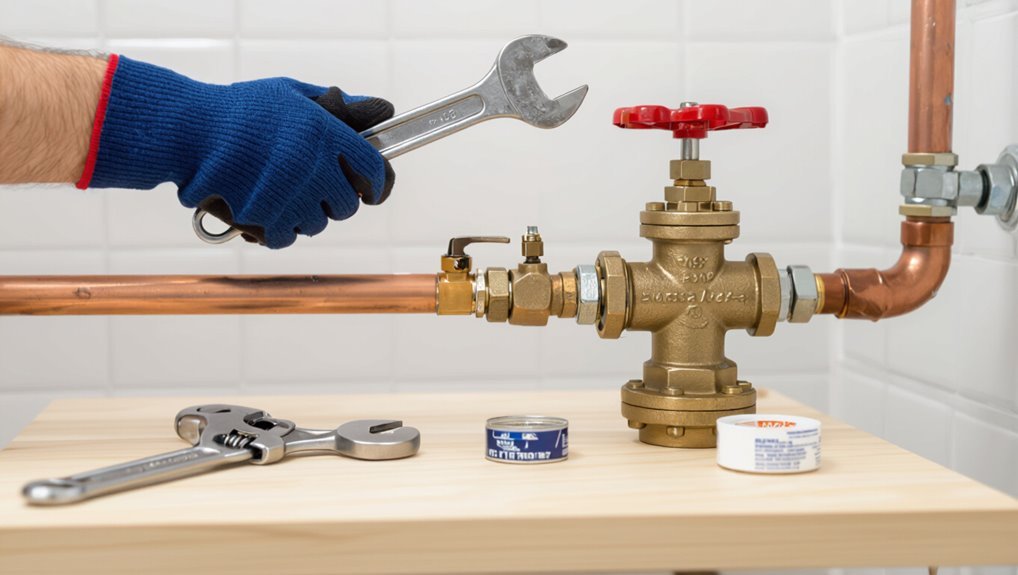
Signs such as persistent leaks, stiff operation, or visible corrosion indicate a gate valve needs attention.
Repair may restore function quickly and cost-effectively for localized problems, but it can be limited by part availability and the valve’s overall condition.
Replacement is generally safer and more economical when damage is extensive, the valve is critical to system integrity, or repairs would be frequent.
Common signs a gate valve needs attention
When should a gate valve be serviced or replaced depends on observable performance issues and the valve’s condition.
Common signs needing attention include persistent leaks, difficulty turning the wheel, incomplete shutoff, visible corrosion or damage, and water hammer.
Stiff or seized stems and packing gland drips indicate repairable faults.
Homeowners searching for how to fix gate valve should assess these clear, measurable symptoms before acting.
Advantages and limitations of repairing a gate valve
Although repairing a gate valve can restore function quickly and at lower cost, its suitability depends on the extent of wear and the valve’s role in the system.
Repair preserves existing infrastructure, reduces downtime and expense, and suits localized issues like stem or packing failure.
Limitations include reduced reliability after major corrosion, potential for recurrent leaks, and shorter remaining service life compared with a new valve.
When replacement is the safer or more cost-effective option
Repairing a gate valve can be economical for minor faults, but replacement becomes the safer or more cost-effective choice when damage is extensive, system reliability is critical, or long-term costs outweigh short-term savings.
Replacement is advised for severe corrosion, stripped threads, recurring leaks, obsolete parts, or when downtime and failure risk threaten safety or operations.
Calculate lifetime cost versus immediate repair.
Tools, materials, and safety preparations
Before starting work, the technician assembles essential tools—adjustable wrenches, pipe wrenches, screwdrivers, pliers, packing tools, and a pipe cutter.
Replacement parts and consumables such as new gate stems, packing, O-rings, nuts, and thread sealant are kept on hand.
Safety preparations include shutting off and draining the water supply, wearing gloves and eye protection, and confirming valve isolation before loosening connections.
Tools required for gate valve repair
A concise set of tools and materials plus basic safety preparations guarantees efficient, safe gate valve repair.
The technician assembles essentials, checks shutoff and pressure relief, and dons gloves and eye protection before starting.
- Adjustable wrench, pipe wrench
- Screwdrivers, pliers
- Teflon tape, lubricant
- Flashlight, drain pan
Replacement parts and materials to have on hand
After gathering the basic tools and completing safety checks, the technician should stock specific replacement parts and consumables to handle common gate valve failures without delay.
Essential items include shutoff-compatible valve cartridges, seat rings, stem packing, and nuts.
Recommended kit:
- Replacement gate valve or cartridge
- Seat rings and gaskets
- Stem packing and PTFE tape
- Assorted nuts, screws, and washers
Safety precautions and shutting off water safely
Although gate valve work is routine, technicians must verify that all energy sources are secured, appropriate PPE is worn, and the correct isolation point is identified before any disassembly begins; this includes closed main shutoff valves, tagged lockout devices if available, and clearly labeled downstream fixtures to confirm complete depressurization.
They should drain lines, test for residual pressure, use non‑sparking tools if needed, and post warning signs to prevent accidental reactivation.
Identifying the gate valve type and system context
Before beginning repairs, the technician examines the valve’s design and material—brass, bronze, cast iron—and notes whether it is a rising-stem or non-rising-stem model.
The valve’s location in household plumbing, an irrigation line, or an exposed outdoor system is recorded because access, corrosion risk, and isolation options vary.
These factors determine which disassembly steps, replacement parts, and sealing methods are appropriate for the job.
Gate valve designs and materials (brass, bronze, iron, rising stem vs non’rising)
Gate valves come in several designs and materials—brass, bronze, cast iron, and ductile iron are common—each chosen for pressure rating, corrosion resistance, and fluid compatibility. Homeowners should note rising-stem (visual position) versus non‑rising (compact) designs and material suitability for potable water, irrigation, or high-pressure lines before repair.
| Design | Material | Typical Use |
|---|---|---|
| Rising stem | Brass | Potable water |
| Non‑rising | Bronze | Irrigation |
| Wedge gate | Cast iron | Sewage |
Locating the valve within plumbing, irrigation, or outdoor systems
Finding a gate valve begins with understanding the system it serves—domestic plumbing, an irrigation network, or an outdoor utility line—because location, accessibility, and valve type vary by context.
Inspect visible pipe runs, meter areas, crawlspaces, basements, valve boxes, and irrigation manifolds.
Note pipe material, size, surrounding obstructions, and whether the valve sits aboveground or buried to plan safe access and appropriate tools.
How valve type affects repair steps
Because repair procedures hinge on both valve design and the system it serves, identifying the exact gate valve type—rising-stem versus non-rising stem, OS&Y, wedge, or parallel disc—and the surrounding context (indoor plumbing, buried irrigation, industrial service) is essential for planning parts, tools, and safety steps.
Correct identification dictates disassembly order, seal selection, stem extraction method, and required isolation or confined-space precautions.
Step-by-step inspection process before repair
Before any repair, a methodical inspection should begin with a visual check for leaks, corrosion, and external damage.
Next, simple functional tests — turning the valve and observing flow and backflow — confirm operational status.
Findings from these steps help diagnose common issues such as a stuck stem, packing leaks, or worn seats.
Visual inspection: leaks, corrosion, and external damage
A methodical visual inspection begins the repair process by focusing on obvious signs of leakage, corrosion, and structural damage around the gate valve and its immediate fittings.
Document wet spots, mineral deposits, rust, cracked packing, loose bolts, and damaged seals. Note pipe discoloration, hairline fractures, and misalignment.
Photograph findings and tag severity to prioritize repair actions and parts needed.
Functional tests: turning the valve, checking flow and backflow
After documenting visible defects, the inspector proceeds to functional testing to verify operational integrity and locate less obvious faults.
They slowly operate the valve fully open and closed, noting smoothness, resistance, and unusual noises.
Flow rates and downstream pressure are measured during both positions.
Backflow checks and isolation effectiveness confirm sealing.
All observations are recorded for repair planning and prioritization.
Diagnosing common problems: stuck stem, packing leaks, seat wear
Several targeted checks guide the inspector through diagnosing a stuck stem, packing leaks, and seat wear prior to any repair work.
The inspector attempts slow stem rotation, noting resistance and corrosion. Packing is examined for external wetness, drips, or softened material.
Seats are inspected visually and by pressure testing for leakage past the gate. Findings determine cleaning, repacking, or seat replacement steps.
How to fix a stuck or hard-to-turn gate valve
When a gate valve is stiff or stuck, initial efforts focus on applying a suitable lubricant to the stem and working it back and forth to free seized parts.
If lubrication alone fails, carefully applied penetrating oil can loosen corrosion—used with proper ventilation, protective gear, and attention to compatibility with surrounding materials.
If access is required, the bonnet may be unbolted and removed to inspect and service the stem and internal components directly.
Applying lubricant and working the stem free
Apply a penetrating lubricant to the valve stem and bonnet threads to loosen built-up corrosion and mineral deposits before attempting to force movement.
Allow dwell time, then gently work the stem with short clockwise and counterclockwise turns using a properly sized wrench.
Increase leverage gradually if needed; avoid sudden force.
Clear loosened debris and reapply lubricant as required until smooth motion is restored.
Using penetrating oil safely and effective techniques
Spray a quality penetrating oil onto the valve stem, bonnet threads, and any visible packing or crevice areas to begin loosening rust and mineral buildup; allow the product to penetrate according to the manufacturer’s dwell-time recommendation before attempting movement.
Wear gloves and eye protection, work outdoors or ventilated areas, avoid ignition sources, and prevent runoff into drains.
Reapply sparingly, tap fittings lightly, and test rotation gently.
Disassembling the valve bonnet to access the stem
After freeing surface corrosion with penetrating oil and gentle taps, attention shifts to removing the bonnet to reach the stem and packing.
The water supply is isolated and drained.
Bolts or nuts securing the bonnet are loosened systematically, using appropriate sockets and penetrating oil where seized.
The bonnet is lifted straight off, avoiding lateral force.
Stem and packing become accessible for inspection and replacement.
Repairing packing and stem leaks
The section distinguishes leaks at the packing nut from leaks at the valve body and explains how to confirm the leak source.
It then outlines a concise step-by-step repacking procedure for removing old packing, installing new material, and adjusting the nut.
Finally, it covers replacement of the packing gland and washers when damage or wear prevents a reliable seal.
Identifying packing nut leaks versus body leaks
When fluid appears near the valve stem, distinguishing between a packing nut leak and a body leak requires close inspection of where the moisture originates and how it behaves.
If wetness trails from around the packing nut or along the stem during operation, the packing is likely failing.
Seepage from seams or the valve bonnet suggests a body or joint leak, requiring different repairs.
Repacking the valve: step-by-step procedure
Begin by isolating the valve from the system and relieving pressure to guarantee a safe workspace; this allows access to the packing nut and stem without fluid or pressure hazards.
Loosen the packing nut, retract the stem, remove old packing with a hook, clean the gland and stem, cut new packing to size, wind or insert rings evenly, seat them, tighten the nut gradually, test for leaks, adjust as needed.
Replacing the packing gland and washers
After repacking or if tightening fails to stop leakage, attention shifts to replacing the packing gland and washers to restore a proper seal around the stem.
The process: isolate and drain the line, remove bonnet or packing nut, extract old gland and washers, inspect stem for wear, fit new compatible packing and gland, reassemble, torque evenly, and test under pressure for leaks before returning valve to service.
Replacing valve seats and internal components
When leakage persists after packing and stem repairs, the valve seats and internal parts should be assessed for wear to determine if seat replacement is necessary.
The procedure begins with isolating the line, removing the bonnet, and carefully extracting the gate and seats for inspection and measurement.
New seats are installed to specification and the valve is reassembled, tested for proper seating, and adjusted as needed.
When seat replacement is necessary
Inspect the valve’s sealing performance and visual condition to determine if seat replacement is necessary.
Seat replacement is warranted when persistent leaks occur despite packing adjustments, when seats show pitting, grooves, corrosion, or deformation, or when valve operation remains stiff or uneven.
Frequent cycling causing wear, or contamination scoring the sealing surfaces, also justifies replacing seats and worn internal components.
Steps to remove and inspect the gate and seat
Before disassembly begins, the technician isolates the valve from the system, relieves pressure, and locks out any energy sources to guarantee a safe work area; only then are the bonnet bolts removed and the actuator or handwheel detached to access the gate and seats.
The gate is withdrawn, inspected for scoring, cracks, or corrosion, and seats are examined for wear, pitting, or debris that prevents sealing.
Installing replacement seats and reassembling the gate valve
Having removed and examined the gate and seats for damage, the technician prepares to install replacement seats and reassemble the valve.
New seats are cleaned, lubricated with appropriate valve grease, and pressed evenly into the body.
The gate is reinserted, aligned to seat grooves, and fasteners torqued to specification.
Stem packing or O-ring is replaced, bonnet tightened, and the valve tested for smooth operation and leaks.
Repairing or replacing the valve bonnet and body
The discussion moves to the valve bonnet and body, starting with methods for repairing minor cracks and addressing localized corrosion.
Guidance is given on criteria that indicate when the entire valve body should be replaced rather than repaired.
The importance of matching any replacement valve’s pressure rating, material compatibility, and dimensions to the existing system is emphasized.
Repairing minor cracks and corrosion on the bonnet
Inspecting the bonnet for minor cracks and surface corrosion is the first practical step in evaluating whether repair or replacement is required.
Small pits and hairline fractures can be cleaned with a wire brush and inspected with dye or magnification.
Apply epoxy or metal filler rated for potable systems, smooth and cure per instructions, then recoat with corrosion-resistant primer and paint before reassembly.
When to replace the entire valve body
When cracks extend beyond hairline fractures, internal cavities are heavily corroded, or previous repairs repeatedly fail, replacement of the entire valve body is typically warranted.
The decision also follows when thread damage, distorted seating surfaces, or persistent leakage compromise safe operation.
Replacement guarantees structural integrity, eliminates hidden defects, and reduces recurrent maintenance.
Homeowners should document condition and consult a plumber for proper removal and disposal.
Matching new valve specifications to the existing system
Match the new valve bonnet and body to the existing system by confirming size, pressure rating, material compatibility, and connection type before purchasing or installing replacements.
Verify flange or threaded dimensions, gasket type, and bolt pattern. Ascertain pressure class meets system maximum and temperature range.
Match materials to fluid chemistry and galvanic concerns. Confirm actuator or handle fit and any required adapters for a proper, leak-free installation.
Techniques for removing a stubborn or seized valve
When a gate valve is seized, technicians consider controlled heat, leverage, and penetrating lubricants to free corroded threads without harming adjacent materials.
In confined spaces, the preferred option may be to cut out the old valve and fit a new one, using compact tools and proper supports.
Throughout the operation, care is taken to protect surrounding pipes and fittings from heat, sparks, distortion, or over‑torquing.
Using heat, leverage, and penetrating agents safely
Apply heat, controlled force, and a suitable penetrating fluid in a deliberate sequence to free a seized gate valve while minimizing damage and risk.
Heat expands metal; use a propane torch briefly, keeping nearby materials protected and thermostable components cool.
Spray penetrating oil, allow dwell time, then apply steady, increasing leverage with a proper wrench.
Stop if threads deform or leaks appear; reassess.
Cutting out and installing a replacement valve in tight spaces
If heat, penetrating fluid, and measured leverage fail to free a seized gate valve without damaging the piping, removal by cutting becomes the practical option in confined spaces.
Use compact tools—mini reciprocating saw, tubing cutter, or angle grinder with cutoff wheel—protect nearby surfaces, cut close to the valve body, remove remaining stub, deburr pipe ends, fit compatible replacement, and secure with proper connectors and support.
Preventing damage to surrounding pipes and fittings
Because seized gate valves often require forceful techniques, careful planning and the right sequence of steps are essential to avoid harming adjacent pipes and fittings.
Stabilize the line with pipe wrenches and support straps, shield nearby joints with heat-resistant cloth when using heat, apply penetrating oil with patience, use controlled taps to loosen corrosion, and cut only when supports prevent movement.
Test for leaks after replacement.
Testing and restoring service after repair
After reassembling the valve, the line should be slowly pressurized while inspecting all joints and the valve body for leaks.
Once leak-free, the valve should be cycled and observed under normal operating pressure to confirm proper sealing and smooth operation.
Finally, any packing or stem nuts should be adjusted to specified torque values and rechecked for tightness and leak-free performance.
How to pressurize the line and check for leaks
Begin by slowly reintroducing pressure to the repaired section while monitoring for any immediate signs of leakage or abnormal behavior.
Open upstream supply gradually, watching joints, packing, and bonnet areas.
Use a dry paper towel or leak detector fluid to reveal escaping drips or bubbles.
If leaks appear, isolate, depressurize, and tighten or reseat components.
Confirm no pressure drop on the gauge before restoring full service.
Functional testing under normal operating conditions
When the repaired gate valve has held steady under initial pressurization, the technician proceeds to functional testing under normal operating conditions to verify performance and longevity.
The technician cycles the valve several times, observes smooth operation, checks for temperature or vibration anomalies, monitors downstream pressure and flow consistency, and inspects for any new leaks.
Results are recorded and service restored if criteria are met.
Final adjustments and torque recommendations
Apply final adjustments and torque the fasteners to specified values to guarantee sealing integrity and reliable operation before returning the valve to service.
After seating and cycling, torque gland nuts, bonnet bolts, and packing follower evenly per manufacturer specs.
Recheck for leaks at working pressure, confirm smooth operation through full travel, and document torque values and observations for future maintenance.
Maintenance tips to extend gate valve life
A regular inspection schedule with seasonal checks helps identify wear, leaks, and frozen components before they fail.
Routine lubrication and controlled exercise of the gate and stem prevent seizing and maintain smooth operation.
Monitoring water quality and applying corrosion prevention measures reduce degradation of valve components.
Regular inspection schedule and seasonal checks
Although gate valves are robust, a predictable inspection schedule and targeted seasonal checks are essential to detect wear, prevent leaks, and extend service life.
- Inspect quarterly for corrosion, stem alignment, and packing condition.
- Winterize before freeze risk: drain nearby lines and insulate exposed valves.
- Spring check for winter damage and moisture intrusion.
- Autumn prepare for cold: verify seals and replace worn components proactively.
Lubrication and exercise procedures to prevent seizing
Having completed seasonal inspections, attention shifts to lubrication and regular operation to keep gate valves moving freely and prevent seizing.
Apply approved valve grease to stem threads and packing, operate valve fully open and closed several times monthly, and cycle slowly to redistribute lubricant.
Tighten packing nut minimally to stop leaks.
Record actions and frequency to guarantee consistent preventive maintenance and early issue detection.
Water quality and corrosion prevention strategies
Monitor water chemistry closely and address corrosive conditions to prolong gate valve life.
Homeowners should test pH, hardness, and chloride levels; adjust treatment to neutralize acidity and reduce dissolved oxygen.
Install filters or water softeners where appropriate, and consider corrosion inhibitors or protective coatings for exposed metal.
Regular inspections detect pitting or galvanic activity early, enabling timely repair or replacement.
Common mistakes to avoid when repairing gate valves
Technicians often over-tighten packing nuts, which can score or bind valve stems and shorten service life.
Installing incorrect replacement parts or incompatible materials can cause leaks, corrosion, or mechanical failure.
Failing to address underlying system issues leads to repeated valve problems despite component-level repairs.
Over-tightening packing nuts and damaging stems
Over-tightening the packing nuts is a frequent mistake that can deform or score the valve stem, compromise the packing seal, and ultimately shorten valve life.
Excessive torque causes stem binding, leaks, and accelerated wear. Technicians should apply just enough pressure to stop leakage, test operation, and retighten minimally after thermal cycles.
Record torque and inspect stems for scoring to avoid premature failure.
Using incorrect replacement parts or incompatible materials
Using the wrong replacement parts or incompatible materials during gate valve repairs can quickly negate any service effort by introducing leaks, corrosion, or mechanical failure.
Homeowners should verify material compatibility (bronze, brass, stainless steel) and pressure ratings, use OEM or equivalent parts, and avoid generic substitutes.
Incorrect seals, stem materials, or fasteners shorten service life and increase risk of sudden failure or system contamination.
Ignoring systemic issues that cause repeated valve failure
Replacing incompatible parts is only one piece of the puzzle; repeated gate valve failures often signal broader system problems that must be identified and corrected.
Evaluation should include pressure surges, water hammer, corrosive chemistry, misaligned piping, and debris sources.
Addressing root causes—pipe supports, pressure regulators, filtration, or material compatibility—prevents recurrence.
Short-term fixes without systemic repair waste time and resources.
Cost, time estimates, and when to call a professional
Typical DIY gate valve repairs often take 30 minutes to a few hours and cost between a few dollars for parts to $50–$150 for replacement components.
Significant leaks, corrosion, seized stems, or work on main water lines indicate a licensed plumber or specialist should be called.
Before hiring, ask about credentials, estimated total cost and timeline, warranty on work, and whether permits are required.
Typical DIY time and cost ranges for common repairs
How long will a basic gate valve repair take, and what will it cost? Typical DIY tasks: replacing a packing, tightening bonnet nuts, or swapping a valve stem. Time ranges 15–90 minutes; parts $5–40. More complex swaps can take longer.
| Task | Typical range |
|---|---|
| Packing replacement | 15–30 min, $5–15 |
| Stem repair | 30–60 min, $10–30 |
| Full valve swap | 60–90 min, $20–40 |
Signs you should hire a licensed plumber or specialist
When should a homeowner call a licensed plumber instead of attempting a DIY gate-valve repair?
If leaks persist after basic fixes, corrosion or broken stems are visible, water pressure issues affect multiple fixtures, or the valve controls a main supply, hire a pro.
Expect higher costs for parts and labor, longer timelines for permits or replacements, and faster, safer resolution with specialist expertise.
Questions to ask a professional before hiring
After deciding a professional is needed—because leaks persist, corrosion is visible, or the valve controls a main supply—homeowners should arrive prepared with specific questions about cost, timeline, and scope.
Ask for written estimates, hourly versus flat rates, parts and permit fees, expected start and completion times, warranty terms, insurance and licensing, diagnostic charges, and scenarios requiring escalation or replacement versus repair.
Resources and parts sources
The text outlines how to locate part numbers and specifications stamped on the valve body or listed in system documentation to guarantee proper replacements.
It then points readers toward reputable retailers and manufacturers that consistently supply genuine replacement valves and trim.
Finally, it notes key manuals, exploded diagrams, and concise instructional videos that clarify disassembly, inspection, and reassembly steps.
How to identify part numbers and specifications
Identifying the correct part numbers and specifications for a gate valve begins with documenting visible markings—cast numbers, stamped codes, manufacturer logos—and measuring key dimensions such as bore diameter, stem thread, and flange or end connection type.
These details let a technician cross-reference catalogs, OEM datasheets, and online valve databases to confirm material grades, pressure ratings, and compatible replacement parts.
Additional useful data include valve size, trim type, and actuation method.
Reliable retailers and manufacturers for replacement valves and parts
When sourcing replacement gate valves and parts, technicians should prioritize suppliers with documented product traceability, certified materials, and clear warranty policies to guarantee compatibility and longevity.
- Industrial distributors: stock OEM and compatible valves, datasheets included.
- Manufacturer direct: best for exact-match replacements and serialed parts.
- Plumbing wholesalers: local availability, trade discounts.
- Online marketplaces: convenient, verify seller ratings and return terms before purchase.
Useful manuals, diagrams, and instructional videos
Where can technicians find reliable manuals, diagrams, and videos to guide gate valve repairs? Sources include manufacturer service manuals, plumbing association guides, and vetted video tutorials.
Key resources:
- Manufacturer technical manuals and exploded diagrams.
- Industry standards (ASME, ANSI) summaries.
- Professional plumbing association how‑tos.
- Verified repair videos from manufacturer or accredited trainers.
Conclusion
When a homeowner follows these gate valve repair steps, the valve often returns to reliable service; however, replacement is sometimes wiser if corrosion or damage is extensive. Regular lubrication and gentle operation keep valves functional like routine oiling keeps a hinge from squeaking. Attention to correct parts, safety, and system context minimizes leaks and costly errors. If doubts or complex plumbing arise, consulting a professional prevents greater damage and expense.
