
How to Install a Wall-Hung WC: Step-by-Step Guide for DIYers and Plumbers
To install a wall-hung WC, start by mounting it to a concealed carrier frame with the cistern hidden in the wall. Ensure you measure and confirm structural backing, locate studs, or create a reinforced stud wall. Secure a rated carrier to both the floor and wall, then connect the water inlet and waste outlet. Position the pan at the correct height, test for leaks and proper flush functionality, and finish the wall by fitting the flush plate. For detailed steps, troubleshooting tips, and maintenance guidance, continue reading.
What a Wall-Hung WC Is and Why Choose One
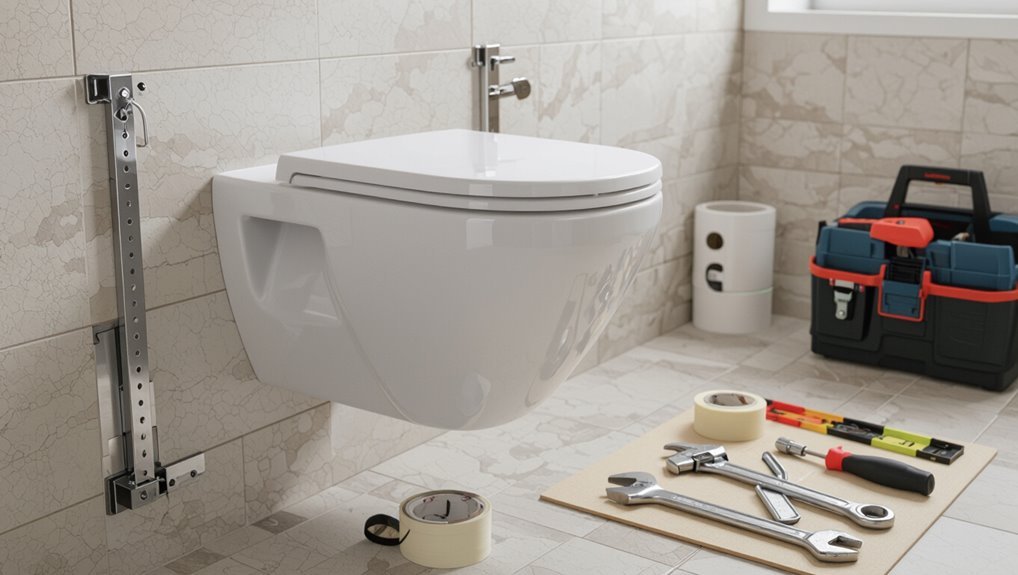
A wall-hung WC is a toilet bowl mounted to a concealed carrier frame with the cistern hidden inside the wall. The main components are the bowl, carrier frame, flush plate, and concealed cistern.
Compared with floor-mounted WCs, it saves floor space and simplifies cleaning but can be more expensive to install and may complicate access for maintenance.
It is commonly chosen for renovations, small bathrooms where space is at a premium, and adaptable layouts that require wheelchair access or adjustable bowl height.
Definition and key components of a wall-hung toilet
Wall-hung toilets are sanitary fixtures mounted to a wall and supported by a concealed in-wall frame, with the bowl suspended above the floor and the cistern hidden behind the wall.
Key components include the steel carrier frame, concealed cistern, flush actuator, wall-hung ceramic bowl, waste outlet and trap, and mounting bolts.
Instructions for how to install wall hung wc focus on secure frame alignment and plumbing connections.
Advantages and disadvantages compared with floor-mounted WCs
Many homeowners and designers weigh the trade-offs between wall-mounted and floor-mounted toilets when planning a bathroom remodel. Wall-hung models offer easier floor cleaning, adjustable height, and a modern look; they require in-wall support and can cost more to install and service.
| Advantage | Disadvantage |
|---|---|
| Easier cleaning | Higher installation cost |
| Adjustable height | Requires sturdy frame |
Typical use cases: renovations, space-saving, accessibility
When remodeling a bathroom or addressing tight dimensions, homeowners and designers often specify wall-hung WCs for their space-saving profile, adaptable mounting height, and streamlined aesthetic.
These units are particularly suited to renovations where existing plumbing can be accommodated within a stud wall or where creating an open floor plane will improve accessibility and cleaning.
They suit small bathrooms, accessible installations for transfer and caregiver use, and modern design schemes.
Regulations, Measurements, and Pre-Installation Planning
Before any demolition or framing work begins, the installer should verify local building codes and obtain required plumbing permits using a clear checklist.
Measurements must establish required clearances, standard and accessible mounting heights, and exact positions for in-wall carriers, while confirming load capacities and structural reinforcements for stud walls or masonry.
Final measuring and marking of the installation location guarantees carrier alignment, waste outlet position, and water supply access prior to fitting.
Local building codes and plumbing permit checklist
Although wall-hung toilets offer design and maintenance advantages, compliance with local building codes and securing the correct plumbing permits are essential steps that determine layout, structural reinforcement, waste line placement, and fixture height.
Verify jurisdictional permit requirements, submit plans showing carrier frame, support detailing, waste and vent connections, and water supply.
Confirm inspection stages, required licensed trades, and fee schedules before ordering materials or beginning demolition.
Required clearances and mounting heights (including accessible heights)
Every installation must respect specific clearances and mounting heights to guarantee functionality, safety, and code compliance; key measurements include the fixture centerline to sidewalls, clear floor space, and the finished rim height above the finished floor.
Typical requirements: 15–18 inches centerline from adjacent walls, 30×48 inches clear floor space, and standard rim height 15–19 inches (lowered to 17–19 inches for accessible installations).
Load requirements and structural considerations for stud wall or masonry
Having confirmed clearances and mounting heights, attention must turn to the supporting structure: wall-hung WCs transfer concentrated loads through the carrier into framing or masonry.
So installers must verify that studs, blocking, or masonry walls can resist vertical, lateral, and cyclic forces specified by applicable codes and manufacturers.
Structural checks include stud spacing, timber grade, blocking depth, fixings, masonry strength and anchorage, and required load ratings.
Measuring and marking the installation location
Before any fixtures are fitted, precise measurements and clear reference markings are essential to guarantee the carrier, waste and water connections, and finished pan align with regulations and manufacturer specifications.
The installer marks floor, stud or masonry fixings, carrier height, waste outlet centre and cistern access, checks clearances and confirms finished pan projection against drawings.
- Mark carrier centreline
- Set pan height
- Locate waste centre
- Note service access
Tools, Materials, and Parts You Need
The installer should gather a concise set of essential tools—measuring tape, spirit level, drill, hole saws, spanners, and silicone gun—before beginning.
Selection of the in-wall carrier frame requires attention to type, load rating, and frame depth to match wall construction and toilet height, while compatible wall-hung pans, cisterns, and flush plates must be chosen for mounting interface and flush performance.
Additional parts such as mounting brackets, fixings, waste fittings and insulation for sound and condensation complete the list.
Essential tools list
A concise kit of reliable tools, materials, and replacement parts is critical for a smooth wall-hung WC installation; it should include measuring and marking tools, drilling and fastening equipment rated for masonry or studs, supply-line fittings, appropriate trap and waste components, a compatible carrier frame, sealants, and safety gear.
- Drill, masonry bits, impact driver
- Torque wrench, spirit level
- Pipe cutters, fittings, sealant
- Protective gear, clamps, anchoring bolts
In-wall carrier frames: types, sizing, and selection tips
In-wall carrier frames support both the toilet bowl and concealed tank, so selecting the right type and size is essential for safety and long-term performance.
Choose fixed or adjustable frames based on wall structure (solid masonry versus stud).
Match frame load rating to expected use, depth to wall cavity, and bracket spacing to toilet mounting holes.
Verify corrosion-resistant finish and compatible waste outlet alignment.
Compatible toilets, flush plates, and cistern options
Several key components must be matched for a reliable wall-hung WC installation: the toilet bowl, flush plate, and concealed cistern.
Choose bowls rated for the carrier frame and desired rim/hygiene features.
Select flush plates compatible with the cistern’s actuator type (mechanical or pneumatic) and mounting pattern.
Cistern options include dual-flush, adjustable-volume, and low-profile models; verify inlet/outlet positions and service access.
Additional materials: brackets, fixings, waste fittings, insulation
Support components guarantee the carrier frame, waste connection, and surrounding structure remain secure, watertight, and serviceable.
Required parts include heavy-duty brackets, corrosion-resistant fixings, and adjustable mounting bolts sized to frame and wall type.
Use appropriate waste fittings—Ø90mm or manufacturer-specified—rubber seals, and flexible connectors.
Insulation or acoustic pads prevent condensation and reduce noise; use waterproof tape at joints for extra protection.
Preparing the Wall and Supporting Structure
Before any installation begins, the wall must be inspected to locate studs, assess whether it is load-bearing, and identify obstructions such as pipes or wiring.
If the existing framing is insufficient, a reinforced or new stud wall should be built to accept the carrier frame and distribute the toilet’s load.
For retrofit situations with masonry or thin walls, solid backing or appropriately rated masonry anchors must be installed to secure the carrier.
Inspecting existing wall and identifying load-bearing elements
Begin by carefully examining the existing wall to determine its construction type, stud spacing, and any visible signs of structural reinforcement or compromise.
Document locations of studs, masonry cores, and service runs.
Identify load-bearing elements versus non-load-bearing partitions by noting beam lines, floor/ceiling joist orientation, and anchor points.
Photograph evidence and consult plans or a structural engineer if uncertainty exists.
Building or reinforcing a stud wall for a carrier frame
Reinforce the opening by laying out a level, plumb stud wall sized to accommodate the carrier frame and anticipated fixtures.
The installer must brace, align, and fasten studs to transfer loads into floor and adjacent structure. Prepare blocking and double studs where the carrier mounts.
- Measure and mark stud locations
- Use treated or structural studs
- Add horizontal blocking
- Secure to floor and ceiling joists
Installing a solid backing or masonry anchors for retrofit installs
When a carrier frame cannot be anchored into new studs, installers must create a solid backing or use masonry anchors to support a wall-hung WC.
Solid backing involves attaching treated timber or plywood between existing studs or fixing a steel plate.
For masonry walls, select appropriate sleeve or chemical anchors drilled into brick or block, ensuring torque ratings match frame specifications and local load requirements.
Installing the In-Wall Carrier Frame and Cistern
The installer positions and levels the in-wall carrier frame, checking alignment with the finished wall and planned pan height.
The frame is anchored securely to the floor and either studs or masonry, then the cistern’s water supply and isolation valve are connected and tested for leaks.
Final adjustments to frame height and outlet location are made to guarantee the pan will fit and seal correctly.
Positioning and leveling the carrier frame
Begin by determining the exact location and height of the carrier frame relative to the finished floor, ensuring clearances for the toilet bowl, flush plate, and service access.
Verify vertical plumb and horizontal level with a spirit level. Adjust temporary supports and frame feet to achieve correct alignment.
Confirm inlet and waste pipe positions align with frame openings before final fastening preparations.
Securing the frame to floor and studs or masonry
Secure the carrier frame firmly to the finished floor and adjacent studs or masonry to guarantee load transfer and stability before enclosing the wall.
Use specified anchors: heavy-duty floor bolts into concrete or lag screws through treated plates into timber studs.
Verify vertical plumb and lateral bracing, tighten to manufacturer torque values, and seal any masonry penetrations.
Recheck alignment and permanence prior to drywall installation.
Connecting cistern water supply and isolation valve
Attach the incoming cold-water line to the cistern inlet and install the dedicated isolation valve so the unit can be serviced without shutting down the building supply.
Verify inlet orientation, use appropriate fittings or adapters, and apply thread sealant or PTFE tape where required.
Pressure-test the connection for leaks at recommended pressure, then secure piping to the frame to prevent strain during operation and maintenance.
Adjusting frame height and outlet position for pan fitting
Measure the finished floor-to-bottom-of-frame distance and set the carrier height so the wall-hung pan’s rim will align with the room’s planned sanitary fixtures and clearances.
Verify outlet stub location horizontally and vertically to match pan inlet.
Adjust frame depth to allow wall finish thickness.
Lock frame, confirm level and plumb, test trap alignment with pan spigot, and recheck before closing the wall.
Waste and Soil Pipe Connections
Attention is given to accurately aligning the WC outlet with the carrier’s soil connection to guarantee a secure fit.
Joints must be sealed with appropriate gaskets or solvent-weld fittings and checked for watertight integrity.
Proper venting and a consistent fall (typically 1:40 to 1:60) are required to prevent blockages and allow effective drainage.
Aligning and connecting the soil/waste outlet to the carrier
Before final fixation, the soil/waste outlet must be precisely aligned with the carrier’s discharge to guarantee a secure, leak-free connection.
Measure horizontal and vertical offsets, adjust carrier height and depth, then trial-fit the outlet. Confirm correct engagement angle and sufficient insertion depth.
Support the pipe to prevent strain, verify clearance for frame adjustment, and lock components so alignment remains during final mounting.
Sealing joints and recommended materials for leak-proof connections
With alignment confirmed and the carrier locked in place, attention turns to creating leak-proof seals between the waste and soil pipe connections.
Use manufacturer-specified rubber gaskets or solvent-welded sockets for PVC/ABS joints.
Apply silicone or plumber’s grease on seals to ease assembly.
For push-fit fittings, guarantee clean cuts and chamfered edges.
Tighten clamps per torque guidance; pressure-test before wall closure.
Venting considerations and slope requirements
Although proper venting is often overlooked, it is essential to prevent siphoning and guarantee smooth drainage from the wall-hung WC.
Waste and soil pipe layouts must maintain vent connections per local code and manufacturer instructions.
Install vents to avoid trap pull‑through, size them appropriately, and slope horizontal waste runs 1/4″ per foot (2%) minimum toward the soil stack.
Confirm cleanouts and access.
Plumbing, Water Supply, and Flush Mechanism Setup
The installer fits inlet valves, verifies water pressure, and incorporates an isolation valve to allow maintenance without shutting the building supply.
Attention then turns to mounting and configuring the chosen flush mechanism, whether dual-flush or a concealed actuator, ensuring linkage and seals are correct.
Before closing the wall, the cistern is filled, and multiple fill and flush cycles are tested to confirm reliable operation and no leaks.
Installing inlet valves, pressure checks, and isolation
Start by locating the cistern inlet connection and verifying the manufacturer’s specified valve type and orientation before proceeding.
Fit the inlet valve using compatible fittings and thread sealant.
Install an accessible isolation valve upstream.
Perform pressure checks at mains and cistern inlet, confirming operating and shutoff pressures meet spec.
Inspect for leaks, adjust inlet float and flow rates, and document isolation location for maintenance.
Setting up dual-flush or concealed flush mechanisms
Begin by identifying the specific dual‑flush or concealed mechanism model supplied for the installation and reviewing the manufacturer’s setup diagram and parts list.
Assemble and fit valve components per instructions, orienting inlet, outlet and overflow correctly.
Adjust float and flush volumes using provided screws or shims.
Secure actuator plate mounting points, confirm linkage alignment, and guarantee access panels remain unobstructed for future maintenance.
Testing cistern fill and flush operation before wall closure
Before closing the wall, verify the cistern’s fill and flush functions under realistic supply conditions to catch leaks, misalignments, or incorrect adjustments.
The installer then performs checks and documents outcomes:
- Open supply; observe fill time and stop valve operation for correct shutoff.
- Trigger full and half flushes; confirm discharge volumes.
- Inspect visible joints for leaks during/after cycles.
- Adjust float and inlet until reliable.
Wall Finishing, Tiling, and Access Panel Installation
Selection of suitable wallboard and moisture-resistant finishes is crucial to protect the carrier frame and concealed cistern from damp conditions.
Tiling should be planned to allow for slight movement around the frame and to guarantee grout and adhesives compatible with the load and substrate.
The flush plate must be fitted precisely and an access panel provided for maintenance without disturbing finished tiling.
Choosing wallboard and moisture-resistant finishes
Choosing the right wallboard and moisture-resistant finishes sets the foundation for a durable, water-tolerant installation around a wall-hung WC.
Use cement board or water-resistant gypsum for areas prone to splashes; seal joints with suitable tape and waterproof membrane.
Choose paints, primers, and tile backer systems rated for bathrooms.
Ascertain compatibility with access panels and follow manufacturer instructions for warranties.
Tiling around the carrier frame and accommodating movement
With the substrate and moisture barriers in place, attention turns to tiling around the carrier frame and ensuring the finished wall can tolerate slight movement without cracking grout or compromising the access panel.
Install uncoupling membrane or flexible adhesive at frame junctions, leave movement joints around fixtures, set tiles with flexible grout, and fit a removable, sealed access panel flush with finished tiling for maintenance.
Installing flush plate and ensuring service access
The flush-plate installation marks the shift from rough-in to finished access, requiring exact alignment, secure mounting, and preserved serviceability.
The technician guarantees the actuator rods match the frame, seals surround the opening, and tile edges meet the plate cleanly.
Hinged or removable panels are fitted for maintenance, fasteners are accessible without tile removal, and operation is tested before final sealing.
Mounting the Wall-Hung WC Pan
The installer prepares the mounting bolts and anti-rotation fittings, confirming they match the carrier frame specifications.
The pan is lifted onto the frame, secured to the bolts, and connected to the waste outlet while alignment is checked.
Final torque values are applied to fastenings and a continuous seal is formed between pan and wall.
Preparing mounting bolts and anti-rotation fittings
Prepare the mounting bolts and anti-rotation fittings by verifying sizes and positions against the WC pan’s template, ensuring each component matches the frame’s anchor points and the pan’s fixing holes.
Inspect bolts, sleeves and washers for damage and correct length.
Fit anti-rotation brackets or sleeves to bolts, adjust protrusion to manufacturer specification, and hand-tighten temporary nuts to hold alignment before final assembly.
Lifting and securing the toilet pan to the carrier frame
Lift the WC pan onto the carrier frame with two people, aligning the pan’s fixing holes with the prepared mounting bolts and anti-rotation fittings.
Lower the pan evenly, ensuring anti-rotation clips engage. Fit rubber seals or washers where specified.
Hand-tighten nuts to seat the pan, then torque evenly to manufacturer values.
Check vertical and horizontal orientation before final tightening and trim bolt studs flush.
Connecting pan to waste outlet and checking alignment
Align the pan’s waste outlet with the carrier’s discharge pipe and lower it carefully until the spigot seats fully into the trap seal.
Verify horizontal and vertical alignment using a spirit level and straightedge. Check that no gap, tilt, or lateral strain exists.
Rotate or adjust pan mounting bolts slightly if needed, ensuring free, even seating without forcing.
Confirm trap engagement visually.
Final tightening torque and sealing between pan and wall
With the pan seated and trap engagement confirmed, attention shifts to final tightening torque and ensuring a watertight seal where the pan meets the wall.
Torque bolts evenly to manufacturer’s specification using a calibrated torque wrench, alternating sides.
Apply appropriate gasket or silicone bead per instructions, avoid over-compression, and inspect for gaps.
Recheck after first flush and retighten if minor settling occurs.
Commissioning and Final Tests
The installer conducts thorough leak tests on both the water supply and waste connections to confirm watertight integrity.
A load test is performed and mounting stability verified to guarantee the pan and frame can safely support expected use.
Flush settings are adjusted and trialled to confirm effective operation and user comfort.
Leak tests for water supply and waste connections
Begin leak testing by isolating the new wall-hung WC’s supply and waste connections and applying the prescribed pressure and water-fill tests to verify integrity.
The installer observes, records, and corrects any defects.
Steps:
- Pressurize supply to specified PSI and hold for duration.
- Inspect joints and shutoffs for seepage.
- Fill trap and check waste outlet under water load.
- Repair faults, retest, and document results.
Load test and verification of mounting stability
Verify mounting stability through a controlled load test that simulates normal and peak use conditions to confirm the frame, fixings, and wall structure resist expected loads without movement or deformation.
Apply graduated static and dynamic loads to the bowl, inspect all fixings and anchor points for loosening or distortion, check wall lining and bracket alignment, and document results.
Repeat or reinforce if any instability is detected.
Adjusting flush settings and verifying user comfort
With mounting stability confirmed, attention shifts to commissioning the cistern and tailoring flush performance for comfort and efficiency.
Technicians adjust dual‑flush volumes, fine‑tune valve timing and sensor sensitivity, and set seat height ergonomics where applicable.
Inspect for leaks, guarantee effective trap seal water level, and perform user trials to confirm audible, visual and tactile comfort.
Document settings and maintenance recommendations.
Common Problems and How to Fix Them
Common installation and commissioning faults typically manifest as poor flush performance, leaks around the concealed cistern or pan connection, and noisy or vibrating fill valves.
Each issue has straightforward diagnostic checks and corrective actions, from adjusting valve settings and clearing obstructions to reseating seals and tightening fixings.
The following section outlines practical troubleshooting steps and recommended repairs for these common problems.
Poor flush performance and troubleshooting steps
Diagnosing poor flush performance begins by recognizing symptoms—weak flush, incomplete bowl clearance, or frequent clogging—and then isolating likely causes such as partial blockages, low water pressure, or tank and valve issues.
Inspect trap and discharge for debris, verify supply pressure and fill height, test flush valve seal and actuator, clear rim jets, and adjust cistern float or fill valve.
Re-test and repeat as needed.
Leaks in concealed cisterns and at pan connection
After addressing flush performance, attention should turn to leaks in concealed cisterns and at the pan connection, which are frequent sources of moisture damage and odor.
Inspect joints, seals, and mounting bolts for cracks or loose fittings.
Replace degraded gaskets, tighten fixings to manufacturer torque, and reseat the pan with fresh silicone or compressible seals.
Pressure-test and monitor for recurrence.
Noisy fill valves, vibration, and rattling fixes
Addressing noisy fill valves, vibration, and rattling requires isolating the source—whether the noise originates from the valve itself, loose mounting, or water hammer in the supply line—and applying targeted fixes.
Replace worn valve internals, tighten or isolate mounting brackets, add rubber washers or foam padding, secure loose pipes, and install a water hammer arrestor or pressure-reducing valve.
Test after each repair for noise elimination.
Maintenance, Servicing, and Long-Term Care
Access panels and removable flush plates should be identified during installation to allow straightforward servicing of concealed cistern components.
A regular maintenance schedule—inspecting seals, testing flush mechanisms, and cleaning surfaces every 6–12 months—helps prevent common issues.
Complex repairs, persistent leaks, or inaccessible parts warrant contact with a professional plumber.
How to access and service concealed cistern components
Servicing a concealed cistern requires a clear plan for reaching internal components without damaging the wall or finish.
Remove the flush plate to access the inspection opening, shut off the water supply, and inspect the fill valve, flush valve, and seals.
Use manufacturer diagrams for part locations, replace worn components with compatible parts, and test operation through the access before reinstalling the flush plate.
Recommended cleaning and maintenance schedule
A clear, regular maintenance schedule preserves functionality and prevents costly repairs.
The following concise routine extends life and guarantees hygiene:
- Weekly: clean bowl, seat, and visible fittings with non-abrasive cleaners.
- Monthly: inspect mounting bolts, flush action, and outlet seal for leaks.
- Biannually: descale trap and rim jets; check concealed cistern access panel.
- Annually: perform a full functional check and replace worn seals.
When to call a professional plumber
Routine checks will catch many issues early, but some problems require a professional plumber’s expertise.
Complex leaks behind the wall, persistent drainage blockages, malfunctioning concealed cisterns, structural frame movement, or repeated failures after DIY fixes warrant a tradesperson.
A plumber offers diagnostic tools, secure access to hidden components, parts replacement, and compliance with regulations, ensuring safety, warranty preservation, and long-term reliability.
Cost Estimates, Timeframes, and Project Variations
Typical DIY installations generally cost less in labor but may require specialized tools, while professional fitting adds predictable labor and warranty expenses.
New-build installations often take a few hours to a day, whereas retrofits can span multiple days due to demolition, plumbing rerouting, and wall reinforcement.
Site-specific factors—access, pipe location, structural work, and local permit or disposal requirements—drive up complexity and overall cost.
Typical DIY vs. professional installation costs
Many homeowners weigh DIY savings against professional reliability when planning a wall-hung WC installation, because cost, time, and project complexity vary widely. DIY typically saves labor but risks errors; professionals add warranty, speed, and code compliance. Typical ranges:
| Option | Approximate cost |
|---|---|
| DIY parts | $300–$900 |
| DIY tools | $50–$300 |
| Pro labor | $400–$1,200 |
| Total pro | $800–$2,500 |
Estimated time for new-build vs. retrofit installations
Having weighed cost differences between DIY and professional installs, attention shifts to how time requirements vary between new-build and retrofit wall-hung WC projects.
New-builds typically require 4–8 hours for framing, plumbing rough-in, and fixture mounting when coordinated with other trades.
Retrofits often take 1–2 days due to demolition, access creation, and waste reconfiguration, with professional teams generally completing faster than solo DIYers.
Factors that increase complexity and cost
Because wall-hung WC projects intersect structural work, plumbing, and finishes, a handful of specific factors can push costs and timelines considerably higher: concealed carrier selection, load-bearing wall reinforcement, relocating waste or soil stacks, limited access for installers, bespoke finishes, waterproofing upgrades, local code or inspection requirements, specialist labour rates, and unexpected conditions (mould, rot, or hidden services).
Each adds material, labour, or permit costs and schedule risk.
Practical Tips, Safety Precautions, and Best Installation Practices
The section outlines essential safety gear and procedures for handling heavy frames and working on tiled surfaces.
It highlights practical measures to secure long-term stability and prevent leaks, including correct fastening and sealant practices.
It also identifies common installation errors to avoid so the WC performs reliably.
Safety gear and working safely with heavy frames and tiles
Several essential safety measures protect installers when handling heavy in-wall frames and large tiles: appropriate personal protective equipment, secure lifting techniques, and stable work platforms.
Gloves, safety boots, eye protection, and back support reduce injury risk.
Use mechanical aids and team lifts for frames; non-slip platforms and edge guards protect tiles.
Follow manufacturer weight limits.
- Inspect PPE
- Plan lifts
- Secure platform
- Use aids
Tips to ensure long-term stability and leak prevention
Prioritize durable connections and waterproofing to prevent future failures: guarantee all frame-to-wall anchors are torqued to manufacturer specifications, use quality corrosion-resistant fixings, and seal joints with an approved flexible sealant or waterproof membrane where pipe penetrations occur.
Verify fixture alignment, test waste and supply under pressure before closing walls, insulate against condensation, use access panels for servicing, and document torque and sealing materials for maintenance.
Common mistakes to avoid during installation
Avoid common shortcuts that trade immediate convenience for costly repairs later; installers should follow manufacturer instructions, use specified fixings, and perform pressure and alignment checks before closing walls.
Common mistakes include:
- Misaligned frame or pan connection causing leaks.
- Undersized or incorrect fixings failing under load.
- Poorly sealed pipe joints leading to hidden water damage.
- Skipping pressure tests before walling in systems.
Conclusion
Ultimately, installing a wall-hung WC transforms bathrooms into temples of suspended efficiency, promising years of whisper-quiet flushing and floor-sweeping freedom. With laser-focused planning, stout frames, and a screwdriver-army of parts, even stubborn pipes surrender. Ignore pitfalls at your peril—measure twice, brace like a fortress, and tighten as if plumbing fate itself depends on it. Proper care keeps mechanisms happy; occasional servicing preserves the floating illusion, forever elevating form and function.
