
How to Repair a Gas Fireplace: Step-by-Step Troubleshooting and Safety Guide
How to Repair a Gas Fireplace: A Step-by-Step Guide
To safely repair your gas fireplace, begin by shutting off the gas and power supply. Ensure proper ventilation and have carbon monoxide detection in place. Next, perform a visual inspection of the unit. Homeowners can often handle minor tasks such as changing batteries, cleaning the pilot light, and repositioning logs.
Check the ignition, gas valves, flame color, and sensor voltages. Use soap-bubble tests to detect leaks, and evacuate the area if you smell gas. For complex issues or confirmed leaks, it’s essential to contact a licensed technician. Continue reading for detailed procedures, tool lists, testing steps, and guidance on replacements.
Overview of Gas Fireplace Repair and Safety
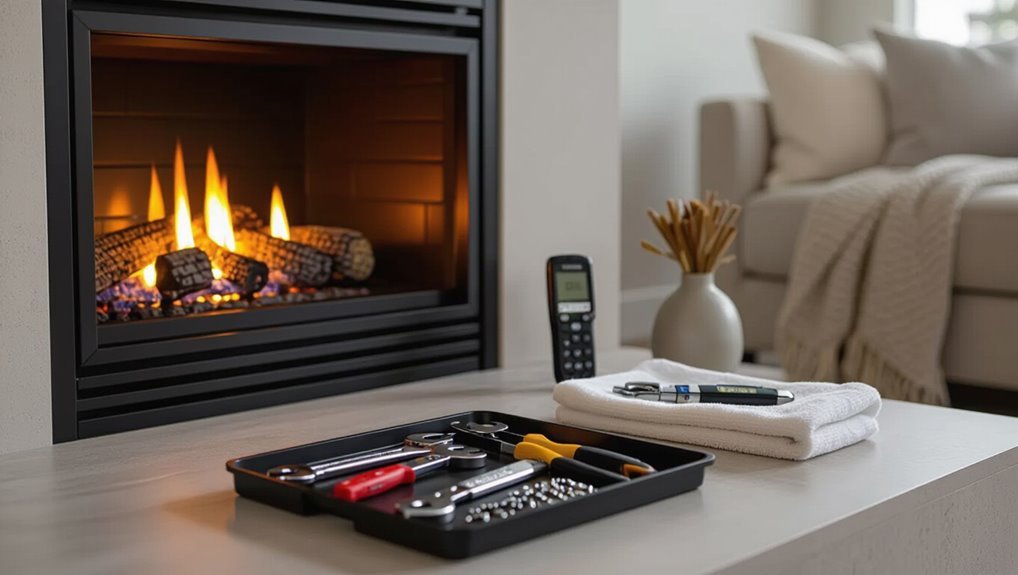
The section distinguishes routine maintenance tasks a homeowner can safely attempt from repairs that require a licensed technician, emphasizing that gas-related work with valves, lines, or persistent odors should be left to professionals.
It lists mandatory safety steps—shutting off the gas, ensuring adequate ventilation, and using a carbon monoxide detector—before any work begins.
It also provides a compact checklist of common tools and materials alongside a brief explanation of key components (valve, burner, pilot/ignition, and venting) and their functions.
When to attempt a DIY repair and when to call a professional
Although some minor issues—like replacing batteries in a remote or clearing loose debris from a pilot assembly—are suitable for a confident homeowner, gas fireplaces involve components and fuels that can create significant hazards if mishandled.
Basic tasks and guided how to repair a gas fireplace steps (igniter swaps, pilot cleaning) suit DIYers; complex problems—gas leaks, valve, control module, or venting faults—require licensed professionals.
Required safety precautions before starting any work
Because gas, heat, and electrical components combine to create real hazards, anyone preparing to work on a gas fireplace must follow strict safety precautions: shut off gas supply, cut power to the unit, ventilate the area, and guarantee the appliance is cool.
Verify absence of gas odor, use a carbon monoxide detector, keep a fire extinguisher nearby, and never work alone.
Tools and materials checklist for common repairs
After confirming safety measures and shutting off gas and power, attention turns to assembling the proper tools and materials for common gas fireplace repairs.
Essential items support diagnostics, small replacements, and safe cleaning.
Typical checklist includes:
- Adjustable wrench, needle-nose pliers, and screwdriver set
- Multimeter and gas leak detector
- Replacement valves, gaskets, and pilot assembly parts
- High-temperature sealant and cleaning brushes
Basic gas fireplace components and how they work
A gas fireplace consists of several distinct components—burner, pilot assembly, gas valve, ignition system, control module, and venting—that work together to deliver and regulate fuel, air, and ignition.
Understanding each part’s function and interaction is essential for diagnosing issues and performing safe repairs.
The burner mixes gas and air to produce flame, the pilot and ignition start combustion, the valve controls flow, the module manages controls, and venting removes combustion products.
Quick Diagnosis: Identify the Problem
A brief symptoms checklist helps pinpoint whether the issue is ignition, flow, or control related.
An initial visual and smell inspection should look for soot, loose connections, or the odor of gas before any tools are used.
When tools are needed, a multimeter, manometer, and gas detector provide measurable confirmation of electrical faults, pressure problems, and leaks.
Symptoms checklist to pinpoint common issues
How can one quickly isolate the source of a gas fireplace problem? A concise symptoms checklist directs focused troubleshooting.
Note flame behavior, ignition response, odors, and noise to prioritize checks.
- Weak, yellow, or flickering flame
- Pilot fails to light or stay lit
- Gas or burning odor present
- Hissing, popping, or unusual mechanical sounds
How to perform an initial visual and smell inspection
Building on the symptoms checklist, the initial visual and smell inspection quickly narrows likely causes before any tools or parts are handled.
The technician scans for obvious damage, loose connections, soot, corrosion, or debris around burners, valves, and pilot.
Odors like rotten eggs or gas prompt immediate evacuation and utility notification.
Note discoloration, soot patterns, and any visible leaks for reporting.
Using diagnostic tools: multimeter, manometer, gas detector
Begin by assembling a compact toolkit—multimeter, manometer, and gas detector—each chosen for its specific role in isolating faults quickly and safely.
The multimeter verifies voltage, continuity, and switch operation. The manometer checks inlet and burner pressures against specifications. The gas detector locates leaks and confirms ambient safety.
Record readings, compare to manufacturer tolerances, and proceed only when values are within safe limits.
Step-by-Step Troubleshooting and Repair Procedures
The following section provides concise, step-by-step troubleshooting and repair procedures for common gas fireplace faults.
It covers no ignition or a pilot that will not stay lit, weak or yellow flames instead of a strong blue flame, and cases where the pilot lights but the main burners do not ignite.
It also addresses intermittent operation or unexpected shutdowns and procedures to follow if a gas odor or suspected leak is present.
No ignition or pilot light will not stay lit
The technician begins by safely checking and relighting the pilot following the manufacturer’s instructions and local safety practices.
If the pilot will not stay lit, the thermocouple or thermopile is inspected, cleaned, and replaced if worn or faulty.
Finally, the pilot assembly and gas valve operation are examined for blockages, loose connections, or mechanical failure.
Checking and relighting the pilot safely
Before attempting relighting, confirm the gas supply is on and the area is well ventilated.
Then consult the appliance’s manual for model-specific pilot controls.
Shut off gas for several minutes if odor present.
Use recommended ignition sequence: set control to pilot, depress and hold, ignite with piezo or match per manual, continue holding 30–60 seconds, then release and verify steady flame before returning to “on.”
Cleaning or replacing the thermocouple/thermopile
Inspecting and, if necessary, cleaning or replacing the thermocouple or thermopile is a common and effective fix when a pilot will not stay lit.
Turn off gas and power, let components cool, then remove the sensor.
Clean gently with fine emery cloth; replace if corroded or output is low.
Reinstall securely, restore gas, test pilot for stable operation.
Inspecting pilot assembly and gas valve operation
After addressing thermocouple or thermopile issues, attention should turn to the pilot assembly and gas valve to determine whether the problem lies in fuel delivery or ignition control.
Inspect pilot orifice for carbon, verify pilot flame shape and size, and guarantee proper alignment with the sensor.
Test gas valve operation with a multimeter or pressure gauge; replace malfunctioning valves and seals per manufacturer specifications.
Weak or yellow flame instead of strong blue flame
A weak or yellow flame typically signals incomplete combustion and requires systematic inspection.
The technician should begin by cleaning burner ports and orifices, then check and adjust the air shutter and gas pressure for proper mixture.
Finally, ventilation and chimney draft must be inspected to guarantee adequate air flow and safe exhaust.
Cleaning burner ports and orifices
Remove debris from burner ports and orifices to restore proper gas flow and achieve a steady blue flame; accumulated dust, spider webs, and soot narrow openings and cause weak or yellow flames.
Shut off gas and power, remove log set and burner cover, then use a soft brush, compressed air at low pressure, and a thin wire or pick to clear each port.
Reassemble and test.
Adjusting air shutter and gas pressure
Begin by confirming that burner ports and orifices are clean and that the unit is cool and shut off at the gas supply and power.
Adjust the air shutter incrementally to introduce more oxygen if flames are yellow; reduce if flames lift.
Verify manifold pressure with a gauge per manufacturer specs and adjust regulator slowly.
Test flame color and stability after each small change.
Inspecting ventilation and chimney draft
Once air shutter and pressure adjustments have been made and flame issues persist, the next step is to inspect ventilation and chimney draft for factors that cause weak or yellow flames.
Check for blockages, bird nests, creosote, or debris; verify vent cap integrity and proper clearances.
Test draft with a smoke pencil or tissue; correct negative or stagnant draft by cleaning, repairing flue, or adding venting.
Pilot lights but burners won’t ignite
When the pilot remains lit but the main burners fail to ignite, the technician first inspects the ignition module and spark electrode for damage, corrosion, or misalignment.
Next, the gas supply and valve positions are verified to confirm adequate pressure and that the correct service valves are open.
If faults persist, replacing the control module or worn ignition components is recommended to restore reliable ignition.
Checking ignition module and spark electrode
Inspect the ignition module and spark electrode to determine why the pilot lights but the main burners do not ignite.
Examine connections for corrosion, loose wires, or damaged insulation.
Verify electrode gap and alignment with the pilot flame; clean carbon deposits with a non-abrasive brush.
Test ignition module operation and spark output with a multimeter or spark tester.
Replace defective components per manufacturer specifications.
Verifying gas supply and valve position
Confirming the gas supply and valve position is a critical next step to determine why the pilot stays lit but the main burners do not ignite.
Inspect the shutoff and manual control valves for full open position, verify gas meter/line pressure if accessible, and confirm any external supply interruptions.
Ascertain valve handles align with flow direction and check flexible connectors for kinks or obstructions.
Replacing control module or ignition components
Begin by powering down the fireplace at the main gas valve and electrical supply to guarantee a safe working environment before replacing any control or ignition components.
Inspect wiring, connectors, and the ignition module for damage or corrosion.
Replace faulty igniters, pilot sensors, or control boards with manufacturer-approved parts.
Reassemble, restore power and gas, and test multiple ignition cycles for reliable operation and leak-free performance.
Intermittent operation or unexpected shutdowns
Intermittent operation or unexpected shutdowns often trace to safety switches, limit sensors, or weak control signals that should be tested for proper continuity and function.
The remote control and receiver wiring warrant inspection for loose connections, corrosion, or intermittent faults.
Technicians should also measure thermocouple and thermopile voltages and verify solid wiring connections before replacing components.
Testing safety switches and limit sensors
Test each safety switch and limit sensor systematically to isolate causes of intermittent operation or unexpected shutdowns.
Visually inspect connectors and housings, then disconnect power and measure continuity and resistance per manufacturer specifications.
Simulate normal and fault temperatures or positions to confirm activation thresholds.
Replace any sensors that fail calibration or show intermittent readings.
Reassemble, restore power, and verify stable operation before concluding repairs.
Inspecting remote control and receiver wiring
Inspect the remote control and receiver wiring for loose connections, damaged insulation, corrosion, or pinched cables that can cause intermittent operation or unexpected shutdowns.
Verify secure terminal screws, tight plug seating, and intact wire routing.
Clean corroded contacts with contact cleaner and a brush.
Replace frayed wires or connectors.
After repairs, cycle the remote and observe consistent response before reassembling and restoring normal use.
Examining thermocouple, thermopile output, and wiring connections
After confirming the remote and receiver wiring are sound, attention turns to the thermocouple and thermopile, which supply the millivolt signals that keep the gas valve open.
Measure thermopile voltage with the pilot lit; expect ~350 mV for multipurpose systems.
Test thermocouple continuity and millivolt output; replace any with low voltage.
Inspect and tighten wiring and clean corrosion at connections.
Gas odor or suspected leak
If a gas odor or leak is suspected, the first priority is immediate safety: shut off the appliance and gas supply if it can be done without entering the hazard area, evacuate occupants, and avoid any ignition sources.
Once evacuated and safe, a qualified technician or homeowner can perform a soap‑bubble leak test on exposed fittings by applying a soapy solution and watching for continuous bubbles that indicate a leak.
If bubbles appear, the odor persists, or any uncertainty remains, contact the gas company or emergency services immediately and do not re-enter until the area is declared safe.
Immediate safety actions and evacuation steps
Any suspected gas odor demands immediate, decisive action to protect occupants and property.
The person should shut off the gas supply at the meter or main valve if safe, avoid flames, electrical switches, and phones indoors, then evacuate everyone outdoors upwind.
From a safe distance, call the gas utility and emergency services.
Do not re-enter until professionals declare it safe.
How to perform a soap-bubble leak test
Once the area is declared safe and the gas supply remains off, a soap-bubble leak test can help identify small leaks on accessible fittings and joints.
Mix mild dish soap with water, apply with a brush or spray to connections, valves and fittings, then watch for steady bubble formation.
Mark any bubbling locations, dry the area, and do not restore gas until repairs are completed.
When to contact gas company or emergency services
When should professional help be summoned: when the smell of gas is strong, persistent, or accompanied by physical symptoms such as dizziness, headache, nausea, or difficulty breathing, evacuation and immediate notification of the gas company or emergency services is required.
If unsure, treat any unexplained odor as urgent: leave the premises, avoid sparks or electronics, and call the gas company or emergency responders from a safe location.
Glass, log set, and cosmetic repairs
Attention to the glass, log set, and interior finishes guarantees both safety and appearance.
Replace cracked tempered glass only with manufacturer-specified panels following proper heat-resistant sealing and handling procedures.
Reposition ceramic logs and ember material per the layout guide and remove soot or discoloration from glass and firebox with approved cleaners and nonabrasive methods.
Replacing tempered glass panels safely
Remove the front surround and verify the fireplace is fully cooled and the gas supply is turned off before attempting to replace tempered glass panels.
Wear cut-resistant gloves and eye protection.
Loosen retaining clips, support the glass to prevent drop, then lift out.
Fit replacement tempered glass (manufacturer-specified), seat into gasketed channels, resecure clips evenly, and inspect seals and alignment before reassembling and testing per manufacturer instructions.
Replacing or repositioning ceramic logs and ember material
Inspect the log set and ember bed for cracked pieces, misplaced elements, or carbon buildup before attempting any adjustments.
Turn off gas and cool completely.
Remove logs per manufacturer order, noting orientation and pilot sensor clearance.
Replace damaged ceramic pieces and redistribute embers evenly for proper flame pattern.
Reinstall logs securely, verify burner ports unobstructed, and test operation for correct combustion and safety.
Cleaning soot and discoloration from glass and interior
Begin by ensuring the fireplace is completely cool and the gas supply is turned off. Once safe to work, visually assess glass and interior surfaces to determine the type and extent of soot, film, or heat discoloration.
Use manufacturer-approved glass cleaner or a vinegar-water solution for light residue. For heavy buildup, apply a paste of baking soda and water, gently scrub with a nonabrasive pad, then rinse and dry.
Testing, Calibration, and Post-Repair Checks
After repairs, the technician verifies safe operation by inspecting flame characteristics and measuring carbon monoxide levels.
Gas pressure and the regulator are checked and adjusted as needed, followed by final leak and ventilation tests.
All findings and actions are documented and added to the service record for future reference.
Verifying safe operation: flame characteristics and CO levels
Several checks confirm that a repaired gas fireplace is operating safely: visual assessment of flame characteristics and quantitative measurement of carbon monoxide (CO) levels are primary.
Flames should be steady, mostly blue with minimal yellow tipping, centered on burners.
Use a calibrated CO meter to verify ambient levels remain below 9 ppm for continuous exposure, addressing any abnormal readings before regular use.
Checking gas pressure and adjusting regulator
Check the gas pressure at the fireplace inlet and at the burner manifold to confirm the system matches the manufacturer’s specifications and that the regulator maintains stable output under load. Measure inlet, manifold, and regulator outlet pressures with a manometer. Adjust the regulator per spec, recheck under simulated demand, and document readings.
| Location | Normal Range | Action |
|---|---|---|
| Inlet | 5–7″ WC | Verify supply |
| Manifold | 3.5–4″ WC | Adjust regulator |
Performing final leak and ventilation tests
Begin final leak and ventilation tests by isolating the fireplace and verifying all service connections are secured and restored to operating condition.
Apply soapy solution to joints, observe for bubbles while gas is pressurized. Confirm burner ports and pilot operate normally.
Measure CO at appliance outlet and room; guarantee draft and vent flow meet manufacturer limits.
Correct any leaks or blockage before returning to service.
Documenting repairs and maintaining service records
After completing leak and ventilation verification, the technician records all findings, adjustments, and measurements in the service file.
The entry includes component replacements, calibration settings, test results, and timestamps. Photographs and serial numbers are attached.
Recommendations and follow-up intervals are noted for the owner.
Copies are retained for warranty, compliance, and trend analysis, enabling efficient future diagnostics and regulatory audits.
Preventative Maintenance and Seasonal Care
A concise routine cleaning schedule and seasonal checklist help prevent common failures and extend fireplace life.
Annual inspections should be performed by the homeowner for obvious issues and by a qualified technician for gas, venting, or ignition concerns.
Remote controls, batteries, and pilot assemblies require regular checks and timely battery replacement to guarantee reliable operation.
Routine cleaning schedule and seasonal checklist
One clear routine—monthly visual inspections with quarterly light cleanings and an annual professional service—keeps a gas fireplace reliable and safe.
A seasonal checklist targets soot, venting, and controls before heavy use. Follow concise tasks and document dates to track maintenance.
- Remove debris and vacuum logs
- Wipe glass and trim with manufacturer-safe cleaner
- Check pilot flame visibility
- Confirm vent termination clearance
How to perform annual inspections and when to hire a technician
Perform a thorough annual inspection to verify safe operation and catch wear before it becomes a hazard.
Check burner flames, venting paths, seals, logs, glass, and gas connections for corrosion, soot, or leaks.
Test ignition and shutoff functions.
Record findings and corrective actions.
Hire a certified technician for gas leaks, persistent odor, irregular flames, pilot/valve failures, or unclear venting.
Maintaining remote controls, batteries, and pilot assemblies
Maintaining remote controls, batteries, and pilot assemblies guarantees reliable fireplace operation and reduces safety risks during the heating season.
Owners should replace batteries annually, test signal range, and clean contacts with isopropyl alcohol.
Inspect pilot assemblies for soot, corrosion, or loose fittings; clean gently and reseat thermocouples.
If pilot instability or gas smell persists, shut off supply and contact a certified technician immediately.
Common Mistakes and How to Avoid Them
Common errors during gas fireplace repair include unsafe practices that can cause gas leaks or carbon monoxide exposure, which should be avoided at all costs.
Technicians and homeowners also sometimes overlook ventilation and flue problems that impair combustion and exhaust.
Finally, installing incorrect or incompatible replacement parts can create malfunctions or safety hazards, so verifying part specifications is essential.
Unsafe practices that can cause leaks or carbon monoxide
Neglecting proper procedures or attempting DIY fixes beyond basic maintenance can create gas leaks and allow carbon monoxide to accumulate, posing serious health and fire risks.
Improperly tightened fittings, damaged flexible connectors, or reused pipe sealant can fail. Bypassing safety valves, disabling detectors, or using incorrect replacement parts increases danger.
Always hire certified technicians for complex repairs and pressure testing.
Overlooking ventilation and flue issues
After stressing the dangers of improper repairs and CO risks, attention must turn to ventilation and the flue, where oversights frequently create hazardous conditions.
Inspect for blockages, corrosion, loose connections, and improper clearances. Verify exhaust paths, draft direction, and vent caps.
Recommend professional evaluation when uncertainty exists. Regular cleaning and adherence to manufacturer and code specifications prevent backdrafting and accumulation of dangerous gases.
Incorrect parts replacement and compatibility pitfalls
Mistakenly installing non‑OEM or mismatched components is a frequent source of malfunction and safety risk in gas fireplaces.
Technicians should verify model numbers, part specifications, and certification ratings before replacement. Incorrect valves, thermocouples, or burners can cause leaks, poor combustion, or control failure.
Use manufacturer parts or approved equivalents, keep documentation, and consult the manufacturer when compatibility is unclear to prevent hazards.
Parts, Costs, and When to Replace the Unit
Typical replacement parts include valves, thermocouples, pilot assemblies, and igniters, with costs ranging from modest parts-only expenses to several hundred dollars for component replacement.
The decision to repair or replace hinges on repair cost versus remaining lifespan, safety concerns, and energy efficiency.
Homeowners are advised to hire certified gas fireplace technicians and to verify licensing, insurance, and manufacturer certifications before proceeding.
Typical replacement parts and estimated costs
Repairing a gas fireplace commonly involves replacing a few recurring components—thermocouples, pilot assemblies, gas valves, ignition modules, and ceramic logs or burners—that wear out or fail over time. Typical parts and ballpark costs are listed below:
| Part | Estimated Cost |
|---|---|
| Thermocouple | $10–$40 |
| Pilot assembly | $30–$120 |
| Gas valve | $50–$300 |
| Ignition module | $40–$200 |
Repair vs. replace decision factors and lifespan considerations
When should a homeowner opt to repair a gas fireplace and when is replacement the more sensible choice?
Consider age, cost of repairs versus unit value, frequency of failures, safety concerns, and efficiency.
Repair if issues are isolated, parts available, and cost under ~50% of replacement.
Replace when multiple systems fail, parts are obsolete, efficiency is poor, or safety risks persist despite repairs.
Finding certified technicians and verifying credentials
Because gas fireplaces involve combustion and gas lines, homeowners should hire technicians with specific certifications and verifiable experience rather than relying on general handymen.
Verify credentials, insurance, and references; request written estimates and warranties; confirm familiarity with the brand and model; and prioritize safety records.
Recommended checks include:
- State contractor license
- Gas safety/combustion certification
- Liability insurance proof
- Local references and reviews
Conclusion
After soot-streaked doubt clears, the repaired gas fireplace stands like a patient lighthouse, ready to warm rooms and stories anew. Armed with careful diagnosis and steady hands, the homeowner tames flickering temper and silent pilots, learning that vigilance trumps haste. Routine maintenance becomes a guardian ritual, sparing costly replacements and danger. When expert help is warranted, it arrives as a precise remedy. Consequently, comfort returns—steady, safe, and luminous—earned through attention.
