How to Fix a Leaking Shower Valve: Step-by-Step Repair Guide for Common Valve Types
To fix a leaking shower valve, first identify the valve type and turn off the water supply. Relieve any pressure before disassembling the valve. Remove the trim and handle, then inspect seals, O-rings, cartridges, or stems for signs of wear or mineral buildup. Clean the components and replace any damaged parts with the correct replacements. Apply plumber’s tape to the threads, reassemble the trim, and test for leaks. Ensure fixtures are tightened securely but avoid over-torquing. If necessary, use temporary patches or buckets while scheduling further repairs. For detailed step-by-step procedures, tool lists, and troubleshooting tips, continue reading.
How to Stop a Leaking Shower Valve Quickly
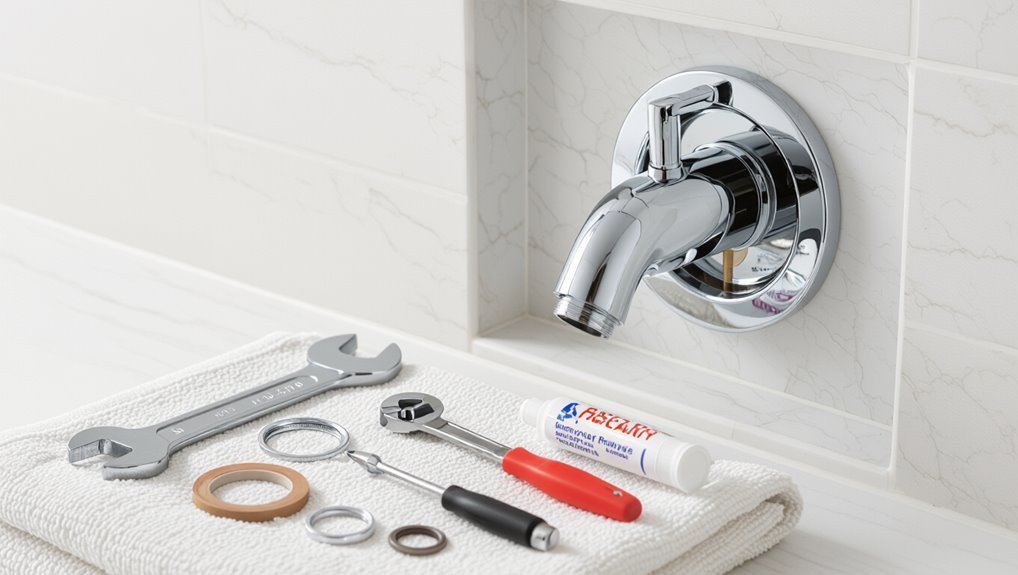
When a shower valve begins to leak, immediate temporary fixes—such as tightening handles, applying plumber’s tape, or using a rubber patch—can reduce water loss until a proper repair is made.
The person should know when to shut off the shower and, if necessary, the home’s main water valve; common main shutoff locations include near the water meter, the perimeter of the house, or the basement utility area.
If leaks persist despite quick measures, worsen under pressure, or cause visible flooding or water damage, professional help is recommended.
Immediate temporary fixes to stop leaks now
A few quick actions can shore up a leaking shower valve long enough to prevent water damage and buy time for a proper repair.
To address how to fix a leaking shower valve temporarily, apply plumber’s tape around visible threads, tighten accessible packing nuts, use a rubber patch or clamp over a small crack, and place a bucket to catch drips while scheduling a full repair.
When to shut off the water and main shutoff locations
If the temporary measures hold only briefly or the leak worsens, shutting off the water promptly prevents damage and makes repairs safer.
Locate the shower shutoff (angle stop) behind access panel, then use the home’s main shutoff—often near the water meter, garage, basement, or exterior wall.
Turn clockwise firmly; drain faucets to relieve pressure before beginning valve work.
Signs a leak requires professional help
Because some leaks start small but indicate bigger problems, recognize signs that require a professional rather than DIY fixes.
Persistent dripping after cartridge replacement, rising water bills, visible mold or wall/ceiling stains, low water pressure affecting multiple fixtures, or corrosion and damaged pipes all warrant licensed plumber assessment.
Structural water damage, recurring failures, or gas-line proximity also demand immediate professional intervention.
How Shower Valves Work and Why They Leak
A shower valve consists of a few common types—cartridge, ceramic disc, ball, and compression—each with a distinct mechanism for controlling flow and temperature.
Leaks typically originate at worn seals, damaged cartridges or discs, corroded valve seats, and loose connections. High water pressure and mineral buildup accelerate wear and prevent proper sealing, turning small faults into persistent leaks.
Basic components of common shower valves (cartridge, ceramic disc, ball, compression)
Several common shower-valve designs rely on distinct internal parts—cartridges, ceramic discs, ball valves, and compression stems—each controlling water flow and mix in a different way.
Cartridges are modular units with seals and ports.
Ceramic discs slide for precise sealing.
Ball valves use a rotating ball with drilled holes.
Compression stems use washers and seats compressed to stop flow.
Typical failure points that cause leaks
Many leaks trace to a handful of predictable failure points within a shower valve: worn seals and O-rings, corroded or scored cartridges and discs, deteriorated rubber seats and washers, loose or damaged retaining clips and screws, and mineral buildup that prevents proper sealing.
Additional issues include cracked valve bodies, warped stems, failing springs or plungers, and improper assembly or mismatched replacement parts causing persistent leakage.
How water pressure and mineral buildup contribute to leaks
Because water pressure determines the force exerted on seals and internal components, fluctuations or excessive pressure accelerate wear and can expose weaknesses in valves.
High pressure forces water past worn O-rings and cartridge seats. Simultaneously, mineral buildup from hard water abrades surfaces, restricts clearances, and prevents proper sealing.
Together these factors cause persistent drips, valve sticking, and shortened component life.
Identifying Your Shower Valve Type
The next step is identifying the valve type by noting visual cues—shape of the cartridge, presence of a round ball, flat ceramic plates, or separate compression stems.
The handle and escutcheon should be removed carefully (turn off water, loosen set screw, and unscrew trim) to expose the valve without damaging finishes.
Photograph and label the exposed parts and any stamping or numbers to aid in ordering the correct replacement components.
Visual cues to distinguish cartridge, ceramic disc, ball, and compression valves
Distinguishing shower valve types begins with visual inspection of the exposed parts and the faucet handle: cartridge valves typically reveal a single cylindrical cartridge behind a straight or slightly tapered handle stem; ceramic-disc setups show a wide, flat housing with a short, often square or round spindle and two ceramic discs inside; ball valves present a rounded, dome-like interior with a single lever handle and spherical cartridge; compression valves are identified by separate hot and cold stems with removable screw-cap handles and visible seat-and-plug components.
Subtle clues include handle movement (smooth vs. multiple turns) and visible fasteners or retaining clips, which confirm valve family without disassembly.
How to remove the handle and escutcheon safely
After identifying the valve type by inspecting handles and visible fittings, proceed to remove the handle and escutcheon carefully to expose the valve without causing damage.
Shut off water, relieve pressure, and note screw locations.
Pry trim plates gently with a flat tool, remove set screws from handles, then lift or unscrew escutcheon.
Protect finished surfaces and avoid forcing stuck parts to prevent cracking.
How to document parts and take photos for replacement
Photograph each exposed component from multiple angles and record clear notes about visible markings, dimensions, and fastener types to guarantee accurate matching for replacement parts.
Capture overall valve location, close-ups of cartridges, stems, sleeves, and seals, and include a ruler for scale.
Label images, note brand/model stamps, part numbers, and orientation.
Store photos and notes for supplier or technician consultation.
Tools and Materials Needed for Valve Repair
A concise set of hand tools—adjustable wrench, screwdriver set, hex keys, pliers, and a cartridge puller or snap-ring pliers when required—will cover most valve repairs.
The homeowner should also obtain the exact replacement cartridge or repair kit matched to the valve model, sourcing parts from the manufacturer, local plumbing supply, or verified online retailers using the valve’s make and model number.
Protective gear (gloves, safety glasses) and materials to protect finishes (towels, painter’s tape, a drop cloth) help prevent injury and cosmetic damage during the job.
Essential tools list
Before beginning valve repair, assemble a compact set of reliable tools and materials to guarantee the job proceeds smoothly and safely.
The technician prepares to isolate water, access the valve, remove cartridges or seats, and reseat components with proper torque. Essential items cover cutting, gripping, sealing, and testing functions for common repairs.
- Adjustable wrench
- Screwdrivers (flat and Phillips)
- Cartridge puller or pliers
- Plumber’s tape and silicone sealant
Replacement parts and how to source the correct cartridge or kit
Several specific replacement parts are commonly required for shower valve repairs, with the cartridge or cartridge kit being the most critical component to match.
Identification requires model number, manufacturer stamp, or measuring cartridge dimensions and port layout.
Parts include O-rings, seats, springs, and retaining clips.
Source genuine or OEM-equivalent kits from plumbing suppliers, manufacturer websites, or reputable online retailers to guarantee fit and durability.
Safety gear and materials for protecting finishes
Proper personal protective equipment and surface protection materials are essential to prevent injury and avoid damage to fixtures and finishes during valve repair.
Recommended items include safety glasses, nitrile gloves, and a dust mask.
Use soft cloths, painter’s tape, and adhesive-backed foam pads to shield tiles, glass, and chrome.
Drop cloths catch debris; nonmarring tools minimize scratches.
Step-by-Step Repair for Cartridge Valves
Before beginning, the work area should be prepared and the water supply turned off to prevent spills and pressure-related issues.
The trim and handle must be removed to access the cartridge, which should then be safely extracted for inspection of both cartridge and valve body for wear or damage.
After cleaning and lubricating—or replacing—the cartridge, reinstall it, reassemble the trim, restore water, and test carefully for leaks.
Preparing the work area and turning off water
A clear, well-lit workspace and a reliably shut water supply are essential before disassembling a cartridge valve.
Clear towels and a parts tray near the tub protect finishes and contain small components.
Locate and close the main or local shutoff valves, then open the shower to relieve residual pressure.
Verify no flow at adjacent fixtures before proceeding.
Removing trim, handle, and cartridge safely
Begin by removing visible trim components and any decorative screws to expose the handle mechanism.
The technician pries off escutcheon plates, detaches set screws, and extracts the handle. After noting orientation, they loosen retaining clips or bonnet nuts securing the cartridge.
Using pliers with a cloth to prevent marring, they withdraw the cartridge straight out, keeping small parts organized for reassembly.
Inspecting cartridge and valve body for damage
Inspect the cartridge and valve body under good light for scoring, corrosion, mineral buildup, or worn O‑rings that could compromise seals or movement.
Note cracks, flattened seals, or groove wear on the cartridge skirt.
Check valve bore for pitting, debris, or warped edges that prevent proper seating.
Photograph damage for reference and determine whether parts require replacement versus repair.
Cleaning, lubricating, and reinstalling cartridge
If the cartridge and valve body show only minor corrosion, mineral deposits, or worn but intact seals, the next step is careful cleaning, lubrication, and reinstallation to restore smooth operation and watertight seating.
Remove debris and old sealant with vinegar or a soft brush, rinse, dry thoroughly, apply plumber’s grease to O-rings and moving surfaces, seat cartridge evenly, and torque retaining fasteners to manufacturer specifications.
Replacing the cartridge and testing for leaks
Remove the old cartridge carefully and install the replacement, following manufacturer alignment marks and torque specs to guarantee a proper seal.
Reassemble trim and restore water supply slowly while checking for leaks. Observe supply lines, valve body, and trim connections for any seepage.
Operate hot and cold cycles, inspect under pressure, and retorque fittings if necessary. Confirm no drips before finalizing the repair.
Step-by-Step Repair for Ceramic Disc Valves
The section outlines how to carefully disassemble ceramic disc valve assemblies to access internal components.
It covers inspecting and replacing worn seals and O-rings, plus cleaning the glass discs and recommending reassembly tips to guarantee smooth operation.
Finally, it explains leak testing and how to adjust disc alignment to stop drips.
Disassembling ceramic disc valve assemblies
Begin by shutting off the water supply and verifying the valve is depressurized before proceeding; this prevents accidental flooding while the ceramic discs and related components are accessed.
Remove handle, trim, and retaining clips or screws.
Lift out the cartridge or disc assembly carefully, noting orientation and order of parts.
Clean seating surfaces, inspect discs for chips or scoring, and set components on a clean, labeled surface.
Inspecting and replacing seals and O-rings
Inspecting seals and O-rings starts with a thorough visual and tactile examination of each rubber component for cracks, flattening, or hardening that indicate loss of elasticity; any part showing damage or evident wear should be replaced rather than reused.
Measure diameters and cross-sections, note material type, source exact replacements, and lubricate new seals lightly with plumber-approved silicone grease before installation to guarantee proper seating and longevity.
Cleaning glass discs and reassembly tips
After seals and O-rings have been checked and replaced as needed, attention turns to the ceramic glass discs: each disc pair should be examined under good light for scratches, chips, or mineral buildup that can prevent a watertight seal.
Clean gently with vinegar or a descaling solution, rinse, dry thoroughly, and handle by edges.
Reassemble in correct orientation, lubricate with recommended silicone grease, and seat evenly.
Leak testing and adjusting alignment
With the valve reassembled, perform a controlled leak test to confirm sealing and fine-tune disc alignment:
Slowly restore water, observe for drips at joints and cartridge faces, and cycle the handle through hot, cold, and mixed positions.
If minor leakage appears, loosen mounting screws slightly to nudge discs, retighten evenly, and retest.
Repeat until no leak and motion is smooth without binding.
Step-by-Step Repair for Ball Valves
The procedure for repairing a leaking ball valve begins with removing the handle and escutcheon to access internal components and inspect the ball, cam, seats, and springs for wear or damage.
Worn seats, springs, and seals are typically replaced during a rebuild, with attention paid to cam and seat condition to determine whether parts or the entire valve must be replaced.
After reinstalling the ball and new components, the assembly is reinstalled, re-pressurized, and tested for leaks and proper operation.
Accessing internal ball valve parts and cam/seat inspection
Begin by removing the handle, trim, and valve cartridge to expose the ball, cam, and seats; this access allows direct inspection of worn seals and mineral buildup that commonly cause leaks.
Visually assess the ball surface for scratches or corrosion, check cam alignment and movement, and inspect seat edges for deformities or embedded debris.
Document findings before proceeding to parts replacement.
Replacing seats, springs, and seals
Proceed to remove the worn seats, springs, and seals using appropriate tools and a steady, deliberate motion to prevent damage to the ball or valve body; each component should be handled separately, inspected for wear or mineral deposits, and placed in order for reference during reassembly.
Clean mating surfaces with a soft brush and descaler if needed.
Install matched replacement seats and springs, ensuring correct orientation and seating before reassembling the ball.
Rebuilding the valve versus full replacement
Decide whether to rebuild the ball valve or replace it outright by comparing the extent of wear, the availability of matched replacement parts, and the valve’s age and corrosion level.
Rebuild when seats, springs, and seals are isolated failures and parts match the model.
Replace when the ball, body, or stem show pitting, extensive corrosion, or when parts are obsolete or unavailable, ensuring long-term reliability.
Reassembly and pressure testing
With the internal components clean and replacement parts verified, reassemble the ball valve in the reverse order of disassembly, seating springs and seals precisely and torquing retaining screws to the manufacturer’s specifications.
Once the body is reinstalled, restore water supply and perform a controlled pressure test—checking for leaks at the stem, seats, and body seams and cycling the handle to confirm smooth operation and watertight seals.
After testing, monitor for several minutes, tighten fittings if necessary, and note any persistent seepage indicating deeper damage or improper assembly requiring further inspection or replacement.
Step-by-Step Repair for Compression Valves
The repair of compression valves begins with inspecting stems and rubber washers for wear or mineral buildup that causes leaks.
Worn washers and packing are then removed and replaced to restore the seal and stop drips.
After reassembling the valve, the fixture is tested under normal water pressure to confirm proper shutoff.
Identifying worn washers and stems
Begin by visually inspecting the valve stem and washer assembly for obvious signs of wear: grooves, flattened or misshapen washers, corroded or scored stems, and mineral buildup where components seat.
Note looseness or wobble in the stem, uneven washer compression, or metal fragments.
Photograph or sketch findings, measure washer diameter and stem condition, and classify defects to determine repair parts needed.
Replacing washers and packing to stop drips
Turn off the water supply and open the faucet to relieve pressure before removing the valve stem assembly to access worn washers and packing.
Inspect and note washer size and packing configuration.
Remove old rubber washer and replace with identical-size neoprene or rubber washer.
Replace deteriorated packing with new plumber’s packing or graphite.
Reassemble components; tighten bonnet nut to specified torque.
Reassembling and testing for proper shutoff
Reassemble the valve stem assembly carefully, aligning the stem, new washer, and packing exactly as they were noted during disassembly to guarantee a proper seal.
Tighten nuts and bonnet to manufacturer torque, replace trim, and restore water supply slowly.
Check for leaks at low then full pressure, operate handle through full range, and re-torque if seepage appears.
Confirm complete shutoff before finishing.
When to Replace the Entire Valve or Rough-In
If corrosion, cracks, or extensive mineral buildup are found in the valve body or the plumbing behind the wall, replacement of the entire valve or rough-in is often necessary.
Homeowners can choose retrofit cartridges that fit existing bodies or upgrade to modern pressure-balancing or thermostatic valves for improved performance.
The decision should weigh parts and labor costs, required drywall or tile work, and the technical complexity of a full replacement.
Signs the valve body or plumbing behind wall is compromised
When should a homeowner consider replacing the entire valve or the rough-in rather than attempting repairs?
Visible corrosion, cracked or warped valve bodies, persistent leaks despite new seals or cartridges, mineral buildup inside the body, loose or damaged mounting to studs, evidence of water damage or mold behind the wall, and repeated failures indicate the underlying plumbing or valve housing is compromised and replacement is necessary.
Options for retrofit cartridges and modern valve upgrades
Although many leaks can be fixed by replacing seals or cartridges, homeowners facing recurrent failures or outdated valve designs should evaluate retrofit cartridge options and modern valve upgrades as alternatives to full rough-in replacement.
Retrofit cartridges fit existing bodies to restore performance and reduce disruption.
When valve bodies are corroded or incompatible, modern pressure-balancing or thermostatic units offer improved safety and longevity but may require trim and handle changes.
Cost and complexity considerations for full replacement
Why replace the entire valve rather than a cartridge? Full replacement is warranted when corroded rough-ins, obsolete models, persistent leaks, or multiple failures exist.
Costs include parts, labor, possible tile or wall repair, and permits; complexity rises with concealed plumbing and single‑handle thermostatic setups.
Professional installation is often recommended for reliable water pressure, code compliance, and long‑term durability.
Common Mistakes and How to Avoid Them
Common mistakes when repairing a leaking shower valve include over-tightening fasteners, which can strip threads or damage finishes.
Installing the wrong replacement part or an incompatible aftermarket kit often leads to persistent leaks.
Failing to remove mineral deposits before reassembly can prevent proper seals and shorten the life of the repair.
Over-tightening and damaging finishes or parts
Excessive tightening during repair can strip threads, warp seals, or mar plated finishes, turning a simple leak fix into a more costly restoration.
Technicians should use specified torque values, snug fittings by feel, and soft-jawed tools or cloth to protect visible surfaces.
Test with moderate pressure, then retorque if needed.
Replace damaged components rather than forcing assemblies that don’t seat properly.
Using the wrong replacement part or aftermarket kit
After cautioning against over-tightening and tool damage, attention must turn to the frequent problem of installing incorrect replacement parts or cheap aftermarket kits.
Incorrect components compromise seals, fitment, and valve function. Technicians verify model numbers, measure dimensions, and source OEM or reputable-brand kits.
When unsure, consult manufacturer diagrams or bring the old part to a supplier to confirm compatibility before purchase and installation.
Not cleaning mineral deposits before reinstalling
Many fixtures show mineral buildup around valve components after removal, and failing to remove these deposits before reinstalling can prevent proper sealing and lead to persistent leaks.
Mineral scale can warp seats, block passageways, and prevent O-rings from seating. Thoroughly clean with a descaler, nylon brush, and compressed air; inspect seals, replace damaged parts, and retest for leaks before final assembly.
Preventing Future Leaks
A consistent maintenance schedule for shower valves can catch wear early and extend service life.
Addressing water quality and mineral buildup through softening or descaling reduces deposits that cause seals and cartridges to fail.
Selecting durable valve types and materials further minimizes the frequency of repairs and replacements.
Routine maintenance schedule for shower valves
Prevention relies on a simple, regular maintenance schedule that keeps shower valves functioning and detects wear before leaks start.
Inspect handles, escutcheons, and visible fittings monthly for looseness or drips. Operate controls fully to notice stiffness.
Quarterly, clean external surfaces and check for mineral deposits on trim.
Annually, test cartridge/seat integrity and replace worn seals or O-rings to prevent failures.
Water treatment and reducing mineral buildup
Reduce mineral buildup through targeted water treatment to cut the primary cause of valve wear and leaks.
Install point-of-entry softeners or point-of-use filters to lower hardness and sediment.
Flush lines after treatment changes and periodically descale exposed components with manufacturer-approved solutions.
Monitor water quality and adjust treatment frequency based on hardness tests to prolong seals, cartridges, and moving parts.
Choosing durable valve types for longevity
When selecting a replacement or upgrade, homeowners should prioritize valve types known for durability and ease of maintenance to minimize future leaks.
Brass and stainless steel cartridges resist corrosion; ceramic-disc cartridges offer long-term sealing with minimal wear.
Modular, cartridge-style valves simplify repairs and parts replacement.
Avoid low-cost zinc alloys and integrated plastic assemblies that deteriorate faster under mineral-heavy or high-temperature conditions.
Troubleshooting Guide for Persistent Leaks
When leaks continue after basic repairs, a systematic assessment can reveal if water is escaping behind the wall, from the valve, the showerhead, or elsewhere in the plumbing.
Simple tests—such as isolating the valve, observing drip patterns, and checking wall stains or moisture with a flashlight/hygrometer—help distinguish the source.
If the leak persists, the next steps include shutting off water, documenting findings, and calling a licensed plumber for further diagnosis or behind-wall access.
Diagnosing hidden leaks behind the wall
How can a shower appear dry while water quietly corrodes framing and finishes behind the wall?
Inspect for soft drywall, discolored grout, musty odors, and warped trim.
Use a moisture meter to map elevated readings, remove access panels or a tile to observe wet insulation, and run controlled tests with the valve isolated.
Document findings, shut off water if saturation is confirmed, and plan targeted repairs.
How to tell if leak is from valve vs. showerhead or plumbing
Having isolated moisture sources behind the wall and documented saturation, the next step is to determine whether the leak originates at the valve, the showerhead, or elsewhere in the supply plumbing.
Inspect for visible drip at cartridge or escutcheon, run water with trim removed to see seepage, test with showerhead removed to check supply line pressure loss, and observe whether leaks occur only when adjacent fixtures are used.
Next steps if leak persists after repair
If leaks continue after replacing seals or cartridges, escalate the diagnosis methodically: recheck the repair work for correct parts and torque, inspect surrounding plumbing and wall cavities for hidden cracks or loose fittings, and perform systematic isolation tests (shut individual supply stops, run water at different fixtures, and monitor pressure) to pinpoint whether residual seepage stems from the valve assembly, upstream supply lines, or structural water migration.
Then consider valve replacement or professional leak detection.
Quick Reference Comparison of Valve Types
A concise comparison of common valve types helps prioritize repairs based on durability, ease of repair, failure modes, and expected lifespan. The table below summarizes typical brass, ceramic, and cartridge valves for quick reference. Use this snapshot to decide whether a simple part replacement or full valve swap is the most practical fix.
| Valve Type | Common Failure Mode | Typical Lifespan |
|---|---|---|
| Brass (compression) | Worn washers, leaks at stem | 10–20 years |
| Ceramic disc | Chip or grit wear, slow leaks | 15–25 years |
| Cartridge | O-ring/seat failure, sticky operation | 10–20 years |
Durability, ease of repair, common failure modes, and typical lifespan
Compare common valve types—compression, ball, cartridge, and ceramic disc—by their durability, ease of repair, typical failure modes, and expected lifespans to aid selection and maintenance planning.
Compression valves wear seals and corrode; inexpensive but frequent repairs, lifespan ~10–20 years.
Ball valves resist wear, harder to service, lifespan ~10–25 years.
Cartridges offer moderate serviceability, common seal failure, ~10–20 years.
Ceramic discs are durable, rarely fail, ~20–30+ years.
Photo Guide: Key Parts to Inspect and Replace
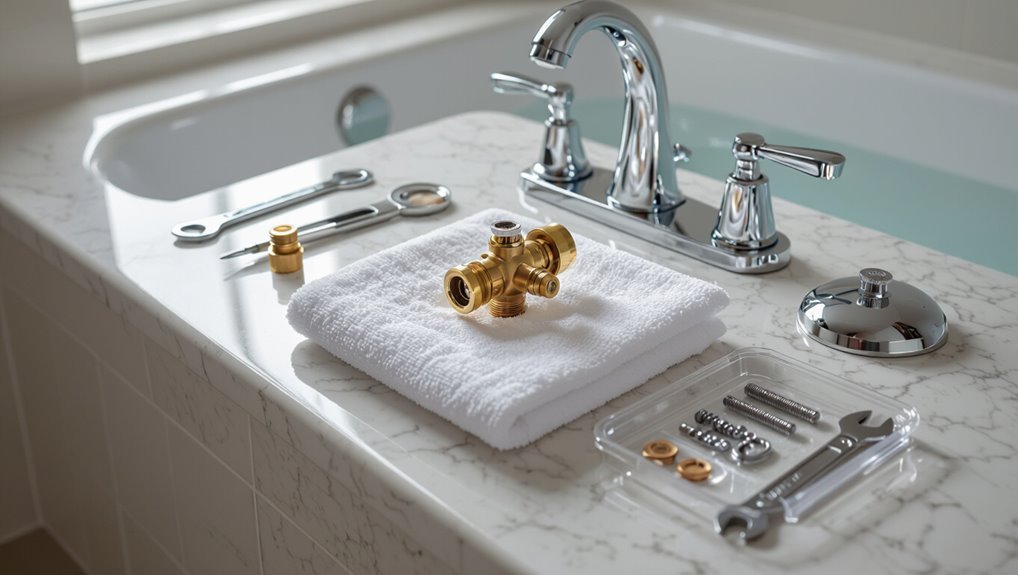
This photo guide focuses on the specific valve components most commonly responsible for leaks—cartridges, O-rings, seats, springs, and packing—and shows how to identify wear, corrosion, and improper seating.
Photographs label parts, illustrate common damage (cracked cartridges, flattened O-rings, scored seats, weakened springs, frayed packing), and compare serviceable versus replacement-ready conditions, guiding accurate part selection and confident replacement.
Conclusion
Concluding calmly, the craftsman can confidently curb continuous curtain-rail clatter by correcting the culprit: the shower’s valve. Careful consideration clarifies causes, cuts costly complications, and creates consistent cold-to-hot control. With correct components, cautious calibration, and clear-cut cleaning, coats of corrosion and creeping cracks can be combatted. Regular routine reviews reduce recurrence, restoring reliable running water. Ultimately, steady stewardship secures silent, smooth showers and sustainable satisfaction.