How to Get Rid of Mold Smell in Bathroom Fast: 10 Proven Fixes That Work
To quickly eliminate musty odors in your bathroom caused by hidden mold, focus on effective strategies such as improving ventilation, drying damp textiles, and using odor absorbers like baking soda or activated charcoal. Deep cleaning grout and tiles with a mixture of baking soda and vinegar, replacing damaged caulk, and applying hydrogen peroxide or bleach on suitable surfaces can also help. Consistently ventilating the space and checking seals will prevent future smells. Below is a detailed list of ten proven fixes to tackle mold odors effectively.
What Causes Mold Smell in Bathrooms
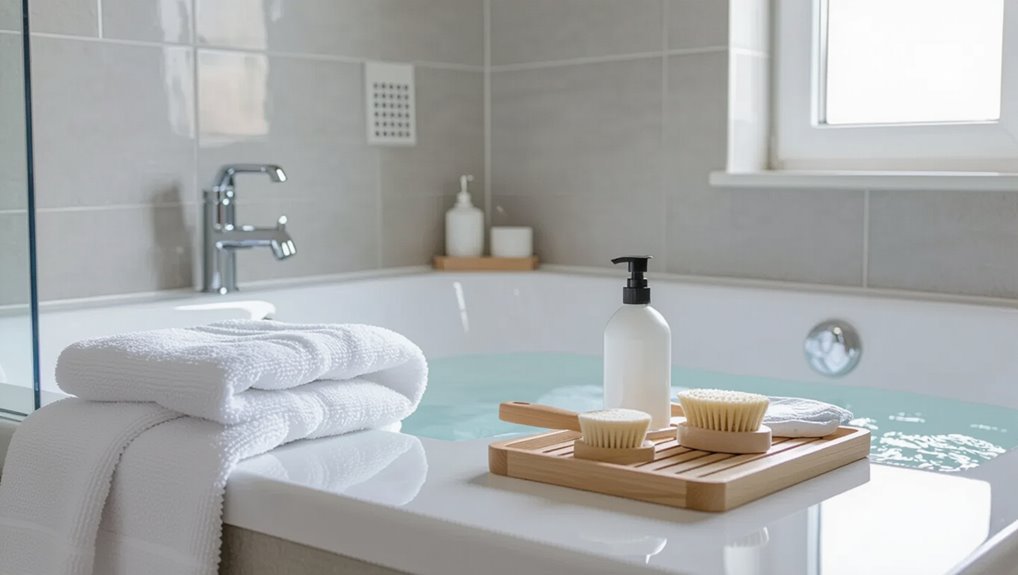
Musty bathroom odors often originate from hidden mold in walls, grout and caulk lines, or poorly cleaned vents.
High humidity and inadequate ventilation create the damp conditions that allow mold to thrive.
Distinguishing mold smell from other bathroom odors—such as sewer gas or stagnant water—helps pinpoint the correct remedy.
Common sources of musty odors (hidden mold, grout, caulk, vents)
Hidden mold, deteriorating grout and caulk, and poorly maintained vents are frequent culprits behind persistent bathroom odors.
Investigations often reveal hidden growth beneath tiles, cracked grout trapping moisture, failing caulk allowing seepage, and dusty ducts dispersing spores.
Advice on how to get rid of mold smell in bathroom targets these sources: clean or replace grout and caulk, inspect cavities, and service or clean ventilation.
How humidity and ventilation contribute to mold growth
Because bathrooms routinely combine warmth, moisture, and poor airflow, they create an ideal environment for mold to establish and produce musty odors.
High humidity sustains spores and promotes growth on porous surfaces. Inadequate ventilation traps moisture, extending wet periods after showers.
Consistent dampness accelerates colonization, increasing odor intensity and recurrence until humidity is controlled and airflow improved.
Identifying mold vs other bathroom odors
How can one tell whether a bathroom odor comes from mold or another source? A musty, earthy scent often signals mold or mildew; sour, ammonia-like smells suggest urine or organic buildup.
Visual signs (stains, black spots), persistent dampness, and worsening odor after drying indicate mold.
Temporary chemical or sewer odors usually fade or correlate with specific sources like drains or cleaning agents.
Quick Fixes to Remove Mold Smell Fast
Immediate actions focus on ventilating and thoroughly drying the bathroom to cut off moisture that fuels mold odors.
Temporary measures include using household deodorizers carefully to mask and neutralize smells without creating hazardous fumes.
A short-term cleaning routine—targeting visible mold, grout lines, and drains—can quickly reduce odors while longer-term solutions are arranged.
Immediate steps to ventilate and dry the space
Open windows and run the bathroom fan or a portable exhaust fan to force stale, damp air outside and speed drying.
Towels, rugs and shower curtains should be removed and laundered or dried outdoors.
Use a squeegee on shower walls and wipe surfaces with a microfiber cloth.
Position a dehumidifier or fan to circulate air until humidity drops and materials feel dry to the touch.
Using household deodorizers safely
Once surfaces are dry and air is moving, attention can turn to neutralizing persistent odors with household deodorizers used correctly.
Use odor absorbers (baking soda, activated charcoal) in bowls; avoid aerosol masking sprays that only hide smells.
Follow product labels, ventilate while using scented products, and keep deodorizers away from children and pets.
Replace absorbers regularly for continued effectiveness.
Short-term cleaning routine to neutralize odors
Tackle lingering bathroom mold odors quickly with a focused short-term cleaning routine that targets source areas and refreshes the air.
Begin by airing the room, then scrub visible mold with a diluted bleach or vinegar solution.
Wipe grout, shower doors, and sink seals; launder mildew-prone textiles in hot water.
Dry surfaces thoroughly, replace air filters, and use a short-run fan or dehumidifier to neutralize remaining smells.
10 Proven Methods That Eliminate Mold Smell (Actionable List)
The following list presents practical, evidence-based steps for removing mold odor from common bathroom surfaces.
Each method targets specific materials or problem areas to stop the smell at its source. Readers should choose methods appropriate for the surface and follow safety precautions.
- Deep-clean grout and tile with baking soda and vinegar.
- Disinfect silicone caulk and replace if needed.
- Use bleach safely on non-porous surfaces.
- Apply hydrogen peroxide for porous areas and steam-clean shower curtains and mats.
Method 1 Deep-clean grout and tile with baking soda and vinegar
Scrub grout and tile with a baking soda paste and white vinegar spray to remove mold and neutralize musty odors.
Apply paste, let sit 10–15 minutes, scrub grout lines with a stiff brush, rinse thoroughly, and repeat stubborn areas.
Guarantee good ventilation and dry surfaces completely to prevent recurrence.
Regular monthly cleaning keeps spores suppressed and reduces persistent bathroom mildew smells.
Method 2 Disinfect silicone caulk and replace if needed
Inspect silicone caulk around tubs, showers, sinks, and joints for black or discolored streaks—common signs of mold that can trap moisture and odors.
Disinfect affected caulk with appropriate cleaner and allow to dry fully.
If mold persists, remove and replace the silicone, ensuring surfaces are dry and sealed.
Proper replacement prevents recurrence and eliminates trapped musty smells efficiently.
Method 3 Use bleach safely on non-porous surfaces
After addressing caulk, attention moves to bleach for treating mold on non-porous surfaces like tile, porcelain, and glass.
Mix one cup bleach with one gallon water, ventilate well, and wear gloves and eye protection.
Apply, wait 10–15 minutes, scrub with a stiff brush, then rinse thoroughly.
Never mix bleach with ammonia or acids; store safely and dispose of diluted solution.
Method 4 Apply hydrogen peroxide for porous areas
Apply hydrogen peroxide to treat mold in porous materials such as grout, wood trim, and fabric, where bleach cannot penetrate; its oxidizing action breaks down mold spores and deodorizes without leaving harmful residue.
Use 3% solution, spray, let sit 10–15 minutes, scrub with a brush, then blot and air-dry. Repeat if needed.
Ventilate and wear gloves and eye protection.
Method 5 Steam-clean shower curtains and mats
Following hydrogen peroxide treatment for porous surfaces, attention should turn to fabrics and flexible fixtures that trap moisture: shower curtains and bath mats.
Steam-cleaning these items kills mold spores, loosens residue, and neutralizes odors without harsh chemicals. Use a handheld steamer or steam-cleaning service; launder machine-safe pieces afterward on hot with vinegar.
Thorough drying prevents recurrence.
Method 6 Install or repair exhaust fan for continuous ventilation
Install or repair an exhaust fan to provide continuous ventilation that removes humid air before mold can develop and odors can linger.
Guarantee the fan vents outdoors, not into attic space. Choose adequate CFM for bathroom size, install a timer or humidity sensor for automatic operation, and clean or replace clogged ducts and grills.
Proper airflow prevents condensation and suppresses mold growth.
Method 7 Use a dehumidifier and monitor indoor humidity levels
After ensuring proper exhaust ventilation, adding a dehumidifier provides steady control of bathroom moisture to prevent mold odors from returning.
Select a unit sized for the room, set humidity to 40–50%, and empty or use continuous drain.
Monitor with a hygrometer, run during and after showers, and maintain filters.
Consistent humidity control inhibits mold growth and reduces musty smells effectively.
Method 8 Clean and inspect plumbing fixtures and drains
Inspect and clean plumbing fixtures and drains to remove the organic film and trapped debris that feed mold and produce musty odors.
Remove and scrub drain covers, use a plumber’s snake or brush to clear biofilm, flush with hot water and a suitable cleaner, and check seals and P-traps for leaks or residue.
Replace damaged parts to prevent recurrence and lingering smells.
Method 9 Use activated charcoal or baking soda for ongoing odor absorption
Clearing and repairing plumbing reduces the organic matter that fuels mold odors, but odors can persist from residual spores and moisture.
Using passive absorbers like activated charcoal or baking soda provides ongoing capture of airborne musty compounds.
Place bowls of baking soda or charcoal pouches near vents, under sinks, and in cupboards.
Replace or recharge absorbers monthly and combine with ventilation for best results.
Method 10 Hire professional mold remediation for widespread infestations
Engage a licensed mold remediation professional when mold covers large areas, recurs despite DIY efforts, or when occupants experience health symptoms.
Experts assess hidden growth, test air and surfaces, contain affected zones, and apply remediation methods that reduce both spores and odor at the source.
Professionals also recommend repairs, moisture control, and clearance testing to confirm success, preventing recurrence and restoring a safe bathroom environment.
Step-by-Step Cleaning Plan to Remove Mold Smell (How-To)
A concise cleaning plan begins with a checklist of tools and supplies and clear safety precautions, including appropriate protective gear.
It then outlines sequential cleaning steps for the shower, tub, sink, and floor to remove mold and stains effectively.
Finally, the plan specifies post-cleaning ventilation and thorough drying routines to prevent recurrence.
Tools and supplies checklist
Essential tools and supplies for removing bathroom mold smell include protective gear (gloves, goggles, and an N95 mask), cleaning agents (white vinegar, hydrogen peroxide, a mild bleach solution if appropriate, and a mold-specific cleaner), scrubbing implements (stiff and soft brushes, microfiber cloths, and non-abrasive sponges), moisture-control items (dehumidifier or fan and replacement caulk or sealant), and disposal materials (heavy-duty garbage bags and paper towels).
Also include a spray bottle, bucket, grout brush, utility knife, mold test strips, and adhesive tape for isolating contaminated materials.
Safety precautions and protective gear
With the checklist assembled, attention shifts to safety precautions and proper protective gear before any cleaning begins.
The writer recommends gloves (nitrile or rubber), an N95 respirator or P100 for heavy mold, eye protection, and long sleeves.
Guarantee ventilation, turn off HVAC, and keep occupants, pets, and children away.
Inspect for allergies; seek professional remediation for extensive infestations.
Sequential cleaning steps for shower, tub, sink, and floor
Begin by tackling the most mold-prone areas in sequence—shower, tub, sink, then floor—so cleaning solutions and loosened spores do not spread to already treated surfaces.
Apply appropriate cleaner, scrub grout and fixtures with a brush, rinse thoroughly, and repeat stubborn spots.
Disinfect treated areas, remove residue, and dry surfaces with towels.
Finish by cleaning debris from drains and floor edges.
Post-cleaning ventilation and drying routine
After cleaning, confirm rapid ventilation and thorough drying to prevent lingering moisture that fuels mold regrowth; open windows and doors, run an exhaust fan or portable dehumidifier, and direct airflow across all treated surfaces until they are completely dry to the touch.
Monitor humidity (below 50%), wipe residual dampness with microfiber cloths, remove wet materials, and keep ventilation running for several hours to confirm complete drying.
How to Identify and Treat Hidden Mold Causing Odors
Hidden mold often announces itself through persistent musty odors, discolored paint or grout, bubbling drywall, or unusual condensation and dampness around vents and beneath tiles.
Practical inspection methods include visual checks, probing grout and caulk, and using moisture meters or borescopes when suspicious areas are inaccessible.
If concealed growth is confirmed, temporary containment with plastic sheeting and negative pressure, followed by targeted remediation or professional removal, prevents spread and reduces odors.
Signs of concealed mold behind walls, under tiles, and in vents
A persistent musty odor in a bathroom often signals mold growth in out-of-sight locations such as behind drywall, beneath tiles, or inside ventilation ducts.
Other signs include localized discoloration on grout or baseboards, peeling paint or wallpaper, unexplained allergy symptoms when occupying the room, higher humidity without visible leaks, and intermittent damp patches or bubbling finishes indicating hidden water intrusion and microbial growth.
Inspection techniques and when to use moisture meters
Several practical inspection techniques help pinpoint mold sources that cause persistent bathroom odors, with moisture meters serving as a key diagnostic tool when visible signs are absent.
Systematic checks include visual scans, odor tracing, and thermal imaging to locate damp spots.
Use a moisture meter when humidity readings or stains suggest hidden wetness; high moisture pinpoints areas needing further investigation or professional testing.
Temporary containment and remediation options
Containment should start immediately upon identifying suspected mold to prevent spores from spreading during inspection or cleanup.
Seal the area with plastic sheeting, use negative air pressure or exhaust fans, and restrict access.
For small spots, clean with detergent and low-strength bleach or commercial mold remover; for extensive or hidden growth, engage certified remediation professionals who will remove affected materials, dry the space, and verify moisture control.
Prevention Strategies to Keep Mold Smell from Returning
To prevent mold smell from returning, the article outlines practical daily habits that reduce moisture buildup and simple ventilation and airflow improvements.
It also covers choosing mold-resistant materials and sealants for long-term protection.
A concise maintenance checklist is provided to keep bathrooms consistently dry and inspected.
Daily habits to reduce moisture buildup
Consistent daily habits that limit humidity and speed drying are the most effective defense against a recurring mold smell in a bathroom.
Wiping wet surfaces, hanging towels to dry outside the room, running exhaust briefly after use, removing damp clothing, and keeping shower doors or curtains open to finish drying all cut moisture.
Promptly address small leaks and empty trays or containers that collect water.
Improving long-term ventilation and airflow
When simple daily habits aren’t enough, improving long-term ventilation and airflow provides a durable barrier against the excess humidity that feeds mold and its odor.
Install or upgrade exhaust fans rated for bathroom size, guarantee ducts vent outdoors, and use timers or humidity sensors.
Keep vents unobstructed, add a window or air-brick where feasible, and promote cross-ventilation to maintain consistently drier conditions.
Selecting mold-resistant materials and sealants
Choose materials and sealants designed to resist moisture and microbial growth to reduce the chance of mold returning.
Specify mold-resistant drywall, cement board, and water-rated paint in damp zones.
Use silicone or antimicrobial caulk for joints and around fixtures.
Select nonporous countertops and grout treated with sealant.
Prioritize products with proven mold-inhibition ratings and follow manufacturer installation guidance to maximize longevity.
Regular maintenance checklist for bathrooms
After installing mold-resistant materials and proper sealants, maintaining those elements prevents odors from returning.
A concise checklist guarantees ongoing dryness and cleanliness: regular ventilation, visual inspections, and spot cleaning reduce mold risk.
Promptly repair leaks and reseal grout when needed. Follow a simple schedule to catch issues early and preserve bathroom integrity.
- Check ventilation weekly
- Inspect seals monthly
- Clean grout biweekly
- Repair leaks immediately
Common Mistakes That Make Mold Smell Worse
A few common mistakes can make a bathroom’s mold odor persist or worsen.
Relying on air fresheners without removing mold, using bleach or mixing cleaners improperly, and ignoring small leaks or damaged grout all allow mold to survive and spread.
Recognizing and correcting these errors is essential before moving on to effective removal and prevention steps.
Overusing air fresheners without addressing root cause
Relying on air fresheners to mask bathroom mold smell only treats a symptom, not the source. They temporarily hide odors while moisture, mold colonies, and poor ventilation persist.
Overuse can desensitize occupants to warning signs and interfere with accurate smell-based detection. Effective remediation requires identifying leaks, improving airflow, and removing moldy materials rather than repeatedly spraying scent to conceal the problem.
Improper bleach use and unsafe mixing of cleaners
Mixing or misapplying bleach and other household cleaners often worsens bathroom mold problems and creates dangerous fumes.
Inexperienced use can drive spores deeper into porous surfaces, damage finishes, and produce toxic gases when combined with ammonia or acids.
Proper dilution, ventilation, and using EPA-approved mold cleaners or professional products are safer; never mix chemicals and follow label instructions to avoid health risks and persistent odors.
Ignoring small leaks and grout damage
Ignoring slow leaks and cracked grout allows moisture to persist behind tiles and under fixtures, creating an ideal environment for mold growth and the musty odors that follow.
Neglecting repairs lets mold colonize unseen cavities, making remediation harder and odors recur.
Promptly sealing grout, replacing damaged caulk, and fixing plumbing leaks prevents hidden dampness, reduces mold development, and eliminates persistent bathroom smells.
Product Recommendations and Comparison
A concise comparison of effective products helps readers choose the right tools to eliminate mold odor and prevent recurrence. The table below summarizes top options for cleaners, moisture control, and air treatment to guide selection. Recommendations focus on efficacy, suitability for bathrooms, and ease of use.
| Category | Top Picks | Notes |
|---|---|---|
| Grout & Tile Cleaners | Oxygen bleach, commercial mold removers | Use according to label; test small area first |
| Dehumidifiers & Fans | Compact dehumidifier, 80 CFM exhaust fan | Size room appropriately and vent to exterior |
| Odor Absorbers & Purifiers | Activated charcoal bags, HEPA + activated carbon purifier | Replace filters/charcoal regularly for best results |
Best cleaners for grout and tile
Several household and commercial cleaners stand out for removing mold stains and odors from grout and tile, each balancing effectiveness, safety, and cost.
Choosing among oxygen bleach powders, enzyme-based sprays, bleach-based liquids, and professional-strength cleaners depends on the severity of mold, surface material, and ventilation constraints.
Oxygen bleach is gentle yet effective. Enzyme sprays target organic residues. Bleach handles heavy infestations, and pros offer concentrated formulas for stubborn, porous grout.
Recommended dehumidifiers and exhaust fans
Many bathrooms benefit from a compact dehumidifier or a properly sized exhaust fan to control humidity and prevent mold odors before they start.
Recommended units include small-capacity dehumidifiers (20–30 pint/day) for enclosed spaces and ENERGY STAR-rated inline or ceiling exhaust fans sized by room volume (CFM).
Look for low-noise operation, automatic humidity controls, and easy-to-clean filters for reliable, maintenance-friendly performance.
Odor absorbers and air purifiers suited for bathrooms
When persistent damp odors resist cleaning, targeted odor absorbers and compact air purifiers provide the most effective next step for bathrooms, balancing odor control, space constraints, and moisture tolerance.
Recommend activated charcoal pouches, silica gel packs, and zeolite-based sachets for passive absorption.
For active purification, suggest small HEPA+carbon units with washable prefilters and moisture-resistant casings; compare runtime, CADR, and maintenance frequency.
When to Call a Professional for Mold Odor Problems
If mold odor persists after thorough cleaning, covers large areas, or is accompanied by visible growth or health symptoms, a professional remediation service should be considered.
A certified inspector will assess moisture sources, identify affected materials, and outline removal and treatment steps, often including containment and deodorization.
Homeowners should expect quoted costs, timelines, and any warranties or guarantees on work and follow-up testing before hiring.
Thresholds for hiring remediation services
Recognize that persistent or widespread mold odors often signal problems beyond routine cleaning and warrant professional assessment.
Hire remediation services when odors persist after cleaning, cover large areas, accompany visible mold growth, recur despite moisture control, or affect sensitive occupants.
Also consider professionals if hidden sources (behind walls, under flooring) are suspected or when DIY efforts fail to eliminate the smell safely.
What to expect from a professional inspection and treatment
Call a certified mold inspector to obtain a systematic assessment of the problem, including source identification, scope measurement, and risk evaluation.
The inspector documents visible mold, moisture intrusion, and hidden growth via moisture meters and borescopes, and may collect air or surface samples.
Recommended actions include targeted containment, removal of affected materials, HEPA vacuuming, antimicrobial treatments, and follow-up verification to confirm odor elimination and moisture control.
Typical costs and warranty/guarantee considerations
Costs for professional mold odor assessment and remediation vary widely based on scope, but homeowners can generally expect a baseline inspection fee followed by charges for targeted removal, repair, and clearance testing.
Typical total costs range from modest repairs to several thousand dollars. Warranties may cover labor or specific treatments for a limited period; verify scope, exclusions, and required maintenance to keep guarantees valid.
Maintenance Schedule and Quick Reference Checklist
A concise maintenance schedule outlines weekly, monthly, and seasonal tasks to keep bathroom humidity and mold growth in check.
A one-page checklist simplifies routine actions such as wiping surfaces, cleaning drains, and inspecting grout and vents.
A quick troubleshooting guide helps identify and address recurring smells before they become major problems.
Weekly, monthly, and seasonal tasks to prevent odors
Regular, targeted maintenance prevents mold smells from developing and keeps small problems from becoming costly repairs.
Weekly: wipe shower walls, empty drains, launder mats and shower curtains.
Monthly: deep-clean grout, inspect vents, clean exhaust fan and replace filters.
Seasonal: check and reseal grout/caulk, inspect roof and plumbing for leaks, service ventilation system.
Record tasks and dates for consistency.
Quick troubleshooting guide for recurring smells
When recurring bathroom odors appear despite routine cleaning, a concise troubleshooting checklist helps pinpoint causes and prioritize fixes.
Inspect ventilation, fans, and timers; verify exhaust ducting and airflow.
Check grout, caulk, drains, and trap seals for leaks or biofilm.
Dry surfaces, launder textiles, and run dehumidifiers.
Document findings, schedule targeted repairs, and repeat checks after remedial actions to confirm resolution.
Conclusion
Persistent bathroom odors prompt prudent people to pursue practical prevention. This piece proposes precise, proven procedures — from swift surface scrubs to strategic structural solutions — to purge putrid, persistent smells. Readers receive reliable recommendations, routine regimens, and remedial resources to remove mold, restore refreshment, and reduce recurrence. When remediation reaches its limits, professionals provide powerful provisions. Ultimately, persistent, proactive practices protect property, promote purity, and prevent perfidious, persistent problems.