How to Install a Freestanding Tub Drain: Step-by-Step Guide for DIYers
To install a freestanding tub drain, start by preparing the tub and floor, and choose the appropriate drain type (pop-up, grid, overflow, or non-overflow). Gather necessary tools, including wrenches, plumber’s putty or silicone, seal tape, tailpiece, and P-trap parts. Measure for alignment and dry-fit the components. Next, seal the drain flange and tailpiece, tighten them by hand, and then torque according to the provided instructions. Connect the trap and test for leaks. Regular maintenance with gentle cleaners will ensure optimal performance. For detailed guidance, follow further steps and troubleshooting tips.
Overview of Installing a Freestanding Tub Drain
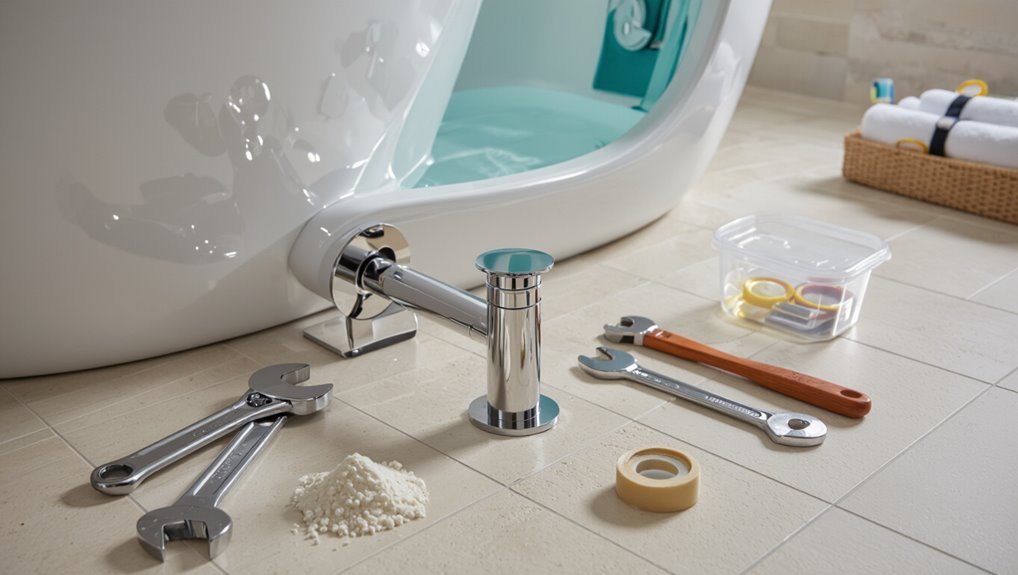
The overview summarizes the main steps: preparing the tub and floor, installing the tailpiece and pop-up or waste assembly, and connecting and testing the drain for leaks.
A concise checklist lists required tools and supplies—pipe wrenches, plumber’s putty or silicone, sealant, fittings, and any specialty parts—so installers can gather materials before starting.
Typical installations take a few hours for a competent DIYer or less than a day for a professional, with moderate difficulty and costs ranging from modest DIY expenses to several hundred dollars for parts and labor.
Quick summary of the installation process
Begin by positioning the freestanding tub and marking the drain alignment.
Then assemble the drain components and dry-fit them to confirm clearance.
Next, connect the tailpiece and P-trap to the rough-in, verify level and proper slope.
Apply sealant or plumber’s putty to joints, tighten fittings, test for leaks, and finalize trim.
This summarizes how to install freestanding tub drain.
Tools and supplies checklist
A concise set of tools and supplies guarantees a smooth freestanding tub drain installation: plumbing wrenches, adjustable pliers, pipe cutters, plumber’s putty or silicone, thread seal tape, appropriate tailpiece and trap assembly, slip-joint nuts and washers, drain flange and strainer, measuring tape, level, and safety gear such as gloves and eye protection.
- Verify parts fit the tub and waste.
- Prefer corrosion-resistant materials.
- Keep sealants and tapes accessible.
Typical time, difficulty level, and cost estimate
With parts confirmed and tools staged, typical freestanding tub drain installations take between 1.5 and 4 hours for a competent DIYer, while professionals commonly complete the job in 1 to 2 hours.
Difficulty rates as moderate: plumbing basics and pipe fitting required.
Parts cost ranges $75–$300; additional fittings or repairs raise totals.
Hiring a pro typically adds $150–$400 labor.
Types of Freestanding Tub Drains and Components
Freestanding tub drains come in several common styles—pop-up, grid, and designs for tubs with or without overflow—and each style affects installation and water control.
Materials and finishes, from brass to chrome or oil-rubbed bronze, should be chosen for durability and to match fixtures.
Key components include the flange, body, tailpiece, trap, seal, and any required overflow assembly, each of which must be compatible for a leak-free installation.
Common drain styles (pop-up, grid, overflow vs. non-overflow)
Several distinct drain styles are commonly used with freestanding tubs, each affecting operation, appearance, and compatibility:
- Pop-up drains allow opening/closing via a lever or push mechanism; often paired with overflow-equipped tubs.
- Grid drains are fixed, simple strainers for tubs without overflow; water drains continuously.
- Overflow vs. non-overflow: overflow drains prevent overfilling; non-overflow models require mindful filling and separate emergency protection.
Drain materials and finishes to consider
Because drains are both functional and visible, choosing the right materials and finishes is essential to performance, durability, and aesthetic harmony.
Brass and stainless steel offer corrosion resistance and longevity; brass accepts plating well.
Bronze and nickel provide warm or muted tones; chrome is bright and budget-friendly.
Powder-coated and PVD finishes increase scratch resistance.
Match finish to fixtures and maintenance preferences for best results.
Parts breakdown: flange, body, tailpiece, trap, seal, overflow assembly
Having selected a finish and material, attention turns to the individual components that make a tub drain function and fit the chosen aesthetic.
The flange secures and seals at the tub rim; the body channels water; the tailpiece connects to the trap; the trap prevents sewer gas; seals and gaskets guarantee watertight joints; an overflow assembly protects against overfilling and links to the drain.
Pre-Installation Planning and Measurements
Before any parts are assembled, measurements and site checks establish whether the tub and floor drain will align correctly.
The installer measures drain alignment and depth, verifies the plumbing rough‑in against local code, and notes any mismatches.
If offsets, inadequate trap distance, damaged piping, or unclear permits appear, a licensed plumber should be contacted.
Verifying tub and floor drain locations
At this stage, installers confirm the exact positions of the freestanding tub and the floor drain to guarantee proper alignment and drainage performance.
They verify clear floor access, check joist or subfloor obstacles, confirm planned tub orientation, and note surrounding fixtures or cabinetry.
Documented locations are marked on the floor plan and physically marked on-site to prevent misplacement during installation.
Measuring drain alignment and depth
Measure the drain alignment and depth precisely to guarantee the freestanding tub sits level and the waste connects without stress.
Determine centerline position from tub base, mark floor, then measure vertical distance from finished floor to trap inlet.
Account for drain flange thickness and any tub offset.
Record measurements, compare to drain assembly specs, and adjust support or extension needs before final positioning.
Checking plumbing rough-in and code requirements
Although the rough-in is already located, the installer must verify that pipe placements, trap orientation, and drain heights conform to local plumbing codes and the tub manufacturer’s specifications.
Confirm required clearances, venting, slope, and connection types.
Compare rough-in dimensions to the tub template. Document discrepancies and obtain necessary permits.
Adjustments must preserve code compliance and guarantee proper drainage before proceeding with installation.
When to call a plumber: red flags
Before moving forward, installers should stop and call a licensed plumber when measurements or site conditions raise doubts that could affect function or code compliance.
Engage a pro for incorrect drain location, insufficient floor support, unclear venting, nonstandard pipe sizes, damaged or corroded supply lines, unexpected obstructions, or when local code interpretations are uncertain.
Early consultation prevents costly rework and safety issues.
Preparing the Work Area
Before beginning work, the water supply should be turned off and the immediate area cleared of fixtures and personal items.
The tub and surrounding floor must be protected with pads or drop cloths to prevent scratches and damage.
All drain components should be dry-fitted to verify alignment and fit prior to final assembly.
Turning off water and clearing the space
Shut off the main water supply and open nearby faucets to drain residual pressure before removing any fittings; this prevents accidental flooding and makes the workspace safer.
Next, clear the immediate area of furniture, rugs, and obstacles to allow unobstructed access and movement.
Confirm good lighting and easy disposal for removed parts.
Keep a bucket and towels nearby for minor drips.
Protecting the tub and floor
With the space cleared and minor drips managed, attention shifts to protecting the tub and floor to prevent scratches, chips, and water damage during the drain installation.
Lay a soft, nonabrasive drop cloth or foam pads inside the tub.
Cover surrounding flooring with waterproof cardboard or rosin paper taped at seams.
Keep tools in a tray and use protective pads under ladders or stools.
Dry-fitting components before final assembly
Lay out all drain components and tools near the tub to verify fit and alignment before any sealant or soldering is applied.
The installer should assemble the tailpiece, flange, gasket, and trap connection dry, checking thread engagement, slip-joint clearances, and height relationships.
Adjust lengths, rotate components, and confirm access for wrenches. Record any required parts replacements before permanent assembly.
Step-by-Step Installation Procedure
The procedure proceeds in a clear sequence: first the drain components are assembled and sealed, then the flange and body are set into the tub and the tailpiece is routed to the floor drain or trap.
Next the P-trap and trap adapter are configured and installed to guarantee a watertight connection.
If the tub includes an overflow, the overflow assembly is secured as the final step.
Step 1 Assemble tub drain parts and apply sealant
Begin by organizing the drain components on a clean work surface and confirming that all parts match the manufacturer’s parts list.
Inspect gaskets, washers, screws, and the tailpiece for defects.
Lightly coat gasket faces and threaded connections with supplied sealant or plumber’s grease as specified.
Assemble components in sequence, hand-tightening initially, to guarantee correct fit before final torque per manufacturer instructions.
Step 2 Install drain flange and body into the tub
Position the drain flange over the tub’s drain opening so the gasket seats evenly, then insert the drain body from below while keeping the assembly aligned.
Hand-tighten mounting nuts to compress the gasket, ensuring no gaps. Verify flange sits flush with the tub rim.
Use a wrench for final snugness without over-torquing. Remove excess sealant and check for straight alignment.
Step 3 Connect tailpiece to the floor drain or trap
Connect the tailpiece to the floor drain or trap by aligning it with the drain outlet and securing the connection to prevent leaks.
Verify proper gasket or slip nut placement, hand-tightening first then final tightening with pliers.
Confirm straight, unobstructed alignment to avoid stress.
Test for leaks by filling the tub slightly and inspecting joints; tighten or reseat components if any seepage appears.
Step 4 Configure and install the P-trap and trap adapter
With the tailpiece secured, the installer measures and assembles the P-trap and trap adapter to guarantee a proper seal and correct trap arm slope.
Components are dry-fitted first, then trimmed or adjusted so the trap aligns straight into the floor drain or wall stub-out without binding.
Once fit is confirmed, solvent welds or compression fittings are tightened, seals checked, and all joints tested for alignment before leak testing.
Step 5 Secure overflow assembly (if applicable)
If the tub includes an overflow, the installer locates the overflow opening and assembles the overflow plate, gasket, and overflow elbow or tube according to the manufacturer’s instructions.
The installer aligns the gasket, hand-tightens mounting screws, and secures the elbow or tube to the drain body with appropriate fittings.
Excess sealant is wiped away. Components are checked for snug fit without final torque.
Step 6 Tighten connections and verify alignment
Begin by hand-tightening all visible fittings to seat gaskets and threads.
Then use the recommended wrench or socket to apply final torque in small, even increments according to manufacturer specs.
After torquing, confirm all coupling faces are parallel, seals compressed evenly, and exposed threads are flush.
Adjust alignment of tailpiece and waste arm so connections sit without strain before proceeding to final testing.
Step 7 Test for leaks and proper drainage
Activate the water supply and fill the tub incrementally while observing every joint and seal for drips, slow weeps, or moisture migration.
Drain several times, checking flow rate and ensuring no backups or gurgling.
Inspect underneath for hidden leaks at slip joints and trap connections.
Correct any leaks by tightening or reseating components, then repeat filling and draining until performance is consistently watertight.
Step 8 Final sealing and cosmetic finishing
Complete final sealing and cosmetic finishing to guarantee the installation is watertight and visually integrated with the bathroom.
Apply silicone sealant around the tub base and drain flange, smoothing joints for a uniform bead.
Reinstall trim and escutcheons, replace any disturbed tile or caulk lines, and clean residue.
Inspect for gaps, touch up paint or grout, and allow full cure before regular use.
Common Problems and How to Fix Them
Common issues after installing a freestanding tub drain include leaks at the tub flange or tailpiece, slow drainage, misaligned drain and floor trap connections, and noisy drains or siphoning.
Each problem can be diagnosed with targeted checks—inspecting seals and fittings for leaks, clearing or removing blockages for slow flow, realigning and shimming the drain assembly for trap fit, and testing venting or anti-siphon devices for noise.
The following sections explain practical fixes and preventive tips for each situation.
Leaks at the tub flange or tailpiece diagnosis and fixes
Inspecting leaks at the tub flange or tailpiece begins with isolating the source: water escaping where the drain meets the tub deck indicates a flange seal issue, while leakage further down the vertical tailpiece points to a loose connection, cracked washer, or split pipe.
Tighten slip nuts, replace deteriorated rubber washers or plumber’s putty, reseat or replace the flange gasket, and test for remaining leaks.
Slow drainage causes and remedies
Several frequent causes can slow a freestanding tub’s drainage, including hair and soap buildup in the tailpiece or trap, mineral deposits narrowing the pipe, a partially clogged vent, improper trap alignment, or an undersized drain assembly.
Remedies include removing and cleaning the tailpiece and trap, using a biodegradable enzyme drain cleaner for organic buildup, descaling with vinegar or CLR, and inspecting venting or replacing undersized components.
Misaligned drain and floor trap adjustment techniques
Misaligned freestanding tub drains and improperly set floor traps frequently cause leaks, slow drainage, and noisy plumbing; addressing them requires precise measurement, alignment, and sometimes minor modifications to the drain assembly or trap position.
Inspect alignment from tub outlet to floor flange, loosen connections, shim or trim tailpiece, adjust trap height and inlet angle, and retighten with proper seals.
Test for leaks and re-level as needed.
Dealing with noisy drains or siphoning
Addressing noisy drains and siphoning starts with identifying the sound source and whether negative pressure is drawing water from the tub trap.
Inspect venting and trap seals for leaks or blockages. Restore proper vent function, add an air admittance valve if needed, and secure loose waste fittings.
If gurgling persists, clear downstream obstructions or consult a plumber to prevent trap loss and odors.
Alternative Drain Options and When to Use Them
The section compares freestanding drains with built-in floor drains to highlight differences in installation complexity, sealing, and accessibility.
It also outlines when an adapter can be used to tie a freestanding unit into existing plumbing and what to evaluate for compatibility.
Finally, it reviews options for tubs without overflow, including integral pop-up drains, external leak protection, and required code considerations.
Freestanding drain vs. built-in floor drain comparison
While both freestanding and built-in floor drains serve to clear bathtub water, they differ in installation, aesthetics, and maintenance requirements. Freestanding drains suit minimal impact installs and show plumbing; built-in drains blend with flooring and require rough-in work. Choose based on access, style, and maintenance preference.
| Feature | Freestanding | Built-in |
|---|---|---|
| Installation | Easy | Complex |
| Aesthetics | Visible | Integrated |
| Maintenance | Accessible | Concealed |
Using an adapter for existing plumbing
Consider using a threaded or slip-fit adapter when a freestanding tub must tie into existing drain lines without reworking the rough-in.
Adapters bridge mismatched pipe sizes and materials, simplifying connection to PVC, ABS, copper, or cast iron.
Choose type and seal compatible with local codes, guarantee proper slope and support, and test for leaks.
Use corrosion-resistant fittings and accessible unions for future service.
Options for tubs without overflow
Often overlooked, tubs without an overflow require alternative drain strategies that prioritize capacity, user safety, and code compliance.
Options include remote floor-mounted overflows, integral drain/overflow systems built into the floor or trim, and electronic shutoff valves tied to level sensors.
Selection depends on local codes, desired fill control, installation complexity, and emergency fail-safes; professional consultation is recommended for compliance.
Maintenance and Long-Term Care
Routine cleaning to prevent hair and soap buildup helps keep the drain flowing and reduces the need for repairs.
Periodic inspection of seals and connections can catch leaks or loosened fittings before they cause damage.
Components such as washers, gaskets, or the pop-up assembly should be replaced when wear or persistent leaks are observed.
Routine cleaning to prevent clogs
To keep a freestanding tub drain flowing freely, establish a simple, regular cleaning schedule that removes hair, soap scum, and mineral buildup before they turn into clogs.
Weekly removal of visible debris, monthly use of a gentle enzymatic cleaner, and occasional soft-bristle scrubbing of the drain opening prevent blockages.
Promptly address slow drainage to avoid more intensive cleaning later.
Inspecting seals and connections periodically
When inspecting a freestanding tub, attention to seals and connections prevents slow leaks and water damage; check the drain flange, tailpiece, and any slip-joint or threaded fittings for tightness and intact gasket material.
Visually examine for corrosion, mineral buildup, or hairline deterioration. Lightly hand-tighten fittings as needed, verify sealant remains continuous, and document findings for future comparisons during routine maintenance.
When to replace components
How often parts should be replaced depends on material, usage, and signs of wear: components that show corrosion, persistent leaks, brittle gaskets, or repeated clogging warrant replacement rather than repair.
Recommended intervals vary: rubber seals and gaskets every 3–7 years, pop-up assemblies when stiff or leaking, and metal parts when pitting or significant mineral buildup compromises function or safety.
Safety, Codes, and Best Practices
The section outlines essential local plumbing code considerations and when permits are required to guarantee the installation meets legal and safety standards.
It also covers practical steps to prevent water damage during installation, such as proper sealing, temporary shutoffs, and pressure-testing connections.
Finally, it highlights eco-friendly materials and water-saving fixtures to reduce long-term consumption and environmental impact.
Local plumbing code considerations and permits
Many jurisdictions require permits and adherence to local plumbing codes before installing a freestanding tub drain. Compliance affects safety, resale value, and liability.
Contractors or homeowners should verify permit requirements, approved materials, trap and venting specifications, and inspection schedules with the local building department.
Failure to obtain permits or meet code can lead to fines, forced modifications, or complications during property sale.
Tips for preventing water damage during installation
After confirming permits and code requirements, attention shifts to practical measures that prevent water damage during the freestanding tub drain installation.
Inspect and seal subfloor penetrations, use appropriate waterproof membrane around the tub base, apply plumber’s putty or silicone to fittings, test for leaks before finishing, slope drain connections correctly, protect nearby finishes with temporary barriers, and guarantee accessible cleanouts for future inspections.
Eco-friendly materials and water-saving tips
While prioritizing safety and code compliance, installers should select eco-friendly materials and water-saving fixtures that reduce environmental impact without compromising performance.
Recommend low-flow tub fillers, durable lead-free metals, recycled brass components, and biodegradable sealants.
Verify local codes for approved materials, install thermostatic or pressure-balanced valves to limit excessive flow, and educate homeowners on shorter fills and efficient bathing habits to conserve water.
Troubleshooting Checklist Before Calling a Pro
Before contacting a professional, the homeowner should run a few quick checks such as confirming shutoff valves, inspecting visible connections for leaks, and testing drain operation.
They should also collect useful information for the plumber visit, including clear photos of the tub and fittings, exact measurements of pipe and drain openings, and any part numbers from loose components.
Having this information ready can shorten diagnosis time and reduce labor costs.
Quick checks to perform yourself
Inspect the visible components of the freestanding tub drain and surrounding fittings to identify obvious issues that can be corrected without professional help.
Check for loose connections, mineral buildup, and obvious leaks. Test stopper operation and listen for unusual gurgling. Confirm floor-level drainage and accessible cleanouts.
- Tighten loose nuts and fittings.
- Remove and clean stopper.
- Clear visible debris from trap.
Information to gather for a plumber visit (photos, measurements, part numbers)
When preparing for a plumber visit, the homeowner should compile clear photos, exact measurements, and any visible part numbers to speed diagnosis and reduce on-site time.
Include: close-up images of the drain, underside trap, and surrounding fittings; pipe diameters, thread types, and distance to floor/centerline; model or stamped numbers on fixtures; a brief note of symptoms and any prior repairs or parts purchased.
Additional Resources and Parts Reference
A concise list of recommended parts and reputable brands (including fittings, seals, and waste assemblies) helps readers choose compatible components.
Links to useful how‑to videos and manufacturer installation guides provide step‑by‑step visuals and specification details.
A brief glossary of common drain installation terms clarifies terminology used earlier in the guide.
Recommended parts and brands (types to look for)
Because the drain assembly is the tub’s most common failure point, selecting durable, compatible parts and reputable brands is essential.
Look for solid brass drains, stainless steel pop-up mechanisms, and silicone gaskets rated for plumbing. Prioritize universal-fit flanges and corrosion-resistant finishes.
Consider manufacturer warranties and spare-part availability.
- Solid brass drains
- Stainless pop-up assemblies
- Silicone/high-temp gaskets
Useful how-to videos and manufacturer guides
Although hands-on experience is invaluable, accessing targeted how-to videos and manufacturer guides provides step-by-step clarity and parts-specific details that reduce installation errors.
Trusted sources include official manufacturer manuals, professional plumber channels, and step-focused DIY videos. Review compatibility, torque specs, and warranty instructions before starting.
- Manufacturer installation PDFs
- Certified plumber video tutorials
- Product-specific parts walk-throughs
Glossary of common drain installation terms
Clear definitions of drain-installation terms help installers, DIYers, and suppliers communicate precisely about parts, tools, and procedures.
This glossary defines common terms: tailpiece, trap, flange, stopper, overflow, pop-up, slip-joint, compression fitting, gasket, P-trap, trap adapter, escutcheon, nipple, cleanout, and thread sealant.
Brief, standardized definitions reduce errors, aid purchasing, and guarantee proper assembly and waterproofing during freestanding tub drain installation.
Conclusion
Installing a freestanding tub drain completes both function and form, but careful planning and correct parts are essential. One compelling statistic: DIYers perform roughly 60% of home plumbing tasks themselves, yet studies show nearly 25% of DIY plumbing projects require professional correction. This underscores the value of following precise measurements, manufacturer instructions, and local codes. With proper preparation, regular maintenance, and attention to troubleshooting cues, most installations remain reliable and long-lasting.