
How to Detect Water Leaks in Walls: 9 Quick Tests and When to Call a Pro
To detect water leaks in walls, homeowners should look for visible signs such as stains, peeling paint, damp patches, musty odors, and mold growth. Conduct quick tests like touch checks, tissue blotting, moisture meter readings, infrared scans, listening for water flow, performing a water meter shutoff test, and using dye checks at fixtures. Additionally, inspect electrical outlets and trace potential sources in specific areas like bathrooms, kitchens, and roofs. If leaks are persistent, widespread, or related to electrical issues, it’s essential to call a professional. Continue reading for detailed step-by-step tests and guidance on when to seek expert help.
How to Tell If a Wall Has a Water Leak Right Now
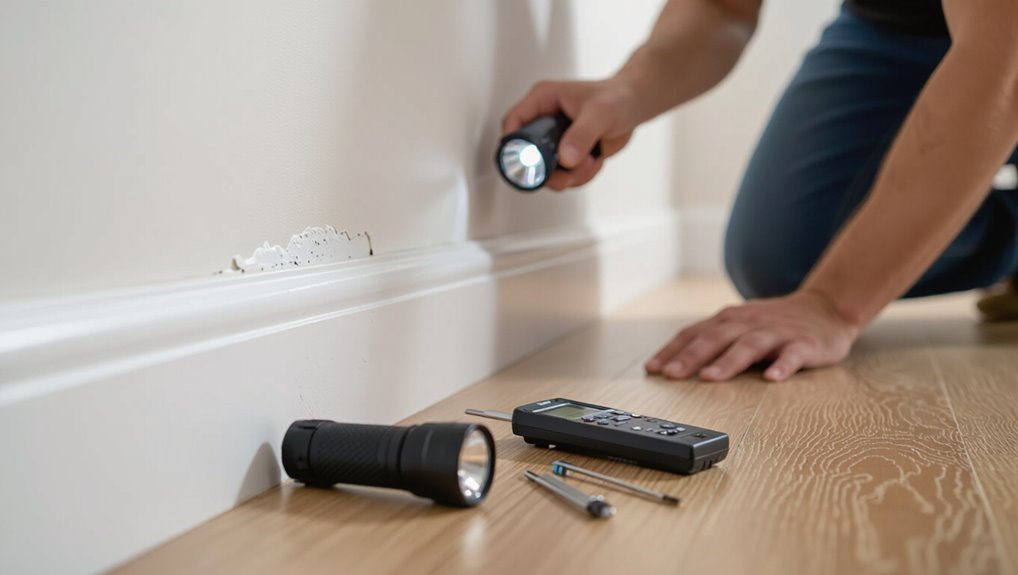
Signs of an active wall leak often include visible water stains, bubbling or peeling paint, and damp or discolored plaster.
A musty odor or visible mold growth can also indicate ongoing moisture even if wetness is not immediately apparent.
For finished walls without obvious damage, subtle changes in wallpaper, soft spots when pressed, or fresh staining along seams can reveal hidden leaks.
Common visible signs of wall leaks
A damp patch spreading across paint or wallpaper often marks the earliest visible indication of a wall leak.
Discoloration, bubbling or peeling paint, and warped or buckled drywall follow. Staining that darkens when wet, streaks beneath ceilings, and salt-like residue indicate ongoing moisture.
Prompt inspection helps how to detect water leaks in walls and limits structural damage and repair costs.
Odor and mold indicators to watch for
How can unusual smells and visible mold growth reveal an active wall leak? A musty, persistent odor often signals trapped moisture and microbial activity.
Visible mold—spots, fuzzy colonies, or discoloration—indicates prolonged dampness and possible structural compromise.
Rapid recurrence after cleaning, spread beyond surface, or concentrated odor near walls suggests ongoing leakage and warrants moisture measurement or professional inspection to locate the source.
Subtle signs: paint, wallpaper, and plaster changes
Frequently, changes in paint, wallpaper, or plaster provide the earliest visible clues of an active wall leak.
Discoloration, bubbling, peeling edges, or localized sagging indicate moisture intrusion. Sudden streaks or halos differ from age-related fading.
Fresh staining that worsens after use of sinks or showers suggests an active source. Document progression and consult a professional if signs enlarge or reappear after drying.
How to detect leaks behind finished walls without tools
Wondering whether a wall is actively leaking without instruments, one can rely on immediate sensory checks and simple observations.
Feel for cool, damp patches; sniff for musty or mildew odors; inspect baseboards, trim, and flooring for warping or staining; press on suspect areas for softness.
Listen for running water within walls during quiet moments.
Note sudden mold growth or recurring dampness.
9 Quick Tests to Detect Water Leaks in Walls
The following quick tests give a systematic way to spot leaks before they worsen.
- Visual inspection checklist for each room
- Touch and moisture-feel test
- Paper towel or tissue blot test
- Using a moisture meter and infrared scan basics.
Each test is brief, repeatable, and suited to different signs and tools so the reader can prioritize which to use.
Visual inspection checklist for each room
When inspecting each room for wall leaks, a systematic visual checklist helps guarantee no signs are overlooked: scan walls and ceilings for discoloration, stains, peeling paint, or bubbling wallpaper; note warped baseboards, swollen trim, or mortar gaps; inspect around windows, doors, and plumbing fixtures for stains or rust; examine closets and behind furniture; document locations, size, and progression of any findings for follow-up.
Touch and moisture-feel test
Feel surfaces for coolness, dampness, or a slight tackiness that signal trapped moisture within walls.
Use bare hands to compare suspect areas with adjacent dry sections. Check corners, behind appliances, near plumbing runs and window frames.
Persistently cool or clammy spots suggest evaporation from hidden wetting.
Repeat testing at different times and after dry weather to confirm consistent moisture presence.
Paper towel or tissue blot test
Press a folded paper towel or tissue gently against suspect wall areas to blot for hidden moisture; a quick, localized test reveals dampness that touch alone can miss.
Hold for several seconds, then inspect for wet spots or discoloration.
Repeat across multiple locations and compare results.
Note gradual dampening indicating slow leaks versus immediate saturation from active seepage.
Record findings for follow-up.
Using a moisture meter: how-to and ideal readings
A handheld moisture meter provides a fast, objective way to pinpoint dampness behind walls by measuring either surface moisture with a non‑contact sensor or internal moisture with pin probes that penetrate the drywall.
The user scans suspect areas, compares readings to baseline dry levels (typically under 5–12% for wood-based materials), and flags higher values for monitoring or professional inspection.
Infrared thermometer or thermal camera scan basics
Many homeowners and inspectors rely on an infrared thermometer or a thermal camera to perform quick, noninvasive scans for hidden leaks, detecting temperature differences caused by moisture’s evaporative cooling or altered thermal conductivity.
Operators sweep surfaces slowly, noting cool spots or unusual thermal patterns. Readings guide targeted moisture meter checks or opening sections for inspection.
Ambient conditions and insulation can affect results; interpret cautiously.
Listening test: how to hear hidden drips or running water
Listen closely: a steady, faint drip or the muted rush of water behind a wall can reveal a concealed leak long before stains appear.
Use quiet, still conditions, press an ear against the wall or use a mechanic’s stethoscope to localize sound. Move systematically, noting pitch and rhythm.
Persistent running sounds suggest active flow requiring prompt inspection; intermittent drips indicate slower leaks to monitor or repair.
Water meter test to isolate plumbing leaks
Sound clues can guide where to focus, but a water meter test provides objective confirmation of a hidden plumbing leak.
Shut off all fixtures and appliances, record the meter reading, then wait thirty minutes without water use. If the meter moves, a leak exists.
Repeat after isolating zones or turning off the main to determine whether the leak is internal or on the supply side.
Dye test for toilets, shower pans, and hidden fixtures
Use a few drops of food coloring or a commercial dye tablet to reveal leaks around toilets, shower pans, and concealed fixtures.
Add dye to tanks, pans, or accessible supply lines, then avoid flushing or running water for 15–30 minutes.
Inspect drains, flange seals, and adjacent wall or floor surfaces for colored staining.
Repeat with different access points if initial test is inconclusive.
Electrical outlet and switch inspection for moisture
After performing dye checks on plumbing fixtures, attention should shift to electrical outlets and switches, which often reveal hidden moisture through staining, corrosion, or loose-fitting covers.
Inspect covers, faceplates, and wall around devices for discoloration, rust, or swelling. Smell for mustiness.
Test outlets carefully with a noncontact voltage tester; if moisture is suspected, cut power and call a licensed electrician to assess and repair.
Room-by-Room Leak Detection Tips
Room-by-room inspection highlights where leaks most often originate and which targeted tests to run.
Bathrooms typically show problems at fixtures, grout, and behind tubs; kitchens and laundry areas require checks of appliances, supply lines, and drain connections.
Exterior walls, basements, ceilings, and upper floors each present distinct clues—siding and foundation issues outside, and staining or soft spots that indicate vertical water migration inside.
Bathrooms: common leak sources and targeted tests
Bathrooms present a high concentration of potential leak sources—fixtures, drains, shower enclosures, grout and sealants, and concealed supply and waste lines—so focused tests and visual checks are essential to pinpoint issues before they cause structural damage.
Inspect grout and caulk for gaps, run showers and watch ceilings/walls for drip patterns, check under sinks for dampness, test toilet seals for slow leaks, and monitor water meter while isolating fixtures.
Kitchens and laundry rooms: appliance- and pipe-related checks
Focus on appliance connections and accessible piping when checking kitchens and laundry rooms, since dishwashers, refrigerators with ice makers, washing machines, sinks, and their supply and drain lines are common leak origins.
Inspect hoses, valves, clamps, and drain connections for corrosion, soft spots, or residue.
Run appliances while observing for drips, monitor water meters for unseen flows, and replace aging flexible lines promptly.
Exterior walls and basements: foundation and siding leak clues
How can exterior walls and basements betray the presence of hidden leaks?
Exterior clues include peeling paint, soft siding, warped trim, pooled soil, or efflorescence on foundation walls.
Basement signs: damp concrete, musty smell, white mineral streaks, mapped stains, or rising water during heavy rain.
Check grade, gutters, downspouts, and flashing; document patterns and call a pro if persistent or structural damage appears.
Ceilings and upper floors: diagnosing vertical migration of water
When water travels downward from upper levels, it often leaves a trail of subtle, room-specific clues—staining, sagging, or recurring damp spots—that point to the source above.
Inspect attic, bathroom, and laundry room plumbing, roof penetrations, and HVAC lines.
Trace stains upward, probe for soft ceiling drywall, check insulation for wetness, and monitor after dry weather.
Call a pro for concealed or structural damage.
How to Confirm and Narrow Down the Leak Location
The next step is to confirm the source by sequentially isolating fixtures and plumbing branches while observing changes.
Readings from moisture meters and thermal cameras are interpreted to refine the likely path and extent of the leak.
If noninvasive methods fail, targeted destructive checks (trim, baseboard, drywall) are performed and all findings are documented for repairs or insurance.
Sequential isolation of plumbing fixtures and branches
Begin by systematically shutting off and testing individual fixtures and branch lines to pinpoint the source of a wall leak.
One at a time, close valves, observe meter and wall for changes, then restore service.
Isolate fixture groups (bathroom, kitchen, laundry) and branch risers.
Record which shutoffs affect leak activity to narrow the affected pipe segment before opening walls or calling a plumber.
Interpreting moisture meter and thermal camera patterns
Several diagnostic passes with a moisture meter and thermal camera often reveal distinct patterns that pinpoint active leaks versus residual dampness.
Technicians map hotspots, moisture gradients, and thermal anomalies to trace flow paths, noting vertical streaks for gravity-driven leaks and concentrated pockets for slow feed points.
Correlating sensor readouts with visible stains refines location confidence and directs targeted noninvasive follow-up testing.
When to perform destructive checks (trim, baseboard, drywall)
After mapping moisture gradients and thermal anomalies, technicians must decide when noninvasive data are insufficient and targeted destructive checks—removing trim, baseboards, or sections of drywall—are warranted.
Controlled opening verifies hidden wet cavities, reveals affected framing or insulation, and differentiates active leaks from historic stains.
Decisions weigh extent of damage, access points, risk of spreading contamination, and homeowner consent before proceeding.
Documenting findings for repair or insurance purposes
Compile clear, chronological documentation that ties observations, measurements, and actions to specific locations and times.
Photograph stains, wet areas, and tools used; include dates, room names, and measuring references (e.g., distance from corner, height).
Record moisture readings, test results, and any temporary fixes.
Note witness statements and contractor visits.
Preserve originals and create backups for insurance or contractor review.
Temporary Fixes and Immediate Safety Steps
Upon confirming a leak, the homeowner should immediately shut off water at the nearest valve and, if necessary, the main supply to stop active flow.
Temporary sealing—such as plumber’s tape for pipes, waterproof patches for drywall, or waterproof sealant for masonry—can limit further damage while a permanent repair is arranged.
After containment, affected areas must be dried, treated to inhibit mold growth, and checked for electrical hazards before reentering or restoring power.
Emergency shutoffs and stopping active leaks
Shut off the main water supply immediately when a wall leak is discovered to limit damage and prevent flooding; locate the home’s shutoff valve—typically near the water meter, where the service line enters the building, or in a basement/utility area—and turn it clockwise until fully closed.
Then drain faucets, unplug electrical circuits in affected areas, contain runoff with buckets, and document the leak for repairs.
Temporary sealing methods for different wall materials
Begin by evaluating the wall material and the leak’s source to choose an appropriate temporary seal that limits water ingress and reduces further damage.
For drywall, use waterproof tape or quick-setting patch compound.
For plaster, apply adhesive-backed membrane or silicone sealant.
For brick or masonry, use hydraulic cement or exterior-grade caulk.
Monitor the repair and avoid electrical contact until a professional assesses permanent fixes.
Drying and mold-prevention steps after a leak is found
After containing the immediate source of water with a temporary seal, attention turns to removing moisture and preventing mold growth.
Open windows, run fans and dehumidifiers, and remove wet insulation and drywall sections.
Dry structural cavities thoroughly within 48–72 hours.
Apply antimicrobial treatments to affected surfaces, dispose of contaminated materials, and monitor for musty odors or staining.
Schedule professional remediation if mold persists.
Electrical safety around wet walls
If water has reached electrical outlets, switches, or wiring, immediate precautions must be taken to prevent shock or fire: shut off power at the main breaker and avoid touching wet walls or fixtures.
Call a licensed electrician before restoring power. Use battery-powered lights for inspection.
Do not operate appliances connected to affected circuits. Document damage for insurance and professional assessment.
When to Call a Professional Plumber or Water Damage Specialist
Visible mold growth, rapidly spreading stains, sinking floors, or loss of water pressure are red flags that warrant immediate professional intervention.
Depending on the source and damage—plumber for pipes, restoration specialists for remediation, roofers for overhead leaks, or structural engineers for compromised framing—different experts may be required.
Professionals typically perform leak location, moisture mapping, infrared scans, and structural assessments.
Homeowners should ask about credentials, insurance, estimated scope and cost, and remediation timelines before hiring.
Red flags that require immediate professional help
A sudden surge in water-related signs—burst pipes, rapidly expanding wet patches, sewage odors, or electrical sparking near damp areas—warrants immediate professional intervention.
Other urgent red flags include visible mold growth spreading quickly, structural sagging or cracking, persistent flooding after shutoff, contaminated water staining, and loss of water pressure combined with unexplained meter activity.
These indicate active, hazardous damage requiring expert assessment and remediation.
Which specialist to call: plumber, restoration, roofer, or structural engineer
When should a homeowner call a professional plumber or water-damage specialist?
A plumber is appropriate for suspected pipe, fixture or sewer leaks.
Water-damage/restoration pros handle soaked walls, mold growth, and drying/mitigation.
Hire a roofer for leaks tracing to the roof.
Engage a structural engineer when framing, foundation, or load-bearing elements show significant deterioration or movement after prolonged water exposure.
Typical diagnostic services professionals provide
Diagnosing wall water damage typically begins with a thorough inspection combining visual assessment, moisture measurement, and leak tracing to pinpoint sources and evaluate the extent of intrusion.
Professionals perform infrared scanning, bore-scope checks, pressure tests, dye tracing, and appliance line inspections. They document findings, assess mold risk, recommend targeted repairs, and provide drying plans, moisture monitoring, and cost estimates for remediation.
Questions to ask a contractor before hiring
Why hire a contractor for wall water damage rather than attempt DIY fixes?
A contractor brings diagnosis, containment, remediation, and documentation expertise.
Ask about licensing, insurance, experience with similar leaks, scope and timeline, moisture testing methods, mold remediation protocols, references, warranty, cost breakdown, and subcontracting.
Request written estimates and a clear communication plan before engagement.
Repair Options and Expected Costs
Repair options vary by severity, from minor fixes to major reconstruction, each with differing timeframes and price ranges. The table below summarizes typical categories and examples to help set expectations:
| Severity | Typical Repairs |
|---|---|
| Minor | Patching, sealants, localized plumbing fixes |
| Moderate | Pipe replacements, drywall repair, mold remediation |
Costs can range from small DIY expenses to thousands for structural work and possible insurance involvement.
Minor repairs: patching, sealants, and localized plumbing fixes
Begin with small, targeted measures: patching drywall, applying sealants around penetrations, and addressing minor plumbing faults can stop most localized leaks before they worsen.
Homeowners can use waterproof caulk, epoxy putty for pinhole leaks, and small replacement fittings for loose connections.
Typical costs range from inexpensive DIY materials to modest handyman fees; successful minor fixes prevent escalation and reduce immediate damage.
Moderate repairs: pipe replacements, drywall repair, and mold remediation
When small patches and sealants fail to stop recurring moisture or inspections reveal hidden damage, more extensive measures become necessary.
A licensed plumber may replace compromised pipes or fittings; drywall with mold or structural rot is removed, dried, and replaced.
Mold remediation includes containment, HEPA cleaning, and antimicrobial treatment.
Expect moderate costs reflecting labor, materials, and testing, varying by extent and location.
Major repairs: wall reconstruction, structural fixes, and insurance claims
Addressing severe wall damage often requires full reconstruction, structural reinforcement, and coordinated insurance navigation to restore safety and habitability.
Professionals assess load-bearing integrity, remove compromised framing, and replace insulation, wiring, and finishes.
Costs vary by extent: partial rebuilds to full structural repairs can reach thousands.
Documentation, contractor estimates, and timely insurer communication streamline claims and guarantee approved, code-compliant restoration.
Preventing Future Wall Leaks
Preventing future wall leaks begins with a routine maintenance checklist for plumbing and exterior elements to catch wear and damage early.
Adding targeted waterproofing, improving ventilation, and fixing flashing or siding weak points reduces moisture intrusion.
Ongoing monitoring with scheduled inspections and smart-home sensors helps spot new leaks before they cause significant harm.
Routine maintenance checklist for plumbing and exterior
Regular inspections of plumbing and exterior elements form the foundation of preventing wall leaks, focusing on measurable checks and timely fixes to stop small issues from becoming major damage.
Inspect fixtures, valves, hoses, visible pipes, and water meters monthly.
Clear gutters, downspouts, and grading quarterly.
Test sump pumps and shutoff valves semiannually.
Document findings, schedule repairs, and replace aging components proactively.
Waterproofing and ventilation improvements
While surface repairs stop immediate leaks, long-term protection relies on targeted waterproofing and improved ventilation to keep walls dry and structural materials intact.
Apply exterior sealants, flashing, and membrane barriers at vulnerable junctions.
Improve attic and wall cavity airflow with vents and baffles to reduce condensation.
Guarantee proper grading and guttering to divert water away.
Regularly inspect waterproofing for deterioration.
Monitoring strategies and smart-home sensors
Many homeowners now rely on continuous monitoring and smart sensors to catch leaks early and prevent wall damage.
Wireless water detectors, moisture probes, and smart water shutoff valves integrate with home hubs and apps to provide real‑time alerts and automatic responses.
Regularly tested sensors, strategic placement near plumbing and appliances, and cloud backups guarantee reliable detection and faster mitigation, reducing repair costs and mold risk.
Signs of Mold and Long-Term Damage to Watch For
Signs of mold should be noted promptly, as certain species pose health risks and may warrant professional testing when widespread, recurrent, or when occupants are symptomatic.
Prolonged water exposure can compromise studs, joists, and drywall, leading to structural weakening that is not always visible on the surface.
When evaluating damage, professionals should weigh the extent of rot and contamination, cost of repairs, and longevity to determine whether targeted repair or full replacement is the safer, more economical choice.
Health risks and when mold testing is warranted
Because prolonged moisture in walls creates conditions conducive to mold growth, occupants can face respiratory irritation, allergic reactions, and exacerbation of asthma or other chronic lung conditions.
Mold testing is warranted when visible growth, persistent musty odors, unexplained health symptoms, or extensive water intrusion occur.
Professional assessment is recommended for vulnerable occupants, unclear contamination scope, or when remediation costs and health risks justify laboratory confirmation.
Structural issues from prolonged water exposure
Prolonged water exposure progressively undermines a building’s materials and systems, leading to visible and hidden damage that can compromise safety and require costly repairs.
Timber rot, warped floors, and delaminated drywall signal structural decline. Corroded metal fasteners and weakened plaster indicate loss of integrity.
Persistent damp accelerates mold growth and pest infestation, reducing load capacity and risking collapse if unchecked.
Repair vs. replacement decision guide
When structural elements show ongoing decay or repeated moisture intrusion, property owners must weigh repair against full replacement by evaluating mold presence and the extent of long-term damage.
Inspect for widespread hidden mold, compromised framing, sagging floors, or persistent odors.
If remediation cannot restore structural integrity or mold recurs despite fixes, replacement of affected assemblies and materials is the safer, longer-lasting option.
Tools and Products Recommended for DIY Leak Detection and Temporary Repair
The following tools and products help identify and temporarily address wall leaks with practical, home-ready options. Recommended items include:
- Moisture meter, thermal camera, inspection mirror
- Sealants, patch kits, plumber’s tape
- Protective gloves, eye protection, respirator
- Fans, dehumidifiers, wet/dry vacs
A brief review of selection criteria and basic usage will guide safe, effective DIY action.
Essential diagnostic tools (moisture meter, thermal camera, inspection mirror)
Identify hidden moisture and its source efficiently with a few targeted diagnostic tools that are affordable and easy for a DIYer to use.
A pin or pinless moisture meter quantifies dampness in drywall and studs. A handheld thermal camera reveals cold spots indicating leaks or insulation gaps.
An inspection mirror and flashlight let one examine voids behind trim or under sinks without demolition.
Temporary repair supplies (sealants, patch kits, plumber’s tape)
Stock a small kit of temporary repair supplies to stop active leaks and stabilize wet areas until permanent fixes can be made.
Include silicone sealant, waterproof tape, plumber’s tape for threaded joints, and a drywall patch kit.
Add epoxy putty for pipe cracks and adhesive-backed flashing for seams.
Label contents and store with instructions for short-term application pending professional repair.
Safety gear and drying equipment recommendations
Personal protective equipment and drying tools are essential when locating and temporarily addressing wall leaks to protect occupants and limit water damage.
Recommended PPE includes gloves, safety glasses, respirator or dust mask, and waterproof boots.
Drying equipment: portable fans, dehumidifiers, wet/dry vacuums, moisture meters, and infrared thermometers.
Select appropriately sized, rated tools and follow manufacturer safety guidelines to prevent injury and secondary damage.
Sample Step-by-Step Check Sequence to Find a Hidden Wall Leak
Before any testing begins, the person should isolate utilities, wear protective gear, and document baseline conditions to guarantee safety and clear records.
They should follow a logical test order—visual inspection, moisture meter scans, pressure or dye tests, and thermal imaging—to narrow the source efficiently.
At each step they should note times, readings, and take dated photographs from multiple angles for professionals or insurance.
Prep and safety steps before testing
Several clear safety checks and preparations should be completed prior to testing to confirm accurate detection and reduce risk: verify power to affected areas is off, turn off main water supply if needed, ventilate confined spaces, wear gloves and eye protection, use a moisture meter that’s calibrated, remove loose drywall or insulation carefully, document baseline conditions, and guarantee stable footing and ladder safety.
Order of tests to efficiently locate the leak
Where should one begin when a hidden wall leak is suspected? Start with visual inspection for stains and soft spots, then isolate water sources by turning off main valves.
Next, test fixtures and appliances sequentially, monitor the meter for flow with all fixtures closed, use moisture meter scans, and finally employ targeted intrusion tests (controlled water runs) to confirm location before calling a specialist.
What to record and photographs to take for professionals or insurance
When documenting a suspected hidden wall leak, the investigator should create a clear, time-stamped record that pairs concise notes with systematic photographs to support diagnosis, repair planning, and any insurance claims.
Record location, date/time, water source suspicion, humidity/temperature, visible damage, and actions taken.
Photograph wide views, mid-range context, close-ups with scale, moisture readings, affected fixtures, and any serial numbers or labels for contractors and insurers.
Conclusion
One in ten homeowners will face a hidden water leak each year, underscoring how common and costly these problems can be. By using the quick tests, room-specific tips, and simple temporary fixes outlined here, homeowners can spot leaks sooner, reduce immediate risks, and decide when to call a pro. Early detection not only prevents mold and structural damage but often saves hundreds to thousands of dollars in long-term repair costs.
