How to Use Pipe Lubricant: Step-by-Step Guide for Smooth Fittings and Leak-Free Joints
How to Use Pipe Lubricant: Step-by-Step Guide for Smooth Fittings and Leak-Free Joints
Using pipe lubricant is essential for reducing friction at joints, making assembly easier, and ensuring leak-free connections. Start by cleaning and deburring the ends of the pipes. Next, test-fit the components before applying a thin, even layer of the appropriate lubricant to both mating surfaces. For slip-fit connections, press the pieces together straight and rotate slightly; for threaded connections, apply a small amount of lubricant before tightening to the specified torque. Be cautious not to use excessive lubricant, as this can attract debris. Finally, check the seals under pressure to confirm their integrity. For further details on types of lubricants, safety precautions, and troubleshooting tips, continue reading.
How Pipe Lubricant Works and Why It Matters
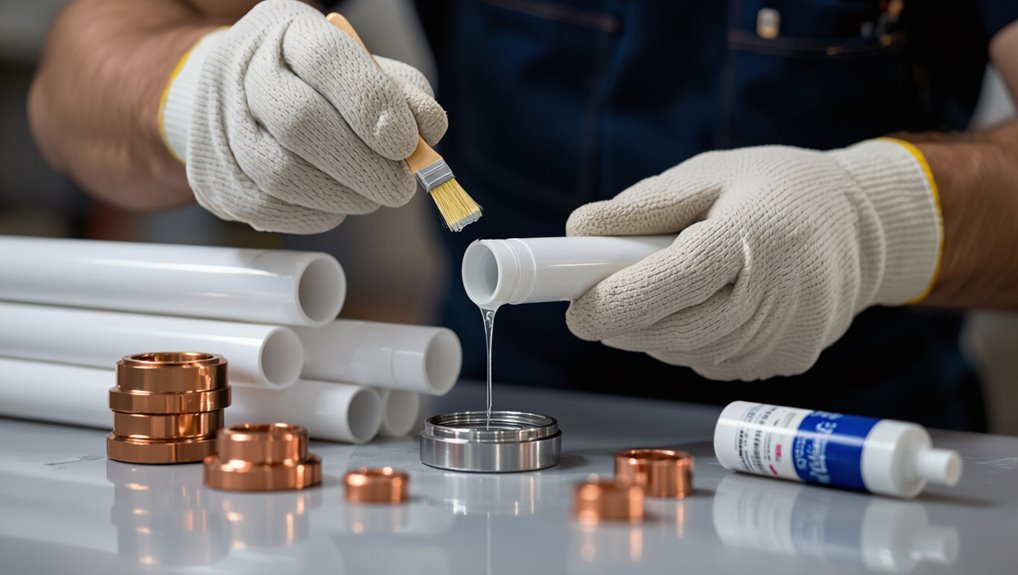
Pipe lubricant typically consists of base oils, thickeners, and corrosion inhibitors formulated for plumbing materials. It reduces friction at threaded and sliding connections to prevent galling and wear, while differing from sealants and thread tape that are designed primarily to create pressure-tight joints rather than to lubricate.
Guidance on when to use lubricant versus sealants or adhesives depends on joint type and service conditions, with lubricant favored for assembly and sealants or tapes used where leak prevention is the primary concern.
What pipe lubricant is made of
A lubricant for joining and servicing pipes combines a base carrier with additives chosen to reduce friction, prevent corrosion, and guarantee a reliable seal.
Typical formulations use petroleum or synthetic oils, thickeners like soaps or polymers, corrosion inhibitors, and sometimes mild antiseptics.
Manufacturers tailor blends for materials and pressures; instructions on how to use pipe lubricant specify compatibility, application amount, and safety precautions.
How lubricant reduces friction and prevents damage
Coating mating surfaces with lubricant forms a thin, low-shear film that separates metal or plastic parts, transforming direct asperity contact into smooth sliding and sharply reducing friction.
This film minimizes wear, prevents seizing and galling during assembly, and absorbs micro-movements that cause fatigue.
Differences between pipe lubricant, sealant, and thread tape
Compare lubricant, sealant, and thread tape by their primary functions: lubricant reduces friction and protects threads during assembly, sealant fills gaps to create a pressure-tight joint, and thread tape provides a conforming barrier that aids sealing and prevents galling.
Each product differs in composition, application method, and curing behavior; compatibility with pipe materials and service fluids determines appropriate selection for reliable, long-term joints.
When to use lubricant versus sealants or adhesives
Many installations benefit from selecting pipe lubricant when the primary needs are reduced assembly torque, prevention of thread galling, and protection of metal surfaces during repeated disassembly.
Sealants or adhesives are preferable when the goal is permanent leak prevention, pressure containment, or bonding of dissimilar materials.
Lubricant eases fitting and preserves serviceability; use sealant or anaerobic adhesive for pressurized, permanent, or chemically aggressive applications.
Types of Pipe Lubricants and How to Choose One
Selecting the right pipe lubricant requires matching product chemistry and approvals to the material and application. Options include water- and oil-based formulas, food-grade or potable-water–safe lubricants, and specialty products for PVC/CPVC, PEX, copper, or threaded metal, each with different performance, environmental, and safety profiles.
A brief comparison of popular types helps identify the best balance of compatibility, lubricity, and regulatory requirements for a given job.
Water-based vs. oil-based lubricants
Choosing between water-based and oil-based pipe lubricants hinges on the specific material, operating conditions, and regulatory needs of the plumbing system.
Water-based lubricants suit rubber, plastic, and applications needing easy cleanup or nonflammability; they resist swelling and are often compatible with seals.
Oil-based lubricants offer superior film strength, temperature stability, and corrosion protection but can degrade certain elastomers and attract contaminants.
Food-grade and potable-water safe lubricants
One critical consideration for food-processing and potable-water systems is the use of lubricants certified safe for incidental contact with consumables.
These products are formulated to meet NSF/ANSI 61, NSF H1, or equivalent standards and avoid contaminants that could taint taste or pose health risks.
Food-grade lubricants are typically synthetic or mineral-based, odorless, non-toxic, and resistant to water washout; verify certification and compatibility before use.
Lubricants for PVC/CPVC, PEX, copper, and metal threaded pipes
Because different pipe materials have distinct surface properties and joint requirements, lubricant selection should match substrate and application.
For PVC/CPVC use solvent-compatible, non-reactive lubricants or assembly primers specified by manufacturers.
PEX benefits from silicone or water-based lubricants safe for expansion fittings.
Copper and brass soldered joints need flux, while metal threaded pipes require anti-seize or PTFE-based thread compounds for corrosion prevention and sealing.
Environmental and safety considerations
While selecting a pipe lubricant, users should weigh environmental impact, toxicity, flammability, and disposal requirements alongside performance characteristics; these factors determine suitability for potable water systems, confined spaces, and environmentally sensitive sites.
Guidance recommends choosing non-toxic, biodegradable formulas for potable or outdoor use, low-VOC, non-flammable options for confined areas, and following label disposal instructions, PPE, and local regulations to minimize health and ecological risks.
Quick comparison of popular product types
After accounting for environmental and safety factors, attention turns to the main categories of pipe lubricants and how they differ in application and properties. A concise comparison aids selection: suitability, temperature range, and compatibility guide choices for PVC, metal, and rubber seals.
| Type | Best for | Notes |
|---|---|---|
| Silicone | Rubber seals | Water-resistant |
| PTFE | Metal threads | High temp |
| Water-based | PVC | Low odor |
| Grease | Heavy fittings | Long-lasting |
Tools and Materials You Need
Necessary tools and materials are outlined before beginning, including wrenches, pipe cutters, and cleaning implements.
Surface-prep items and cleaning supplies are highlighted alongside personal protective equipment such as gloves and eye protection.
Recommended products to keep on hand—lubricant types, sealants, and spare fittings—are noted for efficient and safe work.
Basic tool list (wrenches, cutters, cleaners)
A concise set of hand tools and cleaning supplies makes applying pipe lubricant efficient and effective.
Essential items include adjustable and basin wrenches for tightening fittings, pipe cutters or tubing cutters for clean ends, deburring tools to remove burrs, and pliers for grip.
Also include brushes or rags for wiping, and a small applicator brush or dauber for precise lubricant placement.
Cleaning supplies and surface prep materials
Proper surface preparation requires a compact kit of cleaning supplies: lint-free rags, non-abrasive brushes, a mild solvent or approved cleaner for the pipe material, and abrasive pads or emery cloth for light corrosion removal.
Include a wire brush for threaded fittings, a deburring tool or reamer, and a small container for solvent.
Verify materials match pipe composition to avoid damage or contamination before lubrication.
Personal protective equipment
Before beginning lubrication, technicians should assemble and don personal protective equipment tailored to the pipe material and lubricant type: chemical-resistant gloves, safety goggles or a face shield, and protective clothing or coveralls to prevent skin contact and contamination.
Additional items include respirators for solvent fumes, disposable boot covers, and puncture-resistant gloves for handling sharp fittings.
Confirm PPE fits correctly and is inspected before use.
Recommended products to keep on hand
Essential items for effective pipe lubrication include a selection of compatible lubricants (water-based, silicone, or solvent-based as appropriate), clean applicators such as brushes and squeeze bottles, lint-free rags, and calibrated dispensers for consistent volume control.
Additional recommended products kept on hand support efficiency, cleanliness, and proper sealing.
- Spare O-rings and gaskets
- Small tubing cutters and deburring tools
- Disposable gloves and solvent wipes
Step-by-Step Guide to Using Pipe Lubricant for Slip-Fit Joints
The technician begins by preparing pipe ends and fittings, removing burrs and inspecting for cracks or deformations that require replacement.
Next, lubricant is applied evenly to both the pipe and the socket, followed by careful alignment and a straight push to seat the joint to the specified depth.
A final check confirms proper seating and push depth to guarantee a secure, leak-free connection.
Preparing the pipe ends and fittings
Prepare pipe ends and fittings by inspecting, cleaning, and aligning each component to ascertain a proper slip-fit seal.
Remove burrs, debris, and old sealant with a soft cloth or brush. Deburr cut edges lightly and verify mating surfaces are smooth. Dry thoroughly.
Test-fit components to confirm alignment and depth before applying lubricant, guaranteeing uniform contact and preventing twists or gaps during assembly.
How to inspect for damage and replace parts if needed
Inspect the pipe ends and fittings visually and by touch to identify cracks, corrosion, flattened sealing faces, or deformations that could compromise a slip-fit joint.
Measure diameters and check threads or socket integrity.
Replace any warped, pitted, or compromised components.
Use compatible materials and new seals or O-rings.
Reinspect replacements for fit and surface condition before proceeding with assembly.
Applying lubricant correctly to pipe and fitting
Begin by ensuring hands are clean and dry to prevent contaminating the lubricant or joint surfaces.
Apply a thin, even film of approved lubricant to the pipe end and inside the fitting, avoiding excess that can attract debris.
Rotate the fitting slightly to distribute lubricant uniformly.
Wipe away drips, reseal the lubricant container promptly, and follow product cure or set-time recommendations before pressure testing.
Joining technique and alignment tips
One clear approach to assembling slip-fit joints is to align the pipe and fitting on a flat surface, ensuring both are square and free of offsets before sliding them together.
The assembler should maintain axial alignment, apply steady even pressure, avoid twisting, and rotate slightly if needed to seat evenly.
Use supports to prevent sagging and verify visual concentricity throughout the join.
Checking for proper seating and push depth
Check that the pipe is fully seated by confirming the push depth against the fitting’s stop or a pre-marked reference on the pipe; the correct engagement is typically felt as a firm resistance and seen as the pipe end flush with or slightly recessed into the fitting’s shoulder.
Verify alignment, mark final depth if needed, and guarantee consistent seating around the joint.
Recheck after brief pressure testing.
Step-by-Step Guide to Using Lubricant on Threaded Pipes
Before applying any lubricant to threaded pipes, the threads should be cleaned and inspected for damage or debris.
The choice between a light lubricant and a sealing compound depends on pipe material and service conditions, and should be applied sparingly and evenly.
Proper tightening sequence and torque values must be followed to prevent over-tightening and thread stripping.
Cleaning and thread inspection
Several simple tools and a clear process are needed to prepare threaded pipes for lubrication: a stiff brush, solvent or degreaser, clean rags, and good lighting.
Remove old sealant, oil, and debris with brush and solvent. Dry thoroughly.
Inspect threads for nicks, burrs, corrosion, or cross-threading using magnification if needed.
Replace or repair damaged sections before proceeding to lubrication.
Applying lubricant vs. compound: when and how
Decide whether to use a lubricant or a joint compound based on pipe material, service conditions, and required seal performance; lubricants (pipe dope alternatives such as PTFE-based greases) ease assembly and prevent galling on metal threads, while compounds provide thicker sealing and gap-filling for larger or rougher threads and for systems under higher pressure.
Apply sparingly, coat male threads evenly, avoid excess in bore, and wipe surplus.
Correct torque and tightening sequence
Start by following a measured tightening sequence and target torque to guarantee a leak‑free, mechanically sound joint.
The installer proceeds in stages: finger‑tight, half‑wrench, then final torque using a calibrated wrench.
Tightening follows alternating passes on multi‑port assemblies to distribute load evenly.
Record applied torque values and compare to manufacturer specifications.
Allow fittings to settle, then recheck torque after initial pressurization.
Preventing over-tightening and thread stripping
Apply lubricant sparingly and methodically to reduce friction without masking signs of proper engagement: too much lubricant can lower the torque needed to seal threads, increasing the risk of over-tightening and thread stripping.
Installers should coat only the male threads’ first few turns and avoid excess that can migrate into sealing areas.
Use calibrated torque tools, stop at specified limits, and inspect threads for damage before reuse.
Using Lubricant with Seals, O-Rings, and Gaskets
Selection of a lubricant that is chemically compatible with the specific elastomer prevents swelling, hardening, or deterioration of seals, O-rings, and gaskets.
O-rings and seals should be lightly and evenly coated—avoiding excess that can be squeezed out or displace the part—before careful placement to maintain proper seating.
After reassembly, the joint should be tested under normal operating pressure to verify seal integrity and check for leaks.
Choosing lubricant compatible with elastomers
When choosing a pipe lubricant, compatibility with elastomers—seals, O-rings, and gaskets—must be verified to prevent swelling, cracking, or loss of sealing performance.
Consult elastomer material data (EPDM, NBR, FKM, silicone) and lubricant chemical composition (petroleum, synthetic, silicone-based).
Prefer manufacturer compatibility charts, perform small-scale tests under expected temperature and chemical exposure, and select lubricants rated for the specific elastomer.
How to coat O-rings and seals without displacing them
To coat O-rings and seals without displacing them, work with controlled, minimal lubricant quantities and use tools that deliver thin, even films—such as low-pressure squeeze bottles, lint-free swabs, or foam brushes—so the elastomer is lubricated but not flooded.
Apply a light, continuous stroke around the cross-section; avoid excess pooling. Inspect visually for complete, uniform coverage and remove stray blobs with a clean swab.
Reinstalling and testing seal integrity
Reinstall seals, O-rings, and gaskets carefully to preserve lubricant placement and guarantee proper seating: place each element into its groove or bore with light finger pressure or a non-marring tool, avoiding twisting or rolling that can displace lubricant or distort the elastomer.
After assembly, perform pressure and leak tests at recommended limits, inspect for squeeze, extrusion, or seepage, and retorque fittings as specified.
Testing and Verifying Leak-Free Joints
After assembly, the technician confirms joint integrity by applying appropriate pressure tests for the specific system—air, water, or gas—following safety and manufacturer guidelines.
Visual inspection and tactile checks, including soapy water for gas lines and feeling for moisture on liquid lines, help locate leaks.
If a joint leaks, the technician depressurizes the system, disassembles the connection, inspects seals and lubricant application, replaces any damaged components, and reassembles for retesting.
Pressure testing methods for different systems
Different systems require tailored pressure-testing methods to confirm joints are leak-free and to prevent damage from overpressurization.
Water systems commonly use hydrostatic testing at specified pressures, held for a set duration.
Gas lines require inert gas or air tests with appropriate monitoring and leak detection equipment.
Low-pressure systems use gradual ramp-up; high-pressure or specialty systems follow manufacturer and code-mandated procedures and documentation.
Visual and tactile leak checks
Begin by inspecting each joint closely under good lighting, using visual cues and a gentle touch to detect imperfections and movement that indicate incomplete seals.
Look for hairline gaps, disrupted lubricant beads, or misalignment. Run fingers along fittings to feel for looseness or roughness.
Observe for fresh moisture or residue.
Repeat checks after modest system pressurization and temperature stabilization to confirm integrity.
What to do if a joint leaks after assembly
If a joint leaks after assembly, the installer should stop pressurizing the system and isolate the affected section to prevent further fluid loss or damage.
The installer then depressurizes, dries the joint, inspects for damaged threads, misalignment, or insufficient lubricant, and retightens or disassembles as needed.
Replace seals or fittings if defects exist, retest at low pressure, and monitor for recurrence.
Common Mistakes and How to Avoid Them
Common mistakes when using pipe lubricant include choosing a product incompatible with the pipe material, applying incorrect amounts, and skipping proper cleaning and inspection before assembly.
Confusing lubricant with thread sealant or pipe dope can also compromise joint performance. Addressing these errors quickly prevents leaks and prolongs system life.
Using the wrong lubricant for the material
Choosing an inappropriate lubricant for a pipe’s material can cause seal failure, corrosion, or degraded performance.
Different materials—PVC, CPVC, copper, brass, stainless steel, and various elastomers—require compatible lubricants.
Solvent-based or petroleum products can damage plastics and rubber; corrosive additives harm metals.
Verify manufacturer recommendations, use material-specific formulas, and test a small area before full application to prevent joint compromise.
Applying too much or too little lubricant
Beyond selecting a compatible lubricant, correct quantity matters: both excess and insufficiency can compromise joints.
Applying too much lubricant can prevent proper thread engagement, attract debris, and cause slippage.
Too little increases friction, risks galling, and impedes sealing.
Technicians should apply a thin, even film, follow manufacturer coverage guidelines, and remove visible surplus before assembly to guarantee reliable joints.
Neglecting cleaning and inspection
Neglect of cleaning and inspection undermines joint integrity before lubricant is even applied; contaminants, corrosion, or damaged threads can prevent proper seating and compromise seals.
Professionals should remove debris, descale corroded areas, and verify thread condition. Inspect fittings under good light, use brushes or lint-free cloths, and replace damaged components.
Routine checks prevent leaks and reduce rework.
Confusing lubricant with thread sealant or pipe dope
Mistaking pipe lubricant for thread sealant or pipe dope can lead to leaks, failed joints, and costly rework because each product serves a different function: lubricants reduce friction for proper torque and alignment, while sealants fill gaps and create a pressure-tight barrier.
Technicians should label products, follow manufacturer instructions, and apply lubricant for assembly only, adding sealant or tape where specified to guarantee leak-free connections.
Maintenance, Storage, and Safety Tips
Routine inspection schedules and reapplication intervals for lubricated joints should be established based on pipe material and service conditions.
Lubricants require proper storage, attention to shelf life, and disposal methods that minimize environmental impact.
Safety guidance, including first-aid measures and hazard precautions, must accompany use and handling.
How often to reapply or inspect lubricated joints
Because wear rates and environmental exposure vary, the frequency for reapplying or inspecting lubricated pipe joints should be based on service conditions and lubricant type.
Routine inspections every 3–12 months suit most systems; high-pressure, corrosive, or outdoor installations require monthly checks.
Reapply when seals show wear, friction increases, or contamination appears.
Document inspections and adjust intervals according to findings and manufacturer guidance.
Proper storage and shelf life of lubricants
Inspection schedules and reapplication practices should be accompanied by consistent attention to how lubricants are stored, since improper storage shortens shelf life and degrades performance.
Store lubricants in original, sealed containers away from heat, sunlight, and moisture. Maintain stable temperatures and upright positioning to prevent contamination.
Label opened containers with date of opening; follow manufacturer shelf-life guidance and rotate stock using first-in, first-out.
Safe disposal and environmental precautions
Several straightforward precautions will minimize environmental harm when disposing of pipe lubricants and related materials.
Users should collect excess lubricant, contaminated rags, and empty containers in sealed, labeled containers.
Do not pour lubricants down drains or onto soil.
Follow local hazardous-waste guidelines and use approved disposal facilities.
Recycle compatible containers when accepted; otherwise, arrange for professional hazardous-waste pickup to prevent contamination.
First-aid and hazard information
When handling pipe lubricants, personnel should be aware of common hazards—skin and eye irritation, inhalation of mists or fumes, and fire risk with flammable formulations—and be prepared to follow established first-aid steps and emergency procedures.
Immediate actions include flushing eyes with water, washing contaminated skin, moving affected persons to fresh air, and seeking medical attention for persistent symptoms.
Keep fire extinguishers and MSDS accessible.
Cost, Availability, and When to Call a Professional
Typical pipe lubricants and hand tools commonly cost between a few dollars for a tube of lubricant to $50–$100 for specialized kits.
Complex leaks, blocked drains requiring camera inspection, or work on pressurized systems are best handled by a licensed plumber.
When contacting a professional, describe pipe material, visible damage, symptoms (noise, leaks, poor flow), and any recent repairs or chemicals used.
Typical cost range for common lubricants and tools
Budget estimates for common pipe lubricants and basic tools help homeowners decide whether a DIY fix is viable or a pro is warranted.
Typical silicone or PTFE lubricants cost $5–$15 per tube; specialty plumber’s greases run $10–$25.
Basic tools (wrenches, tape, brushes) total $15–$60.
Replacement fittings vary widely; factor $5–$30 per piece.
Shipping or specialty items may add extra.
Situations best handled by a licensed plumber
Many homeowners can handle minor lubrication and small repairs, but several situations clearly warrant a licensed plumber: persistent leaks despite proper gasket or O-ring lubrication, sewage backups, gas-line work, major water-main or slab leaks, and failures involving pressurized or hidden pipe runs.
Licensed plumbers offer expertise, permits, liability protection, and access to specialized equipment; expect higher rates but faster, code-compliant resolutions.
How to describe the problem when seeking professional help
After recognizing situations that require a licensed plumber, homeowners should prepare a concise, factual description before calling for help.
Include location, material (PVC, copper), visible leaks, odor, sounds, and recent work with pipe lubricant.
Note urgency, preferred times, and budget limits.
Ask about estimated cost ranges, technician availability, warranty, and required permits to decide whether to schedule immediate or regular service.
Quick Reference: Do’s and Don’ts for Using Pipe Lubricant
A concise checklist of do’s and don’ts helps guarantee safe, effective pipe lubricant use. It outlines proper preparation, correct application, and common hazards, enabling consistent results and fewer leaks.
- Do clean and dry fittings before applying lubricant.
- Do apply a thin, even layer; avoid excess that attracts dirt.
- Don’t mix incompatible lubricants or use on pressured systems without approval.
Conclusion
Like a well-oiled hinge in a long-closed gate, proper use of pipe lubricant eases passages and prevents stubborn resistance. When chosen and applied with care, fittings marry smoothly and joints hold firm, saving time and trouble like a practiced handshake. Neglect invites friction, leaks, and needless returns to labor. Remembering basic precautions and knowing when to call a professional keeps systems flowing—quiet, reliable, and ready for whatever current comes next.