How to Clean a Basement French Drain: Step-by-Step Guide to Remove Clogs & Prevent Backups
To effectively clean a basement French drain and prevent clogs, follow these steps:
- Inspect the Sump and Cleanouts: Check for any visible debris.
- Shut Off Power: Ensure safety before proceeding.
- Remove Visible Debris: Clear any obstruction from the drain.
- Flush the Drain: Use a hose or a shop vac to remove sediment from the nearest access point.
- Address Stubborn Blockages: If necessary, employ a rotary jetter or camera inspection to identify issues like roots or collapsed pipes.
- Perform Repairs: Fix any damaged joints and re-gravel as needed.
By following these steps and maintaining your French drain regularly, you can prevent future backups effectively.
How a Basement French Drain Works and Why It Can Clog
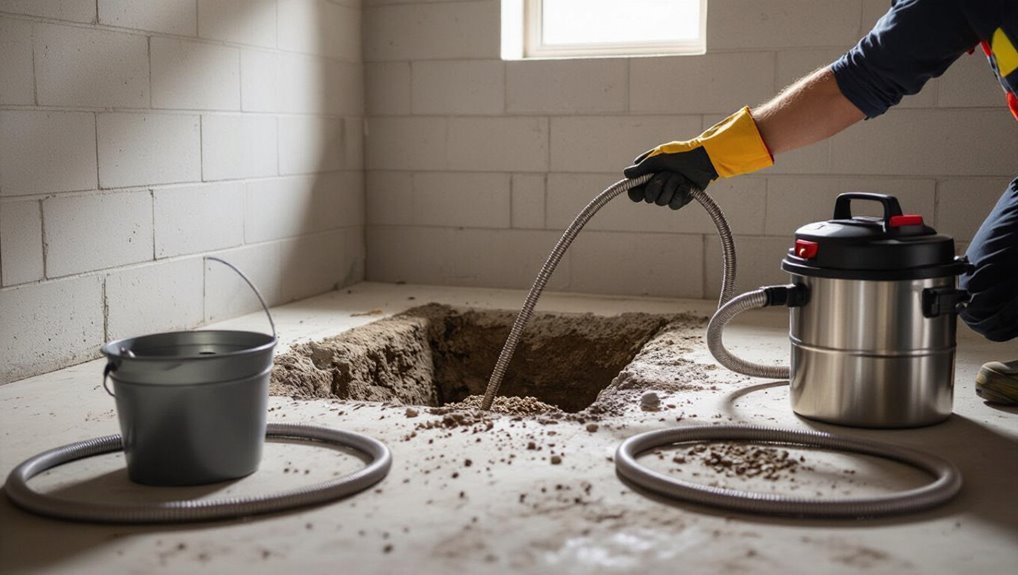
A basement French drain typically consists of a perforated pipe set in gravel and wrapped in filter fabric to collect and divert groundwater away from the foundation.
Soil, sediment, roots, and mineral deposits can enter or accumulate in the pipe and surrounding media, causing clogs and backups.
Reduced drainage flow, standing water in the sump or perimeter, and unusual dampness or odors in the basement indicate the system likely needs cleaning.
Basic components of a French drain system
Sump pumps, perforated pipe, gravel, and filter fabric form the core of a basement French drain system, each part performing a specific role in collecting and directing groundwater away from the foundation.
The perforated pipe conveys water; gravel promotes drainage; filter fabric blocks sediment; and a sump pump removes collected water.
Understanding these components helps inform how to clean French drain in basement maintenance.
Common causes of clogs and backups
Several common issues can cause a basement French drain to clog or back up, all stemming from interruptions in water flow or sediment buildup.
Soil infiltration, silt and fine particles carried by groundwater, root intrusion from nearby vegetation, collapsed or crushed pipe sections, accumulated gravel fines, and improper slope or blocked outlets each reduce capacity and promote localized pooling, leading to gradual or sudden system failure.
Signs your French drain needs cleaning
When any of the issues above begins to impede flow, specific, observable signs typically appear that indicate the French drain requires cleaning.
Indicators include slow draining or pooling water in the basement, persistent damp or musty odors, water backing up at floor drains or sump pits, increased insect activity, and sudden spikes in basement humidity.
Visible sediment or foul discharge from cleanouts confirms blockage.
Safety Precautions and Tools You’ll Need
Before beginning work on a basement French drain, the writer notes the importance of proper personal protective equipment such as gloves, eye protection, and a mask.
A concise checklist of essential tools and materials—including a wet/dry vacuum, plumbing snake, shop light, and replacement pipe fittings—should be assembled and inspected.
If the clog is extensive, involves sewage, or requires excavation, a licensed professional should be contacted.
Personal protective equipment
Although the work is routine, appropriate personal protective equipment is vital to prevent injury and exposure to contaminants while cleaning a basement French drain.
Workers should wear chemical-resistant gloves, eye protection, a NIOSH-approved respirator when airborne particles or mold are present, waterproof boots, and coveralls.
Hearing protection may be needed with loud power tools.
Confirm PPE fits properly and is inspected before use.
Tools and materials checklist
A concise, organized checklist guarantees the job proceeds safely and efficiently. The following essential tools and materials enable inspection, clog removal, and cleanup without unnecessary trips.
- Sturdy work gloves, safety goggles, and respirator mask for confined, damp spaces
- High-pressure wet/dry shop vacuum or drain snake to dislodge and extract debris
- Bucket, stiff brush, replacement filter fabric, and disinfectant for flushing and sanitizing
When to call a professional
With the basic tools and personal protective equipment in place, recognizing situations that exceed DIY capability helps prevent injury and costly damage.
Call a professional when persistent blockages resist snaking, sewage or chemical contamination is present, structural issues or collapsing walls appear, sump pump failure recurs, or diagnostic equipment (camera inspection) is needed.
Licensed contractors guarantee proper repair, permits, and long-term reliability.
Preparatory Steps Before Cleaning
Before beginning, the technician inspects access points and cleanouts to confirm where obstructions might be reached.
Water sources are shut off and any electrical risks in the area are identified and mitigated.
A clear workspace is established and the basement floor is protected with plastic or drop cloths to contain debris and water.
Inspecting access points and cleanouts
Several key access points and cleanouts should be located and inspected to guarantee safe, effective work on a basement French drain system.
The inspector notes visible cleanout caps, sump lid access, and any in-floor grates. They check for corrosion, debris, proper sealing, and easy removal.
Any damaged covers are marked for repair and photographed before cleaning begins.
Shutting off water sources and electrical considerations
After marking and photographing access points, attention turns to shutting off water sources and addressing electrical hazards to guarantee a safe cleaning operation.
All relevant valves—sump, main, and branch lines—are located and closed to stop inflow.
Circuit breakers for pumps, dehumidifiers, and nearby outlets are switched off and labeled.
Temporary power isolation and GFCI verification minimize shock and equipment damage.
Creating workspace and protecting the basement floor
A clear, organized work area reduces trip hazards and limits cleanup after drain maintenance.
The technician lays down waterproof drop cloths or plywood to shield concrete, positions work lights safely, and keeps tools in a designated bin. Wet sections are cordoned with caution tape.
Disposable trays collect debris and water. Protective floor coverings are removed and dried after completion to prevent staining and mold.
Step-by-Step Cleaning Procedure for an Interior Basement French Drain
The procedure begins by locating the drain access or cleanout and opening it to expose the pipe.
Visible debris and sediment are removed by hand or with a shop vacuum before flushing the drain with water to assess flow.
If flow remains restricted, a plumber’s snake or auger is used for deep clogs, with high‑pressure water jetting reserved for stubborn obstructions and applied only with proper precautions.
Locating and opening the drain access/cleanout
Where is the drain access located, and how can it be identified quickly?
The access is typically near the baseboard, in a concrete curb, or a capped riser along the perimeter.
Look for a removable cap, metal cover, or PVC plug.
Clear surrounding debris, wear gloves, and use channel-lock pliers or a wrench to loosen the cap.
Inspect for cracks before proceeding.
Removing visible debris and sediment by hand or with a shop vacuum
Once the cleanout cap is removed and the opening inspected for damage, attention shifts to removing visible debris and sediment from the drain channel.
Gloves and eye protection are worn. Large debris is extracted by hand or with a grabber; finer sediment is vacuumed using a wet/dry shop vac and appropriate filter.
Collected material is contained and disposed of per local regulations.
Flushing the drain with water to test flow
Begin by running a steady stream of water into the cleanout while observing flow and drainage speed.
Note whether water disappears quickly or pools.
Repeat with increasing volume to simulate heavy runoff.
Check downstream outlets and any secondary cleanouts for discharge.
Listen for gurgling or air pockets.
Record flow characteristics and stop if slow drainage persists, indicating deeper obstruction requiring further intervention.
Using a plumber’s snake or auger to clear deep clogs
If flushing indicates slow drainage or persistent pooling, the next step is to inspect and clear deep obstructions with a plumber’s snake or auger.
A rigid or flexible snake is fed into the drain, rotated to engage debris, then withdrawn to remove clogs. Repeat until water flows freely.
Clean and sanitize the tool, wear gloves and eye protection, and dispose of waste properly.
High-pressure water jetting technique and precautions
Deploy high-pressure water jetting to dislodge compacted sediment and biofilm that a snake cannot reach, using a specialized nozzle to direct a concentrated stream into the interior drain channel.
Operators should wear eye, ear, and drainage-resistant protection, secure stable footing, and verify pipe material and fittings can tolerate jetting pressures.
Begin at low pressure, progressively increase, and avoid directing jets at joints or unknown obstructions.
Reassembling the access point and final flow test
Carefully reassemble the access point once cleaning and inspection are complete, ensuring gaskets, seals, and covers are aligned and seated to prevent leaks or soil infiltration.
Tighten fasteners to manufacturer torque, avoiding overtightening. Restore any removed backfill or access plates.
Run a controlled flow test, observe drainage rate and check for seepage.
Document results and schedule routine inspections to confirm continued function.
Cleaning an Exterior/Foundation French Drain and Perimeter Tile
Cleaning an exterior or foundation French drain begins with locating and opening exterior cleanouts and inspection ports to establish access for flushing and inspection.
Where pipe sections are buried, careful excavation exposes the perforated pipe and surrounding filter fabric for assessment and targeted repairs.
From the exterior access points, the system can be flushed or jetted and any damaged pipe or torn fabric replaced before backfilling.
Accessing exterior cleanouts and inspection ports
Several accessible cleanouts and inspection ports are typically located around the foundation to provide entry points for rinsing, rodding, and visual checks. Identifying their locations and understanding their caps and seals is the first step before any maintenance.
Clear debris from lids, test cap removal gently, note threaded versus snap-fit designs, then document port positions.
Use proper tools and PPE, and reseal fittings securely after inspection.
Excavation tips for exposed drain pipe sections
Expose the drain pipe only after utilities have been located and soil conditions assessed.
Excavate gently with hand tools near pipe bedding to avoid damage; use shovels and small trowels for precision.
Remove roots and compacted soil, keeping trench edges stable and sloping for runoff.
Protect exposed pipe from tools and falling debris, and shore trenches deeper than safety limits before further work.
Flushing and jetting from exterior access points
Begin by locating exterior cleanouts or access ports and confirming they provide unobstructed entry to the perimeter tile; these points are the only safe places to introduce flow without disturbing building foundations.
Use a low-pressure hose to flush loose sediment, then progress to a rotary jetter at moderate pressure to dislodge compacted debris.
Monitor outflow for clarity and avoid forcing water against collapsed sections.
Repairing damaged perforated pipe or filter fabric
Assess the extent of damage to the perforated pipe and surrounding filter fabric before any replacement work proceeds.
Remove compromised sections, trimming to sound pipe and fabric.
Replace with matching perforated pipe, secure joints with couplers and solvent or gasket seals.
Install new geotextile fabric overlapping seams, backfill with clean gravel, and compact to restore drainage grade and protect against future clogging.
Dealing with Persistent or Complex Problems
When recurring blockages or damage persist despite routine cleaning, the causes are often more complex and require targeted remedies.
Inspection should check for root intrusion and consider mechanical or chemical removal, assess for collapsed or crushed pipe requiring repair or replacement, and evaluate soil compaction or poor grading as contributing factors.
Professional assessment is recommended when multiple issues coexist or when repairs extend beyond basic maintenance.
Identifying root intrusion, tree root removal options
Detecting root intrusion in a basement French drain requires careful inspection of slow drainage, recurring clogs, and irregular flow patterns, often accompanied by fine soil or fibrous material in the discharge.
Confirm with a camera inspection.
Removal options include mechanical cutting with a rooter or sewer auger, hydro-jetting to clear fibers, and targeted herbicide application.
Follow with pipe repair or replacement if roots reoccur.
Handling collapsed or crushed pipe
Address collapsed or crushed drain pipe promptly, as compromised sections can block flow, cause backups, and undermine surrounding soil and foundation stability.
Inspect via camera or excavation to locate damage. Replace crushed segments with durable pipe, ensuring proper bedding and slope.
Secure joints and consider upgrading to heavier-wall or corrugated alternatives.
Backfill with clean aggregate and compact carefully to restore support and function.
When soil compaction or poor grading is the cause
If poor grading or soil compaction is the underlying problem, water can pool against foundations and overwhelm a French drain regardless of pipe condition.
Addressing this requires regrading to slope away from the foundation, loosening compacted soil, and installing proper topsoil or drainage swales.
In severe cases, replace surrounding fill with porous material or add curtain drains to intercept and redirect groundwater before it reaches the drain.
Preventive Maintenance Schedule and Best Practices
A clear preventive maintenance schedule helps keep a basement French drain functioning and prevents costly backups.
Inspections and light cleanings are recommended at least twice a year, with simple tasks—clearing surface debris, flushing accessible sections, and checking outlet pipes—performed more frequently as needed.
A brief seasonal checklist (spring and fall) guarantees readiness for heavy rains and freeze-thaw cycles.
How often to inspect and clean a French drain
How frequently should a basement French drain be inspected and cleaned to remain effective?
Inspection is recommended at least twice yearly—spring and fall—and after major storms.
Cleaning frequency varies: perform basic checks annually and deeper cleaning every 2–3 years or sooner if sediment, slow drainage, or odors appear.
High-risk properties may require more frequent monitoring and maintenance to prevent backups and damage.
Simple routine tasks to minimize clogs
Establishing a simple, regular routine prevents most clogs before they start: visually inspect the drain pit, grate, and nearby floor for debris and standing water monthly; clear visible sediment and wipe down accessible surfaces; run clean water through the system to confirm flow and listen for irregular sounds; and record findings and any actions taken in a maintenance log to spot trends that signal earlier intervention.
- Remove hair and lint buildup
- Scoop leaves and mud
- Flush with garden hose
Seasonal maintenance checklist
Because seasonal changes affect water flow and debris loads, a concise preventive maintenance schedule guarantees the basement French drain remains functional year-round.
Inspect grates and downspouts spring and fall, clear leaves and sediment monthly during wet seasons, test sump pump before heavy rains, flush the drain line after winter thaw, and document inspections.
Replace damaged components promptly and schedule professional inspection every 3–5 years.
Upgrades and Repairs to Reduce Future Clogs
To reduce future clogs, homeowners can consider targeted upgrades and repairs that make maintenance easier and block debris at the source.
Useful measures include adding or replacing cleanouts and access points, switching to higher-quality filter fabric and proper gravel backfill, and integrating a sump pump with a backup power system.
Adjusting landscaping and grading to divert surface water away from the foundation further minimizes sediment and root intrusion.
Installing or replacing cleanouts and access points
Installing accessible cleanouts and access points makes routine maintenance and emergency clearing of a basement French drain far quicker and less invasive.
Strategically placed threaded or removable-cap cleanouts allow cable or hydro-jet access to pipe runs and junctions.
Replace corroded or buried lids with durable, sealed units at floor level or exterior walls.
Label locations and keep access unobstructed for faster, safer service.
Choosing improved filter fabric and gravel backfill
Selecting the right filter fabric and properly graded gravel can greatly extend a French drain’s service life by preventing sediment intrusion and maintaining permeability.
Use a nonwoven geotextile with high flow and puncture resistance, wrapped around clean, washed angular gravel sized ½–1½ inches.
Guarantee proper compaction without fines, layer separation where soil meets gravel, and inspect periodically for clogging or fabric failure.
Sump pump integration and backup systems
With properly graded gravel and durable geotextile in place, directing collected water into a dedicated sump pit and equipping that pit with a reliable pump reduces standing water and the load on the drainpipe, lowering the risk of sediment buildup and biological growth that can cause clogs.
Backup measures—battery or water-powered pumps, alarm systems, and check valves—ensure continued discharge during power outages or pump failure.
Landscaping and grading changes to divert water
Although not always as visible as mechanical fixes, regrading the yard and adjusting landscaping features can considerably reduce the volume of water reaching a basement French drain.
Sloping soil away from foundations, installing swales, relocating downspouts, and using permeable plantings or rain gardens divert runoff.
These measures lower drainage load, reduce sediment entry, and prolong drain effectiveness, decreasing clog frequency and maintenance needs.
Cost Estimates and Hiring Considerations
Estimating costs for cleaning or repairing a basement French drain highlights the gap between typical DIY expenses and professional service fees.
Homeowners should be prepared with specific questions for contractors—scope of work, timeline, references, and detailed written estimates—and know what to expect during an inspection.
It is also important to confirm required permits, warranties on work and parts, and that the contractor carries proper insurance.
Typical DIY versus professional service costs
When comparing costs for cleaning a basement French drain, homeowners should weigh the lower upfront expense of a DIY approach against the higher but often more predictable price of professional services. DIY costs: tools, rental, time; professionals: inspection, labor, guarantee. Typical ranges vary by scope.
| Option | Typical Cost | Benefit |
|---|---|---|
| DIY | $20–$200 | Low cost |
| Pro | $200–$1,200 | Warranty |
Questions to ask contractors and what to expect
Which contractor is right for the job depends on clear, specific questions and realistic expectations about costs and scope.
Ask for itemized estimates, timeline, references, proof of experience with French drains, and cleanup protocols.
Clarify payment terms, change-order procedures, and contingency for unforeseen damage.
Expect verbal explanations paired with written proposals and a walkthrough before work begins.
Permits, warranties, and insurance considerations
Because basement French-drain work can affect structural elements, contractors and homeowners should verify permits, warranties, and insurance coverage before any work begins.
Confirm required local permits, obtain written estimates listing permit fees, and check contractor licensing.
Require clear warranty terms for labor and materials.
Verify general liability and workers’ compensation insurance; request certificates of insurance and document all approvals before work starts.
Troubleshooting Quick Reference
A concise troubleshooting checklist outlines steps to address a slow-draining basement and identify whether clogs, sump failure, or external drainage issues are likely causes.
Clear symptom-to-cause pairings help prioritize repairs and decide when professional help is needed.
Immediate emergency actions—shutting off power to affected areas, deploying a temporary pump, and directing water away from the foundation—reduce flood risk while longer-term fixes are arranged.
Rapid checklist for a slow-draining basement
Several quick checks can identify common causes of a slow-draining basement: inspect visible debris in the drain grate, listen for gurgling that indicates trapped air, verify the sump pump is cycling and its float moves freely, and confirm downspouts and exterior grading direct water away from the foundation.
Then: clear surface debris, test pump discharge hose for blockages, run water to observe flow, and note any foul odors.
Symptoms vs. likely causes
Many familiar symptoms—slow drainage, gurgling, persistent odors, intermittent pump cycling, or visible standing water—map reliably to a short list of likely causes, enabling focused troubleshooting without unnecessary disassembly. Typical pairings:
| Symptom | Likely cause |
|---|---|
| Slow drainage | Sediment buildup or crushed pipe |
| Gurgling/odors | Blocked vent or organic clog |
| Intermittent pump cycling/standing water | Float switch jammed or sump capacity exceeded |
Emergency steps to prevent immediate flooding
Recognizing the symptom-to-cause pairings allows rapid, targeted action when a drain system threatens to flood; immediate steps focus on preserving dry space and preventing pump overload rather than diagnosing root causes.
Move valuables to higher ground, block water entry points with sandbags or towels, divert surface runoff away, run a backup portable pump or wet-vac briefly, and shut off nonessential electrical circuits to reduce electrocution risk.
Resources and Further Reading
For further guidance, consult manufacturer guides, reputable how-to videos, and published industry standards to confirm proper cleaning methods and materials.
Local building codes and drainage regulations should be checked to verify compliance with installation and maintenance rules.
Together these resources help users make informed, code-compliant choices for French drain care.
Manufacturer guides, reputable how-to videos, and industry standards
When seeking reliable instruction on cleaning a basement French drain, homeowners should consult manufacturer installation and maintenance guides, reputable how-to videos from recognized plumbing professionals, and established industry standards to confirm safe, effective practices.
These resources provide model-specific procedures, recommended tools, warranty considerations, and industry-approved safety and performance benchmarks; cross-referencing materials confirms correct techniques and preserves system integrity.
Local code and drainage regulation resources
Where can homeowners verify that French drain cleaning meets local requirements?
Consultation with municipal building departments, local plumbing inspectors, and stormwater authorities guarantees compliance.
Relevant resources include permit portals, code excerpts, and enforcement contacts.
- municipal building office signage and permit counters
- plumbing inspector in protective vest reviewing plans
- stormwater authority maps and drainage easement records
Conclusion
In summary, the homeowner is reminded that “an ounce of prevention is worth a pound of cure”: routine inspection and maintenance of the basement French drain prevents costly backups and structural damage. By following safety precautions, using appropriate tools, and addressing clogs promptly—whether interior perimeter drains or exterior foundation systems—long-term performance improves. When complexity or severe blockage arises, consulting a qualified contractor guarantees effective repair and reduces future risk. Continuous vigilance pays off.