How to Add a Gas Line to an Existing Line Safely: Step-by-Step Guide for Homeowners
To safely add a gas line to an existing line, follow these essential steps: First, plan your appliances and confirm the suitability of natural gas or propane. Next, obtain the necessary permits and calculate the BTU load required for your setup.
Before starting, turn off the gas supply. Route the piping, cutting and threading it as needed or using approved CSST or copper. Install shutoff valves and unions, and secure the piping with hangers according to code.
After installation, perform pressure and soap-bubble leak tests to ensure safety. Schedule inspections and keep a record of all approvals. Always wear protective gear and be aware of signs of gas leaks.
Remember, improper sizing or neglecting permits can lead to safety hazards and fines. For detailed steps, materials, and costs, continue reading.
What Homeowners Need to Know Before Adding a Gas Line
Homeowners considering a new gas line should first identify the planned uses—such as appliances, outdoor grills, or standby generators—and whether natural gas or propane is most appropriate for the site.
They must also understand legal and safety requirements, including local codes, permit processes, and the need for licensed professionals for most installations.
Clear limits exist for DIY work, and a licensed gas contractor should be hired whenever code, complexity, or fuel type makes professional installation mandatory.
Overview of common reasons to add a gas line (appliances, outdoor grills, generators)
Adding a gas line is often driven by practical needs: new or upgraded appliances such as stoves, water heaters, and furnaces; outdoor features like grills and fire pits; or standby generators for power reliability.
Homeowners considering how to add a gas line to an existing line typically seek increased efficiency, convenience, or backup power.
Typical projects include indoor appliance hookups, outdoor cooking setups, and generator connections.
Legal and safety requirements (permits, codes, licensed professionals)
Because gas work involves clear public-safety risks and varies by jurisdiction, permits, codes, and licensed professionals are not optional considerations but fundamental prerequisites before any installation begins.
Homeowners must obtain local permits, follow building and gas codes, schedule inspections, and hire licensed plumbers or gas-fitters.
Noncompliance risks fines, voided insurance, unsafe installations, and liability; documentation and inspections guarantee legal, safe operation.
Natural gas vs. propane considerations
When deciding between natural gas and propane, property owners should weigh availability, fuel properties, appliance compatibility, and cost implications.
Natural gas typically offers lower per‑unit cost and steady municipal supply, while propane provides portability and higher energy density useful off‑grid.
Conversion requirements, regulator types, storage tank needs, and local fuel prices influence long‑term operating costs and equipment choices.
When to hire a licensed gas contractor vs. DIY restrictions
How should a homeowner determine whether to call a licensed gas contractor or attempt any work themselves?
Homeowners should hire a licensed contractor for meter work, gas main taps, rerouting, permits, pressure testing, or unfamiliar plumbing/electrical interfaces.
Simple appliance hook-ups allowed by local code may be DIY if permits and inspections aren’t required.
When in doubt, consult local regulations and prioritize safety and certification.
How to Plan the Gas Line Installation
Planning begins with a precise assessment of appliance BTU needs and a calculation of total load to set pipe size and pressure requirements.
The installer then maps a practical route, chooses a supply entry point, and verifies the location of the existing gas main with utility markouts.
Finally, appropriate piping materials are selected—noting limitations of copper and differences between black steel and CSST—so sizing and installation meet code and safety standards.
Assessing appliance requirements (BTU load calculation)
A precise BTU load calculation establishes the total gas demand that the new line must supply and guarantees safe, efficient operation of all connected appliances.
The homeowner lists each appliance, records rated BTU/hr, and notes simultaneous-use factors per code. Summing adjusted BTUs yields required capacity.
Compare result to existing supply pressure and pipe sizing charts to determine required pipe diameter and regulator capacity.
Mapping the route and choosing supply entry point
Several clear route options should be sketched before any trenching or wall penetration begins.
The planner compares shortest runs, obstruction avoidance, and pressure drop implications, noting existing service access and meter location.
Entry point selection prioritizes minimal wall penetrations, weather protection, and accessibility for shutoffs and inspection.
Utility locates and local code setbacks determine final routing and exterior entry placement.
Selecting piping materials (black steel, CSST, copper limitations)
Material selection for gas piping hinges on compatibility with fuel type, installation environment, and local code requirements.
Black steel is preferred for durability and exterior runs; CSST offers flexibility and faster installation but requires proper bonding and protection from lightning.
Copper may be restricted or banned by codes and is vulnerable to certain gases and fittings.
Verify local regulations and inspector approval before purchase.
Sizing the gas line and determining pressure requirements
Begin by calculating required flow and pressure drop to match appliance demand and supply limitations: list each appliance’s maximum BTU/hr (or cubic feet per hour), convert to common units, and total concurrent demand per appliance grouping.
Then use those figures with the available supply pressure to determine required pipe size and layout.
Apply pressure-drop tables or software, factor fittings, elevation, and desired working pressure; select pipe diameter accordingly.
Locating existing gas main and utility markouts
Before digging, the installer locates the existing gas main and requests utility markouts to identify all underground services and establish safe digging limits.
They review as-built plans, confirm easements, and verify meter location. Marked lines are documented, photographed, and cross-checked with local utility maps.
Any discrepancies prompt contact with utility providers before excavation. Safe zones and hand-dig protocols are then established.
Step-by-Step Installation Process for Adding a Gas Line
The installation begins with preparing the work area and shutting off the gas supply to guarantee safety.
Technicians then cut, thread or flare pipes, fit connectors, and install shutoff valves and unions.
Finally, the piping is secured to code, shifted to the exterior as needed, and weatherproofed.
Preparing the work area and turning off gas supply
Clear the immediate area and confirm that all potential ignition sources are removed before any work starts.
The homeowner inspects surroundings, removes flammable materials, and guarantees good ventilation.
Next, locate the main gas shutoff and notify occupants.
Using the meter or valve, shut off supply and verify pressure drop with a gauge or by observing appliance pilot lights.
Post warning signs and lock out.
Cutting and fitting pipe sections (threading, flaring, connectors)
Begin by measuring and marking each pipe run to match the plan, then cut sections squarely with an appropriate cutter or saw to guarantee clean, burr-free ends.
Deburr edges, confirm correct lengths, and choose compatible fittings—threaded, flared, or compression—per pipe type.
Threaded joints require pipe thread compound; flares need proper flaring tools and inspection.
Assemble snugly, avoiding overtightening, and verify alignment before testing.
Installing shutoff valves and unions
After cutting, deburring, and dry-fitting pipe runs, attention shifts to installing shutoff valves and unions to control flow and permit future service.
The installer selects code-approved valves, applies appropriate thread sealant, and tightens to manufacturer torque.
Unions are positioned for easy access. Valves are oriented for clear open/closed indication.
After installation, fittings are leak-tested before burying or concealing.
Securing and supporting the piping to code
Secure the gas piping at regular intervals and at all changes of direction to prevent movement, stress, and sagging that can compromise joints or supports.
Follow local code for hanger spacing, clamp types, and material-specific requirements.
Anchor near appliances and at entry points, allow for thermal expansion with appropriate supports, and avoid over-tightening.
Inspect and document support locations before concealment.
Making indoor-to-outdoor transitions and weatherproofing
When shifting a gas line from indoors to outdoors, the installer must create a continuous, weatherproof path that prevents moisture, pests, and air infiltration while maintaining code-compliant clearances and joint integrity.
Penetrations are sleeved with corrosion‑resistant material, sealed with approved caulk or foam, and flashing installed where required.
Exterior piping receives appropriate coatings, supports, and drip loops to shed water and deter pests.
Connecting to the appliance and final fittings
Begin by confirming the service is shut off and the line purged of gas.
Then fit the final connectors and appliance shutoff according to the appliance manufacturer and local code.
Install matching fittings, flare or thread per spec, using approved sealant or tape.
Mount flexible connector without kinks, secure strain relief, and open service slowly.
Perform pressure and leak tests, document results, and label the outlet.
Testing, Inspection, and Commissioning
After installation, the system must undergo pressure testing and leak detection using methods such as soap solution and electronic gas detectors.
Inspectors will verify compliance with codes and sign off on required documentation before commissioning.
Finally, the line is purged, pilots or ignition systems are lit, and appliance operation is confirmed through final safety checks.
Pressure testing and leak detection methods (soap test, electronic)
Proper pressure testing and leak detection verify the integrity of a new or modified gas line before it is put into service, using both pressure-hold procedures and localized leak checks such as soap solution or electronic sniffers.
Technicians pressurize the system to code-specified levels, monitor for pressure decay, then inspect joints and fittings with soapy bubbles or calibrated electronic detectors, addressing any leaks immediately.
Required documentation and code inspections
Document and verify all testing and inspection steps to guarantee a gas installation meets applicable codes and is safe to commission.
Required documentation includes permit approvals, test pressure records, leak test results, material certifications, and technician qualifications.
Arrange municipal or third‑party inspections per local code; obtain signed inspection reports and a final approval or certificate of compliance before commissioning.
Retain records for future reference.
Purging the line and lighting pilot/ignition procedures
With permits approved and inspection records secured, attention turns to purging the gas line and initiating pilot or ignition sequences to ready the system for service.
A qualified technician vents trapped air and residual contaminants using approved purge methods and equipment.
After leak checks and regulator adjustments, pilot assemblies or electronic ignitors are energized per manufacturer instructions, confirming stable flame or ignition before documenting results.
Verifying appliance operation and final safety checks
Begin by operating each connected appliance through its full range of functions to confirm correct ignition, burner adjustment, thermostat responsiveness, and steady combustion.
Inspect all joints and fittings with a leak detector or soapy solution, monitor pressure stability, verify venting and carbon monoxide alarms, and guarantee appliance labels and shutoffs are accessible.
Document results and schedule professional certification if required.
Safety Precautions and Common Hazards
The discussion now turns to essential safety precautions and common hazards encountered when adding a gas line.
It covers required personal protective equipment and safe work practices, procedures for recognizing and responding to gas leaks including emergency shutoffs, and electrical bonding and grounding requirements.
Corrosion risks and effective protection methods are also highlighted to prevent long-term failures.
Personal protective equipment and safe work practices
Although gas-line work is often straightforward in procedure, it carries inherent risks that demand strict adherence to personal protective equipment and safe work practices. Proper PPE, vigilant hazard recognition, and disciplined routines reduce the likelihood of leaks, burns, asphyxiation, and explosions.
Workers should use flame-resistant clothing, gloves, eye and hearing protection, and respiratory protection when needed. They must maintain tool integrity, ventilate spaces, follow lockout/tagout, and document inspections.
Recognizing and responding to gas leaks and emergency shutoff
Detecting a gas leak quickly and shutting the supply off are critical to preventing fires, explosions, and health hazards. Workers should rely on sensory cues (rotten-egg odor, hissing sounds), gas detectors, and pressure changes to identify leaks.
Immediately evacuate affected areas, notify supervisors, and operate the designated emergency shutoff valve only when trained and it is safe to do so.
Trained personnel isolate supply, ventilate, and call emergency services.
Electrical bonding and grounding requirements for gas systems
After isolating and securing a gas leak, attention must shift to preventing ignition sources—specifically by addressing electrical bonding and grounding of gas piping and equipment.
Proper bonding ties metallic piping to the electrical grounding system, eliminating potential voltage differences.
A qualified electrician or gas technician must install bonding clamps, conductors, and grounding electrodes per local code to reduce shock and ignition risk.
Avoiding corrosion, corrosion protection methods
When metal gas piping and fittings are exposed to moisture, soil chemicals, or dissimilar metals, corrosion can compromise joint integrity and create leaks that pose fire and asphyxiation hazards.
Protective measures include using corrosion-resistant materials (CSST, stainless steel), applying approved coatings and tape, installing dielectric unions between dissimilar metals, ensuring proper drainage and ventilation, and conducting periodic inspections with prompt repair or replacement of compromised sections.
Typical Costs, Timeline, and When to Expect Additional Work
Typical costs for adding a gas line include materials, labor, permit fees, and inspection charges, which can vary widely by region and project complexity.
Project timelines commonly range from a day for simple indoor runs to several weeks when permitting, scheduling inspections, or unexpected site conditions are involved.
Additional work such as trenching, excavation, or meter relocation is required when underground routing, obstacle clearance, or utility reconfiguration is necessary and will extend both cost and duration.
Cost breakdown (materials, labor, permits, inspections)
Because gas-line work involves multiple regulated steps, budgeting requires a clear breakdown of materials, labor, permits, and inspections.
Costs vary by scope and region; materials (pipe, fittings, valves), certified labor, permit fees, and mandatory inspections are distinct line items.
Homeowners should plan contingency for code corrections.
- Materials
- Labor (licensed)
- Permits/fees
- Inspections/testing
Typical project timeline and factors that cause delays
A straightforward gas-line installation commonly takes 1–5 days from start to finish for a single appliance in an existing home.
Though projects involving service upgrades, long outdoor runs, or multiple appliances can extend to several weeks.
Typical delays stem from permit approvals, scheduling inspections, material backorders, contractor availability, unexpected code issues or existing piping problems discovered during work, and weather-related interruptions.
When trenching, excavation, or meter relocation is required
When projects extend beyond simple indoor runs—such as installing a new meter, running gas lines under driveways or yards, or creating long exterior trenches—costs, timelines, and permitting needs change considerably.
Trenching and meter relocation typically add several hundred to several thousand dollars, require utility locates, permits, inspections, and may take days to weeks.
Expect additional work for pavement restoration, soil disposal, and unforeseen obstructions.
Common Mistakes and How to Avoid Them
Common errors when adding a gas line include incorrect sizing that restricts flow, faulty joints or unsupported piping, skipped permits or inspections, and amateur DIY work that creates safety hazards.
Each mistake increases the risk of leaks, system failure, or code violations.
The following section outlines how to recognize and prevent these issues.
Incorrect sizing and undersized lines
Incorrectly sized gas lines, particularly those that are too small, create pressure drops that impair appliance performance and increase safety risks.
Undersized piping forces appliances to work inefficiently, causes pilot outage, and can lead to incomplete combustion.
Properly calculate demand, consider pipe length and fixture units, and follow code tables or consult a qualified gas professional to select correct diameters and avoid under-sizing.
Improper joints, fittings, and unsupported pipe
Inspect joints, fittings, and supports closely, as improper connections and unsecured piping are frequent causes of leaks, mechanical stress, and premature failure.
Use approved fittings, proper thread sealant or joint compound, and correct torque.
Support lines at required intervals with rated hangers or clamps to prevent sagging and vibration.
Replace damaged components and test thoroughly for tightness and integrity before commissioning.
Skipping permits or inspections
Many homeowners and DIYers underestimate the importance of permits and inspections when adding a gas line, but skipping them creates legal, safety, and insurance risks.
Failing to obtain approvals can result in fines, mandatory corrective work, or voided homeowner insurance.
Proper permitting guarantees code compliance, qualified inspections, and documented work records, protecting occupants and future property transactions while avoiding costly consequences.
DIY errors that lead to safety risks
Attempting gas-line work without proper knowledge or tools often leads to mistakes that create immediate and long-term hazards.
Common errors include improper fittings, inadequate leak testing, incorrect pipe sizing, over-tightening, and ignoring corrosion. These mistakes increase leak, fire, and carbon monoxide risks.
Avoidance requires following codes, using correct materials, conducting pressure tests, and hiring licensed professionals for inspection and final connections.
Maintenance and Long-Term Care of New Gas Lines
A concise routine inspection checklist helps homeowners systematically check valves, connections, venting, and appliance fittings for leaks or corrosion.
Clear signs of aging or damage—such as rust, persistent odors, hissing sounds, or discolored fittings—should prompt immediate professional evaluation.
Seasonal checks, including winterization measures like protecting exposed pipes and testing shutoff valves before cold weather, reduce risk and extend service life.
Routine inspection checklist for homeowners
How should homeowners monitor a newly installed gas line to guarantee ongoing safety and performance? A concise, regular inspection routine helps catch issues early and maintain system integrity.
- Check visible fittings, joints, and shutoff accessibility for tightness and corrosion.
- Smell for gas and use a detector regularly.
- Verify appliance connections and venting.
- Review recent service records and schedule professional testing annually.
Signs of aging or damage and when to call a pro
After routine checks and annual professional testing, homeowners should be alert for specific signs that a gas line is aging or damaged.
Look for persistent corrosion, visible cracks, loose fittings, unexplained hissing, rotten-egg odors, or dead vegetation near the line.
If any appear, cease use of nearby appliances, ventilate the area if safe, and contact a licensed gas professional immediately for inspection and repair.
Seasonal checks and winterization tips
Regular seasonal checks and winterization help prevent freeze-related damage and guarantee reliable, safe operation of new gas lines. Homeowners should schedule inspections and perform simple maintenance before cold weather sets in.
Inspect exposed piping, valves, and fittings for corrosion or leaks; insulate vulnerable sections, protect outdoor meters, and clear debris. Test shutoff valves, verify venting, and document service dates; consult a licensed technician for concerns.
Comparison of Typical Options for Home Gas Additions
Several common approaches exist for adding gas service to a home, each with distinct costs, installation complexity, and suitability depending on the appliance and property layout. Options differ by accessibility, permit needs, and disruption level; professionals evaluate site constraints and safety. Choose based on risk, required capacity, and long-term maintenance.
| Option | Access | Typical disruption |
|---|---|---|
| Branch line | Medium | Moderate |
| Trench/underground | Low | High |
| Appliance stub | High | Low |
| Flexible connector | High | Minimal |
HH4: Materials, cost, pros/cons, best uses
Having compared common installation approaches, attention turns to the specific materials and costs associated with each option, alongside concise pros, cons, and their most appropriate uses. Choices include black steel (durable, costly, indoor), CSST (flexible, pricier, requires bonding), corrugated stainless (easy install, mid-cost), and PVC for venting. Compare quickly:
| Material | Best use |
|---|---|
| Black steel | Indoor mains |
| CSST | Tight spaces |
| Corrugated stainless | Retrofits |
| PVC | Venting only |
Resources and Next Steps for Homeowners
Homeowners should begin by locating licensed contractors through state licensing boards and trade associations. Then verify credentials, insurance, and recent references.
They must check local building departments for required permits and applicable code references before work begins.
A concise checklist of recommended tools and materials helps homeowners understand what professionals will use and what, if anything, may need to be provided.
How to find licensed contractors and verify credentials
When hiring professional help to add a gas line, start by identifying contractors who hold the appropriate state or local licenses and are insured; these credentials reduce legal and safety risks and indicate experience with gas work.
Verify credentials by checking licensing boards, insurance certificates, references, and online reviews.
- Confirm license number and classification
- Request proof of insurance
- Contact references
- Check complaint history
Where to get permits and local code references
After verifying a contractor’s license, insurance, and references, the next step is to secure the necessary permits and consult local codes to guarantee the gas line installation meets legal and safety requirements.
Homeowners should contact their city or county building department, review state plumbing and gas codes, request inspection schedules, and obtain utility company clearance.
Keep permit documents and inspection reports on file.
Recommended tools and materials checklist for homeowners
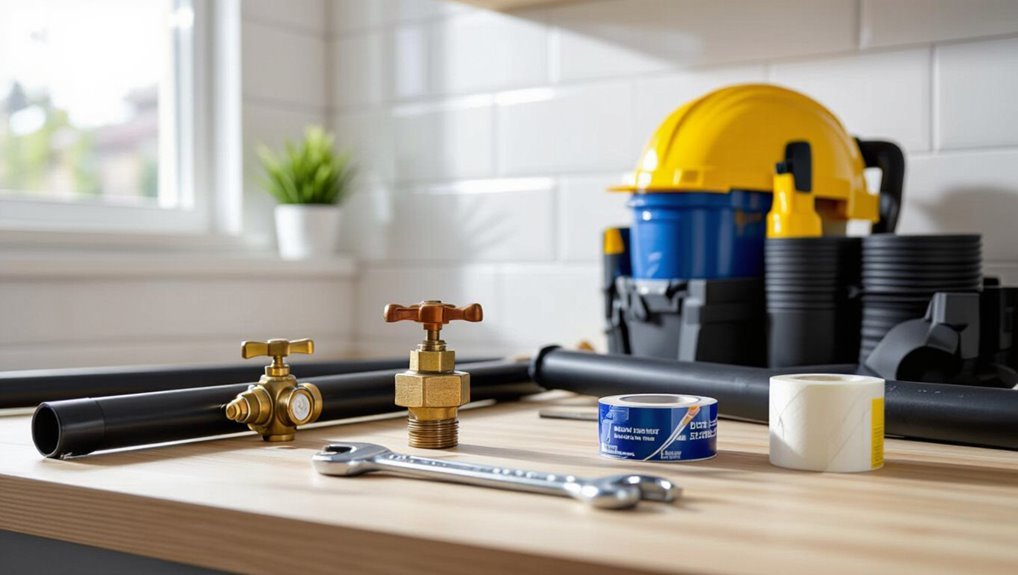
A concise checklist of tools and materials helps guarantee a safe, code-compliant gas line installation; it should include a pipe cutter, threader or approved fittings, pipe wrenches, thread sealant rated for gas (PTFE tape or pipe dope specified for gas), leak detection solution or electronic gas sniffer, pressure gauge and test kit, appropriate pipe (black iron, CSST, or approved tubing), shutoff valves, supports and straps, protective gloves and eye protection, and clear documentation of part specifications and code approvals.
- Verify pipe type, fittings, and valve ratings.
- Assemble testing equipment and sealants.
- Stock supports, straps, and protective gear.
- Keep documentation, permits, and local code references.
Conclusion
Like a gardener grafting a new branch onto an old tree, the homeowner carefully joins new gas piping to a trusted line, nurturing utility and safety in equal measure. With planning as soil, permits as sunlight, and certified professionals as steady hands, the connection can flourish without hazard. Regular inspection waters the graft, vigilance prunes risk, and diligence lets the household enjoy reliable warmth and service, rooted in responsibility and skill.