
How to Clear a Fat-Blocked Drain Fast: Safe DIY Methods That Actually Work
To quickly clear a fat-blocked drain, start by removing any visible debris, then pour very hot water mixed with dish soap down the drain. If the blockage persists, plunge vigorously, use a hand auger, or remove the P-trap. For lingering grease, let enzyme cleaners sit overnight; reserve strong degreasers for tough deposits, using them cautiously. Properly dispose of any removed fat by sealing it in a bag. Follow these steps for effective results and troubleshooting tips.
Fast, Safe Ways to Clear a Fat-Blocked Drain
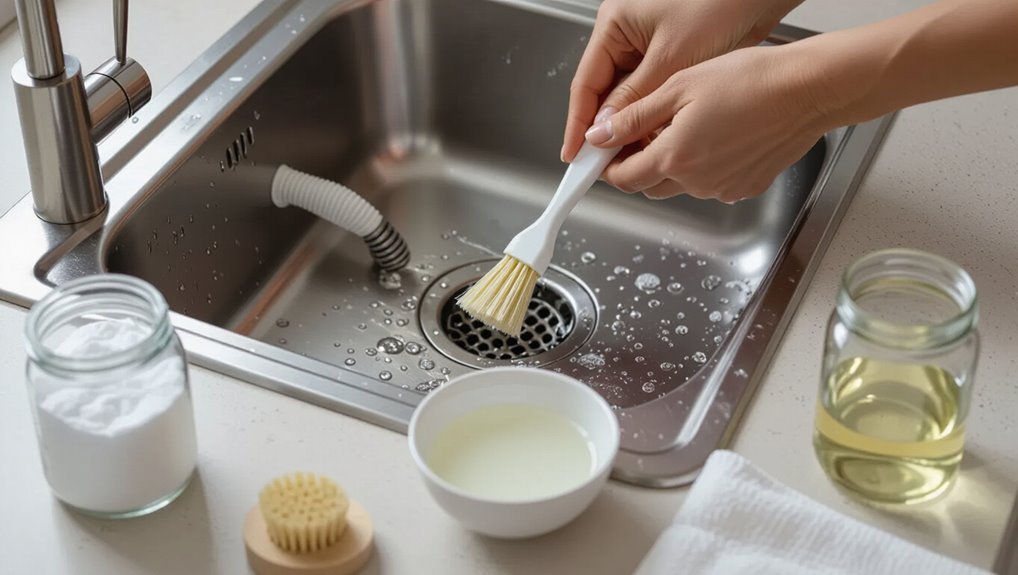
The section outlines quick, safe steps a homeowner can try first, such as removing visible debris and flushing with hot water and dish soap to dissolve fresh fat.
It then explains signs that the blockage is resistant or the situation is hazardous—persistent backup, slow drainage after repeated attempts, or foul odors—indicating cessation of DIY efforts.
Finally, it specifies when to call a professional to avoid damage or health risks.
Immediate actions to try before tools or chemicals
Act quickly when a slow or clogged sink suggests fat buildup: start with methods that require no tools or harsh chemicals to reduce risk of damage and exposure.
Run very hot tap water to melt and flush softened grease, then follow with boiling water in stages.
Use dish soap and vigorous plunging or repeated hot-water rinses.
This outlines how to clear fat blocked drain safely.
When to stop and call a professional
If home remedies like hot water, dish soap, and plunging fail to restore proper flow or the problem recurs quickly, it is time to stop and contact a professional plumber.
Persistent backups, foul odors, gurgling, slow drains throughout the home, visible leaks, or sewage odors indicate deeper blockages or damaged pipes.
A pro prevents damage, assesses risks, and applies safe extraction or repairs.
Quick explanation of fat blockages and why they form
Cooking fats, oils, and grease cool and solidify inside pipes, coating walls and trapping debris.
Common household sources include pan drippings, used cooking oil, and greasy plate rinses that enter kitchen sinks.
Slow drains, gurgling sounds, and greasy residue on drain openings help distinguish fat blockages from hair or object obstructions.
How cooking fats, oils, and grease behave in drains
When hot fats, oils, and grease go down the drain, they flow as liquids but then cool and congeal on pipe walls, gradually narrowing the passage and trapping food particles.
Solidified layers build over time, reducing flow and creating rough surfaces that catch debris.
Repeated deposits form stubborn, odorous blockages; temperature changes and water flow influence deposition and adhesion within plumbing.
Common household sources of fat-based clogs
Household fats—leftover grease from frying, butter and margarine residues, meat drippings, and oil-based sauces—frequently enter sinks and garbage disposals and then cool on pipe walls, forming sticky films that trap food particles.
Common contributors include pan rinses, salad dressings, baked-goods greases, fatty packaging residues, and oil used in food prep.
Repeated deposits accumulate, narrow pipes, and impede flow over time.
Signs your drain is fat-blocked vs. other blockages
Over time, the grease and oil described above harden into a slick, adhesive layer that narrows pipes and creates a distinctive set of symptoms that differ from other types of clogs.
Fat-blocked drains show slow drainage, greasy residue on fixtures, recurring odor, and gurgling as water bypasses sticky buildup.
Unlike hair or mineral clogs, fat layers often reoccur after partial clearing and respond poorly to simple plunging.
Tools and materials you need for DIY fat-clog removal
A concise set of tools and materials makes home removal of fat clogs safer and more effective. The following essentials and choices cover mechanical tools, cleaning agents, and personal protection.
Guidance is included on when to prefer enzyme cleaners over harsher solvents and what precautions to take.
- Basic tools: plunger, drain snake, bucket, gloves.
- Safe cleaners and degreasers; enzyme vs chemical solvent use.
- Protective gear and key precautions.
Basic tools (plunger, drain snake, bucket, gloves)
Prepare a small kit before tackling a fat-clogged drain: a sturdy plunger for creating suction, a drain snake (manual or hand-crank) to reach and break up deeper blockages, a bucket to catch wastewater and debris, and durable gloves to protect hands and improve grip.
Add a flashlight for inspection, rags for cleanup, and adjustable pliers for removing traps or fittings; keep everything within reach.
Safe household cleaners and degreasers to use
Several household cleaners can safely help dissolve or loosen fat-based clogs when used correctly.
Recommended items include liquid dish detergent (concentrated degreaser), baking soda paired with white vinegar for fizzy loosening, and hot water to flush softened grease.
Commercial biodegradable citrus-based degreasers and non-caustic enzyme-friendly formulations are useful.
Avoid mixing chemicals; follow label instructions and ventilate the area.
When to use enzyme drain cleaners vs. chemical solvents
When should one choose an enzyme drain cleaner over a chemical solvent?
Enzyme cleaners suit gradual, organic buildup and routine maintenance: they work slowly, are biodegradable, and are safer for pipes and septic systems.
Chemical solvents act quickly on heavy, stubborn fat clogs but carry higher corrosion and ventilation risks.
Choose enzymes for prevention or mild blocks; reserve solvents for persistent, immediate clogs.
Protective gear and precautions
A sturdy pair of chemical-resistant gloves, splash-proof goggles, and a mask rated for organic vapors form the baseline protection for anyone tackling a fat-blocked drain.
Additional items include long sleeves, rubber boots, and a face shield for splashes.
Guarantee good ventilation, read product labels, keep children and pets away, avoid mixing chemicals, and have baking soda/vinegar or water ready to neutralize spills.
Step-by-step: Safe mechanical methods to remove fat blockages
The following section outlines practical mechanical approaches for dislodging fat clogs, including effective plunger use on kitchen sinks and proper handling of a hand auger or drain snake.
It also covers safe removal and cleaning of the P‑trap and recommended steps for addressing clogs in garbage disposals.
Each method emphasizes precautions to prevent damage and reduce exposure to grease.
Plunger technique for kitchen sinks
Start by selecting a cup-style plunger sized to fit the kitchen sink drain and guarantee the sink basin is partially filled with enough water to cover the plunger cup.
Position plunger over the drain, seal around the strainer, then push and pull vigorously without breaking the seal for 20–30 seconds.
Test flow; repeat up to three times.
Rinse with hot water to clear loosened fat.
Using a hand auger/drain snake effectively
After attempting plunger clearing, attention turns to a hand auger (drain snake) for blockages that resist suction.
The user wears gloves and eye protection, feeds the snake slowly into the drain, rotates the handle clockwise to engage fat buildup, and avoids forcing past resistance.
When resistance releases, retract gently, repeat until flow resumes, then flush with hot water to clear residues.
How to remove and clean the P-trap
Loosen the slip nuts securing the P-trap while placing a bucket underneath to catch water and softened fat.
Remove the trap, disassemble its curved section, and scrape compacted grease with a plastic scraper or old toothbrush.
Rinse parts with hot, soapy water until clear.
Inspect washers and threads for damage, replace if needed, then reassemble and test for leaks before finishing.
Clearing clogs in garbage disposals safely
Carefully addressing a fat-clogged garbage disposal begins with ensuring the unit is powered off and physically disconnected to eliminate electrical risk.
Using a flashlight and pliers, remove visible solidified grease and food debris.
Insert an Allen wrench into the disposal’s manual crank, turning to dislodge jams.
Reassemble, restore power, run cold water and test.
Repeat if resistance persists.
Step-by-step: Safe chemical and biological methods that work
This section explains practical chemical and biological options for loosening and breaking down fat blockages.
It outlines safe use of hot water with dish soap, correct application and timing for enzyme-based cleaners, and safety precautions when applying commercial degreasers.
It also clarifies the limited effectiveness of vinegar and baking soda against hardened grease.
How to use hot water and dish soap safely
Begin by heating water to just below boiling—around 140–160°F (60–70°C)—then combine a generous squirt of liquid dish soap to form a slippery, grease-dissolving solution; pour it slowly down the drain in stages to avoid splashing and allow the hot soapy water time to melt and carry away fatty deposits.
Repeat cautiously, protect skin with gloves, ventilate, and test flow periodically.
Best practices for enzyme-based drain cleaners
After using hot soapy water to soften and flush away surface grease, an enzyme-based cleaner offers a biological approach to break down remaining organic buildup without harsh caustics.
Follow manufacturer dosing, pour into slow drains when no water runs, maintain warm temperatures for enzyme activity, allow recommended dwell time (often overnight), repeat weekly for persistent buildup, and avoid mixing with bleach or strong acids.
When and how to use commercial degreasers (safety notes)
When grease and enzymes prove insufficient, commercial degreasers deliver targeted chemical action to dissolve heavy, baked-on fats — but they require strict safety precautions due to their concentrated, often caustic formulations.
Use only labeled products for drains, follow dilution and contact-time instructions, ventilate the area, wear chemical-resistant gloves and eye protection, avoid mixing with other cleaners, and rinse thoroughly.
Dispose of waste per label.
Why vinegar and baking soda have limited use for fat clogs
Although vinegar and baking soda create a vigorous fizz that seems like it should cut through grease, their chemical action is largely ineffective against solidified fats and heavy, polymerized residue. They mainly agitate loose debris and dilute mild organic films.
For true fat clogs, enzymatic drain cleaners, hot water/degreasers, or mechanical removal are more reliable, as acid–base reactions don’t break long-chain triglyceride bonds.
Combination approaches: fastest reliable sequences
For partial fat buildups, a rapid, reliable routine is to flush with hot water, follow with a plunger, and finish with a drain snake if flow remains slow.
For deep or stubborn blockages, removing and inspecting the P‑trap first allows targeted enzyme treatment to reach affected areas before a mechanical follow‑up clears residual material.
These sequences balance speed and thoroughness while minimizing unnecessary harsh chemicals.
Quick sequence for partially clogged drains (hot water → plunger → snake)
A simple, reliable sequence—apply hot water, follow with a plunger, then use a drain snake if needed—clears most partial clogs quickly and minimizes effort.
Warm water softens grease, the plunger dislodges loosened residue and restores flow, and a hand-operated snake removes remaining obstructions without chemicals.
Proceed gently, repeat steps as necessary, and stop if resistance suggests a deeper blockage requiring advanced intervention.
Deep blockages sequence (P-trap removal → enzyme treatment → mechanical follow-up)
When the hot-water → plunger → snake routine fails to restore full flow, deeper methods are required.
The technician removes the P-trap to clear accessible grease, inspects for block location, then applies an enzyme formula to digest residual fats over 24–48 hours.
After enzymatic action, a focused mechanical follow-up (auger, hand snake, or hydro jet) guarantees passage and confirms leak-free reassembly.
Prevention strategies to stop fat blockages from recurring
Preventing repeat fat blockages requires simple changes to daily kitchen habits, proper disposal of fats, oils, and grease, and a targeted maintenance routine. The following points summarize practical steps homeowners and businesses can take to keep drains clear and reduce the likelihood of future clogs.
Consider escalation to a grease trap or interceptor when routine measures no longer control buildup.
- Avoid pouring cooking oils, grease, or solidified fats down the sink; wipe pans with a paper towel first.
- Collect fats in a sealed container for trash or recycling and cool before disposal; use designated bins where available.
- Use strain screens, apply monthly enzyme treatments, and install a grease trap or interceptor for high-volume kitchens.
Kitchen habits to avoid (what not to pour down the sink)
Grease, coffee grounds, and starchy cooking water are common culprits that should never be poured down a kitchen sink; these substances solidify or bind with other debris to form persistent blockages.
Also avoid pouring fats, oil, egg shells, fibrous vegetable peelings, and small food scraps.
Limit dumping sauces, sugary syrups, and dairy down drains.
Wipe pans with paper before rinsing.
Best disposal practices for fats, oils, and grease
Adopt simple disposal habits to keep fats, oils, and grease from creating recurring blockages: collect cooled cooking fats in a dedicated container and seal it for trash, wipe greasy cookware with a paper towel before washing, and strain and compost small amounts of oily food solids where local rules permit.
Store used oil for recycling programs, avoid pouring any liquid fat down drains, and label containers clearly.
Routine maintenance (strain screens, monthly enzyme treatments)
Regular upkeep of strain screens and periodic enzyme treatments provides a practical, low-effort barrier against fat build-up in household drains.
Screens catch solids and cooled grease before entry; they should be cleaned after each use.
Monthly biological enzyme cleaners break down residual fats and organic matter without harsh chemicals.
Consistent combined use reduces odor, slows residue accumulation, and minimizes frequency of manual or professional interventions.
When to install a grease trap or interceptor
If strain screens and enzyme treatments still allow recurring fat build-up, upgrading to a grease trap or interceptor can provide a more robust line of defense.
Install when persistent slow drains, recurring blockages, or commercial-level grease volumes occur.
Choose size by flow rate and grease load, follow local codes, and schedule regular professional pumping.
Proper installation prevents sewer backups, odors, and costly repairs.
Troubleshooting: Common problems and fixes
If a drain remains slow after an initial cleaning, the next checks should include the trap, venting, and any downstream buildup.
Persistent odors after treatment usually indicate trapped debris or partial blockages and can be addressed with targeted rinses, enzymatic cleaners, or trap removal.
If damage or leaks are discovered while fixing the clog, temporary seals or shutoffs can limit harm, but a follow-up repair or professional replacement is recommended.
Persistent slow drain after cleaning what to check next
When a sink or shower remains sluggish after a thorough fat-clearing, attention should turn beyond the visible trap and drain line to less obvious causes: partially clogged vent stacks, a deteriorating trap seal, mineral buildup in older pipes, or a choke further down the main line.
Inspect vents for roof obstructions, test seals for leaks or air gaps, consider descaling, and use a snake or camera to locate downstream blockages.
Foul odors after treatment remedies
A lingering bad smell after grease removal often signals problems that extend beyond visible clogs: trapped residue in the P-trap, bacterial buildup on pipe walls, infiltrating sewer gas from a dried or broken trap seal, or organic matter lodged deeper in the line.
Remedies include flushing with hot water and enzyme-based cleaners, sanitizing accessible traps, airing the area, running vents, and repeating enzyme treatments until odors cease.
Damage or leaks found while fixing the clog temporary fixes and next steps
Several common issues can surface while clearing a fat-blocked drain—cracked trap fittings, corroded joints, split PVC, or slow but persistent leaks—and each requires a prompt, measured response to prevent water damage or sanitary hazards.
Temporarily cap or bucket under leaks, dry and tighten slip nuts, apply plumber’s tape, use epoxy putty for small cracks, and arrange professional repair for permanent replacement or major corrosion.
Cost, time and safety comparison of DIY vs. professional service
When weighing cost, time and safety for a fat-blocked drain, clear indicators can point to the necessity of hiring a professional rather than attempting a DIY fix. The table below summarizes five key signs that a plumber is required, helping readers compare risks, time investment and likely costs. Professionals should be considered when multiple indicators are present or when uncertainty about the problem remains.
| Indicator | Why it matters |
|---|---|
| Repeated clogs after cleaning | Suggests deeper pipe damage or buildup needing professional inspection |
| Sewage backup or foul gas | Health hazard and requires specialist equipment and remediation |
| Visible pipe damage or leaks | Risk of water damage and structural issues beyond DIY scope |
| Unusual noises or slow drainage system-wide | Could indicate main sewer line problems needing camera diagnosis |
| Chemical-resistant or hardened grease | May require mechanical removal or hydro-jetting not suitable for homeowners |
Indicators that a professional plumber is required
How much time, money, and risk are involved often determines whether a homeowner should attempt a DIY fix or call a professional plumber.
Persistent backups, foul odors, multiple affected fixtures, recurring clogs after attempts, visible pipe damage, sewage smell, or DIY tools failing indicate professional intervention.
Professionals offer diagnostic equipment, safe grease removal, warranty, and faster resolution; costs often justify avoided damage and health risks.
Practical tips to work quickly and safely
The section outlines practical techniques to speed up clearing a fat-blocked drain, including targeted tools and methods that reduce time without sacrificing effectiveness.
It presents a concise safety checklist to follow before and during work to prevent injury and plumbing damage.
It also covers correct containment and disposal of removed grease and waste to avoid re-blocking and environmental harm.
Time-saving techniques for rapid clearing
Start by evaluating the blockage quickly and safely: identify whether the clog is grease near the sink trap, further down the line, or caused by solids.
Then select the appropriate tool—plunger, drain snake, or enzymatic treatment—so work proceeds with purpose rather than guesswork.
Keep tools ready, clear workspace, use targeted plunging or snaking techniques, and test flow periodically to avoid repeated efforts and wasted time.
Safety checklist before starting any drain work
After quickly evaluating clog location and choosing a tool, workers should run a brief safety checklist before any hands-on work begins: confirm water and power are off, wear gloves and eye protection, ventilate the area, keep clear access to exit, position a bucket and towels, inspect tools for damage, and have a phone nearby for emergencies.
Proceed only if conditions are safe.
Proper disposal of removed grease and waste
Bag removed grease and solids immediately to prevent recontamination and odors, using sturdy, sealable containers or double-bagged heavy-duty plastic.
Label and cool hot material before sealing. Dispose according to local regulations—household waste is often acceptable, but some areas require hazardous or bulky-waste collection.
Wipe tools with absorbent paper, collect used rags in a metal container, and wash hands and surfaces with degreaser afterward.
Real-life examples and quick case scenarios
The following brief cases illustrate common outcomes and decisions when tackling fat-blocked drains.
They range from a quick fix to persistent buildup and a cautionary tale about improper DIY work.
Consider each scenario for practical takeaways and when to call a professional.
- Small kitchen sink clog resolved in 15 minutes.
- Stubborn fat pipe buildup requiring multiple treatments.
- When a DIY attempt caused damage — lessons learned.
Small kitchen sink clog resolved in 15 minutes
A homeowner noticed slow drainage in a small kitchen sink and, after a brief inspection, eliminated the clog within 15 minutes using a sink plunger and a baking-soda–vinegar flush.
The effort cleared trapped grease and food particles, restored normal flow, and required only basic tools and minimal cleanup.
The quick approach involved repeated plunges, a short hot-water rinse, and no disassembly, preventing escalation.
Stubborn fat pipe buildup requiring multiple treatments
Facing persistent fat buildup in household drains often requires repeated, targeted interventions rather than a single quick fix.
One homeowner alternated enzyme treatments and hot-water flushes over a week, restoring flow.
Another used manual snaking plus weekly enzyme maintenance to prevent recurrence.
Short, staged efforts—mechanical clearing, enzyme dosing, and routine flushing—resolved entrenched deposits without immediate professional help.
When a DIY attempt caused damage lessons learned
Attempting a quick fix, one homeowner used a wire coat hanger to clear a fat-clogged sink and accidentally punctured the P-trap, causing a slow leak that went unnoticed for weeks.
Another tried boiling water and cracked a PVC elbow.
Lessons: avoid improvised tools, know pipe materials, inspect for unseen damage, and call a pro when unsure to prevent costly repairs and mold.
Conclusion
Clog-clearing confidence comes from careful, consistent craftsmanship: confronting congealed cooking grease with correct, cautious choices cuts costly calls to contractors. Swift scooping, snaking, steaming or biological solutions should be staged sensibly, securing safety supplies and simple safeguards. When stubborn solids stubbornly stick, skilled service steps in. Ultimately, sensible speed and steady smarts save sinks, sustain systems and spare stress—small, smart steps solve sluggish sewers and stabilize satisfaction.
