How to Install a Dishwasher Air Gap: Step-by-Step Guide for a Leak-Free Kitchen
Installing a dishwasher air gap is essential for preventing wastewater backflow into your dishwasher, ensuring a clean and safe kitchen. This small plumbing device creates a physical barrier between the dishwasher discharge and your household drain. Follow these step-by-step instructions to install it correctly and achieve a leak-free result.
What a Dishwasher Air Gap Is and Why It Matters
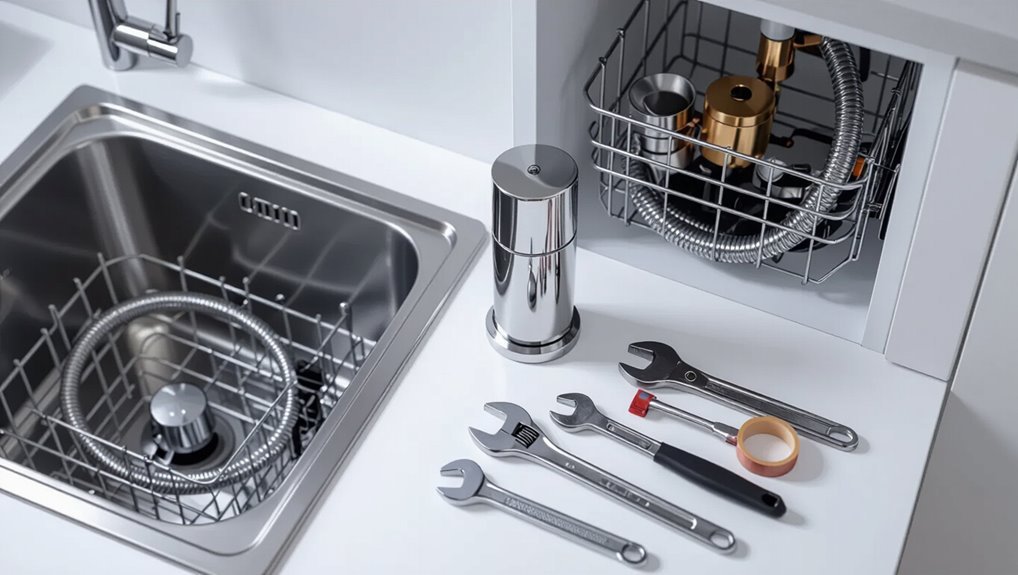
A dishwasher air gap is a small, plumbing-mounted device that creates a physical break between the dishwasher discharge and the household drain to prevent wastewater from flowing back into the appliance.
By maintaining this open-air separation, the air gap stops backflow and reduces the risk of contamination from sink or garbage disposal effluent.
Local plumbing codes often require an air gap for dishwashers or specify approved alternatives, so compliance should be checked before installation.
Definition and basic function of an air gap
An air gap is a small, cylindrical device mounted above the sink that prevents contaminated water from flowing back into the dishwasher by creating a physical break in the drain line.
It serves as a visible, code-required component ensuring proper drainage, reducing odors, and signaling clogs.
Homeowners learning how to install a dishwasher air gap should understand its role before proceeding with placement and connections.
How an air gap prevents backflow and contamination
Building on the air gap’s role as a visible safety device above the sink, its primary function is to interrupt any path that would allow wastewater to siphon back into the dishwasher.
It creates a physical air break between dishwasher discharge and sink drain, preventing contaminated backflow during pressure changes. This simple barrier protects dishes and plumbing from foul water and bacterial contamination.
Local plumbing codes and when an air gap is required
Several jurisdictions mandate an air gap for dishwasher installations to guarantee compliance with backflow and public health standards.
Codes vary: some require an air gap on all new or relocated dishwashers, others allow high-loop alternatives only with local approval.
Installers must consult municipal plumbing codes, permit requirements, and inspector guidance to determine mandated devices, placement, and acceptable exceptions for each project.
Signs You Need to Install or Replace an Air Gap
Visible drainage problems such as water backing up into the sink, food particles in the dishwasher drain, or persistent odors can indicate a missing or failing air gap.
Homeowners should follow a simple inspection checklist—check for clogs at the sink connection, inspect the air gap cap for debris, and confirm the hose routing and secure fittings.
If symptoms persist after basic checks or if there is any uncertainty about plumbing connections, a professional plumber should be contacted.
Common symptoms of a missing or failing air gap
Recognize early warning signs that indicate a missing or failing dishwasher air gap to prevent contamination and drainage issues.
Persistent sink backups after dishwasher cycles, foul odors near the sink or disposal, slow drainage from the dishwasher, visible water pooling around the sink or countertop, and occasional dishwasher error codes related to drainage are common symptoms signaling installation or replacement is needed.
Inspection checklist for homeowners
A simple, systematic inspection helps homeowners determine whether an air gap should be installed or replaced.
Check for visible debris or corrosion at the gap top, standing water in the sink or hose, dishwasher drainback, persistent odors, loose or cracked hoses, and improper hose routing under the sink.
Note recurring backups or code noncompliance; document findings for action.
When to call a professional plumber
When should a homeowner call a professional plumber?
A plumber is warranted if persistent backflow, frequent dishwasher clogs, visible corrosion, loose or missing air gap parts, unclear or noncompliant plumbing layout, or repeated leakage occur.
Also seek help when local code requirements exist, the sink/countertop requires cutting, or the homeowner lacks tools or confidence.
A pro guarantees proper installation and code compliance.
Tools and Materials Required
A concise list of the basic tools and parts—air gap assembly, hose clamps, dishwasher and drain hoses, screwdriver, and plumber’s putty—prepares the reader for the installation steps.
Optional materials for different sink types, such as escutcheons, longer hoses, or sink-adapter fittings, are noted where relevant.
Compatibility notes regarding dishwasher models and garbage disposals, including required hose diameters and mounting clearances, are provided to prevent mismatches.
List of required tools and parts
Several essential tools and replacement parts are required to install a dishwasher air gap safely and effectively.
The installer should gather quality components and basic hand tools to guarantee a secure, code-compliant connection without interruption.
- Air gap assembly (matching finish)
- Dishwasher hose and tailpiece
- Hose clamps and gasket
- Phillips screwdriver, adjustable wrench, utility knife
Optional materials for different sink types
Because sink configurations vary, additional materials may be needed beyond the basic kit to guarantee a proper fit and waterproof seal.
For stainless undermounts, use silicone gasket sealant and thin mounting shims.
For cast iron or stone, rubber isolation pads and stainless mounting screws prevent damage.
For multi-hole faucets, employ deck plates and shorter tailpieces to align the air gap neatly.
Compatibility notes for dishwasher models and disposals
Practitioners should verify compatibility between the chosen air gap, the dishwasher model, and any food disposal before gathering tools and materials.
Check manufacturer specifications for hose diameter, outlet orientation, and required adapters.
Confirm disposal inlet position and whether knockout plugs must be removed.
Some compact or integrated dishwashers need low-profile air gaps or alternative high-loop solutions; document model-specific installation notes.
Preparing for Installation
Before beginning, the installer measures the sink or countertop to select a suitable hole location that clears faucet fixtures and provides proper alignment with the dishwasher hose.
Power to the dishwasher circuit and the water supply to the area are turned off to guarantee a safe, dry worksite.
Any existing knockout plug, old air gap, or sink sprayer is removed and the opening is cleaned and inspected for a proper fit.
Measuring and choosing the installation location on the sink or countertop
One clear, practical step in preparing to install a dishwasher air gap is measuring and selecting the exact hole location on the sink or countertop.
Measure clearance from faucet, soap dispenser, and sink rim; confirm sufficient deck thickness and underside access.
Verify the chosen spot aligns with drain and dishwasher hose routing to avoid kinks.
Mark center, recheck measurements, then drill.
Turning off power and water supply
With the hole marked and drilled, attention shifts to shutting off utilities to guarantee a safe workspace.
The installer locates and shuts the dishwasher circuit at the breaker to prevent electrical hazards.
Next, the hot and cold supply valves under the sink are closed, and the dishwasher supply line is relieved of pressure by running the appliance briefly or opening a nearby faucet.
Removing existing components (knockout plug, old air gap, or sprayer)
Begin by clearing the area under the sink and removing any loose items to create unobstructed access to the sink deck and garbage disposal connections.
Inspect the existing knockout plug, old air gap, or sprayer. Remove screws, retaining nuts, or mounting clips with appropriate tools.
Lift out components, clean the mounting hole, and discard or store old parts.
Check for residual sealant or debris before installing the new air gap.
Step-by-Step Dishwasher Air Gap Installation
The installer begins by positioning the air gap on the countertop and marking drill points for a precise fit.
They then drill the hole, secure the air gap body, and attach the dishwasher hose to the inlet.
Finally, the installer connects the outlet to the drain or disposal, tightens clamps, checks seals, and completes the final assembly.
Positioning the air gap and marking drill points
Position the air gap so it sits centered behind the sink faucet and clear of countertop obstructions.
Then verify there is enough clearance beneath the sink for the tailpiece and hose routing.
Align the unit to avoid drawer or cabinet hinges.
Use a pencil to mark the hole center and any mounting or clearance outlines.
Double-check measurements and clearances before proceeding.
Drilling the hole and securing the air gap body
Using a drill with the appropriate hole saw, the installer cuts a clean opening at the marked center point sized to the air gap’s threaded body.
Debris is cleared, edges deburred, and the air gap body is inserted from above.
A rubber gasket sits beneath; a mounting nut threads on securely from below and is tightened hand-firm then snugged with a wrench to prevent movement.
Connecting the dishwasher hose to the air gap
With the air gap body firmly mounted and the sealing gasket seated, attention shifts to attaching the dishwasher drain hose to the inlet fitting on the air gap.
The hose end is checked for damage, slid fully onto the inlet, and secured with a stainless steel or nylon clamp.
Verify a smooth, downward hose run with no kinks and test for snug, leak-free seating.
Connecting the air gap to the drain or disposal
The installer routes the air gap’s outlet hose to the sink drain or garbage disposal inlet, ensuring the hose end is cut square and free of burrs before slipping it onto the outlet barb.
The hose follows a smooth path without kinks, reaching the disposal’s knockout fitting or tailpiece. If using a disposal, the knockout is removed; for a tailpiece, the hose slips over the barbed fitting.
Tightening clamps, checking seals, and final assembly
After the outlet hose is seated on the disposal inlet or tailpiece, attention shifts to securing all connections and completing the assembly.
Hose clamps are tightened evenly without overcompression. All seals and gaskets are inspected for proper seating and damage; any defective parts are replaced.
The air gap housing is secured to the sink, hoses routed neatly, and fittings rechecked for firm, leak-free engagement.
Restoring power and testing for proper operation
Power is restored to the dishwasher only after confirming all mechanical connections are secure and no tools remain in the area; this minimizes risk while enabling functional checks.
The installer reconnects power, runs a short wash cycle, inspects the air gap and hose junctions for leaks, and listens for unusual noises.
Successful operation is confirmed by proper drainage, no leaks, and normal cycle completion.
Installation Variations and Special Cases
Countertop material, adjacent appliances, and sink location can change mounting choices and required fittings for an air gap.
Mounting on stainless steel, granite, or composite surfaces may need different drill bits or grommets, and connections must be adjusted when a garbage disposal is present.
For islands or remote sinks, under-sink or remote-routing options provide alternatives to countertop-mounted installations.
Installing on stainless steel vs. granite or composite countertops
Different countertop materials require distinct mounting approaches and precautions when installing an air gap: stainless steel surfaces allow for thin-gauge drilling and require protection against scratching and deformation, whereas granite or composite surfaces demand hardened bits, careful template placement, and sometimes professional cutting to avoid cracking or chipping.
Fastener choice, sealant type, and backing support vary; measure twice, clamp, and test fit before finalizing.
Air gap installation when a garbage disposal is present
When a garbage disposal is present, the dishwasher air gap must be routed and connected so that wastewater cannot backflow into the appliance or interfere with the disposal’s outlet.
This typically involves installing the air gap above the disposal’s discharge, using the disposal’s hose barb or a dedicated branch tee on the sink tailpiece, and ensuring the air gap’s outlet hose slopes downward without kinks.
Secure clamps, correct hose diameter, and proper sealing prevent leaks and cross-contamination.
Under-sink shortcut for islands or remote sink installations
If routing from a sink-mounted air gap over a garbage disposal is impractical—such as with island or remote sink installations—an under-sink shortcut offers an alternate path that keeps wastewater from reentering the dishwasher while minimizing visible hardware.
Install a short high-looped hose from dishwasher to a dedicated under-sink junction or inline air gap, then route to disposal or drain with secure clamps and check valves to maintain backflow protection.
Troubleshooting Common Problems
When problems arise with a dishwasher air gap, common signs include water leaking at the air gap or hose connections, gurgling noises, slow drainage, or complete failure to drain.
Noisy operation or intermittent backflow often indicates partial clogs, damaged valves, or improper hose routing that require inspection.
Simple clogs can usually be cleared by removing and cleaning the air gap and hoses, while persistent leaks or damaged components warrant replacement.
Water leaks at the air gap or connections
Inspecting the air gap and its hose connections is the first step in diagnosing water leaks; loose fittings, cracked hoses, or a clogged air gap can allow water to escape during the dishwasher’s drain cycle.
The technician checks hose clamps, tightens fittings, replaces brittle or split hoses, and clears debris from the air gap chamber.
Re-seating seals and testing a short drain cycle verifies repair.
Gurgling, slow drainage, or dishwasher not draining
Addressing gurgling noises, slow drainage, or a dishwasher that won’t drain starts with recognizing the symptoms: bubbling sounds during the drain cycle, standing water in the tub, or water backing into the sink.
Checking the air gap for blockages, inspecting the dishwasher and disposal hoses for kinks or clogs, and running the disposal to clear shared drains often resolves flow issues before calling a professional.
Noisy air gap or intermittent backflow
A noisy air gap or intermittent backflow signals disrupted drainage or a partial obstruction in the vented connection between the dishwasher and sink drain.
Such symptoms often arise from trapped debris, misrouted hose bends, or incorrect installation height causing siphoning.
Inspect visible tubing and hose clamps for kinks or looseness, confirm correct routing, and check for foreign material in the gap housing without disassembling harder-to-service components.
How to clear clogs and when to replace components
When a noisy air gap or intermittent backflow points to obstruction, the next step is to systematically clear clogs and assess which parts need replacement.
Disconnect power and hoses, remove cover, inspect for debris, and flush passages with water.
Clean or replace the cap, inner chamber, and hose sections if cracked, warped, or persistently blocked.
Reassemble and test for proper drainage.
Maintenance and Long-Term Care
Routine maintenance begins with a simple inspection schedule and easy cleaning steps to keep the air gap clear and functional.
The guide notes common signs of wear—cracks, persistent clogs, or corrosion—that indicate when replacement is necessary.
It also recommends seasonal checks and odor-prevention measures, such as flushing with vinegar and ensuring proper drainage.
Regular inspection schedule and simple cleaning steps
Although often overlooked, regular inspections and simple cleanings are essential to keep an air gap functioning and to prevent clogs or backflow.
Inspect monthly: remove cap, check for debris or standing water, and confirm hoses remain secure.
Clean with a soft brush and mild detergent; flush with warm water.
Document findings and perform deeper cleaning quarterly to maintain reliable operation.
Signs of wear and when to replace the air gap
Inspect the air gap regularly for clear signs of deterioration: persistent leaks, visible cracks or corrosion on the housing, warped or brittle gaskets, and recurring blockages that resist normal cleaning indicate compromised function.
Replacement is recommended when seals fail, metal or plastic shows structural damage, or cleaning no longer restores flow.
Timely swap prevents backflow and kitchen water damage.
Seasonal checks and preventing odors
Schedule seasonal checks to keep the air gap functioning and to prevent odors: every spring and fall, examine the cap and surrounding trim for debris, remove and flush the chamber with a mild vinegar solution, and run water through both inlet and outlet lines to confirm unobstructed flow.
Inspect hoses for kinks, tighten fittings, deodorize with baking soda if needed, and document maintenance dates for future reference.
Code Compliance, Best Practices, and Safety Tips
Code requirements and local permitting should be checked before beginning, including municipal plumbing codes and manufacturer documentation for the air gap and dishwasher.
Installers should use secure, leak-proof fittings, maintain the proper high loop or air gap elevation, and guarantee drain hoses slope toward the disposal to prevent standing water.
If work involves complex routing, concealed connections, or uncertain code interpretation, a licensed plumber should be hired to verify safety and compliance.
Typical code requirements and documentation to check
When planning an air gap installation, homeowners and contractors should verify local plumbing and building regulations, manufacturer instructions, and any applicable municipal or utility requirements to guarantee compliance and avoid costly rework.
Check code references for required air gap types, permitted locations, discharge routing, and trap/venting standards.
Confirm inspection, permit, and documentation procedures, and retain product specifications, installation records, and inspection approvals for future verification.
Best practices for leak-proof connections and slope of drain hoses
Make certain all connections are watertight and drain hoses maintain a consistent downward slope to prevent backups and leaks.
Use high-quality clamps, guarantee hose ends seat fully over barbs, and apply plumber’s tape where threaded fittings exist.
Route hoses without kinks, secure with straps, and verify slope toward the sink or disposal.
Test under full load for leaks and proper drainage.
Safety precautions and when to hire a licensed plumber
After confirming all hoses and fittings are leak-free and properly sloped, attention should turn to safety measures and recognizing circumstances that require a licensed plumber.
Wear eye protection, shut off power and water, and verify local code for air gap placement.
Hire a licensed plumber for electrical work, complex cabinetry, nonstandard drains, persistent leaks, or required permits to guarantee compliance and avoid damage.
Cost, Timeframe, and DIY vs Professional Decision
A brief cost overview compares parts (air gap unit, fittings, hoses) and typical labor rates to frame budgeting.
Estimated DIY installation time is presented alongside common steps so readers can gauge whether they have the skills and tools.
Factors such as complex plumbing, local code inspections, or lack of experience that often justify hiring a professional are then highlighted.
Typical cost breakdown for parts and labor
Cost varies by component and labor: basic air gap kits typically range from $15 to $40, higher-end or decorative models $50–$150, while plumbing fittings and hoses add $10–$30. Labor rates and permit needs shift totals; DIY saves on labor but may require tools. Consider warranty, difficulty, and local code compliance when deciding between DIY and hiring a licensed plumber.
| Item | Typical cost |
|---|---|
| Basic kit | $15–$40 |
| Decorative model | $50–$150 |
| Fittings & hoses | $10–$30 |
| Professional labor | $75–$200+ |
Estimated time to install for DIYers
While familiarity with basic plumbing tools and sink/cabinet access speeds the process, most DIYers can install a dishwasher air gap in about 45 minutes to 2 hours.
Time varies with countertop drilling, tight workspace, and routing hoses. Allow extra time for measuring, test runs, and cleanup.
Novices should plan for the upper range; experienced DIYers often finish near the lower bound.
Factors that justify hiring a professional
Many homeowners weigh several practical factors when deciding whether to hire a professional for an air-gap installation: labor and service fees, expected timeframe including scheduling and inspections, and the installer’s experience with local plumbing codes and countertop work.
Professionals justify higher cost when complexity, code compliance, warranty, or limited DIY time exist; conversely, simple installs, confidence, and lower risk favor DIY.
Quick Reference: Step-by-Step Checklist for a Leak-Free Installation
A concise, numbered checklist helps confirm a dishwasher air gap is installed correctly and remains leak-free.
Follow systematic steps, verify fittings, and test for drips to assure durability.
- Inspect parts and clear sink hole.
- Seat air gap, tighten mounting hardware.
- Connect dishwasher and waste hoses with clamps.
- Run wash cycle, observe for leaks and adjust as needed.
Conclusion
To sum up, the dishwasher air gap proves an essential guardian against backflow, ensuring a hygienic, leak-free kitchen when installed and maintained correctly. Homeowners should recognize signs of wear, follow code-minded procedures, and weigh DIY versus professional help based on skill and local regulations. With proper tools, routine checks, and timely replacement, this humble device—akin to a pocket watch in a digital age—continues to perform a quiet, indispensable role in household sanitation.