How to Level a Tub: Step-by-Step Guide to Fix Wobbles and Uneven Drain
To level a bathtub effectively, follow these steps: First, inspect the subfloor and joists for any issues. Next, shut off the water supply and use a spirit level to check the tub’s position. If it’s uneven, adjust the factory legs or insert shims at the low points. For permanent support, consider using plywood, mortar, or a manufactured cradle. Finally, secure the tub and caulk the flange to prevent leaks. While these steps are manageable for DIY enthusiasts, consult a professional for structural rot or significant plumbing issues. Continue reading for detailed instructions and helpful tips.
Why Properly Leveling a Bathtub Matters
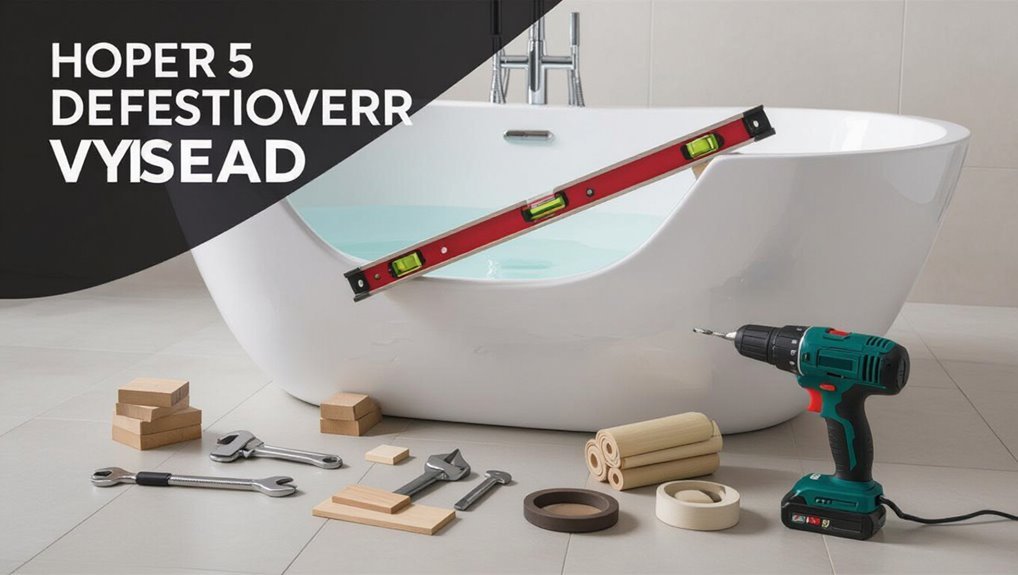
An unleveled bathtub can wobble, cause improper draining that leads to pooling, and eventually allow leaks or structural damage to develop.
Common signs indicating the tub needs attention include noticeable movement underfoot, water collecting in low spots, and creaking or noisy floors.
Addressing level issues promptly prevents further wear and costly repairs.
Risks of an Unleveled Tub (wobbling, uneven drain, leaks, structural damage)
Even a slight tilt in a bathtub can cause immediate and long-term problems: wobbling under weight, slow or uneven draining, persistent leaks at seals and connections, and eventually stress-related damage to the surrounding floor and framing.
Left unchecked, these issues accelerate deterioration, invite mold, raise repair costs, and compromise safety. Homeowners researching how to level a tub should address leveling promptly to prevent structural and water damage.
Signs Your Tub Needs Leveling (movement, water pooling, noisy floors)
Since an unleveled tub often leads to wobbling, slow drains, leaks, and structural strain, homeowners should watch for clear, observable signs that leveling is needed.
Indicators include persistent movement when stepping in, water pooling at one end or slow drainage, uneven soap residue lines, and creaking or squeaking floors beneath the tub.
Early detection prevents damage and costly repairs.
Tools and Materials Needed to Level a Tub
To level a tub effectively, the technician collects essential tools such as a spirit level, shims, adjustable legs, a pry bar, and a torque wrench.
Necessary materials and potential replacement parts include plywood for substrate repairs, mortar for bedding, silicone sealant, and drain assembly components.
Safety gear and preparations—gloves, eye protection, and floor protection—are used throughout to prevent injury and damage.
Essential Tools (level, shims, adjustable legs, pry bar, torque wrench)
A few essential tools make tub leveling accurate and efficient: a reliable spirit level (or digital level) for verifying horizontality, thin plastic or composite shims to raise and support the apron, adjustable tub legs for coarse height adjustment, a pry bar for repositioning the unit, and a torque wrench to tighten fasteners to specified values without over-stressing mounts.
Additional items include a rubber mallet for gentle taps and a set of metric and standard sockets for adjustments.
Materials and Replacement Parts (plywood, mortar, silicone, drain assembly components)
Gathering the right materials and replacement parts assures a level tub will remain stable and watertight.
Required items include exterior grade plywood for subfloor reinforcement, sand or cement-based mortar for bedding, high-quality silicone sealant for joints, and compatible drain assembly components (strainer, flange, gasket, locknut).
Additional replacement parts may include tub feet, clips, and corrosion-resistant fasteners to guarantee longevity.
Safety Gear and Preparations (gloves, eye protection, floor protection)
After assembling materials and replacement parts, attention turns to personal and site protection before lifting or adjusting the tub.
Protective gloves prevent cuts and chemical exposure; safety glasses guard against debris and splashes.
Lay a thick drop cloth or cardboard on the floor to protect finish and catch mortar or silicone.
Guarantee adequate ventilation and a clear work area to minimize trip hazards.
How Bathtub Types Affect Leveling Approach
Different bathtub styles require distinct leveling strategies based on installation method and material.
Alcove and soaking tubs often rely on wall framing and adjustable feet, while freestanding tubs demand a perfectly level floor or shimmed pedestal.
Drop-in installations and variations in cast iron, acrylic, or fiberglass affect support needs and fastener choices due to weight and flex characteristics.
Alcove and Soaking Tubs
Alcove and soaking tubs require distinct leveling strategies because their installation contexts and support structures differ: alcove tubs are typically three-walled with flange attachments and often rest on a simple mortar bed or feet.
So leveling focuses on ensuring the tub sits squarely against all walls and transfers load to the floor framing, while soaking tubs—especially freestanding or drop-in models—demand attention to full-perimeter support, uniform bearing under the rim or tub flange, and preventing flex that can stress the finished surface and plumbing connections.
For alcoves, shim and bed adjustments align walls and drain; for soaking tubs, build continuous support, verify bearing, and secure connections to avoid movement.
Freestanding Tubs
Freestanding tubs demand a leveling approach that prioritizes isolated support and stability because they do not rely on surrounding walls for bearing.
Installers assess floor flatness, use adjustable feet or shimming under the tub base, and guarantee the drain aligns without stress.
Support pads or a mortar bed can distribute weight.
Final checks verify even water drainage and eliminate rocking.
Drop-in and Alcove with Surround
Because these tubs sit within a surround or deck, leveling must guarantee the rim is uniformly supported to prevent stress on the shell and misalignment of the drain.
The surrounding structure bears load, so installers check framing, shims, and adhesive pads beneath the flange.
Access panels and adjustable feet aren’t always available, making precise deck construction and shim placement critical for long-term alignment and water drainage.
Cast Iron vs Acrylic vs Fiberglass Considerations
Material differences—cast iron, acrylic, and fiberglass—dictate distinct leveling strategies because each shell responds differently to concentrated loads, support patterns, and long-term deflection.
Cast iron needs rigid, evenly distributed mortar or metal framing to prevent point loads.
Acrylic benefits from adjustable supports and foam backer for even bedding.
Fiberglass requires moderate support and careful shimming to avoid flexing and stress cracks over time.
Pre-Leveling Inspection Checklist
Before beginning leveling, the inspector evaluates the subfloor and joists for damage and confirms the drain alignment and trap position.
They verify the bathtub’s support structure and feet for stability and correct any deficiencies.
Finally, they decide whether the tub can be leveled in place or must be removed for safe, effective work.
Inspect Subfloor and Joists for Damage
A thorough inspection of the subfloor and joists identifies rot, water damage, and structural weaknesses that must be addressed before leveling a tub.
The inspector checks for soft spots, mold, sagging, and nail pops. Probing with an awl, measuring deflection, and photographing findings document issues.
Any compromised framing should be repaired or reinforced to guarantee a stable, long-lasting tub installation.
Check Existing Drain Alignment and Trap Position
When checking the existing drain alignment and trap position, the inspector verifies that the tub outlet lines up with the waste opening and that the trap sits within accessible range and correct orientation.
They measure offset, inspect for visible stress, look for deteriorated seals or misaligned slip joints, and confirm trap pitch and clearance for future access.
Any deviations are documented for correction.
Assess Bathtub Support Structure and Feet
Inspection of the bathtub support structure focuses on verifying that the floor framing, subfloor, and adjustable or fixed feet provide stable, level support without gaps, rot, or undue movement.
The inspector notes foot placement, signs of water damage, loose or missing screws, and compressible shims.
Measurements of levelness at several points and documentation of problematic areas guide repair planning and required materials.
Determine Whether to Remove or Work In-Place
Decide whether the tub can be leveled in place or must be removed by evaluating access, extent of damage, and risks to surrounding finishes.
Inspect flange, surround, and plumbing for corrosion or hidden rot.
If structural failure, extensive shim access, or difficult drain realignment exists, removal is safest.
If supports and plumbing are accessible and sound, in-place leveling minimizes disruption and repair scope.
Step-by-Step: Leveling a Tub In-Place (No Full Removal)
The procedure describes how to level a tub in place without removing it, focusing on practical adjustments and permanent support.
It outlines preliminary shutdowns, precise testing to locate uneven areas, and methods to stabilize the fixture. The steps progress from simple adjustments to installing durable support materials for a long-term fix.
- Prepare the area and turn off water
- Test for level and identify low/high spots
- Tighten or adjust factory-installed adjustable legs
- Insert shims or plywood supports under tub rim
- Use mortar bed or expanding foam for permanent support
Step 1 Prepare the Area and Turn Off Water
Clear the immediate work area and shut off the water supply before any leveling work begins.
The technician removes toiletries, rugs, and loose items, then protects surfaces with drop cloths.
Access panels and trim are unscrewed for inspection.
Water is isolated at the main or local shutoff and lines are drained.
Electrical sources nearby are deactivated to prevent hazards during adjustments.
Step 2 Test for Level and Identify Low/High Spots
Begin by placing a reliable 2- or 4-foot level across multiple points of the tub rim and along the apron to determine pitch and crown.
Note bubble position and mark any gaps or tilted zones with a pencil.
Check diagonals and the drain area to locate the lowest point.
Record high and low spots for reference before planning shimming, support pads, or under-tub adjustments.
Step 3 Tighten or Adjust Factory-Installed Adjustable Legs
After identifying high and low points on the tub rim and drain area, attention shifts to the factory-installed adjustable legs under the tub.
The technician inspects leg locations, checks for loose locknuts, and uses a wrench to raise or lower legs to reduce rocking and correct drain slope.
Adjustments are incremental, rechecking level frequently until the tub sits stable and the drain aligns.
Step 4 Insert Shims or Plywood Supports Under Tub Rim
Carefully slide thin shims or strips of exterior-grade plywood between the tub rim and the surrounding framing or tile lip at the identified low points to provide continuous support and prevent future settling.
Tap shims gently to level, recheck with a level, and trim flush. Use multiple thin shims rather than one thick piece for fine adjustment.
Secure placement to avoid shifting during use.
Step 5 Use Mortar Bed or Expanding Foam for Permanent Support
Choose a permanent support method—portland cement mortar or low-expanding polyurethane foam—based on the tub type, floor access, and local building codes.
Mix mortar to a stiff, damp consistency and pack under the tub skirt for continuous support, or apply low-expansion foam in measured lifts to avoid warping.
Allow full cure time, then trim excess material flush with the subfloor before proceeding.
Step 6 Re-check Level and Adjust Drain Tailpiece Alignment
Verify the tub’s level once the support material has cured and any excess has been trimmed.
The installer uses a spirit level across multiple points, making minor shims or grinding adjustments to achieve true horizontal.
Then the drain tailpiece is aligned, ensuring smooth, straight coupling to the trap without stress.
Final checks confirm no binding, proper slope, and unobstructed flow before proceeding.
Step 7 Secure Tub and Seal Edges with Silicone
Secure the tub to its framing and apply a continuous bead of silicone along the gap where the flange meets the wall to prevent movement and moisture intrusion.
Fasten using corrosion‑resistant screws into studs or blocking, avoiding overtightening.
Smooth the silicone with a wet finger or tool for a uniform seal.
Allow manufacturer‑recommended cure time before restoring water and fixtures to guarantee a durable, watertight installation.
Step-by-Step: Leveling a Tub After Removal (When to Remove and How)
When removal of a tub is necessary to correct significant settling or structural damage, the process should proceed in a controlled, methodical sequence to guarantee a durable, level installation.
The following points outline the critical steps from safe disconnection through final plumbing checks, emphasizing subfloor repair and proper support. Each step requires verification before moving to the next to prevent repeat work or leaks.
- Step 1: Safely disconnect and remove tub
- Step 2: Repair or replace damaged subfloor and joists
- Step 3: Install proper mortar bed or support frame
- Step 4: Set tub, level, and align drain assembly
- Step 5: Reconnect plumbing and test for leaks
Step 1 Safely Disconnect and Remove Tub
Begin by turning off the water supply and power to the bathroom, then draining and disconnecting any plumbing and electrical connections to the tub.
Next, remove trim, caulk, and fasteners securing the tub.
With help, lift the tub free, avoiding strain and protecting surrounding finishes.
Cap or label disconnected lines and clear the area for inspection and subsequent subfloor work.
Step 2 Repair or Replace Damaged Subfloor and Joists
Inspect the exposed subfloor and joists for rot, sagging, or water damage, since these defects compromise a new tub’s support and must be addressed before leveling.
Replace rotted subfloor sections, sister or sister-beam weakened joists, and secure remaining framing to solid bearing points.
Verify repairs restore structural stiffness and flatness; confirm with straightedge and localized load tests before proceeding.
Step 3 Install Proper Mortar Bed or Support Frame
Install a stable, level support—either a Portland cement mortar bed or a manufactured framing cradle—before setting the tub to guarantee uniform contact and long-term support.
Mix mortar to a workable consistency, screed to required thickness, and shape a cradle matching the tub’s underside.
Alternatively, secure a prefabricated frame to joists per manufacturer specs.
Allow curing time and verify rigidity before proceeding.
Step 4 Set Tub, Level, and Align Drain Assembly
With the mortar bed or support frame fully cured and verified for rigidity, the tub is set onto its foundation and adjusted for level and plumb while the drain assembly is aligned to the waste outlet.
Shims or thinset are used under any low spots, temporary blocks hold position, and the drain flange is centered and threaded just enough to confirm alignment before final tightening and bedding sealant application.
Step 5 Reconnect Plumbing and Test for Leaks
Reconnect the drain, overflow, and supply lines, taking care to seat gaskets and tighten connections to manufacturer torque specifications; this prepares the system for a controlled leak test.
With shutoffs open, fill the tub partially and inspect joints for seepage. Operate faucet and diverter, watch for slow drips beneath and at connections.
Repair any leaks, retighten fittings, then fully cycle water to confirm integrity.
Step 6 Finish Surroundings and Seal Perimeter
Finish surrounding surfaces and seal the tub perimeter to protect the subfloor and create a watertight barrier between the tub and adjacent walls.
Inspect drywall, tile, and trim; repair or replace damaged sections.
Apply backerboard where needed, then install appropriate waterproof membrane.
Use high-quality silicone caulk along the joint, tool smooth, and allow full cure.
Recheck for gaps and touch up finishes.
How to Fix an Uneven Drain and Prevent Clogs
The article explains how to diagnose drain pitch problems by inspecting slope, water flow, and standing water.
It then covers adjusting the drain tailpiece and trap alignment to restore proper pitch and prevent backups.
Guidance is provided on when replacing the drain assembly or repositioning the trap is the appropriate long-term solution.
Diagnosing Drain Pitch Problems
Why is the tub draining slowly or leaving standing water?
Inspect the tub’s visible slope toward the drain, checking for levelness with a small level placed in multiple directions.
Look under the access panel for low points in the drain run, sagging pipe, or misaligned hangers.
Note any hair, debris buildup, or slow flow patterns before proceeding to repairs or adjustments.
Adjusting Drain Tailpiece and Trap Alignment
Begin by disconnecting the trap and tailpiece to inspect alignment and clear any immediate blockages.
Verify the tailpiece centers in the tub outlet; trim or shim as needed.
Reassemble with correct slip nuts and washers, ensuring the trap slope permits gravity flow without backpitch.
Test for leaks and steady drainage.
Tighten fittings incrementally to avoid stressing connections or causing misalignment.
When to Replace Drain Assembly or Reposition Trap
Inspecting the drain assembly and trap should follow persistent drainage issues or visible misalignment that cannot be corrected by simple adjustments.
If leaks, corroded parts, stripped threads, or warped flanges are present, replace the assembly.
Repositioning the trap suits improper slope or misaligned slip joints; guarantee a continuous downward pitch toward the drain and secure connections.
Test for leaks and proper flow afterward.
Quick Fixes vs Permanent Solutions
Temporary shims and expanding foam can correct minor tub tilt quickly but may compress or degrade over time, risking recurrence.
A properly installed mortar bed or structural repair provides lasting support and corrects underlying issues at greater cost and effort.
Professional assessment is advised when subfloor damage, persistent movement, or plumbing complications are present.
Temporary Shims and Foam: Pros and Cons
When a tub sits unevenly, quick fixes such as thin plastic or composite shims and expanding foam can stabilize it temporarily, but they differ sharply in durability, load distribution, and serviceability.
Plastic shims are easy to install and adjust but compress or shift under weight.
Expanding foam fills voids and resists movement longer yet complicates future adjustments and can off-gas during curing.
Mortar Bed and Structural Repair Benefits
After evaluating short-term measures like shims and foam, attention turns to permanent solutions: a properly installed mortar bed and structural repairs.
These provide stable, long-lasting support, correct slope for drainage, and prevent future settling. Mortar bonds the tub to the subfloor; joist reinforcement or subfloor replacement addresses underlying failures.
Though more time-consuming, these methods restore alignment and durability.
When Professional Intervention Is Recommended
Although simple shims and foam can buy time, recognizing when a tub issue exceeds DIY scope is essential for safety and longevity.
Professional evaluation is recommended for persistent slope, cracked subfloor, rotten joists, recurrent leaks, or complex plumbing/drain alignment.
Licensed contractors assess structural damage, install proper mortar beds or framing, guarantee waterproofing, and provide permits and warranties—permanent solutions that prevent recurrence and liability.
Common Mistakes and How to Avoid Them
Common mistakes can undo the benefits of a careful tub leveling job and lead to leaks, instability, or costly repairs. This section highlights frequent errors and simple precautions to prevent them. Readers are encouraged to check each item before finishing the installation.
- Over-reliance on expanding foam instead of structural supports
- Failing to support the tub rim properly during adjustment
- Ignoring subfloor damage that compromises stability
- Misaligning the drain during height or pitch corrections
- Skipping incremental checks with a level while tightening fixtures
Over-Reliance on Expanding Foam
Relying too heavily on expanding foam to level a tub often creates more problems than it solves: the foam can compress unevenly under weight, expand unpredictably into gaps, and make future adjustments or repairs difficult.
Instead, professionals recommend using solid shims, adjustable supports, or mortar beneath the tub base for stable, predictable support.
Reserve foam for minor void-filling, not primary structural support.
Failing to Support the Tub Rim Properly
After warning against treating expanding foam as primary structural support, attention must turn to the tub rim, where improper backing or missing supports often causes shifting, uneven gaps, and flange damage.
Install continuous blocking or plywood backing behind the flange, use adhesive and mechanical fasteners per manufacturer specs, and verify level and square before finishing to prevent future movement and seal failure.
Ignoring Subfloor Damage
Subfloor deterioration is a frequent but overlooked cause of tub misalignment, leading to sagging, uneven grout lines, and premature seal failure. Inspecting for rot, water damage, soft spots, or delamination before installation guarantees the tub rests on a stable, level base.
Ignoring damaged subfloor risks recurrent movement and leaks. Replace or reinforce compromised sections, use appropriate waterproofing, and confirm flatness with a straightedge before setting the tub.
Misaligning the Drain During Adjustment
Carefully aligning the tub drain during adjustment is essential to prevent leaks, poor drainage, and the need for rework.
Misalignment often results from shifting the tub while shimming or failing to verify flange seating. The technician should confirm drain orientation, tighten connections progressively, test with water, and recheck level.
Using a flexible coupling and sealant reduces stress and accommodates minor positional changes.
Cost, Time, and DIY Difficulty Estimates
An overview of expected costs, time commitments, and required skills helps readers decide whether to attempt tub leveling themselves or hire a pro.
Typical DIY expenses (materials and basic tools) and contrast with professional service ranges should be outlined alongside estimated hours for in-place repairs versus full removal and reset.
A clear summary of necessary tools and skill level completes the comparison so readers can match the task to their abilities and budget.
Typical DIY Cost Breakdown
Typical projects range from simple reglazing to full tub replacement, and each carries distinct cost, time, and skill considerations.
DIY expenses commonly include shims, sealant, replacement hardware, and tools: $20–$200 for materials.
Time varies from 1–2 hours for minor leveling to 1–3 days for refinishing or partial replacement.
Difficulty spans easy to advanced plumbing and carpentry skills.
Professional Service Cost Range
Professional tub-leveling services generally cost more than DIY options but provide faster, more reliable results for complex issues; pricing typically ranges from $150 to $800 depending on the scope.
Technicians charge hourly or flat fees; travel, materials, access difficulty, and structural repairs raise costs. Expect professional estimates to factor warranty, licensing, and insurance.
DIY difficulty remains lower cost but higher risk for hidden problems.
Time Required for In-Place vs Removal Methods
Beyond cost differences, the choice between leveling a tub in place or removing it affects time and DIY difficulty considerably.
In-place adjustments typically take 1–4 hours: shimming, tightening fasteners, and minor drain realignment.
Full removal and reset can span 8–24 hours across multiple days due to demolition, subfloor repairs, plumbing reconnection, and curing times, increasing labor intensity and project duration.
Skill Level and Tool Requirements
When weighing tub-leveling options, the required skill set and tools—ranging from basic carpentry and plumbing familiarity for in-place adjustments to advanced demolition, structural repair, and precise plumbing work for full removal—directly influence cost, time, and DIY difficulty estimates.
Simple shim and fastener fixes need basic hand tools and a level; full removals demand power tools, plumbing permits, inspection, and professional-level expertise.
Maintenance Tips to Keep Tub Level Long-Term
Periodic inspections for shifting, soft spots, or water pooling around the tub are recommended to catch early signs of movement.
When supports loosen or deteriorate, re-tightening fasteners or replacing shims and brackets restores level and prevents future sagging.
Attention to seasonal shifts in humidity and any nearby renovation work will help preserve the tub’s alignment over time.
Regular Checks for Movement and Water Pooling
Inspect the tub regularly for signs of movement and any areas where water pools after use.
Note subtle shifts, creaks, or gaps at the base and observe drain flow during and after draining.
Mark recurring pooling spots and track frequency.
Prompt detection of changes helps identify developing support or slope issues early, allowing timely assessment before leaks, mold, or structural damage occur.
How to Re-tighten or Replace Supports Over Time
Start by identifying which supports are adjustable and which are fixed so maintenance focuses on the components that actually control the tub’s level.
Inspect supports for corrosion, cracks, or loosening. Re-tighten adjustable feet and brackets to manufacturer torque specs; replace worn jacks, shims, or brackets with compatible parts.
After any change, recheck level and drain slope, documenting repairs and dates for future reference.
Seasonal and Renovation Considerations
After re-tightening or replacing supports, homeowners should plan for seasonal and renovation-related factors that can affect long-term tub level.
Temperature and humidity shifts may cause framing, joists, or mortar to shrink or expand; seasonal inspections catch movement early.
During renovations, verify subfloor rigidity, plumbing changes, and added weight.
Document adjustments and retorque fasteners after major work or extreme seasonal cycles.
Troubleshooting Guide: Problems and Immediate Remedies
A concise troubleshooting guide lists common tub problems with immediate remedies to help identify causes and apply fixes quickly. The following table summarizes key checks and actions for wobble, pooling, and drain leaks to guide fast assessment. Readers can follow the brief steps to decide whether a simple adjustment or professional repair is needed.
| Problem | Quick Check | Immediate Fix |
|---|---|---|
| Wobble when standing on edge | Rock test at rim | Tighten flange bolts or add shims |
| Water pooling at one end | Level across length | Adjust pitch with shims or mortar |
| Persistent leak at drain | Inspect seal and connections | Replace gasket and retighten drain |
| Follow-up | Recheck after fix | Monitor for recurrence and retorque bolts if needed |
Wobble When Standing on Edge Quick Checks and Fixes
When a tub wobbles under the weight of someone standing on its edge, the issue is usually localized to uneven support, loose fasteners, or a weakened substrate; quick checks can identify the cause and suggest immediate fixes.
Inspect mounting brackets, shims, and floor access; tighten screws and replace stripped anchors.
Add temporary shims or support blocks under the flange.
Recheck stability before reuse.
Water Pooling at One End How to Correct Pitch
Identify and address a tub that holds water at one end by checking its pitch and support system: standing water typically indicates the drain end is higher than the opposite end due to incorrect slope, settling of the subfloor, or missing/compromised shimming.
Verify level across tub, inspect underpan or access panel, add or adjust shims, and pack with noncompressible support (cement board or hydraulic cement) to restore proper drain slope.
Persistent Leak at Drain Steps to Diagnose and Repair
Begin by isolating the leak source to determine whether water is escaping from the drain flange, the overflow assembly, the trap connection, or between the tub and adjacent flooring.
Inspect seals, gaskets, and pipe joints. Tighten connections, replace damaged rubber flanges or overflow gaskets, reseal with appropriate plumber’s putty or silicone, and test.
If leak persists, remove drain assembly and inspect for cracks or faulty fittings; replace as needed.
When to Call a Plumber or Contractor
Signs of structural rot, extensive subfloor damage, or the need for major rework indicate professional intervention is warranted.
Similarly, any project requiring repositioning of plumbing that triggers local code compliance or permits should be handled by a licensed plumber or contractor.
Homeowners are advised to consult professionals when repairs exceed routine leveling or involve safety and legal requirements.
Structural Rot, Extensive Subfloor Damage, or Major Rework
When substantial structural rot, widespread subfloor failure, or major plumbing reconfiguration is suspected, homeowners should stop DIY efforts and consult a licensed plumber or general contractor to assess scope and safety.
Professionals can identify hidden damage, recommend structural repairs, replace compromised joists or subflooring, and coordinate necessary trades.
Attempting complex remediation without expertise risks injury, code violations, and costly rework; hire licensed pros for durable, safe solutions.
Code-Related Plumbing Repositioning and Permits
Call a licensed plumber or contractor if bathtub leveling requires moving drains, supply lines, or fixtures, or if local codes mandate inspections and permits for the work.
Professionals guarantee code compliance, proper venting, slope, and watertight connections. They obtain permits, schedule inspections, and document changes.
DIY attempts risking concealed leaks, failed inspections, or insurance issues should be avoided; hire qualified tradespeople for permitted plumbing alterations.
Conclusion
Investigating the theory that a level tub prevents structural damage, the guide confirms practical truth: small adjustments restore function and slow decay. Methodical inspection, correct shimming, and targeted grout or foam resolve most wobbles without full removal. Rhythm emerges from measured steps—assess, support, adjust, secure—each action reinforcing the prior. When uncertainty or major sagging appears, professional assessment breaks the pattern, ensuring safety and lasting alignment.