How to Remove a Push Fit Pipe Connector Fast: Step-by-Step Guide
To quickly remove a stuck push-fit pipe connector, follow these essential steps: First, isolate the connector by closing the nearest isolation valve. Next, relieve pressure by opening a downstream tap and a high-point vent, then protect the surrounding area with towels and a bucket to prevent water damage. Use a release tool or two adjustable spanners to hold the pipe and press the collar while pulling the fitting straight off. After removal, inspect the pipe for any damage and prepare for replacement if necessary. For further techniques and troubleshooting, continue with the detailed steps provided.
Quick Overview: Why a Stuck Push‑Fit Connector Is a Problem
In tight spaces and under pressure, a stuck push‑fit connector can quickly escalate from a minor annoyance to a serious problem. It hinders repairs, prolongs downtime, and may force dismantling adjacent fittings or fixtures.
Water flow obstruction risks property damage; trapped pressure complicates safe removal. Improper attempts can deform pipe or connector, creating leaks or necessitating replacement.
Time and materials costs rise as access worsens. For professionals and DIYers alike, recognizing the operational impact—reduced system reliability, potential contamination if seals fail, and increased labor—clarifies why prompt, informed resolution methods are preferable to improvised force.
Fast Action First: When You Should Remove a Push‑Fit Connector Immediately
A stuck push‑fit connector that threatens immediate damage or safety warrants prompt removal. It should be addressed without delay when conditions indicate escalating risk, to prevent property harm or system failure. Prioritize situations where waiting increases scope of repair or creates hazard.
The decision rests on observable signs and potential consequences rather than convenience. Rapid removal minimizes collateral damage and simplifies restoration when performed appropriately by someone confident in basic plumbing tasks.
- Visible leak expanding rapidly
- Persistent dripping onto electrical components
- Pipe separation under pressure
- Evidence of significant corrosion or cracking
Safety First: How to Shut Off the Water Supply
Before attempting connector removal, the water supply must be shut off to prevent flooding and reduce pressure inside the pipe.
Locate the nearest isolation valve feeding the affected run—typically under sinks, near appliances, or at the mains shutoff.
Turn the valve clockwise until fully closed; for ball valves, align the handle perpendicular to the pipe.
Confirm closure by operating a downstream tap briefly; minimal or no flow indicates success.
If no local valve exists, shut off the property’s main supply.
Notify occupants before shutting water.
Keep a wrench or key handy for stubborn valves and note valve condition for later restoration.
How to Drain the Pipe and Relieve Pressure Quickly
With the isolation valve closed, the easiest way to drain and depressurize the line is to open the nearest downstream fixture—sink tap, hose bib, or appliance valve—and allow water to run until the flow stops; this vents trapped water and equalizes pressure quickly.
Then open a high-point vent or an upstream bleed if present to remove airlocks.
If flow persists, confirm the isolation valve is fully closed or shut the main supply.
Observe for slow drips indicating residual pressure and wait briefly before proceeding.
- Open downstream fixture
- Open high-point vent
- Verify isolation closure
- Confirm flow cessation
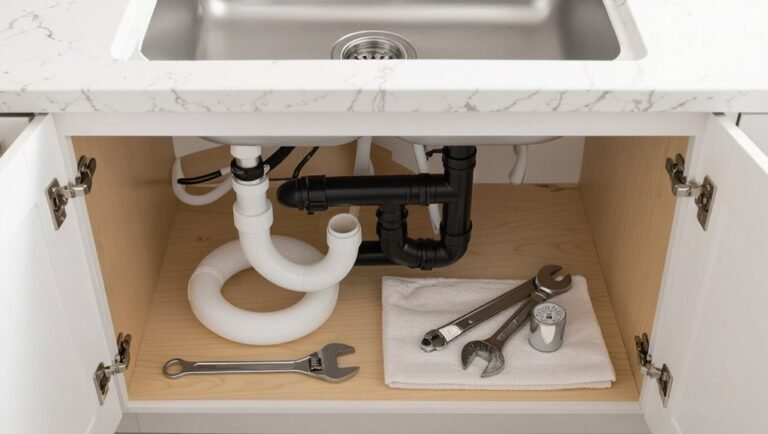
How to Protect the Work Area and Catch Water
Several small barriers and a few absorbent towels should be placed under and around the connector area to protect surfaces and catch any remaining water. The technician arranges trays, towels, and a drip bucket to control spills. Towels are folded for height; plastic sheeting shields cabinetry. A small pump or syringe removes pooled water from tight spots. Waste is contained in a shallow bin to avoid floor damage. After work, damp items are replaced and surfaces wiped dry to prevent staining and mold. The setup is portable, easy to remove, and sized to the fixture for a quick cleanup.
| Item | Purpose | Tip |
|---|---|---|
| Towels | Absorb | Fold for height |
| Tray | Contain | Use shallow bin |
| Sheeting | Protect | Tape edges |
How to Inspect the Push‑Fit and Surrounding Pipe
In examining the push‑fit and adjacent pipe, the technician first performs a visual check for cracks, scoring, or deformation of the fitting body and the pipe surface where it seats.
Next, tactile inspection assesses looseness, movement, or rough edges; gentle rotation and light pulls detect slippage.
The area is then wiped dry to reveal hairline damage and residues.
Finally, the technician notes corrosion, mineral buildup, or adhesive remnants that could affect reseating or require cleaning before removal.
- Visual damage check
- Tactile stability test
- Surface cleaning and reinspection
- Contamination and buildup assessment
How to Identify the Pipe Material Under the Push‑Fit
The technician begins by visually inspecting the exposed pipe for color, markings, and fittings that indicate material type.
A brief tactile assessment — feeling for rigidity, wall thickness, and performing a gentle flex test — helps distinguish between metal, plastic, and composite pipes.
If uncertainty remains, simple measuring tools such as calipers or a tape measure provide wall and outer diameter data to confirm the material.
Visual Inspection Of Pipe
A careful visual inspection provides the quickest clues to what lies beneath a push‑fit connector. The inspector notes color, surface texture, markings and any fittings visible at the joint. Metal shows seams, solder or corrosion; plastic often has molded rings, consistent color and printing; composite pipes reveal layers at cut ends or faint spirals; older pipes may display paint, scale or stamped codes. Photographs of the joint and surrounding run aid identification. When uncertainty remains, documented markings (standards, size) and nearby accessible runs help confirm material before removal.
- Color and finish
- Surface markings
- Visible seams or layers
- Joint hardware and signs
Feel And Flex Test
Following visual clues, a tactile assessment helps confirm what lies beneath a push‑fit connector: an inspector feels the pipe along accessible lengths, noting firmness, temperature, and how the material responds to pressure or bending.
A rigid, cool surface that barely compresses suggests copper or steel; a slightly warm, firm yet springy feel indicates PEX; soft, pliable yielding with a plasticky texture points to PVC or CPVC.
Flex tests include gentle bending to observe memory and creasing—metal won’t flex, PEX flexes then returns, PVC may flex slightly but can crack.
Document findings before proceeding with removal.
Use Measuring Tools
Using calipers, tape measures, and thickness gauges, an inspector quantifies pipe diameter, wall thickness, and external fittings to narrow material identification beneath a push‑fit.
Surface texture, color, and magnetic response offer immediate clues; precise measurements confirm whether dimensions match copper, CPVC, PEX, or steel standards.
Joint type and residue patterns indicate solder, solvent weld, or mechanical coupling history.
Recorded measurements guide tool selection and removal technique, reducing damage risk and ensuring compatible replacement parts.
Safety considerations include depressurization and verification before probing.
- Measure outside diameter and wall thickness
- Check magnetic attraction
- Inspect surface finish and markings
- Compare against material tables
How to Check for Clips, Sleeves, or Locking Tabs
Before attempting removal, inspect the connector for any visible retention features—clips, sliding sleeves, or small locking tabs—that secure the pipe in place.
Visually examine the joint from all angles, using a flashlight if necessary, to locate molded tabs or separate plastic/metal clips.
Gently feel around the collar for a sliding sleeve or recessed release ring; note its direction of movement.
Identify any external clips that may need prying or removal and any internal tabs visible through inspection holes.
Record the types found before proceeding, as different retention methods dictate specific release actions and help avoid damage during disassembly.
Quick Release Methods: Tools That Speed Up Push‑Fit Removal
Select the right release tool to speed removal and reduce damage risk. The section outlines quick methods that free the collet or deformable grip without forceful prying.
Suitable devices focus pressure evenly, retract retaining tabs, or cut minimal material for reuse where possible. Techniques emphasise controlled, reversible action and minimal pipe stress.
- Plastic spudger or sleeve tool to depress the collet evenly.
- Thin metal pick to slide behind the collet for gradual release.
- Purpose-made push‑fit release keys that clip and pull in one motion.
- Small tubing cutter for sacrificial removal when connector replacement is planned.
Choosing the Right Push‑Fit Removal Tool
When choosing a push‑fit removal tool, prioritize compatibility with the connector type and the pipe material to avoid damage and guarantee efficient disengagement. The selection should balance size accuracy, grip design, and material robustness. Consider plastic jaws for delicate plastics, metal for stubborn fittings, and adjustable heads for mixed systems. Portability, ease of use, and availability of spare parts influence long‑term value. Matching tool profile to collar geometry prevents slippage. Safety features like insulated handles matter for live systems. Test on scrap where possible. The table summarizes common choices and typical applications.
| Tool Type | Best For | Notes |
|---|---|---|
| Plastic keys | CPVC/PET | Gentle grip |
| Metal pliers | Brass/Metal | Strong force |
| Adjustable tools | Mixed systems | Versatile design |
How to Depress the Grab Ring With a Removal Tool
The technician selects the appropriate removal tool sized for the connector to guarantee a secure fit.
The tool is slid into place so its tips engage the grab ring evenly around the pipe.
Steady, symmetrical pressure is applied to depress the ring and release the fittings without distorting the pipe.
Choose Proper Removal Tool
Choose a removal tool sized to match the pipe diameter and compatible with the connector’s manufacturer; using an undersized or generic pick can damage the grab ring or O‑ring and make future resealing impossible.
The correct tool provides firm, controlled depression of the grab ring without slipping or spreading force to the seal. Materials should resist corrosion and have a slim profile to reach the ring. Ergonomic grips reduce hand fatigue during sustained use. Inspect tools for burrs or deformation before use.
- Manufacturer-specific pick or collar
- Stainless or plated steel construction
- Slim, tapered tip profile
- Comfortable, non-slip handle
Position Tool Correctly
After selecting the correctly sized removal tool, align its tip over the grab ring so the tapered face sits squarely against the ring’s inner edge; misalignment will bend the ring or miss the release point. The operator steadies the tool, verifies coaxial alignment with the pipe, and makes certain the tool body clears surrounding fittings. Visual confirmation of parallelism prevents slippage. Gentle forward pressure locates the ring; no twisting is applied. The hand maintains consistent angle as the tool contacts the ring, preparing for even depression. The diagram below evokes orientation and contact points.
| Tool tip | Ring edge | Pipe wall |
|---|---|---|
| Tapered | Inner | Smooth |
| Centered | Secure | Aligned |
| Clear | Visible | Parallel |
Depress Ring Evenly
Depressing the grab ring requires a steady, even push on the removal tool so the tapered tip compresses the ring uniformly around the pipe circumference; uneven force risks deforming the ring or leaving some teeth engaged. The operator centers the tool, aligns it square to the pipe, and applies slow, consistent pressure until the ring retracts slightly.
Visual and tactile feedback confirm full compression. If resistance varies, withdraw and reseat the tool. Once compressed evenly, slide the connector off while maintaining depression to prevent re-engagement.
- Center tool on pipe
- Apply steady, even pressure
- Monitor compression visually and by feel
- Withdraw and reseat if uneven
How to Use Needle‑Nose Pliers for a Quick Release
Grip the collar of the push-fit connector with needle-nose pliers, pinching the release ring toward the body while holding the pipe steady.
Position the pliers so their tips compress the ring evenly; avoid twisting the pipe.
Apply steady inward pressure to disengage the internal O-ring, then pull the pipe straight out with the free hand.
If resistance persists, re-pinching and a slight back-and-forth motion can help release the grip.
Inspect the pipe and connector for burrs or debris before reconnecting.
Clean and dry both components.
Store the pliers with a protective grip and check for tip alignment before next use.
How to Use an Internal Release Tool in Tight Spaces
When space limits the use of needle-nose pliers, an internal release tool offers a compact alternative for disengaging the O-ring from inside the connector.
The user inserts the slim tool into the fitting until the release prongs contact the collet. Apply gentle axial pressure, then rotate slightly to make certain prongs engage behind the collet tabs.
Once engaged, pull back evenly to free the pipe while maintaining steady support to prevent pipe damage.
Inspect the O-ring and collet after removal, cleaning debris before reassembly or replacement.
- Insert tool fully
- Engage prongs behind collet
- Apply steady pull while supporting pipe
- Inspect and clean parts
How to Use an External Sleeve Tool for Stubborn Fittings
Before applying an external sleeve tool, the technician checks that the sleeve fits snugly around the push-fit body without slipping.
They select an external removal tool sized for the fitting to guarantee even pressure and prevent damage.
The controlled application of the tool allows the connector to be released from the pipe with minimal force.
Inspect Sleeve Fit
Using an external sleeve tool, the technician checks how the sleeve sits on the pipe and connector to assure full contact and correct alignment before applying force.
The technician inspects for gaps, rotation, and concentricity, confirming the sleeve covers the grip area evenly.
Any misalignment is corrected by sliding or rotating the sleeve slightly until seating is uniform.
Visual and tactile checks assure the sleeve does not bind on burrs or debris.
Proper fit prevents damage and enables controlled disengagement when force is applied.
- Verify full circumferential contact
- Check axial alignment
- Sweep for debris or burrs
- Confirm smooth rotation
Use Proper Removal Tool
Select an external sleeve tool sized to the fitting and center it over the grip area, ensuring the tool’s leading edge aligns with the connector’s shoulder before applying force.
The operator positions the sleeve flush, verifies alignment visually, and holds the pipe steady with one hand while gripping the tool with the other.
Apply steady, even pressure to compress the sleeve inward; avoid twisting motions that can damage tubing.
Once the internal collet clears the pipe, slide the connector off smoothly.
Inspect for nicks or burrs and replace the sleeve tool if it slips.
Clean the pipe end before reinstalling a new fitting.
How to Twist and Pull Without Damaging the Pipe
Grip the connector firmly at its collar and apply a steady rotation while pulling straight out to disengage it without deforming the pipe.
The motion should be slow and controlled; rapid jerks risk flattening or kinking the tubing.
Support the pipe behind the connection with the free hand or a clamp to isolate the force.
If resistance persists, stop and inspect for clips or debris; forcing may damage the sealing ring.
Use consistent pressure and small oscillations rather than large twists.
Maintain alignment so the pipe exits axially, preserving roundness and minimizing strain on fittings.
- Support pipe behind connector
- Apply steady rotation
- Use slow axial pull
- Inspect before forcing
When to Cut: How to Cut the Pipe Cleanly for Fast Connector Removal
If twisting and pulling fail to release a push-fit connector or the pipe shows signs of deformation, cutting the pipe cleanly just behind the collar becomes the next best option.
The operator should mark a straight cut line a few millimetres from the connector face, ensuring excess pipe remains for reinserted fittings. Use a sharp blade or appropriate cutting tool perpendicular to the pipe axis to avoid angled edges.
Support the pipe to prevent crushing, rotate for an even cut, and deburr the cut end lightly to remove shards.
Inspect the face for roundness and cleanliness before fitting a replacement connector.
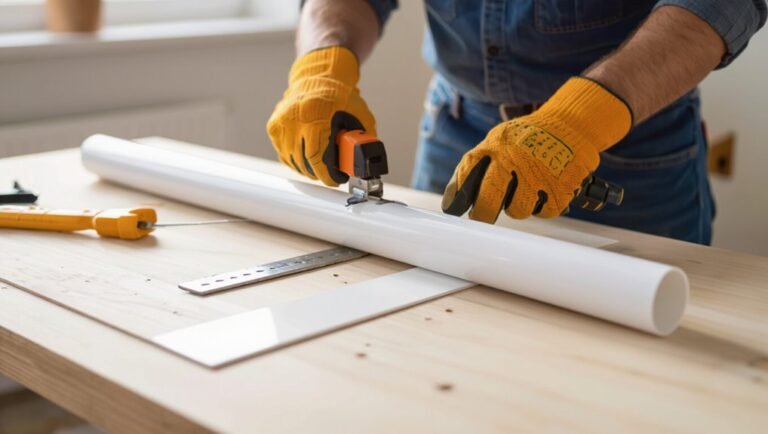
How to Use a Mini Pipe Cutter for Plastic Tubing
A mini pipe cutter offers a quick, controlled way to score and slice plastic tubing cleanly without crushing or deforming the bore. The operator secures the tubing, aligns the cutter wheel at the desired mark, and tightens the tool incrementally while rotating it around the pipe.
Proper technique yields a square, burr-free end ready for push fit removal or reconnection.
- Make certain tubing is supported and free of pressure.
- Mark cut location clearly and align wheel precisely.
- Tighten gradually between rotations to avoid binding.
- Deburr lightly and inspect the cut before proceeding.
How to Use a Hacksaw Safely When Cutters Won’t Fit
When cutters cannot reach a tight space, a hacksaw provides a reliable alternative for cutting plastic or metal tubing; the user should select the shortest feasible blade and a frame that fits the clearance to maintain control. The operator secures the pipe, marks the cut, and uses steady, even strokes without excessive pressure to avoid binding. Wear eye protection and gloves; protect surrounding fittings with tape. After cutting, deburr the edge and test fit. Choose blade tooth count appropriate to material and replace dull blades promptly.
| Blade Type | Teeth per Inch | Best For |
|---|---|---|
| Fine | 18–32 | Thin metal |
| Medium | 14–18 | Plastic |
| Coarse | 6–12 | Thick metal |
How to Remove the Fitting Body When the Pipe Is Stuck
After cutting or freeing the pipe with a hacksaw, the next step is to remove the push-fit fitting body when the pipe remains stuck. The fitter should secure the assembly, depress the retention clips with a thin screwdriver or sharp pick, and gently twist the fitting body to break the seal. If resistance persists, tap the fitting body lightly with a plastic mallet to loosen internal jaws. Once movement begins, pull the fitting straight off while continuing to depress the clips to prevent re-grip.
- Secure assembly and access clips.
- Depress retention clips evenly.
- Twist and tap to break the seal.
- Pull straight off while holding clips.
How to Salvage the Pipe After Removal
Once the push-fit connector is off, the pipe should be inspected closely for cracks, scoring, or deformation that would compromise a seal.
Any rough edges must be cleaned and deburred to restore a smooth mating surface before reuse.
After reassembly, the joint should be pressure-tested and checked for leaks to confirm the repair.
Inspect For Damage
Inspect the exposed pipe thoroughly for scratches, gouges, warped sections, or compressed O‑ring grooves that could compromise a future seal.
The inspector notes depth and length of any damage, checks for ovality or kinks, and evaluates whether deformation rebounds when pressure is released.
Surface corrosion and embedded debris are recorded.
If damage is minor and confined to the outer layer, the pipe may be salvageable; deeper cuts, fracture lines, or permanent flattening require replacement.
Document findings and mark limits for safe use before proceeding to cleaning and edge work.
- Record damage type and location
- Measure deformation extent
- Assess seal groove integrity
- Decide salvage vs replace
Clean And Deburr
Begin by removing loose debris and residual sealant from the pipe end using a soft brush and a lint‑free cloth, taking care not to push grit into the seal groove.
Next, use fine‑grade sandpaper or a deburring tool to remove burrs and compressive marks, rotating evenly to preserve roundness. Smooth edges prevent seal damage and make certain proper insertion depth.
Wipe with an approved solvent to eliminate oils and particles, then inspect the bore and exterior for scratches, pitting, or deformation.
If imperfections remain beyond light scoring, cut back to a sound section; otherwise, the pipe is ready for reassembly.
Test For Leaks
After cleaning and deburring, the pipe should be pressurized briefly to verify the integrity of the prepared end before reassembly.
The inspector applies low-pressure air or water, watches for drops or hissing, and marks any fault.
Small leaks may be re-cut and re-deburred; larger defects require replacement.
Allow fittings and seals to sit under test pressure for several minutes to reassure stability.
Once no leaks appear, depressurize, dry the pipe, and apply appropriate lubricant or sealant as required before fitting.
- Isolate and apply low-pressure test
- Observe and mark defects
- Rework or replace damaged sections
- Confirm stability under pressure
How to File or Deburr the Pipe End Quickly
Use a file or deburring tool to remove the burr and square the cut quickly and cleanly, holding the pipe steady and rotating it while applying even pressure to the tool. The practitioner works methodically: remove sharp edges, bevel the outer edge slightly, and clear internal flash. Small, controlled strokes prevent over-removal. Clean swarf with a cloth and check visually for a smooth, uniform edge. For plastic pipes, a light touch avoids distortion; for metal, firmer strokes are acceptable. Proper deburring guarantees secure fittings and prevents O-ring damage during reassembly.
| Tool | Stroke | Result |
|---|---|---|
| Hand file | Short | Smooth outer edge |
| Deburrer | Rotational | Clean inner lip |
| Sandpaper | Light | Fine finish |
How to Test the Pipe End for Reassembly Readiness
With the cut edge deburred and cleaned, the pipe end should be inspected and tested before fitting to guarantee a reliable seal.
Visual inspection checks for nicks, crushing, and uneven bevels. A light feel with a clean cloth confirms no burrs or debris remain. Measure diameter and roundness with calipers to make certain compatibility with the push-fit O‑ring. Finally, dry-fit into the connector sleeve to verify full insertion depth and smooth engagement without forcing.
- Visual inspection for damage or irregularities
- Surface wipe to remove particles
- Dimensional check with calipers
- Dry-fit insertion test
How to Replace a Removed Push‑Fit With a New One Fast
Before fitting a new push‑fit, the pipe ends should be inspected for clean cuts, burrs, and proper roundness.
The correct connector size and material must be selected to match the pipe type and pressure requirements.
Finally, the new fitting should be inserted firmly until it seats and then checked for a secure, leak‑free connection.
Inspect Pipe Ends
When the push‑fit has been removed, a careful inspection of the exposed pipe ends determines whether a new connector can be fitted immediately or if repairs are needed first. The technician checks for burrs, deformation, corrosion, and remaining sealant. Clean cuts and smooth, round ends are required for reliable sealing. Any roughness is removed with a file or abrasive cloth; damaged sections are trimmed squarely.
Measures guarantee correct pipe alignment and verify wall thickness remains adequate. Moisture and debris are cleared before assembly. If abnormalities persist, further repair or replacement of the pipe section is scheduled.
- Check for burrs and deformation
- Inspect for corrosion or thinning
- Clean and square the cut ends
- Verify alignment and cleanliness
Choose Correct Connector
Selecting the correct connector begins by matching pipe material, diameter, and operating pressure to the new push‑fit’s specifications.
Next, check compatibility with system fluids and temperature range; brass, plastic, and stainless bodies have different limits.
Choose a connector rated for the pipe wall thickness or SDR where applicable.
Prefer fittings with certification marks (e.g., WRAS, NSF) when required by code.
Consider whether a straight, elbow, or tee is needed based on alignment and space constraints.
Finally, confirm the connector’s insert depth and sealing design to make certain reliable engagement without assuming additional fastening methods.
Ensure Secure Fit
After matching the correct connector to the pipe, attention turns to installing the replacement so it seals and holds immediately. The installer inspects pipe ends for burrs, cleans surfaces, and verifies depth marks. Lubricant is applied sparingly to the O‑ring; the connector is pushed straight on until the depth stop is reached. A gentle twist confirms engagement without disturbing seals.
Pressure tests follow: slowly introduce water, check for leaks, then fully pressurize and recheck. If leaks appear, depressurize and reseat or replace the connector immediately.
- Clean and deburr pipe
- Mark insertion depth
- Lubricate O‑ring lightly
- Perform staged pressure test
How to Join a Pipe After Cutting With a Coupling
Using a proper coupling guarantees a secure joint between two cut pipe ends by aligning, sealing, and mechanically fastening them in one operation.
The technician deburrs and cleans both ends, checks for straight, square cuts, and measures insertion depth marks.
The coupling type is selected for pipe material and diameter; slip or repair couplings are positioned over one end, pipe inserted fully, then the opposing end aligned and inserted.
For solvent-weld couplings, apply primer and cement evenly; for mechanical couplings, tighten clamps or compression nuts to manufacturer torque.
Finally, inspect the joint for alignment, leaks, and proper engagement before pressure testing.
How to Use a Compression Fitting as a Fast Alternative
A compression fitting is presented as a fast, reliable choice when replacing a push-fit connector, offering a secure seal without soldering.
The installation steps are summarized: cut and deburr the pipe, slide on the nut and olive, insert the pipe and tighten to specified torque.
Attention is drawn to a common pitfall—overtightening the nut can deform the olive and cause leaks.
Why Choose Compression
Compression fittings offer a reliable, quick alternative to push-fit connectors by combining a simple mechanical seal with minimal tools, making them well suited for permanent or semi-permanent joins where speed and durability are priorities.
They create a compact, low-profile joint that resists vibration and thermal movement. Materials suit copper, plastic, and mixed systems. Reusable nuts allow adjustments or disassembly without damaging pipe. Fewer parts reduce leak points compared with some quick-fit alternatives.
- Durable seal: compressive ring forms tight joint.
- Tool-minimal: typically requires only a spanner.
- Versatile: compatible with varied pipe materials.
- Serviceable: nuts can be retightened or removed.
Installation Step Overview
For a quick, reliable connection, the installation of a compression fitting follows a few straightforward steps that prioritize prep, alignment, and proper tightening. The installer measures and cuts the pipe squarely, deburrs the end, slides on the nut and olive, inserts the pipe fully into the fitting, then hand-tightens the nut before applying a final quarter- to half-turn with a wrench. Verification includes checking alignment and ensuring no gap between pipe and fitting. Pressure testing after installation confirms integrity. The table below highlights key actions, tools, and outcomes.
| Action | Tool | Outcome |
|---|---|---|
| Cut & deburr | Pipe cutter | Square, clean end |
| Assemble | Wrench | Secure joint |
| Test | Pressure gauge | Leak-free confirmation |
Common Pitfall Avoidance
After completing the standard installation steps, attention shifts to common mistakes that can undermine using a compression fitting as a fast alternative.
The detached observer notes key pitfalls: improper pipe deburring, uneven nut tightening, using wrong ferrule size, and neglecting alignment.
Each error reduces seal integrity and increases leak risk. To avoid them, guarantee clean cut edges, slide ferrule fully, tighten nuts hand-plus-quarter-turn or per manufacturer, and maintain axial alignment while tightening.
Compression fittings suit quick repairs but demand correct preparation and torque.
Following these precautions preserves speed without sacrificing reliability.
- Improper deburring
- Uneven tightening
- Wrong ferrule size
- Misalignment
How to Use an Adapter When Pipe Dimensions Changed
When pipe sizes change midway through a run, an adapter bridges the dimensional gap by converting one fitting type or diameter to another, preserving flow and seal integrity.
Select an adapter matching both materials and nominal diameters; confirm push-fit, compression, or threaded styles are compatible.
Deburr and clean pipe ends, then mark insertion depths to guarantee full engagement.
For push-fit-to-different-diameter shifts, use a stepped or reducing adapter; for material changes, use a dielectric or crossing adapter to prevent corrosion.
Tighten compression or threaded adapters to manufacturer torque specs without overtightening.
Inspect alignments and support the joint to prevent stress.
How to Prevent Leaks After Rapid Reassembly
After rapid reassembly, a technician examines seal integrity to assure O-rings and mating surfaces are undamaged and properly seated.
They verify fittings are re-tightened to manufacturer torque or hand-tight specifications to prevent stress on the seal.
A brief pressure test confirms no leaks before returning the system to service.
Seal Integrity Check
Reliability depends on a systematic seal integrity check immediately following rapid reassembly: visual inspection for proper seat alignment, tactile confirmation that O‑rings or gaskets are fully seated and undamaged, and a controlled pressure test to reveal any leaks before returning the line to service.
The technician confirms components sit flush, cleans mating surfaces, and replaces compromised seals. A slow pressurization with a calibrated gauge exposes marginal failures. Any detected seepage triggers immediate shutdown and reseating or seal replacement.
Documentation of results and test parameters supports traceability and prevents premature commissioning.
- Inspect seating and seal condition
- Clean mating surfaces
- Perform controlled pressure test
- Record findings and actions
Proper Joint Re-Tightening
Following the seal integrity check, attention shifts to proper joint re-tightening to guarantee the assembly remains leak-free under service conditions.
The technician applies incremental torque to threaded fittings, following manufacturer-specified values, and uses calibrated tools to avoid over- or under-tightening.
For compression or push-fit collars, seating is confirmed visually and by light tactile verification; clips or locking rings are re-engaged fully.
After tightening, a pressure test at operating pressure checks for drips or seepage.
Any movement detected prompts immediate disassembly, inspection of seals and pipe ends, and replacement of damaged components before repeating the controlled re-tightening and retest sequence.
How to Pressure‑Test the Repair Quickly
To verify the repair quickly, isolate the repaired section, re‑pressurize the system to normal working pressure, and observe for any pressure drop or visible leaks over a brief monitoring period.
The technician notes gauge stability and inspects joints, fittings, and nearby fixtures. Any drip, wetness, or gauge fall triggers immediate depressurization and correction. Record baseline and final pressures, and if available, use soapy water at joints for bubble detection.
If uncertainty remains, extend monitoring or perform a localized dye test before returning the system to full service.
- Confirm isolation and set pressure
- Monitor gauge for 5–10 minutes
- Inspect visually and with soapy water
- Log results and act on any leak
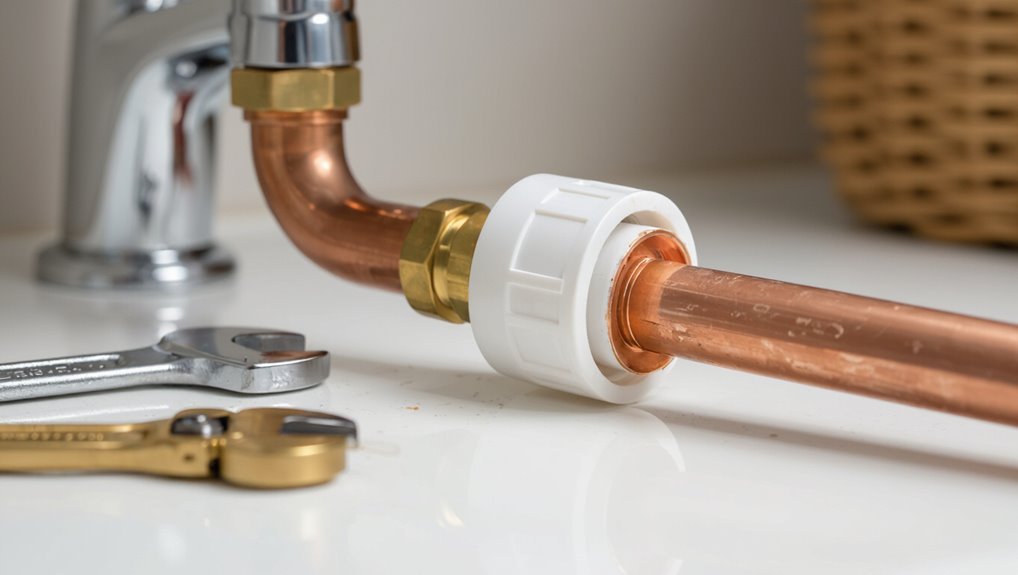
How to Remove a Push‑Fit on Copper Pipe Specifically
Begin by isolating the copper run and draining any residual water so the work area is dry and fully depressurized; this prevents slippage and guarantees a clear view of the joint.
For push-fit removal, mark orientation then depress the plastic collet ring toward the fitting body using a firm thumb or small flat tool.
While holding the collet depressed, pull the copper pipe straight out with steady force; twist slightly if resistance occurs.
If stuck, score the pipe just outside the fitting and use pliers or a pipe puller.
After removal, deburr and clean the pipe end before installing a new connector or cap.
How to Remove a Push‑Fit on PEX or Plastic Pipe
When working with PEX or plastic pipe, the first step is to identify the specific push‑fit connector model and whether it uses a removable collet or an internal locking ring.
Next, the installer releases the internal collet—typically by pressing or prying the securing tabs—so the gripping teeth disengage from the pipe.
Finally, the pipe is pulled straight out from the fitting while maintaining pressure on the released collet.
Identify Connector Type
Before attempting removal, the connector must be identified so the correct method is used and damage is avoided. The inspector examines material, markings, and assembly type. Plastic push‑fit bodies for PEX often differ from metal or hybrid fittings. Identifying a single‑use crimp adapter, a reusable push‑fit, or a solvent‑weld joint reduces guessing. Measure diameter and note retaining features visible externally. Consult manufacturer’s codes or color bands when present. With type confirmed, select compatible tools and replacement parts. Incorrect identification leads to pipe damage or leaks; accurate recognition guarantees a safe, efficient removal and proper reassembly.
- Check material and markings
- Note visible retaining features
- Measure pipe/fitting diameter
- Verify manufacturer/color code
Release Internal Collet
To release the internal collet on a push‑fit used with PEX or plastic pipe, depress the collet evenly around the pipe while pulling the pipe straight out; this disengages the teeth that grip the tubing and allows withdrawal without twisting.
Maintenance requires clearing debris from the collet face first. Use a small flat tool or dedicated collar depressor to press evenly if fingers cannot reach.
Apply steady axial pull while maintaining pressure on the collet until the pipe begins to move. If resistance persists, verify there is no secondary locking clip or damaged teeth preventing release before applying additional force.
Remove Pipe From Fitting
After the internal collet has been released and any debris cleared, the pipe can be withdrawn by applying steady axial force while keeping the collet depressed; this guarantees the teeth remain disengaged and the tubing slides out smoothly.
The operator maintains alignment to prevent binding, supporting the pipe close to the fitting. If resistance persists, the collet is checked for hidden debris or damage.
Heated fittings remain cool before attempting removal. Once freed, the tubing end is inspected for nicks and squared for reinstallation or cap.
Dispose of damaged sections and clean the fitting bore before reuse.
- Maintain axial alignment
- Keep collet depressed
- Inspect pipe end
- Clean fitting bore
How to Remove a Male Push‑Fit or Threaded Adapter
Disconnecting a male push‑fit or threaded adapter begins with isolating the water supply and relieving pressure, then examining the adapter type to choose the correct release method.
For push‑fit male adapters, press the collet squarely toward the fitting while pulling the pipe straight out; if stubborn, use a plastic spanner or two retaining clips to compress evenly.
For threaded male adapters, apply an adjustable wrench to the hex body while holding the mating fitting to prevent twisting; turn counterclockwise, using penetrating oil for seized threads.
After removal, inspect seals and replace O‑rings or tape as needed before reinstalling or capping.
How to Remove a Push‑Fit Under a Sink or in Tight Cabinets
Working beneath a sink or inside a cramped cabinet requires clear access planning and the right tools before attempting to release a push‑fit connection. The technician assesses space, shuts water, and removes obstacles. A slim plastic or metal release ring and long needle‑nose pliers aid access; a small mirror and torch improve visibility.
Support the pipe to prevent stress when depressing the collar. Once released, gently pull the pipe straight out; rotate slightly if resistance occurs. Inspect seals and clean the bore before reinstalling or replacing the connector.
- Plan access and clear space
- Shut water and relieve pressure
- Use slim release tools and mirror
- Support pipe while releasing
How to Remove a Push‑Fit Behind Appliances Fast
When space is limited behind an appliance, a technician should first slide the unit forward enough to create a narrow access corridor.
With the appliance shifted, they isolate water and relieve pressure.
Using a compact LED headlamp and magnetic tray for fittings improves efficiency.
A slim quick-release tool or flat spanner with a thin profile depresses the collet while easing the pipe from the fitting.
Gentle twisting reduces binding; avoid excessive force that damages plastic.
Inspect the pipe end and fitting for burrs or debris.
Re-seat or replace components as needed, then test for leaks before returning the appliance to position.
How to Handle Frozen or Seized Connectors
When a push‑fit connector is frozen or seized, applying gentle heat to the fitting can help expand the material and loosen the joint.
If warming alone is insufficient, carefully using a soft‑jawed wrench or light taps with a rubber mallet can encourage a mechanical release without damaging the pipe.
The technician should proceed slowly, alternating heat and gentle mechanical action until the connector moves.
Warm The Connector
In cold or neglected installations, a push-fit connector that feels immovable often owes its grip to contracted materials or mineral buildup; gently warming the joint can restore flexibility and ease removal.
The technician applies controlled heat to expand plastic or soften deposits, using a hair dryer or warm water rather than open flame. Heating should be gradual, monitored, and limited to avoid warping seals. After warming, testing for slight movement indicates readiness. If no change occurs, allow cooling and reassess rather than force.
- Use a hair dryer or warm water rinse.
- Heat slowly, avoid flames.
- Monitor temperature and seals.
- Test movement periodically.
Gentle Mechanical Release
If warming fails to free the grip, the technician proceeds to gentle mechanical release methods to coax a frozen push-fit connector without damaging pipe or seal. First, plastic or nylon pry tools are used at the collar to compress the retaining clip while minimizing gouging. A soft-jawed pliers applies steady, even pull; tapping the pipe end with a rubber mallet helps break adhesion. If resistance persists, the technician works the collar incrementally around its circumference to disengage internal teeth. Surfaces are protected and inspections follow removal for seal integrity and reuse decisions.
| Tool | Purpose |
|---|---|
| Pry tool | Compress clip |
| Soft pliers | Even pull |
| Rubber mallet | Break adhesion |
| Inspection | Check seal integrity |
How to Remove Corroded Push‑Fit Connectors Safely
Although corroded push-fit connectors can seize unpredictably, removing them safely requires a methodical approach that minimizes damage to the pipe and surrounding fittings.
Begin by isolating and depressurizing the line, then clean visible corrosion with a wire brush and apply penetrating oil sparingly.
Use heat cautiously on metal fittings only, avoiding plastic.
Support the pipe to prevent flexing, and score plastic sleeves gently if required.
If seized persists, cut the connector free and prepare pipe ends for a replacement coupling.
- Isolate and depressurize
- Clean and apply penetrating oil
- Heat metal fittings cautiously
- Cut and replace when necessary
How to Avoid Common Mistakes That Slow Removal
When preparing to remove a push‑fit connector, following a clear sequence and using the right tools prevents wasted time and damage. The writer recommends confirming water is off and pressure relieved before touching the fitting; skipping this wastes attempts and risks leaks.
Use proper release tools or pliers with jaw protectors rather than improvising with screwdrivers that slip. Avoid forcing connectors—rock gently while depressing the collet to disengage the pipe.
Inspect for hidden clips or sleeves before prying. Keep workspace organized so removed parts aren’t lost. Test removal technique on a spare fitting to prevent repeated mistakes on the job.
How to Speed Removal When Multiple Fittings Are Involved
For jobs involving multiple push‑fit connectors, organizing the sequence and tools before starting cuts overall cycle time and reduces errors.
Technicians should map fittings, stage spare connectors, and position cutters, isolation valves, and sealing materials within reach.
Prioritizing fittings by accessibility and downstream impact prevents repeated shutoffs.
Use one person to hold pipe alignment while another cuts and removes fittings to maintain steady workflow.
Label removed components and record sizes to speed replacements and avoid mismatches.
Maintain a clear workspace and discard damaged parts immediately to prevent reuse.
Consistent technique across fittings minimizes rework and shortens total project time.
- Map and stage tools
- Sequence by accessibility
- Assign paired roles
- Label and discard damaged parts
How to Decide When to Cut and Replace Versus Reuse
When evaluating whether to cut and replace a push-fit connector or attempt reuse, the condition of the connector is the first consideration: visible damage, worn seals, or compromised locking teeth argue for replacement.
The state of the adjoining pipe—corrosion, deformation, or scoring from removal—may force cutting back to a fresh section regardless of connector condition.
Finally, a practical comparison of material cost versus the time and labor required for careful reuse guides the most efficient choice.
Condition Of Connector
Assess the connector’s condition by inspecting for visible damage, deformation, corrosion, or persistent leaks that indicate the internal O‑ring or grab ring has failed.
The assessor notes seal condition, housing integrity, and whether the connector still grips pipe without slippage.
Minor scuffs or surface discoloration often permit reuse; cuts, deep gouges, split bodies, or corroded metal require replacement.
Age and prior repairs inform risk tolerance; frequent failures merit replacement over reuse to avoid repeat work.
If unsure, favor replacement when the connector no longer meets original sealing and mechanical standards.
- Seal inspection
- Body integrity
- Grip performance
- Age/repair history
Condition Of Pipe
In determining whether to cut out and replace a length of pipe or to reuse it with the existing push‑fit connector, the inspector evaluates visible damage (cracks, deep gouges, corrosion), roundness and dimensional integrity, presence of pitting or soft spots from erosion, and contamination that could compromise sealing—if the pipe shows any deformation, significant wall loss, hard deposits that prevent a clean cut, or evidence of ongoing corrosion, replacement is warranted; otherwise, a clean, round pipe with intact outside diameter and no sharp burrs may be reused after proper cleaning and deburring.
Further assessment includes testing fit with a gauge, checking for scale or biofilm, and ensuring sufficient remaining wall thickness at the proposed seal location.
If uncertainty exists, cutting back to sound material provides the most reliable outcome.
Cost Versus Time
Balancing immediate labor and material costs against longer‑term risks and downtime determines whether cutting out and replacing pipe or reusing an existing push‑fit connector is the more economical choice.
The decision weighs connector condition, expected seal life, access difficulty, and potential failure consequences.
Reuse saves parts and time if seals are intact and access is simple.
Replacement suits damaged fittings, unknown history, or high‑risk systems where failure costs exceed replacement expense.
Consider labor rates, part prices, and service interruption when estimating total cost.
Prioritize reliability for critical lines; conserve time and budget on low‑risk, accessible sections.
- Inspect connector condition
- Estimate labor vs part cost
- Assess failure impact
- Factor access difficulty
Choosing Reusable Push‑Fits to Make Future Removal Easier
When planning for future maintenance, choosing reusable push‑fit connectors materially reduces time and effort during removal; these fittings are designed with release collars or clips that preserve pipe integrity and allow disconnection without cutting.
Reusable models typically feature durable housing, visible release mechanisms, and compatibility with common pipe materials. Selecting certified brands and matching sizes avoids leaks and simplifies reassembly.
For complex runs, modular reusable fittings permit section replacement without disturbing adjacent joints. Although cost may be higher upfront, the tradeoff favors faster servicing and less waste.
Professionals recommend inventorying spare reusable fittings to streamline repairs and minimize downtime.
How to Maintain Push‑Fit Fittings to Make Future Removal Easy
With regular inspection and simple care, push-fit fittings stay serviceable and can be removed later without cutting or damaging pipework.
Periodic checks identify leaks, corrosion, or movement; lubricate O-rings with silicone grease, not petroleum, to prevent drying.
Make sure pipes are clean and cut squarely before seating; avoid overtightening nearby clamps that distort fittings.
Protect fittings from prolonged UV exposure and extreme temperatures; replace worn seals promptly.
Record maintenance dates on job sheets to schedule future inspections.
- Inspect for leaks and movement quarterly.
- Lubricate O-rings with silicone grease.
- Keep pipe ends clean and square.
- Replace worn seals promptly.
How to Document Your Repair for Future Reference
For future maintenance and quicker troubleshooting, technicians should create a concise repair record that captures what was done, why, and when. Include part details (brand, size, material), serial or batch numbers if present, and exact location within the system.
Note tools used, steps taken to remove and refit the push‑fit connector, and any seals or lubricant applied. Record photos of before, during, and after with timestamps and orientation notes.
Log pressure tests and leak checks performed, plus measured values. Store the record in a centralized, searchable system and link it to the asset ID for easy retrieval.
How to Know When to Call a Plumber Instead of DIY
Before attempting further work, a technician should assess risk factors that indicate professional intervention is needed. If leaks are extensive, water damage visible, or multiple fittings fail, escalation is prudent. Uncertainty about system layout, hidden valves, or gas lines demands licensed expertise. When tools or access are inadequate, or local codes require certified work, calling a plumber prevents liability. Complex diagnostics, recurring faults after initial fixes, or inability to isolate a section are signs to stop and consult.
- Significant or uncontrolled leaks
- Involvement of gas or main shutoffs
- Repeated failures after repair
- Code or access limitations
How to Estimate Time and Cost for a Fast Removal Job
The section outlines the basic tools and materials required for a quick connector removal, including common hand tools and replacement parts.
It then gives typical time estimates per connector based on access and complexity.
Finally, it presents a concise cost breakdown with allowances for unexpected contingencies.
Tools And Materials Needed
When estimating time and cost for removing a push-fit pipe connector, a concise list of required tools and materials allows a quick, realistic plan: basic hand tools (adjustable wrench, pliers), removal aids (push-fit release keys or internal extractor), cleaning supplies (rag, emery cloth), replacement components (new connector or coupler and appropriate seals), and consumables (PTFE tape, joint lubricant).
A focused inventory prevents delays and hidden expenses. Minor extras like a torch for stubborn fittings or a small container to catch water are optional. Prices and availability affect budget decisions; sourcing alternatives can reduce cost without compromising safety or function.
- Inventory core tools and consumables.
- Note optional specialty aids.
- Record replacement part specs.
- Check local pricing and stock.
Time Estimates Per Connector
For a quick removal job, time per push-fit connector typically ranges from 5 to 20 minutes depending on accessibility, water presence, and whether release keys or internal extractors are used.
Estimate low-end times for exposed, dry, and unobstructed fittings where a release key or simple push-and-pull suffices.
Allow mid-range for semi-concealed fittings, minor corrosion, or partial water in line requiring towels and valve isolation.
Allocate upper-range time for tight spaces, stubborn grips, or when internal extractors are necessary.
Multiply per-connector estimates, add setup and safety buffer, and reassess on-site for final scheduling.
Cost Breakdown And Contingencies
With a focus on speed and predictability, cost estimates for a fast push-fit connector removal break into labor, materials, access time, and contingency allowances. The estimator assigns per-connector labor minutes, includes minimal replacement parts or sealing materials, accounts for additional minutes to gain access or clear obstacles, and applies a contingency percentage for surprises. Clear itemization accelerates approvals and reduces overruns. Contingency reflects risk: tight spaces, corroded fittings, or unexpected joints. Combining typical time-per-connector with local labor rates and a 10–30% contingency gives a practical, defensible budget for rapid, controlled removals.
- Labor minutes per connector
- Material costs
- Access/overhead time
- Contingency percentage
How to Source Replacement Parts Quickly
In situations where a push-fit connector fails, locating replacement parts quickly minimizes downtime and prevents water damage.
The homeowner or tradesperson should first note pipe material, diameter, and connector brand or markings.
Check local plumbing suppliers and big-box stores for common sizes; bring the failed fitting as a reference.
Use online retailer filters for exact match by brand and dimensions, and read compatibility notes.
For uncommon fittings, contact manufacturer support or specialized plumbing distributors for part numbers and lead times.
Keep a small stock of common connectors on hand to expedite repairs and reduce repeat service calls.
How to Safely Dispose of Removed Fittings and Scrap Pipe
After removal, fittings and scrap pipe should be sorted immediately to prevent contamination, injury, and disposal errors.
The operator inspects materials for hazardous residue, sharp edges, and reusable parts.
Metals are separated from plastics; contaminated pieces are contained and labeled.
Small debris goes into puncture‑resistant containers.
Local regulations determine recycling, hazardous waste drop‑off, or municipal bulk pickup.
Documentation of disposal and receipts are kept for compliance.
Protective equipment is cleaned and stored.
Waste streams are minimized by salvaging undamaged fittings for reuse or resale.
- Separate metals, plastics, contaminated items, and general waste.
- Use puncture‑resistant containers for sharp debris.
- Follow local recycling and hazardous‑waste rules.
- Record disposal and retain receipts.
Conclusion
In the hush after the wrenching and the rush, the freed push‑fit connector lies like a small victory: practical, unglamorous, necessary. Calm hands and quick thinking turned a ticking leak into a solved problem, but the work also leaves a faint ache of respect for water’s quiet power. Keep parts labeled, replacements ready, and a pro’s number in the phone—because preparedness is a quiet kind of courage that keeps homes safe.