How to Clean a Pipe: Simple Steps for Sparkling Results
Key Takeaway: How to Clean a Pipe
To clean a pipe effectively, follow these simple steps:
1. Identify Material & Purpose: Determine the pipe’s material and its intended use.
2. Depressurize & Disassemble: Ensure safety by depressurizing and disassembling the pipe if possible.
3. Gather Supplies: Collect necessary cleaning tools: brushes, picks, warm water, mild soap, isopropyl alcohol, and coarse salt.
4. Clean the Pipe:
- Flush Debris: Rinse out loose debris.
- Brush: Clean from one end to the other using a brush.
- Soak Stubborn Spots: For tough residues, soak briefly.
- Rinse Thoroughly: Ensure all soap and debris are washed away.
- Air-Dry Completely: Allow the pipe to dry before reassembly.
5. Inspect for Damage: Check seals, screens, and joints for wear and replace any damaged parts.
6. Follow Care Guidelines: Adhere to material-specific maintenance to prevent warping or corrosion.
By following these steps, you can achieve a sparkling clean pipe that is safe and ready for use.
What Kind of Pipe Are You Cleaning?
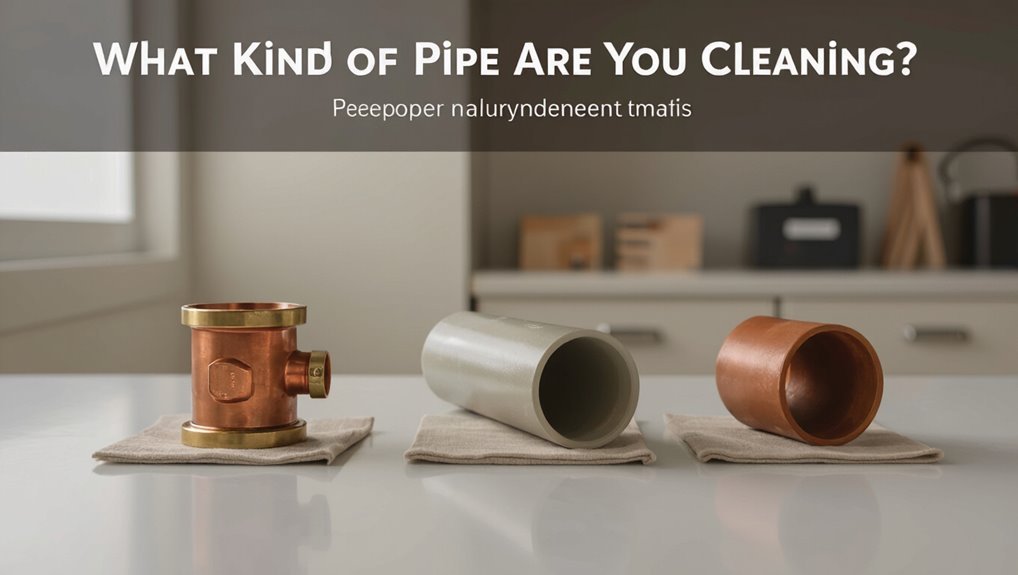
Which type of pipe requires cleaning determines the methods and precautions to follow. The writer distinguishes materials (metal, PVC, ceramic, glass), purpose (water supply, drainage, ventilation, smoking), and condition (scale, corrosion, biological growth, resin buildup).
Each combination suggests compatible tools, cleaners, and safety measures: chemical descalers for mineral scale in metal, mechanical snaking for blockages in drains, soft brushes and solvent-safe cleaners for delicate glass. Consider joint types and fittings to avoid damage, and whether pipes are pressurized or connected to potable systems.
Identifying these factors before beginning guarantees appropriate technique selection and reduces risk of contamination or repair needs.
Quick Steps: Clean a Pipe Now
The guide now outlines immediate actions to prepare a pipe for cleaning, including safe disassembly and gathering needed supplies.
It then describes a straightforward cleaning method to remove buildup and residue.
Finally, it covers thorough drying and proper storage to prevent moisture damage and future clogging.
Quick Prep Steps
Before beginning, gather necessary tools and prepare a clean, well-lit workspace to prevent damage and simplify the job.
The preparer inspects the pipe for cracks, loose fittings, and clogged sections, noting removable parts.
Gloves and protective eyewear are donned; a towel or tray protects surfaces.
Appropriate solvents, brushes, picks, and replacement seals are set within reach.
Ventilation is checked if chemicals will be used.
Water-sensitive surroundings are covered.
The pipe is cooled and depressurized; fluids are drained into a safe container.
Small parts are organized and labeled to guarantee correct reassembly and efficient, damage-free cleaning.
Basic Cleaning Technique
With gloves and eyewear already in place, the cleaner begins by flushing the pipe with water or an appropriate solvent to remove loose debris, then works systematically from one end to the other using brushes and picks sized to the bore.
Stubborn deposits are softened with a compatible chemical, applied briefly and rinsed.
Mechanical action—rotating brushes, gentle scraping, and agitation—dislodges residue without scoring the interior.
Frequent inspection with a torch or bore scope guides progress.
Connections and fittings receive focused attention to prevent hidden buildup.
Final rinses continue until discharged fluid runs clear and internal surfaces appear uniformly clean.
Drying And Storage
After flushing and inspection, attention shifts to thorough drying and proper storage to prevent corrosion and microbial growth.
The pipe is air-dried with clean, lint-free cloths and allowed to sit in a warm, ventilated area until all moisture evaporates. Compressed air can expedite drying for internal passages; avoid high heat that could damage seals.
Once dry, apply light protective oil to metal surfaces if recommended, cap open ends, and store horizontally on padded racks to prevent dents. Label cleaned pipes with date and the responsible technician. Regularly inspect stored pipes and rotate stock to maintain readiness and integrity.
Essential Tools for Pipe Cleaning
For effective pipe cleaning, a small set of reliable tools covers most needs: a hand auger or snake for blockages, a set of plumber’s brushes and picks for scraping scale and debris, a length-adjustable brush or bottle brush for interiors, and nitrile gloves and eye protection for safety. Additional useful items include a flashlight, rags, and a bucket for waste. Selection prioritizes durable materials and appropriate sizes for the pipe diameter. Proper tool maintenance extends service life. The table below summarizes core categories and purpose.
| Tool category | Primary purpose |
|---|---|
| Auger/snake | Clear clogs |
| Brushes/picks | Remove buildup |
Best Brushes and Picks to Use
In choosing brushes and picks, focus on bristle material, stiffness, and head size to match pipe diameter and the type of buildup.
Stiff nylon brushes work for mineral deposits and dried grime; softer natural bristles suit delicate finishes.
Long-handled, flexible brushes reach bends while compact heads clean narrow passages.
Picks with hooked or angled tips remove lodged debris; choose stainless steel for durability or plastic for non-scratching needs.
For glass or varnished surfaces, use padded or silicone-tipped tools.
Replace worn brushes to avoid spreading residue.
Store tools dry and separate to prevent contamination and preserve effectiveness between uses.
Safe Cleaning Chemicals to Keep on Hand
Frequently, a small, well-chosen selection of gentle, effective cleaners covers most pipe maintenance needs without risking damage to materials or finishes.
Recommended items include isopropyl alcohol for removing oils and residue, mild dish soap for routine cleaning, and white vinegar for dissolving light mineral buildup.
A baking soda paste works as a gentle abrasive for stubborn spots.
For metal pipes, a dedicated brass or silver polish may be appropriate.
Avoid caustic drain cleaners and abrasive powders that can pit surfaces.
Store chemicals in labeled containers, separate from food and children’s items, and replace solutions when visibly contaminated.
Prepare Your Workspace Safely
Before beginning any cleaning task, the workspace should be organized to minimize hazards and make the process efficient. Surfaces are cleared, adequate lighting guaranteed, and ventilation arranged. Tools and approved cleaners are placed within reach but away from open flames. Floors remain dry and trip hazards removed. A clear waste container stands ready for used wipes and debris.
| Item | Purpose |
|---|---|
| Tray | Contain small parts |
| Mat | Protect surface |
| Bucket | Hold rinse water |
| Cloths | Wipe and dry |
| Label | Identify chemicals |
Protect Your Hands and Lungs
Wearing appropriate gloves and a respiratory barrier reduces exposure to solvents, ash, and particulate while cleaning a pipe.
The cleaner selects chemical-resistant gloves and a fitted N95 or higher mask, replacing disposable gloves between solvent types.
Eye protection and long sleeves further limit contact.
Hands are washed thoroughly after finishing and before touching face or food.
Work occurs in a ventilated area or outdoors to disperse fumes.
Proper disposal of contaminated wipes and gloves prevents secondary exposure.
Routine inspection of personal protective equipment confirms continued effectiveness and reduces risk over repeated cleaning sessions.
- Gloves selection
- Respiratory protection
- Disposal and hygiene
Disassemble a Pipe Without Damage
Carefully separating a pipe’s components minimizes the risk of cracks, stripped threads, and lost parts. The person cools the pipe fully, examines the joint for residue, and twists gently in the direction of original assembly. If resistance occurs, a soft cloth provides grip; avoid pliers or excessive torque.
For stubborn stems, brief warming by hand increases pliability; never apply flame. Note alignment markers or take a photo to make certain correct reassembly. Place each piece on a clean surface or in labeled containers to prevent scratches and misplacement. Refrain from forcing frozen or fused connections; seek professional help if needed.
Remove Loose Debris From Bowl and Stem
With the pipe disassembled and components laid out, attention shifts to clearing loose ash and debris from the bowl and stem. Gently tap the bowl over a waste receptacle to dislodge large ash clumps; avoid striking surfaces. Use a soft pipe tool or folded paper to scoop remaining particles, working from rim toward draft hole.
For the stem, pass a dry pipe cleaner through to capture loose residue; repeat until cleaner emerges mostly free of debris. Inspect imprinted areas and ledges with a small brush or soft cloth, ensuring no loose fragments remain before proceeding.
- Tap gently
- Scoop carefully
- Brush and inspect
Rinse With Warm Water Correctly
Next, the pipe should be rinsed with warm — not hot — water to soften residue without warping materials.
The person rinses the bowl and stem under a gentle, steady flow, angling openings to flush loosened particles away.
Short, controlled movements prevent water from entering areas that could trap moisture.
Warm Water Temperature
At a moderate temperature — typically between 90°F and 110°F (32°C–43°C) — warm water loosens residues without risking damage to pipe materials or finishes.
This range balances solubility and safety: it melts tar and oils more effectively than cold water while avoiding thermal stress on wood, acrylic, or bonded components.
Consistent temperature prevents sudden expansion or finish clouding.
Users should test a small area if uncertain about material tolerance and avoid boiling or icy extremes.
Warm water also improves mild soap performance, aiding residue suspension for easier removal during subsequent steps.
- Preferred range: 90°F–110°F (32°C–43°C)
- Benefits: loosens tar, preserves finishes
- Caution: avoid extremes
Rinse Technique
Following warm-water soaking, the rinsing step removes loosened residue and any remaining soap without damaging pipe surfaces.
The person holds the pipe under a gentle, warm stream, tilting to allow water to flow through all chambers and the bowl.
They avoid high pressure that could force debris deeper or crack fragile materials.
A soft-bristled brush or pipe cleaner guides residual particles toward the exit while water carries them away.
Rinse until water runs clear, checking mouthpiece and draft holes.
Afterward, shake out excess water, pat dry with a lint-free cloth, and air-dry completely before reassembly.
Use Isopropyl Alcohol Safely
Why is isopropyl alcohol a common choice for pipe cleaning? It dissolves residues, evaporates quickly, and reduces odors. Users should handle it with care to avoid inhalation, skin irritation, and fire risk. Work in a ventilated area, keep away from open flames, and store tightly capped.
- Use 70–99% isopropyl alcohol; higher concentration cleans faster but is more flammable.
- Wear nitrile gloves and avoid prolonged skin contact; rinse thoroughly afterward.
- Allow full evaporation before heating or using the pipe; dispose of soaked materials safely to prevent accidental ignition.
Follow label instructions and local disposal rules.
Use Salt as a Mechanical Scrubber
Used as an abrasive, coarse salt provides mechanical scrubbing that dislodges resin and tar when combined with a solvent or agitation. The granular texture reaches crevices without scratching most glass or metal surfaces.
A measured pinch sprinkled into the pipe before adding solvent increases contact and accelerates loosening of deposits. Rotational movements or gentle tapping help the salt grind away buildup; discarded salt collects particles for easy removal.
After use, thoroughly rinse to remove residual grains and dissolved residue. Salt is inexpensive, non-toxic, and disposable, making it a practical complement to chemical cleaning methods when used appropriately.
Clean Tight Bends and Mortises
Tackling tight bends and mortises requires tools and techniques that reach narrow curves without damaging the pipe.
Specialized flexible brushes, pipe cleaners, or thin wire can dislodge and extract compacted residue.
Persistent buildup may need repeated gentle agitation and targeted scraping to fully remove stubborn debris.
Accessing Narrow Bends
When reaching narrow bends and mortises inside a pipe, specialty tools and patient technique are essential to dislodge debris without damaging the bore.
The technician assesses bend geometry, selects slender brushes, flexible picks, or micro-cable assemblies, and progresses incrementally. Gentle rotation and controlled withdrawal prevent snagging; intermittent flushing clears loosened particles. Lighting and endoscopic inspection verify progress; insecure probing is avoided to prevent scoring. After each pass, debris is removed and tools inspected for wear. Routine measurement of curvature guides tool choice for future maintenance.
- Match tool profile to bend radius.
- Use inspection before and after passes.
- Progress slowly, avoid force.
Removing Stubborn Debris
In tight bends and mortises where routine brushes fail, the technician relies on a sequence of targeted actions to dislodge compacted residue without harming the bore.
First, mechanical picks and flexible micro-probes scrape lodged buildup, used with steady, controlled strokes to prevent scoring.
Next, low-pressure pneumatic pulses or syringe-driven fluid jets loosen particles trapped in crevices.
Enzymatic or solvent applicators follow, tailored to deposit composition and material compatibility, then allowed dwell time.
Agitation with soft nylon picks and flushing removes loosened debris.
A final inspection with a borescope confirms clearance before reassembly and operational testing.
Tools for Cleaning Tight Bends
For tight bends, specialized tools make effective cleaning possible without damaging the pipe. A compact selection aids access, dislodges buildup, and preserves interior surfaces. Flexible bristle brushes reach curved sections; nylon bristles resist scratching while conforming to angles. Spring-loaded serpentine picks navigate S-shaped passages to push or pull compacted residue. Miniature rotary attachments, used at low speed, abrade deposits gently without forcing through bends. Selection depends on pipe diameter, bend radius, and material. Proper tool choice reduces the need for aggressive chemicals and lowers risk of fracture or wear. Regular inspection guides tool replacement and safe technique.
- Flexible bristle brushes
- Serpentine picks
- Miniature rotary attachments
Clean Screens, Filters, and Bowls
The author recommends removing residue from screens, filters, and bowls with gentle, nonabrasive tools to avoid damage.
Stubborn buildup should be soaked in an appropriate cleaning solution until loosened.
After soaking, each part must be rinsed thoroughly and allowed to dry completely before reassembly.
Remove Residue Carefully
When removing residue, one should handle screens, filters, and bowls with steady, deliberate motions to prevent damage and avoid spreading debris. Use a soft brush or wooden tool to coax loose particles out, tapping gently to dislodge compacted buildup.
Inspect each component for cracks or warping; compromised parts require replacement rather than repair. Collect debris on a paper towel or tray to prevent recontamination. Avoid forceful scraping that could enlarge pores or deform fittings. After dry removal, proceed to the next cleaning phase as directed.
- Gentle tools only
- Inspect for damage
- Contain removed residue
Soak With Cleaning Solution
After collecting loose debris, submerge screens, filters, and bowls in an appropriate cleaning solution to dissolve remaining residue; choose a solvent and soak time based on material—e.g., isopropyl alcohol for metal and glass, mild dish soap for silicone or plastic—and make certain parts are fully covered without crowding.
Allow the items to soak long enough for stubborn buildup to loosen, checking periodically to avoid overexposure. Agitate gently or use a soft brush during soaking to accelerate breakdown of deposits.
For multi-piece systems, soak smaller components separately to prevent trapping grime. Dispose of used solvent responsibly and replenish solution as needed for effective cleaning.
Rinse And Dry Thoroughly
Usually, rinsing and drying thoroughly guarantees all solvent and loosened residue are removed from screens, filters, and bowls before reassembly.
The components are rinsed under warm running water until no suds or particles remain, then inspected for remaining deposits.
A soft brush or cotton swab frees trapped debris.
Blotting with a lint-free cloth prevents fibers from lodging in perforations.
Air-drying on a clean rack assures complete evaporation; gentle heat can accelerate drying but avoid high temperatures that warp parts.
Reassembly only occurs when parts are bone-dry to prevent mold, rust, or solvent entrapment.
- Inspect visually.
- Brush gently.
- Air-dry completely.
Clean the Stem and Airway
Because the stem and airway channel moisture and residue from each draw, they require careful cleaning to maintain airflow and prevent buildup.
A thin pipe cleaner should be pushed through the stem several times, rotating to dislodge tar and gunk.
For stubborn deposits, soak the stem in isopropyl alcohol for a short period, then rinse thoroughly with warm water.
Use a soft-bristle brush for the airway if accessible.
Dry completely with compressed air or by leaving components on a lint-free cloth.
Reassemble only when fully dry to avoid corrosion or mold and to guarantee optimal draw and flavor.
Cleaning Metal Pipes vs. Glass Pipes
The differences between metal and glass pipes affect the choice of cleaning techniques and solvents appropriate for each material.
Metal pipes often tolerate stronger chemical cleaners and mechanical abrasion for stain and residue removal, while glass benefits from gentler solvents and soak-and-rinse methods to avoid scratches.
Regular, material-specific maintenance routines extend lifespan and prevent buildup that compromises function.
Material-Specific Cleaning Methods
When addressing cleaning methods for pipes, material composition dictates appropriate techniques and solvents; metal and glass require different approaches due to their thermal properties, susceptibility to abrasion, and reaction to chemicals.
Metal pipes benefit from gentle alkaline cleaners, rust inhibitors, and non‑metallic brushes to avoid scratching or galvanic corrosion.
Glass tolerates higher temperatures and stronger solvents but requires softer tools to prevent chips.
Both need thorough rinsing and drying to prevent residue or corrosion.
Consider protective gear and ventilation when using chemicals.
Choose products rated for the specific material and follow manufacturer guidance.
- Assess material type first
- Use compatible cleaners
- Rinse and dry thoroughly
Stain And Residue Removal
Different approaches are required to remove stains and residues from metal versus glass pipes: metal surfaces often need alkaline cleaners and non‑abrasive brushes to lift tarnish and prevent corrosion, while glass tolerates stronger solvents and heat but demands softer tools to avoid chipping.
For metal, apply a mild alkaline solution, agitate with a nylon brush, rinse thoroughly and dry to inhibit oxidation.
For glass, use solvent soaks or warm water with appropriate cleaner, gently dislodge deposits with soft brushes or pipe cleaners, then rinse until clear.
Stubborn buildup on either may require repeat treatments rather than harsher mechanical action.
Maintenance And Longevity
Moving from stain removal to ongoing upkeep, metal and glass pipes require distinct maintenance routines to preserve function and lifespan. Metal benefits from regular drying and corrosion checks; polishing removes oxidation while avoiding abrasive cleaners that remove protective coatings. Glass demands gentle handling, frequent rinsing, and occasional deep soaks to prevent buildup without scratching. Both types profit from scheduled inspections, timely repairs, and proper storage to avoid damage.
- Inspect regularly for wear, cracks, or corrosion.
- Use material-appropriate cleaners and nonabrasive tools.
- Store dry, cushioned, and away from extreme temperatures.
Deep‑Clean a Heavily Gunked Pipe
Begin by evaluating the pipe to identify the type and extent of buildup—hair, grease, mineral scale, or a combination—so the appropriate tools and chemicals can be selected and applied safely. For heavy gunk, mechanical agitation (brushes, auger) precedes controlled chemical soak; protect finishes and ventilation. Work in stages: loosen, extract, rinse, repeat until flow restores. Inspect seals and traps for damage; replace if compromised. Finish with a neutralizing flush and light lubricant on threads. Record findings for future maintenance to prevent recurrence.
| Tension | Relief | Renewal |
|---|---|---|
| Frustration | Satisfaction | Freshness |
| Mess | Order | Confidence |
Remove Stubborn Resin Buildup
After loosening and removing bulk debris, attention turns to resin deposits, which bond firmly to pipe walls and resist ordinary scrubbing. Targeted methods dissolve or dislodge buildup without damaging material.
Soak removable components briefly in isopropyl alcohol or a dedicated solvent, then agitate with pipe cleaners or soft bristles. For fixed sections, apply solvent cautiously with cotton swabs, allow dwell time, then scrape gently with nylon tools.
Rinse thoroughly and dry fully to prevent residue. Repeat as needed until smooth. Dispose of used solvent responsibly and ventilate the area during treatment.
- Solvent soak
- Mechanical agitation
- Thorough rinse and dry
Clean Wooden Pipes Without Warping
When treating wooden pipes, care must be taken to remove residues without exposing the wood to excessive moisture or heat that can cause warping; use minimal liquid, controlled temperatures, and gentle tools to preserve shape and finish.
The pipe should be disassembled if possible. Use a dry brush or soft brass bristle to loosen debris, then apply a barely dampened cloth with isopropyl alcohol sparingly to stubborn spots, avoiding prolonged contact.
Dry immediately with paper or a soft lint-free cloth. Allow slow air-drying at room temperature.
Finish with a light application of food-safe oil to restore moisture and protect the wood.
Clean Silicone Pipes for Longevity
Flexible and durable, silicone pipes tolerate thorough cleaning that preserves functionality and extends service life; proper maintenance focuses on removing residue, preventing odor buildup, and avoiding abrasive chemicals that degrade the material.
Cleaning begins with disassembly and rinsing under warm water to remove loose debris. A soft brush and mild dish soap eliminate sticky buildup; for odors, soak parts in a baking soda solution or diluted vinegar, then rinse thoroughly.
Avoid alcohol-based or harsh solvent cleaners that can swell or discolor silicone. Dry completely before reassembly and store in a ventilated, cool place to prevent mold and odors.
- Disassemble, rinse, brush
- Soak for odors
- Avoid harsh solvents
Clean Ceramic and Clay Pipes Safely
Before cleaning, the ceramic or clay pipe should be inspected for hairline cracks or chips that could worsen with moisture or pressure.
A mild, non-abrasive cleaning solution and soft brushes are recommended to remove residue without scratching the surface.
After rinsing, the piece must be thoroughly air-dried in a stable position to prevent trapped moisture and avoid thermal shock.
Inspect for Cracks
During inspection for cracks, attention must focus on hairline fractures and chips that compromise ceramic and clay pipe integrity. The inspector examines the bowl, stem junction, and interior walls under good light, sometimes using a magnifier.
Surface discoloration, uneven edges, or moisture seepage indicate damage. Gentle tapping can reveal hidden faults by sound change; any dull tone warrants closer review.
If structural compromise exists, repair risks affecting function and safety, so replacement is often advised. Document findings and photograph defects before proceeding to cleaning steps to avoid worsening unseen damage.
- Inspect joints and rims
- Check interior walls
- Note and photograph defects
Gentle Cleaning Solutions
When approached with care, ceramic and clay pipes respond best to mild, nonabrasive cleaners that dissolve residue without etching glaze or weakening the material. Use warm water with a few drops of gentle dish soap, diluted white vinegar for mineral buildup, or a baking soda paste for stubborn spots. Soft brushes and cotton swabs reach crevices; avoid metal tools and harsh chemicals. Test solutions on an inconspicuous area first. Rinse thoroughly until no suds or vinegar scent remain. Repeat sparingly to preserve surface. Store cleaned pipes in padded, ventilated spaces.
| Cleaner | Purpose |
|---|---|
| Dish soap | General residue |
| Vinegar | Mineral deposits |
| Baking soda | Gentle abrasion |
| Soft brush | Crevice cleaning |
| Water rinse | Remove residues |
Proper Drying Techniques
After cleaning, ceramic and clay pipes require controlled drying to prevent cracking, glaze crazing, or mold growth. They should air-dry slowly at room temperature, avoiding direct heat or sunlight that stresses material.
Make certain internal passages drain; tilt pipes on a soft, absorbent towel to vent moisture. For stubborn dampness, use gentle airflow from a fan placed at distance, not a hairdryer. Complete drying can take 24–72 hours depending on thickness.
- Inspect regularly for residual moisture.
- Rotate and reposition to expose all cavities.
- Store in a breathable container once fully dry.
Clean a Bong or Water Pipe (Different)
A bong or water pipe requires a different cleaning approach than a dry pipe because water traps resin, tar, and bacteria in chambers and percolators that restrict access and accumulate residue. The procedure involves disassembling removable parts, discarding old water, and rinsing. Use isopropyl alcohol and coarse salt or specially formulated cleaners to dissolve buildup; agitate gently, then rinse thoroughly. For tight passages, employ pipe cleaners or soft brushes. Reassemble only when fully dry. Regular maintenance prevents odor and bacterial growth; deep cleans restore airflow and taste. Handle glass carefully to avoid chips or cracks.
| Step | Tool |
|---|---|
| Disassemble | Gloves |
| Clean | Alcohol & salt |
| Rinse & dry | Brushes |
How Often to Clean Each Pipe Type
Having covered cleaning methods for water pipes, attention turns to recommended cleaning frequency for different pipe types. Frequency depends on material, use, and residue buildup. Regular maintenance prevents clogging, preserves flavor, and extends lifespan. Suggested intervals suit typical recreational use but adjust for heavier or lighter use.
- Glass and borosilicate: deep clean weekly; quick rinse after each session.
- Ceramic and stone: deep clean biweekly; avoid harsh scrubs to protect finishes.
- Metal and silicone: deep clean monthly; rinse thoroughly after each use to prevent corrosion or odor retention.
Follow manufacturer guidance when available.
Dry and Reassemble Your Pipe Properly
Once cleaned, all pipe components should be air dried thoroughly to prevent moisture buildup and mold.
Reassembly must follow the original order and secure fittings to guarantee an airtight seal.
A final inspection confirms joints are tight, screens are seated, and the pipe is ready for use.
Air Dry Thoroughly
After rinsing and removing all solvent, the pipe should be set aside in a clean, well-ventilated location to air dry completely.
Components must not be reassembled while damp; trapped moisture promotes corrosion and microbial growth.
Position parts on a lint-free towel or drying rack with airflow around bores and joint surfaces.
Use gentle ambient air — avoid forced heat that can deform seals or finishes.
Allow several hours or overnight depending on material and thickness.
Verify dryness by touch and visual inspection before proceeding to reassembly.
- Guarantee full airflow around all parts
- Avoid direct heat sources
- Confirm no residual moisture
Reassemble Correctly
With all components fully dry and inspected, reassembly should proceed methodically to restore function and prevent leaks or damage.
Arrange parts in original order, referencing photographs or notes if taken earlier.
Replace worn or brittle gaskets and O-rings before seating joints.
Apply appropriate lubricant sparingly to threads and seals when manufacturer recommends.
Align mating surfaces carefully to avoid cross-threading or misalignment.
Hand-tighten connectors initially, then torque to specified values with proper tools.
Reinstall clamps or brackets to support the assembly.
Restore ancillary fittings and reattach hoses.
Keep workspace clean to prevent contamination during final reconnection.
Final Inspection
Having reassembled the components, perform a final inspection to confirm the pipe is dry, correctly seated, and free of defects before pressurization.
The inspector checks joints, threads, and seals visually and by touch, ensuring no residual moisture or debris remains.
Alignment and torque are verified against specifications.
Any damaged parts are replaced; loose fittings are tightened to recommended values.
A brief leak test with low pressure or soapy solution validates integrity.
Documentation of findings and corrective actions completes the step.
Only after confirming dryness and proper assembly should normal service pressures be applied.
- Verify dryness and seal seating.
- Perform low-pressure leak test.
- Record results and corrections.
Restore Shine to Metal and Glass
To restore shine to metal and glass, surfaces should be cleaned, polished, and protected using appropriate products and techniques for each material.
Metal parts benefit from a non-abrasive cleaner to remove residue, followed by a metal polish applied sparingly with a soft cloth to eliminate tarnish and fine scratches.
For glass, use a streak-free glass cleaner and a lint-free cloth, addressing stubborn spots with a paste of baking soda and water applied gently.
After polishing, wipe surfaces with a microfiber cloth and apply a thin protective coating—wax for metal, a commercial sealant for glass—to slow re-soiling and oxidation.
Deodorize Pipes Naturally
For persistent odors, addressing pipes with simple, natural methods eliminates smells without harsh chemicals. The process uses common pantry ingredients to neutralize odors and dissolve light residues.
A measured approach prevents damage to finishes while restoring a neutral scent. Apply solutions, allow dwell time, then rinse thoroughly with warm water. Mechanical clearing with a soft brush can assist where safe.
- Sprinkle baking soda, pour vinegar, wait 15 minutes, then flush with hot water.
- Use lemon juice or citric acid solution to neutralize sulfurous smells.
- Rinse and air-dry pipes between uses to remove lingering moisture.
Prevent Future Buildup With Routine Care
Regularly scheduled maintenance keeps pipes clear and reduces the need for heavy cleaning. A brief weekly rinse with warm water and a soft brush prevents residue buildup.
After each use, empty moisture and debris, and allow full drying to inhibit mold and gunk. Monthly inspections catch early clogs: check joints, screens, and bends for deposits.
Use gentle, pipe-safe cleaners sparingly to break gradual buildup, avoiding harsh chemicals that damage finishes. Store pipes in a dry, ventilated place between uses.
Consistent, simple habits extend pipe life and maintain optimal airflow and flavor without intensive interventions.
Compact Cleaning Methods for Travel
For travel, compact cleaning methods prioritize portability and speed.
Recommended items include pocket-sized tools, quick disassembly tips to minimize parts, and travel-safe cleaning kits that meet transport rules.
These approaches help maintain a pipe’s condition without bulky equipment.
Pocket-Sized Tools
When space is limited, a few compact tools can keep a pipe functional and clean on the go. A small kit balances portability with effectiveness: lightweight picks, a folding reamer, and a travel brush. Each tool targets residue without bulky cases. Maintenance between sessions prevents buildup, extending pipe life and preserving flavor.
The kit fits a pocket or small pouch, encouraging frequent use. Materials should resist corrosion; replaceable heads prolong utility. Simple storage prevents contact with other items. Regular brief cleaning reduces need for deep work later, streamlining care during trips.
- Pocket picks
- Folding reamer
- Travel brush
Quick Disassembly Tips
With minimal fuss, a quick disassembly focuses on removing the stem and bowl in a few predictable steps so cleaning can be done cleanly and quickly while traveling. The method emphasizes cool pipes, gentle twisting, and a secure grip to avoid damage. Small parts are organized and wiped; stubborn build-up is softened with a brief soak. Reassembly follows the reverse order, checking seals and alignment. Compact steps minimize tools and time, preserving the pipe’s fit and finish.
| Step | Action | Tip |
|---|---|---|
| 1 | Cool pipe | Wait 10–15 min |
| 2 | Twist stem | Gentle force |
| 3 | Remove bowl | Hold base |
| 4 | Organize parts | Use pouch |
| 5 | Quick wipe | Lint-free cloth |
Travel-Safe Cleaning Kits
Travel-ready kits bundle the few essentials needed to maintain a pipe on the road: compact brushes, a slim cloth, a small tube of cleaner or alcohol wipes, and a sealed pouch to contain residues.
They prioritize portability and discretion, fitting into luggage or a pocket while meeting basic maintenance needs.
Durable cases protect tools; leakproof containers prevent spills.
Selection focuses on noninvasive cleaning for quick touch-ups and odor control between thorough cleanings.
Users are advised to choose materials compatible with the pipe’s finish and to follow local regulations for carrying liquids and tools.
- Compactness
- Compatibility
- Containment
Disinfect a Pipe Without Harming It
Disinfecting a pipe without damaging its material requires selecting agents and methods that eliminate microbes while preserving finishes, seals, and any delicate components; alcohol-based solutions and gentle, non-bleach disinfectants are commonly recommended for glass, metal, and most plastics because they kill pathogens quickly and evaporate without corroding surfaces. A detached routine: wipe with isopropyl alcohol, avoid soaking wooden or decorated parts, rinse and dry thoroughly, and test a small area first. Proper ventilation and gloves protect both user and pipe. Confidence, care, and restraint preserve function and appearance.
| Clean | Calm | Safe |
|---|---|---|
| Test | Wipe | Dry |
| Rinse | Air | Store |
Fix Minor Pipe Damage Yourself
Before attempting repairs, the condition of the pipe should be carefully assessed to identify corrosion, hairline cracks, or loose joints.
For small leaks, temporary patches or epoxy putty can stop seepage until a permanent solution is applied. If damage appears extensive or affects structural integrity, a professional should be consulted.
Assess The Damage
Begin by examining the pipe visually and by touch to identify leaks, cracks, corrosion, or loose fittings.
The assessor notes location, size, and material, distinguishing surface rust from structural corrosion.
Water stains, mineral buildup, and damp insulation indicate chronic issues; hairline fractures show under pressure testing.
Fasteners and joints receive careful inspection for wear or misalignment.
Photos and brief measurements document findings for reference.
Safety considerations, such as shutting off supply and relieving pressure, precede intrusive checks.
Prioritize repairs by severity and accessibility to determine whether simple DIY measures suffice or professional help is required.
- Record location, size, and material.
- Check joints and fasteners.
- Note signs of chronic leakage.
Patch Small Leaks
Repairing small leaks can often be handled without professional help if the assessor confirmed the damage is limited, accessible, and the pipe material is compatible with DIY methods. The individual isolates the section, shuts off water, dries the area, and selects an appropriate repair: epoxy putty for hairline cracks, rubber patches with hose clamps for pinholes, or solvent weld for compatible plastics. Curing times and pressure limits are observed. Post-repair testing guarantees integrity. If corrosion, spreading damage, or unknown fittings appear, professional evaluation follows. Documentation and periodic checks prevent recurrence and ensure long-term reliability.
| Step | Material | Time |
|---|---|---|
| 1 | Shutoff | 5 min |
| 2 | Dry | 10 min |
| 3 | Apply | 15–30 min |
| 4 | Cure | 1–24 hr |
| 5 | Test | 10 min |
Common Cleaning Mistakes to Avoid
While many try to speed the process, common mistakes—using harsh chemicals, scrubbing too aggressively, or neglecting regular maintenance—can damage the pipe or shorten its lifespan.
Cleaners should avoid abrasive pads that erode protective coatings, mixing cleaning agents that produce harmful fumes, and using excessive force that deforms joints.
Skipping rinsing leaves residue that attracts grime.
Ignoring manufacturer guidance voids warranties and may cause corrosion.
Proper tools, gentle brushes, and recommended solutions reduce risk.
Periodic inspections catch issues early.
Safety gear and ventilation protect the cleaner.
Remember: cautious, consistent care preserves function and extends service life.
- Use gentle, compatible cleaners
- Rinse and dry thoroughly
- Inspect regularly
When to Choose DIY vs. Professional Cleaning
When deciding between DIY and professional pipe cleaning, evaluate the problem’s complexity, the tools and chemicals required, and the user’s experience; simple buildup or routine maintenance can usually be handled at home, but corrosion, persistent blockages, structural damage, or systems under warranty warrant a pro.
Home efforts suit light resin, ash, or residue with basic tools and mild cleaners; they save time and cost.
Choose professionals for deep clogs, metal fatigue, cracked glass or ceramic, hidden contamination, or when safety concerns arise.
Professionals offer inspections, specialized solvents, and repairs; hiring them prevents further damage and preserves warranties.
Clean Pipes Used With Concentrates
Pipes used with concentrates require more frequent and careful cleaning than those used for dry herbs, because sticky oils harden quickly and trap residue in tight passages.
The detached observer notes that concentrates leave thick, stubborn buildup in bowls, stems, and atomizer areas; regular disassembly, solvent baths, and gentle scraping prevent clogs and flavor degradation.
Isopropyl alcohol and dedicated cleaners dissolve residues; warm rinses and thorough drying restore airflow.
Frequent short cleanings reduce the need for aggressive methods and extend component life.
- Disassemble and soak.
- Agitate and scrape gently.
- Rinse, dry, reassemble.
Clean Shared Pipes Hygienically
When multiple people use the same pipe, users are advised to wear protective gloves to prevent direct contact with residues and skin.
Food-safe cleaners should be selected to avoid toxic residues while effectively removing buildup.
Surfaces and mouthpieces ought to be sanitized between users to minimize germ transmission.
Wear Protective Gloves
A pair of disposable gloves provides a sanitary barrier between the cleaner’s hands and residue inside a shared pipe, reducing pathogen transfer and chemical exposure.
Gloves should fit snugly, be intact, and be changed between users or tasks to prevent cross-contamination.
After removal, hands require immediate washing.
Inspect gloves for tears during use; discard if compromised.
Choose nitrile or latex alternatives for durability and allergy considerations.
Proper removal technique avoids contact with contaminated surfaces.
Dispose of gloves in a sealed bag and follow local waste guidelines.
Finally, document glove changes when cleaning multiple pipes in a shared setting.
- Fit
- Integrity
- Disposal
Use Food-Safe Cleaners
How should shared smoking implements be cleaned to protect users’ health and taste? One recommended approach uses food-safe cleaners: mild dish soap, baking soda, white vinegar diluted, or commercially labeled food-contact sanitizers.
Rinse tools thoroughly before and after cleaning to remove residues affecting flavor. Apply cleaners with soft brushes or cloths to reach bowls and stems, avoiding abrasive agents that scratch surfaces.
Allow parts to air-dry completely on a clean rack. Store cleaned components separately or covered to prevent recontamination.
Follow manufacturer guidance for materials like wood or silicone to prevent damage while maintaining hygienic, taste-neutral results.
Sanitize Between Users
Beyond using food-safe cleaners for routine maintenance, sanitation between different users focuses on reducing microbial transfer and protecting respiratory health.
The pipe should be disassembled when possible; removable parts cleaned, soaked in an EPA-registered disinfectant or a 70% isopropyl solution, then rinsed and fully dried.
Mouthpieces or shared tips benefit from single-use covers or personal replacements.
Establish clear storage so cleaned components remain uncontaminated.
Communicate hygiene expectations among users and replace worn seals or brushes regularly to prevent harboring bacteria.
Regularly inspect for residue or damage that impedes complete sanitation and address issues promptly.
- Disassemble and disinfect
- Use personal tips
- Inspect and replace
Dispose of Cleaning Waste Safely
When finished, the residual ash, water, and residue should be collected and contained to prevent spills or contamination.
Waste is placed in a sealable, nonreactive container and labeled if containing solvents.
Ash and solid debris go to regular trash only if cold and dry; liquids with solvents require hazardous-waste disposal per local regulations.
Rinse residues into a separate waste receptacle rather than down household drains to avoid clogging or chemical exposure.
Gloves and eye protection are removed and disposed or laundered appropriately.
Hands are washed thoroughly.
Records of disposal are kept when required by local ordinances or shared-use facilities.
Store Cleaned Pipes to Stay Fresh
After cleaning, pipes should be stored in a dry, cool place away from direct sunlight and strong odors to preserve flavor and prevent warping.
The cleaned pipe must be fully dry before storage; residual moisture invites mold and metal corrosion.
Use breathable containers—cloth bags or wooden boxes—that allow air circulation while shielding from dust.
Avoid airtight plastic when wood is involved.
Rotate stored pipes occasionally to detect early issues.
Keep maintenance tools separate to prevent contamination.
Inspect periodically for odor changes or buildup and re-clean if necessary.
- Verify complete dryness
- Use breathable storage
- Inspect periodically
When a Pipe Needs Replacement
Regularly evaluating a pipe’s condition helps determine when replacement is necessary. Indicators include deep, irreparable cracks, warped stems, persistent sour or metallic tastes despite cleaning, and damaged tenons or mortises that prevent a proper seal.
Burned or charred bowls beyond reaming, extensive briar rot, or thinning walls that risk collapse also warrant replacement. If repairs—stem replacement, shank reinforcement, or professional restoration—would cost more than a sound substitute, replacement is pragmatic.
Safety and consistent smoking quality guide decisions; replacing a compromised pipe preserves enjoyment and prevents health risks linked to deteriorated materials.
Clean Antique or Collectible Pipes
For antique or collectible pipes, cleaning requires greater care and restraint than routine maintenance to preserve value, patina, and structural integrity.
The process favors minimal intervention: gentle dusting with a soft brush, dry swabbing of the bowl and stem, and avoiding aggressive solvents or abrasives that strip finishes.
Any repairs should be deferred to a conservator or experienced restorer to prevent devaluation.
Documentation of condition before work is recommended.
When minor cleaning is undertaken, test a hidden area first and use cotton swabs with distilled water sparingly.
Store pipes in stable humidity and temperature to prevent warping.
- Assess condition
- Use gentle, tested methods
- Consult a professional
Improve Flavor by Cleaning Right
While careful, minimal cleaning preserves antique pipes, everyday smoking pipes benefit from a different approach focused on flavor.
Regularly removing tar and moisture prevents stale tastes and protects the bowl.
After cooling, empty ashes, run a pipe cleaner through stem and shank, and use a cotton swab with a little alcohol to lift residue from tight spots.
Ream lightly when cake becomes excessively thick, but retain a thin protective layer.
Allow components to dry fully before reassembling.
Clean tools and replace severely charred filters.
Consistent, thorough attention preserves tobacco nuances and guarantees a cleaner, truer smoke.
Build a Simple Cleaning Schedule
Often, a simple, predictable schedule keeps pipe maintenance manageable and effective. A concise routine prevents heavy buildup and preserves taste.
Establish daily, weekly, and deep-clean intervals based on usage: a quick wipe after each session, a weekly thorough brush and stem check, and a monthly soak or alcohol swab for stubborn residue. Track tasks with a calendar or reminder app to maintain consistency. Adjust frequency if smoking habits change.
Consistent, small efforts reduce time spent per cleaning and extend pipe life. Clear expectations make upkeep less likely to be deferred.
- Daily: quick wipe and ash removal
- Weekly: brush and stem check
- Monthly: soak or alcohol swab
Teach Someone Else to Clean a Pipe
The instructor demonstrates each cleaning step clearly and at normal pace so the trainee can observe technique and tool use.
Trainees then perform supervised practice runs while the instructor corrects mistakes and reinforces safety.
A brief checklist is used during practice to guarantee consistency and confidence before independent work.
Demonstrate Each Step
Start by outlining each task in the sequence it will be performed, using simple, numbered instructions and clear labels for tools and materials so a novice can follow without prior knowledge.
The instructor performs each step slowly, narrating actions, reasons, and expected outcomes.
Visual cues, like hand placement and brush angles, are emphasized.
Short demonstrations precede learner attempts; mistakes are shown and corrected calmly.
Safety points and sanitation are reiterated at relevant moments, not as a separate lecture.
The goal is reproducible technique, clear pacing, and measurable proficiency checks after demonstration.
- Show
- Explain
- Correct
Supervise Practice Runs
A supervisor observes each trainee’s practice run, noting technique, timing, and adherence to safety and sanitation protocols while remaining prepared to intervene with concise corrections when errors appear.
The supervisor assigns realistic scenarios, monitors tool handling, joint cleaning, and solvent application, and times each sequence.
Feedback focuses on specific improvements: grip adjustments, stroke consistency, proper solvent dwell, and safe disposal.
Trainees repeat tasks until competence is evident, documenting progress and questions.
Successful runs require correct PPE, clear workspace, and verified leak-free joints.
Final assessment uses a checklist and demonstration under observation to confirm independent, safe, and effective pipe cleaning.
Troubleshoot Lingering Odors and Stains
How can lingering odors and stains be identified and resolved without damaging the pipe? The cleaner inspects surface and interior using light and smell, noting discoloration, residue, or sour odor. Tests a small area with diluted isopropyl alcohol or vinegar to assess reaction. When stubborn spots remain, gentle mechanical action or enzyme cleaners are preferred over harsh acids.
- Start with mild solutions and a soft brush to remove surface deposits.
- Use enzyme or baking soda treatments to neutralize organic odors safely.
- Rinse thoroughly and dry; repeat targeted treatment if smell or stain persists.
Conclusion
Consistent, appropriate cleaning preserves pipe function and flavor while extending its life. For example, a hobbyist who switched from only tapping out ash to a weekly regimen—dry brushing after each use, alcohol-soaked cotton swabs for deep spots, and monthly full soaks—noticed smoother draws and eliminated sour odors within weeks. By matching methods to pipe type, keeping basic tools and safe solvents on hand, and following a simple schedule, anyone can achieve reliable, sparkling results.