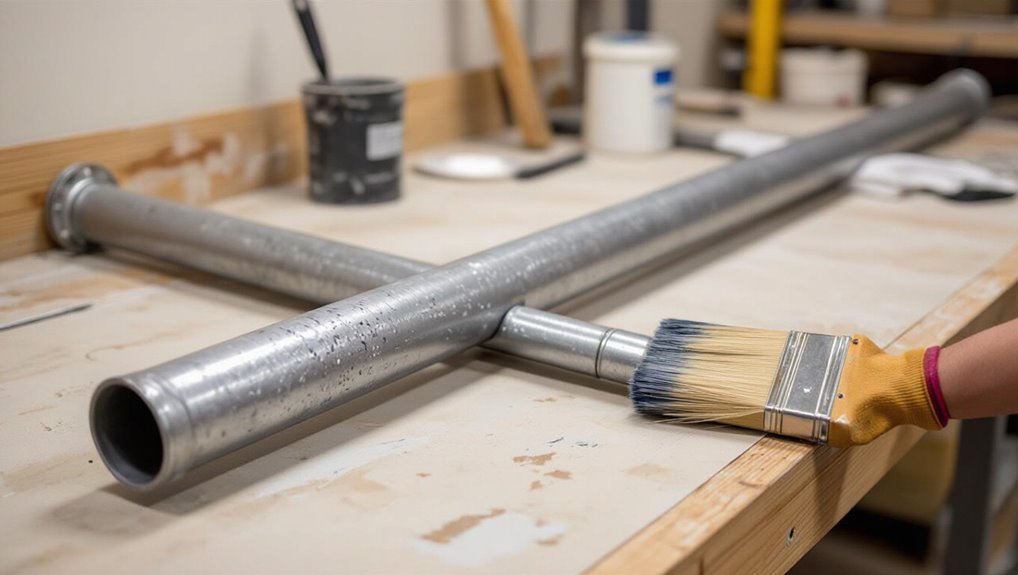
How to Paint Galvanized Pipe: Easy Prep & Long-Lasting Finish
To effectively paint galvanized pipe, start by thoroughly cleaning the surface to eliminate dirt, oils, and any loose zinc. Next, lightly abrade the surface using 120–220 grit sandpaper or a wire brush to create a suitable profile for paint adherence. If you encounter white rust or heavy oxidation, use a zinc/acid cleaner or rust converter, then neutralize and dry the pipe. After preparing the surface, apply a zinc-compatible primer—options include zinc-rich, zinc-phosphate, or acid-etch primers. Finally, topcoat with a paint that matches the primer, ensuring to apply thin, even coats and mask off any threads. Proper preparation is essential to prevent peeling, and further detailed steps and tips are available for optimal results.
Quick Answer: How to Paint Galvanized Pipe Safely
When preparing to paint galvanized pipe safely, begin by removing dirt, oils, and loose zinc by wiping with a degreaser and scuffing the surface with fine-grit sandpaper or a wire brush; this guarantees primer adhesion and reduces the risk of flaking.
Next, neutralize any remaining residue with a water rinse and allow full drying.
Apply a zinc-compatible primer formulated for galvanized metal, using even strokes and thin coats.
After primer cures, finish with a suitable metal paint designed for corrosion resistance.
Work in a well-ventilated area, wear protective gear, and follow manufacturer cure times for maximum longevity.
Should You Paint or Replace Galvanized Pipe?
Deciding whether to paint or replace galvanized pipe hinges on its condition, location, and purpose: painting can extend life and improve appearance if the zinc coating is intact or only superficially corroded, while replacement is warranted for deep pitting, structural weakness, internal corrosion affecting water quality, or when pipes no longer meet code. Painting suits cosmetically worn or accessible exterior lines; replacement fits safety-critical, hidden, or heavily corroded runs. Costs, longevity, and code compliance guide the choice.
| Option | When to Paint | When to Replace |
|---|---|---|
| Cost | Lower short-term | Higher but lasting |
| Longevity | Moderate | Long-term |
How to Identify Your Galvanized Pipe and Its Condition
Identification begins by checking pipe markings and estimated installation age to confirm whether the material is galvanized steel.
Visual and tactile inspection of the surface texture and remaining zinc coating helps determine paint adhesion prospects.
Any visible corrosion, rust streaks, or pitting severity should be noted because deep pits may require replacement rather than painting.
Pipe Age And Markings
Determining the age and condition of galvanized pipe relies on visual cues and stamped markings that indicate manufacture date, material standards, and any past repairs.
Inspect stamps on fittings or lengths for year codes, mill marks, and standards (e.g., ASTM); compare to local code eras to estimate age.
Note field-applied tags, paint codes, or patched joints signaling prior work.
Check corrosion patterns and service records rather than assuming age from appearance alone.
- Read stamped codes and mill marks for manufacture date.
- Record visible repair marks, clamps, or solder.
- Cross-reference markings with historical material standards.
Surface Texture And Coating
Examine the pipe’s surface for telltale textures and coatings that reveal its galvanizing condition: a smooth, spangled finish indicates an intact hot-dip zinc layer, while dull, powdery, or flaking surfaces suggest heavy weathering or breakdown of the zinc. The observer notes paint remnants, mill scale, or additional coatings that affect adhesion; lightly abraded shine accepts primers better than slick or oily films. Removal or profiling is advised where coatings interfere. Simple tactile and visual checks guide preparation decisions without evaluating deep metal loss.
| Texture | Coating Clues | Prep Needed |
|---|---|---|
| Smooth spangle | Intact zinc | Clean, light scuff |
| Dull/powdery | Weathered zinc | Remove, prime |
| Painted | Old paint film | Strip or sand |
| Oily/slick | Contamination | Degrease, abrade |
Corrosion And Pitting Levels
After evaluating surface texture and existing coatings, the next step is to gauge corrosion and pitting levels to judge whether the galvanized layer still protects the steel or if repair or replacement is needed.
Inspection focuses on visual signs: rust streaks, shallow white oxidation, and deep pits exposing base metal.
Simple tests—light scraping and magnet check—help assess coating integrity.
If pitting is superficial, cleaning and primer may suffice; extensive pits or flaking galvanization call for replacement or professional repair.
Prioritize safety and long-term protection when deciding.
- Superficial oxidation — clean and prime
- Moderate pitting — abrade and coat
- Severe pitting — replace
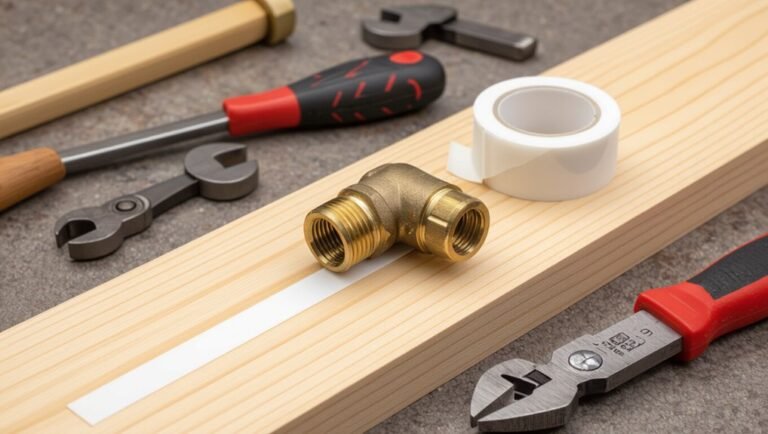
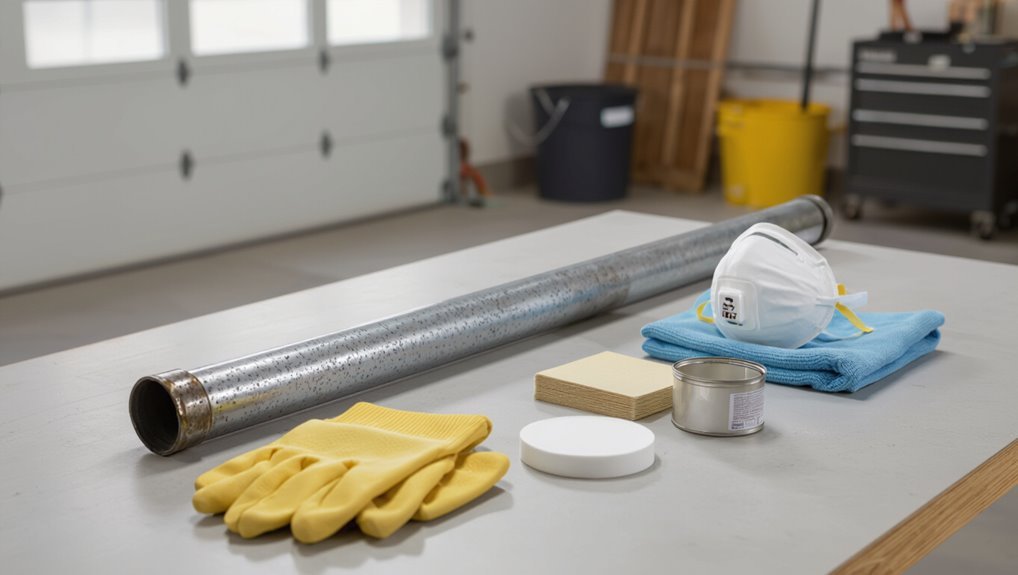
Tools & Materials You’ll Actually Need
What tools and materials are essential for reliably painting galvanized pipe? A concise kit speeds prep and ensures adhesion: wire brush, sandpaper, solvent, etching primer, metal paint, clean rags, and applicators. Selection depends on pipe location and finish; oil-based primers bond best to zinc. Use low-lint cloths and a rust converter where needed. The table lists core items, purpose, and recommended type to simplify purchases.
| Item | Purpose | Recommended type |
|---|---|---|
| Wire brush | Remove loose coating | Stainless steel |
| Sandpaper | Scuff for adhesion | 120–220 grit |
| Solvent | Degrease surface | Mineral spirits |
| Primer | Promote bonding | Zinc-phosphate |
| Paint | Protect and finish | Oil-based enamel |
Safety Gear and Ventilation Tips for Pipe Work
Always prioritize personal protection and airflow when working on galvanized pipe to limit exposure to dust, solvents, and paint fumes. The worker should wear an NIOSH-approved respirator for particulates and organic vapors, chemical-resistant gloves, and eye protection. Local exhaust or cross-ventilation reduces fume buildup; consider an inline fan for confined spaces. Avoid open flames while solvents are present.
- Use a P100/organic vapor respirator for sanding and solvent use.
- Wear nitrile or neoprene gloves and safety glasses or a face shield.
- Provide continuous ventilation and monitor air quality; pause if smells intensify.
Prep Checklist: What to Do Before Painting
Before painting, the surface must be thoroughly cleaned to remove grease, dirt, and loose mill scale.
Any signs of rust should be identified and treated with a wire brush or rust converter before priming.
Completing these steps guarantees proper adhesion and a longer-lasting finish.
Surface Cleaning Steps
Prepare the surface by removing dirt, grease, and loose zinc to guarantee paint adhesion and longevity.
The area should be cleaned systematically, using appropriate cleaners and mechanical action where needed.
Remove oils with a degreaser, rinse thoroughly, and allow full drying.
Lightly scuff the entire surface with fine abrasive to promote mechanical keying without exposing bare metal.
- Use a mild detergent or trisodium phosphate substitute to eliminate contaminants.
- Degrease stubborn film with a commercial solvent, then rinse.
- Scuff with 180–220 grit abrasive, then wipe with a lint-free cloth and solvent.
Check For Rust
How can one identify and address rust on galvanized pipe before painting? The surface is inspected visually and by touch: orange-brown spots, flaking, or rough texture indicate corrosion. Light rust is removed with a wire brush or abrasive pad; stubborn areas require sanding to bright metal. After mechanical removal, clean with a degreaser and rinse; allow to dry. Apply a zinc-rich primer to protect treated areas and promote adhesion. Regular inspection intervals are noted to catch recurrence early. Follow manufacturer guidelines for primer compatibility and drying times to guarantee durable adhesion and a uniform painted finish.
| Issue | Action |
|---|---|
| Light discoloration | Wire brush |
| Flaking rust | Sand to bright metal |
| Surface debris | Degrease and rinse |
| Exposed steel | Zinc-rich primer |
| Recurrence | Schedule inspections |
Prep Differences for Mildly vs. Heavily Rusted Pipe
When the surface shows only light surface rust and intact galvanizing, prep can be limited to cleaning and scuffing to promote adhesion; for heavy corrosion, however, more aggressive removal, spot repairs to bare metal, and rust conversion are required to guarantee a stable primer bond.
The approach differs by extent of damage and desired longevity.
- Light rust: degrease, scuff with fine abrasive, rinse, dry, and apply a zinc-rich or etch primer for adhesion.
- Moderate rust: clean, treat edges with rust converter, feather shifts, and prime promptly.
- Heavy rust: remove loose material, treat exposed metal, fill pits, then prime.
Removing Loose Rust and Scale (Mechanical Methods)
For loose rust and scale, mechanical abrasion provides the most direct removal.
Handheld wire brushes are effective for light flaking and for reaching seams and fittings.
For heavier corrosion, power tools with sanding or grinding attachments accelerate material removal and restore a sound substrate.
Wire Brush Cleaning
Wire brushing removes loose rust, scale, and mill residue from galvanized pipe surfaces before painting. A stiff-wire brush, used by hand or on a low-speed drill with a cup brush, clears flaking zinc and contaminants without aggressive substrate removal.
Technique: use overlapping strokes, maintain consistent pressure, and keep angle shallow to avoid gouging. After brushing, wipe with a clean cloth and inspect for remaining corrosion or bare spots requiring spot treatment.
Proper PPE—gloves, eye protection, and dust mask—is essential. Waste should be collected and disposed of per local regulations to prevent environmental contamination.
- Tools: hand brush, cup brush, drill
- Motion: overlapping strokes
- Safety: PPE, dust control
Power Tool Grinding
Power tool grinding efficiently removes stubborn rust, scale, and heavy mill residue from galvanized pipe surfaces prior to painting. Operators use angle grinders with flap discs or wire wheels, applying light, even pressure to avoid substrate damage. Proper PPE, controlled speed, and steady motion yield a uniform profile for primer adhesion. Cleaned areas are wiped with a solvent to remove dust and oils before coating. Mechanical preparation is preferred for localized corrosion and hard deposits; follow with zinc-rich or epoxy primers for best durability.
| Tool | Use |
|---|---|
| Angle grinder | Broad surface cleaning |
| Flap disc | Smooth profiling |
| Wire wheel | Heavy scale removal |
| Sanding pad | Final smoothing |
Cleaning Grease, Oil, and Dirt From Galvanized Surfaces
When preparing galvanized pipe for painting, removing grease, oil, and dirt is essential to guarantee proper adhesion and a durable finish.
Begin by wiping the surface with a clean, dry cloth to remove loose particulates. Then use a mild degreasing solution—dish soap diluted in warm water—or a commercial citrus-based cleaner to break down oils. Rinse thoroughly with clean water and dry fully to prevent flash rust or residue.
For stubborn spots, gently agitate with a nonabrasive nylon brush. Finally, inspect the pipe for remaining contaminants before proceeding to sanding or priming.
- Wipe and dry
- Degrease and rinse
- Inspect and repeat
When to Use an Acid/Zinc Cleaner and How to Apply It
Determining whether to use an acid/zinc cleaner depends on the condition of the galvanized surface and the level of contamination: use it for heavy oxidation (white rust), welding flux residue, weld spatter, or thick mill scale that simple degreasing and light abrasion won’t remove, but avoid it on lightly weathered or painted surfaces where milder cleaners suffice.
When selected, follow manufacturer instructions, work outdoors or with ventilation, and wear chemical-resistant gloves, eye protection, and a respirator.
Pre-wet the area, apply cleaner with a nylon brush or low-pressure sprayer, allow dwell time, agitate stubborn spots, then thoroughly rinse and neutralize before drying and proceeding to priming.
Choose the Right Primer for Galvanized Metal
Before selecting a primer, the galvanized surface must be thoroughly clean and free of oils, salts, and loose corrosion to guarantee proper adhesion.
For stubborn contaminants or to improve primer bonding, an acid-etch or zinc-phosphate etching treatment is a common option. The chosen primer should be compatible with the etching method and specifically formulated for galvanized metal.
Clean Surface Requirements
For a durable finish on galvanized pipe, selecting a primer formulated specifically for zinc-coated surfaces is essential. Preparation begins with removing oils, dirt, and white corrosion to guarantee adhesion. Recommendations focus on simple, effective cleaning steps.
- Use a trisodium phosphate (TSP) solution or a mild detergent and warm water; scrub with a non-metal brush, then rinse thoroughly.
- Degrease with a solvent like mineral spirits where oil or handling residues persist; allow full evaporation before priming.
- Dry completely and inspect for residual contaminants; any remaining film prevents primer bonding and shortens coating life.
Acid-Etch Options
When working with galvanized metal, acid-etch primers provide a chemical key that promotes adhesion by lightly etching the zinc surface; these primers contain phosphoric or chromic acids formulated to neutralize the passive zinc layer and create a profile suitable for topcoats.
Select primers labeled for galvanizing, noting phosphoric types are common and chromate variants offer enhanced corrosion resistance.
Apply per manufacturer instructions, ensuring full coverage and proper dwell time before rinsing if required.
Use appropriate PPE and ventilation.
After curing, test adhesion with a tape or cross-hatch test.
Match primer to its intended topcoat chemistry for best long-term performance.
Best Topcoat Paints for Galvanized Pipe
In selecting a topcoat for galvanized pipe, durability, adhesion, and resistance to corrosion and moisture are the primary criteria.
Suitable topcoats protect against rust, UV, and abrasion while bonding to primed or properly prepared zinc surfaces. Common effective choices include acrylic enamel, oil-based alkyds, and epoxy or polyurethane systems for higher-performance needs.
- Acrylic enamel — fast-drying, good UV resistance, easy maintenance.
- Alkyd (oil-based) — robust adhesion, flexible, economical for interiors.
- Epoxy/polyurethane — superior corrosion resistance and chemical durability for industrial or outdoor exposure.
Compatibility with primer and environmental conditions guides final selection.
Choose: Brush, Roll, or Spray for Pipes
Which application method suits a given galvanized pipe depends on pipe diameter, location, finish quality desired, and available equipment.
For small runs or touch-ups, a brush provides control and good adhesion in seams; use a short-bristle angled brush to reach threads and fittings.
Rollers work well on larger straight runs where a smooth, uniform finish matters; choose a small-diameter foam roller to follow the pipe contour.
Spray yields fastest coverage and the smoothest result for complex layouts but requires masking, ventilation, and thinner coats to avoid runs.
Prioritize access, drying time, and overspray risk when selecting a method.
Step-by-Step Priming for Long Adhesion
Before priming, the pipe surface must be cleaned of oil, oxidation, and loose debris using degreasing solvents, light sanding, or a wire brush.
A zinc-friendly primer formulated for galvanized metal should be chosen to promote chemical bonding and corrosion resistance.
Allow each coat to dry the manufacturer-recommended time between applications to guarantee long-term adhesion.
Surface Cleaning Methods
Prepare the galvanized pipe surface by removing oils, dirt, and oxidation so primers can bond effectively. Surfaces should be cleaned, de-rusted, and rinsed thoroughly before priming. Effective methods vary by condition and access.
- Degrease: Wipe with a solvent or household degreaser, then rinse and dry to eliminate oils and contaminants.
- Abrade: Lightly scuff with fine-grit sandpaper or a scouring pad to promote mechanical adhesion; remove loose zinc and white rust.
- Acid or alkaline wash: Apply a mild phosphoric or muriatic solution per instructions to convert oxidation, then neutralize, rinse, and allow complete drying.
Inspect surface for residue before priming.
Zinc-Friendly Primer Options
With the surface clean, dry, and free of loose zinc, the next step is to select a primer formulated to bond to galvanized metal and resist corrosion over time. Options include acrylic primers for easy application, etching primers where adhesion is difficult, and zinc-rich primers for maximal corrosion protection. Primers should be compatible with the chosen topcoat and labeled for galvanized steel. Apply thin, even coats following manufacturer instructions, avoiding pooling. Inspect for uniform coverage before painting. The table summarizes typical choices and key advantages.
| Primer Type | Key Advantage |
|---|---|
| Acrylic | Fast cure, easy cleanup |
| Etching | Improves adhesion on smooth zinc |
| Zinc-rich | Superior corrosion resistance |
Proper Drying Times
After applying primer, allow each coat to dry fully according to the manufacturer’s specified tack-free and recoat times to guarantee proper adhesion and prevent trapping solvents. The painter monitors temperature, humidity, and ventilation; lower temperatures or high humidity extend drying. Touch tests must be gentle—no tack or imprint. Between primer and topcoat, follow full recoat window to avoid lifting or poor bond. If extended delays occur, scuff sand lightly and clean before recoating.
Recommended practice includes:
- Record tack-free time and recoat window.
- Verify ambient conditions meet label requirements.
- Wait additional 25–50% time when uncertain.
Step-by-Step Topcoat Application for an Even Finish
Beginning by inspecting the primed surface for tackiness and uniform coverage, the applicator selects a compatible topcoat and the appropriate tools—brush, roller, or spray—to achieve an even film.
Working methodically, they cut in edges with a brush, then lay down smooth passes with a roller or maintain consistent overlap with a spray gun. They apply thin, uniform coats, keeping the tool wet to avoid lap marks and working along the pipe’s length to follow its profile. After finishing a section, they inspect for drips, sags, or missed spots, addressing defects immediately with light blending before proceeding.
Drying Times & Recoat Windows
Once the topcoat has been applied uniformly and inspected for defects, attention turns to drying times and recoat windows to guarantee proper film formation and adhesion.
Drying varies by coating type, temperature, humidity and film thickness; allow manufacturer-specified tack-free and hard-dry intervals before handling.
Recoat windows prevent solvent entrapment or intercoat bonding failure: wait at least the minimum before applying another coat, but avoid exceeding the maximum cure window unless surface is lightly abraded.
Monitor conditions and use infrared or touch tests for confirmation.
- Check label for minimum/maximum recoat times.
- Verify environmental conditions.
- Perform tack and adhesion tests.
Painting Threaded Joints and Flanges Without Sealing Them
Paint threaded joints and flanges carefully to maintain serviceability while achieving corrosion protection.
The inspector masks threads and mating faces with low-tack tape or removable caps to prevent paint build-up that hinders assembly.
Brush or spray thin, even coats around crevices, avoiding heavy application that can clog threads.
For flanges, coat peripheral faces but leave gasket surfaces clear; remove overspray immediately with solvent-safe wipes.
Use fast-dry primers compatible with galvanizing, applied sparingly at joints to inhibit rust without forming thick films.
Label treated areas, note torque requirements remain unchanged, and inspect before reassembly.
Prevent Peeling, Bubbling, and Flaking (Common Failures)
Careful handling of threads and flanges reduces localized paint buildup, but preventing more widespread peeling, bubbling, and flaking requires attention across the entire surface preparation and application process.
Surface contaminants, incompatible primers, and trapped moisture are primary culprits. Follow methodical steps to guarantee adhesion and durability:
- Clean: Remove grease, zinc salts, and oils with a suitable degreaser; abrade lightly to create profile.
- Prime: Apply a primer formulated for galvanized metal; allow full cure before topcoats.
- Coat: Use thin, even coats; respect recommended recoat times and ambient conditions to avoid entrapment of solvents or moisture.
Routine inspection and touch-up limit failure propagation.
Painting Outdoor Galvanized Pipe for Corrosion Resistance
When exposed to weather, galvanized pipe still benefits from a properly applied protective coating to extend service life and resist corrosion; achieving this outdoors requires products and techniques that accommodate temperature swings, UV exposure, and moisture while preserving the zinc barrier.
Surfaces must be cleaned of contaminants and light-abraded to promote mechanical keying.
A zinc-tolerant primer or specialty galvanized metal primer is recommended, followed by a durable exterior topcoat rated for UV and wet conditions.
Application in appropriate temperature and humidity ranges guarantees proper curing.
Joints and cut ends receive extra attention with brush-applied primer to maintain continuous protection.
How to Test Adhesion and Maintain the Painted Finish
Begin by verifying adhesion with a simple cross-hatch or tape test to confirm the primer and topcoat are properly bonded to the galvanized surface before committing to long-term maintenance steps. If paint lifts, re-prepare and re-prime affected areas. For intact finishes, routine inspection and gentle cleaning preserve longevity.
- Inspect quarterly for chips, rust bleeds, or soft spots; document locations and severity.
- Clean with mild detergent and a soft brush; rinse thoroughly and allow full drying before touch-up.
- Touch up small defects with compatible primer and topcoat; for widespread failure, strip and restart the coating system.
Cost, Time Estimates, and a Quick DIY Checklist
For homeowners weighing a DIY galvanized-pipe paint job against hiring a pro, this section outlines typical costs, time requirements, and a concise checklist to help plan the work efficiently.
Material costs: cleaner/degreaser, acid etch or primer, rust converter (if needed), paint, brushes/rollers, tape, drop cloths — expect $40–$120 for small jobs.
Labor/time: prep 1–3 hours, priming 30–60 minutes plus dry time, topcoat 30–60 minutes plus curing; a single run of exposed piping can be completed in a weekend.
Quick checklist: clean, de-rust, sand/etch, prime, paint, cure, inspect.
Conclusion
Painting galvanized pipe preserves function and curb appeal when replacement isn’t necessary. Proper prep—cleaning, sanding or etching, and a zinc-rich primer—prevents failures like peeling; controlled ventilation and PPE protect workers. One study found well-prepared galvanized surfaces retain paint adhesion over 90% after five years, emphasizing the payoff for careful work. Routine inspection and touch-ups extend life further, making painting a cost-effective option for long-term corrosion resistance and appearance.